Beans and Sardines

  • Home
  • About
  • Recipe of the week
  • Recipes
  • Wines
  • Contact

Pljukanci-Traditional Istrian handmade rolled Pasta Recipe 

Beans and Sardines
October 19, 2022 by tina oblak in Adriatic Recipe, All year round recipe, Celebratory dish, child friendly dish, child friendly meal, dinner, Easy recipe, Egg based pasta, family friendly dish, family friendly meal, Festive dish, first course, first course dish, first course meal, Fresh pasta, hearty dish, Istrian cuisine, Istrian dish, Istrian food, Istrian gastronomy, main course, main dish, main vegetarian dish, main vegetarian meal, Pasta, Rustic dish, simple recipe, Slovenian cuisine, Slovenian food, Slovenian gastronomy, Starters, supper, Vegan, no egg fresh pasta

Pljukanci is a handmade, traditional Istrian variety of pasta, most commonly found along the northern coastline of Slovenia and Croatia. This is the quickest and the easiest way to make your own pasta, no pasta machine or any knowledge of pasta making is required. This seriously delicious type of pasta with incredibly pleasant chewy texture is hand made by simply rolling a small piece of dough between the palms of your hands or on a clean working surface or a table. 

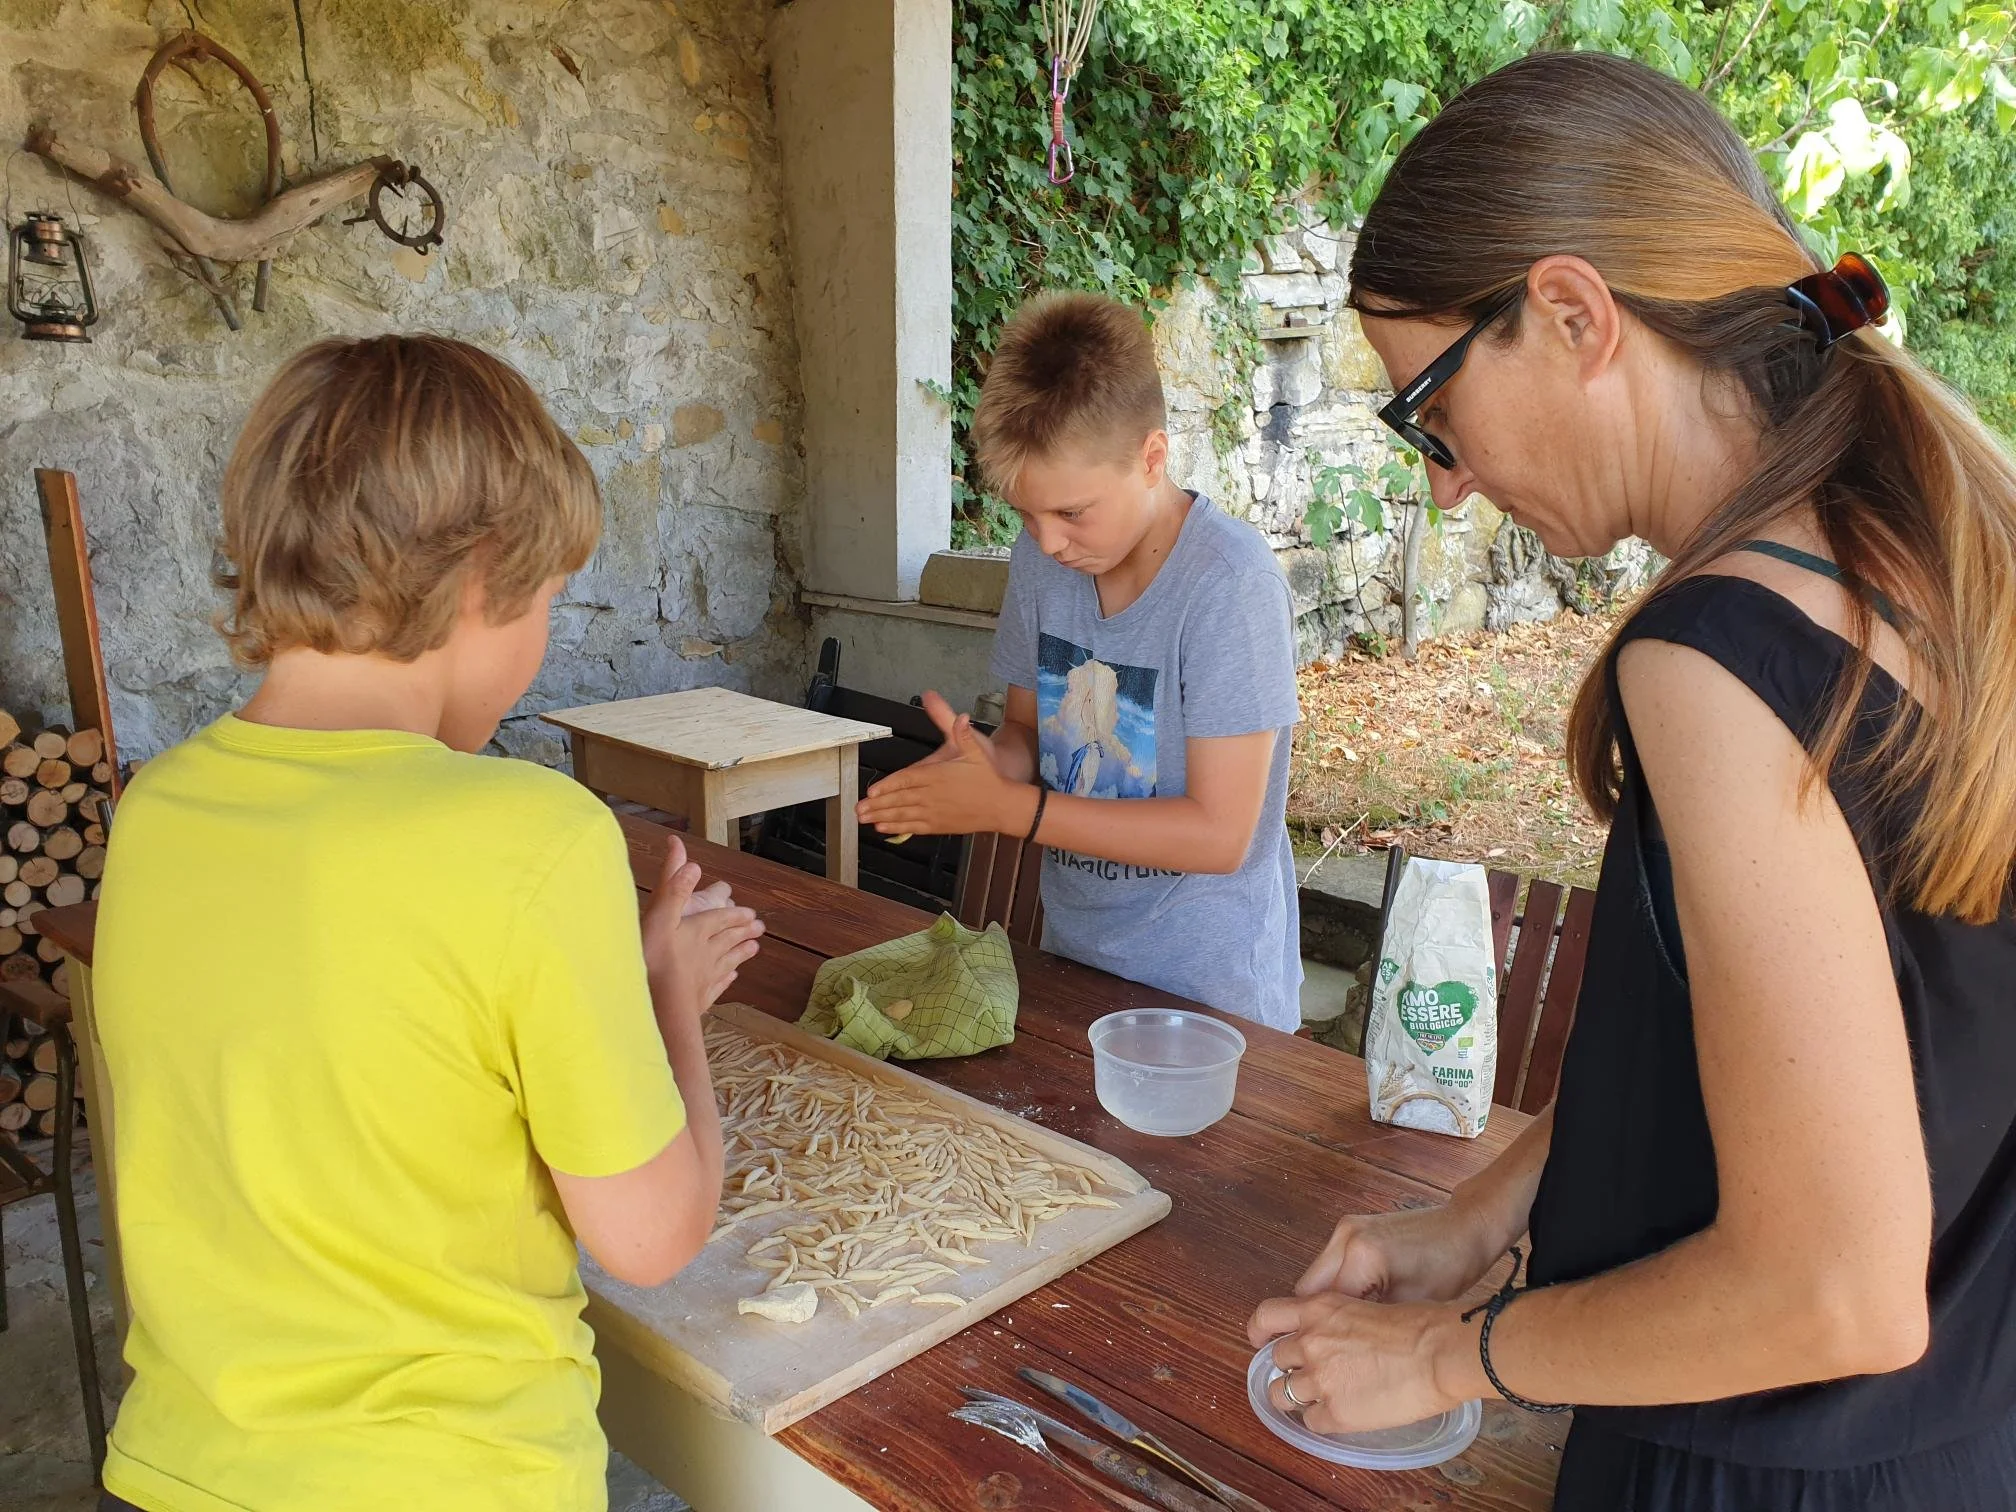
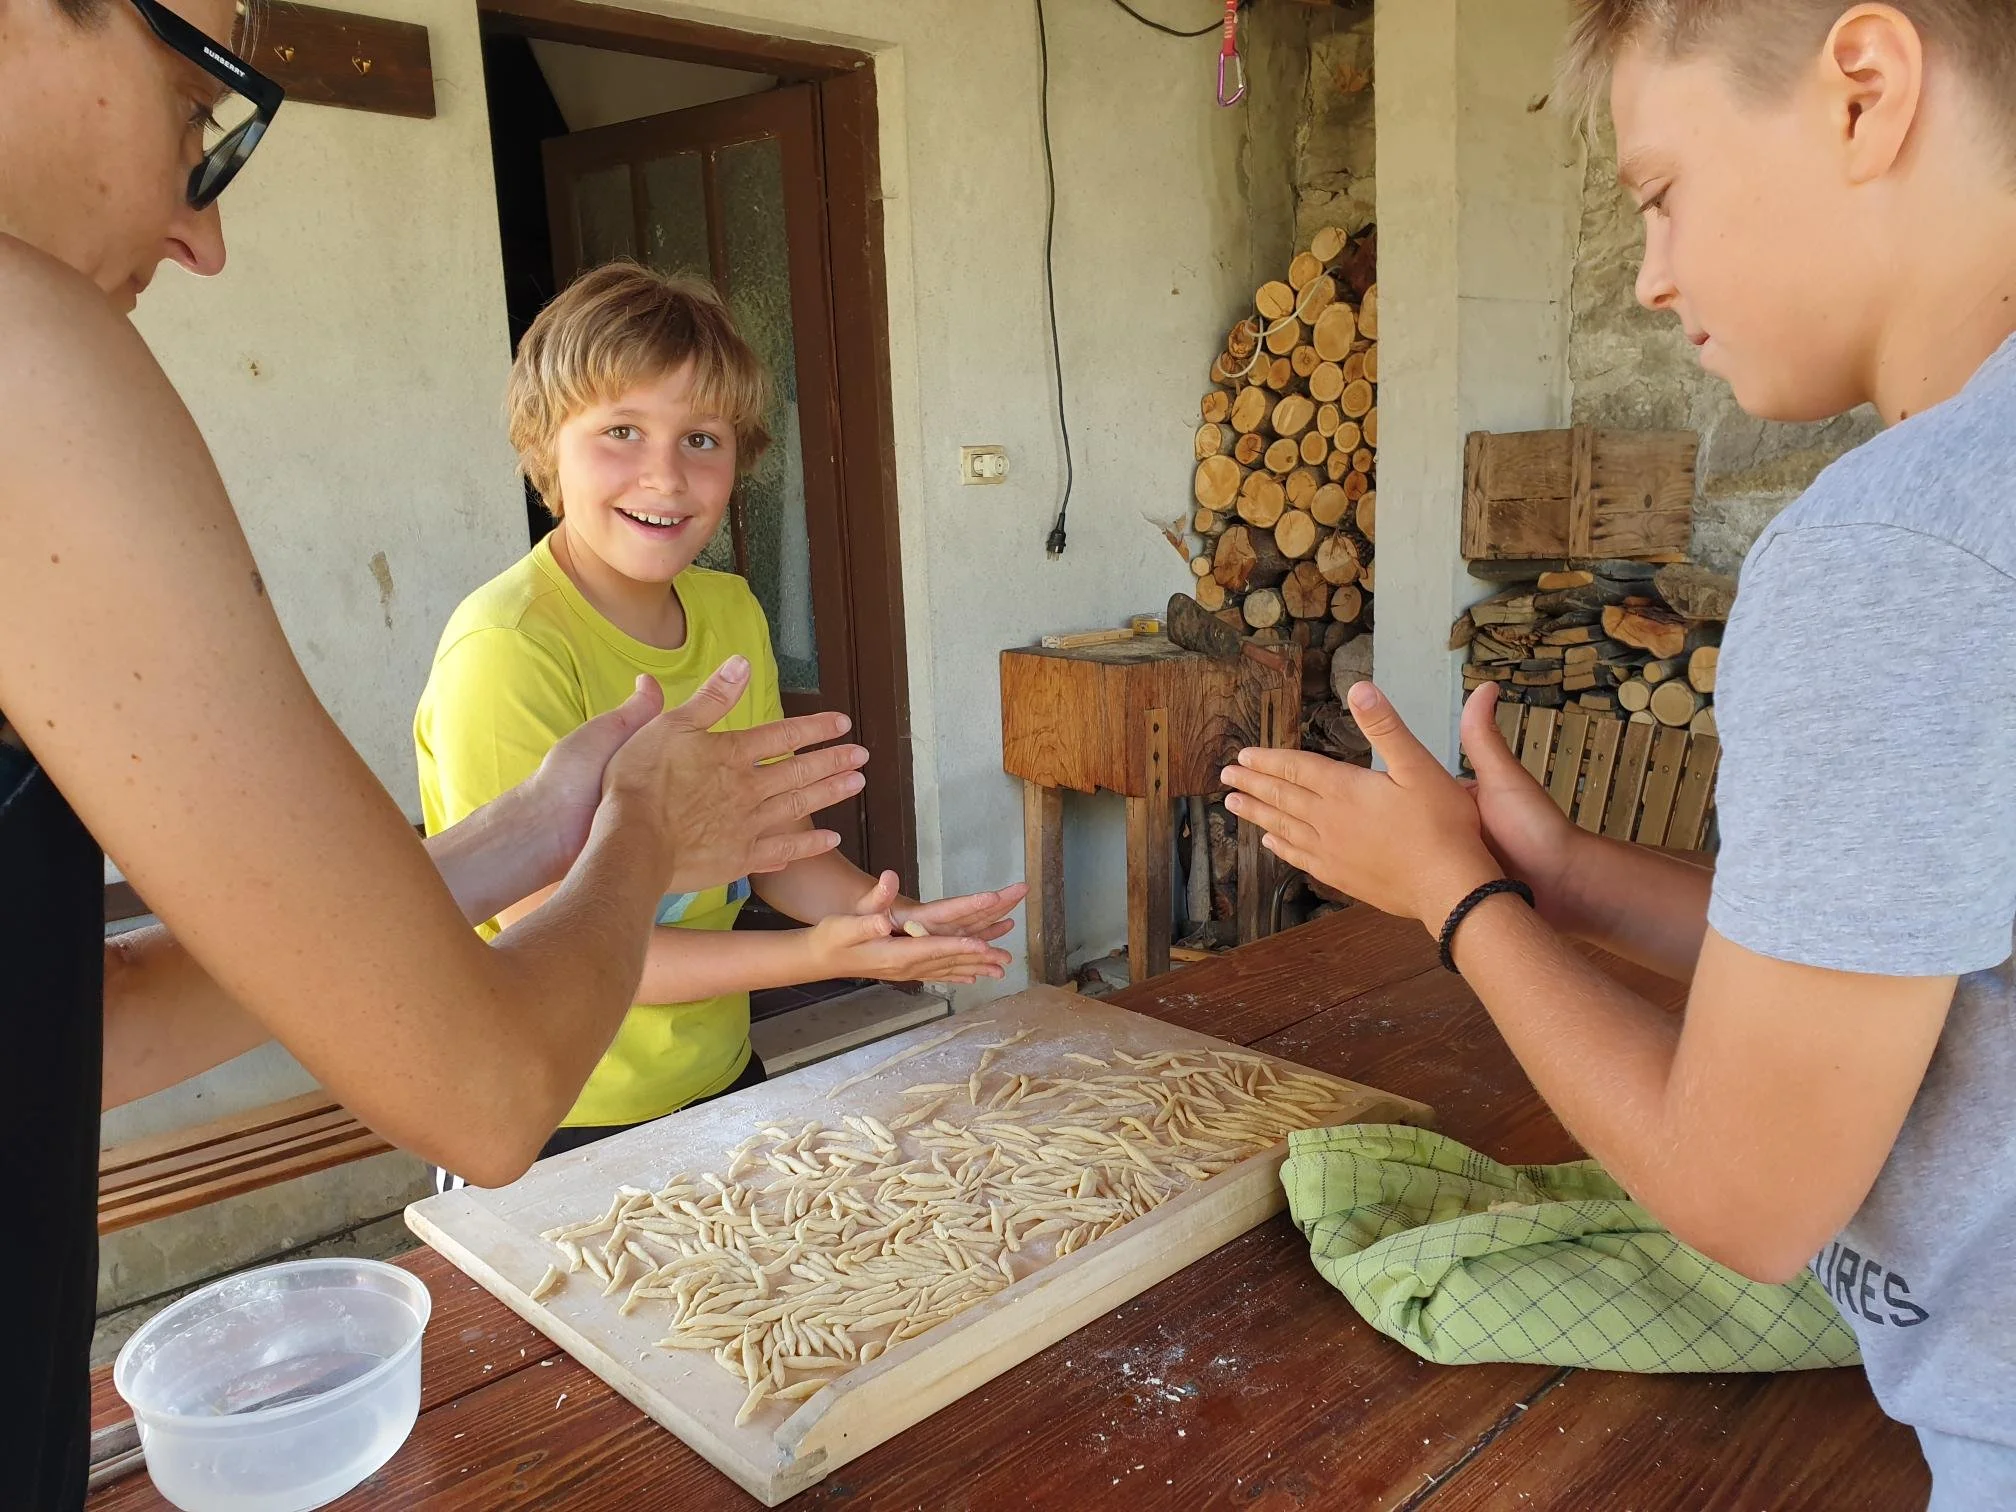
Making Pljukanci with my nephew Dan (in grey T-shirt), my son Jakob, and my sister in law Tatjana - Summer 2022 in my nona’s garden in Koper, Slovenia

In the past, Pljukanci were created during the time of extreme poverty with significant shortage of food, but there was one thing in abundance, the ingenuity of local people to create mouthwatering dishes from the most humble, basic and simple ingredients. Pljukanci are a perfect example of this, this type of pasta is made of nothing else but flour, sea salt and water, sometimes eggs and bit of extra virgin oil would be added. Pljukanci were a everyday meal to fill up the stomach, nowadays, they represent a celebratory dish, a dish you pick up from the menu when you go out with family and friends to mark a special occasion. 

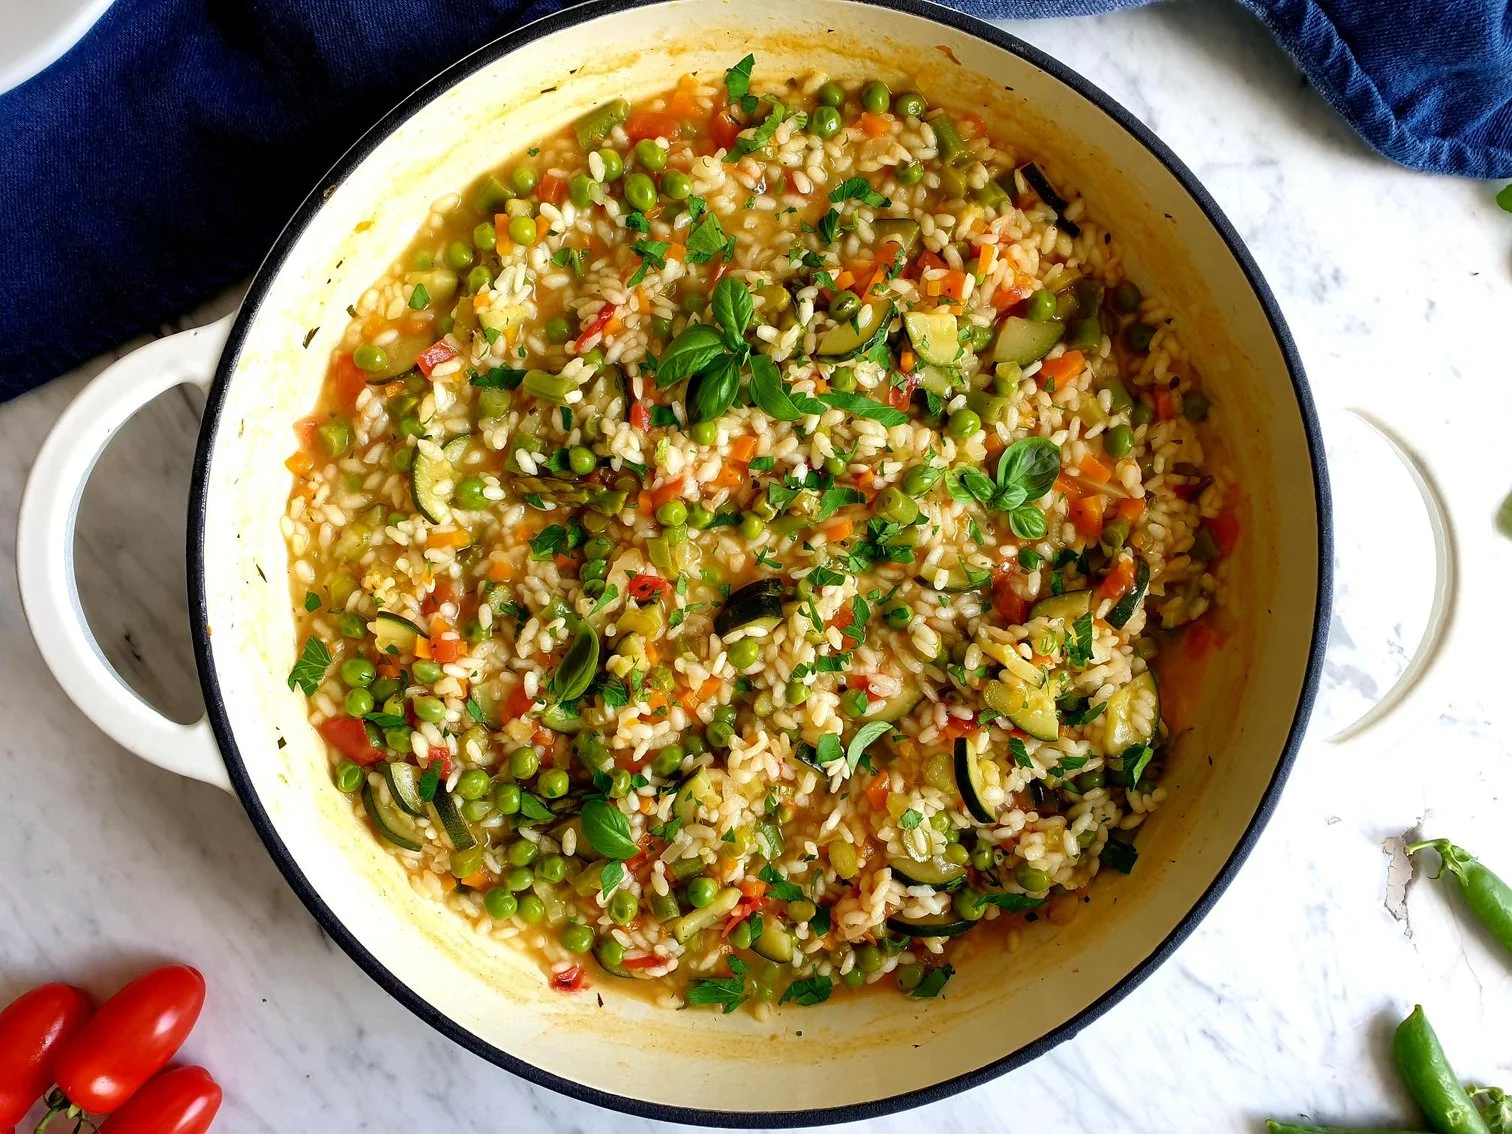
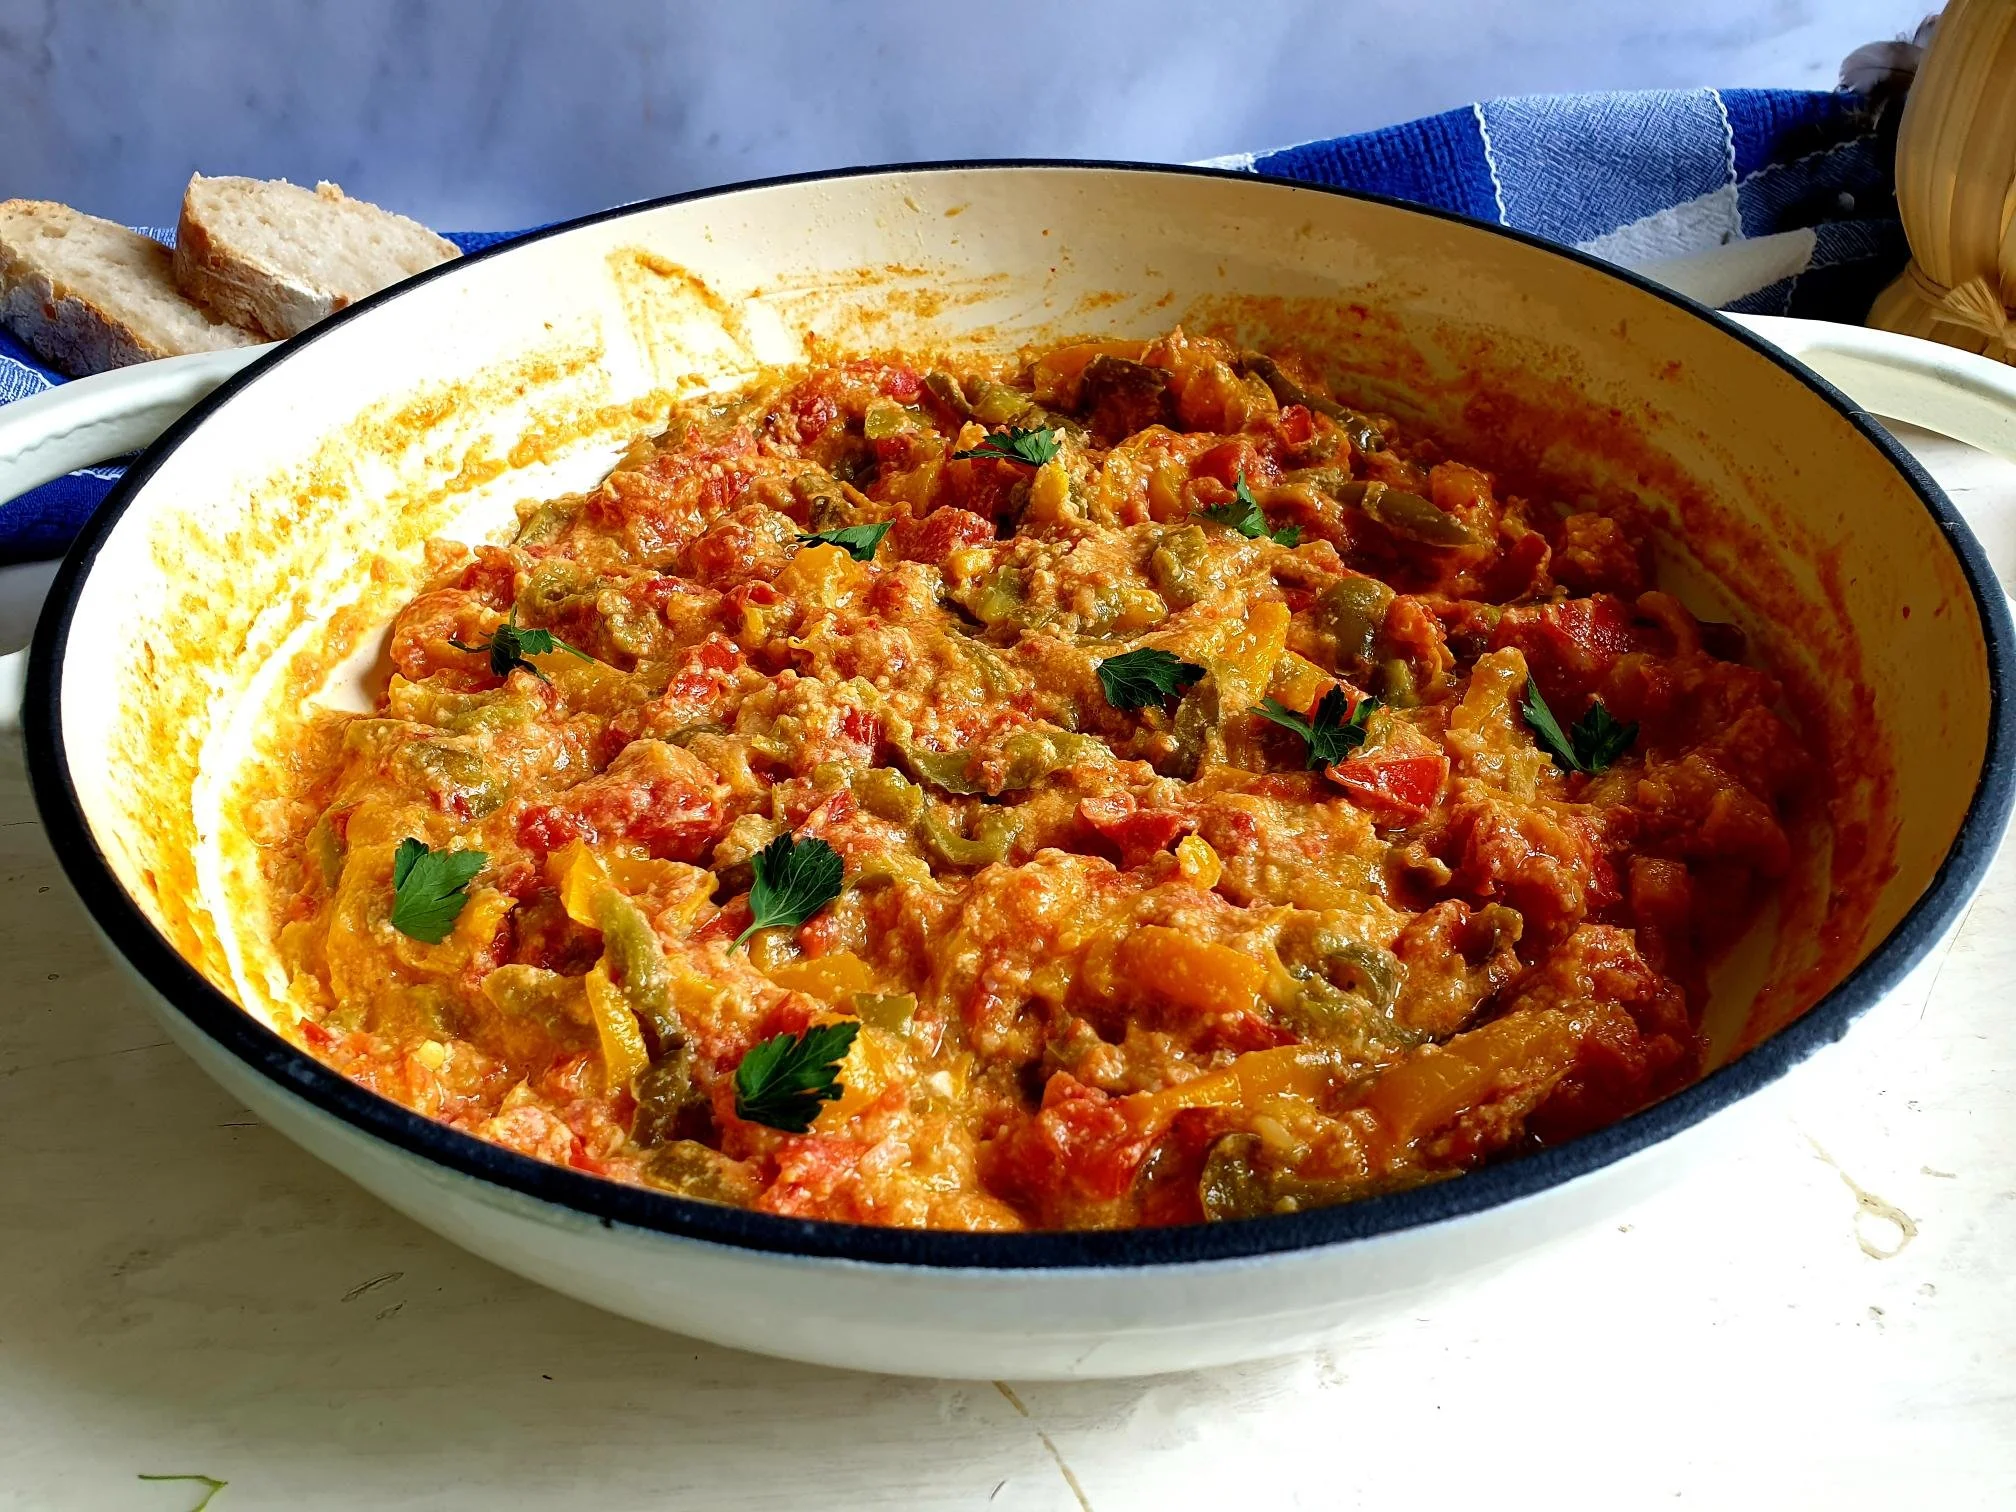
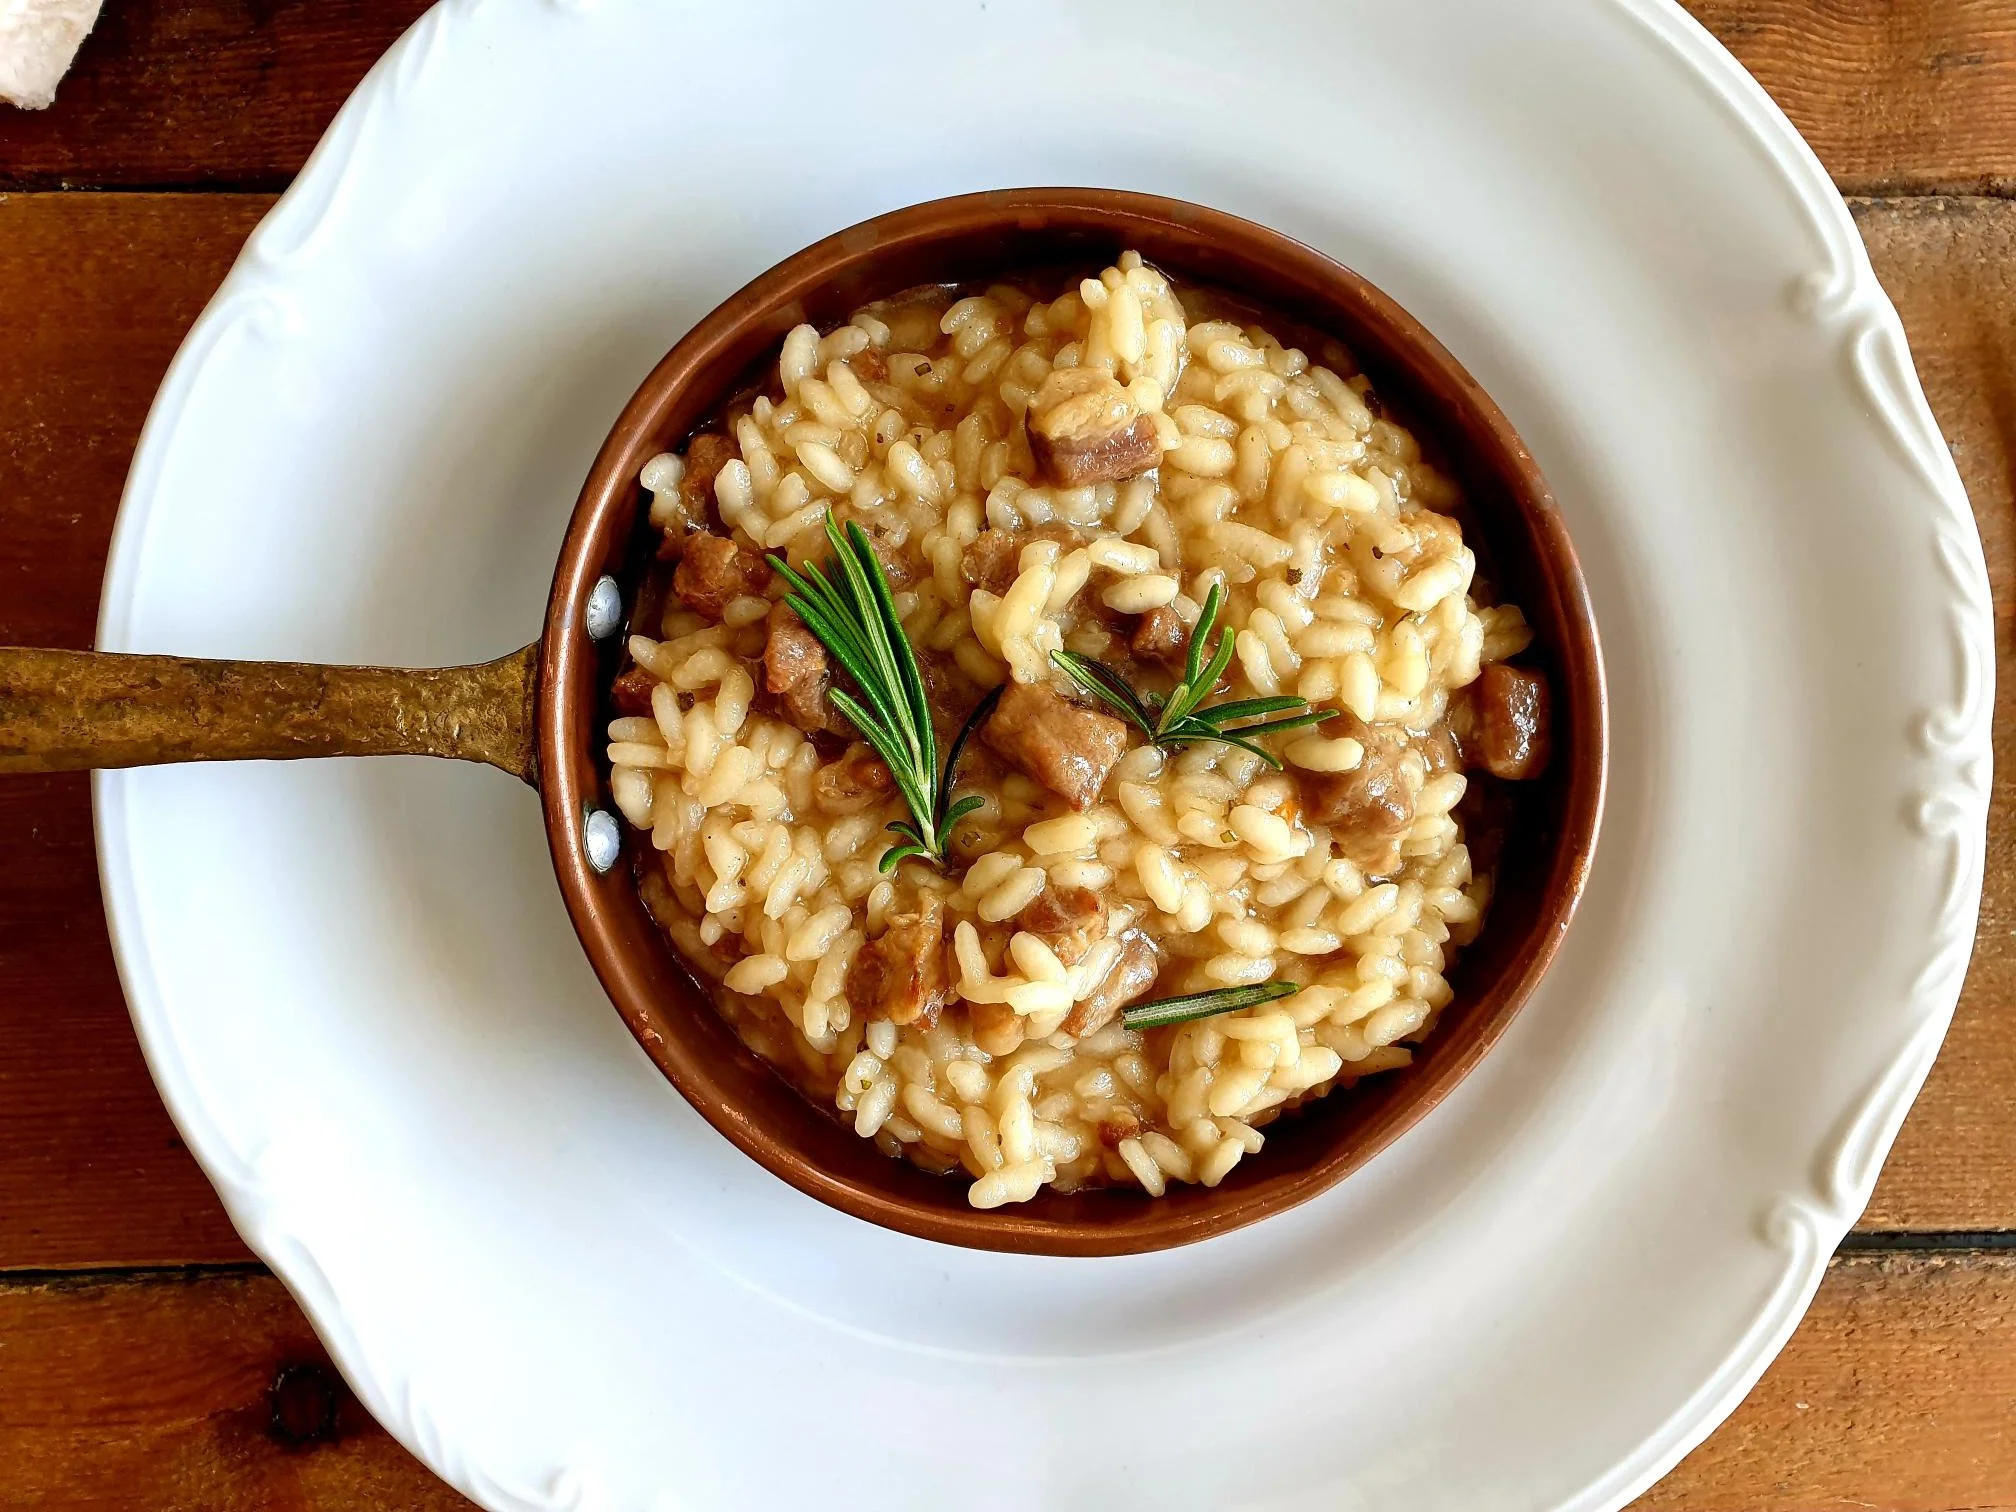
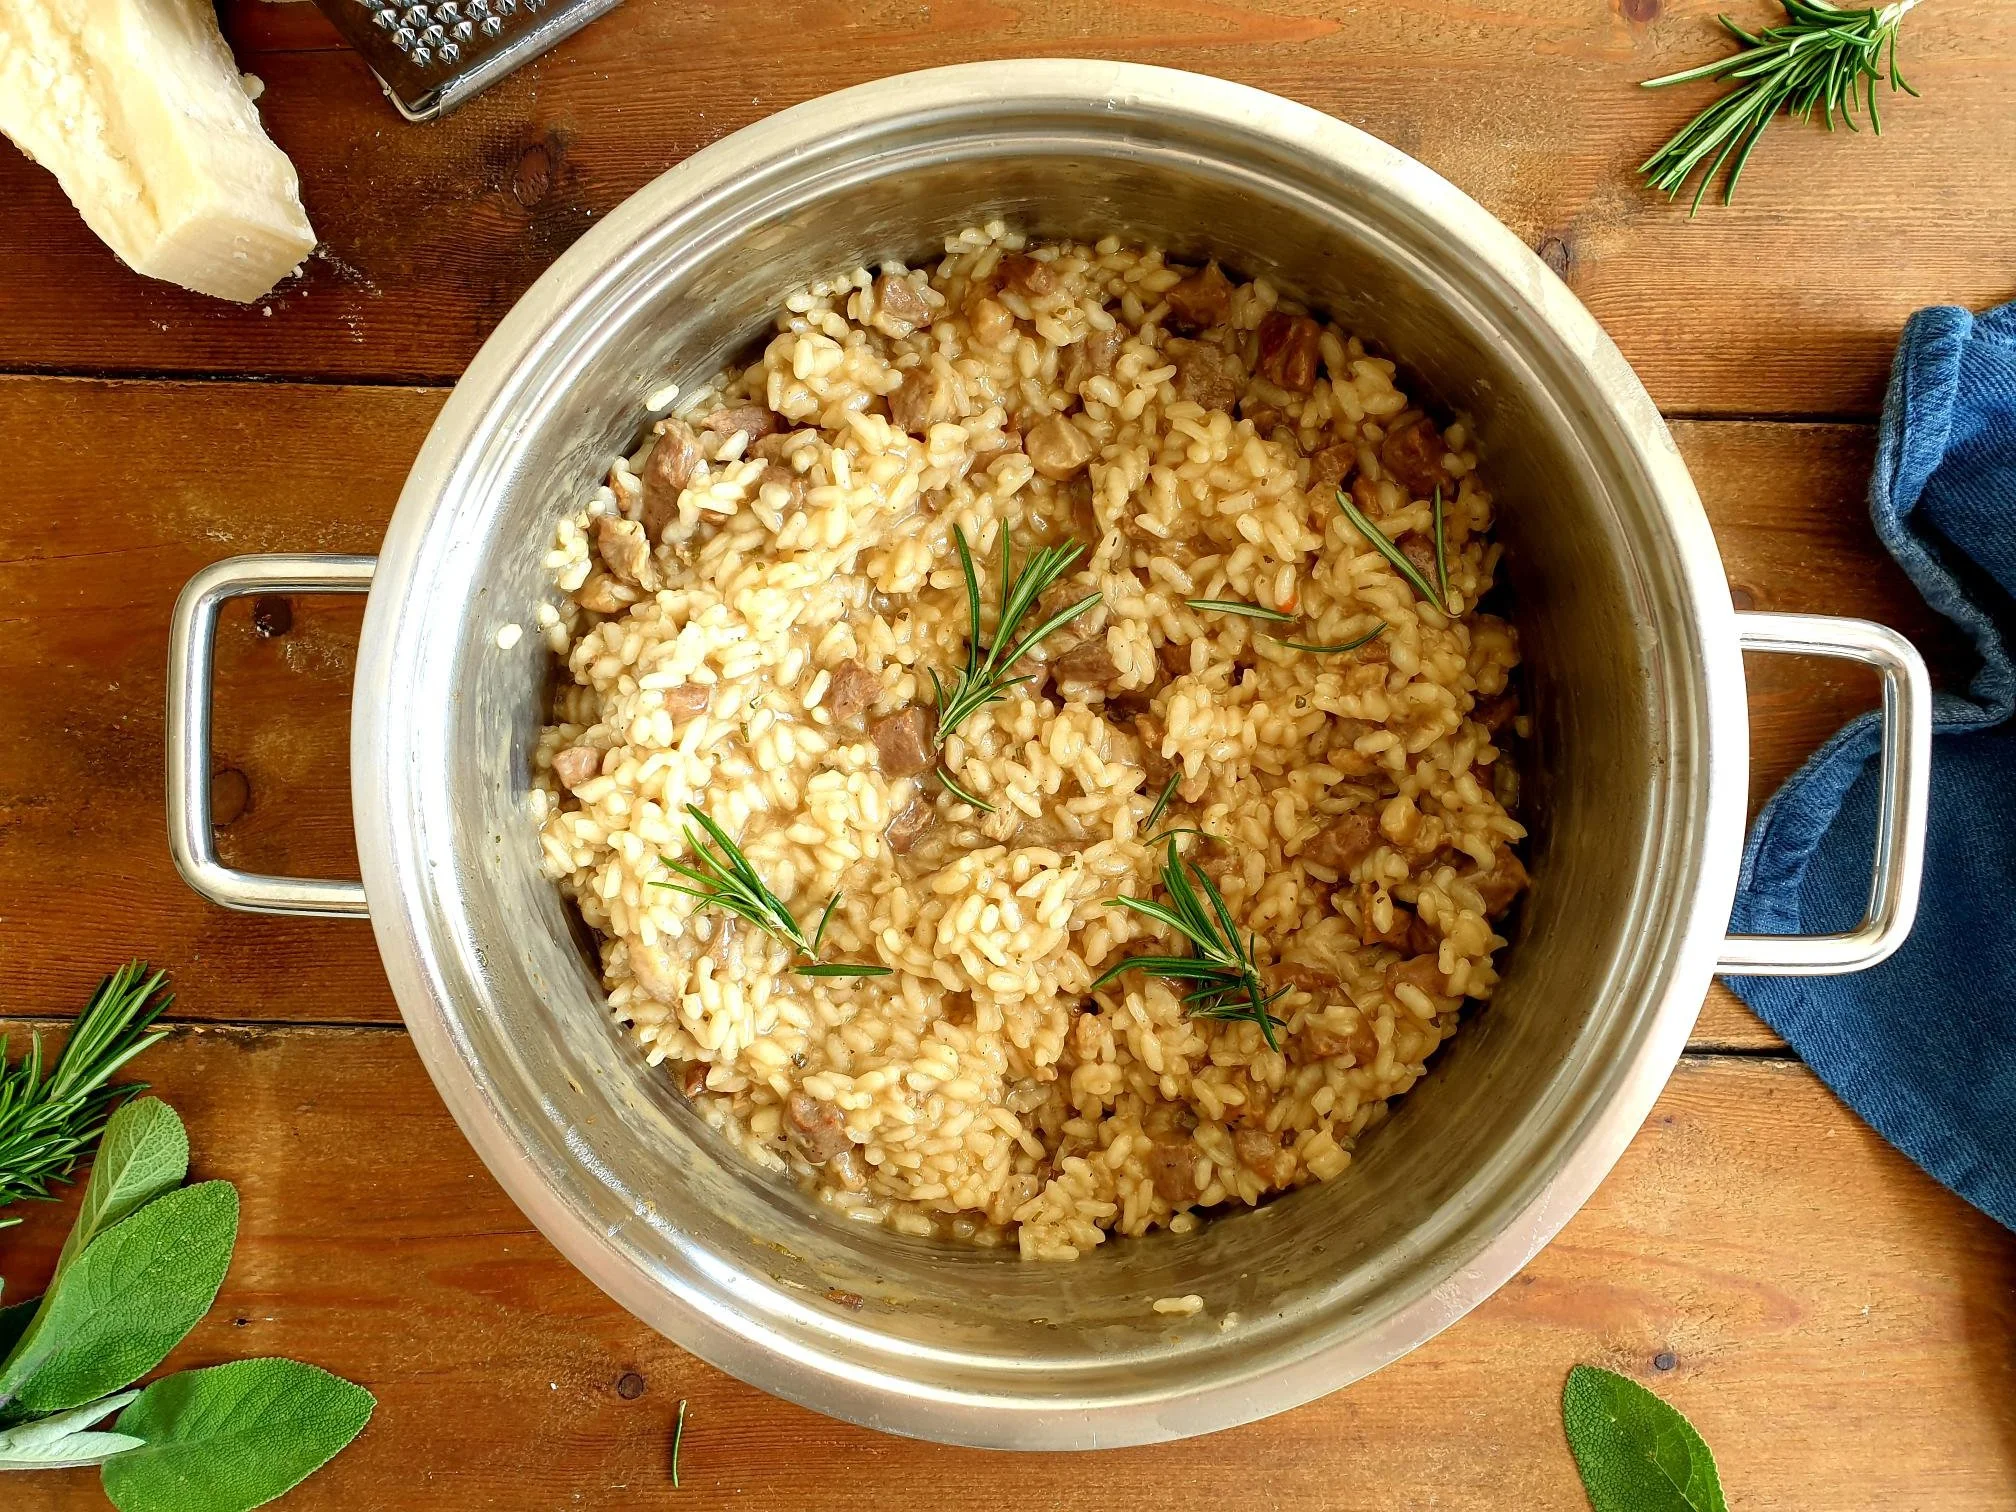
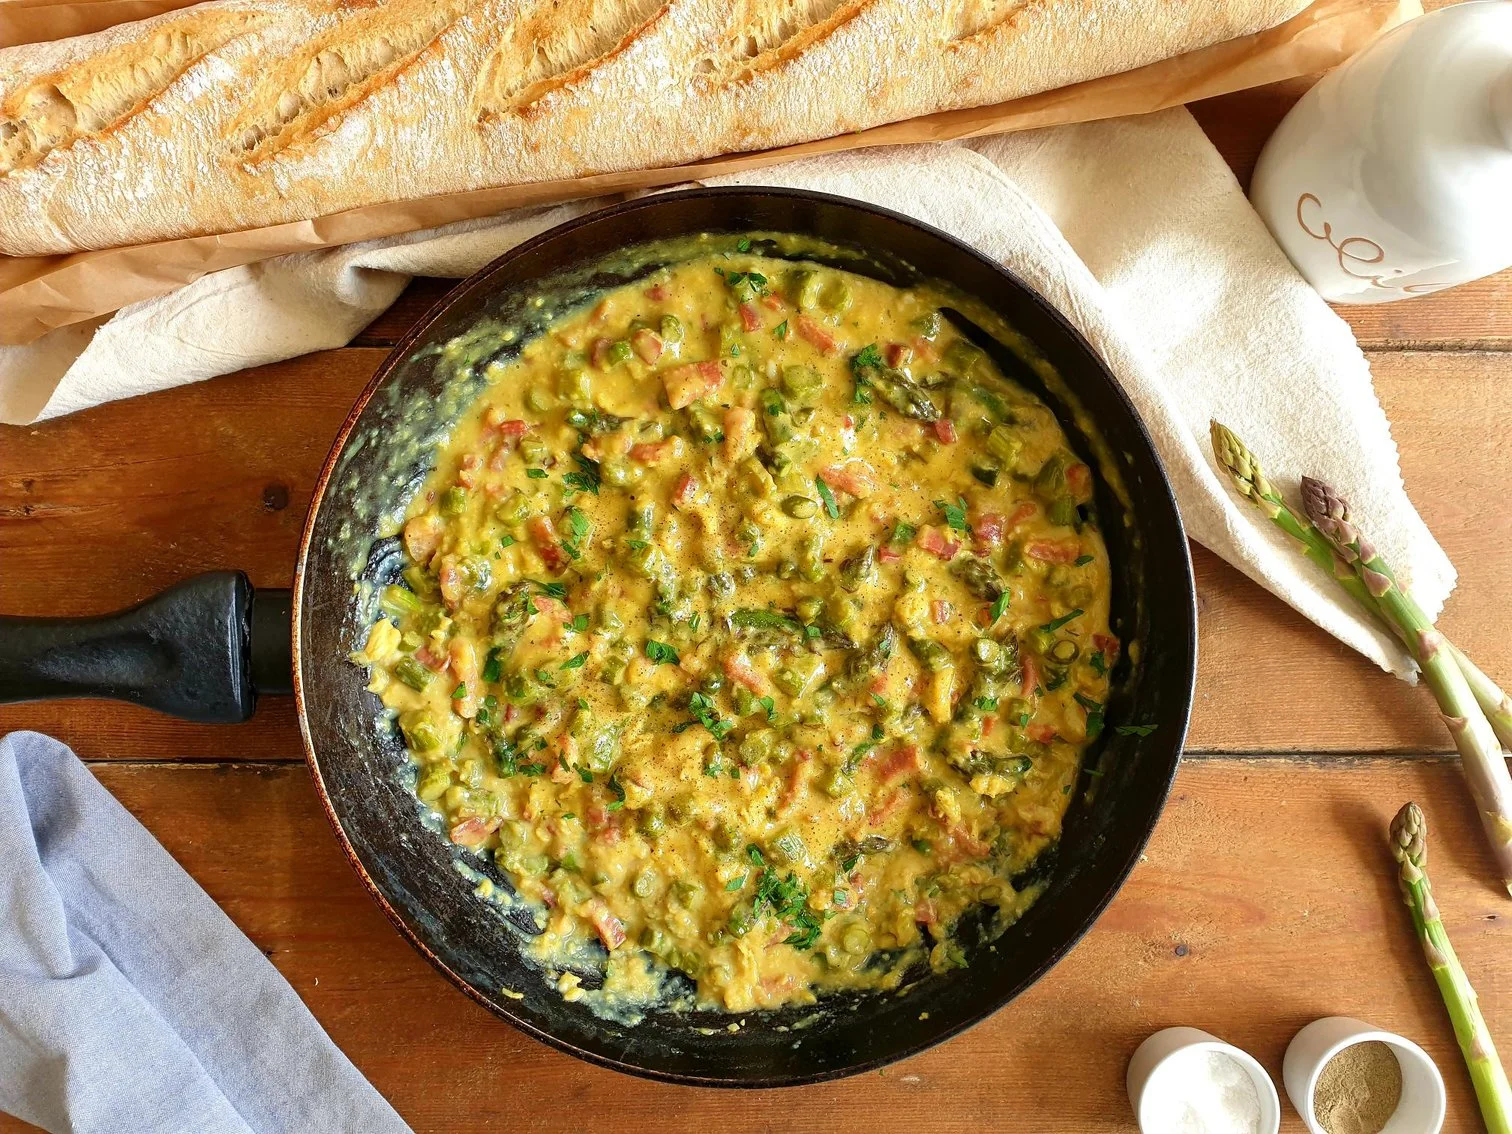
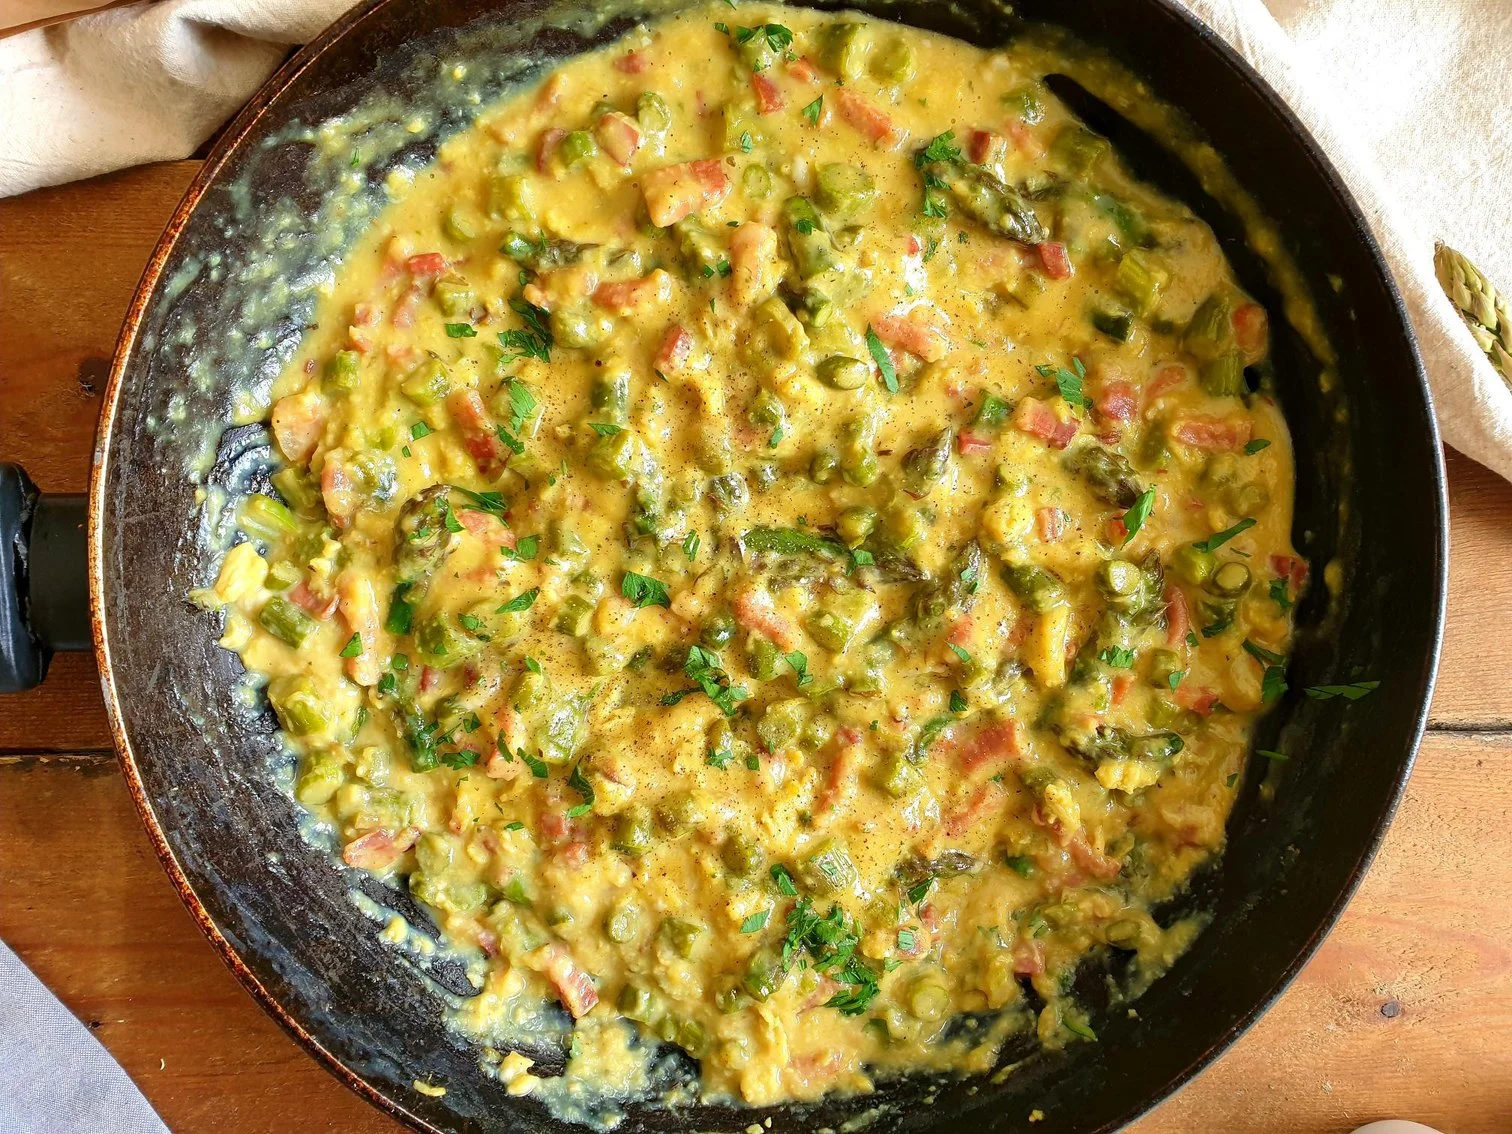
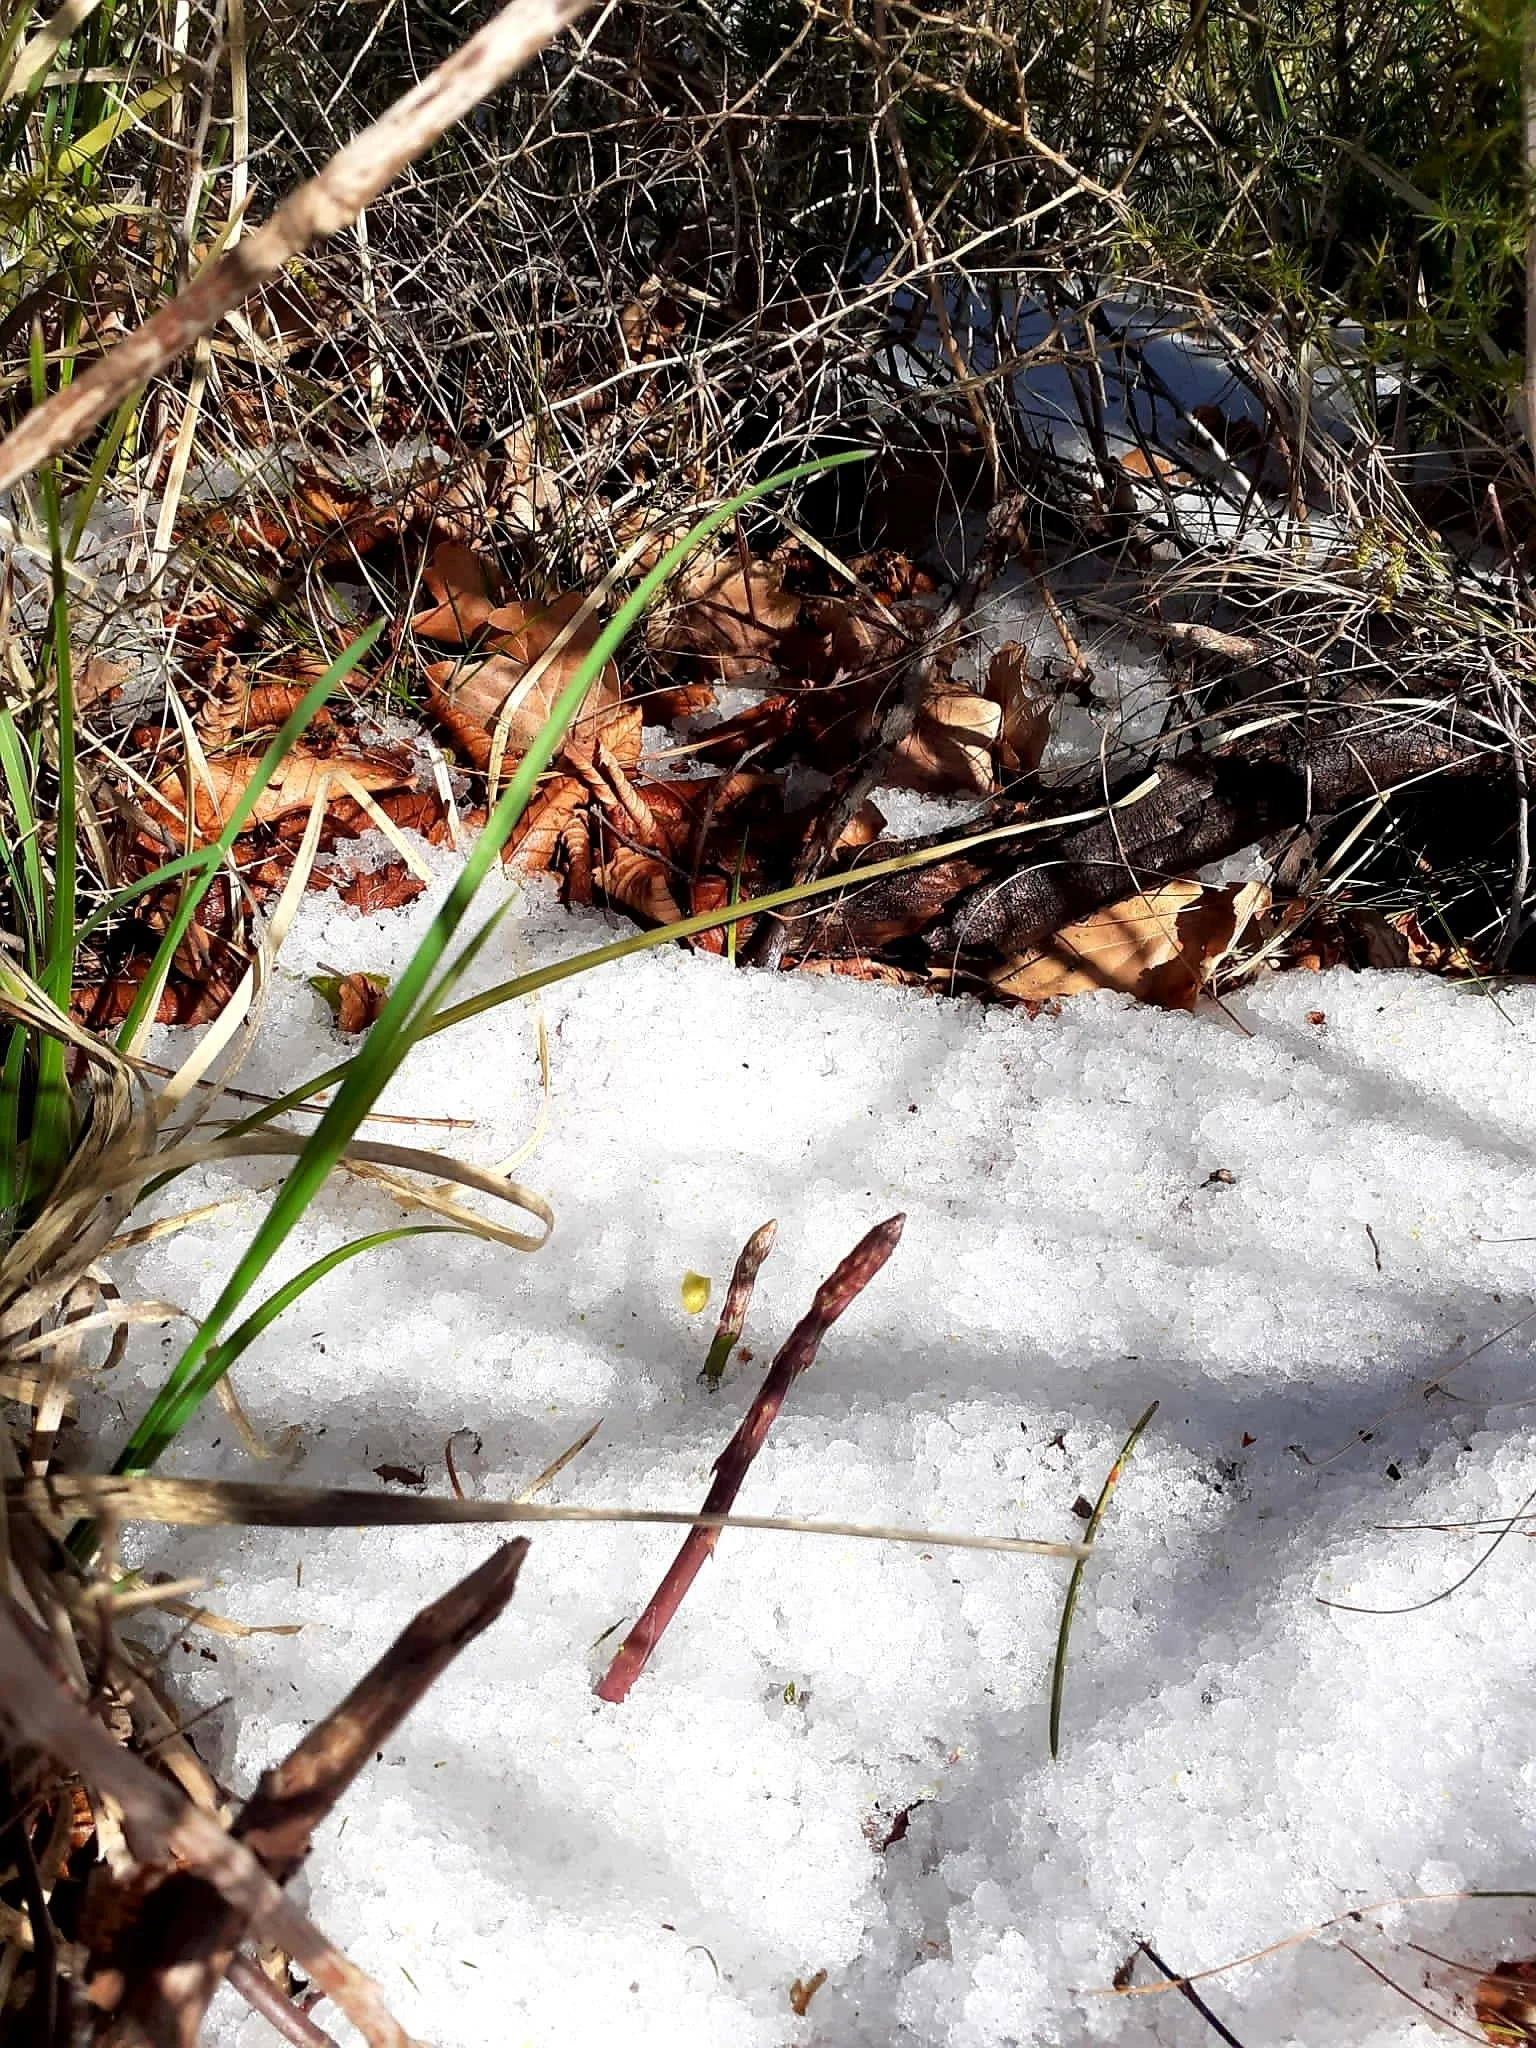
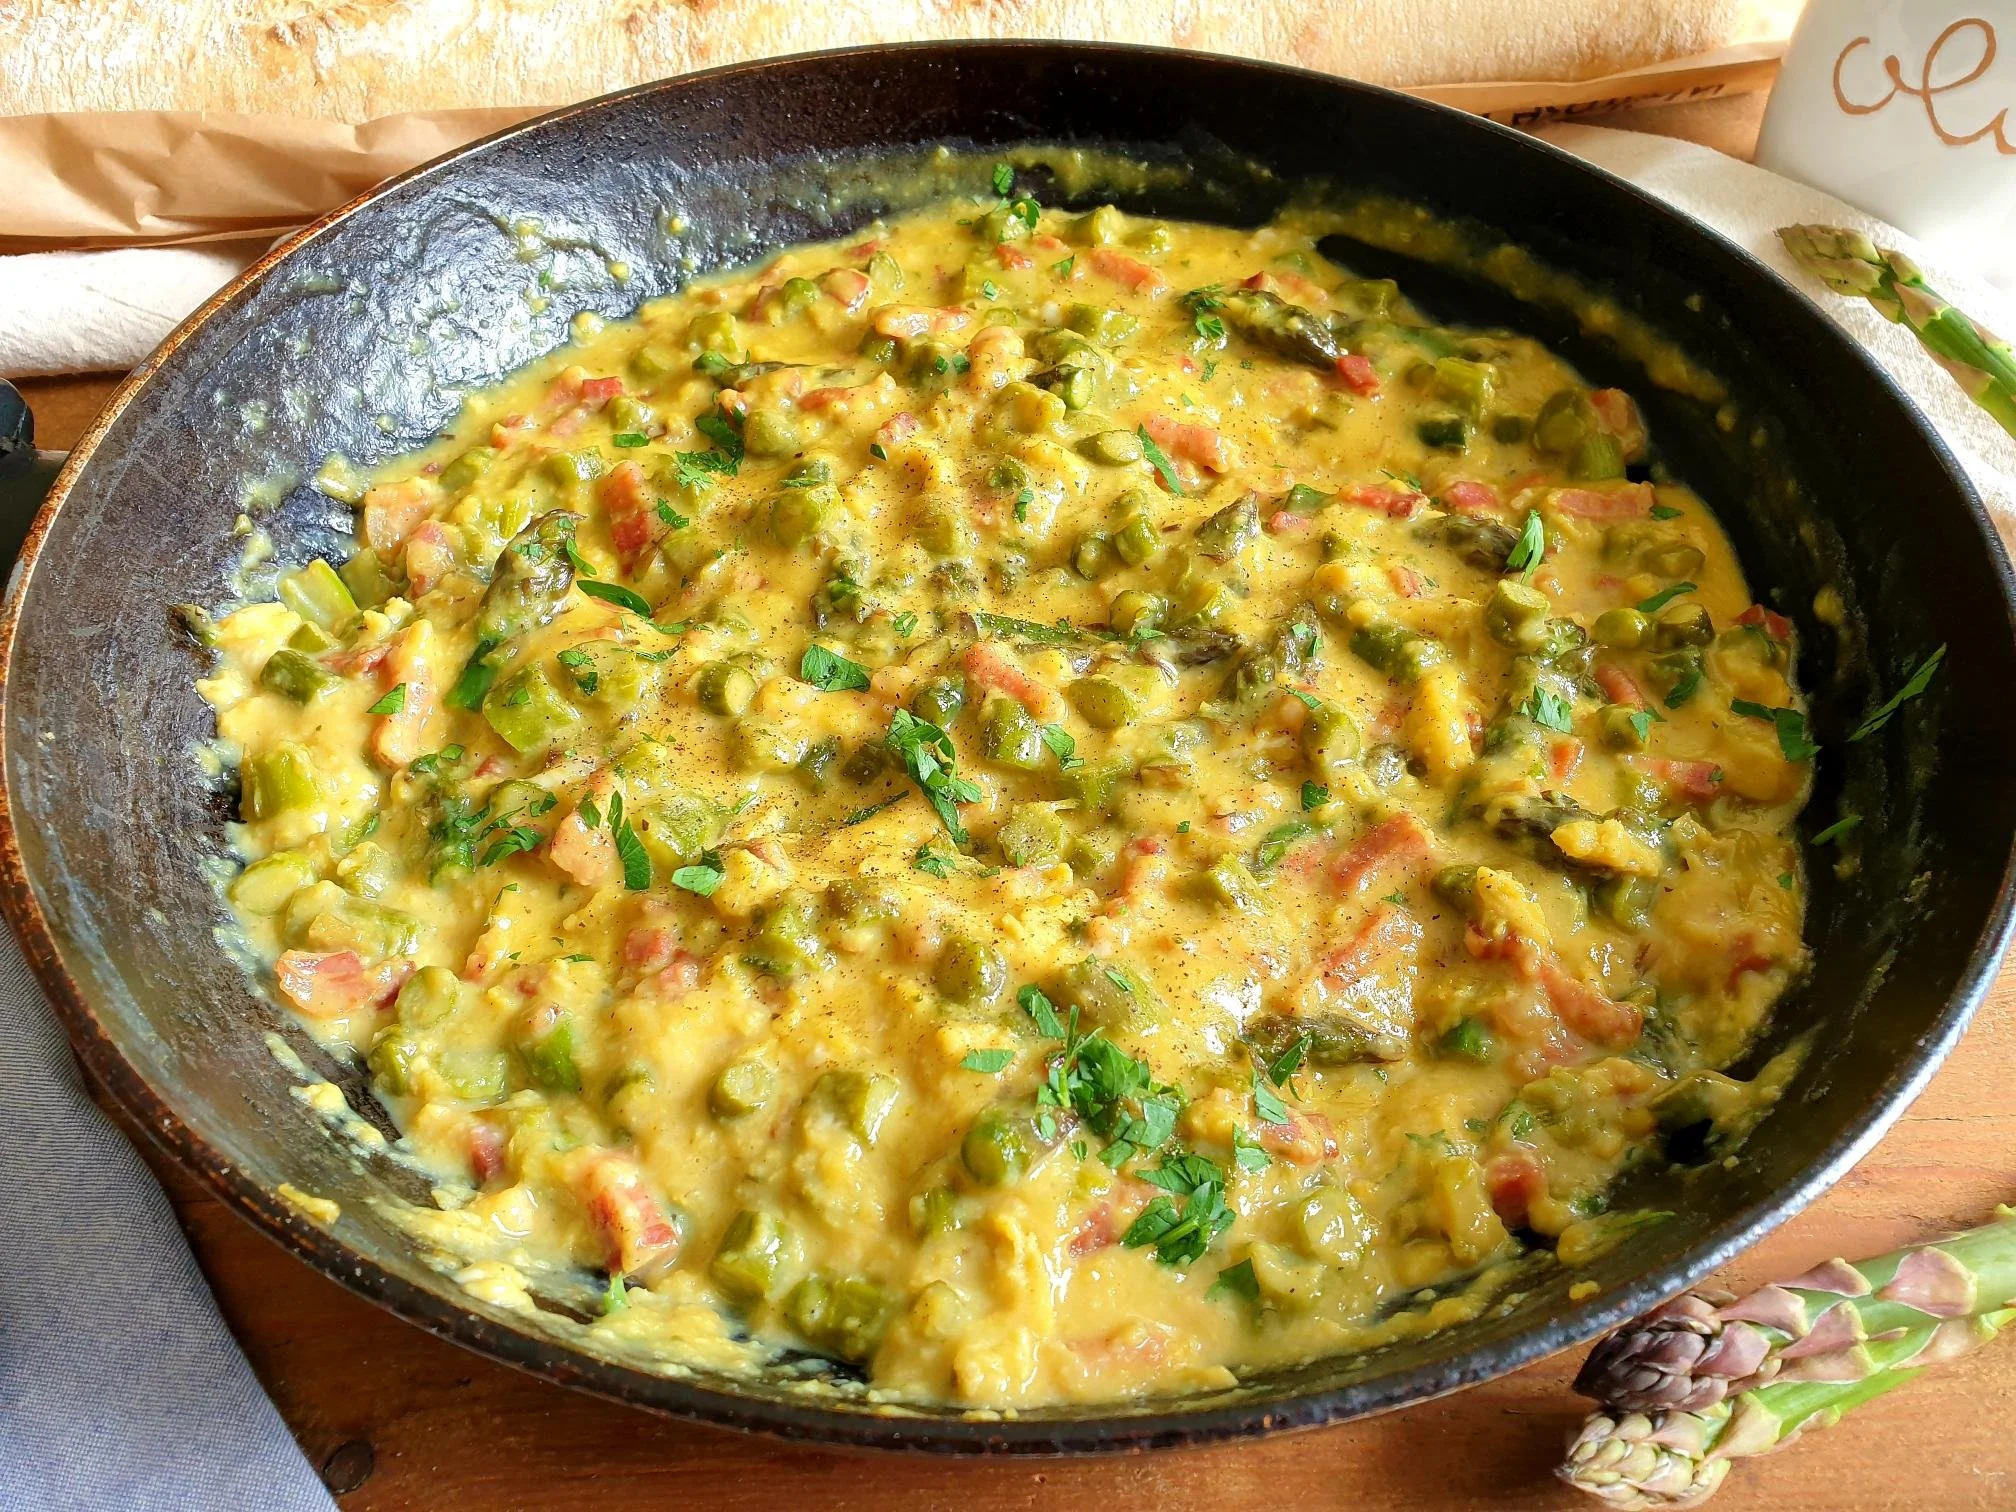
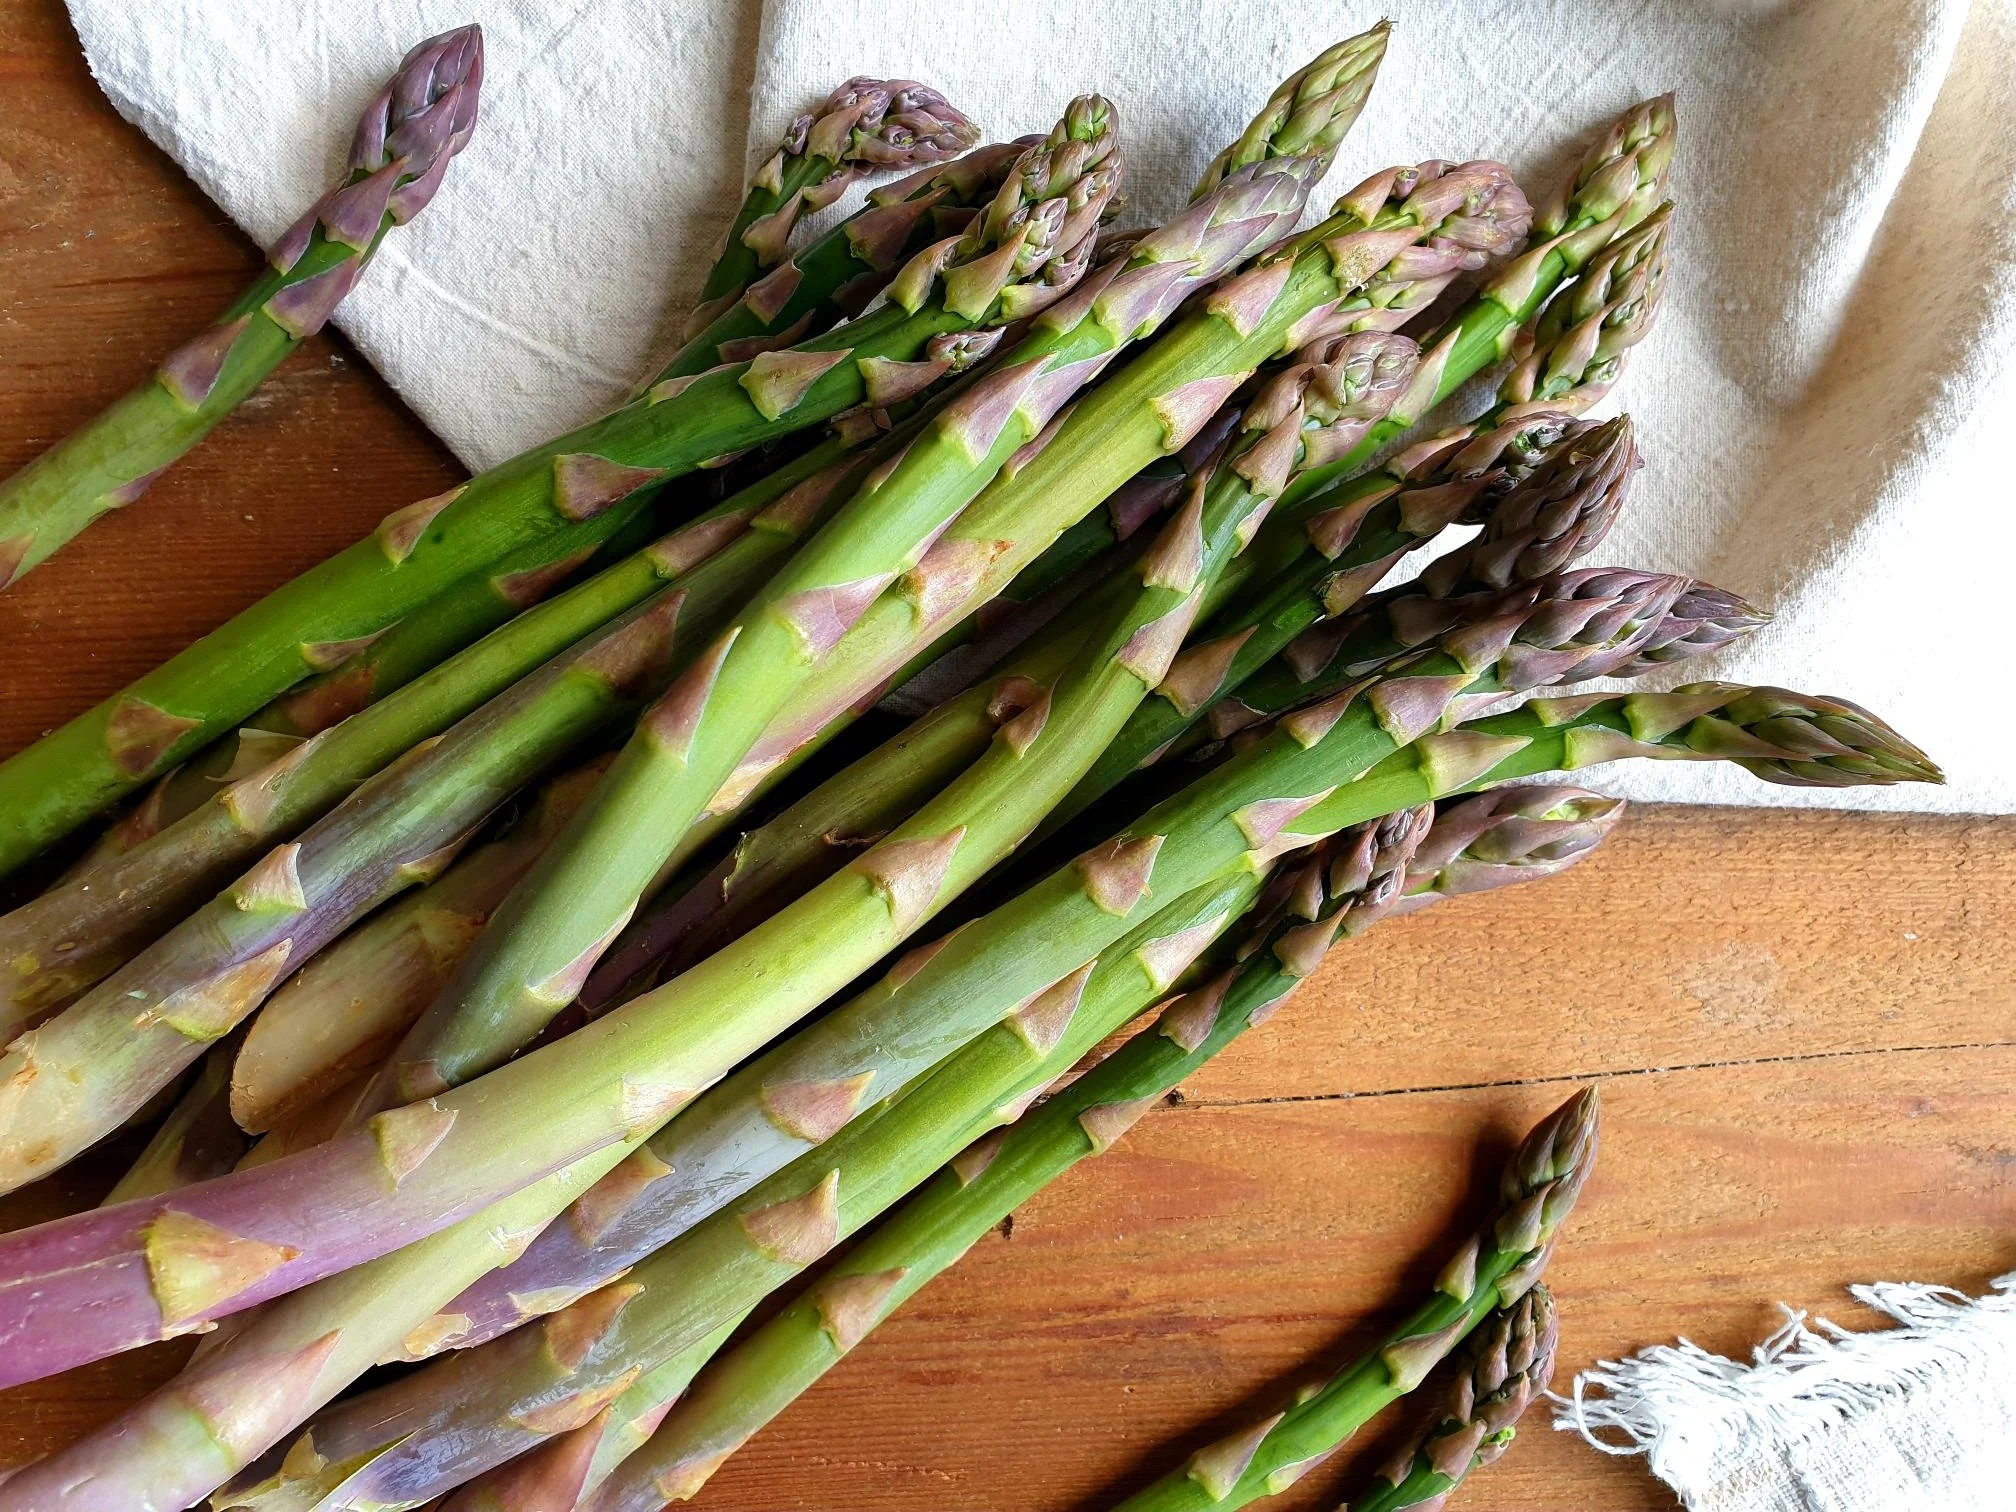
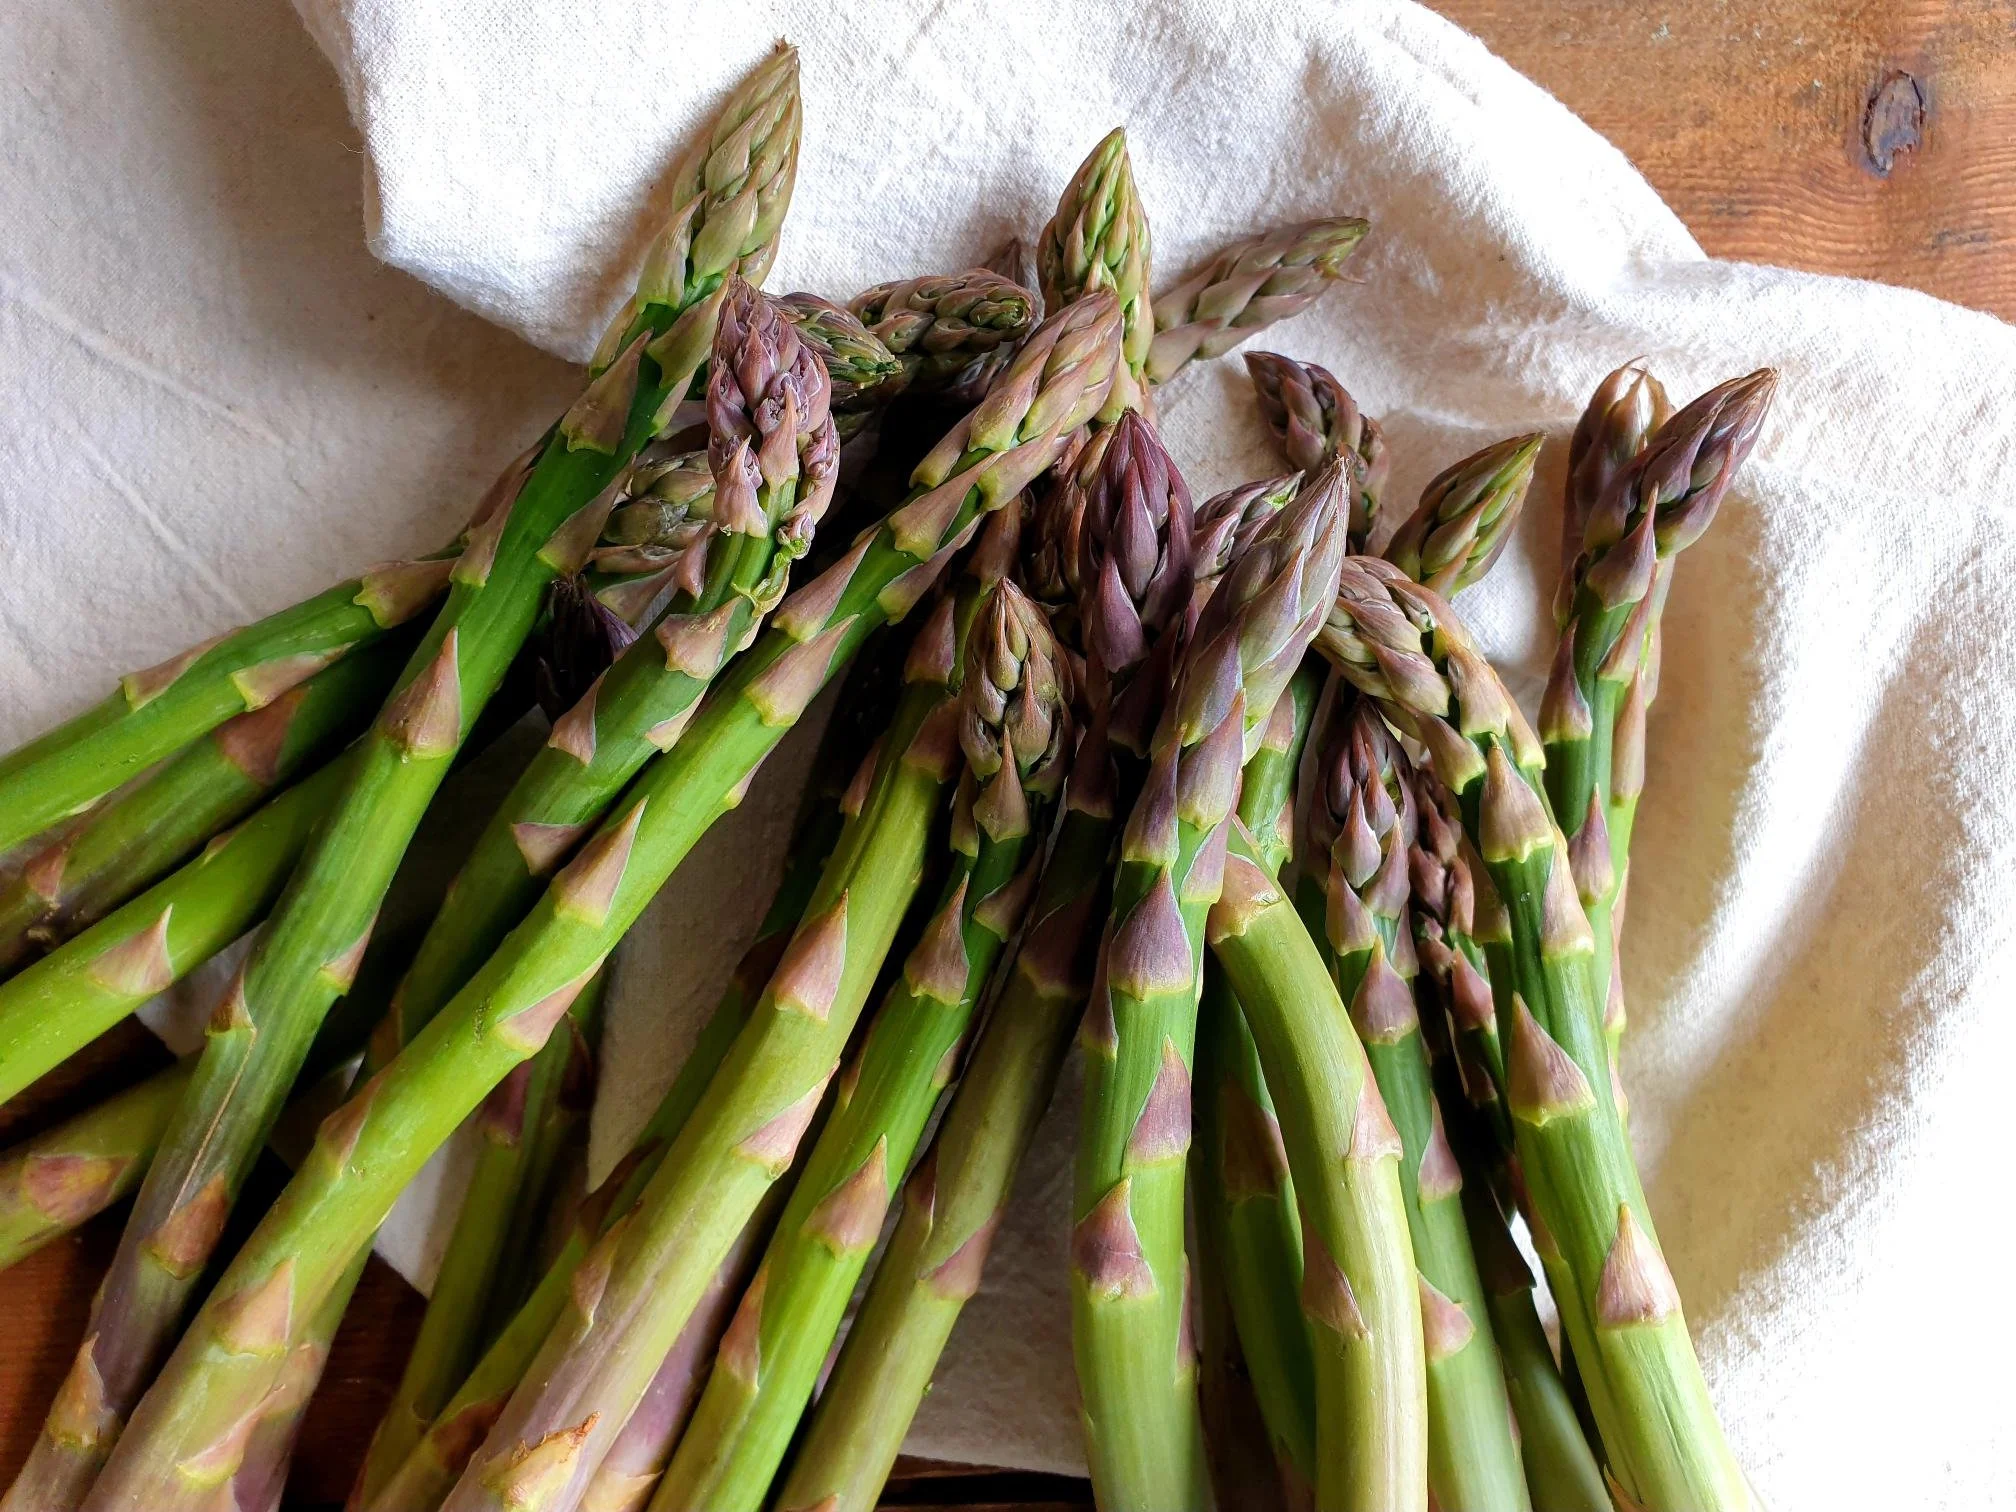
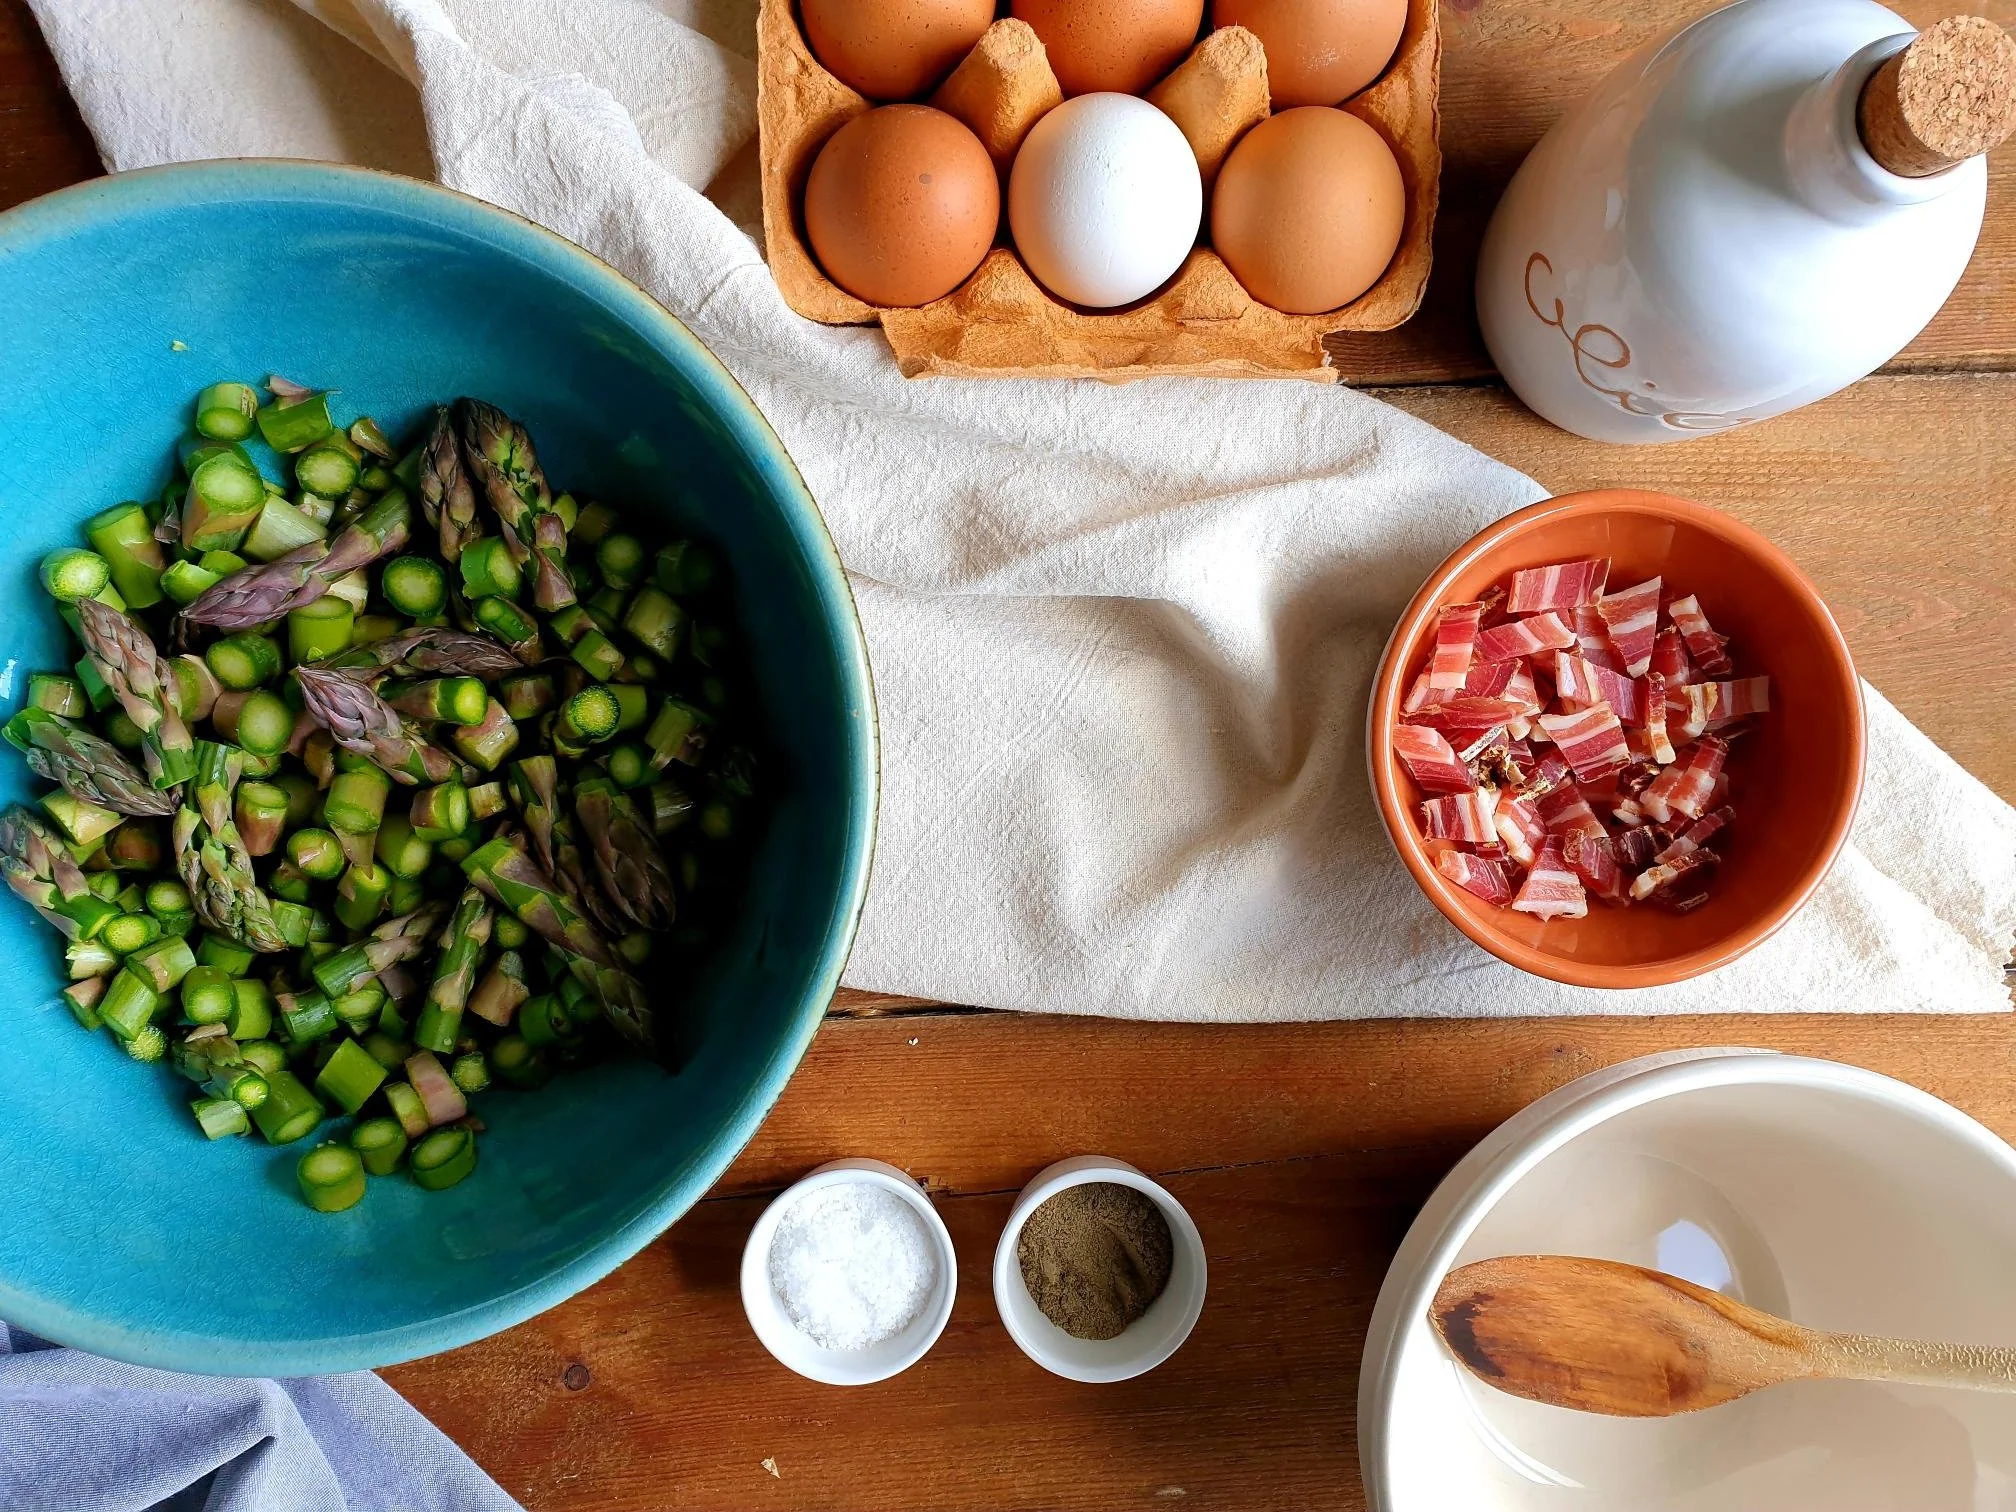
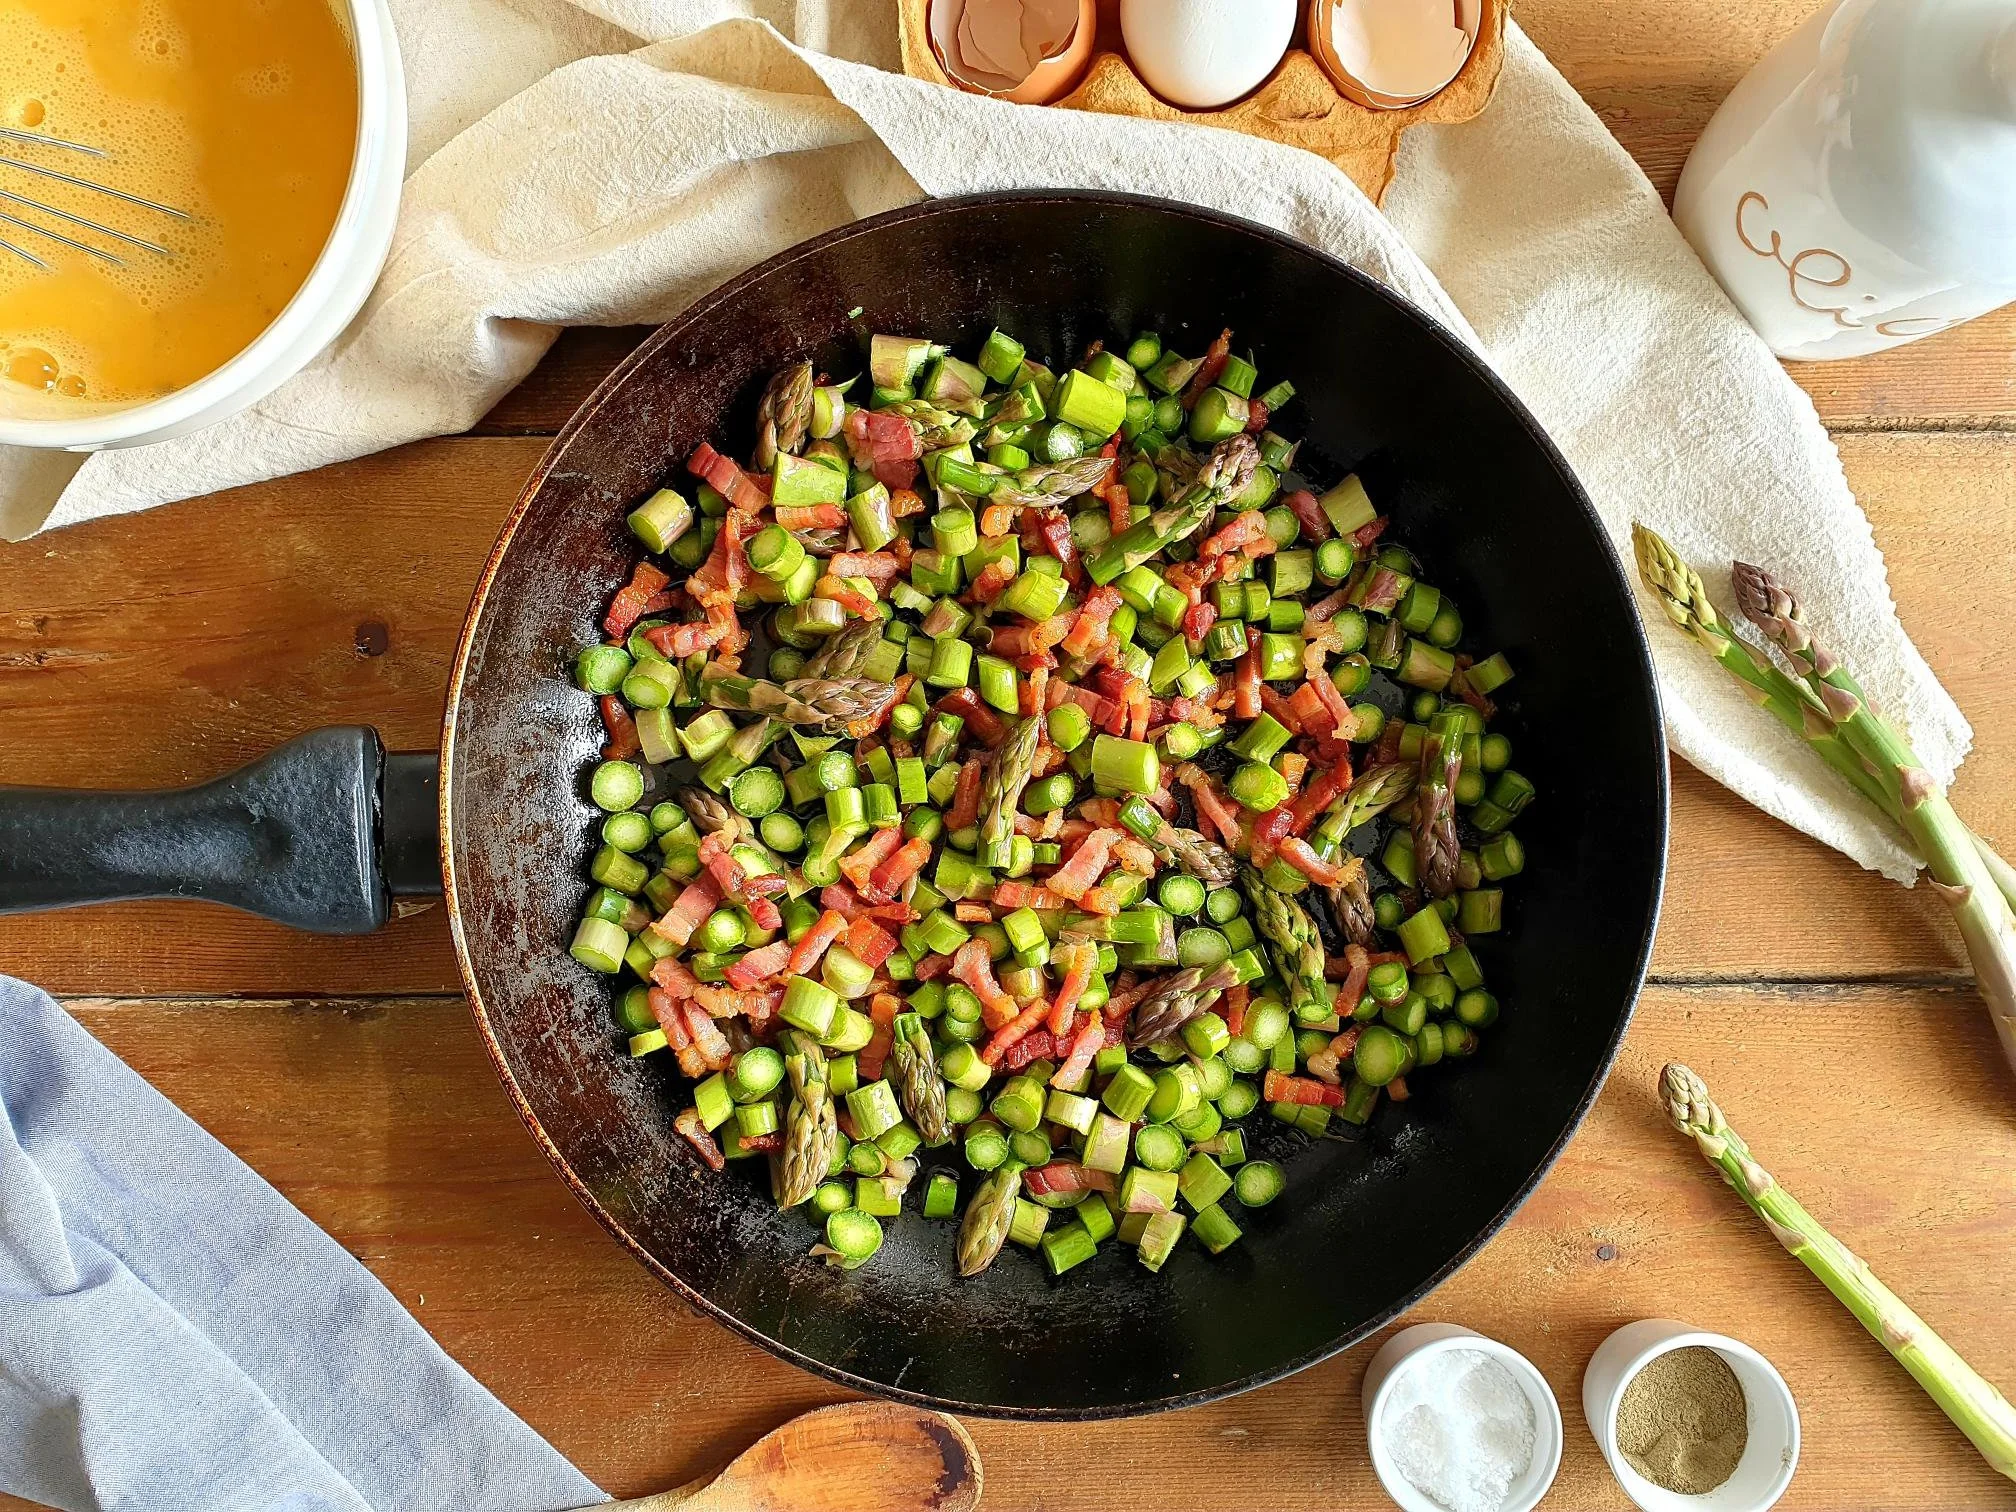
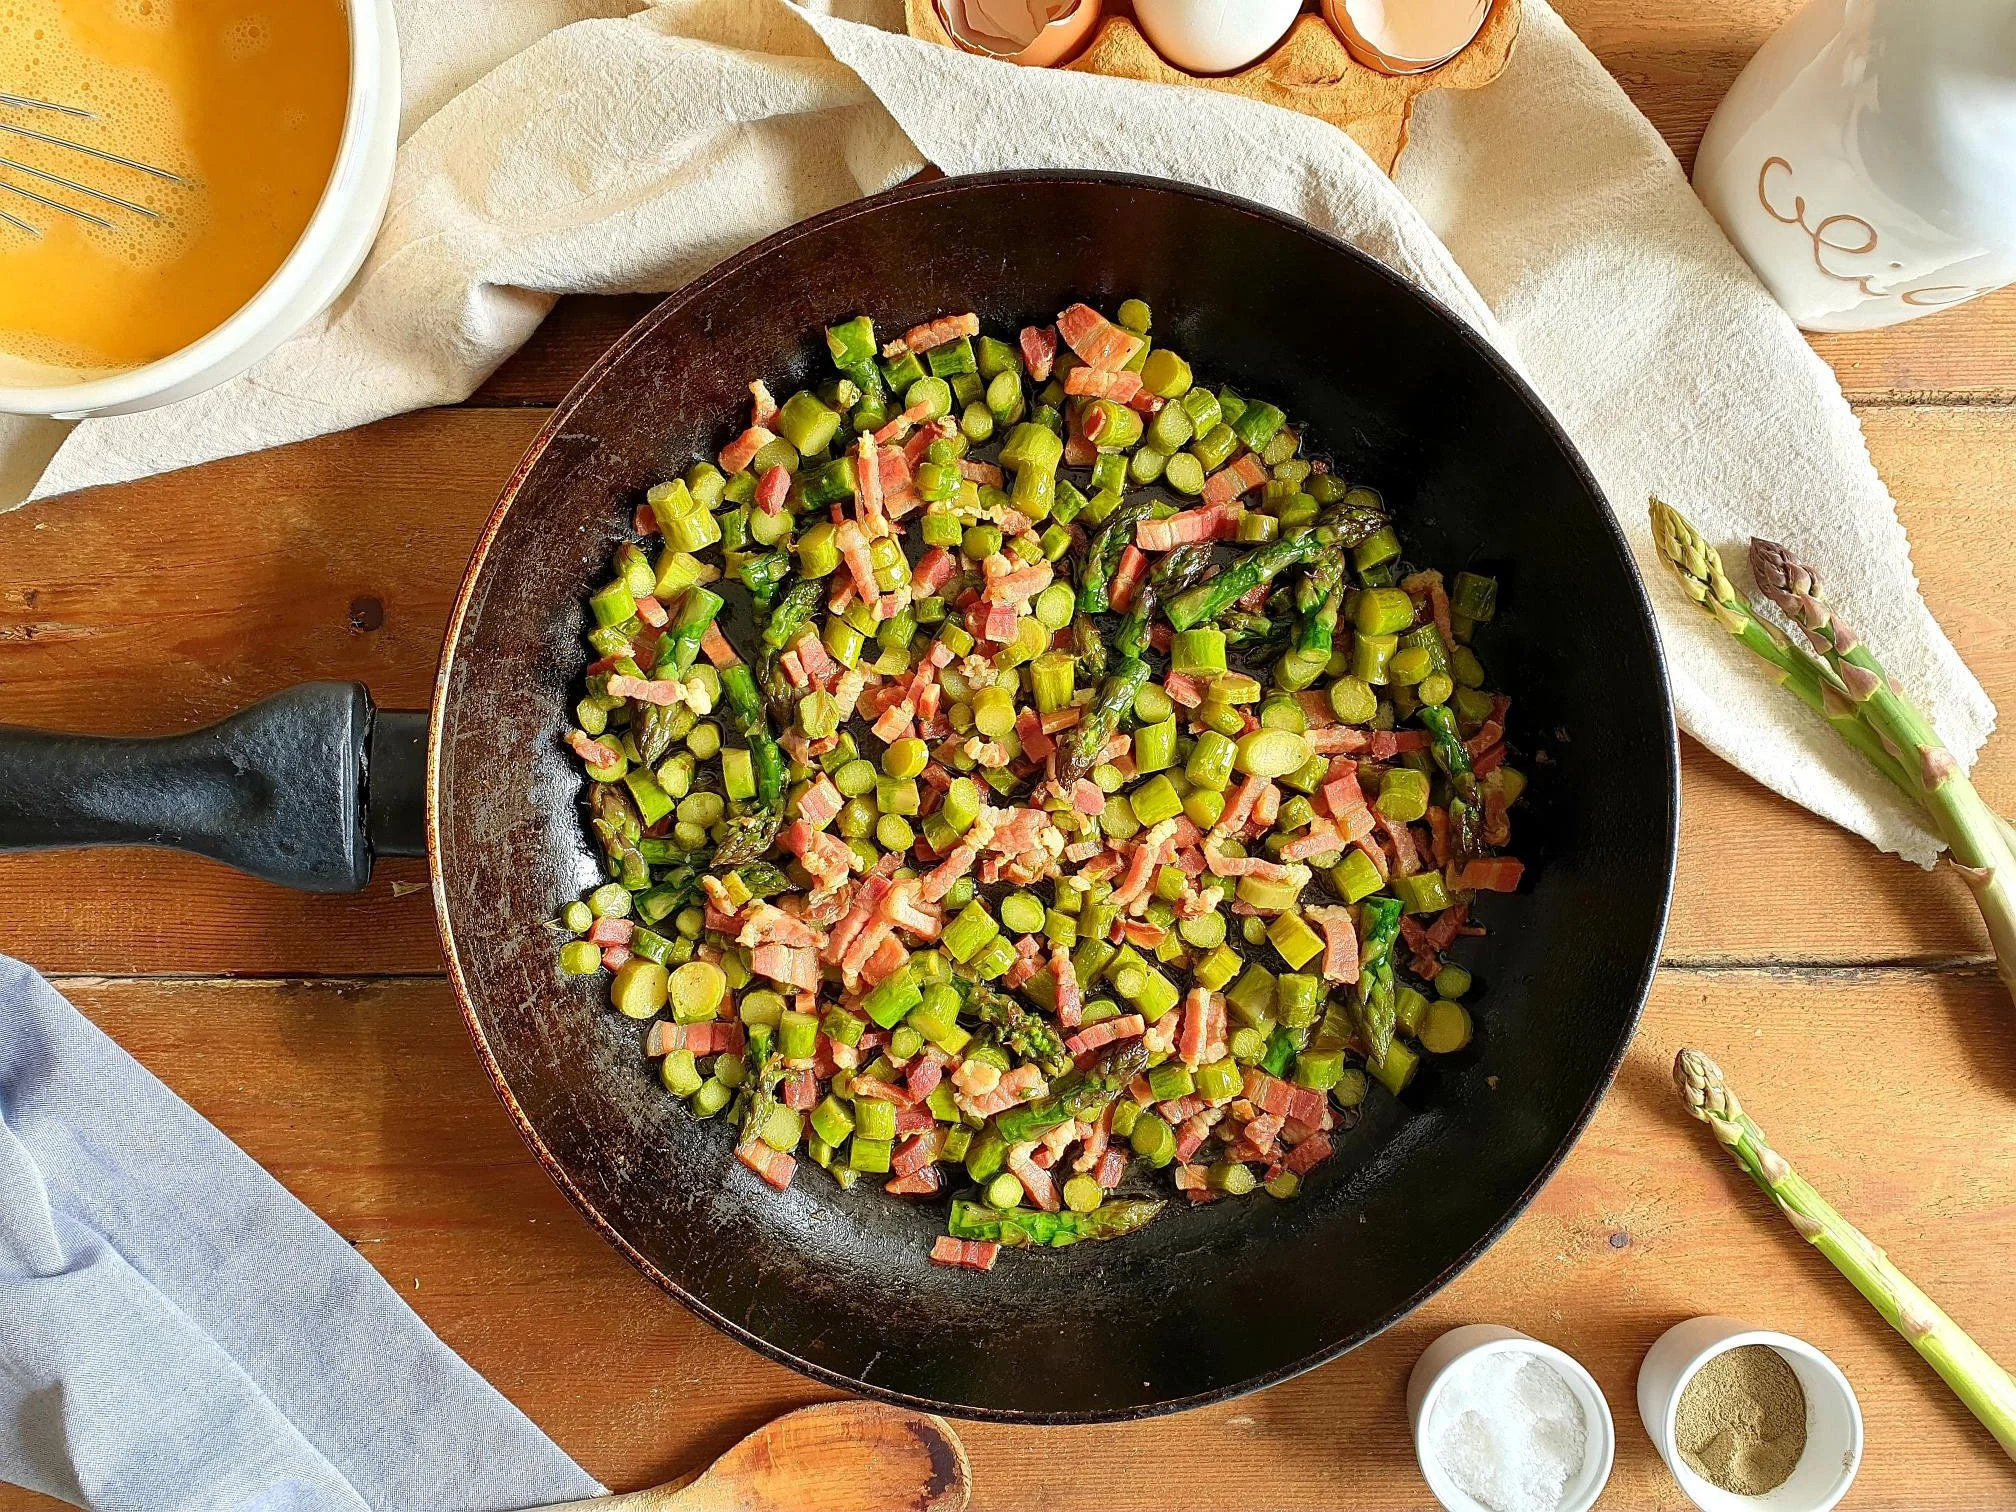
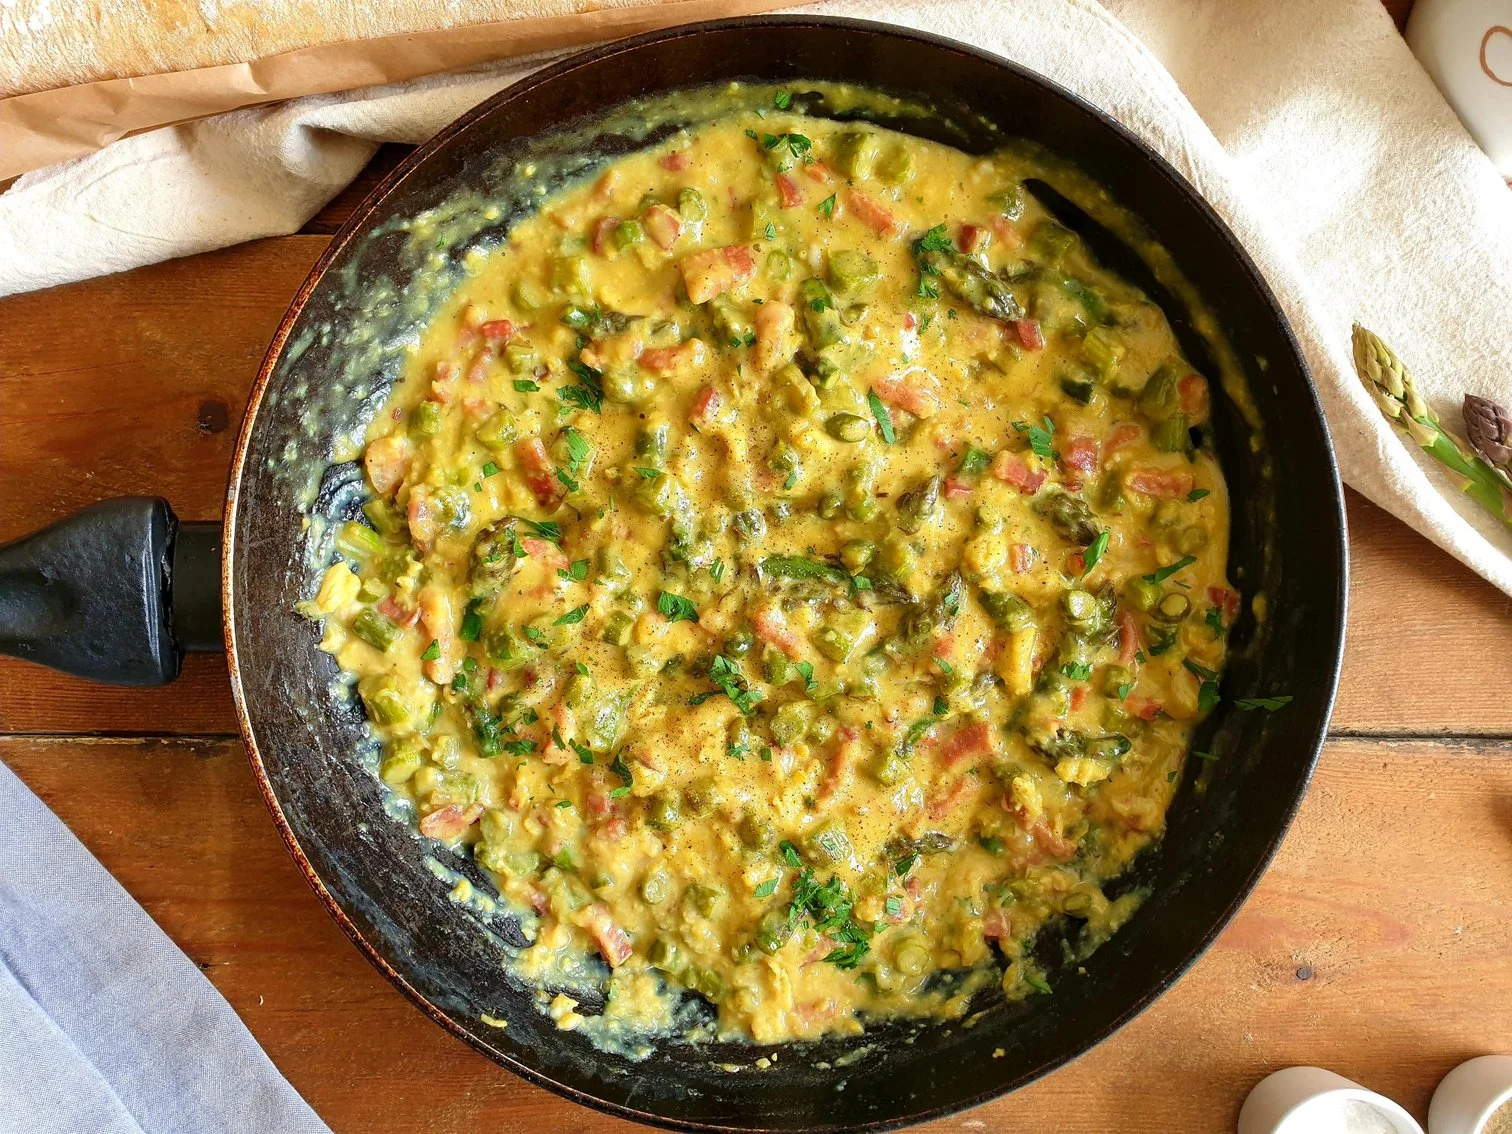
Pljukanci would commonly be served with different types of sauces made with local, seasonal ingredients like, wild asparagus and Istrian Prsut (Istrian dry cured ham), wild mushrooms, goulash sauce cooked with different kinds of meats, black or white truffles, or simply with top quality extra virgin olive oil and freshly grated hard cheese.  

Incredibly satisfying to make, if have never made pasta before, start with this one, children can make this with no problem, it is a bit like playing with Play-Dough. 

This pasta dish made with pljukanci will just instantly make you feel better, there is something so cosy and warm about them, pair them with any sauce you like, you cannot go wrong, well, maybe not making enough of them...

Recipe

Ingredients 

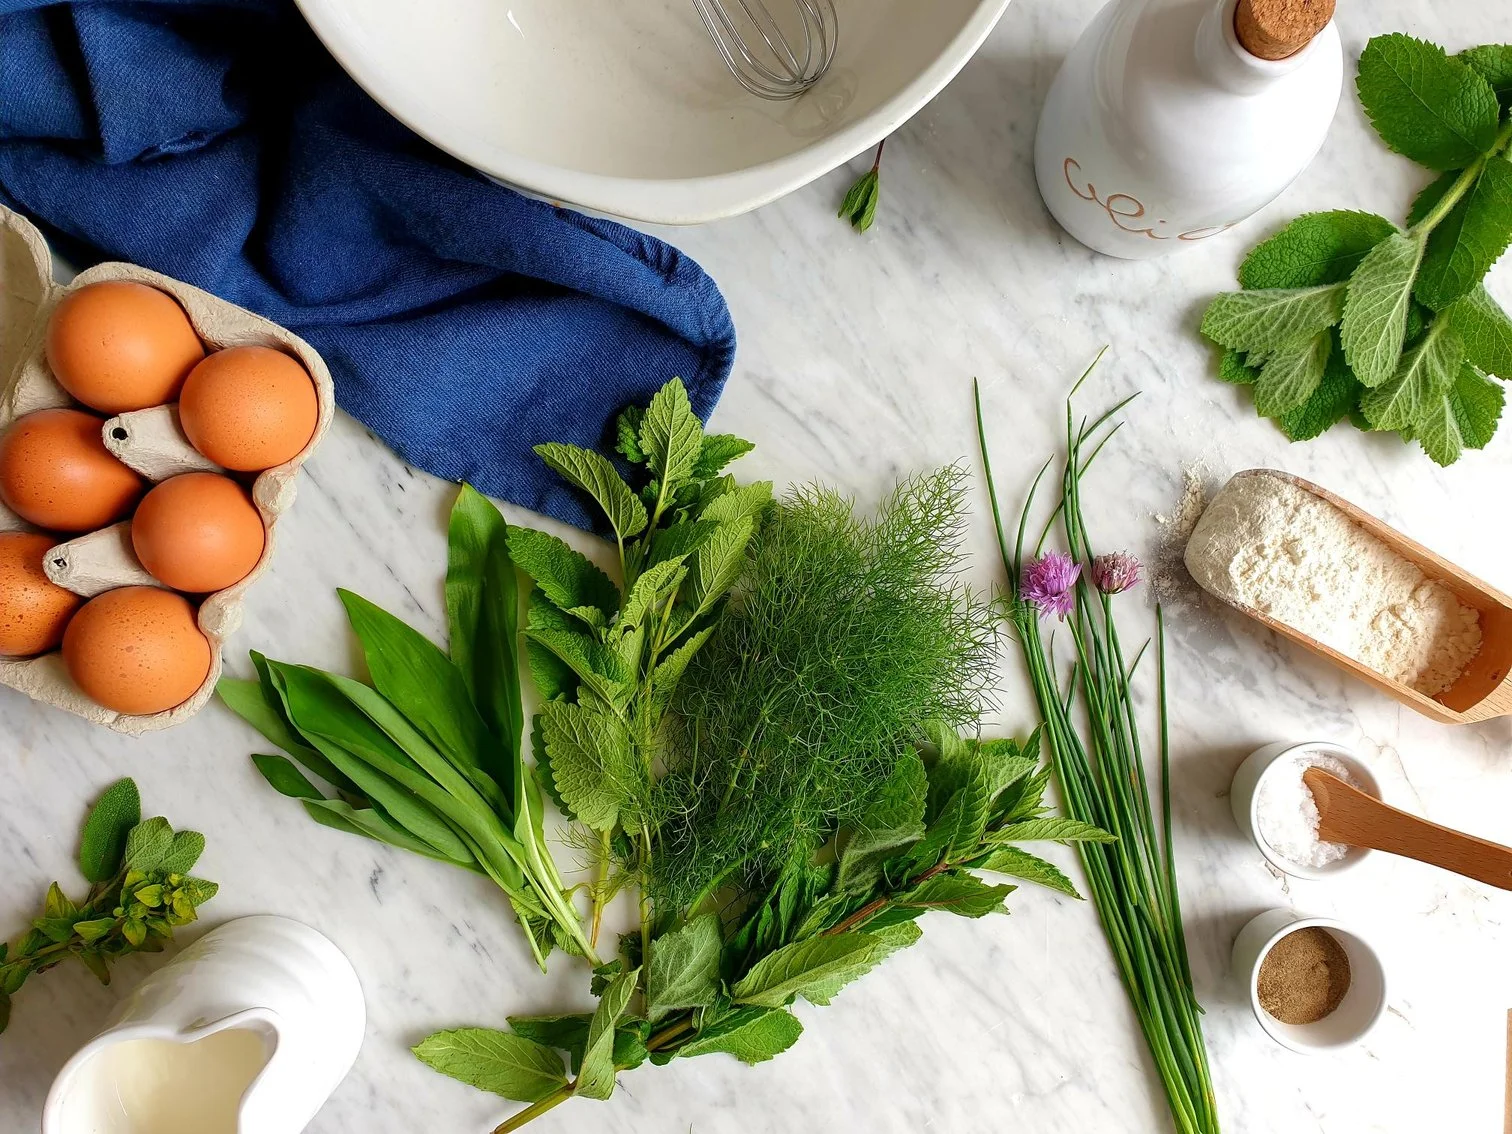
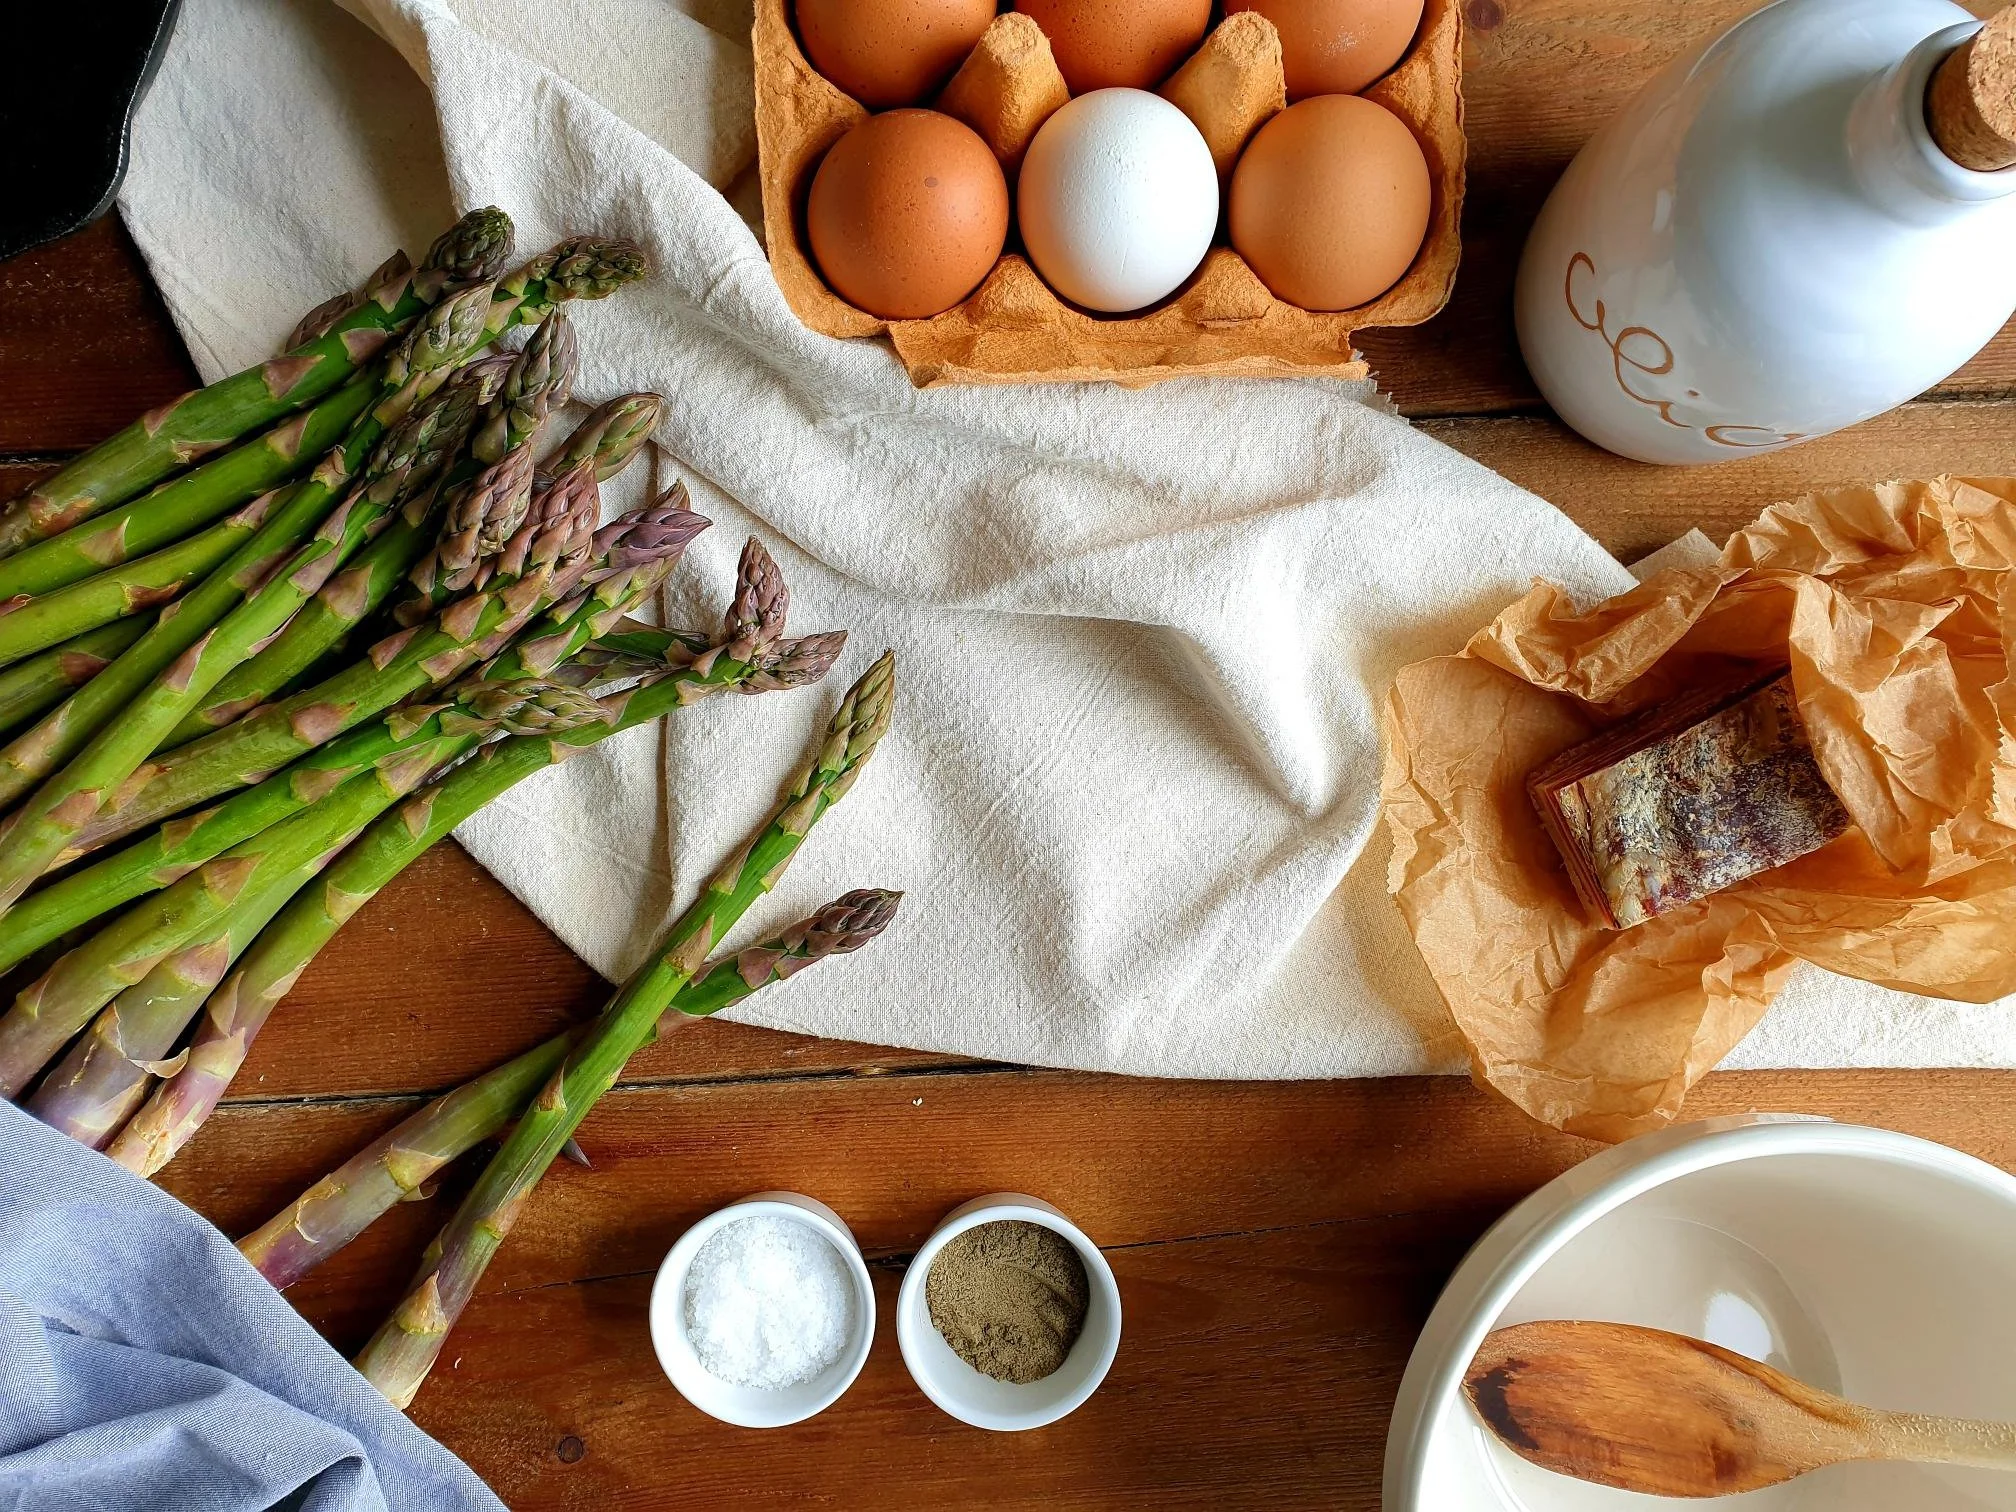
  • 500g all purpose white flour or 00 flour 

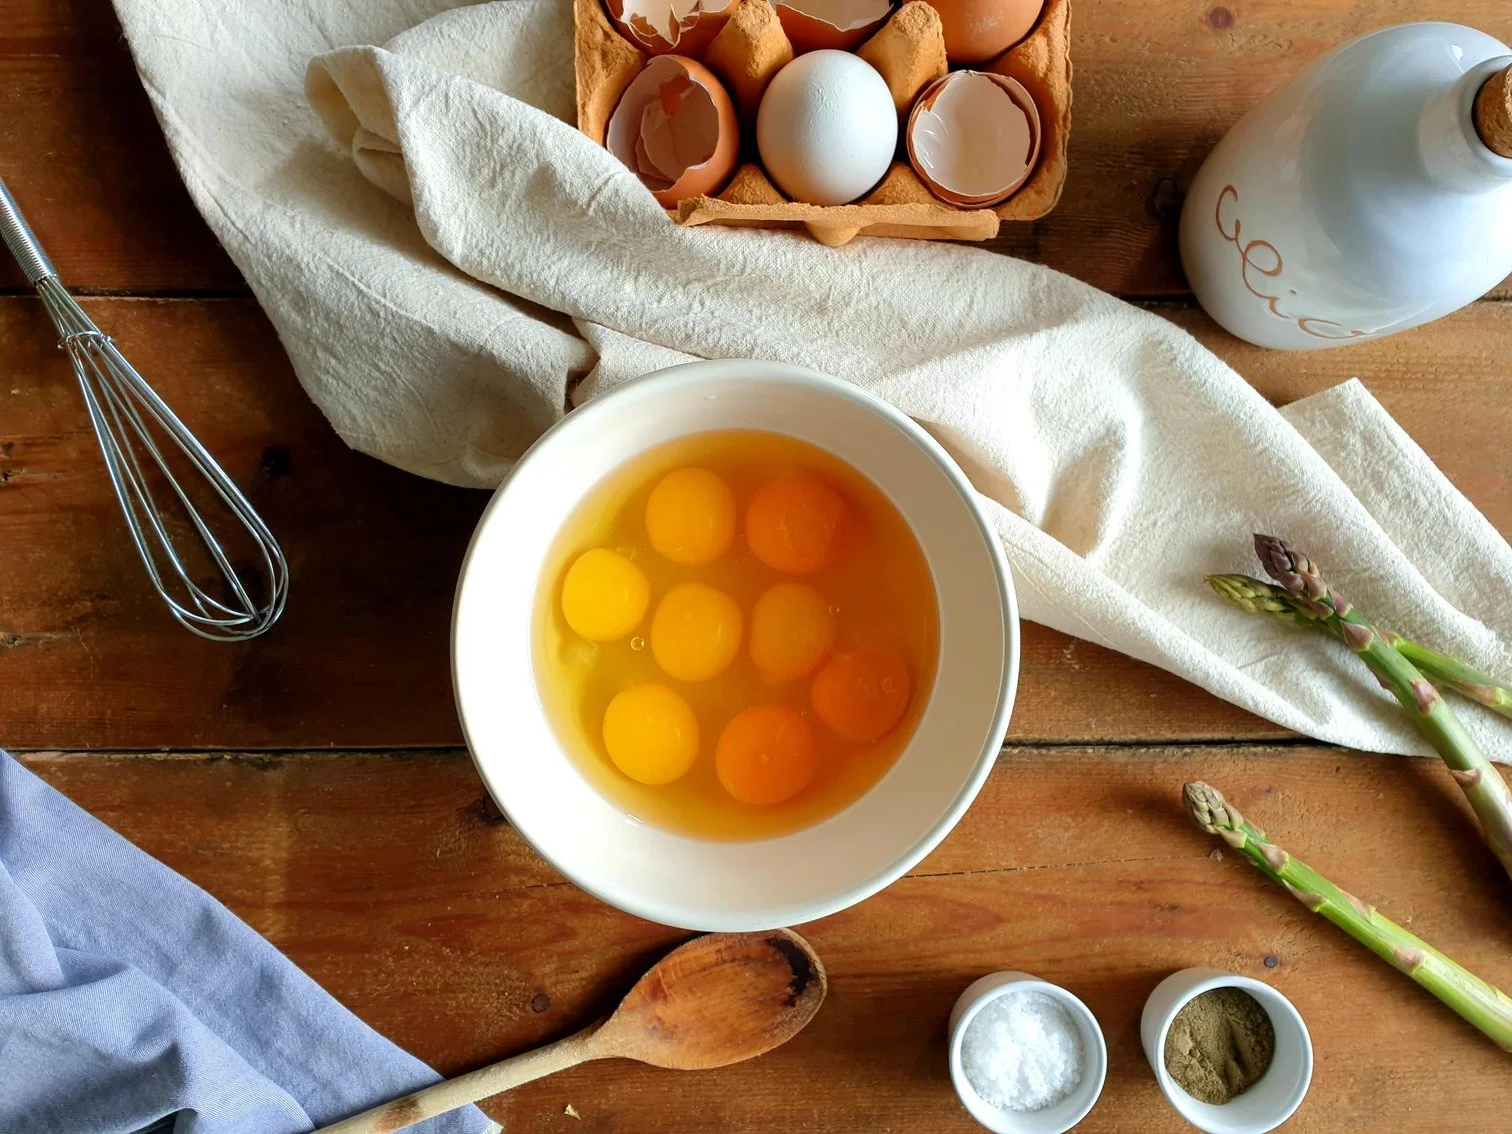
  • 2 smallish eggs or 1 bigger egg (weight the cracked eggs and add enough water to obtain the total amount of 250ml of liquid). For example, I used 2 small eggs weighing 104g so I added 146ml of lukewarm water.

  • lukewarm water, as needed (this will depend on the size and the weight of the eggs you are using)

Method 

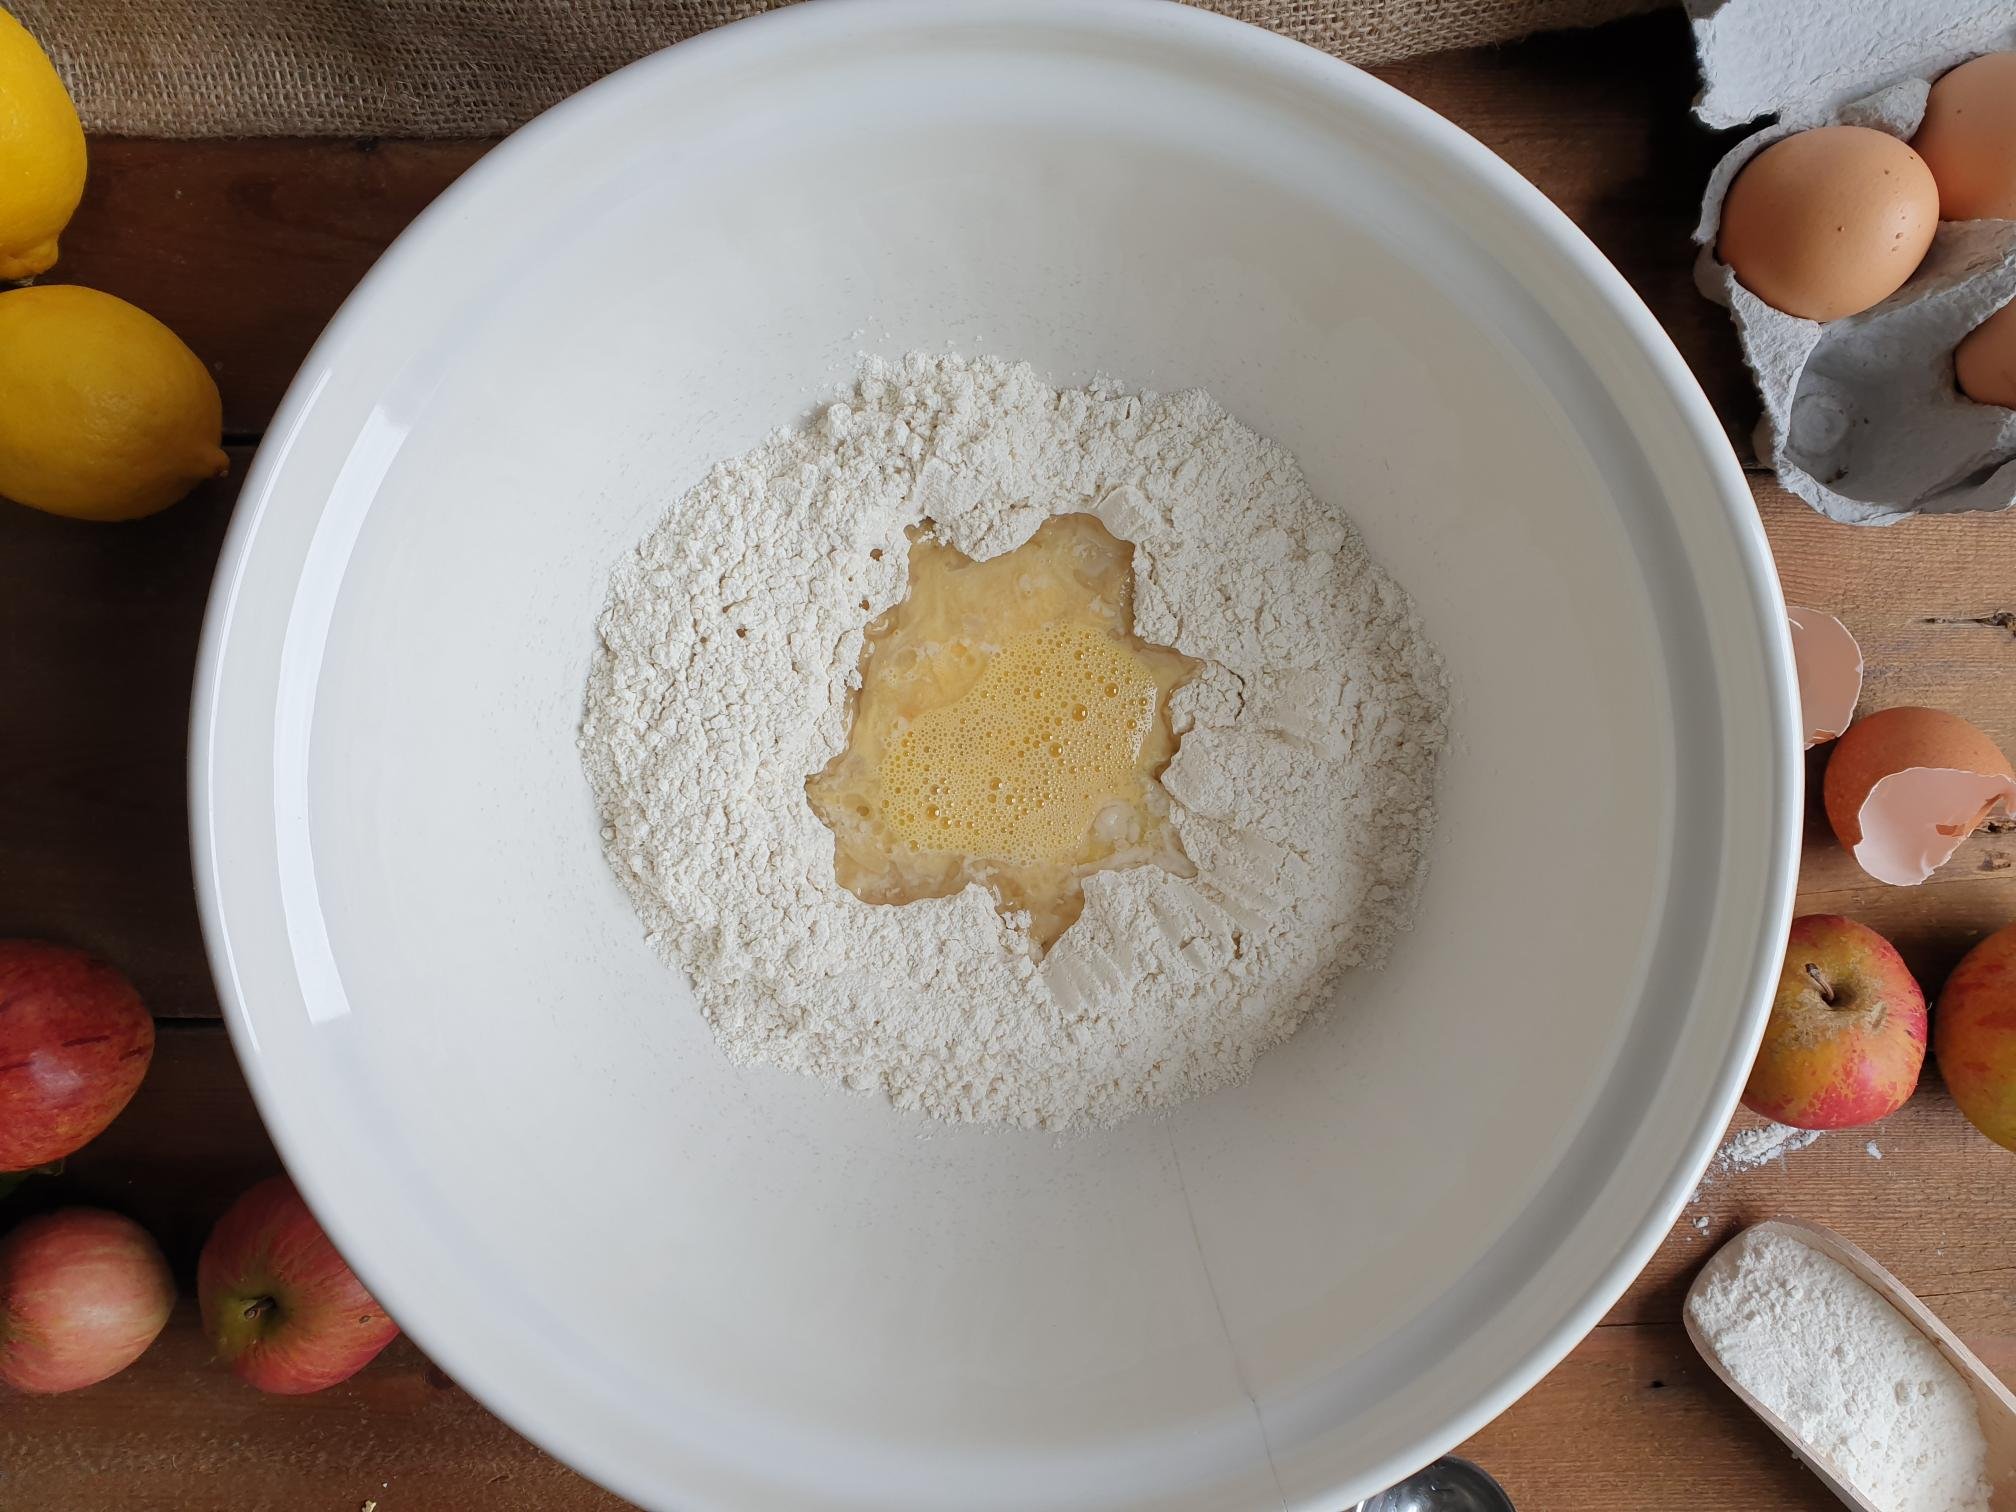
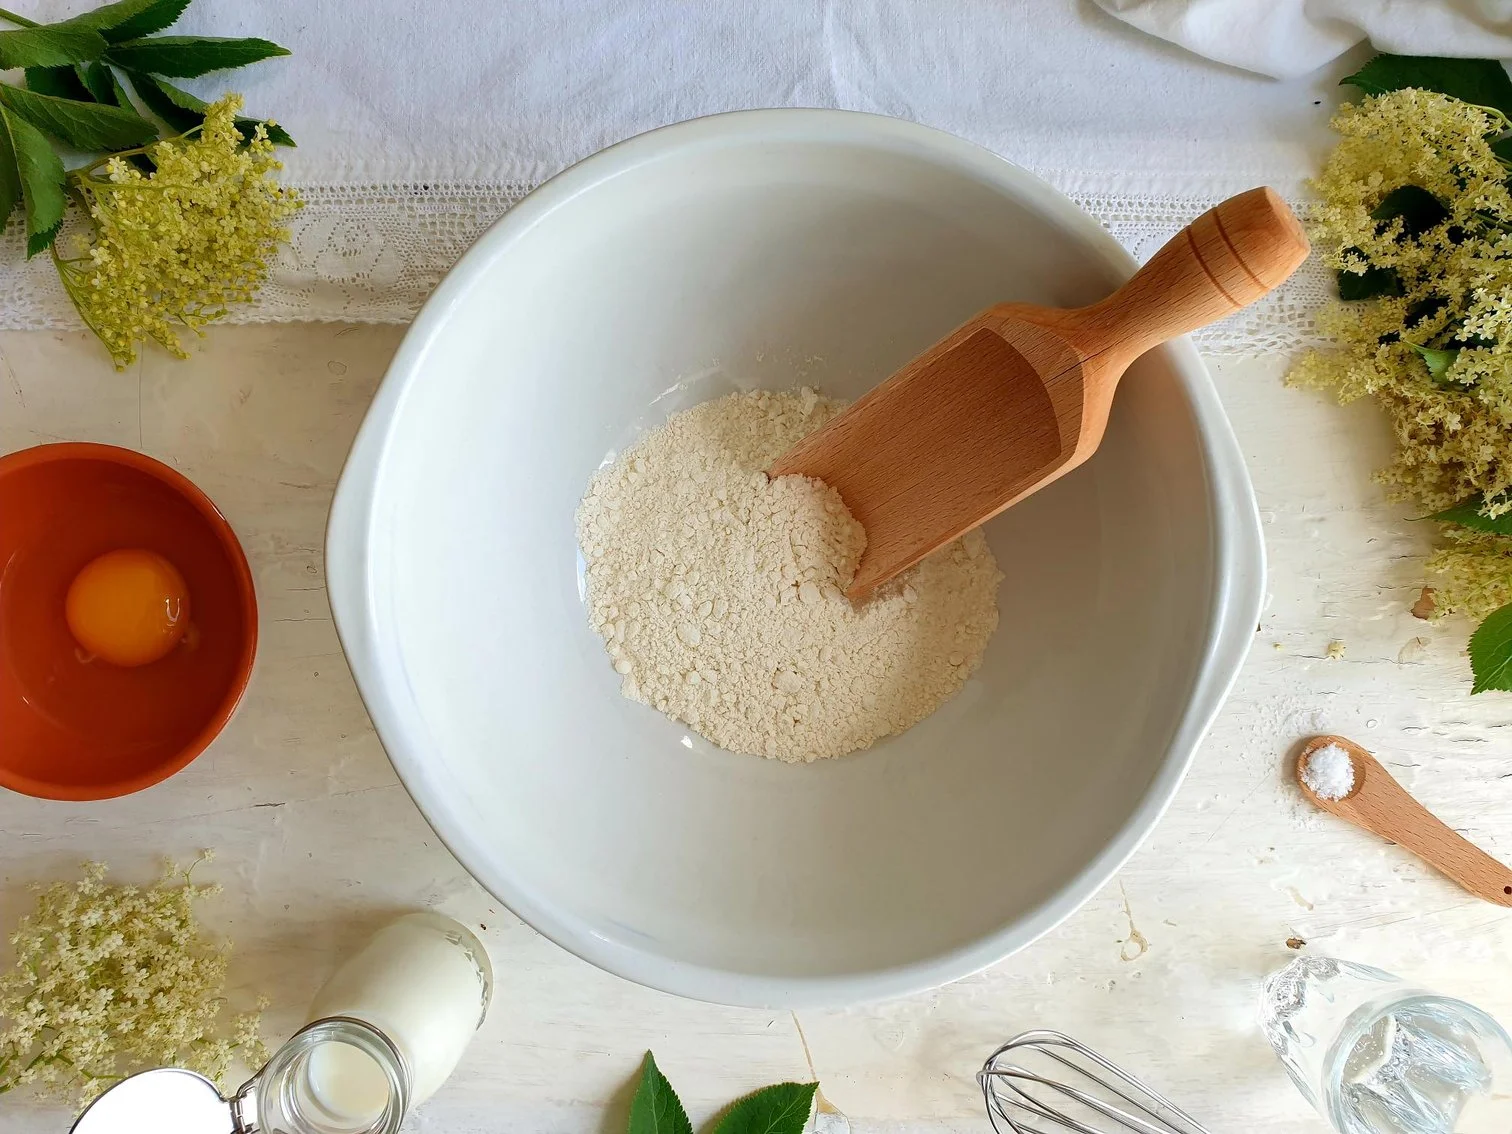
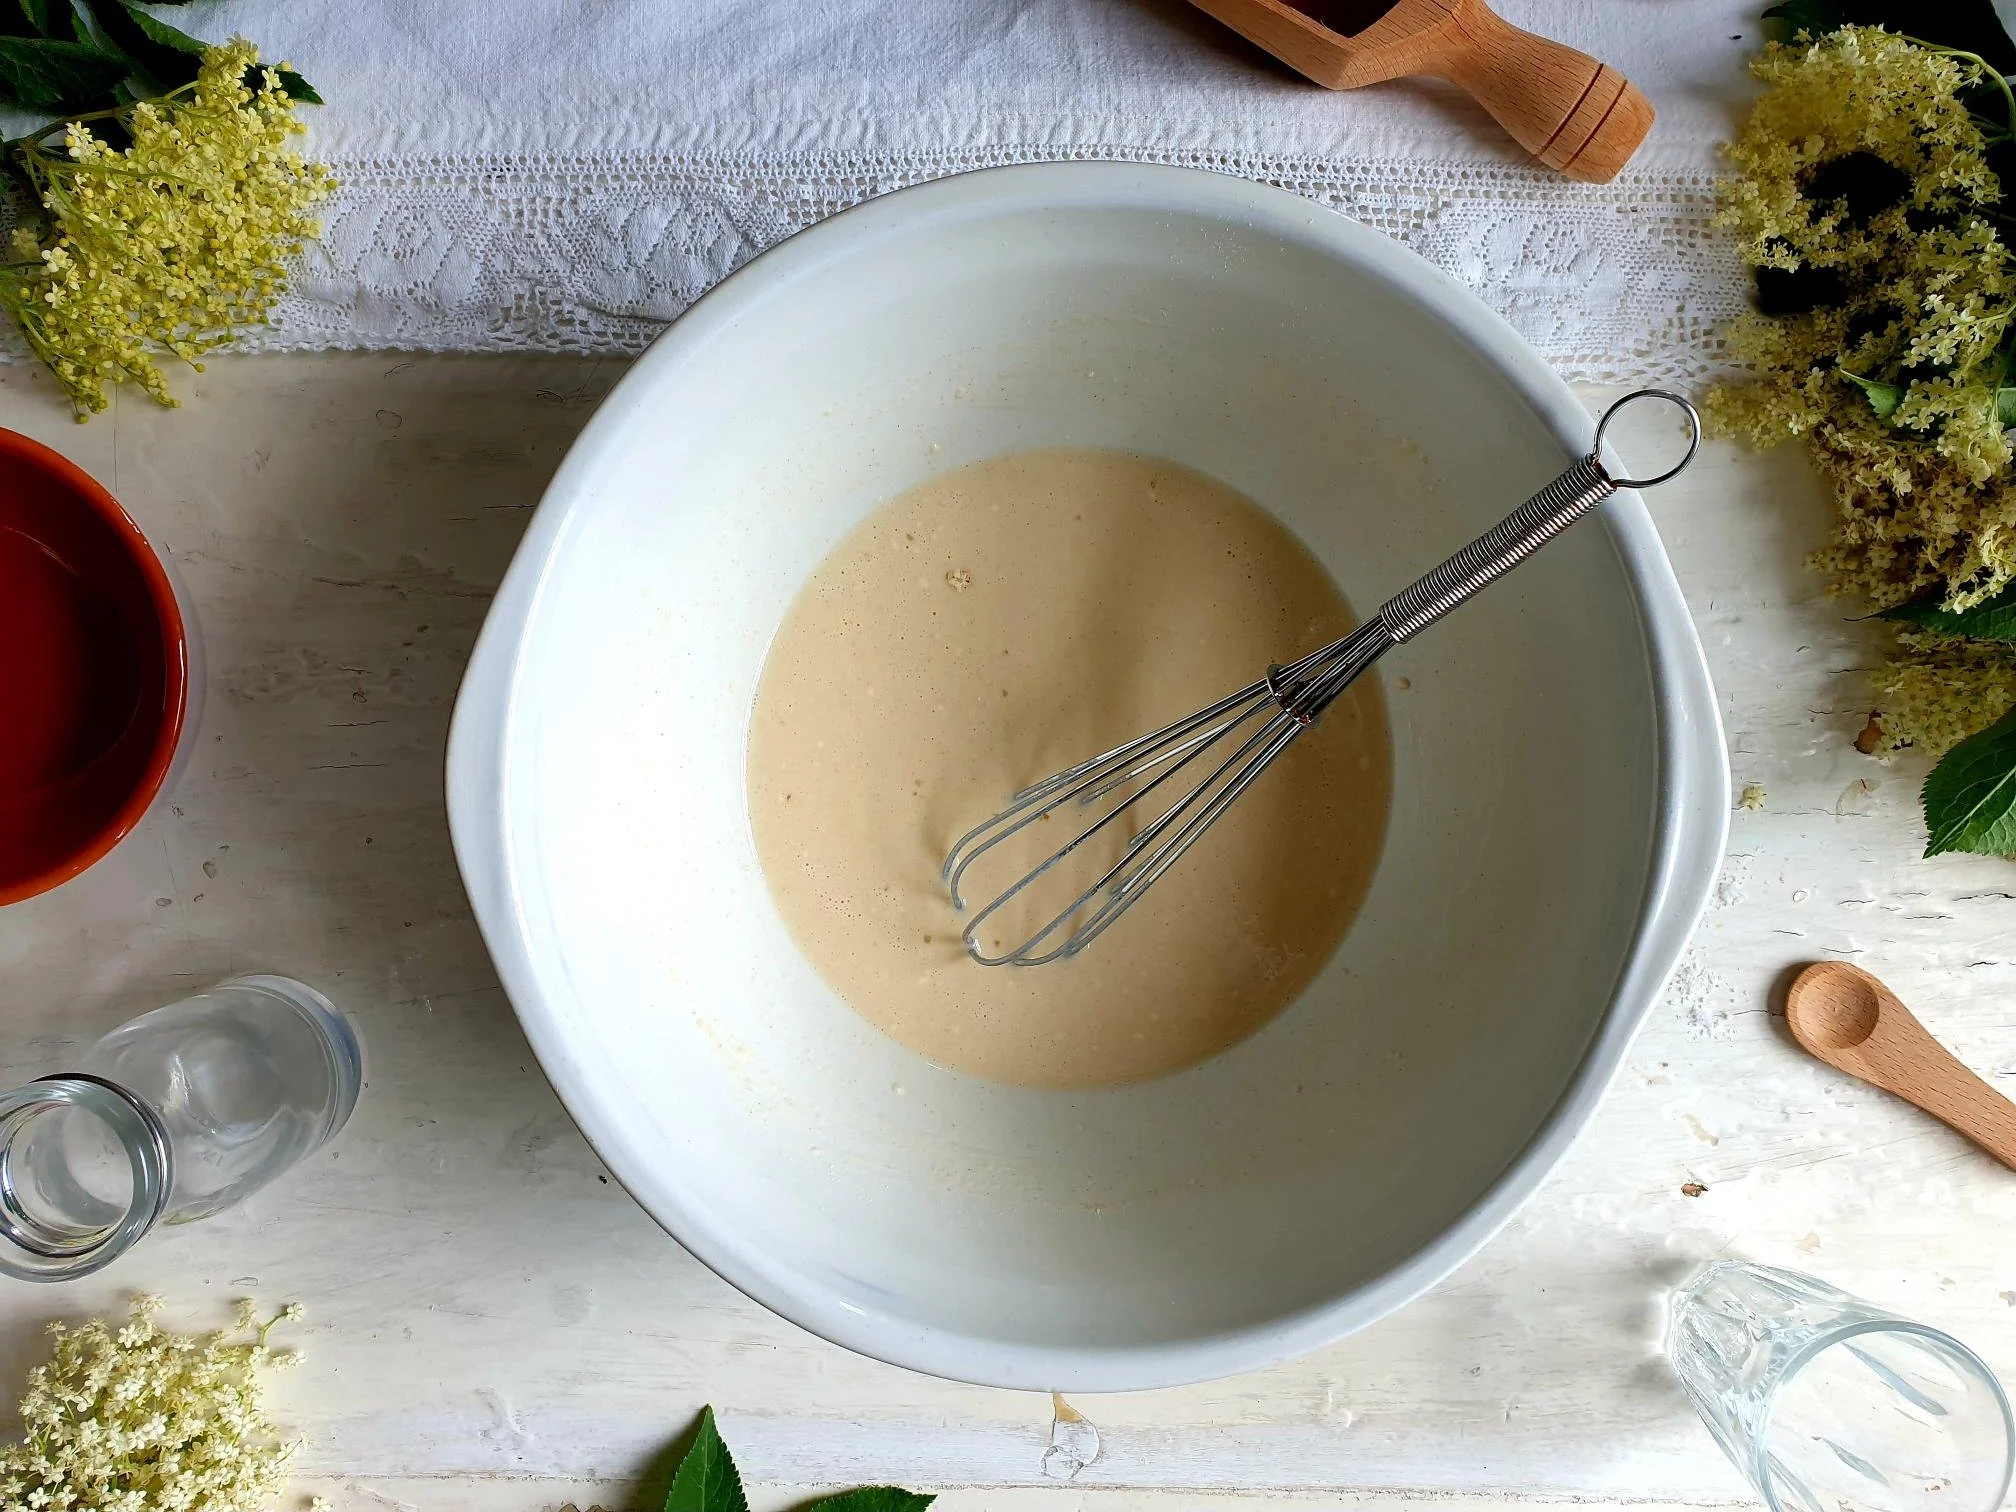
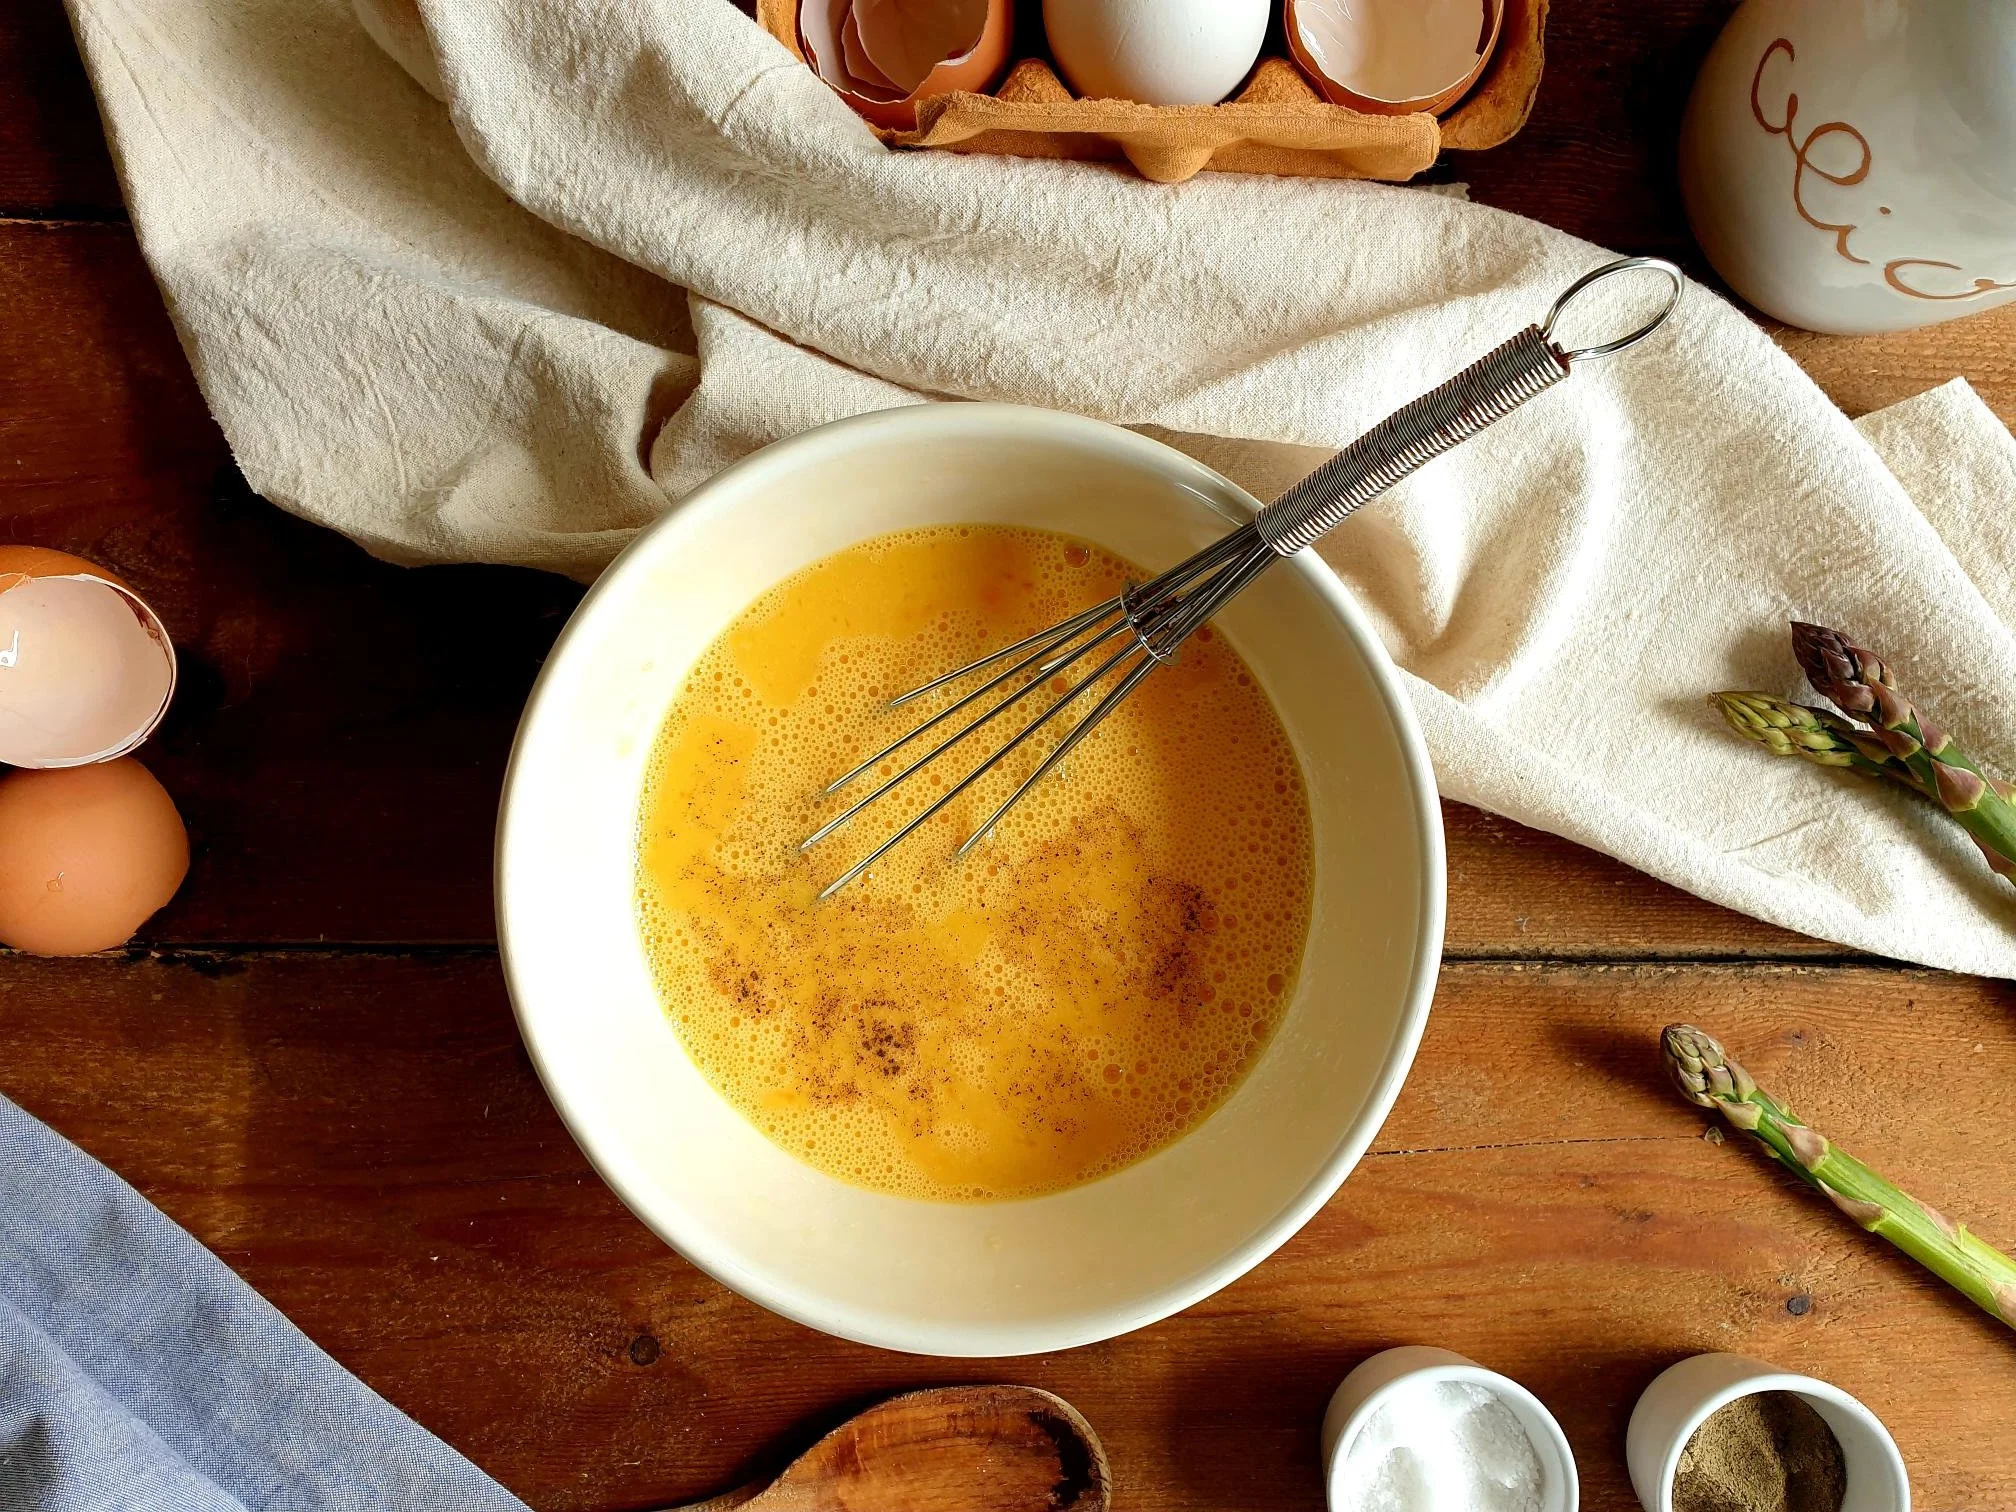
Place the flour in a mixing bowl or directly on a working surface or a wooden pasta board (if you have one). Make a well in the centre of the flour and add salt and beaten eggs.

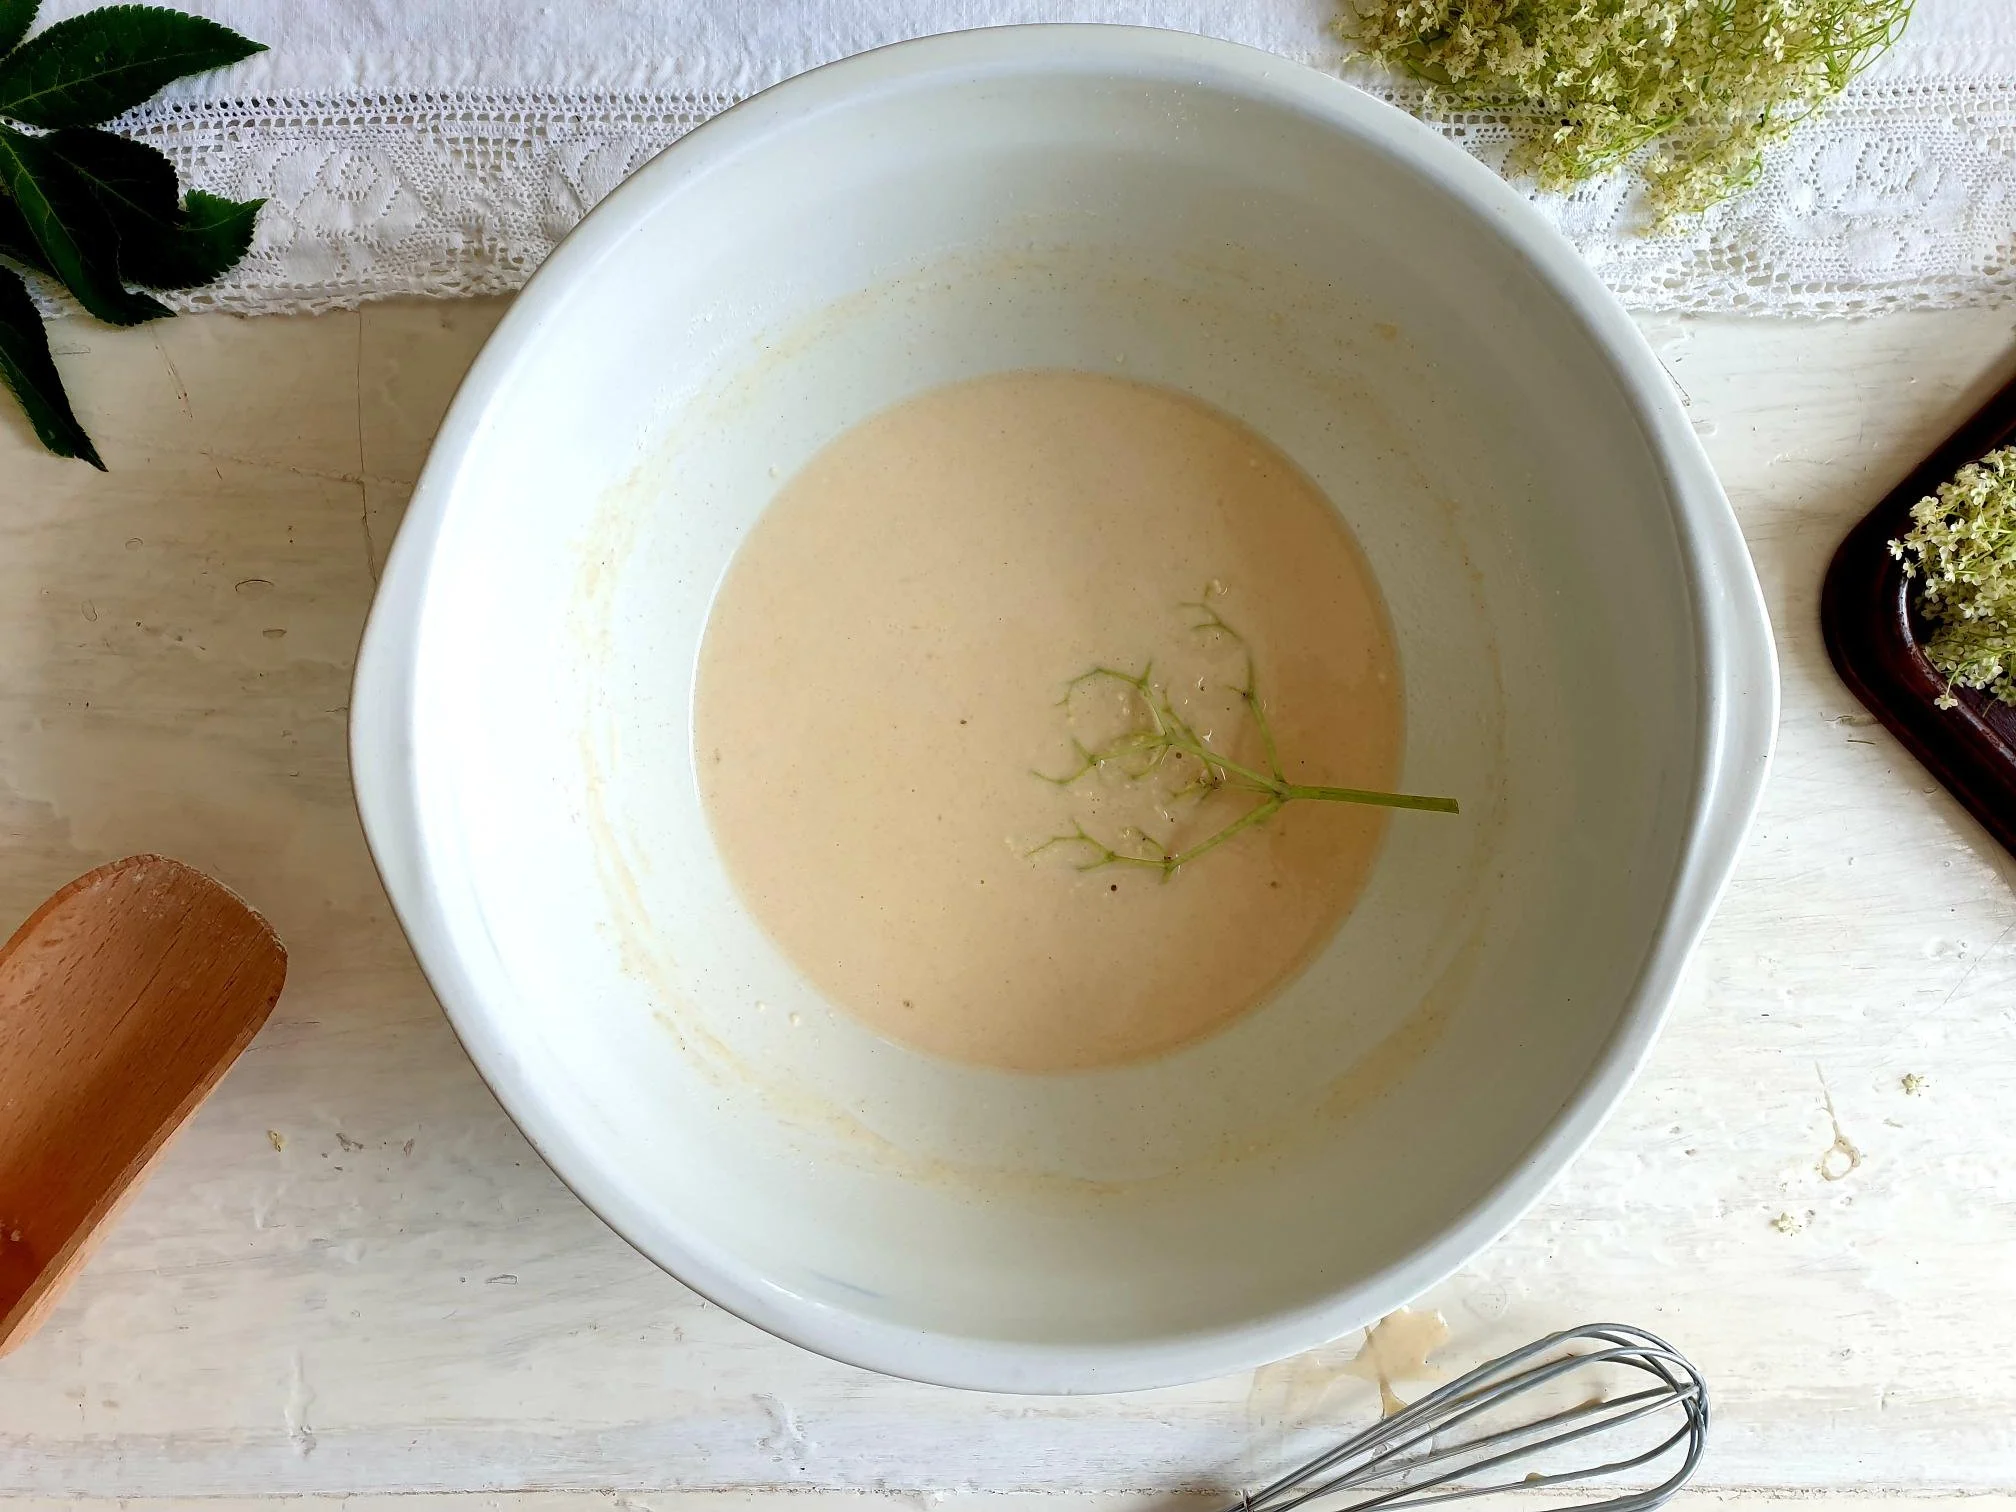
Stir with the fork or a wooden spoon, then start adding water, bit by bit and incorporate well all the ingredients .

View fullsize Pljukanci 9.jpg
View fullsize Pljukanci 10.jpg

Mix until well combined. 

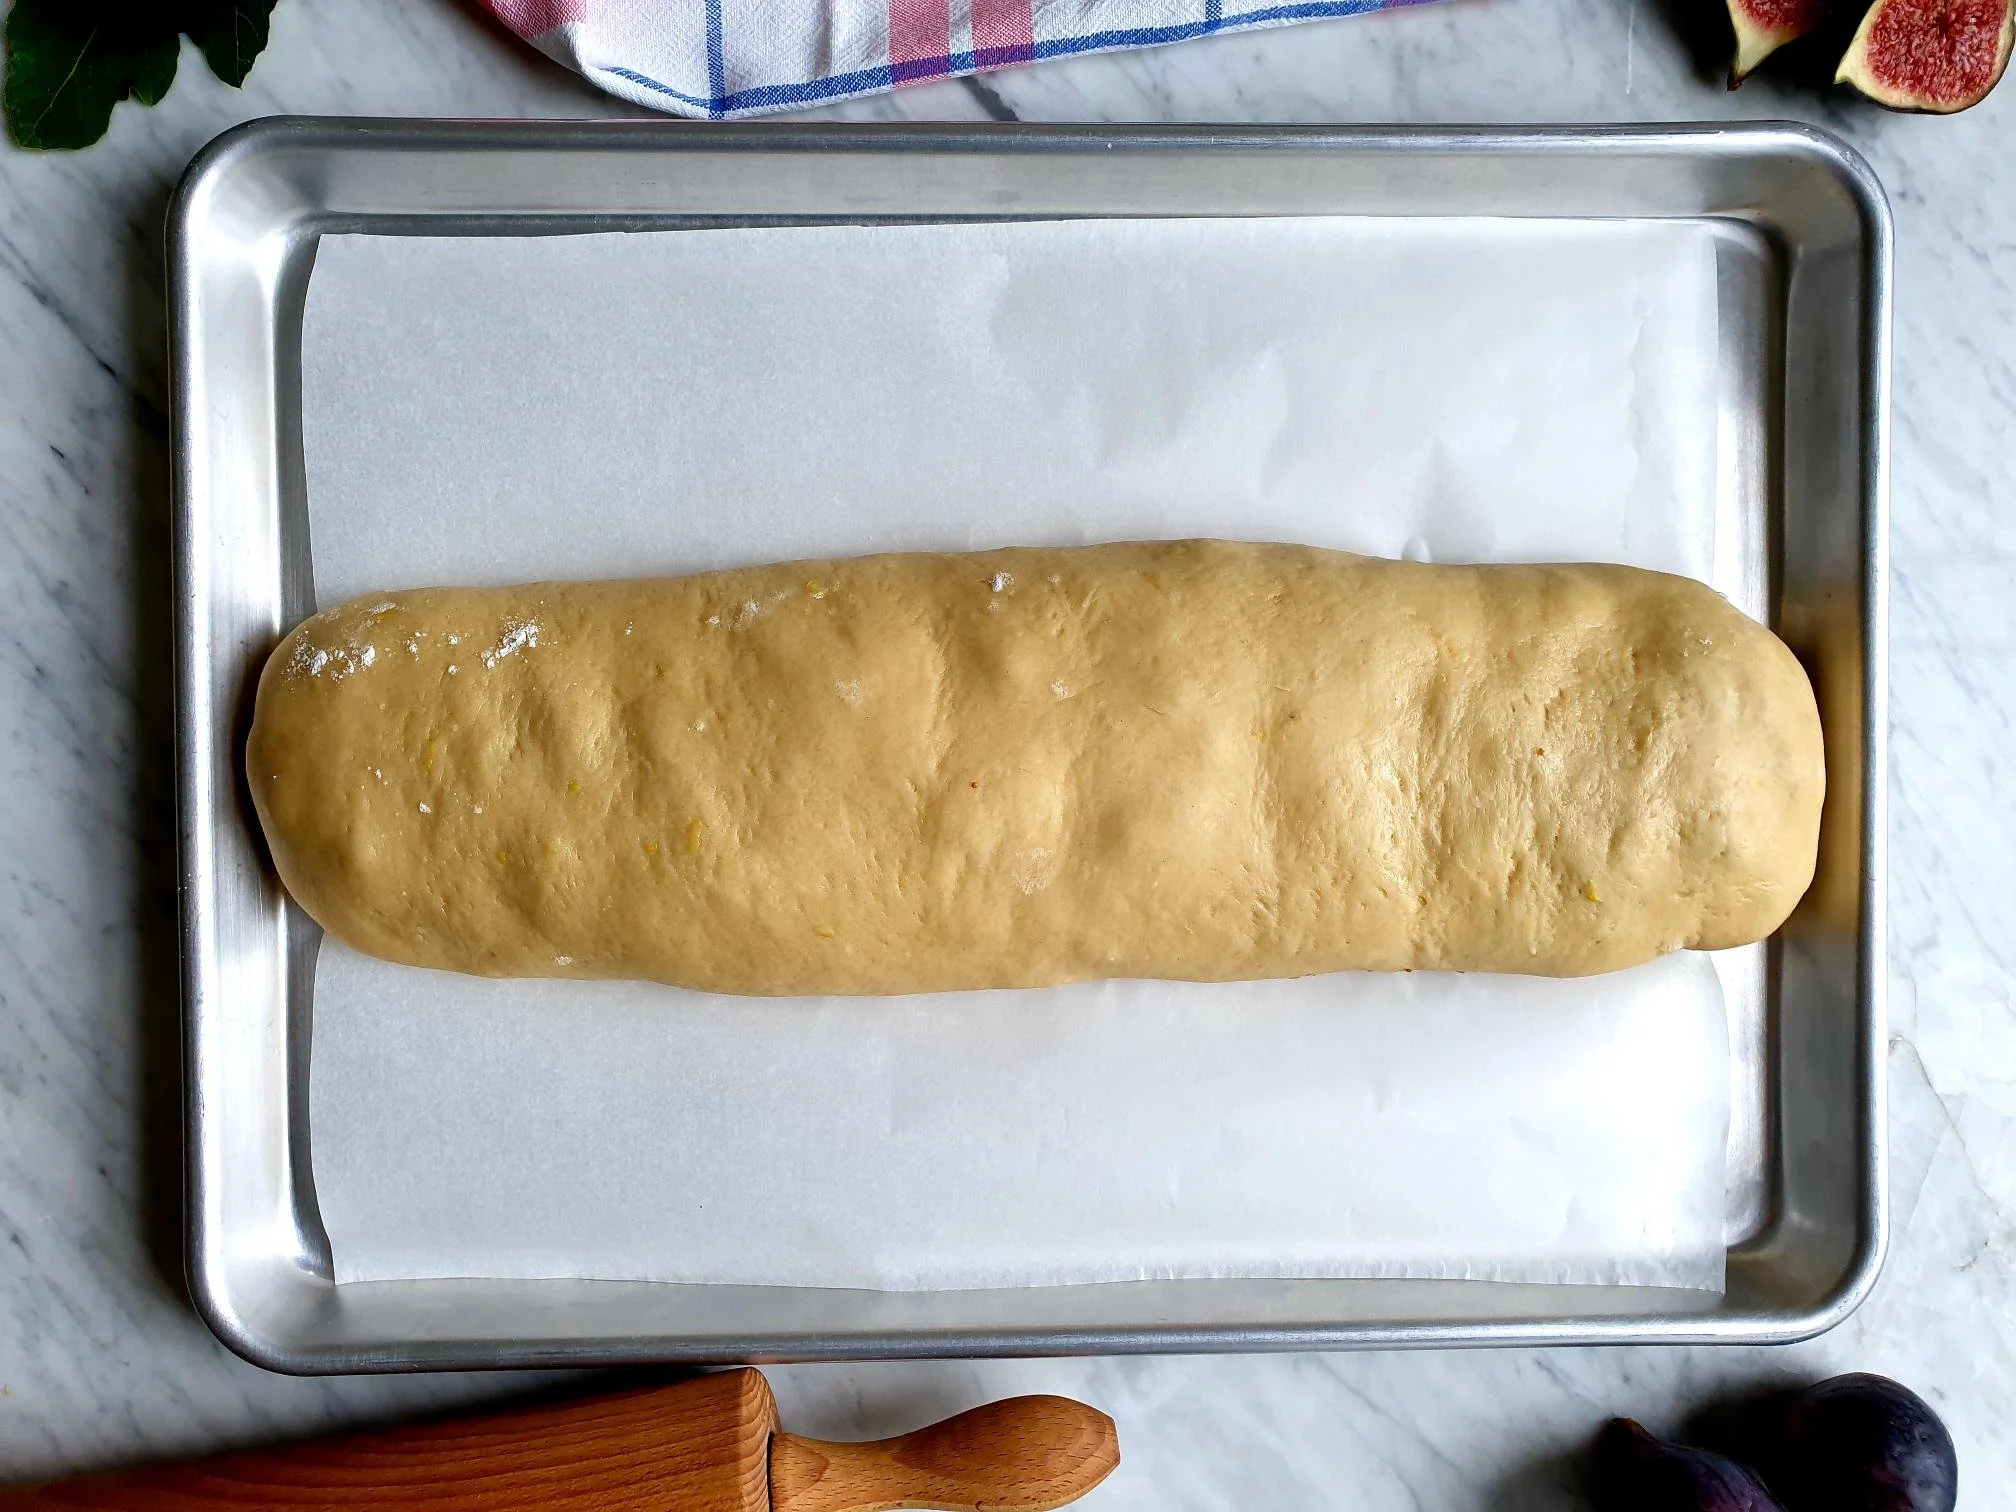
Transfer the dough onto a clean surface or wooden pasta board.

View fullsize Pljukanci 11.jpg
View fullsize Pljukanci 12.jpg

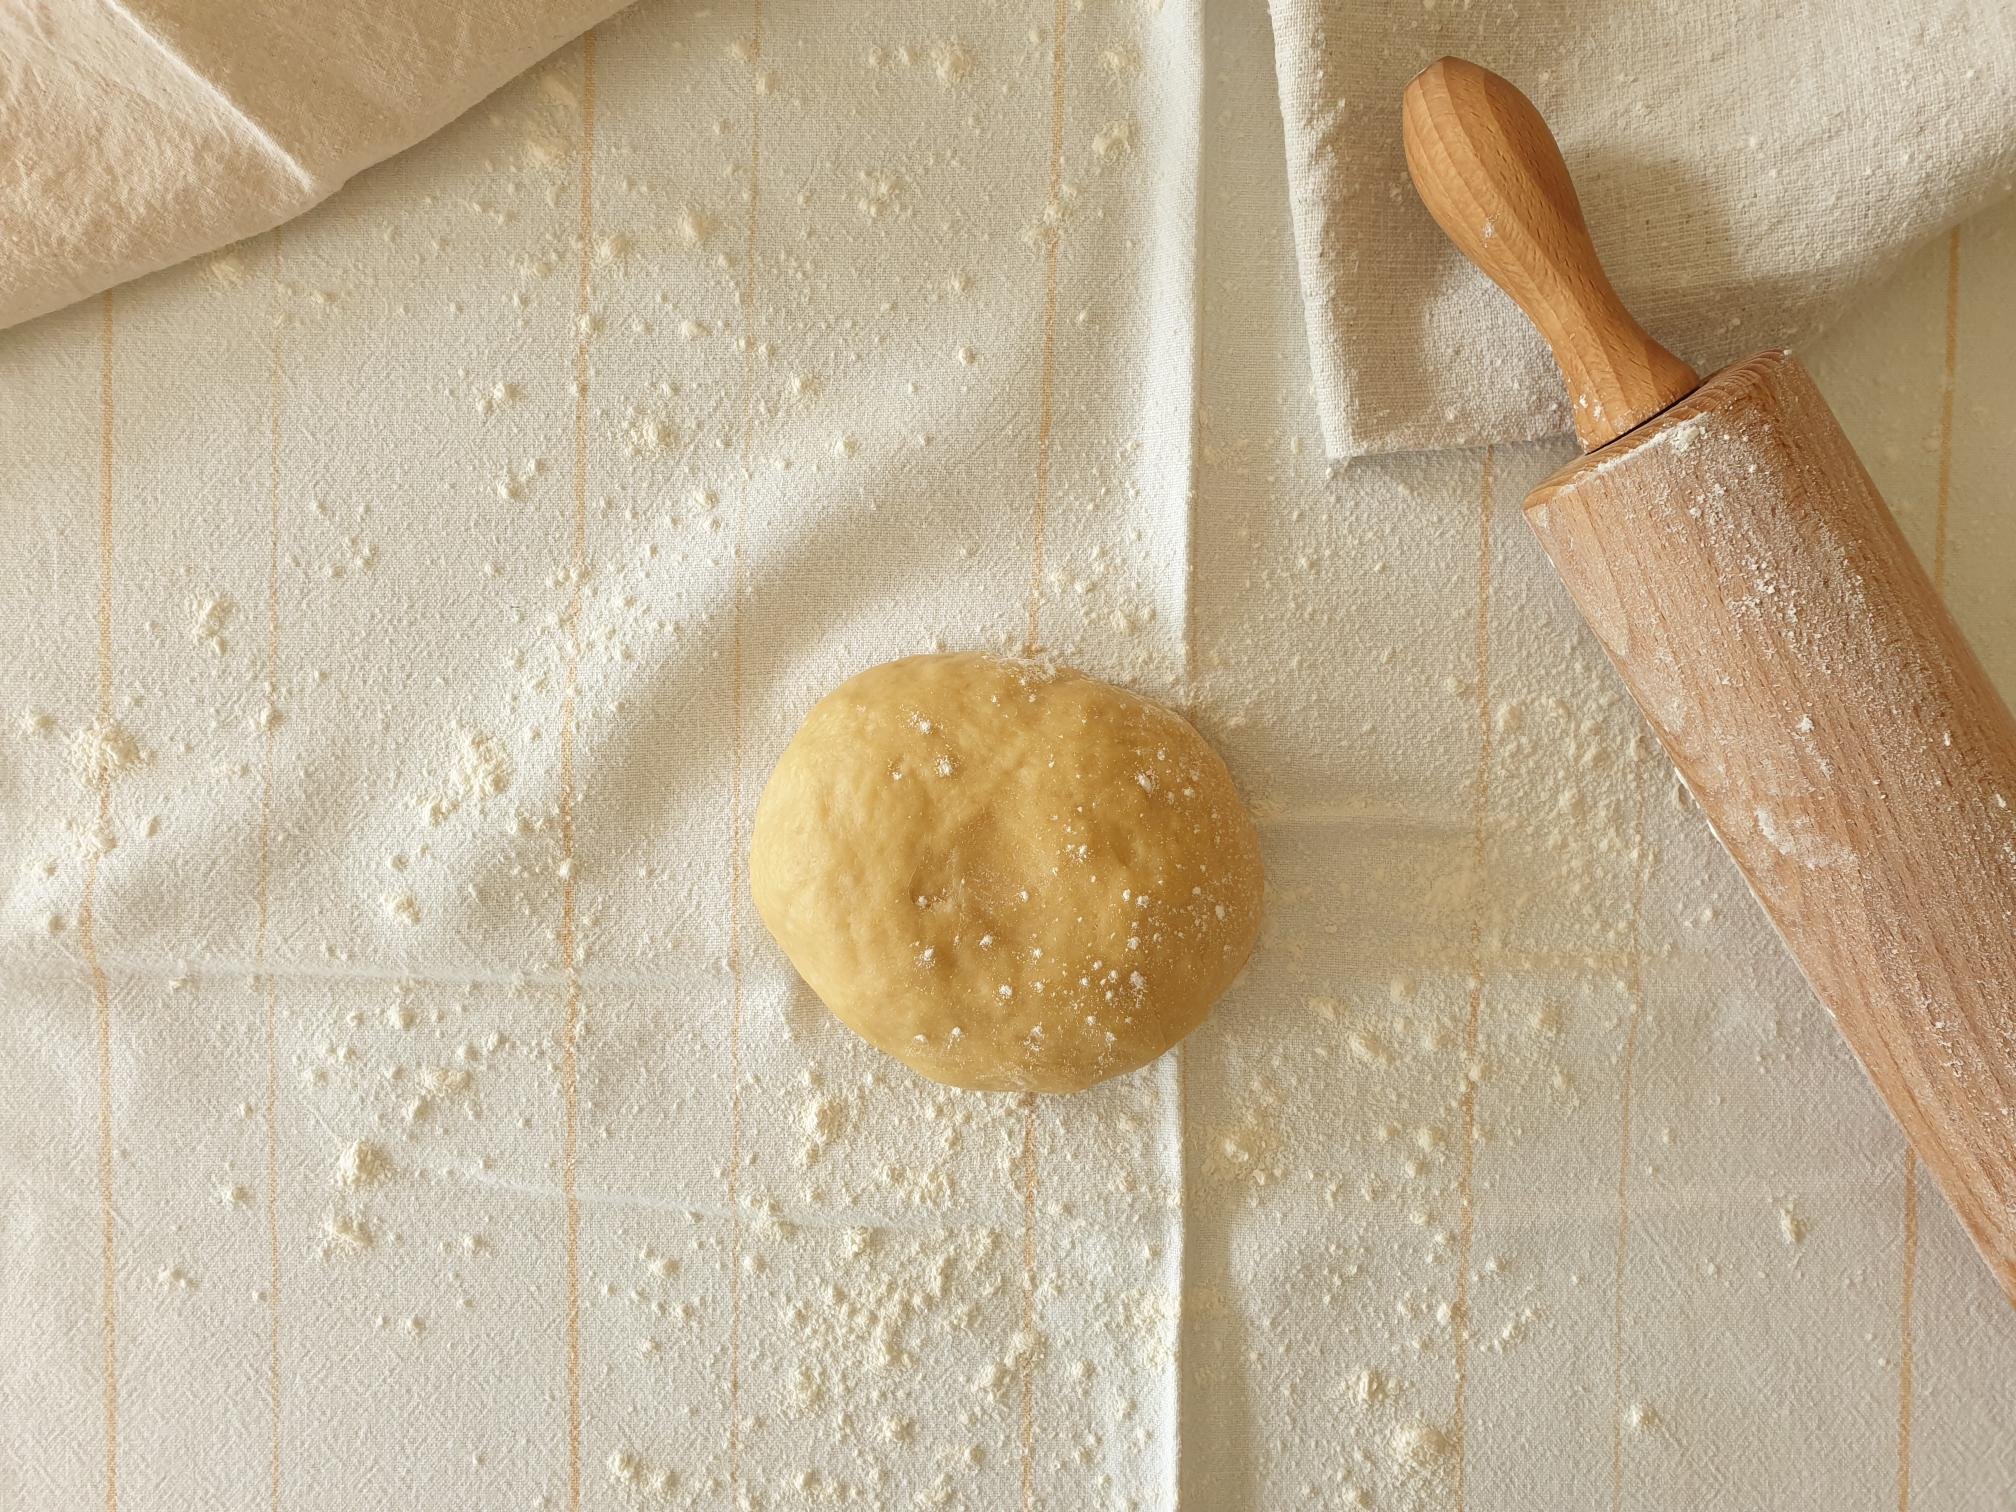
Work the dough gently (no proper kneading required) until it becomes compact, elastic, and not sticky.  

Cover the dough in cling film, and allow the dough to rest for about 30 min. 

View fullsize Pljukanci 13a.jpg
View fullsize Pljukanci 14a.jpg

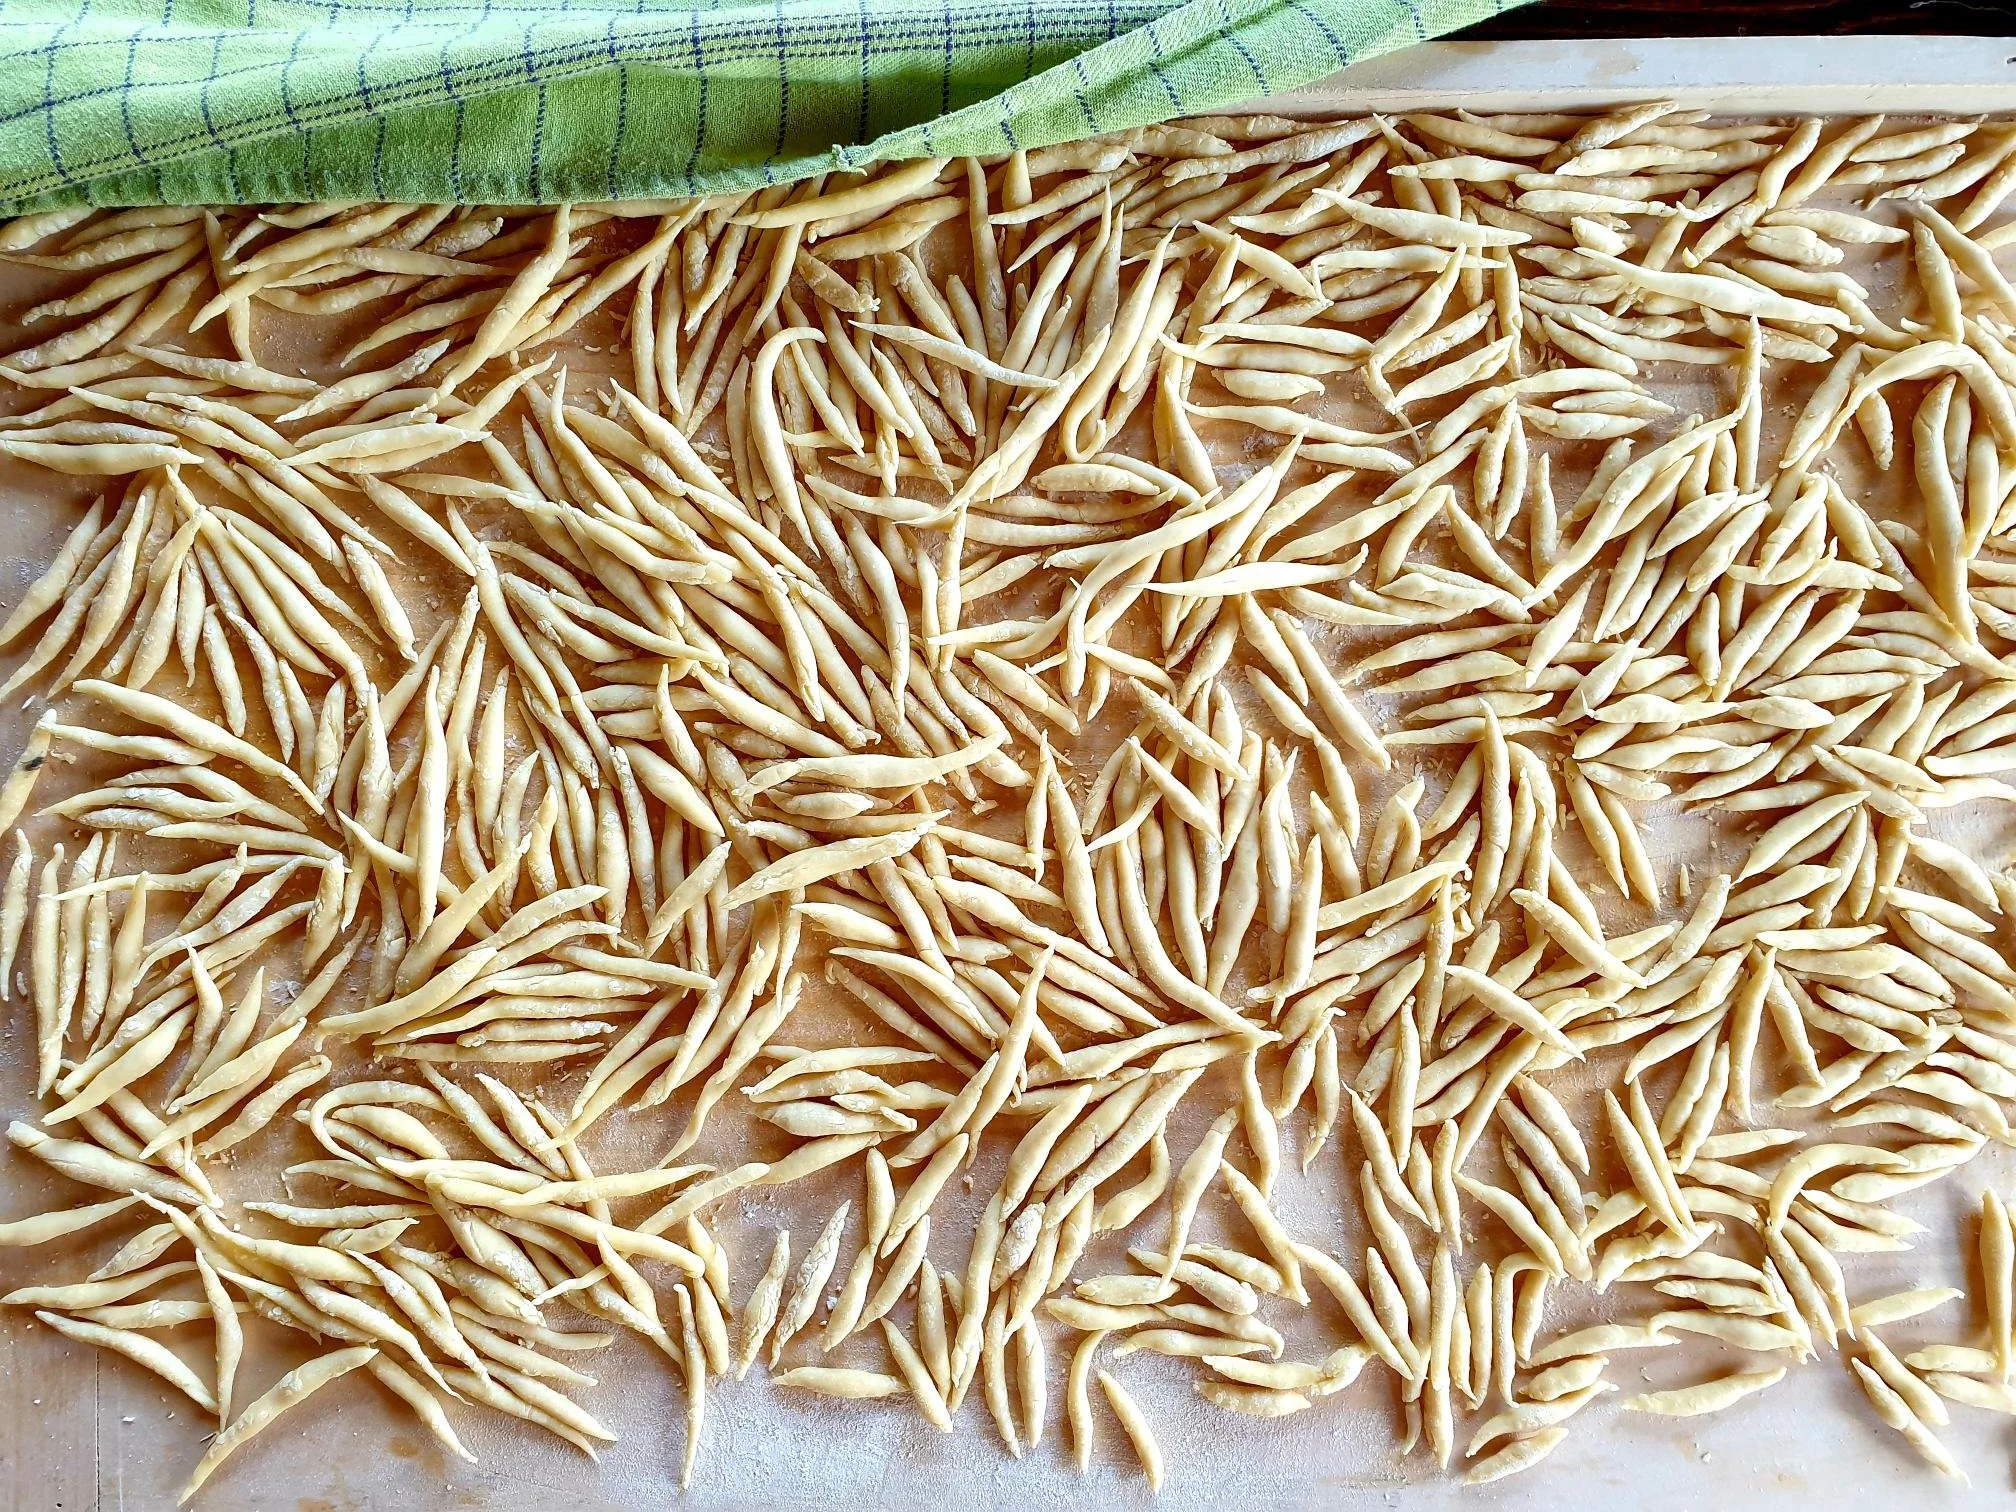
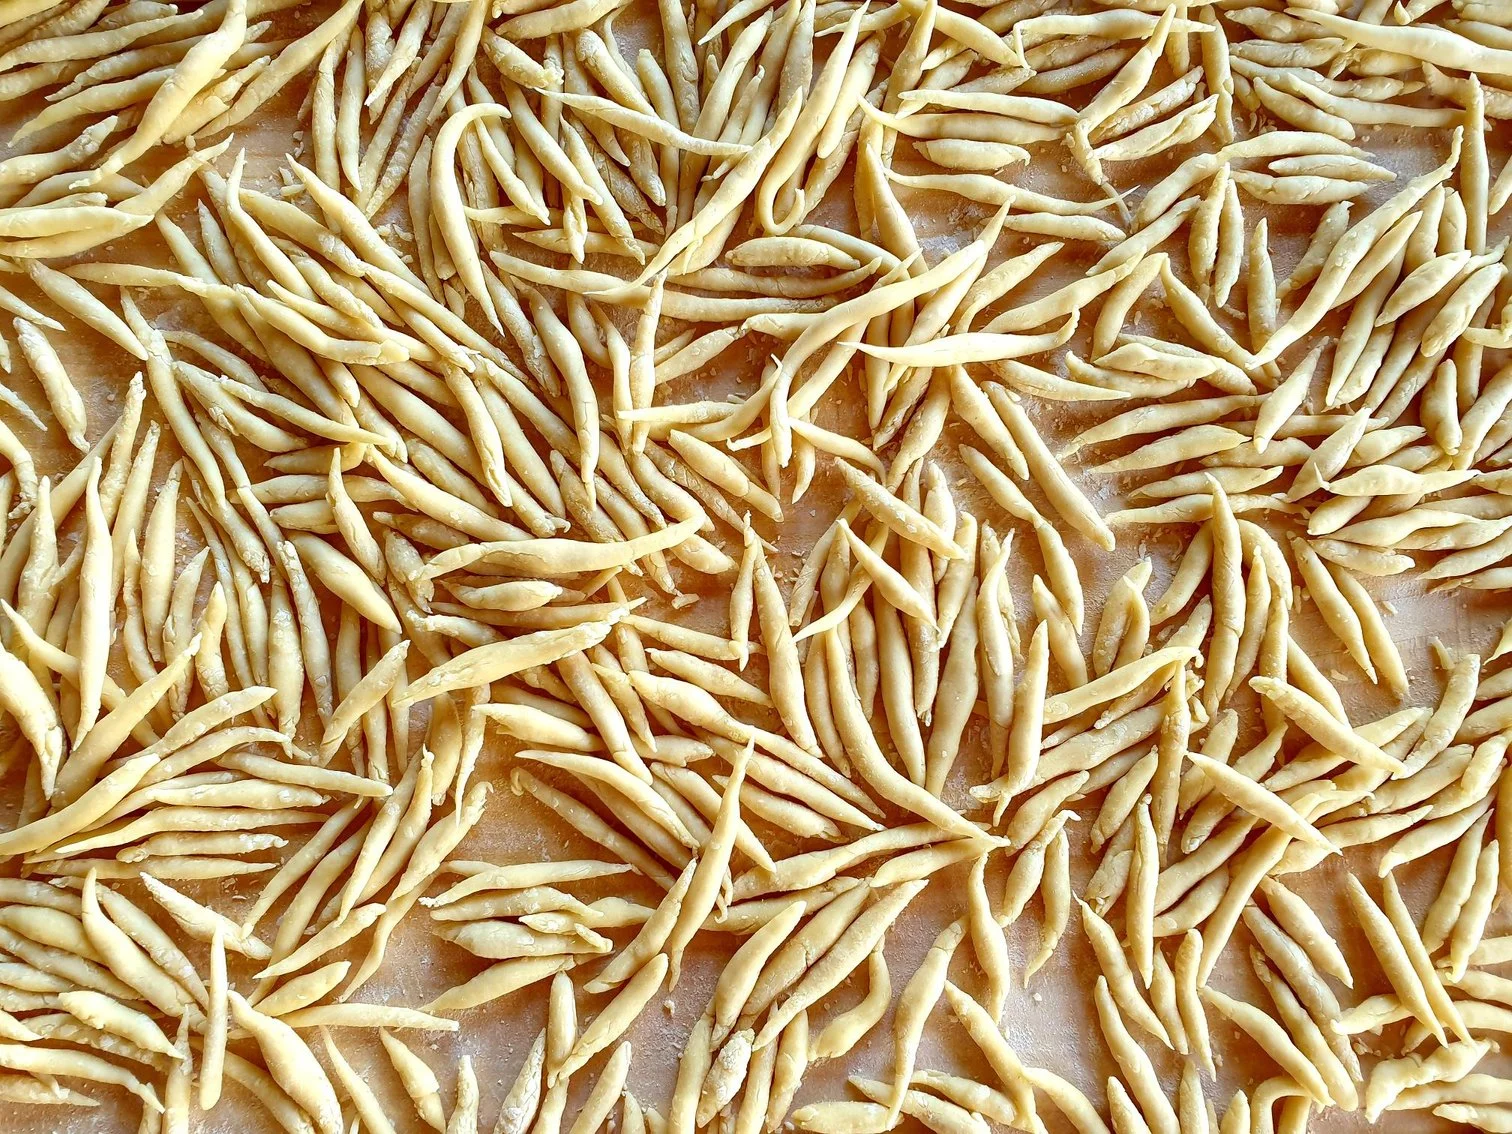
Pinch small pieces from the dough (roughly the size of  a hazelnut) and roll each piece between your palms or on a clean working surface until you get long thin compact pasta shapes, thinner at the ends and thicker in the middle.  

View fullsize Pljukanci 15a.jpg
View fullsize Pljukanci 16a.jpg
View fullsize Pljukanci 17a.jpg
View fullsize Pljukanci 18a.jpg

Repeat the process until you finish all the dough.

Pljukanci to dry a bit in about 30 min. 

To cook the pljukanci, bring large pot of salted water to boil, and cook pljukanci for about 10 minutes or until “al dente”.  

Drain or take pljukanci out using a skimmer and transfer in the pan with the boiling sauce. Make sure you always keep a bit of cooking liquid and add a bit to it in a frying pan together with the pasta and the sauce, and you will surprised what lovely velvety consistency this creates. 

Strain, and combine with your favourite sauce and serve hot immediately. 

Just a thought

You can make Pljukanci without the eggs, just add 250ml of lukewarm water to the flour.

October 19, 2022 /tina oblak
Pljukanci, Pljukanci pasta, Pljukanci fresh pasta, Traditional Istrian Pasta, Handmade rolled pasta, vegan fresh pasta
Adriatic Recipe, All year round recipe, Celebratory dish, child friendly dish, child friendly meal, dinner, Easy recipe, Egg based pasta, family friendly dish, family friendly meal, Festive dish, first course, first course dish, first course meal, Fresh pasta, hearty dish, Istrian cuisine, Istrian dish, Istrian food, Istrian gastronomy, main course, main dish, main vegetarian dish, main vegetarian meal, Pasta, Rustic dish, simple recipe, Slovenian cuisine, Slovenian food, Slovenian gastronomy, Starters, supper, Vegan, no egg fresh pasta
3 Comments

Traditional Istrian Fig Strudel made from sweet yeast dough Recipe 

Beans and Sardines
October 12, 2022 by tina oblak in Adriatic Recipe, Autumnal dish, Autumnal recipe, baked dish, baking, breakfast, celebratory desserts, dessert, easy baking, Enriched dough, festive bakes, festive dessert, festive sweet things, Istrian cuisine, Istrian dish, Istrian food, Istrian gastronomy, Rustic dish, Slovenian cuisine, Slovenian food, Slovenian gastronomy, Small bites, Snacks, summer dish, summer recipe, Sweet bread, sweet course, sweet finger food, sweet nibbles, Sweet Things

This rustic bake is one of the most traditional and authentic sweet treats in the cuisine of Slovenian Istra, it is called by the locals kvašen štrudelj s figami or kvašen štrukelj s figami, and it is made from soft, brioche like sweet yeast dough and fig filling. 

It is usually baked towards the end of summer and early autumn, when the figs are in abundance, and although fig filling is the most common and most traditional, other fruits can be used like apples, pears or plums, and different type of nuts can be added too.   

This sweet fig log is a bit of a “gastronomic hybrid”, it looks like a strudel in a way that is rolled into a log like a strudel, but it is made from yeast dough, resembling quite strongly, in terms of flavour, to the dough that is used to make a traditional Slovenian nut roll, Potica. 

This sweet bake used to be prepared and offered for special occasions as a dessert at the end of a big meal, and given to children as a snack and a special treat. Nowadays, it is also eaten for breakfast and offered with tea and coffee, but it is not commonly found in the restaurants and almost exclusively baked in the household. 

Istrian cuisine is a no waste cuisine, so juicy figs, with their delicately perfumed flavour, when fully ripen and plentiful, would get picked, chopped, cooked down in a frying pan with some butter to bring out their innate sweetness, cooled completely and then frozen to be used during late autumn and winter season, when fresh figs are no longer available. 

As a child, on the Slovenian coast, where I grew up, I would eat figs straight from the tree and the common sight of ripe figs slowly started to mark the end of summer and the start of cooler days, back to school days... 

I am sharing here this slightly off the beaten track, very special recipe, passed to me by my nona Nada and her dear friend Arnanda. It was truly touching listening to them, deep in  conversation about the recipe, and its different variations, even when the villages only a few kilometres apart from each another. 

Celebrate this wonderful fruit that marks the transition into autumn and try this delicious bake,. However, if you cannot get hold of fresh figs, you can just use fig jam, or any other jam of your preference for the filling. Your friends and family will be seriously impressed. 

Recipe 

Ingredients for the dough 

  • 500g plain all purpose white flour 

  • 7g fast-action dried yeast (also called instant yeast) or 20g fresh yeast 

  • 100g unsalted butter, melted 

  • 100g caster sugar 

  • 250ml lukewarm milk or water or a combination of the two (125ml milk and 125ml water) 

  • 2 eggs, room temperature, slightly beaten 

  • grated lemon zest of 1 unwaxed lemon   

  • 1 Tsp sea salt 

Ingredients for the filling 

The filling is made from fresh figs, you can use other fresh fruit like apples, pears, plums or fig jam instead, or any other jam of your preference. 

  • 1kg, roughly, of fresh figs   

  • 20g unsalted butter 

  • grated lemon zest of 1 unwaxed lemon 

  • 200ml single cream or ricotta

Method 

The dough 

In a fairly large bowl, sift the flour, make a little well in the centre and add lukewarm milk, instant yeast melted butter, sugar, lightly beaten eggs, grated lemon zest and a pinch of sea salt on the side of the bowl. 

View fullsize Fig Strukelj 4.jpg
View fullsize Fig Strukelj 5.jpg

Mix and combine well all the ingredients with the fork or a wooden spoon. 

(If using fresh yeast, place it into a small bowl and slightly break it down into smaller pieces with your fingers. Add a few tablespoons of tepid milk, ¼ tea spoon of sugar, gently stir and leave for about 15-20 minutes or until gentle bubbles form on the surface). 

Transfer the mixture onto a well floured  working surface and start kneading, for about 10 minutes, adding a little flour at a time if the mixture is too wet and sticky (this will partially depend on the flour and the size of the eggs)

Alternatively, use a mixer fitted with a dough hook and leave running for about 5 minutes. 

View fullsize Fig Strukelj 6.jpg
View fullsize Fig Strukelj 7.jpg

The dough is ready when it ends up being really smooth and elastic. It should not stick to your hands or working surface and should leave the bowl clean, if using a mixer. 

Transfer the dough back into a very lightly oiled bowl and cover with cling film (I use a shower cap, works really well). 

Put the bowl in a warm room free of drafts for at least one hour and leave the dough to rest and rise, the dough should increase in volume and double in size. 

While the dough is resting and rising start preparing the filling. 

View fullsize Fig Strukelj 8.jpg
View fullsize Fig Strukelj 9.jpg

The filling 

Wash the figs and pat dry them. 

Transfer the figs onto a chopping board, half them, quarter them and then roughly chop them. 

In a fairly large frying pan melt the butter and add chopped figs. 

Cook them for a few minutes on a gentle heat, stirring occasionally, until they become completely soft and break down. (if the skin of the figs is still a bit hard, break it down with the help of a wooden spoon). 

Cool completely and set aside. 

View fullsize Fig Strukelj 11.jpg
View fullsize Fig Strukelj 13.jpg

Transfer cooked figs into a bowl, add the cream and the lemon zest, stir and mix until all the ingredients are well combined. 

View fullsize Fig Strukelj 14.jpg
View fullsize Fig Strukelj 16.jpg

Flour well your working surface and rolling pin. Put your dough onto a working surface and roll it out to a more or less rectangular shape (40cmx50cm) to the thickness of about or not more than 1cm. 

This will give you a one big loaf, this is how it is traditionally made, and this is the size I made for this recipe. 

Because of its size, it could be a bit tricky to handle if you are not familiar with the recipe. 

I suggest you might want to divide the dough and the filling in half and make two logs instead.  

Take the fig mixture and spread it evenly on the rolled dough but leave some space around the edge so the filling does not come out when rolling the dough. 

View fullsize Fig Strukelj 17.jpg
View fullsize Fig Strukelj 18.jpg

Gently roll the filled dough quite tightly into a log and tuck well in the edges. 

View fullsize Fig Strukelj 19.jpg
View fullsize Fig Strukelj 20.jpg

Place the log onto a baking tray, previously lined with baking parchment. 

Cover with a clean kitchen towel , place it in a warm, draft free room and leave to prove for the second time for about 30 minutes or until well risen, not necessarily doubling in size. 

Take a toothpick and make a little holes in the dough on the whole surface and brush with either some melted butter or beaten egg. 

Bake in the preheated oven at 180C static, or equivalent, for about 50-60 minutes. Halfway through baking, tent the roll with the aluminium foil to prevent it browning too much and starting to burn. 

Leave on a baking tray until completely cool. 

Transfer on a serving plate, dust with icing sugar and serve. 

Just a thought 

For a more modern version of this traditional fig based sweet treat you can use ricotta instead of the single cream for preparing fig mixture filling and adding a splash of vanilla extract to both the filling and the dough mixture. 

Fig roll tastes at its best the day after has been baked. 

You can store it in an airtight container for up to five days and is suitable for freezing. 

Wine suggestion

Alto Adige Moscato Rosa Passito DOC 2018 - Laimburg

October 12, 2022 /tina oblak
kvašen štrudelj s figami, kvašen štrukelj s figami, fresh figs, fig jam, fruit strudel with sweet yeast dough, Istrian fig strudel, sweet yeast dough strudel, Apple strudel made from yeast sweet dough, plum strudel made from sweet yeast dough, Pear strudel made from sweet yeast dough, Istrian sweet treats, strudel with enriched dough, enriched dough, sweet enriched dough
Adriatic Recipe, Autumnal dish, Autumnal recipe, baked dish, baking, breakfast, celebratory desserts, dessert, easy baking, Enriched dough, festive bakes, festive dessert, festive sweet things, Istrian cuisine, Istrian dish, Istrian food, Istrian gastronomy, Rustic dish, Slovenian cuisine, Slovenian food, Slovenian gastronomy, Small bites, Snacks, summer dish, summer recipe, Sweet bread, sweet course, sweet finger food, sweet nibbles, Sweet Things
Comment

Djuvec Rice with Bell Peppers and Tomatoes Istrian Recipe

October 05, 2022 by tina oblak in Adriatic Recipe, Appetizers, Autumnal dish, Autumnal recipe, Balkan dish, brunch, child friendly dish, child friendly meal, dinner, Easy recipe, entrée course, family friendly dish, family friendly meal, first course, first course dish, first course meal, Healthy, healthy mael, hearty dish, Istrian cuisine, Istrian dish, Istrian food, main course, main dish, main vegetarian course, main vegetarian dish, main vegetarian meal, Nutritious, Nutritious dish, one pot meal, Rustic dish, Side Dishes, simple recipe, Slovenian cuisine, Slovenian food, Slovenian gastronomy, Starters, summer dish, summer recipe, supper, Vegan, Vegetable side dish, Vegetables, Vegetarian

Djuvec (frequently spelled Ðuveč and pronounced Joo-vetch) is a one pot rice dish, and a bit of a hidden gem in the gastronomic world.  It is very commonly found in South-Eastern Europe in countries like Slovenia, Croatia, Serbia and other Balkan countries, and  perhaps it is not very well known to the rest of the world. 

This vegetarian and vegan friendly dish is one of my absolute favourites, it is incredibly simple and quick to make, healthy, and is really delicious. It is also a very practical dish. It can be prepared ahead of time, and it makes a fantastic addition to more familiar picnic foods and buffets at parties. 

Djuvec is always a big hit with friends and family at the barbecue gatherings, as it is  traditionally served at a room temperature as a side dish, and makes a great paring to pan fried or grilled vegetables, fish or  different type of meats like Ćevapčići (small pieces of rolled grilled mince meat) and Ražnjići (grilled pork meat on skewers). 

It can also be served hot or warm as a main mail, maybe with a side salad, as an alternative to a tasty, and perhaps,  more frequently cooked, well known and much loved a classic Italian risotto. 

It is often made during the summer, end of summer and early autumn with main ingredients being onions, red, orange or yellow bell peppers and tomatoes, and often peas, ajvar (sweet roasted red pepper spread) and powdered paprika is added to a basic recipe to create a very common variations of this dish. 

I am sharing here my mum's super delicious one pot pepper and tomato rice dish that she used to make time and time again, just try it, I promise you, you will came back to this “off the beaten track recipe” that my family and my friends simply adore, and cannot get enough of it. 

Recipe

Ingredients 

Serves 4-6 

  • 3 Tbsp virgin olive oil or olive oil 

  • 1-2 onions (about 250g), peeled and finely chopped 

  • 1 clove garlic, peeled and crushed 

  • 2 red bell peppers (about 400g), wash, dry, remove the seeds and white filaments and cut into small cubes (for this recipe you can also use yellow or orange bell peppers or a combination) 

  • few vine tomatoes or other types of ripe and sweet tomatoes (about 300g) washed, quartered and roughly chopped 

  • 1 Tbsp tomato paste 

  • 300g long grain rice 

  • 600ml vegetable stock or instant vegetable stock powder 

  • sea salt 

  • black pepper 

  • fresh flat leaf parsley for serving, roughly chopped, optional 

Method 

Place olive oil in a fairly large shallow cast iron casserole dish or frying pan, add finely chopped onions, crushed garlic, a generous pinch of sea salt and  cook for about 10 minutes on a gentle heat until the onions become soft and translucent, stirring occasionally. 

View fullsize Djuvec 4.jpg
View fullsize Djuvec 5.jpg

Add small cubes of bell peppers and stir in with the onions and garlic, cook further for about 15 minutes, stirring occasionally. 

View fullsize Djuvec 6.jpg
View fullsize Djuvec 7.jpg

Transfer roughly chopped tomatoes to the pan, add tomato paste, mix and cook for 10 minutes or so  or until the tomatoes are soft and cooked down, stirring occasionally. 

View fullsize Djuvec 8.jpg
View fullsize Djuvec 9.jpg

Add the rice to the pan, stir with the onion, pepper and tomato mixture 

Toast the rice for about 2 minutes, stirring constantly. 

View fullsize Djuvec 10.jpg
View fullsize Djuvec 11.jpg

Pour vegetable stock in the pan and bring to boil. 

Turn the heat down to a minimum, put the lid on and cook for about 20 minutes without stirring. 

Halfway through cooking time, very gently move about the rice with the fork. 

Serve hot or at room temperature. 

View fullsize Djuvec 12.jpg
View fullsize Djuvec 14.jpg

Sprinkle some roughly chopped fresh flat leaf parsley, optional.

Just a thought 

This dish is not suitable for freezing and will keep in an airtight container in a fridge for a few days. 

Wine suggestion

Alto Adige Valle Isarco Kerner DOC 2021 - Pacher Hof

October 05, 2022 /tina oblak
Djuvec Rice, Ðuveč, Ðuveč Rice, Red Bell Peppers, tomatoes, fresh tomatoes, Djuvec Istrian Recipe, Djuvec Balkan Recipe, picnic food, rice salad, rice salad with bell peppers and tomatoes, buffet foods
Adriatic Recipe, Appetizers, Autumnal dish, Autumnal recipe, Balkan dish, brunch, child friendly dish, child friendly meal, dinner, Easy recipe, entrée course, family friendly dish, family friendly meal, first course, first course dish, first course meal, Healthy, healthy mael, hearty dish, Istrian cuisine, Istrian dish, Istrian food, main course, main dish, main vegetarian course, main vegetarian dish, main vegetarian meal, Nutritious, Nutritious dish, one pot meal, Rustic dish, Side Dishes, simple recipe, Slovenian cuisine, Slovenian food, Slovenian gastronomy, Starters, summer dish, summer recipe, supper, Vegan, Vegetable side dish, Vegetables, Vegetarian
Comment

Chicken Goulash traditional Istrian Recipe 

Beans and Sardines
September 28, 2022 by tina oblak in Adriatic Recipe, All year round recipe, Autumnal dish, Autumnal recipe, casserole, child friendly dish, child friendly meal, dinner, family friendly dish, family friendly meal, Fresh herbs, hearty dish, Istrian cuisine, Istrian dish, Istrian food, Istrian gastronomy, main course, main dish, main meat course, Meat, one pot meal, one pot meat recipe, Rustic dish, simple recipe, Slovenian cuisine, Slovenian food, Slovenian gastronomy, supper, Winter dish, Winter recipe

This hearty, comforting, succulent, and delicious meat dish, is as rustic or as elegant as you want to make it. It is made with only a few ingredients, fresh marjoram, being one of them, which gives this dish a distinguished flavour, very often found in Istrian cooking. 

Chicken goulash is one of the most representative dishes of Slovenian Istra, known in local dialect as Kakušji šugo  or in standard Slovenian Kokošji golaž, and it is a part of Istrian Žgvacet or Žvarcet, a collective term indicating traditional stew or goulash made with different kinds of meat like chicken, beef, venison, rabbit and then cooked in a sauce. 

Nowadays, chicken goulash is prepared in the households on a regular basis, but this certainly was not the case in the past, as my nona told me. When she was a child,  meat dishes were a rare sight on the dining table, and this particular dish was no exception, served exclusively to mark special occasion and during festivities. This may be a concept a bit difficult to grasp, as in today's world chicken meat is easily affordable and accessible for most people. 

My nona also told me that in the past, in more rural settings, on small land holdings, even if not a farm, chickens were a very common sight, and were most common animal around. They roamed freely around the courtyards of the farmhouses, and kept safe during night time in fenced spaces (called in local dialect Kapunere). They were fed exclusively on corn or scraps from home grown vegetables, which made the meat particularly tasty. This was the reason, my nona explained, why a long list of ingredients were not used for this dish, as you really want to taste, elevate and appreciate the flavour of the chicken meat of such high quality. 

Old chickens, no longer able to lay eggs would “disappear” from the courtyards and appeared in pots and pans in a slightly different form. Traditionally, for this recipe, the whole chicken is used, even the parts that have very little or no meat on them like ribs, but will truly add crucial flavour to the goulash and are removed and discarded when the dish is fully cooked. 

This once festive food was accompanied by home made potato gnocchi, polenta, typical Istrian home made fresh pasta like bleki, fuzi, pljukanci or bigoli, pan-fried potatoes with onions and pancetta, or simply with some crunchy bread to soak up the sauce. This recipe for Chicken goulash can be served with mashed potatoes or oven baked potatoes, although these alternatives are slightly a less traditional, but are still quite common side dishes. These days this dish is still enjoyed in this same way!  

I am sharing here my nona's recipe, a very simple but very special recipe, as it has been in the family for generations. My nona learned how to cook this dish from her nona, and as the story goes for most of the recipes, this one also has variations and ingredients like white wine, a bit of chopped fresh tomatoes or a tablespoon of tomato concentrate, crushed garlic and other fresh herbs like a bit of finely chopped fresh rosemary, sage, basil and parsley, few celery leaves finely chopped can be added to the basic recipe. 

Recipe 

Ingredients 

Serves 4-6 

  • 1 whole chicken (roaster or cockerel) 1kg-1.5kg, skinned, jointed and cut into chunks (your butcher will be more than happy to do this for you) 

    You can use just chicken thighs or drumsticks on the bone (or boneless pieces) or a combination of the two, and some chicken wings. 

    If you skin yourself, make sure you remove most of the skin to avoid the dish becoming to oily and greasy, and potentially unpleasant to eat. 

  • 2 Tbsp olive oil 

  • 2 medium onions (about 240g) peeled and finely chopped 

  • 1 Tbsp white all purpose plain flour 

  • 1 Tbsp fresh marjoram, finely chopped  (can use dry marjoram) 

  • sea salt 

  • black pepper 

Method 

Put olive oil, finely chopped onions, and chunks of chicken in a fairly large shallow cast iron casserole dish or frying pan. 

Add salt and pepper, and cook on a gentle heat until the onions become soft and caramelized, and meat is golden brown in colour, stir occasionally. This process should take around 45 minutes. 

If it starts catching at the bottom, add a tiny bit of water. 

View fullsize Chicken Goulash traditional Istrain Recipe 3.jpg
View fullsize Chicken Goulash traditional Istrain Recipe 4.jpg

Sprinkle flour and add finely chopped fresh marjoram (or dry if using), stir with a wooden spoon. 

Add water to the pan, about ¾ full, and scrap with a wooden spoon bits and pieces that attached to the bottom and the sides of the pan. 

Simmer for a few more minutes until the sauce thickens a bit. 

View fullsize Chicken Goulash traditional Istrain Recipe 5.jpg
View fullsize Chicken Goulash traditional Istrain Recipe 6.jpg

The dish is fully cooked when the sauce becomes nice and velvety in consistency, it should not be either too thick nor to watery and too thin. 

If you are using whole jointed chicken, fish out and discard pieces that you are not going to serve, like knuckles and chunks of ribs for example. 

Taste and adjust seasoning with sea salt and black pepper. 

Serve hot with potato gnocchi , soft cooked or grilled polenta, typical Istrian home made fresh pasta like bleki, fuzi, pljukanci or bigoli, pan-fried potatoes with onions and pancetta , mashed or oven roasted potatoes or simply with some crunchy bread to soak up the sauce. 

Wine suggestion

Provincia di Pavia Pinot Nero IGT “Junior” 201 - Monsupello

September 28, 2022 /tina oblak
chicken, whole chicken, roaster, cockerel, chicken goulash, Istrian chicken goulash, chicken with fresh marjoram, fresh marjoram, dry marjoram, Kakušji šugo, Kokošji golaž, Istrian Žgvacet, Istrian Žvarcet, chicken thighs, chicken thighs on the bone, chicken drumsticks on the bone, chicken wings
Adriatic Recipe, All year round recipe, Autumnal dish, Autumnal recipe, casserole, child friendly dish, child friendly meal, dinner, family friendly dish, family friendly meal, Fresh herbs, hearty dish, Istrian cuisine, Istrian dish, Istrian food, Istrian gastronomy, main course, main dish, main meat course, Meat, one pot meal, one pot meat recipe, Rustic dish, simple recipe, Slovenian cuisine, Slovenian food, Slovenian gastronomy, supper, Winter dish, Winter recipe
Comment

Sautéed Aubergines with garlic and parsley Istrian Recipe

Beans and Srdines
September 21, 2022 by tina oblak in Adriatic Recipe, Appetizers, Autumnal dish, Autumnal recipe, bite-sized nibbles, brunch, Canapés, child friendly dish, child friendly meal, dinner, Easy recipe, entrée course, family friendly dish, family friendly meal, Finger food, first course, first course dish, first course meal, Healthy, healthy mael, hearty dish, Istrian cuisine, Istrian dish, Istrian food, Istrian gastronomy, main course, main dish, main vegetarian course, main vegetarian dish, main vegetarian meal, Nutritious, Nutritious dish, Rustic dish, Side Dishes, simple recipe, Slovenian cuisine, Slovenian food, Slovenian gastronomy, Small bites, Snacks, Starters, summer dish, summer recipe, supper, Vegan, Vegetable side dish, Vegetables, Vegetarian

This simple and rustic aubergine side dish is light and full of flavour. It can also be enjoyed in less traditional way, spread on bruschetta, toasted bread, as a topping on a pizza, and it can be mixed with rice, or used as a base for a pasta sauce. 

Sautéed aubergines in garlic and parsley infused oil is an unpretentious dish, very easy to make and typically prepared in the households along the Slovenian coast, where my nona lives. She told me that her family had a lovely vegetable garden where aubergines grew during the summer months and early autumn. The best ones were picked and sold on the market, just across the Italian border, in Trieste, where they fetched good money. Only the wonky and imperfect ones, but most certainly not less tasty, were left behind for domestic use. They were cooked in delicious home-made extra virgin olive oil flavoured with garlic and fresh parsley and accompanied by potatoes or polenta. 

This is not the dish that you would normally find in restaurants, with the glimpse of sadness in my nona's eyes, and a slight sense of embarrassment, she explained to me that this dish is “too simple” and  is part of what  “the modern world” defines as “the food of the poor” (more widely known as the Italian concept of Cucina Povera). However, it is slightly intriguing, since without her realizing it, this is precisely one of the kinds of dishes that are becoming increasingly popular and appreciated by many people. 

What is interesting about this dish is that visually cooked aubergines resemble more closely mushrooms than aubergines. This is why Italians call a very similar and typical aubergine side dish from the Campania region in southern Italy, Melanzane a Funghetto (Mushroom-style aubergines ). 

I am sharing here my nona's recipe for this delicious and humble sautéed aubergines with garlic and  fresh parsley. 

Ingredients 

Serves 4 

  • 1 kg aubergines 

  • 5 Tbsp extra virgin olive oil 

  • 1 clove of garlic, peeled 

  • handful of fresh flat leaf parsley (about 13g) plus some extra for garnishing,  finely chopped 

  • sea salt 

  • black pepper, optional 

Method 

Wash the aubergines and dry them, remove the stem. 

Cut each aubergine into quarters lengthwise and check for the amount of seeds. If there is a considerable amount of seeds, eliminate and remove the central part containing the higher concentration of the seeds.   

Cut the rest of the aubergine into a fairly small and thin regular-sized chunks. 

Transfer the aubergine pieces into a colander, sprinkle with a bit of sea salt and place it over a bowl or into the sink so the bitter juices can drain away (avoiding the aubergines to taste bitter) during a sweating process (about 30 minutes).  This phase will help to loose the liquid avoiding the aubergines tasting bitter.   Squeeze very gently. 

View fullsize Sauteed Aubergines with garlic and parsley 5.jpg
View fullsize Sauteed Aubergines with garlic and parsley 6.jpg

Pour the oil in a fairly large frying pan and sauté a whole garlic until golden in colour . 

Stir in chopped parsley and add aubergine pieces. 

Mix well so all the aubergine chunks are coated in oil and parsley. 

View fullsize Sauteed Aubergines with garlic and parsley 7.jpg
View fullsize Sauteed Aubergines with garlic and parsley 8.jpg

Simmer in an open pan, on a fairly gentle heat, for about 30 minutes, stirring occasionally to prevent sticking at the bottom of the pan and burn, or until they release most of their liquid and the skin starts to have the same kind of texture as mushrooms. The aubergine pieces should be nice and  soft but not mushy. 

Taste and adjust the seasoning with sea salt and black pepper. 

Fish out and remove garlic clove, discard. 

Sprinkle with a bit of roughly chopped fresh parsley. 

Serve hot, warm or at a room temperature. 

Just a thought

Aubergines cooked this way are mainly served as a side dish but they can also be enjoyed in less traditional way, spread on bruschetta, toasted bread, canapes, as a topping on a pizza, and they can be mixed with rice, or used as a base for a pasta sauce. 

Wine suggestion

Collio Friulano DOC 2021 - Ronchi di Cialla


September 21, 2022 /tina oblak
aubergines, sauteed aubergines with garlic and fresh parsley, Aubergines Istrian Recipe, Istrian style aubergines, easy aubergine recipe, simple aubergine recipe, aubergines vegan, Melanzane a funghetto
Adriatic Recipe, Appetizers, Autumnal dish, Autumnal recipe, bite-sized nibbles, brunch, Canapés, child friendly dish, child friendly meal, dinner, Easy recipe, entrée course, family friendly dish, family friendly meal, Finger food, first course, first course dish, first course meal, Healthy, healthy mael, hearty dish, Istrian cuisine, Istrian dish, Istrian food, Istrian gastronomy, main course, main dish, main vegetarian course, main vegetarian dish, main vegetarian meal, Nutritious, Nutritious dish, Rustic dish, Side Dishes, simple recipe, Slovenian cuisine, Slovenian food, Slovenian gastronomy, Small bites, Snacks, Starters, summer dish, summer recipe, supper, Vegan, Vegetable side dish, Vegetables, Vegetarian
Comment

My mum's easy Pear Traybake Recipe

Beans and Sardines
September 14, 2022 by tina oblak in Adriatic Recipe, All year round recipe, Autumnal dish, Autumnal recipe, baked dish, baking, bite-sized nibbles, breakfast, Central Europe cakes, Central European recipes, child friendly dish, dessert, easy baking, easy cakes, Easy recipe, Finger food, home baking, Istrian cuisine, Istrian food, Istrian gastronomy, pudding, Rustic dish, simple recipe, Slovenian cuisine, Slovenian food, Slovenian gastronomy, Small bites, Snacks, sweet course, sweet finger food, sweet nibbles, Sweet Things

This pear tray bake is made with simple, everyday, ingredients found in your pantry, it is moist, light, soft, super delicious, and incredibly easy and quick to prepare. You will want to make it over and over again, and it will become your number one recipe for a traybake.

This recipe covers it all when it comes to sweet treats, it is perfect for any occasion and it can be enjoyed any time of the day. You can serve it at room temperature or cold as a snack, it goes really well with tea and coffee, it can be made in advance and taken to the picnics; but, it also can be equally served warm as an elegant dessert when “dressed up” a bit and accompanied with cream, whipped cream, fromage frais, yoghurt, or a good quality vanilla ice cream or gelato.

This sumptuously moist pear traybake is incredibly popular back home on the Slovenian coast and baked in the households on a regular basis all year round. In fact, the idea behind this traybake is to use the same basic sponge recipe and add different fresh seasonal fruits or their combinations, so you always end up with a slightly different cake. And of course, using jarred or tinned fruit in this recipe is perfectly fine too.

In the autumn you can use for example pears, apples, plums and blackberries and add ground cinnamon and clove and orange zest to enhance that characteristic autumnal flavours, on the contrary, in the spring and summer months the use of peaches, cherries, nectarines and lemon zest will add freshness to the sponge base.

View fullsize Pear Traybake 1.jpg
View fullsize Pear Traybake 2.jpg

I am sharing here my mum's recipe for a tray bake she used to make, and still does, it will become a staple in your sweet things repertoire to bake.

Ingredients

Serves 12

  • 3-4 ripe pears (about 500g), tinned pears also work well in this recipe

  • lemon zest and juice of ½ small unwaxed lemon

  • 3 medium eggs (room temperature)

  • 150g caster sugar

  • 130g plain white all purpose flour

  • 6g baking powder (1 Tsp)

  • 5 Tsp neutral tasting oil (75ml)

  • ½ Tsp vanilla extract

  • ¼ Tsp ground cinnamon, optional

  • ¼ Tsp ground cloves, optional

  • icing sugar, for dusting

Method

Pre-heat the oven to 180C/Fan 160C/Gas 4.

Lightly grease a tray bake or roasting tin, approx 30 x 23cm (12 x 9), then line the base with baking parchment.

Peel, core and thinly slice the pears. Transfer into a bowl, add lemon zest and squeeze the lemon juice over them. This will help the pears from turning brown and discolouring but also adds a bit of of extra flavour.

Crack the eggs into a mixing bowl, add the sugar and beat with a free-standing or hand-held mixer for about 7 minutes or until the mixture has thickened, becomes slightly pale in colour and foamy.

View fullsize Pear Traybake 11.jpg
View fullsize Pear Traybake 12.jpg

Add sifted flour and baking powder along with oil, vanilla extract, and ground cinnamon and clove, if using. Stir with a wooden spoon to incorporate well all the ingredients.

View fullsize Pear Traybake 13.jpg
View fullsize Pear Traybake 14.jpg

Add pears to the mixture and stir with a wooden spoon or spatula.

View fullsize Pear Traybake 15.jpg
View fullsize Pear Traybake 16.jpg

Transfer the mixture into the tray.

Bake in the pre-heated oven for about 40-45 minutes or until the cake is golden, firm to the touch and and when inserting the knife into the centre should come out clean.

Leave to cool then turn out, remove the parchment, dust with a bit of icing sugar and cut into 12 pieces.

You can also serve it warm as a dessert with cream, whipped cream, fromage frais or a good quality vanilla ice cream or gelato.

Just a thought

In this traybake you could use other fruit such as apples, peaches, nectarines, cherries or plums or a combination of the fruits that your prefer, and all of the fresh fruits can be replaced by jarred or tinned alternative.

You can freeze this tray bake for up to three month.

Wine suggestion

Moscato di Trani DOC Dolce Naturale "Dulcis in Fundo" 2019 - Torrevento

September 14, 2022 /tina oblak
Traybakes, fresh fruit, tinned fruit, jarred fruit, fruit sponge cake, fresh pears, ground cinnamon, ground cloves, lemon zest, pear cake, pear traybake
Adriatic Recipe, All year round recipe, Autumnal dish, Autumnal recipe, baked dish, baking, bite-sized nibbles, breakfast, Central Europe cakes, Central European recipes, child friendly dish, dessert, easy baking, easy cakes, Easy recipe, Finger food, home baking, Istrian cuisine, Istrian food, Istrian gastronomy, pudding, Rustic dish, simple recipe, Slovenian cuisine, Slovenian food, Slovenian gastronomy, Small bites, Snacks, sweet course, sweet finger food, sweet nibbles, Sweet Things
1 Comment

One Pot Roasted Octopus with Potatoes and Vegetables Istrian Recipe (Octopus Peka)

Beans and Sardines
August 31, 2022 by tina oblak in Adriatic Recipe, All year round recipe, baked dish, child friendly dish, child friendly meal, dinner, Easy recipe, family friendly dish, family friendly meal, Fish & Seefood, Healthy, healthy mael, hearty dish, Istrian cuisine, Istrian dish, Istrian food, Istrian gastronomy, light fish course, light meal, main course, main dish, main fish course, main fish meal, Nutritious, Nutritious dish, one post fish recipe, one pot meal, roasted dish, Rustic dish, simple recipe, Slovenian cuisine, Slovenian food, Slovenian gastronomy, supper

One pot roasted octopus with potatoes and vegetables called Octopus Peka (dish found in Slovenian and Croatian Istria and along Dalmatian coast in Croatia) is seriously delicious, very aromatic and one of the easiest and simplest recipe for a one pot roast where the preparation for it requires minimal effort but the finished dish is a serious show stopper, and although this dish is very rustic and formal, for locals it feels very special and celebratory, as it is usually prepared for a large number of people, for friends and family to mark a special occasion

The word Peka, in Slovenian (also called črpinja) and in Croatian, refers to a large metal baking dish with a lid that resembles a bell-shaped dome but it is also a name given to the finished dish (lamb peka, octopus peka etc.) cooked with this very ancient method (in an open fireplace) and the oldest roasting technique which ensures the slow and even cooking as hot coals and embers are placed on top of the dome.

Most of us do not have a possibility to make this dish with the authentic and traditional peka method, but I am sharing here the recipe that would come as close as you can get to the “real deal octopus peka” using Dutch oven, cast iron casserole dish, even a baking tray and some aluminium foil will do.

Serve this dish hot, place the pot in the centre of the table and make sure there is plenty of crunchy bread to soak up the juices, prepare a mixed salad to accompany the dish, and you are ready to go.

I am sharing here this traditional one pot roasted octopus using potatoes, carrots, onions and garlic as basic selection of vegetables, together with fresh fennel bulb that can be replaced by courgettes, aubergines, and bell peppers. Play around and use the vegetables, or a combination of vegetables that you like or prefer. There really is no wrong or right way here, the most important thing is that you enjoy the dish!

Ingredients

Serves 4

  • octopus, cleaned, 1 big or a few smaller ones, about 2kg in weight (fishmongers will be happy to clean it for you).

  • For this recipe it is best if the octopus has been previously frozen and then thawed, or buy an already frozen octopus if you can.

  • 1 kg potatoes, peeled and cut into chunks

  • onion (about 150g) peeled and cut into chunks

  • carrots (about 280g) peeled and roughly cut into chunks

  • 3 cloves of garlic, peeled

  • tomatoes (I used 6 mini San Marzano Tomatoes), you can use other variety of small tomatoes or use one bigger in size and cut into chunks

  • one fresh fennel bulb, trimmed and cut into chunks. You can also replace fennel with other vegetables, such as courgettes, aubergines and bell peppers, or you can use fennel in addition to other vegetables. Few black pitted olives are a tasty addition too.

  • 50ml white wine, optional

  • extra virgin olive oil, a very generous drizzle

  • one small sprig of fresh or dry rosemary

  • sea salt

  • black pepper

Method

Place clean and defrosted octopus (or octopuses) in a pan, put the lid on and cook the octopus on a medium-low heat for about 30 minutes. There will be quite a lot of liquid coming out of the octopus. Drain in a colander and set aside.

Preheat the oven to 200C static or equivalent.

View fullsize Octopus Peka 3.jpg
View fullsize Octopus Peka 6.jpg

Put all the vegetables in a Dutch oven, baking dish or tray, and very generously drizzle with extra virgin olive oil.

Season with sea salt and black pepper and mix well.

View fullsize Octopus Peka 5.jpg
View fullsize Octopus Peka 7.jpg

Place previously cooked octopus on top of the vegetable and drizzle lightly with olive oil.

Put the lid on and roast for 60 minutes.

View fullsize Octopus Peka 8.jpg
View fullsize Octopus Peka 9.jpg

Take the lid off and roast for further 10 minutes, or a bit more if there is still a lot of liquid. This will partially depend on the type of vegetables you are using and personal preference.

You want enough liquid so the final dish is juicy and moist.

Place the dish at the centre of the table, so everyone can help themselves, with some crunchy bread to soak up the juices and maybe a nice fresh salad.

Just a thought

This dish is best served hot immediately.

It can be reheated but the dish will be slightly drier as the potatoes and other vegetables will soak up all the juices, although it will still be tasty though.

This recipe is not suitable for freezing.

Wine suggestion

Vitovska 2019 - Čotar

August 31, 2022 /tina oblak
octopus, cooking octopus, roasted octopus, octopus peka, octopus peka with vegetables, roasted seafood, hobotnica pod peko, hobotnica z zelenjavo v pecici, polipo al forno con le verdure
Adriatic Recipe, All year round recipe, baked dish, child friendly dish, child friendly meal, dinner, Easy recipe, family friendly dish, family friendly meal, Fish & Seefood, Healthy, healthy mael, hearty dish, Istrian cuisine, Istrian dish, Istrian food, Istrian gastronomy, light fish course, light meal, main course, main dish, main fish course, main fish meal, Nutritious, Nutritious dish, one post fish recipe, one pot meal, roasted dish, Rustic dish, simple recipe, Slovenian cuisine, Slovenian food, Slovenian gastronomy, supper
Comment

Courgette risotto Istrian Recipe

Beans and Sardines
August 24, 2022 by tina oblak in Adriatic Recipe, Appetizers, child friendly dish, child friendly meal, dinner, Easy recipe, entrée course, family friendly dish, family friendly meal, first course, first course dish, first course meal, Healthy, healthy mael, hearty dish, Istrian cuisine, Istrian dish, Istrian food, Istrian gastronomy, light meal, main course, main dish, main vegetarian dish, main vegetarian meal, Nutritious, Nutritious dish, one pot meal, recipe from Northern Ital, Risotti, Risotto, Rustic dish, simple recipe, Slovenian cuisine, Slovenian food, Slovenian gastronomy, Spring dish, Spring recipe, Starters, summer dish, summer recipe, supper, Vegan, Vegetables, Vegetarian, Venetian dish

Courgette risotto is a perfect choice if you want to make a light and elegant dish, but one that is delicate in taste and yet filling. Summer risotto is incredibly easy to make, and during the summer months, when courgettes are in full season and in abundance, choosing this delicious vegetable to cook with seems almost an obvious choice.

This is not a risotto you will find in the restaurant menus on the Slovenian coast, it is cooked in the households that almost always keep a slab of pancetta in the fridge, and whenever possible grow courgettes. This recipe, since Istria is geographically so close to Veneto region in Italy, where there are a great variety of risotti recipes, it should be no surprise that courgette risotto has been created, and cooked on a regular basis and enjoyed by generations.

This risotto will cover all occasions, it is a perfect rustic and informal choice for a mid week lunch or dinner, but has nothing to dread if it is served in a more formal setting.

I am sharing here my mother's summer courgette risotto, most of the time made with freshly picked courgette that my paternal grandfather used to grow in his vegetable patch.

If you happen to grow your own courgettes and have courgettes flowers as well, and not quite sure what to do with them, use them in the risotto, just chop them roughly and cook together with sliced courgettes.

Ingredients

Serves 4

  • 300g risotto rice (like Vialone Nano, Arborio or Carnaroli)

  • courgettes 430g roughly, sliced

  • 2 Tbsp olive oil

  • 1 onion, 80g roughly

  • 50g pancetta, finely sliced (can use cubed pancetta, sliced bacon, lardons or pork sausage meat), optional for a vegetarian variation

  • small clove of garlic, peeled and crushed

  • 1 litre of hot chicken broth or stock (can use vegetable broth or stock)

  • sea salt

  • fresh flat leaf parsley, roughly chopped, optional (for garnish)

  • generous knob of butter, optional

  • a handful of Parmiggiano Reggiano cheese, finely grated, optional

Method

Before starting to make the risotto have your boiling hot chicken or vegetable broth or stock ready to hand for later.

Wash the courgettes and pat dry them with kitchen paper or clean kitchen towel.

Trim off the ends of the courgettes and slice or cut into smaller pieces (if the courgette is big, cut in half first, then slice lengthways into quarters, then chop into smaller chunks)

View fullsize Courgette risotto 4.jpg
View fullsize Courgette risotto 5.jpg

Put olive oil in a pan, add finely chopped onions, pancetta, crushed garlic, a pinch of salt and cook on a gentle heat, stirring occasionally, until the onions become soft and translucent.

View fullsize Courgette risotto 6.jpg
View fullsize Courgette risotto 7.jpg

Add courgette pieces and cook for a few minutes until they soften a bit.

View fullsize Courgette Risotto 7a.jpg
View fullsize Courgette risotto 8.jpg

Add the risotto rice and toast for a bit , stirring constantly to avoid sticking to the pan.

View fullsize Courgette risotto 9.jpg
View fullsize Courgette risotto 10.jpg

Pour or ladle ½ litre (500ml) of hot chicken or vegetable broth or stock.

Cook until the first amount of liquid is absorbed then start gradually adding ladles of hot stock, one at a time, allowing the liquid to be absorbed before adding more.

There should always be enough liquid just to cover the risotto.

Cook on a medium heat, stirring almost constantly, until the rice is cooked al dente, meaning fully cooked but still a bit firm when bitten, it should roughly take between 15 -18 minutes for a risotto to be cooked.

Taste and adjust the seasoning with sea salt, but this might not be necessary since the stocks that come from the store generally speaking are salty already!

For even creamier texture, you can finish cooking the courgette risotto with a typical Italian mantecare phase. Remove the saucepan from the heat, add grated cheese and a bit of cold butter to the risotto when it is almost finished, and stir with a wooden spoon quite vigorously in order to develop its delicious creamy texture. This phase is optional.

Sprinkle with some roughly chopped fresh flat leaf parsley and finely grated Parmiggiano Reggiano Cheese (only if you have not used it already in the mantecare phase) and serve immediately while the risotto is still hot.

Just a thought

Courgette risotto can be kept in the fridge for a couple of days in an airtight container.

It can be enjoyed at room temperature as well and is not suitable for freezing.

You can freeze the onion, courgettes and pancetta base and defrost when deciding to make a risotto.

With a leftover courgette risotto you can make some arancini (staple Sicilian stuffed rice ball, coated in breadcrumbs and fried)

Wine suggestion

Roero Arneis DOCG 2021 - Malvirà

August 24, 2022 /tina oblak
fresh courgettes, risotto rice, zucchini risotto, creamy courgette risotto, vegetarian risotto, vegan risotto, courgette risotto with pancetta
Adriatic Recipe, Appetizers, child friendly dish, child friendly meal, dinner, Easy recipe, entrée course, family friendly dish, family friendly meal, first course, first course dish, first course meal, Healthy, healthy mael, hearty dish, Istrian cuisine, Istrian dish, Istrian food, Istrian gastronomy, light meal, main course, main dish, main vegetarian dish, main vegetarian meal, Nutritious, Nutritious dish, one pot meal, recipe from Northern Ital, Risotti, Risotto, Rustic dish, simple recipe, Slovenian cuisine, Slovenian food, Slovenian gastronomy, Spring dish, Spring recipe, Starters, summer dish, summer recipe, supper, Vegan, Vegetables, Vegetarian, Venetian dish
Comment

Ražnjići- Grilled Pork meat on skewers Balkan inspired Recipe

Beans and Sardines
August 17, 2022 by tina oblak in Adriatic Recipe, All year round recipe, Appetizers, bite-sized nibbles, child friendly dish, child friendly meal, dinner, Easy recipe, family friendly dish, family friendly meal, Istrian cuisine, Istrian dish, Istrian food, Istrian gastronomy, main dish, main meat course, Meat, Rustic dish, simple recipe, Slovenian cuisine, Slovenian food, Slovenian gastronomy, summer dish, summer recipe

Ražnjići is a very popular dish of the Balkans, and is similar to Greek Souvlaki.

It consists of threading on metal or wooden skewers, different types of cubed meats, traditionally pork, but chicken or lamb can be used, and even a variety of vegetables, or different combinations of them.

They are then cooked (if using a frying pan), or more traditionally they are barbecued. In fact, back home, on the Slovenian coast, it is almost impossible to imagine having a barbecue without ražnjići (Ćevapčići is another must).

This very informal and rustic dish gets served and offered on the skewers where the dish gets the name from, the word ražanj meaning “skewer”.

Meat lovers will be in heaven with this meal but you can equally make your vegetarian and vegan friends and family very happy too, alternating on the skewers pieces of onion, bell peppers, and courgettes. You have covered your complete guest list, everybody is included, and there is no need to think of alternative dishes for non-meat eaters.

Recipes and gastronomic habits in my homeland have been greatly influenced by both Balkan and Venetian cuisine (as well as Austro-Hungarian) and here I am sharing the recipe for Ražnjići cooked in the family inspired by the Balkan version, which seems to have “won over” the Venetian variation that uses cubes of veal, pork, pancetta, calf's and pig's livers, and is served over soft cooked polenta.

Next time you pull out your frying pan or are planning a barbecue, this recipe is a must!

Ingredients

Serves 3-6 (1 or 2 skewers per person)

  • 600g roughly lean pork meat (pork shoulder or loin) trimmed and diced into 48 bite size pieces

    (for this recipe I used 6 skewers, 8 pieces of meat on each skewer, you can distribute less meat on more skewers)

  • 24 fresh sage leaves (plus a few extra for the marinade)

  • fresh sprig of rosemary (for the marinade)

  • 2 cloves of garlic, peeled (for the marinade)

  • a few pieces of onion (for the marinade)

  • 2 Tbsp olive oil

  • sea salt

  • black pepper

Method

Place cubed pork meat in a bowl (you can also use an airtight container with the lid) add a generous drizzle of olive oil, peeled garlic, a few pieces of onion, a few sage leaves, fresh sprig of rosemary, sea salt and black pepper. Mix well with your hands, cover with cling film and leave to marinate for at least 1 hour, ideally overnight.

Thread cubed pork meat on metal skewers or wooden skewers (the latter need to be previously well soaked in the water) alternating two pieces of meat and one fresh sage leaf.

You can cook pork skewers either in a frying pan, in which you have previously put a bit of oil and heated it up, or in a griddle pan.

Cook on a medium-high heat turning the skewers every now and again.

Serve very hot, still on the skewer with some crunchy bread, salad (cucumber, bell pepper, tomatoes and salad onions with some kind of white cheese like feta, is the most traditional) or/and with (french fries) and ajvar (sweet roasted red pepper spread).

Wine suggestion

Toscana Rosso IGT "Vigorello" 2017 - San Felice

August 17, 2022 /tina oblak
pork loin, pork shoulder, chicken, lamb, meat on skewers, vegetables on skewers, spiedini di maiale, spiedini di carne, meat skewers in a frying pan, meat skewers on a grill, meat skewers on a barbecue
Adriatic Recipe, All year round recipe, Appetizers, bite-sized nibbles, child friendly dish, child friendly meal, dinner, Easy recipe, family friendly dish, family friendly meal, Istrian cuisine, Istrian dish, Istrian food, Istrian gastronomy, main dish, main meat course, Meat, Rustic dish, simple recipe, Slovenian cuisine, Slovenian food, Slovenian gastronomy, summer dish, summer recipe
Comment

Peperonata Istrian style Recipe

Beans and Sardines
August 10, 2022 by tina oblak in Adriatic Recipe, brunch, child friendly dish, child friendly meal, dinner, Easy recipe, entrée course, family friendly dish, family friendly meal, Healthy, healthy mael, Istrian cuisine, Istrian dish, Istrian food, Istrian gastronomy, light meal, main course, main dish, main vegetarian dish, main vegetarian meal, Nutritious, Nutritious dish, one pot meal, Rustic dish, Side Dishes, simple recipe, Slovenian cuisine, Slovenian food, Slovenian gastronomy, Starters, stew, summer dish, summer recipe, supper, Vegan, Vegetable side dish, Vegetables, Vegetarian, vegetarian summer stew, Venetian dish

This quintessentially summer dish gets devoured and seems to be a real hit every single time, it is a very “practical” dish, as it usually prepared in advance, and takes central stage on the tables of the locals back home on the Slovenian coast, where during the summer months the heat can be terrible but it is also during this time of the year that the ingredients for this dish are most abundant and taste their best.

Peperonata is cooked by the locals during the fresh, cooler, hours of the day, usually early in the morning or in the evening when it cools down a bit (there is a different rhythm of life, a different way of doing things, when you live in a climate that can regularly be very hot).

Moreover, better cooking follows this different, summer, rhythm of daily activities, since the following day the dish tastes even better as all the ingredients have a chance to mingle together!

Peperonata is so delicious you can just eat it on its own with some fresh crunchy or toasted bread, it is great paired with grilled meats and fish, cheeses, cold meats, cooked rice, makes a great base for a risotto or a pasta dish and incredibly tasty spread on bruschetta.

I am sharing here my mother's recipe for Istrian style peperonata, which is different from the Venetian variety where a little white wine is added to the dish.

When I cook this dish, I get immediately transported back home, to the sound of cicadas, to the fragrance of salty air, and to the childhood memories of long summers that never seemed to end...

Ingredients

Serves 4

  • 1 clove of garlic, peeled and crushed

  • 5 Tbsp olive olive

  • onions (about 300g) peeled and finely sliced

  • 400g aubergines, diced

  • 500g yellow or green bell peppers, washed, deseeded and sliced into strips or cut into chunks)

  • 300g tomatoes (juicy, ripe and sweet) roughly chopped

  • sea salt

  • few fresh basil leaves, optional

  • fresh flat leaf parsley, roughly chopped for garnish, optional

Method

Place the oil in a fairly large pan, add sliced onions, crushed garlic, a generous pinch of sea salt and cook the onions on a gentle heat (for about 10 minutes) or until soft and translucent stirring now and again (do not rush this process as the slowly caramelized onions will add a final taste of the dish).

View fullsize Peperonata 6.jpg
View fullsize Peperonata 7.jpg

Add cubed aubergines and cook gently for about 10-15 minutes or until cooked down and soft, stirring occasionally, making sure they do not catch to the bottom of the pan.

View fullsize Peperonata 8.jpg
View fullsize Peperonata 9.jpg

Transfer sliced bell peppers to the pan and cook together with the onions and aubergines for about 10-15 minutes or until softened a bit and cooked down, stirring now and again (if onion, aubergine and pepper mixture starts to catch at the bottom of the pan add a splash of water).

View fullsize Peperonata 10.jpg
View fullsize Peperonata 11.jpg

Add chopped tomatoes, a few fresh basil leaves, a splash of water and cover with the lid.

View fullsize Peperonata 12.jpg
View fullsize Peperonata 13.jpg

Simmer on a very gentle heat for about 40minutes, checking and stirring now and again making sure it does not stick to the bottom.

Taste and adjust the seasoning with sea salt.

Let it cool, sprinkle with some roughly chopped fresh flat leaf parsley and some basil leaves (optional) and serve tepid, at room temperature or cold.

Just a thought

Peperonata will keep very well in a fridge in an airtight container for a few days and is suitable for freezing especially if you make a large quantity, and want to eat it again in the near future; or, indeed, you want to bring back summer memories in the middle of winter.

The traditional way of preparing this dish does not call for chill, however, if you wish to add a bit of a kick to this dish it is perfectly fine to do so during the cooking process.

You can also add courgettes, some olives and capers to taste as a variation of this dish.

Wine suggestion

Calabria Rosato IGT "Terre Lontane" 2021 - Librandi

August 10, 2022 /tina oblak
bell peppers, yellow bell peppers, green bell peppers, aubergines, tomatoes, fresh basil, bell peppers summer stew
Adriatic Recipe, brunch, child friendly dish, child friendly meal, dinner, Easy recipe, entrée course, family friendly dish, family friendly meal, Healthy, healthy mael, Istrian cuisine, Istrian dish, Istrian food, Istrian gastronomy, light meal, main course, main dish, main vegetarian dish, main vegetarian meal, Nutritious, Nutritious dish, one pot meal, Rustic dish, Side Dishes, simple recipe, Slovenian cuisine, Slovenian food, Slovenian gastronomy, Starters, stew, summer dish, summer recipe, supper, Vegan, Vegetable side dish, Vegetables, Vegetarian, vegetarian summer stew, Venetian dish
Comment

Crispy Breaded Courgettes Istrian Recipe

Beans and Sardines
August 03, 2022 by tina oblak in Adriatic Recipe, Appetizers, bite-sized nibbles, brunch, child friendly dish, child friendly meal, dinner, Easy recipe, entrée course, family friendly dish, family friendly meal, Finger food, first course, first course dish, first course meal, Istrian cuisine, Istrian dish, Istrian food, Istrian gastronomy, main course, main dish, main vegetarian course, main vegetarian meal, main vegetarian dish, Rustic dish, Side Dishes, simple recipe, Slovenian cuisine, Slovenian food, Slovenian gastronomy, Small bites, Spring dish, Spring recipe, Starters, summer dish, summer recipe, supper, savory nibbles, Vegetable side dish, Vegetables, Vegetarian

Crispy breaded courgettes is one of the most most loved dishes and a total crowd pleaser. It consists of slicing the courgettes, dredging them into a flour, then dipping them into whisked eggs, coating them with breadcrumbs and quickly shallow fried them until golden and crispy, which makes them utterly delicious, irresistible and scrumptious, you just cannot stop eating them! This dish will become an instant hit and breaded courgettes will disappear from the serving plate in no time!

Try to prepare courgettes this way when they are in full season and abundant, I can almost guarantee you, that the most reluctant courgette eaters will be converted in eating this summertime vegetable with delight.

This dish is also fun to make, and if you have children, try to involve them in the breading process, they will absolutely love it, but make sure they are as far away as possible, in a nicest way, during frying.

Breaded courgettes are ideally eaten hot as soon as they are fried with some mashed potatoes, a seasonal salad, but also incredibly delicious at the room temperature and offered as a part of a buffet, great used as a filler in a sandwich (add a bit of fresh rocket salad and spread a slice of bread with a bit of mayonnaise, basil or vegetarian pesto, and you will have a sandwich that is to die for).

This dish can be made ahead and stored which makes it an ideal picnic food, you bring this dish with you on a picnic, and you will stand out from the crowd and have no chance to bringing back home any leftovers...

I am sharing here my mother's recipe for crispy breaded courgettes, one of whole family's absolute favourite plates of food.

I simply adored this dish as a child, and nothing much has really changed since...

Ingredients

Serves 4

  • fresh courgettes, medium size (approximately 700-800g)

  • 2-3 eggs (the number of the eggs needed depends on their size and on the quantity of the courgettes you are using)

  • dry breadcrumbs

  • plain flour

  • sea salt

  • black pepper, optional

  • oil for frying

Method

Wash the courgettes under cold running water and dry them with the kitchen paper or a clean kitchen towel.

Place the courgettes on a chopping board and cut off the ends.

With the knife or a mandolin slicer, slice the courgettes into a 4-5mm thick slices (if the courgettes are big, and you find them difficult to slice vertically, cut each courgette in half first, and then slice).

View fullsize Breaded Courgettes 6.jpg
View fullsize Breaded Courgettes 7.jpg

Prepare three dishes for flour, eggs and breadcrumbs.

Put the flour in a wide shallow bowl, dish or on a plate (I just use a piece of baking paper, fold it when I finish, and use it the next time)

Put the eggs in another shallow bowl or dish (big enough to accommodate one or two slices of courgettes at the same time) whisk lightly and season with sea salt and black pepper, if using. I suggest you use two eggs to start with, and crack another one, if two are not enough.

Put the breadcrumbs in a third shallow bowl, dish or plate.

Start the breading process.

Dredge each slice of courgettes into flour making sure everything is coated and gently shake off the excess.

View fullsize Breaded Courgettes 9.jpg
View fullsize Breaded Courgettes 10.jpg

Dip the floured slice of the courgette into a whisked egg, turn to coat, make sure all the sides are covered in egg, and let drip off excessive egg.

View fullsize Breaded Courgettes 11.jpg
View fullsize Breaded Courgettes 12.jpg

Coat in breadcrumbs and press a bit so the breadcrumbs adhere well and shake off gently the excess.

View fullsize Breaded Courgettes 13.jpg
View fullsize Breaded Courgettes 14.jpg

Repeat the process until you have used all the courgette slices.

Breaded courgettes can be shallow fried or baked in the oven.

Frying method

Pour oil into a large frying pan, about 1cm, and heat it over a medium heat (how much oil you need will depend on how big your frying pan is)

Once oil is hot, add breaded courgette slices, a few at time without overcrowding the pan (this will bring the oil temperature down)

Fry for about one minute on each side or until the breadcrumbs turn golden-brown in colour.

Transfer fried courgettes onto a dish lined with kitchen paper to allow excess oil to be absorbed.

If the slices are lined in layers, make sure you put a kitchen paper between every layer.

Baked in the oven method

Line large baking tray with a non stick baking parchment and place sliced bread courgettes on a tray, one next to each other, spray or drizzle with olive oil and bake in a preheat oven at 200 C static or equivalent for about 20 minutes or until golden-brown in colour.

Just a thought

I have shared here the basic recipe for crispy breaded courgettes, but if you wish to add additional flavour to the dish, you can add some fresh finely chopped flat leaf parsley in whisked egg and some grated Parmiggiano Reggiano cheese in breadcrumbs.

You can store crispy breaded courgettes in an airtight container in the fridge for about two days.

This dish is not suitable for freezing.

If you wish to prepare this courgette dish in advance, it is a good idea to store the uncooked and not fried breaded slices of courgettes in an airtight container in the fridge, and just before frying, “refresh” the breadcrumbs coating by covering the slices in breadcrumbs once again, this will give you a crunchy coating.

A vary tasty variation of this dish is using mushrooms or aubergines instead of courgettes.

Wine suggestion

Valdobbiadene Prosecco Superiore Brut - Nino Franco

August 03, 2022 /tina oblak
fresh courgettes, breaded courgettes, crispy breaded courgettes, fried breaded courgettes, zucchini, fresh zucchini, breaded zucchini, crispy breaded zucchini, fried breaded zucchini, zucchine impanate fritte, zucchine impanate al forno, pohane bučke, ocvrte pohane bučke
Adriatic Recipe, Appetizers, bite-sized nibbles, brunch, child friendly dish, child friendly meal, dinner, Easy recipe, entrée course, family friendly dish, family friendly meal, Finger food, first course, first course dish, first course meal, Istrian cuisine, Istrian dish, Istrian food, Istrian gastronomy, main course, main dish, main vegetarian course, main vegetarian meal, main vegetarian dish, Rustic dish, Side Dishes, simple recipe, Slovenian cuisine, Slovenian food, Slovenian gastronomy, Small bites, Spring dish, Spring recipe, Starters, summer dish, summer recipe, supper, savory nibbles, Vegetable side dish, Vegetables, Vegetarian
Comment

Risotto Primavera Venetian inspired Recipe 

Beans and Sardines
July 27, 2022 by tina oblak in Adriatic Recipe, child friendly dish, child friendly meal, dinner, Easy recipe, entrée course, family friendly dish, family friendly meal, first course, first course dish, first course meal, Healthy, healthy mael, hearty dish, Istrian cuisine, Istrian dish, Istrian food, Istrian gastronomy, light meal, main course, main dish, main vegetarian dish, main vegetarian meal, Nutritious, Nutritious dish, recipe from Northern Ital, Risotti, Risotto, Rustic dish, simple recipe, Slovenian cuisine, Slovenian food, Slovenian gastronomy, Spring dish, Spring recipe, Starters, summer dish, summer recipe, supper, Vegan, Vegetables, Vegetarian

This classic spring vegetable risotto, using any seasonal spring vegetables, must be one of the most loved and popular dishes for all generations. This risotto is rustic, simple, and filling, and represents a genuine plate of food that puts a smile on anyone's face with the array of colours on the plate offered by the vegetables.

It can be enjoyed as a first course meal, which is traditionally what it is in Italy, or as a main course with a nice salad on the side.

This vegetarian risotto really celebrates the new season of vegetables, it is light but full of freshness and flavour and it is very satisfying. You can vary the recipe using different vegetables and combinations according to what is in season, just mix and match the vegetables that are your top favourites, add a handful of fresh roughly chopped baby spinach or broad beans a few radishes for example.

My mother has made this risotto time and time again, it was a regular mid week meal, we knew we had risotto primavera but it would be slightly different every single time depending on the variety of vegetables she would find available in the season from the market or from my paternal grandfather's vegetable patch. 

Ingredients 

Serves 4 

  • 300g risotto rice (like Vialone Nano, Arborio or Carnaroli) 

  • 3 Tbsp extra virgin olive oil 

  • 1 celery stick (about 30g), finely chopped 

  • 1 medium courgette (about 113g), sliced or diced 

  • 1 medium carrot (about 90g), peeled and sliced or diced 

  • 1 medium onion (about 100g), peeled and finely chopped 

  • green asparagus (about 100g), wash, trim off the wooden ends and finely slice the stalks leaving the tips whole 

  • green beans (about 50g), sliced 

  • fresh peas in pods (about 300g), remove the peas from the pods (can use frozen petits pois, about a handful) 

  • 1 tomato (about 170g), roughly chopped 

  • sea salt 

  • fresh flat leaf parsley (about 4g), finely chopped 

  • 1 litre hot vegetable or chicken broth or stock (you can use instant vegetable or chicken stock powder) or hot water 

  • Parmiggiano Reggiano or Grana Padano cheese, finely grated for serving, optional 

Method 

Before starting making risotto have your boiling hot vegetable or chicken stock (or just hot water) ready to hand for later. 

Put extra virgin olive oil in a pan,  add finely chopped onions, carrots and celery and sauté for a few minutes on a gentle heat until cooked down and soft. 

Add all the other vegetables (except asparagus tips, if using).

View fullsize Risotto Primavera 5.jpg
View fullsize Risotto Primavera 7.jpg

Add the parsley, and cook on a gentle heat for about 10-15 minutes stirring occasionally. 

Add the rice and toast it for a few minutes, stirring constantly to avoid sticking to the bottom of a pan. 

View fullsize Risotto Primavera 10.jpg
View fullsize Risotto Primavera 11.jpg

Pour or ladle ½ litre (500ml) of hot vegetable or chicken stock, or hot water. 

Cook until the first amount of liquid is absorbed then start gradually adding ladles of hot stock, one at a time, allowing the liquid to be absorbed before adding more. 

Cook on a medium heat, stirring almost constantly, until the rice is cooked al dente, meaning fully cooked but still a bit firm when bitten, it should roughly take between 15-18 minutes for a risotto to be cooked. 

Add the tips of the asparagus, if using, a few minutes before the end of cooking time. 

Taste and adjust the seasoning with sea salt, but this might not be necessary since the stocks from the stores generally speaking contain salt already. 

Serve immediately while the risotto is still hot and a bit runny in consistency. 

Ladle the risotto onto the plates, sprinkle with freshly grated Parmiggiano Reggiano cheese and garnish with some roughly chopped fresh parsley. 

Just a thought 

For even creamier texture, you can finish cooking the asparagus risotto with a typical Italian mantecare phase. Remove the saucepan from the heat, add grated cheese and a bit of cold butter or cream to the risotto when is almost finished and stir with a wooden spoon quite vigorously in order to develop that delicious creamy texture.

Wine suggestion

July 27, 2022 /tina oblak
riso Arborio, riso Vialone Nano, riso Carnaroli, Spring vegetable risotto, vegetarian risotto, vegan risotto, plant based risotto, fresh tomatoes, fresh sweet peas, carrots, green asparagus, courgettes
Adriatic Recipe, child friendly dish, child friendly meal, dinner, Easy recipe, entrée course, family friendly dish, family friendly meal, first course, first course dish, first course meal, Healthy, healthy mael, hearty dish, Istrian cuisine, Istrian dish, Istrian food, Istrian gastronomy, light meal, main course, main dish, main vegetarian dish, main vegetarian meal, Nutritious, Nutritious dish, recipe from Northern Ital, Risotti, Risotto, Rustic dish, simple recipe, Slovenian cuisine, Slovenian food, Slovenian gastronomy, Spring dish, Spring recipe, Starters, summer dish, summer recipe, supper, Vegan, Vegetables, Vegetarian
Comment

Cooked fennel salad with lemon and olive oil dressing Istrian Recipe

Beans and Srdines
July 20, 2022 by tina oblak in Adriatic Recipe, All year round recipe, dinner, Easy recipe, family friendly dish, family friendly meal, Healthy, Istrian cuisine, Istrian dish, Istrian food, Istrian gastronomy, light meal, Nutritious, Nutritious dish, Root vegetables, Rustic dish, Salads, Side Dishes, simple recipe, Slovenian cuisine, Slovenian food, Slovenian gastronomy, supper, Vegan, Vegetable side dish, Vegetables, Vegetarian

Cooked fennel salad is a great choice when you want to complete a meal with a simple salad, all you need is a few humble fresh fennel bulbs and an uncomplicated olive oil and lemon dressing which will get soaked up with some crunchy bread.

This fennel salad is rustic and informal, very healthy and nutritious and a great companion to grilled meats and fish, very fresh and incredibly easy to prepare, can be done in advance, stored in a fridge and served cold on a hot summer day.

Along the Slovenian coast, where I grew up, the area is blessed with Mediterranean climate, which subsequently means that there is an abundance of fennel, a very much loved vegetable by the locals, it is traditionally eaten raw or cooked in salads, or braised, which does go down a treat. Wild fennel is also abundant and grows just about anywhere it can, the fronds are used in the local cuisine instead of flat leaf parsley or in combination with.

I am sharing here this traditional and unpretentious cooked fennel salad that it has been made in my family, and by the locals, well, since forever.

If you go so the food store, see some lovely fennel bulbs, and not quite sure what to do with them, you can start with this recipe...

Ingredients

Serves 4-6 as part of meal

  • few fresh fennel bulbs, approximately 900g (smaller bulbs are better for this dish)

  • extra virgin olive oil, a very generous drizzle

  • 1 lemon (juice of ½ or whole lemon, depending on a taste)

  • fresh flat leaf parsley, roughly or finely chopped (amount to taste)

  • sea salt

  • black pepper, optional

  • fennel fronds, optional

Method

Wash fennel bulbs under cold running water and dry them with kitchen paper or clean kitchen towel.

Place the bulbs on the chopping board and cut off the hard hollow stalks from the bulb which are quite tough and very fibrous. Cut the feathery fronds from the stalks if you are using them for this dish for adding extra flavour and garnish.

Discard the stalks or use them in other recipes for soups and stews, you can use them as a bed for roasted chicken or other meats, and roasted fish.

Trim off a thin layer of the root end of the bulb (the base of the fennel bulb).

View fullsize Cooked fennel salad 4.jpg
View fullsize Cooked fennel salad 5.jpg

Stand your fennel straight up and slice in half.

Check how big the core is, if it is quite big, it is a good idea to remove it for this recipe, as they are very fibrous. The cooking time for this recipe is fairly short, and the core, if not removed, could stay quite hard.

View fullsize Cooked fennel salad 6.jpg
View fullsize Cooked fennel salad 7.jpg

To remove the core, take a knife at a 45 degree angle on both sides of the core and slice in, the core will pop out easily.

Place the fennel in a pot, add boiling water, about ¾ up, alternatively you can steam the fennel.

Put the lid on and gently simmer for about 15 minutes, cooking time will depend on the size of the fennel pieces and the desired consistency.

Adjust cooking time, depending on whether you want the fennel quite soft, or prefer it with still quite a bit of a bite.

View fullsize Cooked fennel salad 9.jpg
View fullsize Cooked fennel salad 10.jpg

Drain in a colander, run under cold water, leave to drain well and cool a bit.

Slice cooked fennel to your liking.

View fullsize Cooked fennel salad 11.jpg
View fullsize Cooked fennel salad 12.jpg

Transfer sliced fennel onto a serving plate.

Season with sea salt and black pepper, if using.

Dress cooked fennel with very generous extra virgin olive oil and lemon juice.

Sprinkle with chopped fresh flat leaf parsley an fennel fronds, if using.

Serve at room temperature or cold, place the serving plate in the middle of the table for everyone to help themselves, and make sure you have some crunchy bread to soak up all those juices.

Just a thought

For extra flavour, sprinkle dressed fennel salad with dried garlic, not a very traditional way of serving, but a nice addition or a variation of the recipe.

July 20, 2022 /tina oblak
fresh fennel bulb, cooked fennel, fennel salad with olive oil and lemon dressing, summer salads
Adriatic Recipe, All year round recipe, dinner, Easy recipe, family friendly dish, family friendly meal, Healthy, Istrian cuisine, Istrian dish, Istrian food, Istrian gastronomy, light meal, Nutritious, Nutritious dish, Root vegetables, Rustic dish, Salads, Side Dishes, simple recipe, Slovenian cuisine, Slovenian food, Slovenian gastronomy, supper, Vegan, Vegetable side dish, Vegetables, Vegetarian
Comment

Šataraš - Bell peppers, onions and tomato Balkan inspired stew with scrambled eggs Recipe

Beans and Sardines
July 13, 2022 by tina oblak in Adriatic Recipe, Appetizers, Balkan dish, breakfast, brunch, child friendly dish, child friendly meal, dinner, Easy recipe, entrée course, family friendly dish, family friendly meal, first course, first course dish, first course meal, Healthy, healthy mael, hearty dish, Istrian cuisine, Istrian dish, Istrian food, Istrian gastronomy, main course, main dish, Nutritious, Nutritious dish, Rustic dish, simple recipe, Slovenian cuisine, Slovenian food, Slovenian gastronomy, Spring dish, Spring recipe, Starters, stew, Vegetable side dish, Vegetables, Vegetarian, summer recipe, summer dish, vegetarian summer stew

Šataraš (pronounced Satarash) is a stew like dish made with fresh bell peppers, ripe sweet tomatoes, onions, and scrambled eggs, it is similar to Shakshuka which has a sunny-side up eggs and makes a perfect main meal choice in the summer when the vegetables used for the dish are in full season. This dish is very well known in the Balkan regions but not so much to the rest of the world.

Eating šataraš just make you happy, and it feels like having a sunshine on a plate, as the addition of the eggs makes this dish colourful, extra flavourful and filling, it is also healthy and fresh.

This is one of my absolute favourite childhood dishes and if you like bell peppers this recipe is one of those you will come back to it time and time again as the recipe is very easy to make and the base can be cooked well in advance.

This dish is normally homemade and not found in the restaurants, it is typically served for lunch or dinner but it is also a great choice for breakfast or brunch.

Šataraš travelled from the neighbouring Balkans and stayed in Slovenian Istra, where it has been a very welcomed guest and has been enjoyed by the generations of locals in the area where gastronomy has been strongly shaped and enriched by the Balkan culinary traditions as well as Venetian and Austro-Hungarian.

I am sharing here my mother's recipe for šataraš with which she has delighted us during long hot summer months. If you do try it, then I think you will soon realize how delicious this dish truly is in its humble simplicity.

Ingredients

Serves 4

  • 4 bell peppers, a combination of yellow and green (each bell pepper weighing about 200g), wash, dry, remove the seeds and white filaments, and cut into strips (you can use more or less peppers according to your preference)

  • 4 vine tomatoes (each weighing about 150g) or other types of sweet and ripe tomatoes, washed and roughly chopped (use more or less tomatoes according your liking)

  • 1 onion (about 170g), peeled and finely sliced

  • 4 Tbsp extra virgin olive oil

  • 4 eggs

  • sea salt

  • black pepper

  • fresh flat leaf parsley, roughly chopped, for serving, optional

Method

Place extra virgin olive oil in a fairly large frying pan, add sliced onions, a pinch of sea salt and cook for about 10 minutes on a gentle heat until the onions become soft and translucent, stirring occasionally.

View fullsize Sataras 5.jpg
View fullsize Sataras 6.jpg

Add strips of bell peppers and stir in with the onions. Cover with the lid (the steam will help to cook down and soften the peppers) and cook on a gentle heat for up to about 30 minutes.

View fullsize Sataras 7.jpg
View fullsize Sataras 8.jpg

Add chopped tomatoes, cover with the lid, and cook on a gentle heat, stirring occasionally, for about 20-30 minutes, or until tomatoes are cooked down and soft.

If the mixture has too much liquid (this will depend on how watery the tomatoes you are using are) take the lid off and cook further for a few minutes or until all of the liquid evaporates.

View fullsize Sataras 9.jpg
View fullsize Sataras 10.jpg

In a small bowl crack the eggs, slightly whisk, add sea salt and pepper.

Pour the egg mixture over the pepper stew, mix and stir and cook until desired consistency.

View fullsize Sataras 11.jpg
View fullsize Sataras 12.jpg

Sprinkle with roughly chopped fresh parsley, optional, and serve immediately with plenty of rustic crunchy bread.

Just a thought

This dish is best served hot, equally delicious at room temperature.

You can prepare pepper, onion and tomato stew well in advance, keep it in a fridge in an airtight container for about 3 days, and pour the whisked eggs on a pepper base just before you want to complete the dish and ready to serve it.

The pepper stew (without the egg) is also great served with grilled and barbecued meats, a great base for a risotto or a pasta dish, and it can also be enjoyed with polenta or an egg frittata.

Pepper, onion and tomato base is suitable for freezing.

Wine suggestion

Salento Negroamaro Rosato IGT “Calafuria” 2021 - Tormaresca

July 13, 2022 /tina oblak
bell peppers, fresh bell peppers, yellow peppers, green peppers, tomatoes, scrambled eggs with peppers, peppers stew
Adriatic Recipe, Appetizers, Balkan dish, breakfast, brunch, child friendly dish, child friendly meal, dinner, Easy recipe, entrée course, family friendly dish, family friendly meal, first course, first course dish, first course meal, Healthy, healthy mael, hearty dish, Istrian cuisine, Istrian dish, Istrian food, Istrian gastronomy, main course, main dish, Nutritious, Nutritious dish, Rustic dish, simple recipe, Slovenian cuisine, Slovenian food, Slovenian gastronomy, Spring dish, Spring recipe, Starters, stew, Vegetable side dish, Vegetables, Vegetarian, summer recipe, summer dish, vegetarian summer stew
Comment

Whole baked Sea Bass on roasted potatoes Istrian Recipe

Beans and Sardines
July 06, 2022 by tina oblak in Adriatic Recipe, All year round recipe, baked dish, baked fish, child friendly dish, child friendly meal, dinner, Easy recipe, family friendly dish, family friendly meal, Fish & Seefood, Healthy, healthy mael, hearty dish, Istrian cuisine, Istrian dish, Istrian food, Istrian gastronomy, light fish course, light meal, main course, main dish, main fish course, main fish meal, Nutritious, Nutritious dish, roasted fish, Rustic dish, simple recipe, Slovenian cuisine, Slovenian food, Slovenian gastronomy, supper

Whole baked sea bass on a layer of potatoes is very simple, easy, and healthy recipe for oven-roasted fish that calls for only a few fresh simple ingredients, and it is a perfect choice for a light meal main course option. This delicate fish, baked whole in the oven, is effortless to make, flavoursome and never fails to impress your guests. The recipe gives you a superior taste, the flesh remains really tender and moist and the potatoes, during the baking, absorb all the wonderful flavours and aromas from the garlic, onions, olive oil and the juices from the fish.

This basic method of roasting the whole fish on the bone on a bed of sliced potatoes represents the most common and traditional way of preparing and eating fish along the Slovenian coast in restaurants as well as in the households. It is considered one of the best fish based recipes by the locals, very often made on Sundays as a Sunday roast choice, and as a alternative to a meat roast.

I am sharing here my family recipe for whole baked sea bass with potatoes that would traditionally be accompanied by a vegetable side dish such as (depending on what is available in the season) sautéed courgettes, peas or bell peppers, green beans with tomatoes, borlotti beans salad, creamed spinach, braised fennel and different types of seasonal salads, just to mention a few...

Ingredients

Serves 4

  • 4 fresh whole sea bass (each weighing around 300g), cleaned, scaled and gutted (your fishmonger will be happy to do this for you)

  • potatoes (about 800g), peeled and sliced (roughly3-5mm)

  • 1 small onion (about 50g), peeled and very finely chopped

  • 2 cloves of garlic, peeled and thinly sliced

  • 4 small sprigs of fresh rosemary (small enough to fit into the body cavity of the fish)

  • 4 Tbsp extra virgin olive oil (plus some extra for drizzling)

  • sea salt

  • black pepper

  • 100ml white wine, fish stock or water (I used a ¼ Tsp of dry granulated fish powder and dissolved it into a 100ml of hot water)

  • fresh flat leaf parsley, finely chopped, for serving, optional

  • fresh lemon, for serving, optional

Method

Preheat the oven to 220C static or equivalent.

Line a baking tray with non stick baking parchment.

Peel the potatoes and cut them with the knife or a mandolin slicer into slices the thickness of about 3-5mm.

Place sliced potatoes into a bowl and add finely chopped onions, sliced garlic, extra virgin olive oil, season with sea salt and black pepper and mix well.

Transfer the potato mixture onto a baking tray and with your hands arrange them, distribute evenly more or less, into a single layer (they will overlap a bit).

Put in the oven and bake for 15-20 minutes.

While the potatoes are baking prepare the fish.

View fullsize Roasted sea bass with potatoes 7.jpg
View fullsize Roasted sea bass with potatoes 8.jpg

Wash the fish thoroughly inside and out under cold running water and pat dry well the fish with the kitchen paper.

With a sharp knife, slash the fish 3 to 5 times through the flesh, about 5mm deep, almost to the bone.

Season with sea salt and black pepper and put a small sprig of fresh rosemary into the body cavity of each fish.

Take the potatoes out of the oven (after 15-20 minutes) and place the sea bass on top of the potatoes, side by side, scored side up and drizzle each fish with a bit of extra virgin olive oil.

Cover the baking tray with the aluminium foil, put it back into the oven and bake for 30 minutes.

View fullsize Roasted sea bass with potatoes 9.jpg
View fullsize Roasted sea bass with potatoes 10.jpg

Remove the aluminium foil and bake further for 10 minutes.

View fullsize Roasted sea bass with potatoes 11.jpg
View fullsize Roasted sea bass with potatoes 12.jpg

Pour white wine, fish stock or water over the fish and potatoes and bake further for about 5-6 minutes.

Serve hot with a sprinkle of finely chopped fresh flat leaf parsley and an extra drizzle of extra virgin olive oil and a squeeze of lemon.

Just a thought

If you end up with a leftover baked sea bass, it is delecious eaten cold or at a room temeprature with a drizzle of olive oil and finely chopped fresh flat parsley and accompanied with some cruncy bread, or alternatively you can make a fish spread (see my recipe for Rustic Sea Bream spread)

Wine suggestion

Fiano di Avellino DOCG “Ciro 906” 2019 - Ciro Picariello

July 06, 2022 /tina oblak
fresh sea bass, whole sea bass, whole baked sea bass, whole roasted sea bass, roasted sliced potatoes, branzino al forno con le patate, brancin v pecici s krompirjem, roasted fish
Adriatic Recipe, All year round recipe, baked dish, baked fish, child friendly dish, child friendly meal, dinner, Easy recipe, family friendly dish, family friendly meal, Fish & Seefood, Healthy, healthy mael, hearty dish, Istrian cuisine, Istrian dish, Istrian food, Istrian gastronomy, light fish course, light meal, main course, main dish, main fish course, main fish meal, Nutritious, Nutritious dish, roasted fish, Rustic dish, simple recipe, Slovenian cuisine, Slovenian food, Slovenian gastronomy, supper
Comment

Cherry strudel Istrian Recipe

Beans and Sardines
June 29, 2022 by tina oblak in Adriatic Recipe, All year round recipe, Austrian inspired dishes, baked dish, baking, breakfast, child friendly dish, dessert, easy baking, Easy recipe, home baking, Hungarian inspired dishes, Istrian cuisine, Istrian dish, Istrian food, Istrian gastronomy, Mitteleuropean cuisine, Mitteleuropean dish, Mitteleuropean food, Mitteleuropean recipes, pudding, Rustic dish, simple recipe, Slovenian cuisine, Slovenian food, Slovenian gastronomy, Snacks, sweet course, Sweet Things, sweet nibbles

Cherry Strudel is a variation of a traditional and well known Viennese Apple Strudel, it is a very scrumptious dessert made with very thin elastic pastry, and the filling contains fresh cherries, a bit of sugar, lemon zest and breadcrumbs. If you are thinking that you cannot be bothered pitting the cherries and making your own dough, I can guarantee you an equal delicious results using store bought pastry and jarred, tinned or frozen cherries, no hassle involved!

Apple strudel dates back to1696, when it was first mentioned, and “conquered” all the countries that were once part of Austro-Hungarian Empire, but it is believed that strudel originated from baklava (a famous Turkish pastry based dessert) and travelled to Austria with Ottoman's Empire and through Hungarian cuisine.

Apple strudel has been a big hit in all the countries that were once ruled by Austro-Hungarian Empire, but it is in the North Adriatic that this new variation was created giving originality to a very unique and less known type of strudel. A cherry strudel, is a very much loved seasonal dessert in Slovenian Istra, (Češnjev štrudelj or Češnjev zavitek) where I come from, and neighbouring Trieste in Italy.

Cherry strudel has always been very popular, and when fresh cherries are in season, this dessert is regularly baked in the households, and if you are lucky enough, sometimes you can find it on the menus of informal family run restaurants.

This irresistible dessert really takes me back to my childhood. My mother frequently baked it with fresh cherries picked by ourselves in the garden, or were very generously given by our neighbours, it is the garden where I, as a child, spent a lot of time when my parent were working in the restaurant. Along with the girl next door, who was only a year older than me, we used to pick cherries from the tree that had the reddest and ripest cherries, climbed up it, found a comfortable branch to sit on and munch on cherries until we were completely full, chatting and giggling...

When we were called for lunch, there was little appetite left for it, no matter how delicious it was, and my mother would only looked at us and had the answer, our T-shirts were stained, our lips and mouths deep red in colour from the cherry juices...she never got cross with us, just smiled and shook her head...since my mother used to do exactly the same when she was small...

Looking back, it just made me realize how lucky I was, the first time I ever had the chance to buy fresh cherries was when as an adult I moved to England...

Cherry strudel is traditionally served warm and generously dusted (there is no sugar in pastry) with regular icing sugar or vanilla flavoured icing sugar.

You can turn this simple and rustic pudding into an elegant dessert and serve it with whipped cream, vanilla ice cream or vanilla sauce.

I am sharing here my mother's recipe, which is slightly off the beaten track, for cherry strudel made with home-made pastry and fresh cherries, however you can still indulge yourself and cut corners a bit by using a store bought ready made puff pastry and frozen, tinned or jarred cherries.

Ingredients

Serves 10-12

You can use store bought ready made puff pastry, shortcrust or filo pastry.

Ingredients for home-made strudel dough

  • 250g all purpose flour

  • 1 egg, lightly beaten

  • 3 Tbsp neutral tasting vegetable oil (I used sunflower oil)

  • 2 Tbsp white wine vinegar or lemon juice

  • sea salt, a pinch

  • 50ml-60ml lukewarm water, or as needed

Ingredients for cherry filling

  • 700g fresh cherries, washed and pitted (can also use tinned or jarred cherries or store bought frozen cherries, defrost and drain well)

  • 100g caster sugar

  • 1 unwaxed lemon, grated zest

  • 20g butter plus, some extra for brushing

  • 80g dry fine breadcrumbs

  • sea salt, a pinch

  • icing sugar, for dusting

Method

To make the dough

Place the flour in a big mixing bowl and make a well.

In a separate, smaller bowl, mix slightly beaten egg, oil, vinegar or lemon juice, (the acidity will help to relax gluten in the flour making the dough more stretchy) a pinch of sea salt and lukewarm water. Pour the mixture into a flour well.

With the fork, stir the mixture with the flour until well combined. Add a little bit of flour at a time, until the dough comes nicely together, then work the dough with your hands.

Transfer the dough on a lightly floured working surface and knead the dough for about 10 minutes or until nice and smooth.

After this time, the dough should be moist and elastic and not sticky. Add a little more flour if the dough is too sticky to knead.

In order to further encourage the development of the gluten, resulting in a very elastic dough, slam the dough onto the working surface a few times.

Shape the dough into a smooth ball and place it in a clean bowl, previously brushed with oil.

Cover the bowl with cling film and let the dough rest for about 1 hour at room temperature (strudel dough has no yeast, so do not expect the dough to rise or double in size, it needs to rest for gluten to relax).

View fullsize Apple Strudel 4.jpg
View fullsize Apple Strudel 5.jpg

To make the filling

In a small pan melt the butter over medium-low heat. When the butter is melted add breadcrumbs, toast them, stirring constantly until golden-brown in colour. Remove from the heat, cool and set aside.

Wash the cherries, dry them a bit, take the stalks off and pit them. Place them in a colander and leave them to drain until needed.

Preheat the oven to 200C static or equivalent.

Divide the dough in half to make two separate strudels as easier to work with.

Place half of the dough on a clean and lightly floured table cloth. Flour the rolling pin and start rolling out the dough. While rolling, to prevent sticking, flour the dough and the surface every now and then.

When the dough reaches about 20 cm in diameter pick it up and keep stretching it. The best way to do so is to use the back of your hands and in particular the knuckles but make sure you remove any sharp jewellery first.

When the dough becomes difficult to handle as it becomes bigger and thinner, place it on a lightly floured tablecloth.

With your hands (tip of the fingers) keep stretching gently the dough on the tablecloth to paper thin consistency, from the inside to the outside working your way round the sheet of dough.

Keep stretching until the sheet of dough starts to look almost translucent and you will be able to see a pattern of your tablecloth through it.

You should end up with a thin sheet of dough stretched more or less into a rectangular shape with a diameter of approximately 40 cm which will fit into a standard 40 cm baking tray.

If you notice that the edges are still a bit thick, stretch them further very gently or cut them off. If you leave the edges thick, when rolling the strudel, they will form quite a thick layer at the very centre of the strudel risking to remain slightly underbaked.

View fullsize Apple Strudel 9.jpg
View fullsize Cherry Strudel 16.jpg

Transfer the cherries into a bowl, add sugar, breadcrumbs mixture, lemon zest and mix well to incorporate all the ingredients.

View fullsize Cherry Strudel 11.jpg
View fullsize Cherry Strudel 12.jpg
View fullsize Cherry Strudel 13.jpg
View fullsize Cherry Strudel 14.jpg

Place and spoon evenly the cherry mixture over one half of the dough sheet leaving about 2-3cm to the edge. Fold in the side ends of the sheet to prevent filling coming out during rolling.

View fullsize Cherry Strudel 17.jpg
View fullsize Cherry Strudel 18.jpg

Using the tablecloth to help you, roll the dough all the way and roll it directly onto a sheet of baking parchment, seam side down.

View fullsize Cherry Strudel 19.jpg
View fullsize Cherry Strudel 20.jpg

Transfer very gently the baking parchment with the rolled strudel on a baking tray.

Repeat the process with the other half of the dough.

View fullsize Cherry Strudel 21.jpg
View fullsize Cherry Strudel 22.jpg

Brush it with a bit of melted butter.

Bake on the middle shelf for 40-45 minutes.

View fullsize Cherry Strudel 23.jpg
View fullsize Cherry Strudel 24.jpg

Cherry Strudel is ready when the crust turns nice and golden.

Take it out of the oven and let it cool completely. Dust it with icing sugar, cut into slices and serve it on its own or with vanilla ice cream or cream.

Just a thought

You can make the strudel dough ahead and keep it refrigerated for up to two days. Before using the dough take it out of the fridge allowing it to come to a room temperature.

Cherry strudel is best eaten the day is made. You can keep cherry strudel in an airtight container in the fridge for 3-4 days or overnight on the counter.

Wine suggestion

Friuli Colli Orientali Verduzzo Sottozona Cialla DOC "Verduzzo di Cialla" 2016 - Ronchi di Cialla

June 29, 2022 /tina oblak
fresh cherries, Češnjev štrudelj, Češnjev zavitek, jarred cherries, tinned cherries, frozen cherries, store bought pastry, filo pastry, ready made puff pastry, shortcrust pastry, strudel pastry, strudel dough, homemade strudel dough, strudel di ciliege
Adriatic Recipe, All year round recipe, Austrian inspired dishes, baked dish, baking, breakfast, child friendly dish, dessert, easy baking, Easy recipe, home baking, Hungarian inspired dishes, Istrian cuisine, Istrian dish, Istrian food, Istrian gastronomy, Mitteleuropean cuisine, Mitteleuropean dish, Mitteleuropean food, Mitteleuropean recipes, pudding, Rustic dish, simple recipe, Slovenian cuisine, Slovenian food, Slovenian gastronomy, Snacks, sweet course, Sweet Things, sweet nibbles
Comment

Elderflower fritters Recipe

Beans and Sardines
June 22, 2022 by tina oblak in Adriatic Recipe, Appetizers, Austrian inspired dishes, breakfast, Central European recipes, child friendly dish, child friendly meal, dessert, Easy recipe, family friendly dish, family friendly meal, foraging, Istrian cuisine, Istrian dish, Istrian food, Istrian gastronomy, main course, main dish, main fish course, Rustic dish, Slovenian cuisine, Slovenian food, Slovenian gastronomy, Small bites, Snacks, Spring dish, Spring recipe, sweet course, sweet finger food, sweet nibbles, Sweet Things, Vegetarian

Bring the sunshine and the scent of summer in your kitchen with these elderflower fritters which are lightly fried elderflowers in a pancake batter like, they are golden, crunchy and a delicious dessert with a difference, they are a real treat and a delightful seasonal delicacy.

The culinary use of elderflower has been revolutionized in the past few years, but in the whole of Slovenia, including the Slovenian coast where I come from, elderflower fritters are a dish that is very old and traditional.

Those of you that have been reading my posts on this blog for a while, will know that I come from a family of very passionate foragers, and so there should be no surprise that this fragrant flower ends up on a plate. My maternal grandmother, stara mama Iva, would make them when we were little.

We children got away with eating just that, with a glass of milk, and skipping altogether a main evening meal, which is quite a common practice in neighbouring Austria.

If you are not too familiar with the elderflower, please go and read my page with the recipe for elderflower cordial where I explain a bit more in detail where, when, and how to pick this edible, fragrant, and sweet flower.

What can be better than going on a walk on a sunny day and bring home a free meal...try these elderflower fritters, you will be hooked, and will have another reason to look forward to a following spring/summer.

Ingredients

Serves 4-6 as a dessert (2-3 heads per person)

  • about 10-14 elderflower heads with their stems

  • 100g all purpose (plain) flour

  • 1egg

  • 70ml milk

  • 70ml very cold sparkling water

  • sea salt, a pinch

  • 2 tsp caster sugar, optional

  • oil for frying (neutral tasting, I used sunflower oil)

  • icing sugar or vanilla icing sugar, for dusting

Method

Prepare elderflower heads by cutting the stems with the scissors but leaving at least 5cm of stem for easy handling (in other words enough stem to hold them by). Very gently shake any insects and dirt off your flower heads, but do not be tempted to wash the flower heads as you will loose the flavour.

In a mixing bowl, using a hand whisk, whisk the egg, add milk, sea salt and sugar, if using, and mix until well combined.

Add the flour gradually and whisk until smooth with no lumps, then add sparkling water which will help lighten the batter, set aside an leave it to rest for about 30 minutes.

Heat about 5cm of oil a pan (big enough to accommodate the largest elderflower head) until hot (180C on a temperature probe). You will know the oil is ready when a drop of batter bubbles immediately and turns golden in about 5 seconds.

Holding the elderflower by their stems, dip each elderflower head into the batter, so they are coated all over, gently shake off excess batter.

View fullsize Elderflowers fritters 10.jpg
View fullsize Elderflowers fritters 17.jpg

Drop the flowers into the pan with hot oil (flower side down) and fry for about 30 seconds. Fry one flower at a time.

They should be lightly golden in colour and not too brown.

Remove with a slotted spoon and dry on kitchen paper.

Dust generously with icing sugar, serve and eat while still warm and crunchy.

Delicious also drizzled with honey, accompanied with vanilla ice cream, lemon sorbet or fresh strawberries, cherries or other seasonal fresh fruit of your choice.

Just a thought

Elderflower fritters ideally should not be made well in advance as the batter, which should be crisp, will become soft.

Wine suggestion

Friuli Colli Orientali Traminer Aromatico DOC 2021-Zorzettig

June 22, 2022 /tina oblak
edible flower, elderflower, deep fried desserts, deep fried elerflower, fiori di sanbuco fritti, ocvrti bezgovi cvetovi
Adriatic Recipe, Appetizers, Austrian inspired dishes, breakfast, Central European recipes, child friendly dish, child friendly meal, dessert, Easy recipe, family friendly dish, family friendly meal, foraging, Istrian cuisine, Istrian dish, Istrian food, Istrian gastronomy, main course, main dish, main fish course, Rustic dish, Slovenian cuisine, Slovenian food, Slovenian gastronomy, Small bites, Snacks, Spring dish, Spring recipe, sweet course, sweet finger food, sweet nibbles, Sweet Things, Vegetarian
Comment

Egg frittata with wild herbs Istrian Recipe

Beans and Sardines
June 16, 2022 by tina oblak in Adriatic Recipe, All year round recipe, Appetizers, baked dish, bite-sized nibbles, breakfast, brunch, Canapés, dinner, Easy recipe, entrée course, family friendly dish, family friendly meal, Finger food, first course, first course dish, first course meal, foraging, Healthy, healthy mael, Istrian cuisine, Istrian dish, Istrian food, Istrian gastronomy, light meal, main course, main dish, Nutritious, Nutritious dish, Rustic dish, simple recipe, Slovenian cuisine, Slovenian food, Slovenian gastronomy, Small bites, Snacks, Spring dish, Spring recipe, Starters, supper, Vegetarian, Fresh herbs

Egg frittata with wild herbs is a very simple and rustic dish, quick to make and a perfect recipe choice for an easy and uncomplicated midweek or weekend lunch, dinner, brunch or breakfast.

It is delicious when eaten hot, but equally very tasty at room temperature or cold, it can be made ahead, providing a great picnic solution, and frittata cut into small bite size pieces will make a brilliant finger food feeding larger groups served together with some drinks.

This humble frittata is a very traditional dish in the Slovenian Istra where I grew up, it is similar to an omelette, it is Italian in origin (Italian word frittata roughly translates to “fried”) and to me, is more than just a quick meal solution.

This type of frittata together with other two most common variations (frittata with dry sausage and frittata with wild asparagus and pancetta) represent a real speciality in Slovenian Istra which, due to close geographical proximity to Italy, made this dish very popular and is referred by locals as Fritaia de erbe, Fritaja, Fritata or Frtalja, Fritaia, and all of these words derive from the Venetian word fritaia, given Venice's domination of the region.

Both my paternal and maternal grandfathers loved all variations of frittata and would have them for merenda (a dialect word, from Italian meaning snack) indicating in the past a quite substantial late morning breakfast (a slightly less sophisticated version of a “modern” brunch) for pheasants, farmers, fishermen and workers. They all started work at dawn, so by mid morning, when they finished working, and before returning home for lunch, they were all quite hungry, and more than ready to have some food to replenish the energy. Nowadays, merenda indicates a light mid morning or mid afternoon snack, that can be savoury or sweet, and of course, children always push for a sweet option...

Both my grandfathers would pick up wild herbs (spring providing the widest range) when returning home from spending a morning working in their vegetable gardens, orchards or olive groves, in which case egg frittata with wild herbs would be prepared for lunch or dinner.

Wild herbs frittata and other types of frittata were for a long time considered a dish for only the poorest people, but thanks to new gastronomic traditions, they are very proudly back on the menus of many homes and restaurants, and given the true dignity they deserve. They are quick and cheap to prepare, have low caloric intake, and are abundant with nutrients from freshly picked herbs in the local area.

I am sharing here a very easy family recipe for this modest frittata. All you need to do is take a nice walk in the natural world around you - forests, meadows etc., and pick some seasonal wild herbs. What can be easier than that?

Well, if you are mainly in an urban area, you can skip the walk and use store bought baby spinach, wild rocket, some fresh basil and flat leaf parsley and you are ready to go...

Ingredients

Serves 4

  • 100g-150g (about 4 full handfuls) fresh mixed wild herbs, washed and finely chopped

    In this recipe I used wild garlic leaves, wild fennel, stinging nettle, dandelion leaves, mint, chives, lemon balm, sage, marjoram, flat leaf parsley, basil.

    You can also use store bought baby spinach, wild rocket, any combination, proportion does not really matter as long as you have more or less the total amount of fresh herbs stated in the ingredients list.

  • 2 Tbsp extra virgin olive oil

  • 8 medium sized eggs (in this recipe I calculated 2 eggs per person)

  • sea salt

  • black pepper

Method

Wash thoroughly fresh mixed herbs, dry them using a salad spinner, if you have one.

Finely chop the herbs and set aside.

View fullsize Egg frittata with wild herbs 4.jpg
View fullsize Egg frittata with wild herbs 6.jpg

Crack the eggs into a mixing bowl and whisk well, add sea salt and black pepper.

Add finely chopped herbs into a mixing bowl and mix well with the egg mixture.

Put extra virgin olive oil in a fairly large non stick frying pan (28cm or 30cm) and heat it up a bit.

Pour the egg and wild herbs mixture into a pan, cover with a lid (glass lid with steam hole works very well if you have it) and cook on a gentle heat.

The frittata is ready and cooked when the underside is set and the egg mixture on the surface no longer has “runny and raw” consistency.

View fullsize Egg frittata with wild herbs 7a.jpg
View fullsize Egg frittata with wild herbs 10.jpg

Hold a plate upside-down over the pan and turn the two over together so that the frittata inverts on to the plate. Slide the frittata back into the pan and cook for a further minute or so.

Fresh herbs frittata can be eaten and enjoyed warm, room temperature or cold and will make a complete meal accompanied by some salad, fresh crunchy bread, soft cooked or grilled polenta and it also makes a great sandwich filler.

If you want to enjoy it Istrian style, pour yourself a small glass of red wine.

Just a thought

This type of frittata will keep in the fridge in an air tight container for about two days and is not suitable for freezing.

In this recipe, I have chosen to cook the frittata in a traditional way, on the stove with a lid, as my family has always used this method. However, if you are familiar cooking the frittata in the oven, and that is your preferred method, it is perfectly fine to do so.

Wine suggestion

Friuli Colli Orientali Ribolla Gialla DOC 2021 - Torre Rosazza

June 16, 2022 /tina oblak
fresh herbs, fresh wild herbs, wild herbs, fresh parsley, fresh basil, fresh sage, fresh wild dill, fresh wild garlic, stinging nettle, dandelion leaves, fresh mint, Frtalja z zelišči, Fritaia z zelišči, Fritaia de erbe, meadow herbs, edible plants, wild garlic leaves
Adriatic Recipe, All year round recipe, Appetizers, baked dish, bite-sized nibbles, breakfast, brunch, Canapés, dinner, Easy recipe, entrée course, family friendly dish, family friendly meal, Finger food, first course, first course dish, first course meal, foraging, Healthy, healthy mael, Istrian cuisine, Istrian dish, Istrian food, Istrian gastronomy, light meal, main course, main dish, Nutritious, Nutritious dish, Rustic dish, simple recipe, Slovenian cuisine, Slovenian food, Slovenian gastronomy, Small bites, Snacks, Spring dish, Spring recipe, Starters, supper, Vegetarian, Fresh herbs
Comment

Pork risotto Venetian inspired Recipe

Beans and Sardines
June 08, 2022 by tina oblak in Adriatic Recipe, All year round recipe, Autumnal dish, Autumnal recipe, child friendly dish, child friendly meal, dinner, Easy recipe, entrée course, family friendly dish, family friendly meal, first course, first course dish, first course meal, hearty dish, Istrian cuisine, Istrian dish, Istrian food, Istrian gastronomy, main course, main dish, Meat, recipe from Northern Ital, Risotti, Rustic dish, Spring dish, Spring recipe, Starters, supper, Venetian dish, Winter dish, Winter recipe, Risotto, simple recipe

Pork risotto is a perfect recipe when you want to rustle up a quick meal, using only a few fresh simple ingredients. This risotto is easy and uncomplicated to make, and is a delicious, creamy, and very comforting meal. I would not be surprised if it becomes your all time favourite risotto recipe.

The actual name for this pork risotto is Risotto all'Isolana that originated, and is famous in the area of Isola della Scala, situated between Verona and Mantua, in the region of Veneto in Italy. This is where Vialone Nano (type of short grain risotto rice) is widely cultivated. The authentic recipe for this risotto includes the use of two types of meat, a combination of veal and pork, and ground cinnamon, and this is how it is also cooked and eaten in Venice.

In Slovenian Istra, however, where I grew up, and where numerous dishes were inspired from Venetian cooking, it should be no surprise that an Istrian variation of this risotto was created using only pork and omitting ground cinnamon, as this exotic spice was difficult to get hold of, and was out of reach for most locals, and only used to make desserts and puddings.

This type of risotto is a risotto of my childhood and is the one that my mother used to prepare very often, and here I am sharing her recipe.

Ingredients

Serves 4

  • 400g pork shoulder steaks, trimmed off excessive fat and diced

  • 300g risotto rice (like Arborio, Vialone Nano or Carnaroli)

  • 1 medium onion (about 150g), peeled and finely chopped

  • 1 clove of garlic, peeled and crushed

  • 2 Tbsp extra virgin olive oil

  • 1 litre of beef or other meat stock (home made or good quality store bought stock)

  • few leaves of fresh sage, finely chopped

  • one sprig of fresh rosemary, needles removed and finely chopped

  • sea salt

  • black pepper

  • Parmiggiano Reggiano or Grana Padano cheese, finely grated, to serve (optional)

Method

Before starting making risotto have your boiling hot beef or other meat stock ready to hand for later.

Place in a pan extra virgin olive oil, finely chopped onions, crushed garlic and trimmed and diced pork shoulder steaks.

Add a pinch of salt, a bit of black pepper and gently fry on a fairly low heat until the onions become soft and translucent and the meat light brown in colour.

View fullsize Pork risotto Venetian inspired Recipe 2.jpg
View fullsize Pork risotto Venetian inspired Recipe 4.jpg

Add finely chopped herbs and about 100ml of water. With a wooden spoon mix and scrap all the bits and pieces from the bottom of the pan, deglaze and cook further for a few minutes on a gentle heat until all the water evaporates.

View fullsize Pork risotto Venetian inspired Recipe 5.jpg
View fullsize Pork risotto Venetian inspired Recipe 6.jpg

Add risotto rice and toast briefly, stirring constantly to avoid sticking to the pan.

View fullsize Pork risotto Venetian inspired Recipe 7.jpg
View fullsize Pork risotto Venetian inspired Recipe 8.jpg

Start gradually adding ladles of hot stock, one at a time, allowing the liquid to be absorbed before adding more.

Cook on a medium heat, stirring almost constantly, until the rice is cooked al dente, meaning fully cooked but still a bit firm when bitten, it should roughly take between 15-18 minutes for a risotto to be cooked.

Taste and adjust the seasoning with sea salt and black pepper, but this might not be necessary since the store bought stocks are, generally speaking, salty already.

Serve immediately while risotto is still hot and rather liquidy, smooth and runny or as the Italians would describe it, all'onda, meaning on the wave.

Ladle the risotto onto the plates and sprinkle with freshly grated Parmiggiano Reggiano or Grana Padano cheese.

Just a thought

Pork risotto is not suitable for freezing.

Wine suggestion

Marca Trevigiana Raboso IGT 2018 - Gatti

June 08, 2022 /tina oblak
Pork risotto, Venetian style posrk risotto, Istrian style pork risotto, meat based risotto, simple risotto, rustic risotto, Risotto all'Isolana, Arborio, Vialone Nano rice, Carnaroli rice, risotto rice, Rižota s svinjskim mesom
Adriatic Recipe, All year round recipe, Autumnal dish, Autumnal recipe, child friendly dish, child friendly meal, dinner, Easy recipe, entrée course, family friendly dish, family friendly meal, first course, first course dish, first course meal, hearty dish, Istrian cuisine, Istrian dish, Istrian food, Istrian gastronomy, main course, main dish, Meat, recipe from Northern Ital, Risotti, Rustic dish, Spring dish, Spring recipe, Starters, supper, Venetian dish, Winter dish, Winter recipe, Risotto, simple recipe
Comment

Green asparagus with pancetta and scrambled eggs Istrian Recipe

June 01, 2022 by tina oblak in Adriatic Recipe, breakfast, brunch, child friendly dish, child friendly meal, dinner, Easy recipe, entrée course, family friendly dish, family friendly meal, first course, first course dish, first course meal, hearty dish, Istrian cuisine, Istrian dish, Istrian food, Istrian gastronomy, main course, main dish, Rustic dish, Slovenian cuisine, Slovenian food, Slovenian gastronomy, Spring dish, Spring recipe, Starters, supper, Vegetarian, Vegetables

This extraordinarily simple and humble dish is really easy to make and truly sublime. It consists of cooking down the asparagus with some crunchy pancetta and then adding whisked eggs and cooking them to a creamy and smooth consistency, and when served with some fresh crunchy bread, this dish becomes a perfect choice for breakfast, brunch, lunch or dinner.

Green asparagus with pancetta and scrambled eggs (Umešana jajca s šparglji) or Green asparagus frittata with pancetta, know locally as Fritaja s špargljo, Fritata s šparglji or Fritaia coi sparesi, are probably the two of the most representative dishes and part of a unique gastronomic offers of Slovenian Istra, so much so, that a Festival called Šparga Fest is dedicated to these two dishes, traditionally using exclusively wild asparagus (divji šparglji).

Wild asparagus, like store bought ones, have a fairly short season, but are more aromatic and they are ready to be picked around Easter period and one can commonly find them growing on the south facing pieces of land close to dry stone walls, on the edges of the forests, among the bushes, and although they are free in Slovenia to be foraged and enjoyed, there is a legal limit of how much wild asparagus someone can pick for personal use and consumption.

This is not quite the case in the United kingdom, where I currently live, as I found out, according to Janet Lister (Wildlife and Countryside Advisor for the National Trust). Wild asparagus, once a plentiful plant, is now a very rare coastal plant that only grows and can only be found in a handful of counties (Glamorgan, Pembrokeshire, Cornwall and Dorset). In fact, it is in decline and classed as an “endangered” species on the GB Red List.

Wild asparagus

In the olden days, along the coats in Slovenia, these green delicacies were only known to the locals who used to invent and create dishes that were born out of necessity, with the ingredients available only during a particular season. This, once again, is a testimony and a reminder of the great resourcefulness of local people, who proved time and time again the ability to find clever ways to overcome hunger.

Nowadays, this type of asparagus has reached such a popularity that the inhabitants from inland Slovenia make a special day trip to the coast to enjoy this truly seasonal speciality.

Green asparagus with pancetta and scrambled eggs is a very much loved dish in many households, and so it is made very often. However, since it can only be made during asparagus season, it is also during this time that it is found in many informal family run restaurants.

I am sharing here the family recipe I grew up with, made with wild asparagus, which was picked by the family during many enjoyable and very memorable walks in nature. In this recipe I have replaced wild asparagus for the cultivated alternative, and you can also transform this recipe into a vegetarian and vegan friendly variation by using and frying the onions instead of pancetta, bacon or lardons. For this recipe you can also use fresh white asparagus.

View fullsize Green Asparagus with pancetta and scrambled eggs Istrian Recipe 3.jpg
View fullsize Green Asparagus with pancetta and scrambled eggs Istrian Recipe 5.jpg

Ingredients

Serves 4

  • about 500g fresh green asparagus

  • 180g roughly, pancetta, bacon or lardons, finely sliced

  • 2 Tbsp extra virgin olive oil

  • 8 fresh eggs

  • sea salt

  • black pepper

Method

Wash the asparagus under cold running water and chop each asparagus into smaller sections.

Put extra virgin olive oil in a fairly large frying pan, add finely sliced pancetta, bacon or lardons and fry until fully cooked and slightly crispy.

Add chopped asparagus and cook for a few minutes together with pancetta, until they soften a bit and deepen in colour.

Add small amounts of water, about 50ml at a time, this will help to cook down the asparagus.

Cook the asparagus until they are fully cooked, deepen in colour, and tender but not overcooked and falling apart.

View fullsize Green Asparagus with pancetta and scrambled eggs Istrian Recipe 13.jpg
View fullsize Green Asparagus with pancetta and scrambled eggs Istrian Recipe 14.jpg

Cook the asparagus until they are fully cooked and tender but not overcooked and falling apart.

Crack the eggs into a bowl, add sea salt, black pepper and whisk.

View fullsize Green Asparagus with pancetta and scrambled eggs Istrian Recipe 10.jpg
View fullsize Green Asparagus with pancetta and scrambled eggs Istrian Recipe 12.jpg

Take the pan off the heat and pour the eggs over the asparagus mixture.

Put the pan back on the heat, stir and cook the eggs to the desired consistency stirring with a wooden spoon or spatula, lifting and folding the egg and asparagus mixture from the bottom of the pan.

Cook the eggs until they are softly set and slightly runny in places or cook further until they reach the desired consistency.

Taste and adjust the seasoning with sea salt and black pepper.

Sprinkle with roughly chopped fresh parsley, if desired, and serve hot immediately with fresh crunchy bread.

Just a thought

This dish is not suitable for freezing.

Cooked asparagus and pancetta mixture, without adding the eggs, makes a fantastic base for risotto.

You can also turn cooked asparagus and pancetta base into a scrumptious sauce for a pasta dish by simply adding a bit of single cream to it and dilute it, if it gets too thick, with a bit of water where you cooked the pasta.

Wine suggestion

Lugana DOC "Le Fornaci" 2021 - Tommasi

June 01, 2022 /tina oblak
green asparagus, cultivated green asparagus, wild asparagus, scrambled eggs with asparagus, scrambled eggs, pancetta, bacon, lardons, asparagi verdi con pancetta e uova strapazzate, Umešana jajca s šparglji, divji šparglji, Umešana jajca z divjimi šparglji
Adriatic Recipe, breakfast, brunch, child friendly dish, child friendly meal, dinner, Easy recipe, entrée course, family friendly dish, family friendly meal, first course, first course dish, first course meal, hearty dish, Istrian cuisine, Istrian dish, Istrian food, Istrian gastronomy, main course, main dish, Rustic dish, Slovenian cuisine, Slovenian food, Slovenian gastronomy, Spring dish, Spring recipe, Starters, supper, Vegetarian, Vegetables
Comment
  • Newer
  • Older