Beans and Sardines

  • Home
  • About
  • Recipe of the week
  • Recipes
  • Wines
  • Contact

Easter Sweet Plaited Bread (Tičice) Istrian Recipe

Beans and Sardines
April 07, 2023 by tina oblak in Adriatic Recipe, baking, breakfast, brunch, celebratory desserts, Celebratory dish, child friendly dish, dessert, Easter, Easter recipes, Easter treats, easy baking, Easy recipe, Enriched dough, festive bakes, festive dessert, festive sweet things, home baking, Istrian cuisine, Istrian food, Istrian gastronomy, Rustic dish, Slovenian cuisine, Slovenian Easter Sweet Br, Slovenian food, Slovenian gastronomy, Spring recipe, Sweet bread, sweet course, sweet finger food, sweet nibbles, Sweet Things

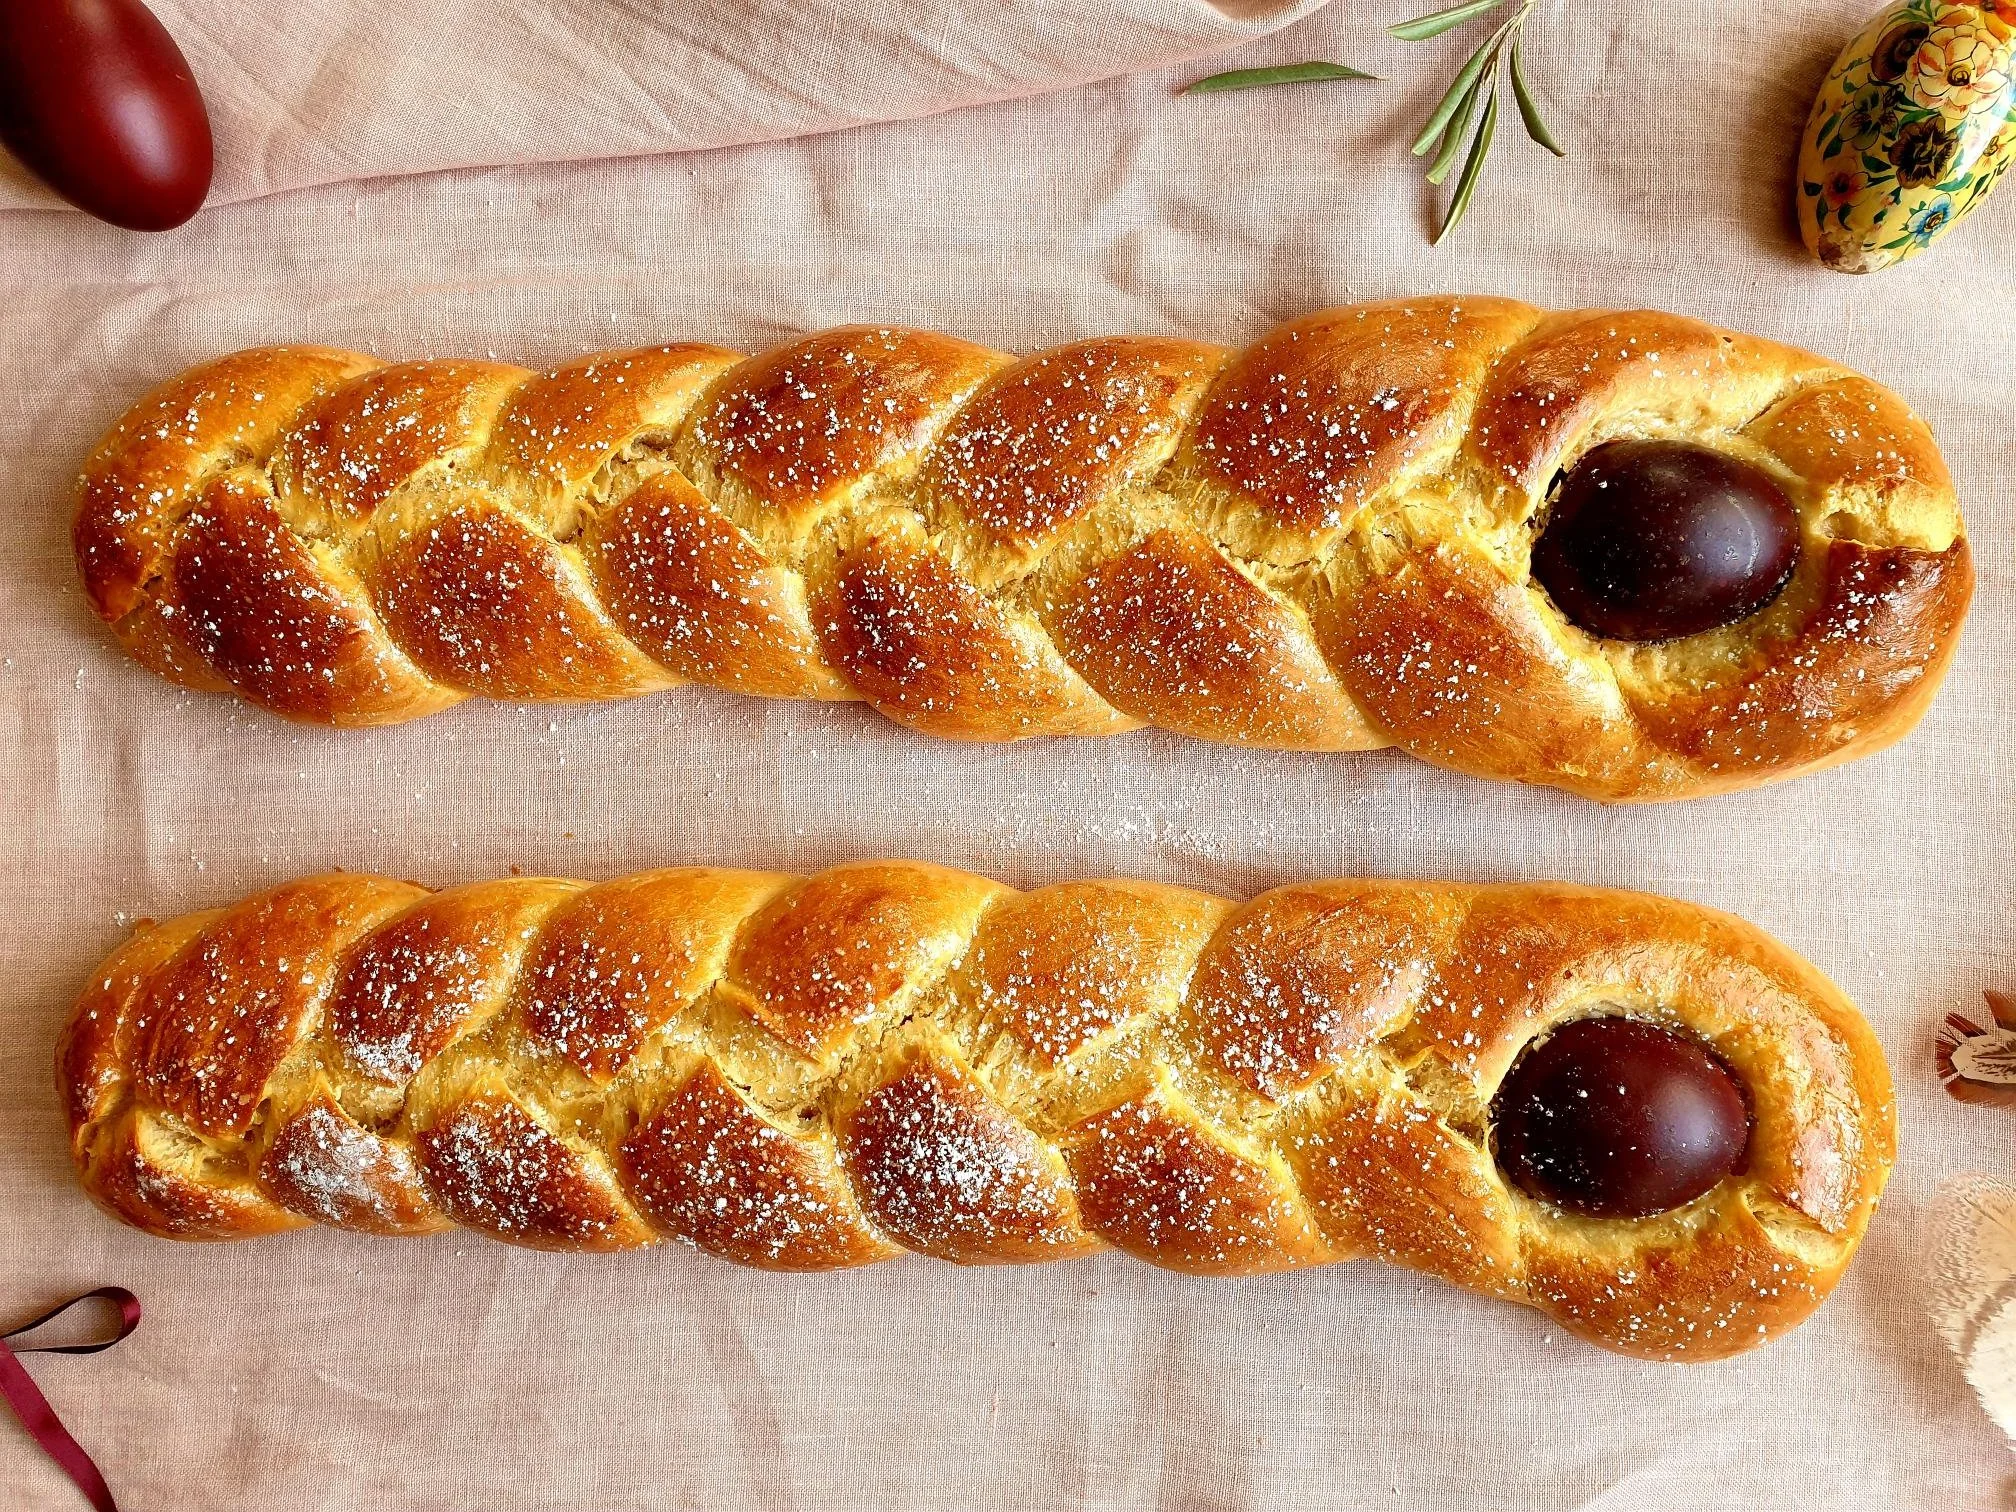
This celebratory sweet bread is similar to Jewish Challah, and is very flavoursome, soft and fluffy. It is made with yeasted enriched dough, and is shaped into a plait (or braid), and decorated with hard boiled eggs. It is very popular and traditionally baked during Easter festivities in Slovenian and Croatian Istra, Dalmatia (in Croatia) and in neighbouring Trieste in Italy and its surrounding areas.

It is best eaten fresh straight away, on its own with tea, coffee, or sweet wine, or paired with, as is traditionally the case, with cooked ham, and a selection of cheeses or cold dry cured meats. It is equally very delicious toasted the following day with some butter or jam.

This traditional recipe for sweet bread can be distinguished from other recipes for sweet bread across Europe by the addition of dark rum or grappa in the dough for extra flavour, and by the quantity of eggs used. This makes the bread have a heavier and slightly denser texture and richer taste, but this also means that it also requires a longer proofing time.

The eggs in the bread have symbolic significance in Christianity. Eggs represent new birth, new life, and are a reminder of the Passion and Resurrection of Christ. Traditionally, new converts to Christianity were baptised on Easter Sunday, representing their new birth in the faith, and new life in the Church. During the Middle Ages eggs were also a real treat to eat on Easter Sunday since they were forbidden during Lent, the 40 days of fasting before Easter.

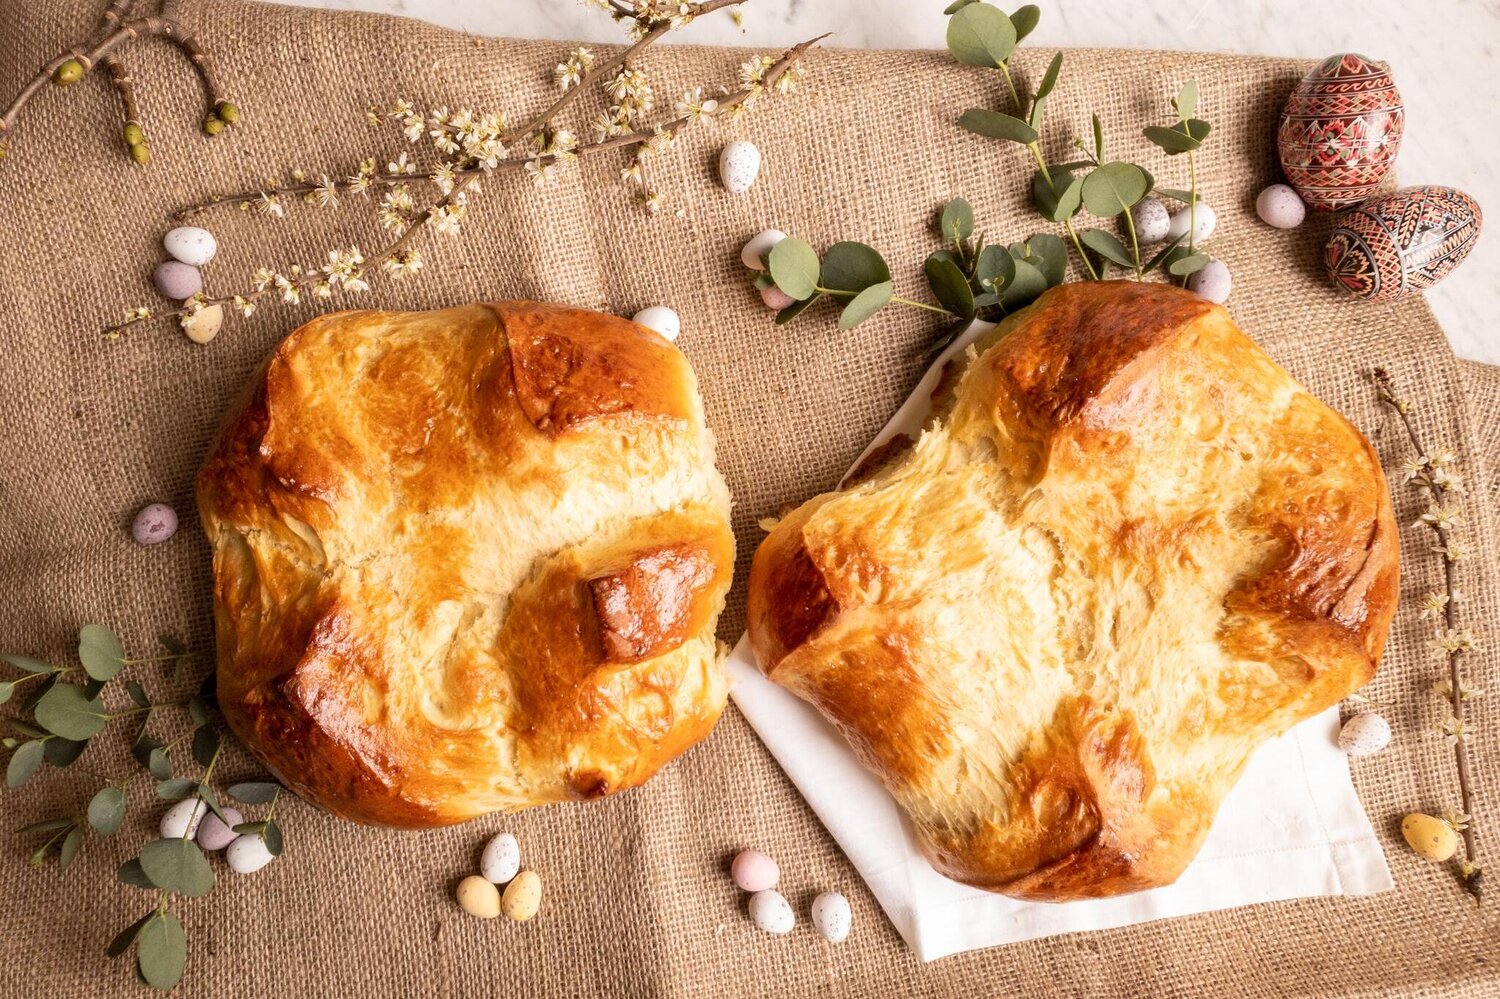
Most of the time every household back home would bake two kinds of bread: the dough would be divided in half, and one kind is pinca bread, and is shaped like a regular round type of bread, but with cross-shaped incision on the top (representing Christ’s Crucifixion), and the other kind of bread, using the other half of the dough, is tičice, the braided variation with a hard boiled egg.

I am sharing here the recipe for this very traditional Easter sweet bread that has been made in my family for generations, it will make your holiday even more special!

Recipe

Method

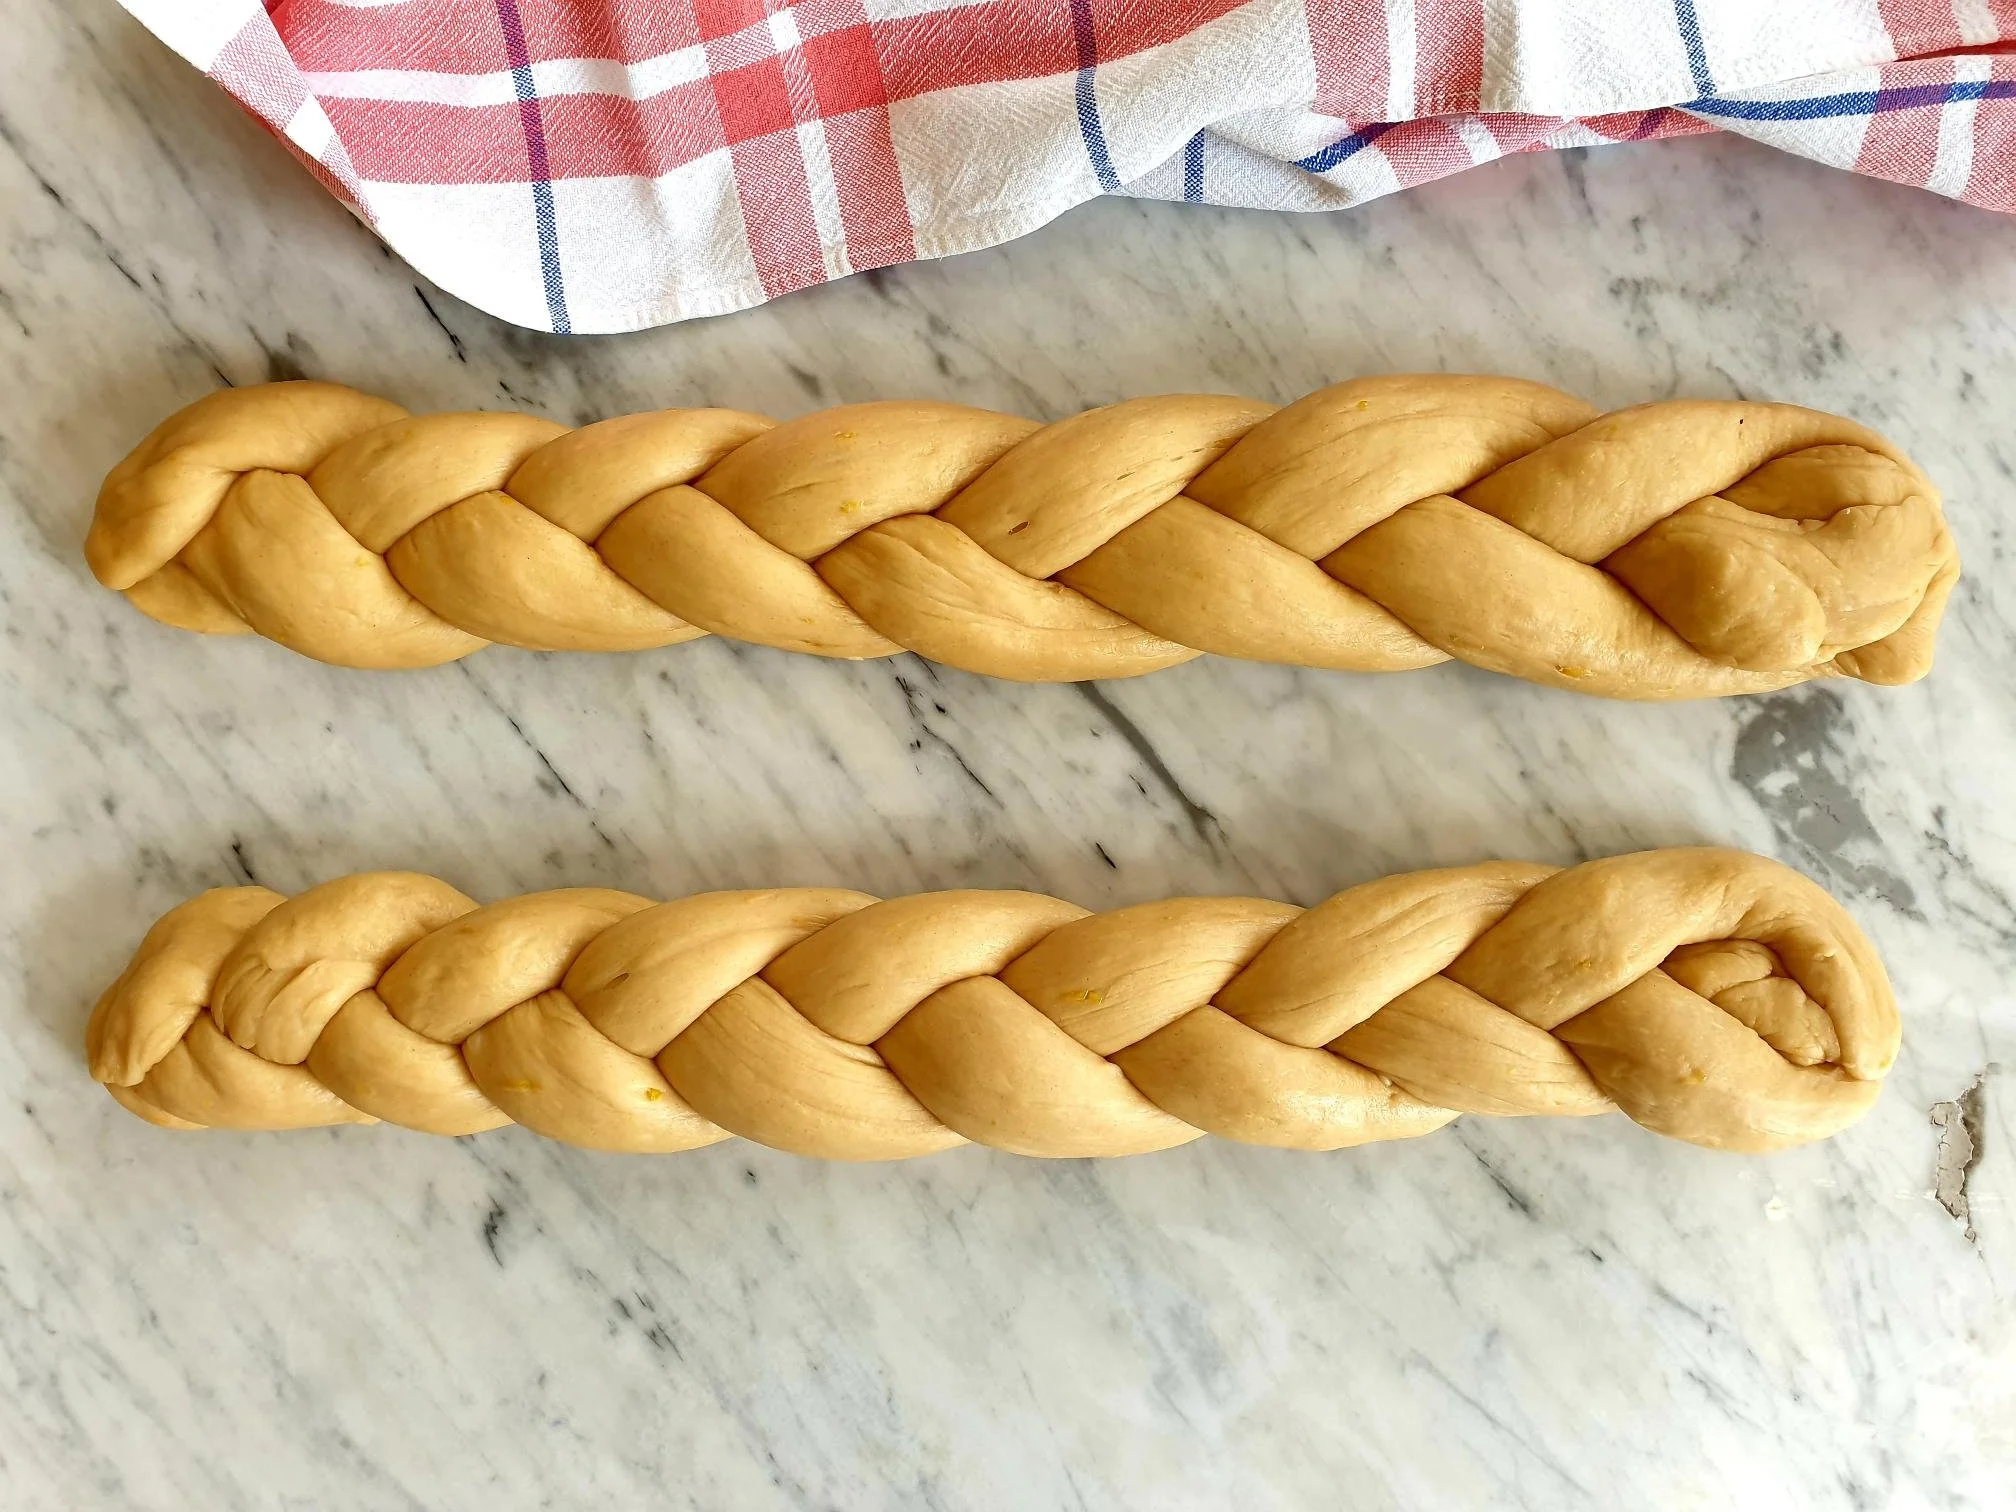
This recipe will make 2 braided breads.

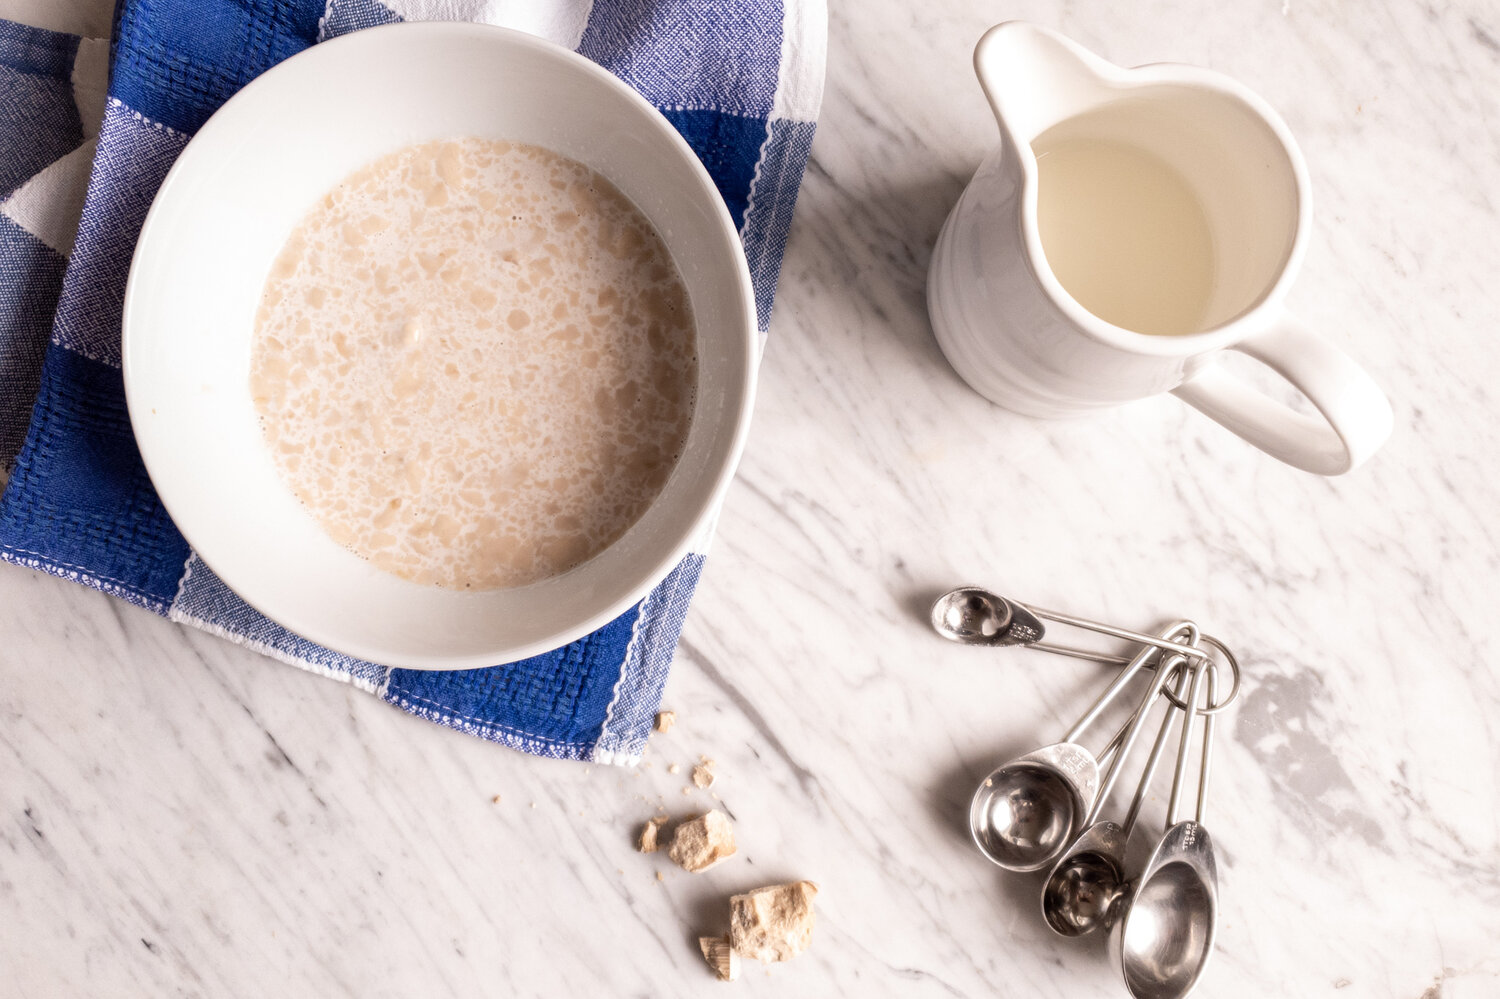
To make sweet bread plait, follow the recipe for basic sweet bread (pinca).

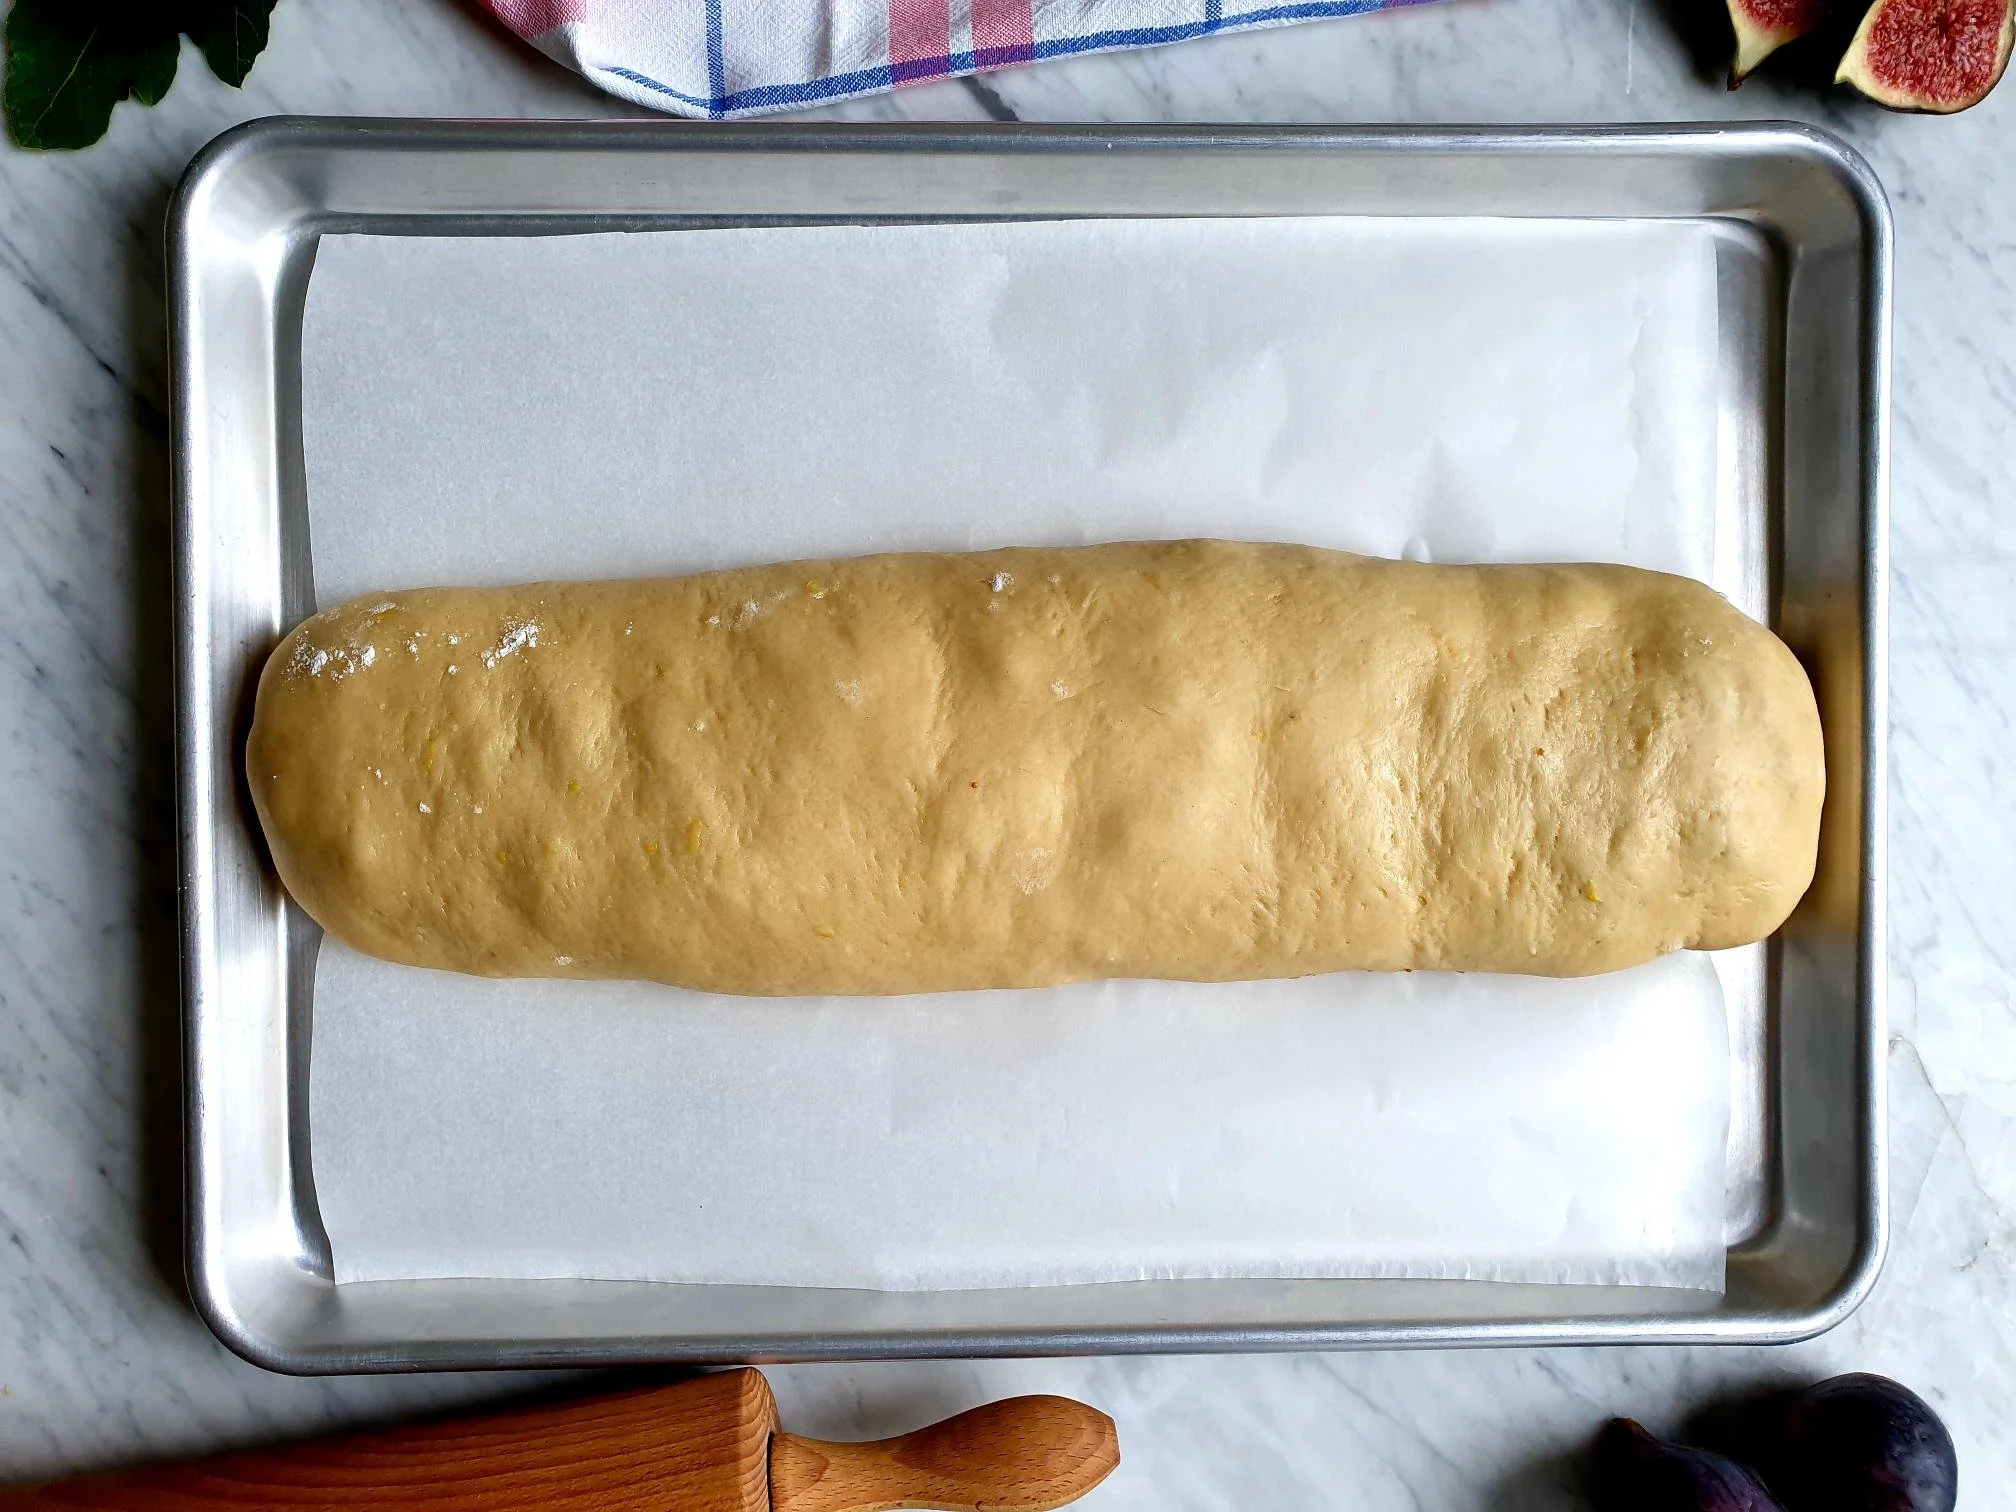
After the dough has risen and doubled in volume, remove it from the bowl.

Tip it onto a lightly floured surface and divide the dough in half.

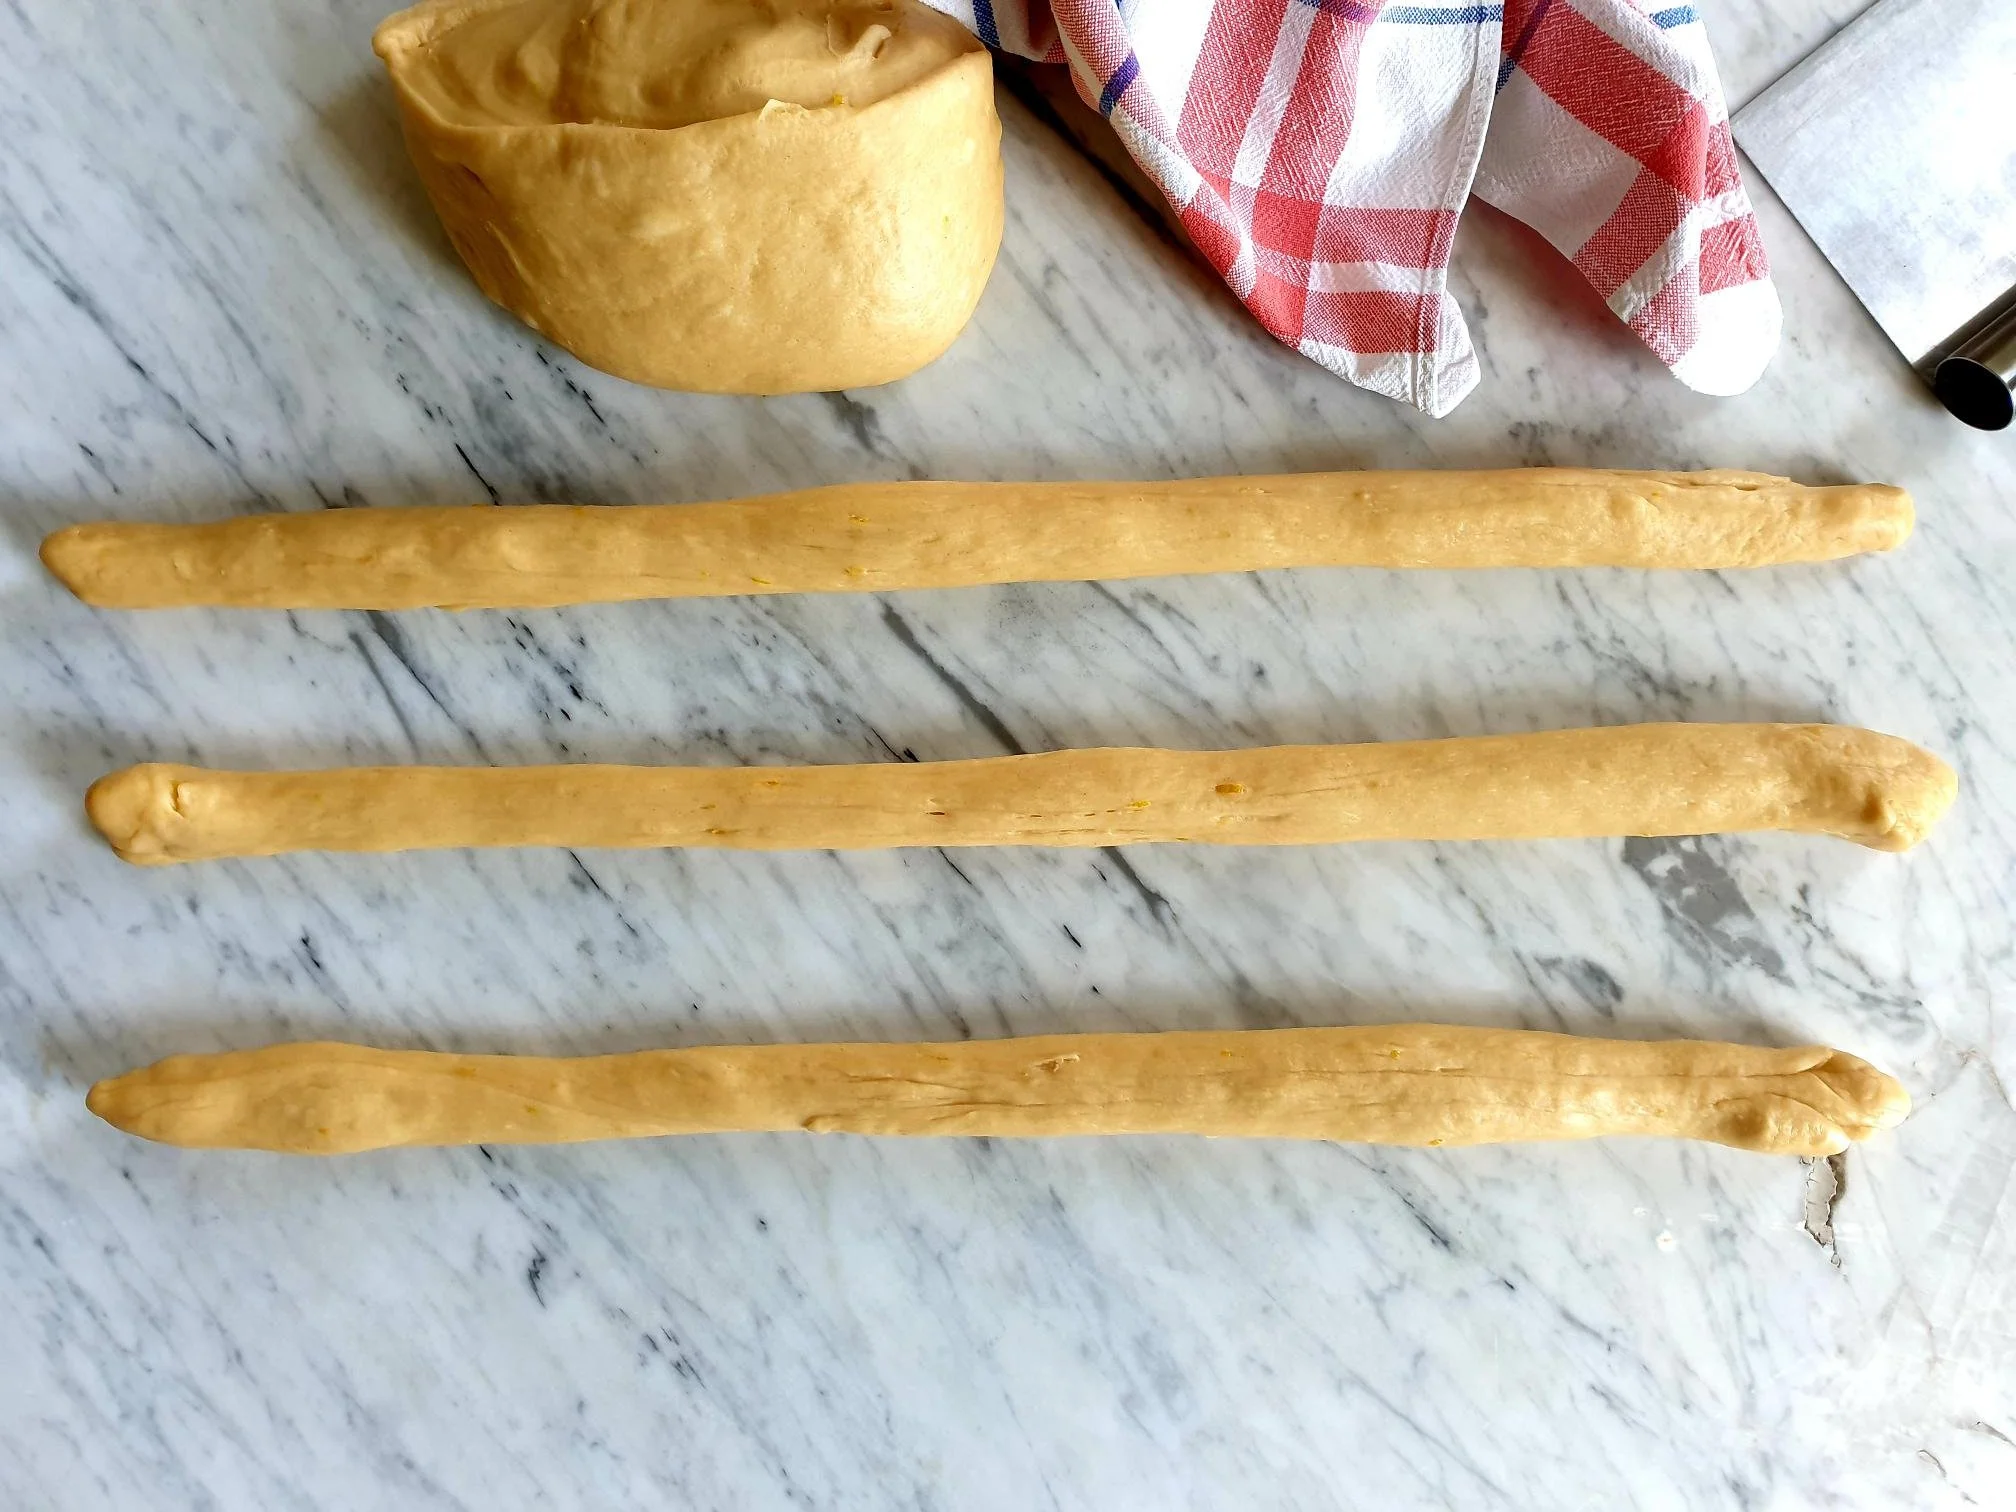
Divide one half of the dough into 3 equal parts (cover the other half of the dough with the tea towel to prevent it from drying).

Roll each piece of the dough into 3 logs.

View fullsize Ticice 1.jpg
View fullsize Ticice 2.jpg

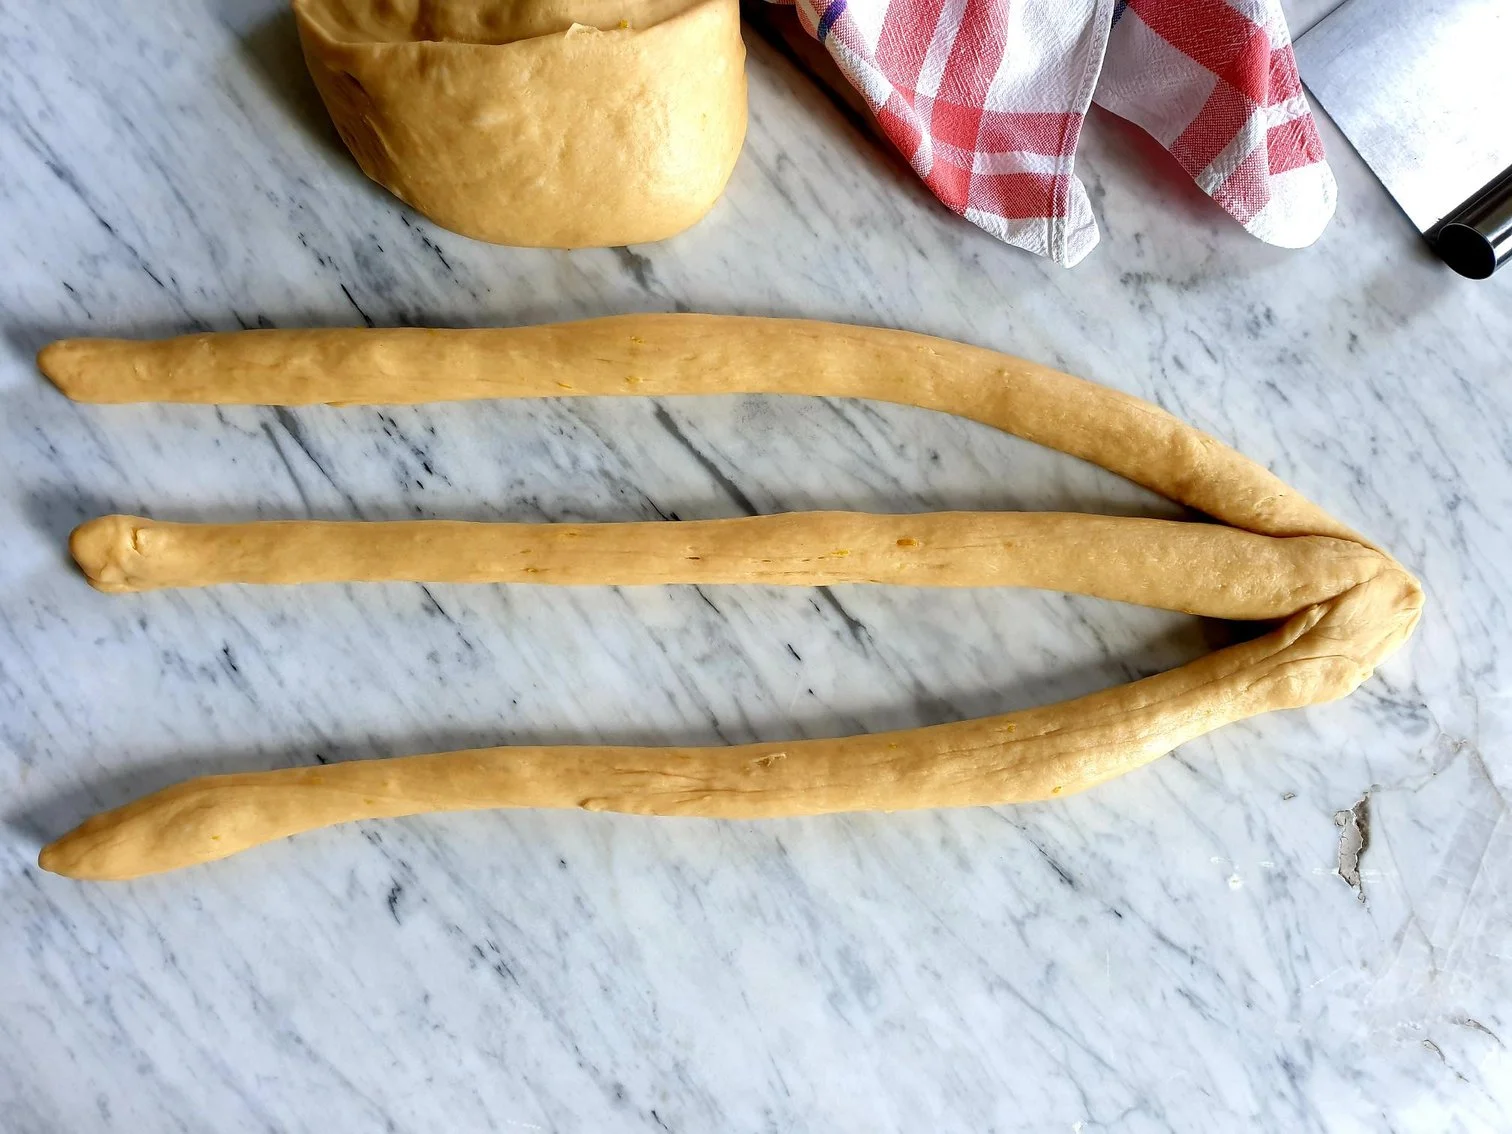
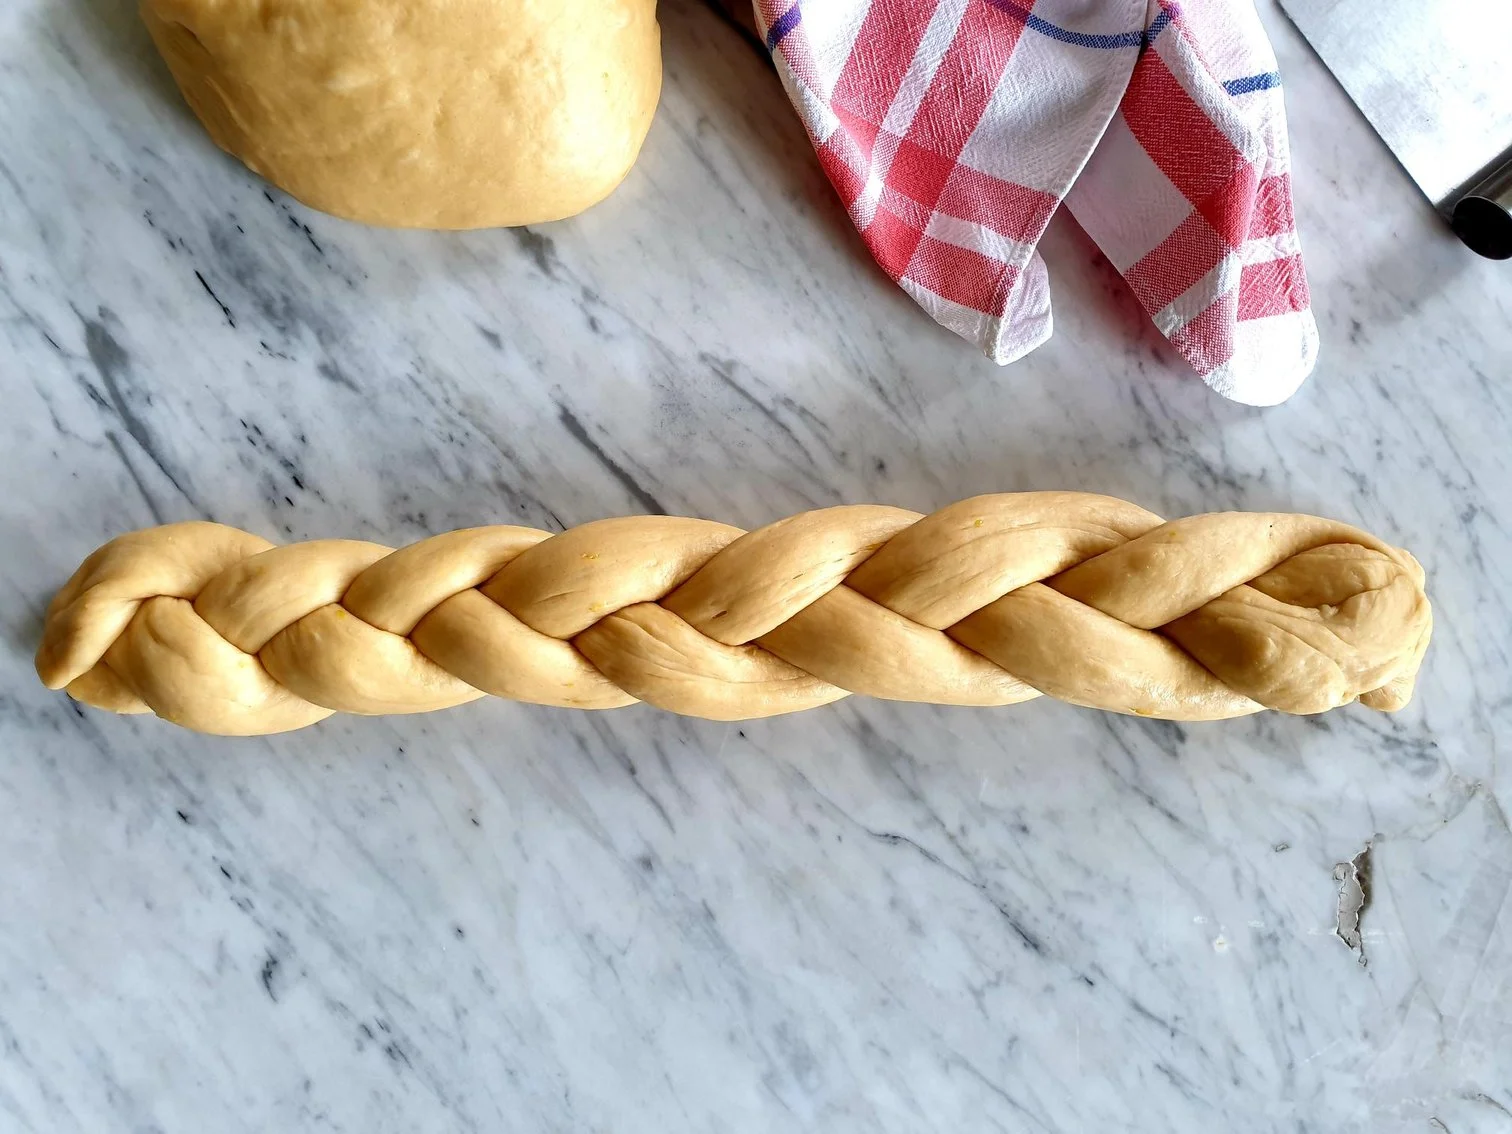
Join and pinch the ends of all 3 logs together to start shaping them into a braid.

View fullsize Ticice 3.jpg
View fullsize Ticice 4.jpg

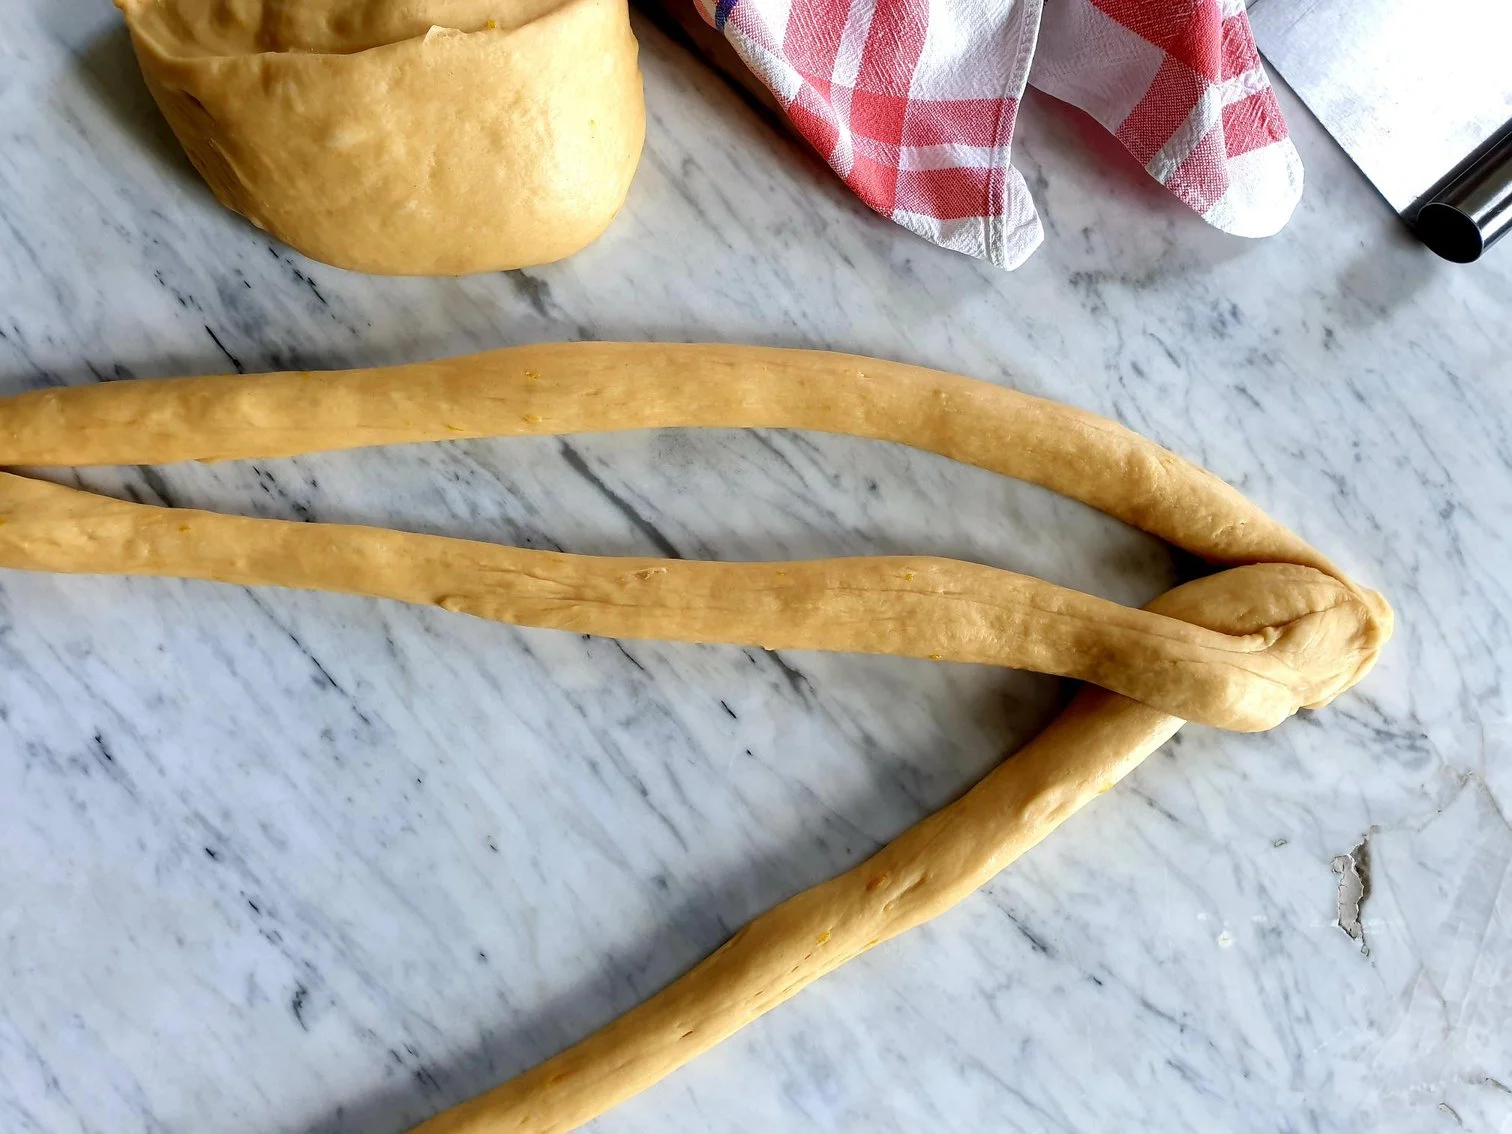
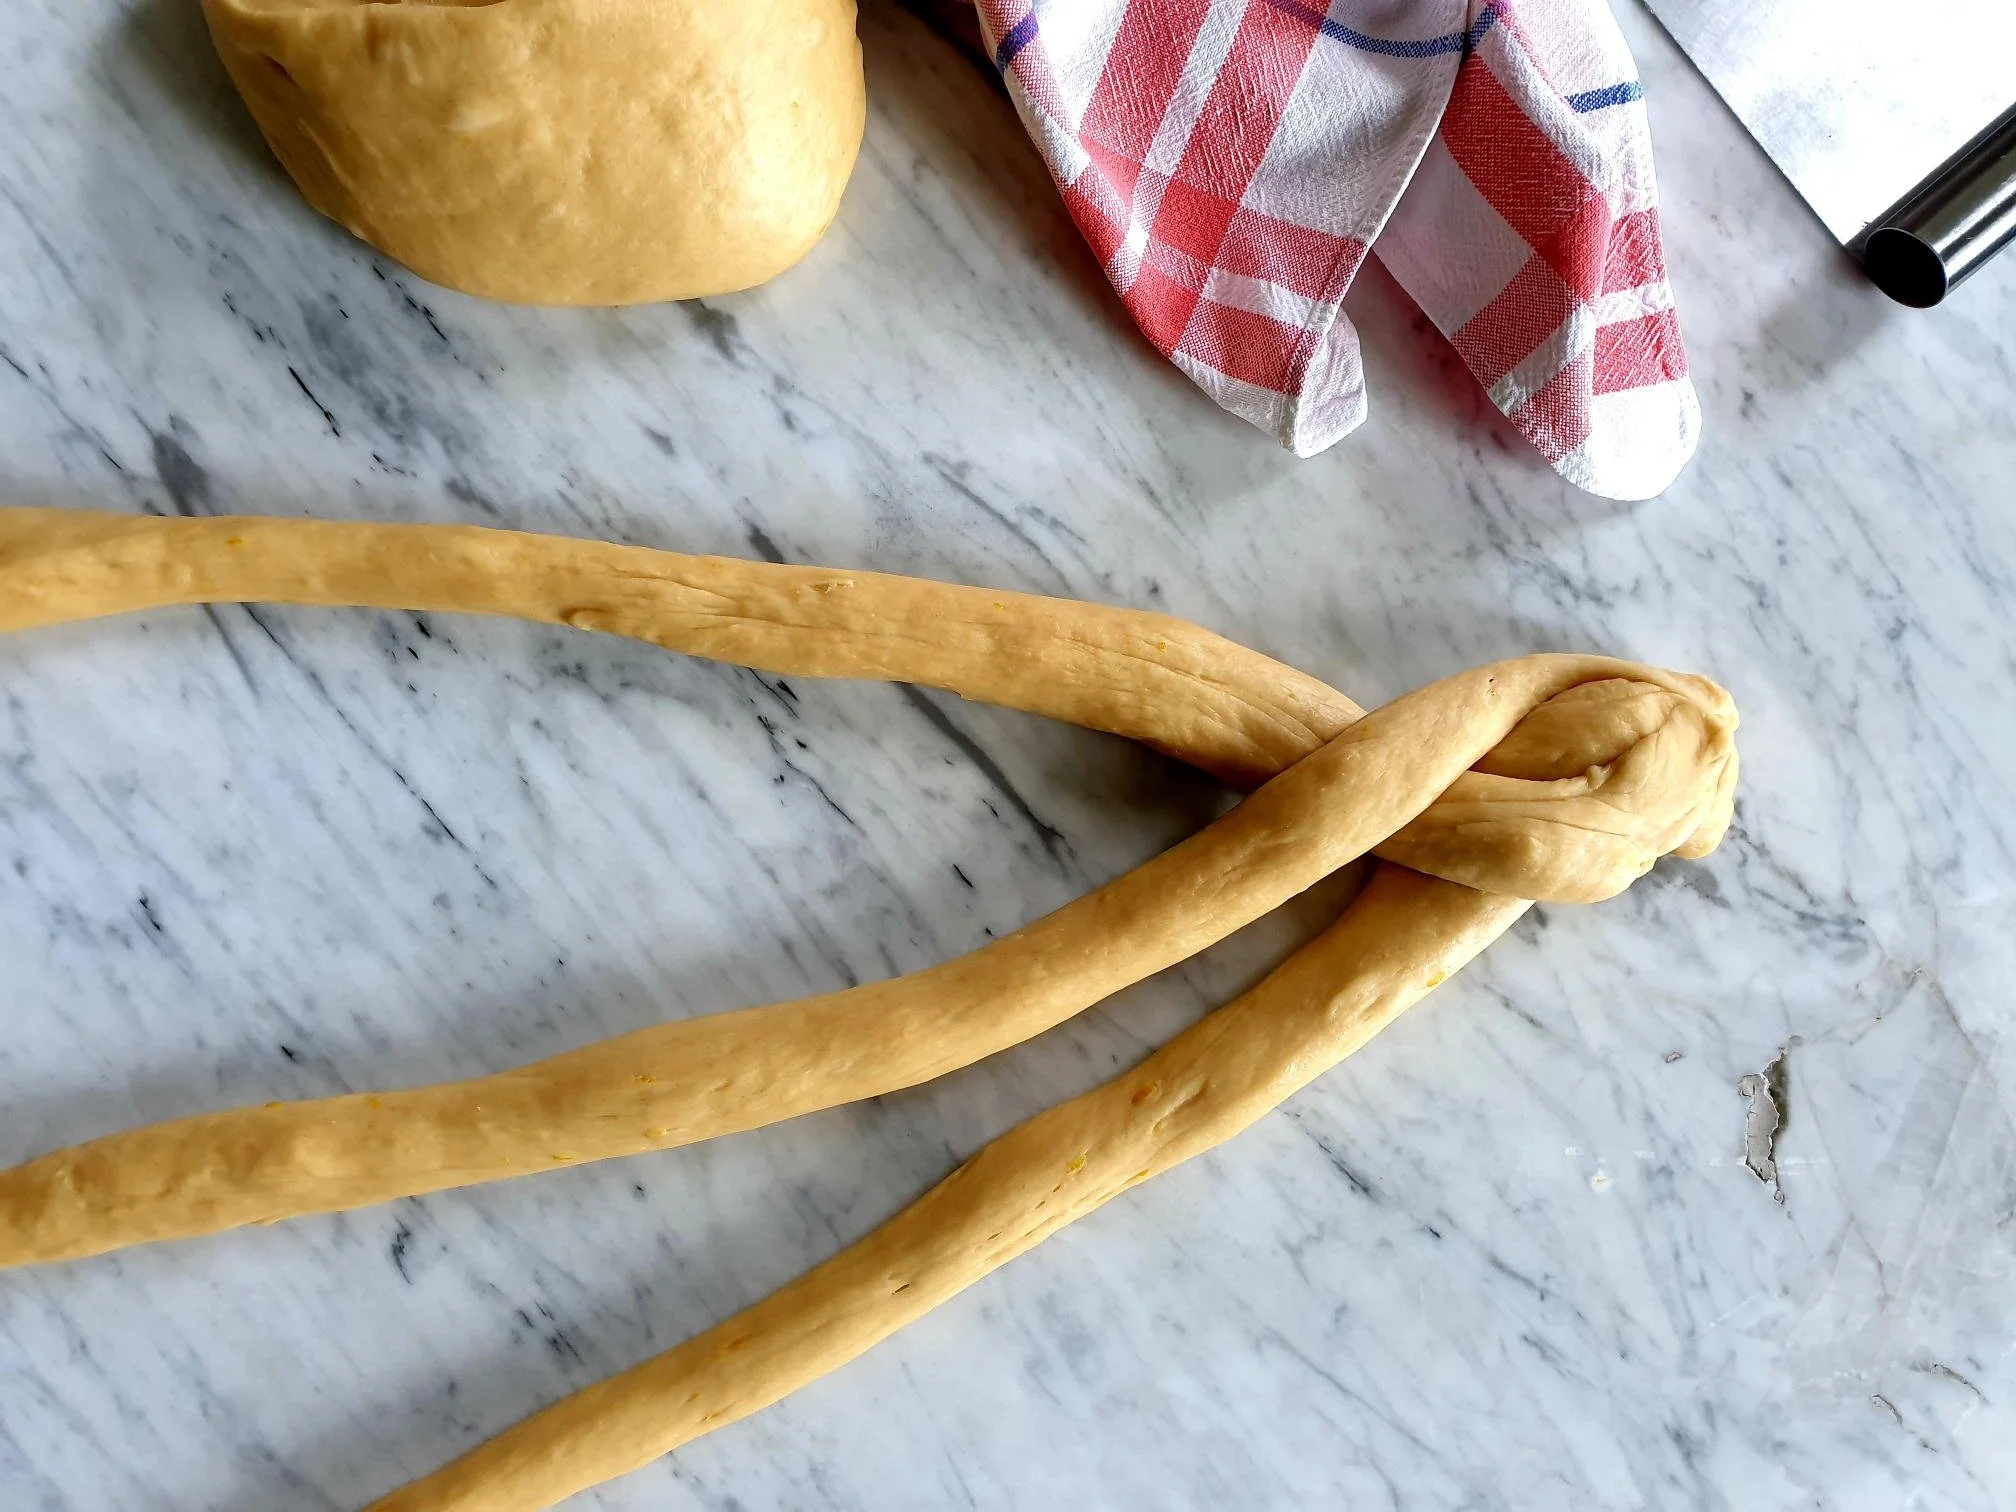
Pinch the opposite end of the braided dough together.

View fullsize Ticice 5.jpg
View fullsize Ticice 6.jpg

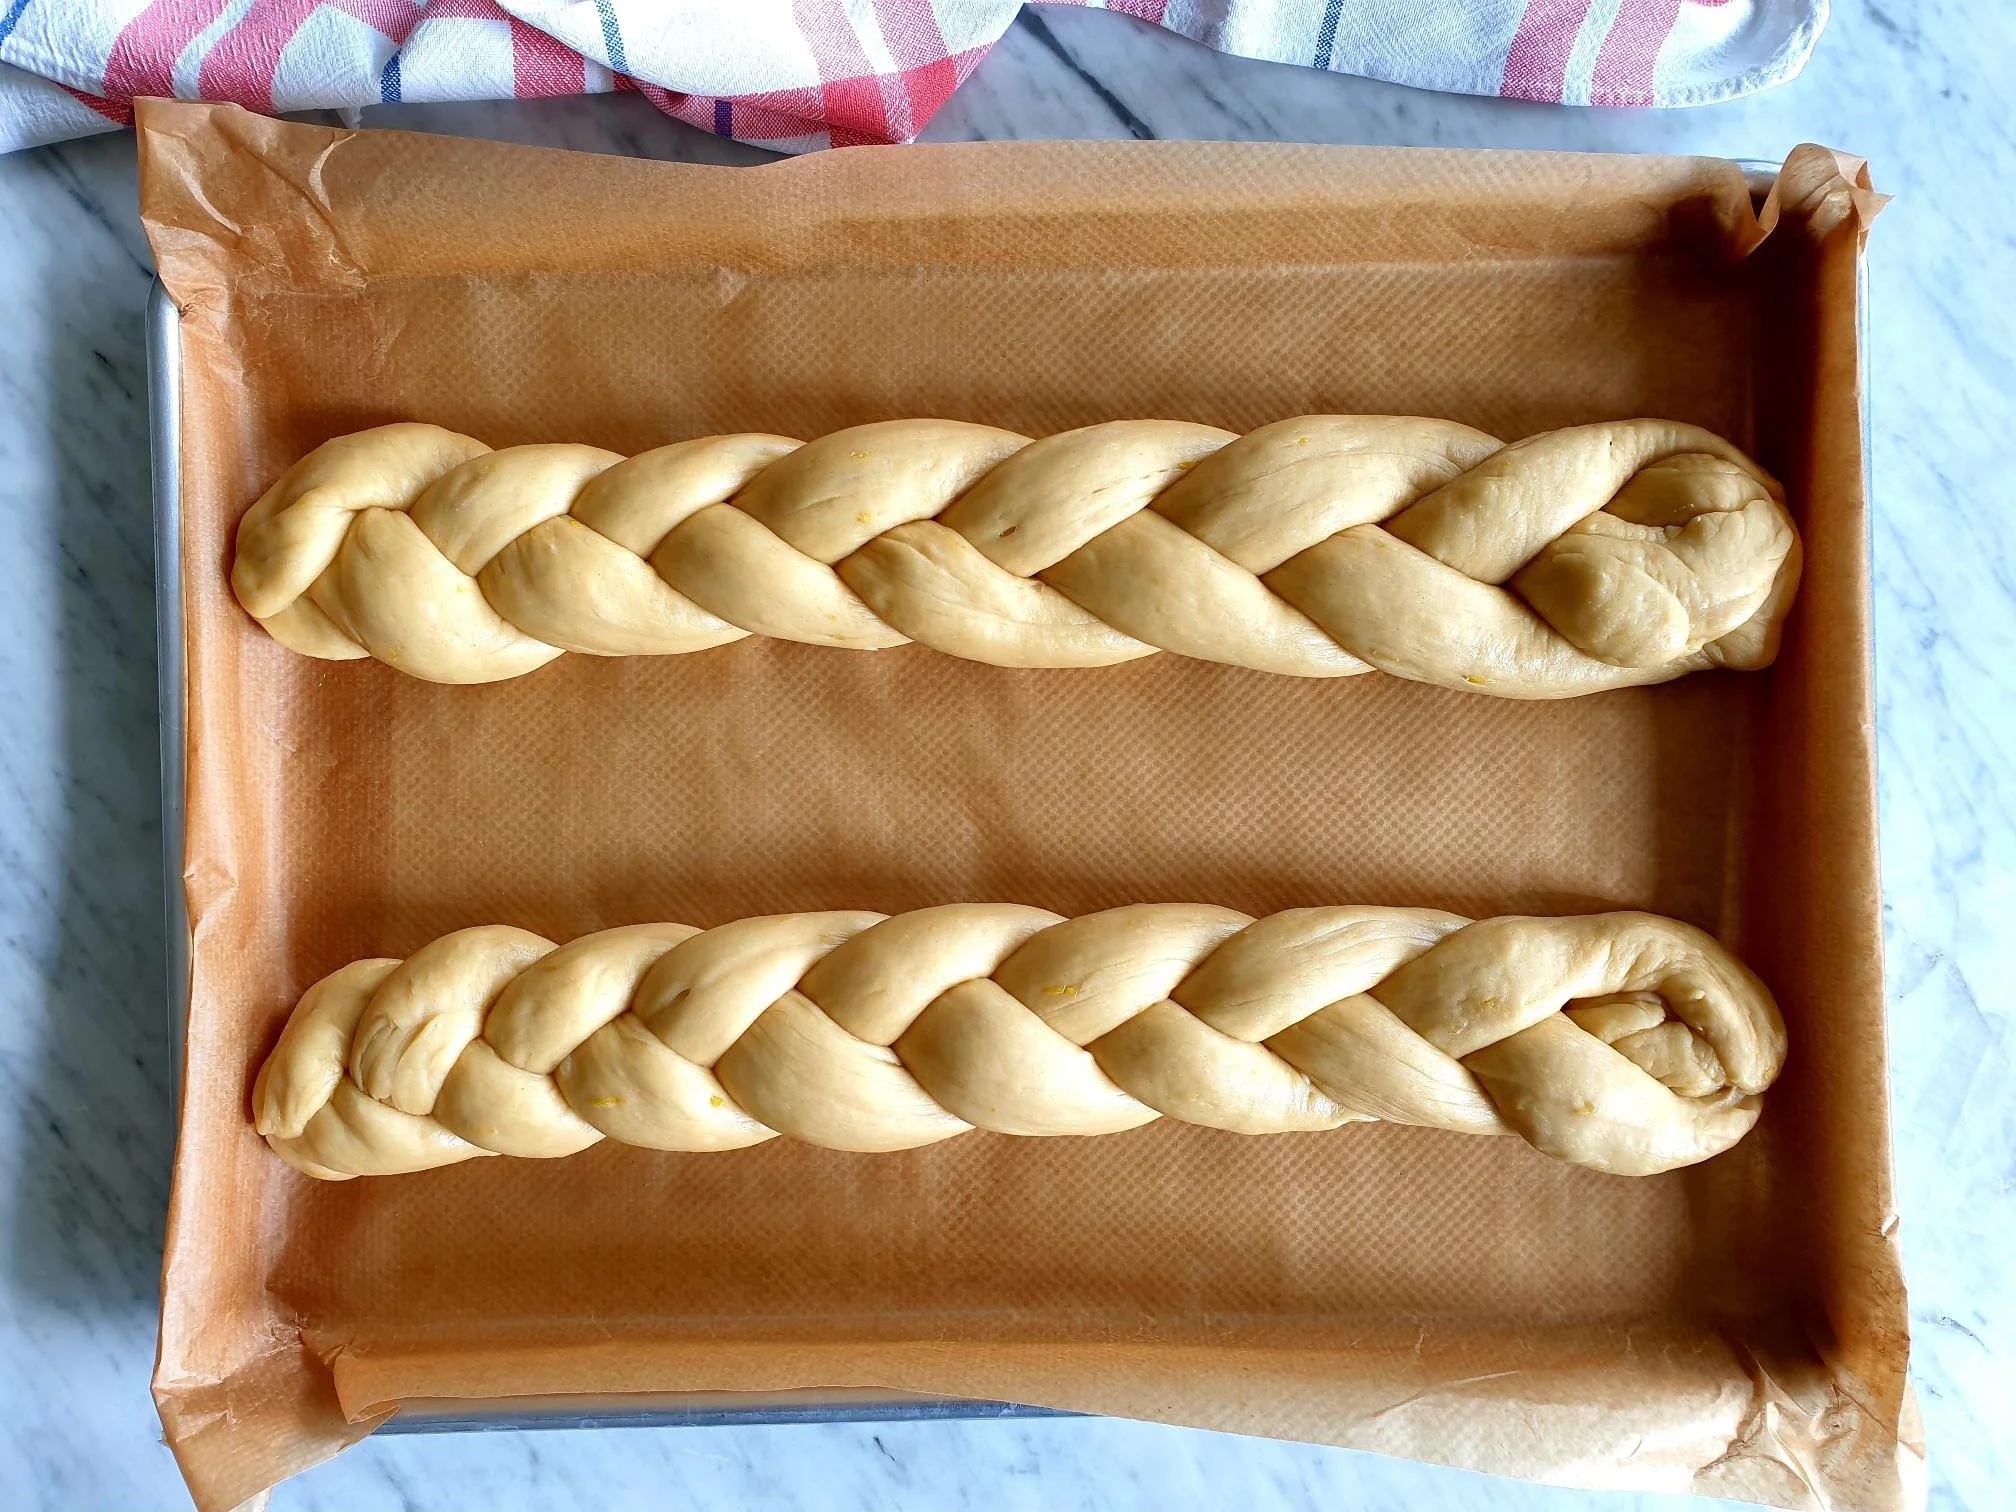
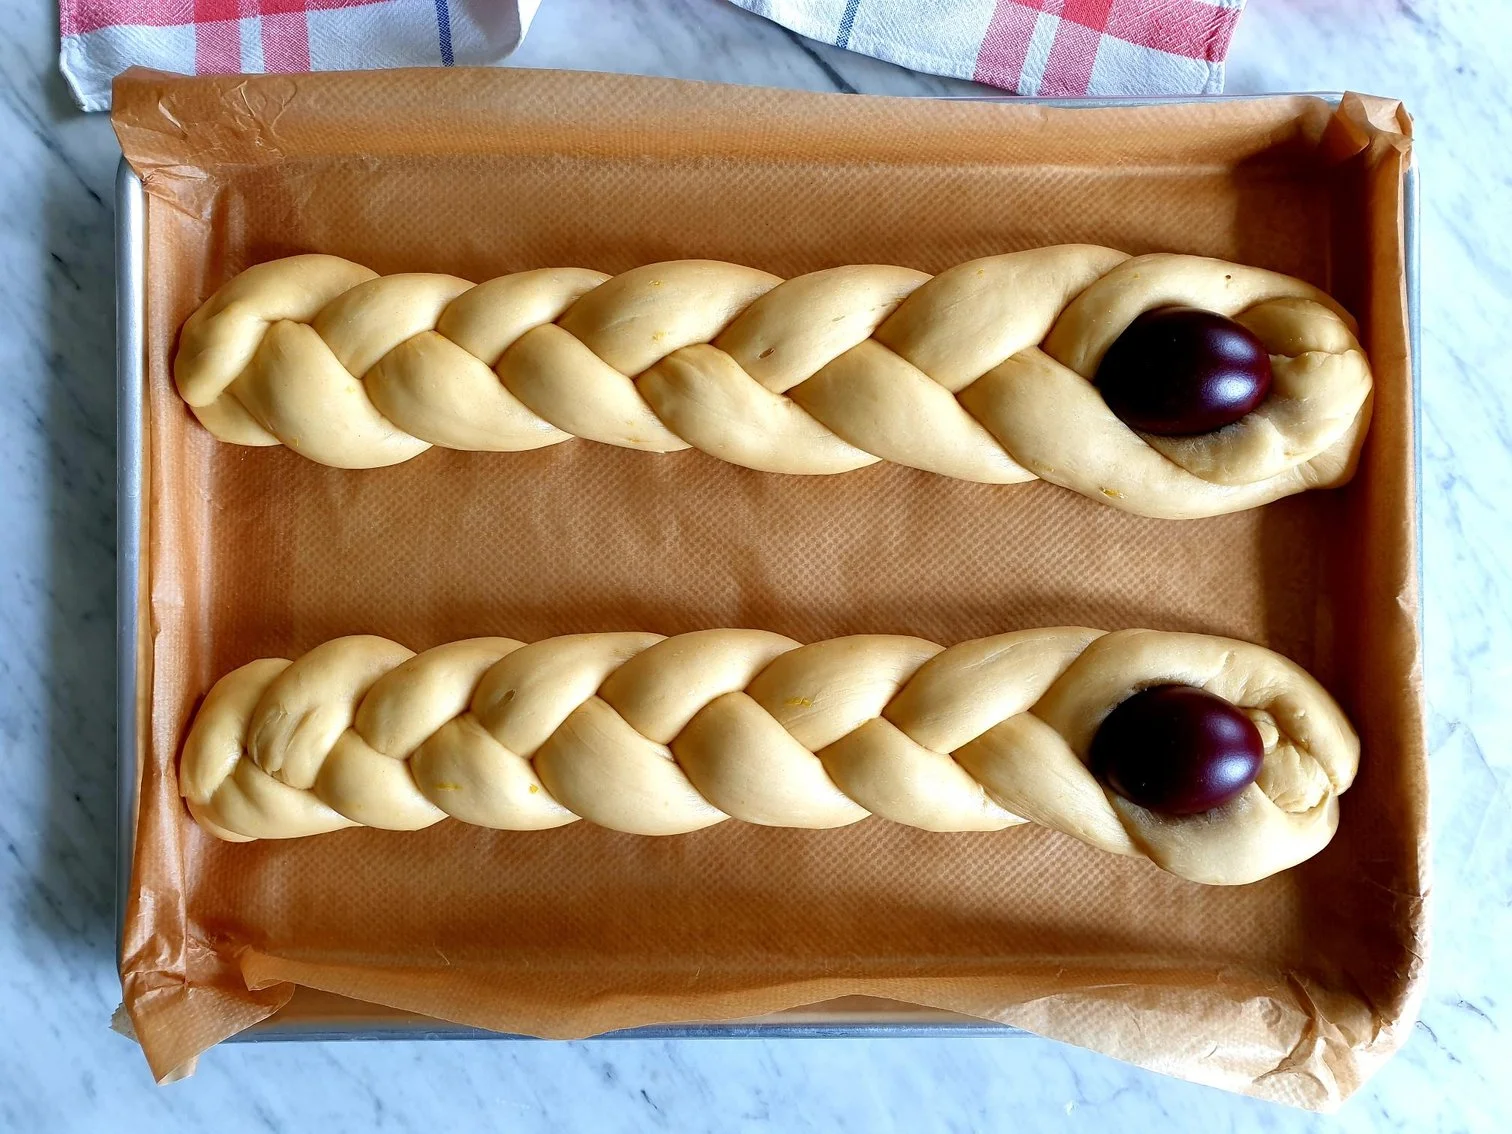
Place it on a baking tray previously lined with baking parchment.

Repeat the process with the other half of the dough.

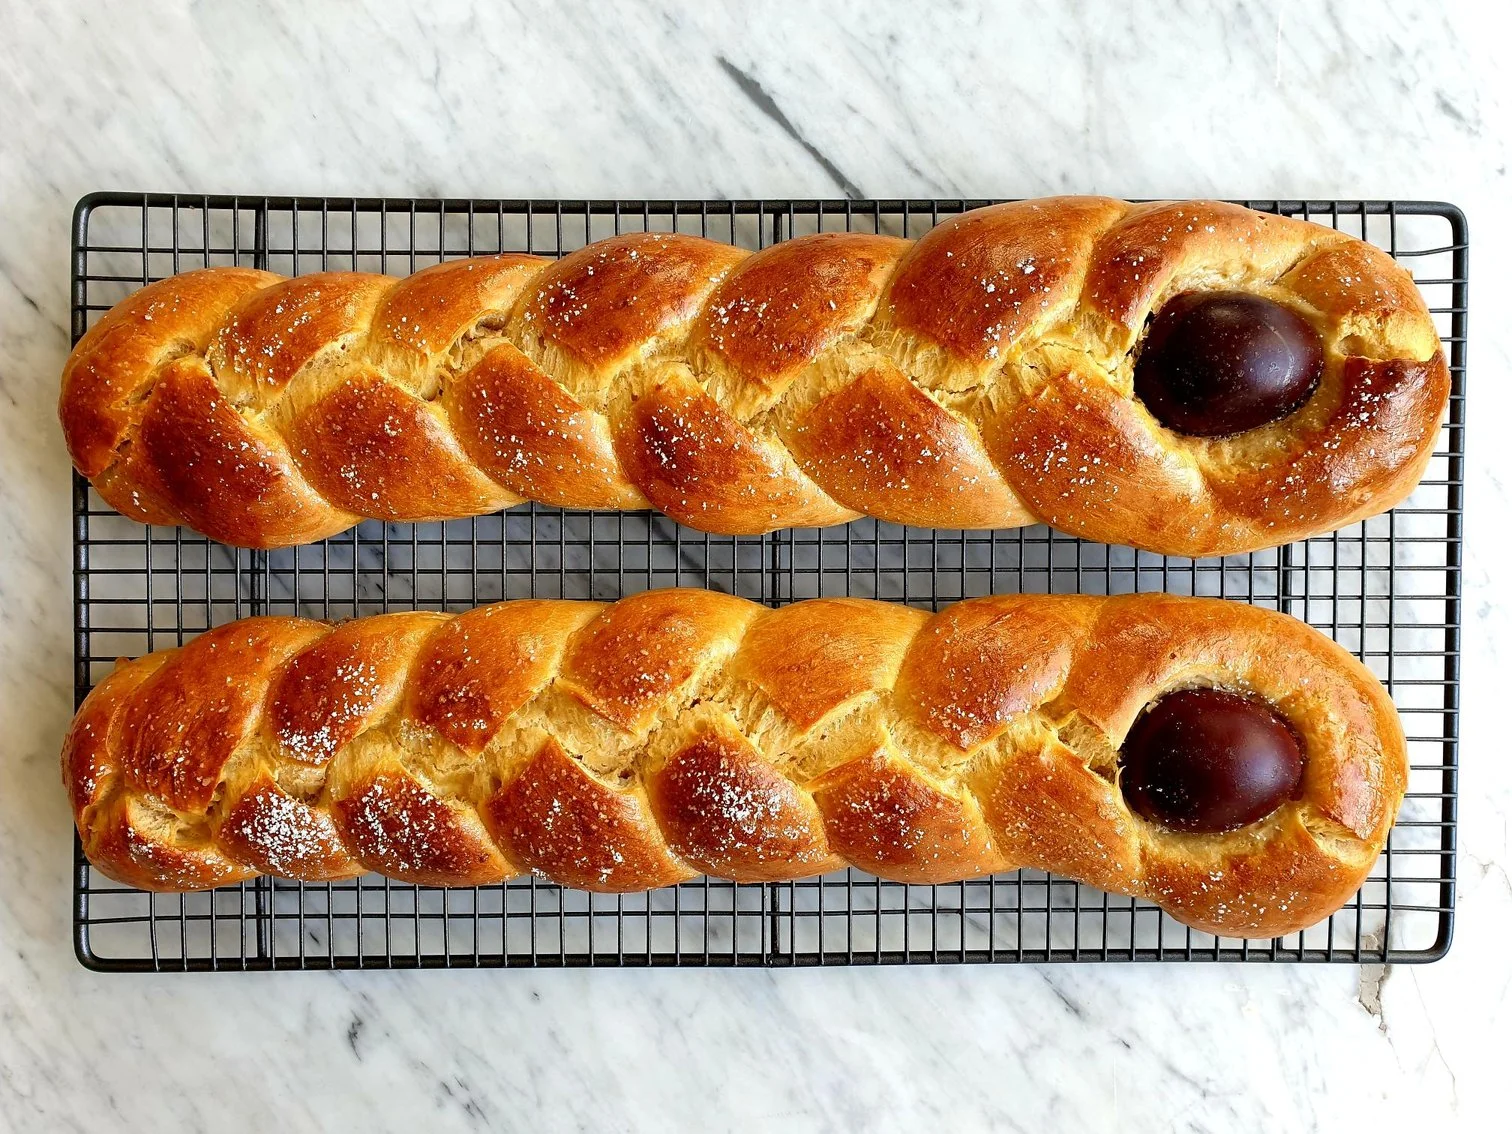
Decorate the plait with hard boiled eggs (you can use the eggs previously decorated and dyed, see my recipe how to decorate and dye the eggs, Easter Eggs Dyed with Onion Skins Recipe). Place hard boiled eggs at the end part of the braid, pressing down a bit, almost creating a little nest where the egg can sit.

Brush both plaits with the egg whites.

Allow braided loaf to rise in warm, draft free, room for about 1 hour.

View fullsize Ticice 7.jpg
View fullsize Ticice 8.jpg

Bake in the preheated oven at 180C for about 30 minutes, tent it with the aluminium foil halfway through if the top starts browning too much.

Once baked, take from the oven.

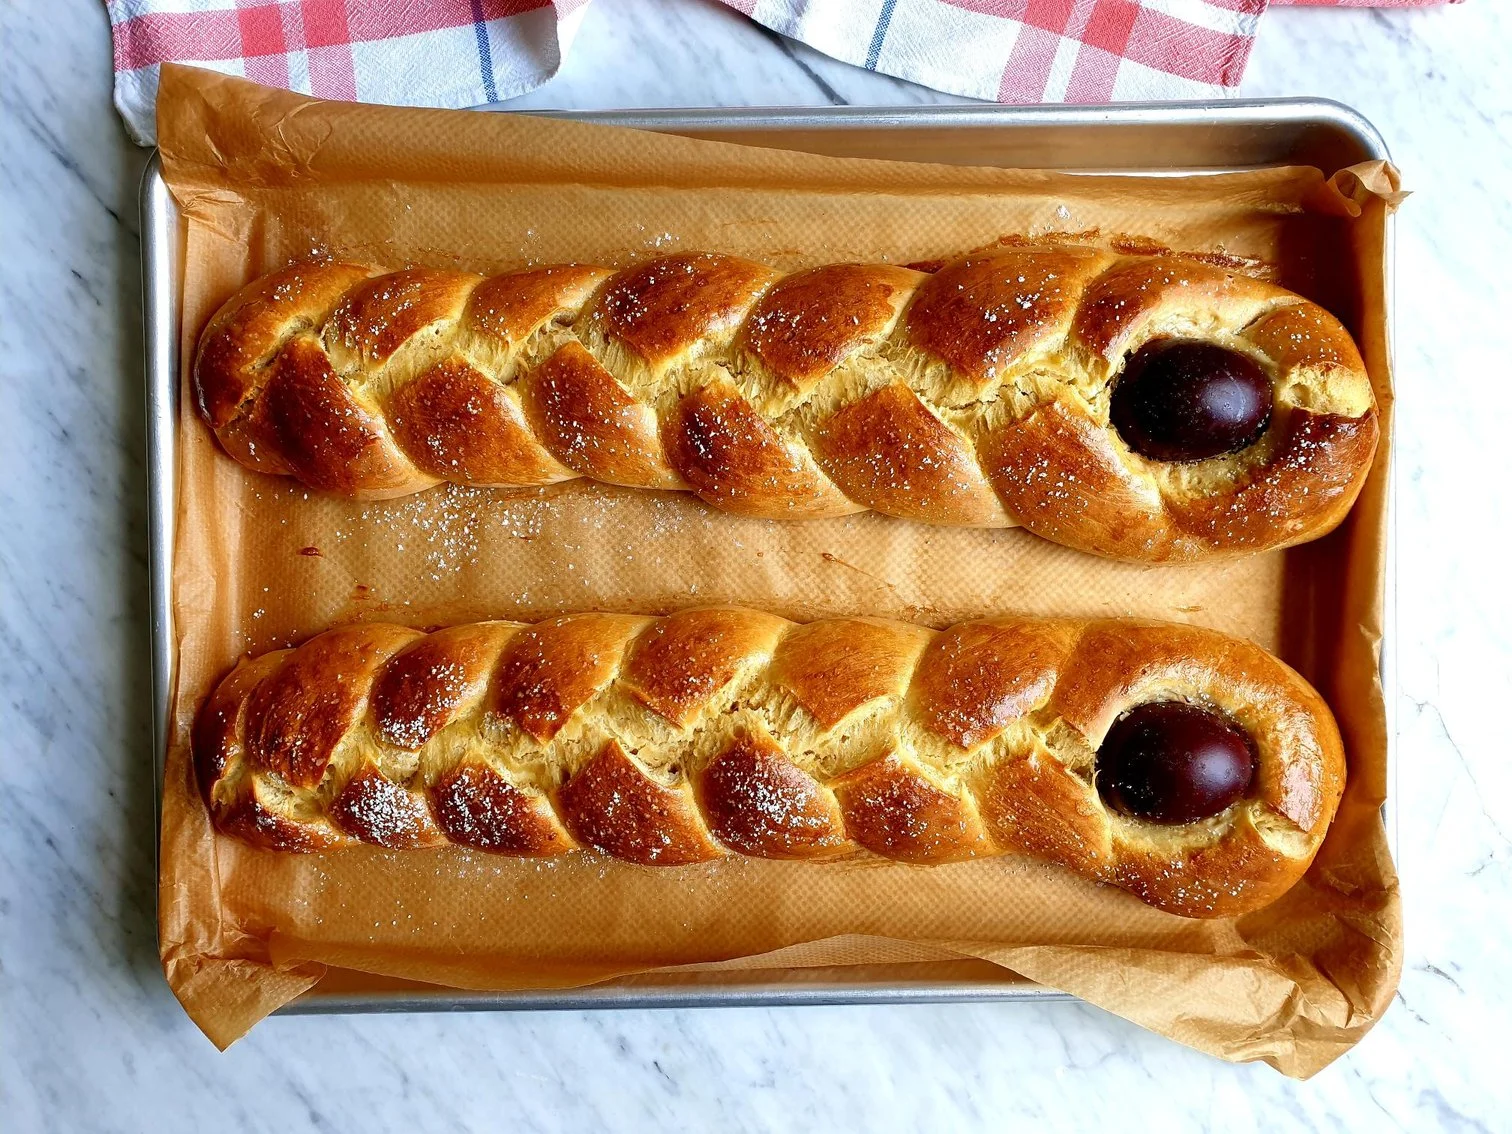
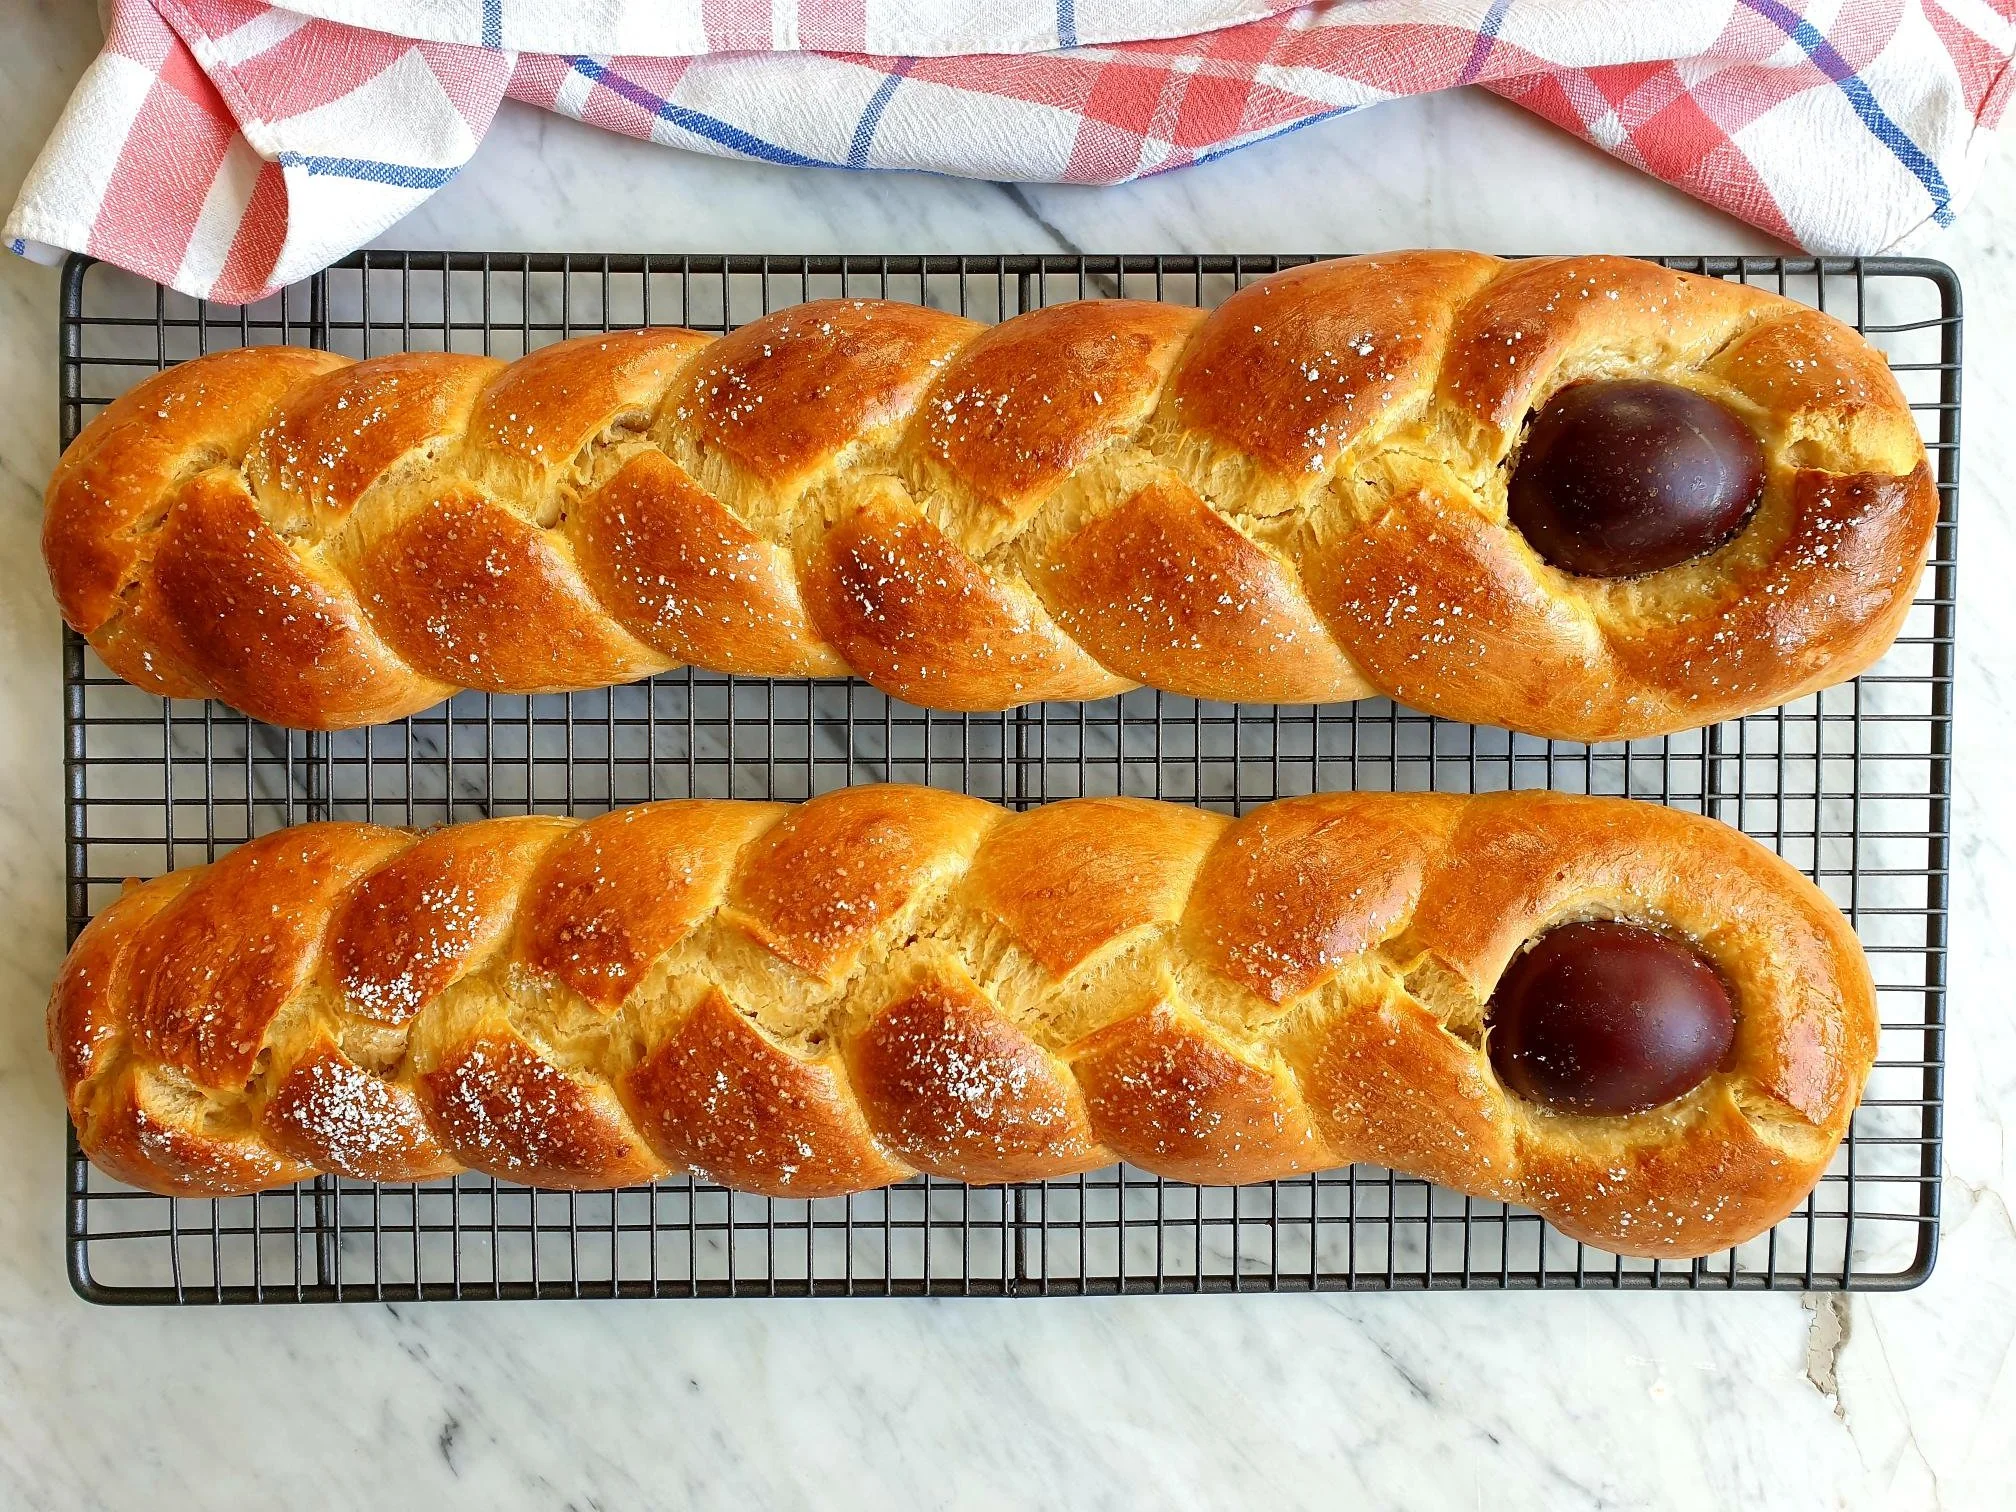
Transfer on a cooling rack and let it cool a bit.

Best served fresh still a bit warm.

Just a thought

Best eaten freshly baked on the same day.

Store leftover sweet bread in an airtight container for up to three-four days.

You can toast the slices and enjoy them with butter, jam, peanut or almond butter or use it to make French toast or bread and butter pudding, delicious!

Wine suggestion

Fior d'arancio Colli Euganei Spumante Dolce DOCG 2021 - Alla Costiera

April 07, 2023 /tina oblak
Braided sweet bread, plaited sweet bread, Easter sweet bread, Easter sweet braided bread, Easter sweet plaited bread, Tičice, celebratory sweet bread, yeasted dough, enriched dough
Adriatic Recipe, baking, breakfast, brunch, celebratory desserts, Celebratory dish, child friendly dish, dessert, Easter, Easter recipes, Easter treats, easy baking, Easy recipe, Enriched dough, festive bakes, festive dessert, festive sweet things, home baking, Istrian cuisine, Istrian food, Istrian gastronomy, Rustic dish, Slovenian cuisine, Slovenian Easter Sweet Br, Slovenian food, Slovenian gastronomy, Spring recipe, Sweet bread, sweet course, sweet finger food, sweet nibbles, Sweet Things
Comment

Traditional Istrian Fig Strudel made from sweet yeast dough Recipe 

Beans and Sardines
October 12, 2022 by tina oblak in Adriatic Recipe, Autumnal dish, Autumnal recipe, baked dish, baking, breakfast, celebratory desserts, dessert, easy baking, Enriched dough, festive bakes, festive dessert, festive sweet things, Istrian cuisine, Istrian dish, Istrian food, Istrian gastronomy, Rustic dish, Slovenian cuisine, Slovenian food, Slovenian gastronomy, Small bites, Snacks, summer dish, summer recipe, Sweet bread, sweet course, sweet finger food, sweet nibbles, Sweet Things

This rustic bake is one of the most traditional and authentic sweet treats in the cuisine of Slovenian Istra, it is called by the locals kvašen štrudelj s figami or kvašen štrukelj s figami, and it is made from soft, brioche like sweet yeast dough and fig filling. 

It is usually baked towards the end of summer and early autumn, when the figs are in abundance, and although fig filling is the most common and most traditional, other fruits can be used like apples, pears or plums, and different type of nuts can be added too.   

This sweet fig log is a bit of a “gastronomic hybrid”, it looks like a strudel in a way that is rolled into a log like a strudel, but it is made from yeast dough, resembling quite strongly, in terms of flavour, to the dough that is used to make a traditional Slovenian nut roll, Potica. 

This sweet bake used to be prepared and offered for special occasions as a dessert at the end of a big meal, and given to children as a snack and a special treat. Nowadays, it is also eaten for breakfast and offered with tea and coffee, but it is not commonly found in the restaurants and almost exclusively baked in the household. 

Istrian cuisine is a no waste cuisine, so juicy figs, with their delicately perfumed flavour, when fully ripen and plentiful, would get picked, chopped, cooked down in a frying pan with some butter to bring out their innate sweetness, cooled completely and then frozen to be used during late autumn and winter season, when fresh figs are no longer available. 

As a child, on the Slovenian coast, where I grew up, I would eat figs straight from the tree and the common sight of ripe figs slowly started to mark the end of summer and the start of cooler days, back to school days... 

I am sharing here this slightly off the beaten track, very special recipe, passed to me by my nona Nada and her dear friend Arnanda. It was truly touching listening to them, deep in  conversation about the recipe, and its different variations, even when the villages only a few kilometres apart from each another. 

Celebrate this wonderful fruit that marks the transition into autumn and try this delicious bake,. However, if you cannot get hold of fresh figs, you can just use fig jam, or any other jam of your preference for the filling. Your friends and family will be seriously impressed. 

Recipe 

Ingredients for the dough 

  • 500g plain all purpose white flour 

  • 7g fast-action dried yeast (also called instant yeast) or 20g fresh yeast 

  • 100g unsalted butter, melted 

  • 100g caster sugar 

  • 250ml lukewarm milk or water or a combination of the two (125ml milk and 125ml water) 

  • 2 eggs, room temperature, slightly beaten 

  • grated lemon zest of 1 unwaxed lemon   

  • 1 Tsp sea salt 

Ingredients for the filling 

The filling is made from fresh figs, you can use other fresh fruit like apples, pears, plums or fig jam instead, or any other jam of your preference. 

  • 1kg, roughly, of fresh figs   

  • 20g unsalted butter 

  • grated lemon zest of 1 unwaxed lemon 

  • 200ml single cream or ricotta

Method 

The dough 

In a fairly large bowl, sift the flour, make a little well in the centre and add lukewarm milk, instant yeast melted butter, sugar, lightly beaten eggs, grated lemon zest and a pinch of sea salt on the side of the bowl. 

View fullsize Fig Strukelj 4.jpg
View fullsize Fig Strukelj 5.jpg

Mix and combine well all the ingredients with the fork or a wooden spoon. 

(If using fresh yeast, place it into a small bowl and slightly break it down into smaller pieces with your fingers. Add a few tablespoons of tepid milk, ¼ tea spoon of sugar, gently stir and leave for about 15-20 minutes or until gentle bubbles form on the surface). 

Transfer the mixture onto a well floured  working surface and start kneading, for about 10 minutes, adding a little flour at a time if the mixture is too wet and sticky (this will partially depend on the flour and the size of the eggs)

Alternatively, use a mixer fitted with a dough hook and leave running for about 5 minutes. 

View fullsize Fig Strukelj 6.jpg
View fullsize Fig Strukelj 7.jpg

The dough is ready when it ends up being really smooth and elastic. It should not stick to your hands or working surface and should leave the bowl clean, if using a mixer. 

Transfer the dough back into a very lightly oiled bowl and cover with cling film (I use a shower cap, works really well). 

Put the bowl in a warm room free of drafts for at least one hour and leave the dough to rest and rise, the dough should increase in volume and double in size. 

While the dough is resting and rising start preparing the filling. 

View fullsize Fig Strukelj 8.jpg
View fullsize Fig Strukelj 9.jpg

The filling 

Wash the figs and pat dry them. 

Transfer the figs onto a chopping board, half them, quarter them and then roughly chop them. 

In a fairly large frying pan melt the butter and add chopped figs. 

Cook them for a few minutes on a gentle heat, stirring occasionally, until they become completely soft and break down. (if the skin of the figs is still a bit hard, break it down with the help of a wooden spoon). 

Cool completely and set aside. 

View fullsize Fig Strukelj 11.jpg
View fullsize Fig Strukelj 13.jpg

Transfer cooked figs into a bowl, add the cream and the lemon zest, stir and mix until all the ingredients are well combined. 

View fullsize Fig Strukelj 14.jpg
View fullsize Fig Strukelj 16.jpg

Flour well your working surface and rolling pin. Put your dough onto a working surface and roll it out to a more or less rectangular shape (40cmx50cm) to the thickness of about or not more than 1cm. 

This will give you a one big loaf, this is how it is traditionally made, and this is the size I made for this recipe. 

Because of its size, it could be a bit tricky to handle if you are not familiar with the recipe. 

I suggest you might want to divide the dough and the filling in half and make two logs instead.  

Take the fig mixture and spread it evenly on the rolled dough but leave some space around the edge so the filling does not come out when rolling the dough. 

View fullsize Fig Strukelj 17.jpg
View fullsize Fig Strukelj 18.jpg

Gently roll the filled dough quite tightly into a log and tuck well in the edges. 

View fullsize Fig Strukelj 19.jpg
View fullsize Fig Strukelj 20.jpg

Place the log onto a baking tray, previously lined with baking parchment. 

Cover with a clean kitchen towel , place it in a warm, draft free room and leave to prove for the second time for about 30 minutes or until well risen, not necessarily doubling in size. 

Take a toothpick and make a little holes in the dough on the whole surface and brush with either some melted butter or beaten egg. 

Bake in the preheated oven at 180C static, or equivalent, for about 50-60 minutes. Halfway through baking, tent the roll with the aluminium foil to prevent it browning too much and starting to burn. 

Leave on a baking tray until completely cool. 

Transfer on a serving plate, dust with icing sugar and serve. 

Just a thought 

For a more modern version of this traditional fig based sweet treat you can use ricotta instead of the single cream for preparing fig mixture filling and adding a splash of vanilla extract to both the filling and the dough mixture. 

Fig roll tastes at its best the day after has been baked. 

You can store it in an airtight container for up to five days and is suitable for freezing. 

Wine suggestion

Alto Adige Moscato Rosa Passito DOC 2018 - Laimburg

October 12, 2022 /tina oblak
kvašen štrudelj s figami, kvašen štrukelj s figami, fresh figs, fig jam, fruit strudel with sweet yeast dough, Istrian fig strudel, sweet yeast dough strudel, Apple strudel made from yeast sweet dough, plum strudel made from sweet yeast dough, Pear strudel made from sweet yeast dough, Istrian sweet treats, strudel with enriched dough, enriched dough, sweet enriched dough
Adriatic Recipe, Autumnal dish, Autumnal recipe, baked dish, baking, breakfast, celebratory desserts, dessert, easy baking, Enriched dough, festive bakes, festive dessert, festive sweet things, Istrian cuisine, Istrian dish, Istrian food, Istrian gastronomy, Rustic dish, Slovenian cuisine, Slovenian food, Slovenian gastronomy, Small bites, Snacks, summer dish, summer recipe, Sweet bread, sweet course, sweet finger food, sweet nibbles, Sweet Things
Comment
Pinza 21.jpg

Pinca (Sweet Easter Bread) recipe

Beans and Sardines
March 30, 2021 by tina oblak in Sweet Things, Sweet bread, Enriched dough, Easter treats, Slovenian Easter Sweet Br

Pinca is a type of egg enriched bread that is not very sweet, but is flavourful, soft and fluffy. It is similar to a brioche, but contains less butter, and is therefore lighter. It is eaten especially during Lent and Easter, but is also prepared all year round.

It is widely available in bakeries, food stores and supermarkets, but nothing compares to the one baked at home. It is so easy to make; yes, it is a bit lengthy, perhaps because of the proving times, but give it a go. When you taste the real thing you will never want to buy it again.

Traditional Italian Pinza is very popular in the province of Trieste and Gorizia. It became an essential part of culinary tradition in Istria where is called Pinca and along the Adriatic coast and Dalmatia.

Pinza bread is often mistaken for Venetian Pinza, which is very different, as the dough has distinct consistency, and it is well seasoned and flavoured, for example, with walnut kernels, sultanas soaked in rum or Marsala, soft dried figs, pine nuts and apples.

My nona Nada always made pincas for Lent, and she baked quite a few, and then gave them to the family to be enjoyed. As soon as you entered the main entrance porch of her house, the aromas were unmistakable, I instantly knew what she had been making that day, and I also knew Easter was coming soon.

Sadly, her 93 years old hands have no longer the strength to knead the dough. I bake pinca today for my family, using her exact recipe, and when I cut a slice of it, close my eyes and smell the aroma of it, I get immediately transported to her kitchen, and the vision of a pile of pincas on a wooden table, covered with hand embroidered white linen tea towels appear in my mind.

She also told me that the tradition wanted the pinca to be blessed in the church. People would fill their wicker baskets with pinca, cooked ham and hard boiled eggs and take it to the mass on Holy Saturday or early on Easter Sunday to be blessed.

Only after being blessed, it was served either for breakfast on Easter day with coffee, a selection of cured meats, cooked ham, cheese and hard boiled eggs and different types of jams and preserves or as a dessert after Easter lunch where a slice of pinca would be very commonly dunked into a sweet wine or Muscat, locally known as muškat.

The tradition is very strong and this is how it is still served today.

View fullsize Pinza 2.jpg
View fullsize Pinza 3.jpg

Pinca has a typical incision on the surface either in the shape of a 'cross' that symbolizes the suffering of Jesus Christ, or a the 'letter Y,' dividing the pinca into three sections, symbolizing the Holy Trinity in Christianity.

It is believed, that the incisions represent Jesus as a martyr, and that the Pinca itself represents a kind of Holy Sponge from which Jesus, according to the Gospels, was offered a drink during the Crucifixion (Matthew 27:48, Mark 15: 36, John 19:29).

Pinca is enriched with eggs, which also has symbolic significance, since it is a kind of constant reminder of Christianity, and the resurrection of Christ, and can also be linked to perhaps other old traditions that celebrate the arrival of spring after the bleak winter period.

Ingredients

  • 500g regular plain flour

  • 1 cube of fresh (brewer’s) yeast 42g or 14g of dry yeast

  • 100g unsalted butter, melted

  • 150g caster sugar

  • 2 medium eggs, lightly beaten

  • 2 egg yolks, lightly beaten

  • 100 ml tepid, lukewarm milk (semi skimmed or full fat)

  • 2 Tbsp dark rum or grappa (alcoholic, fragrant, grape-based pomace brandy of Italian origin)

  • finely grated lemon zest of 1 unwaxed lemon

  • pinch of sea salt

  • 1 small egg, lightly beaten for glazing (you can use lighly beaten egg whites, it will result lighter in colour after baking)

Method

In a small bowl place fresh yeast and slightly brake it down into smaller pieces with your fingers. Add 100ml of tepid milk and ¼ Tsp of caster sugar. Gently stir and leave for about 20min or until gentle bubbles form on the surface.

View fullsize Pinza 4.jpg
View fullsize Pinza 5.jpg
View fullsize Pinza 6.jpg

In a separate mixing bowl put the egg, egg yolks and beat them gently. Add melted butter, sugar, rum or grappa, grated lemon zest, 100ml of milk and a pinch of sea salt. With the fork mix well all the ingredients.

Pinza 7.jpg

In a separate mixing bowl put the egg, egg yolks and beat them gently. Add melted butter, sugar, rum or grappa, grated lemon zest, 100ml of milk and a pinch of sea salt. With the fork mix well all the ingredients.

In a large mixing bowl put the flour, add egg mixture and the yeast mixture. Combine well all the ingredients with the wooden spoon or spatula to start with. When all the ingredients are well combined transfer the mixture onto a clean, very well floured surface.

View fullsize Pinza 8.jpg
View fullsize Pinza 9.jpg

Work with your hands, adding a little flour at the time if the dough is too sticky, kneading the dough until you get a very smooth and soft dough with all the ingredients completely incorporated.

The dough will be at first quite wet and sticky, be very patient and do not be tempted to add too much flour too soon.

During the kneading, on the contrary, if you think the dough is too hard and dry add more tepid milk.

Knead the dough for about 10-15min, stretching it and folding it, until the dough is smooth in consistency and does not stick to the surface.

View fullsize Pinza 10.jpg
View fullsize Pinza 11.jpg
View fullsize Pinza 12.jpg

Shape the dough in a ball, place it back into a previously oiled big mixing bowl. Cover with cling film, leave to rest and proof in a draft free space at a warm room temperature for a minimum of 2h. After this time your dough should be at least double in size.

View fullsize Pinza 13.jpg
View fullsize Pinza 14.jpg

Take the dough out of the mixing bowl, place it on a floured surface and knead the dough once again. Divide the dough into two equal parts or three, if you wish a slightly smaller size bread and shape them into a sphere or other shapes if you prefer, maybe a plait.

Lay big baking tray with baking parchment or use a paper panettone mould if you prefer. Place the divided parts of the dough onto the baking tray. Cover with clean tea towel and put it in a warm place away from drafts and let them rest and proof for further 2h hours. I usually put the tray in the oven, by doing this I do not have to worry about the drafts or the room being too cold. Just make sure you take the tray out of the oven before turning it on in order to preheat it!

View fullsize Pinza 15.jpg
View fullsize Pinza 16.jpg

Towards the end of proofing time, heat the oven to 180C.

With the very sharp knife decisively cut the cross on the surface or Y, making sure you do not drag the dough. The cut should be quite deep but not to the point of touching the bottom of the tray. Brush with the beaten egg and put in the preheated oven to bake for about 30-40 min or until nicely golden brown in colour on the surface.

View fullsize Pinza 17.jpg
View fullsize Pinza 18.jpg

I suggest you check the colour of your pinca after about 20-25min, if it is browning too quickly, tent it with the aluminium foil and bake further.

You might want to double check if it is baked completely by pricking the centre with a clean wooden skewer (the skewer should come out clean) or use an instant food thermometer if you have one (it should register a temperature between 195 and 200C). If still wet, cover the pinca with the aluminium foil and bake for further few minutes.

It is a good idea to make sure that pinca is thoroughly baked as it browns quite quickly during the baking and therefore it is easy to undertake.

Pinza 19.jpg

Remove from the tray and let cool completely on a cooling rack. Slice and serve.

Pinza 20.jpg

Pinca can be stored for about 2-3 days or frozen for later use. You can also serve it sliced and slightly toasted.

Just a thought

Pinca dough can be also shaped into a plait.

Nowadays, a bit of a vanilla extract is often added to the pinca dough for extra flavour. However, it is important to remember that pinca is a humble bread, and originally only has lemon zest and dark rum or grappa added to the dough for the aroma. My nona Nada also told me that in her days vanilla was not very common to use, simply because it was a very difficult ingredient to get a hold of, and far too expensive.

Pinza 1.jpg

Wine suggestion

Breganze Torcolato 2018 by Maculan.

March 30, 2021 /tina oblak
Pinca, Pinza, enriched dough, sweet bread, celebratory bread
Sweet Things, Sweet bread, Enriched dough, Easter treats, Slovenian Easter Sweet Br
Comment