Beans and Sardines

  • Home
  • About
  • Recipe of the week
  • Recipes
  • Wines
  • Contact

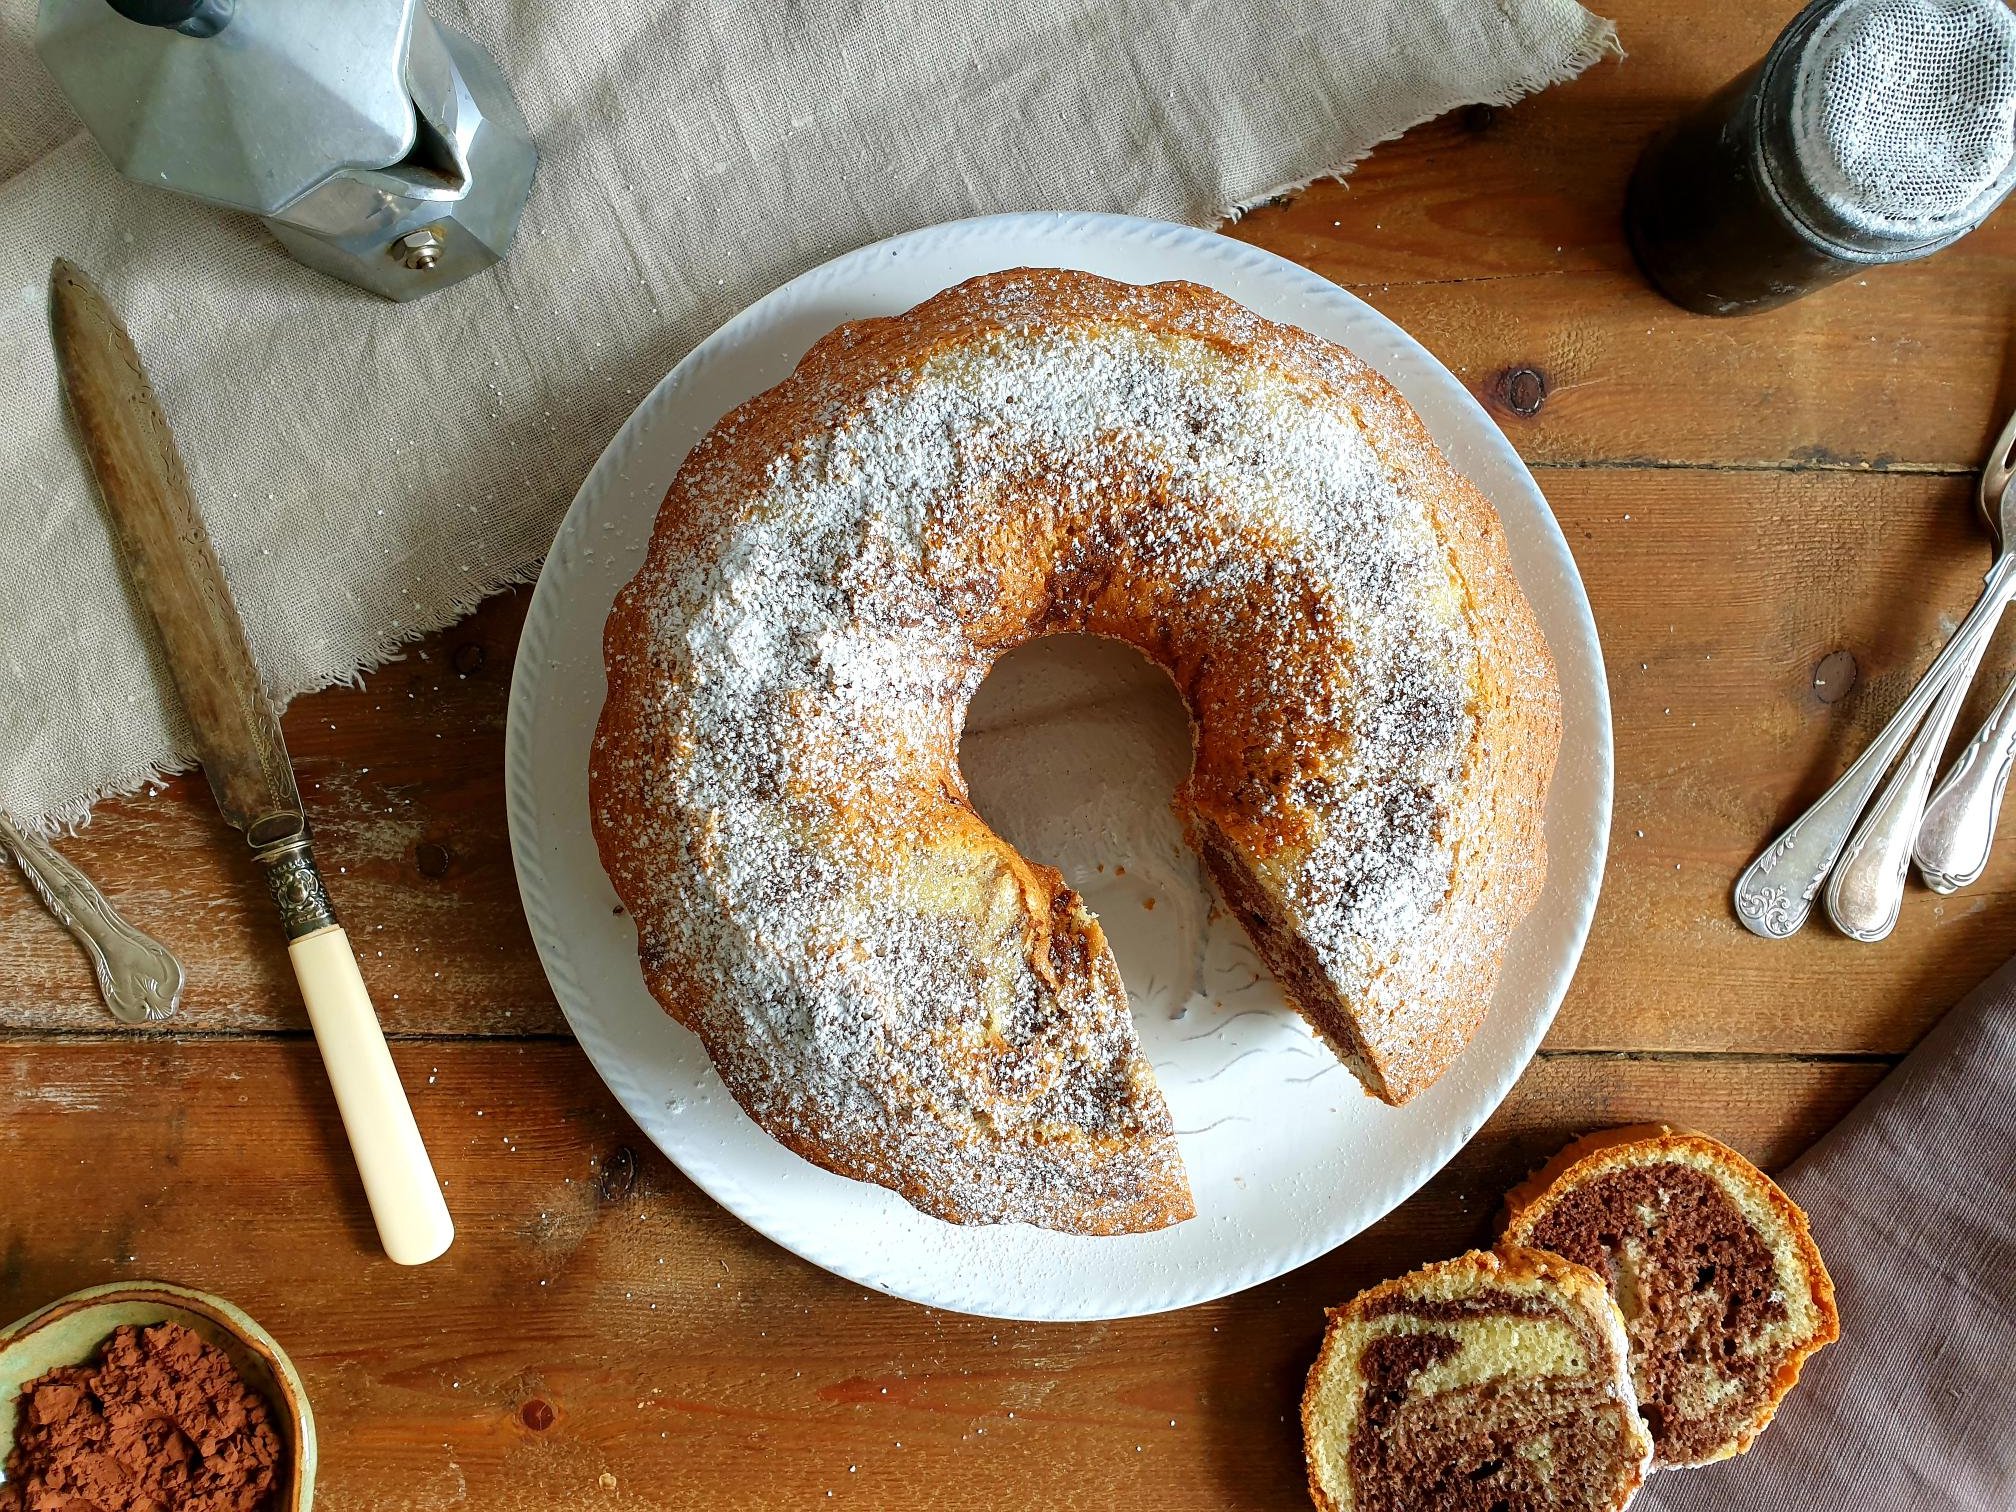
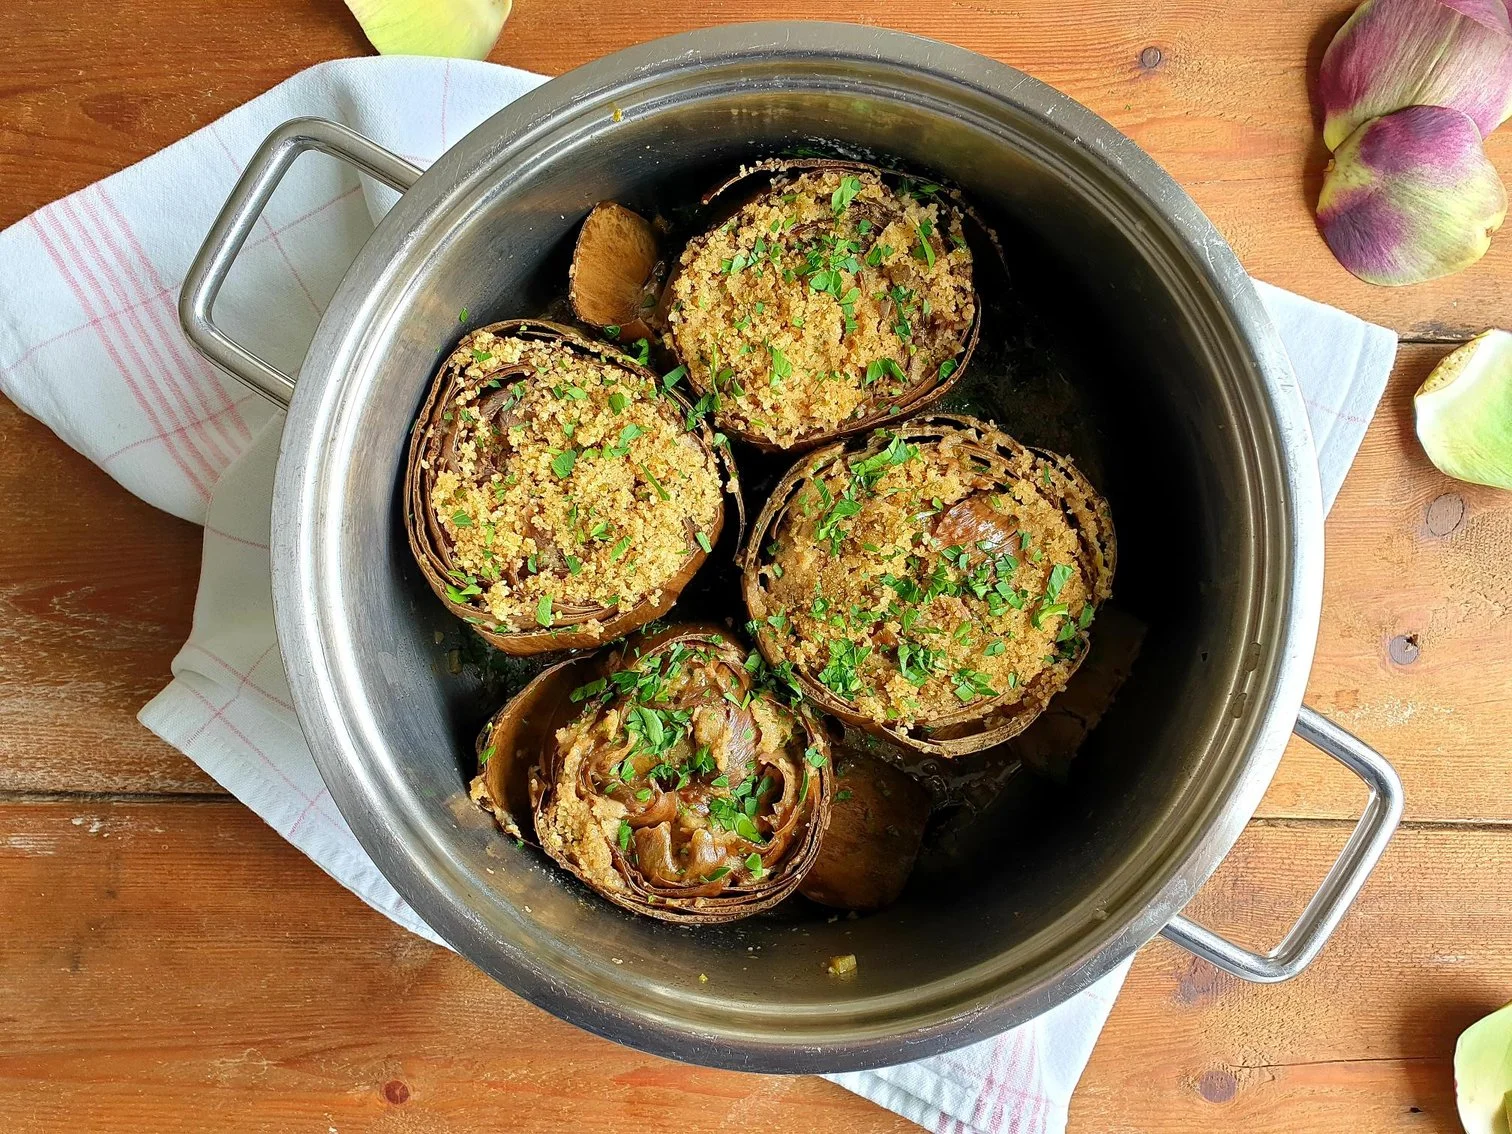
Stuffed Artichokes Istrian Style Recipe

Beans and Sardines
June 26, 2025 by tina oblak in Adriatic Recipe, Appetizers, comfort, dinner, Easy recipe, family friendly meal, Istrian dish, light meal, recipe from Northern Ital, Rustic dish, simple recipe, Slovenian cuisine, Slovenian food, Slovenian gastronomy, Starters, stuffed dishes, supper, Vegan, Vegetable side dish, Vegetables, Vegetarian, weekend

If you are looking for a little inspiration for a slightly different appetizer, look no further.

Artichokes are a great garden vegetable, rich in potassium and iron, and low in calories, but somehow ignored and overlooked in the supermarkets or vegetable stalls as the majority of people are not acquainted with this vegetable, not quite sure how to prepare it, clean it and eat it.

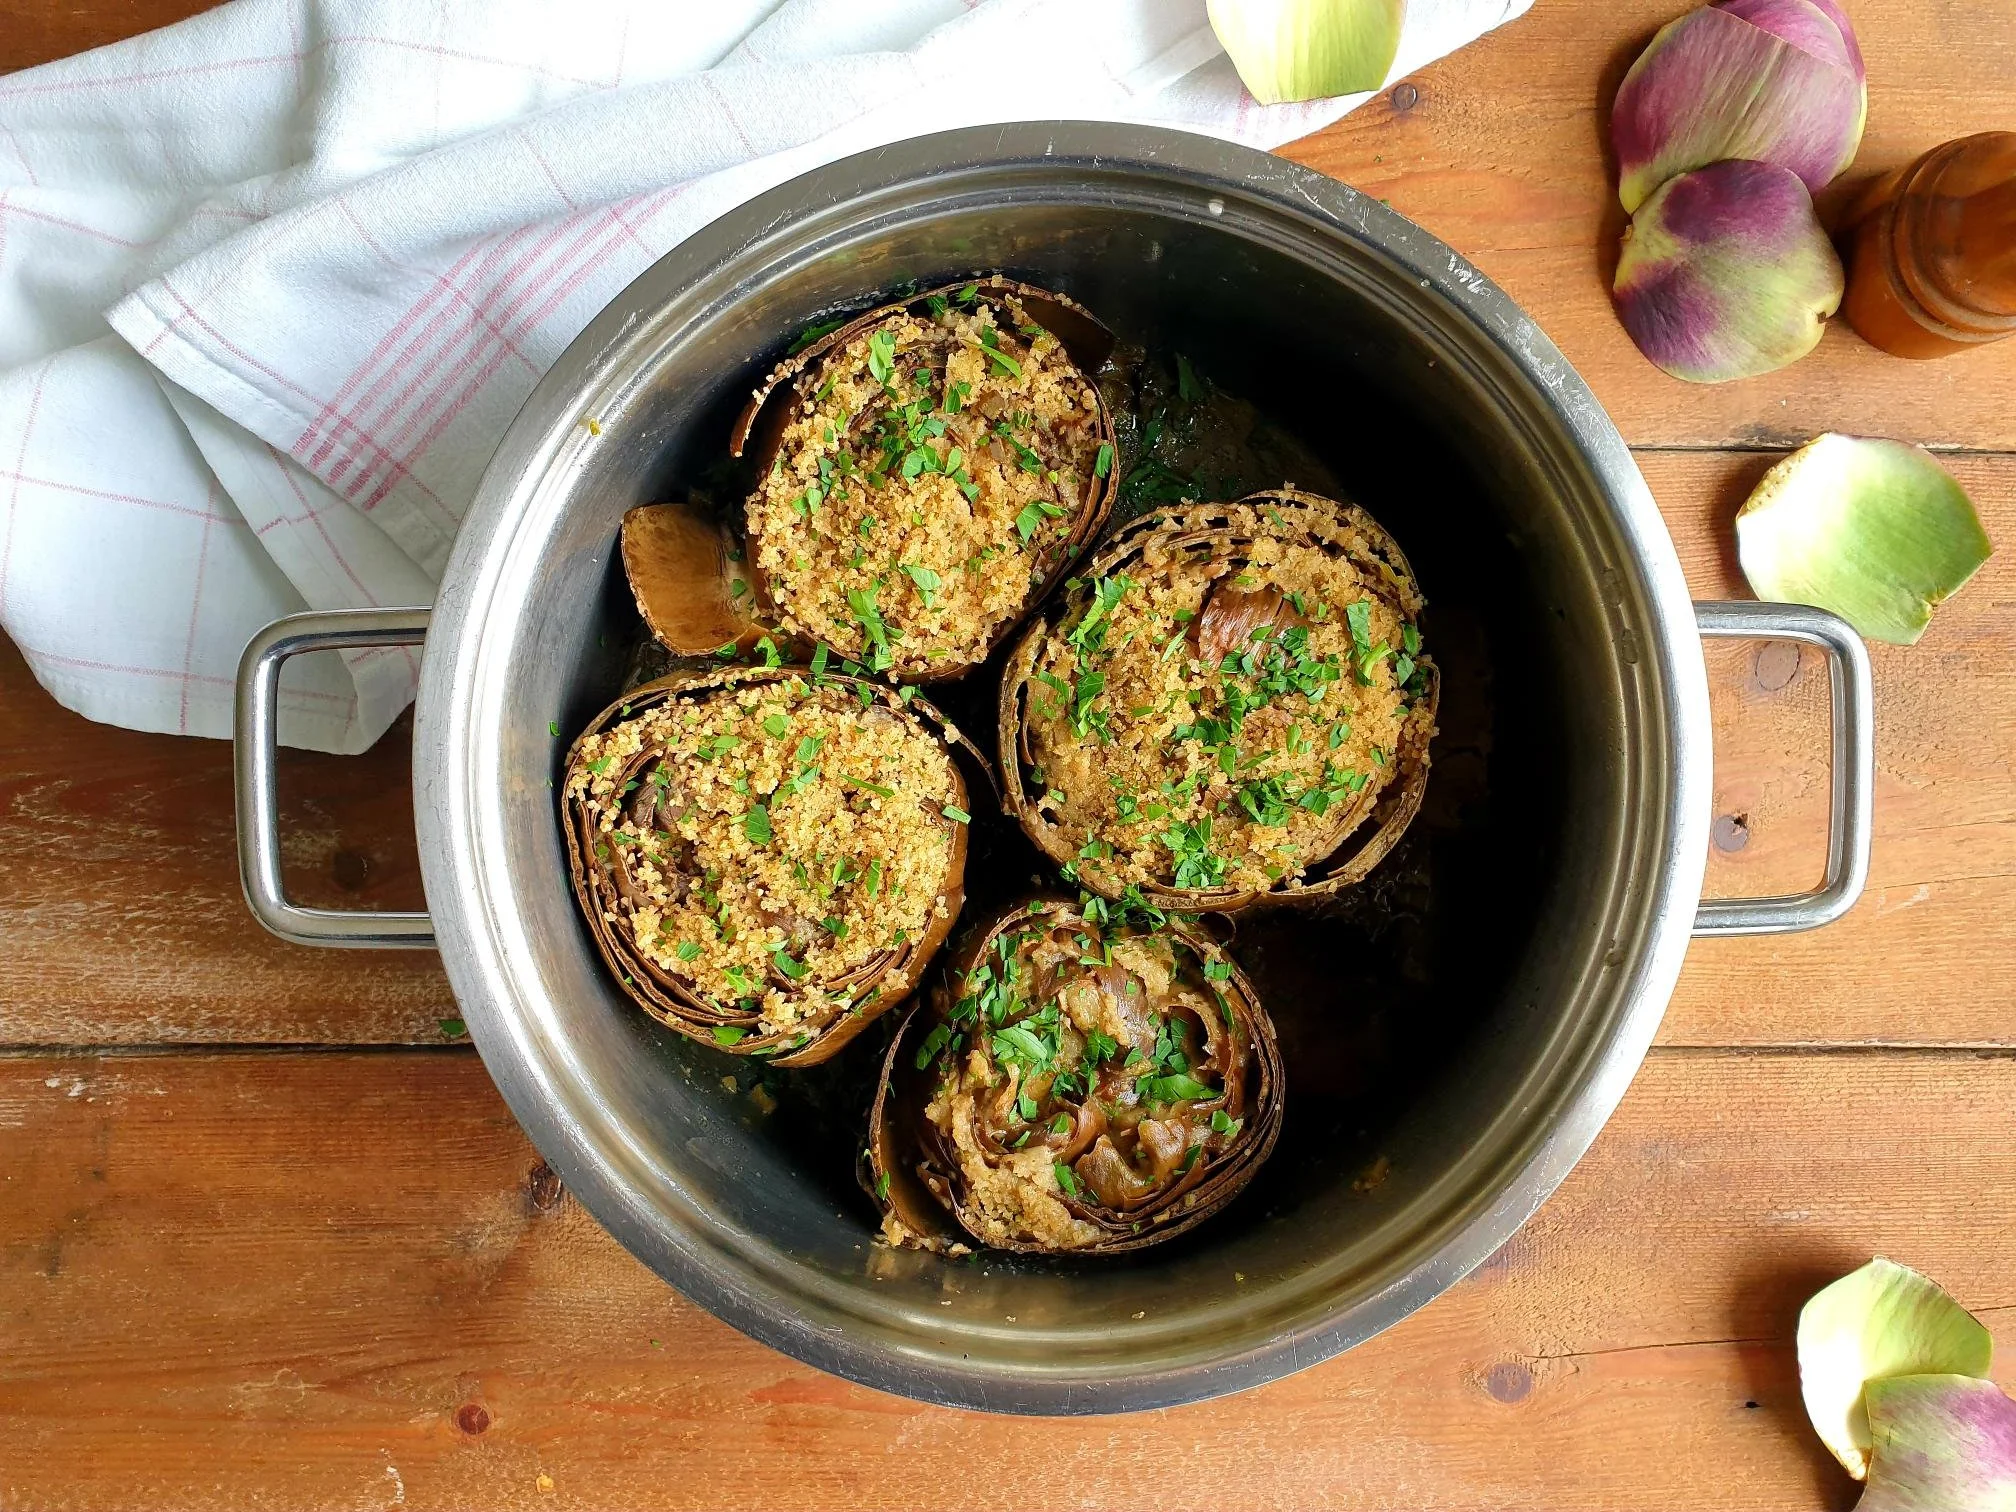
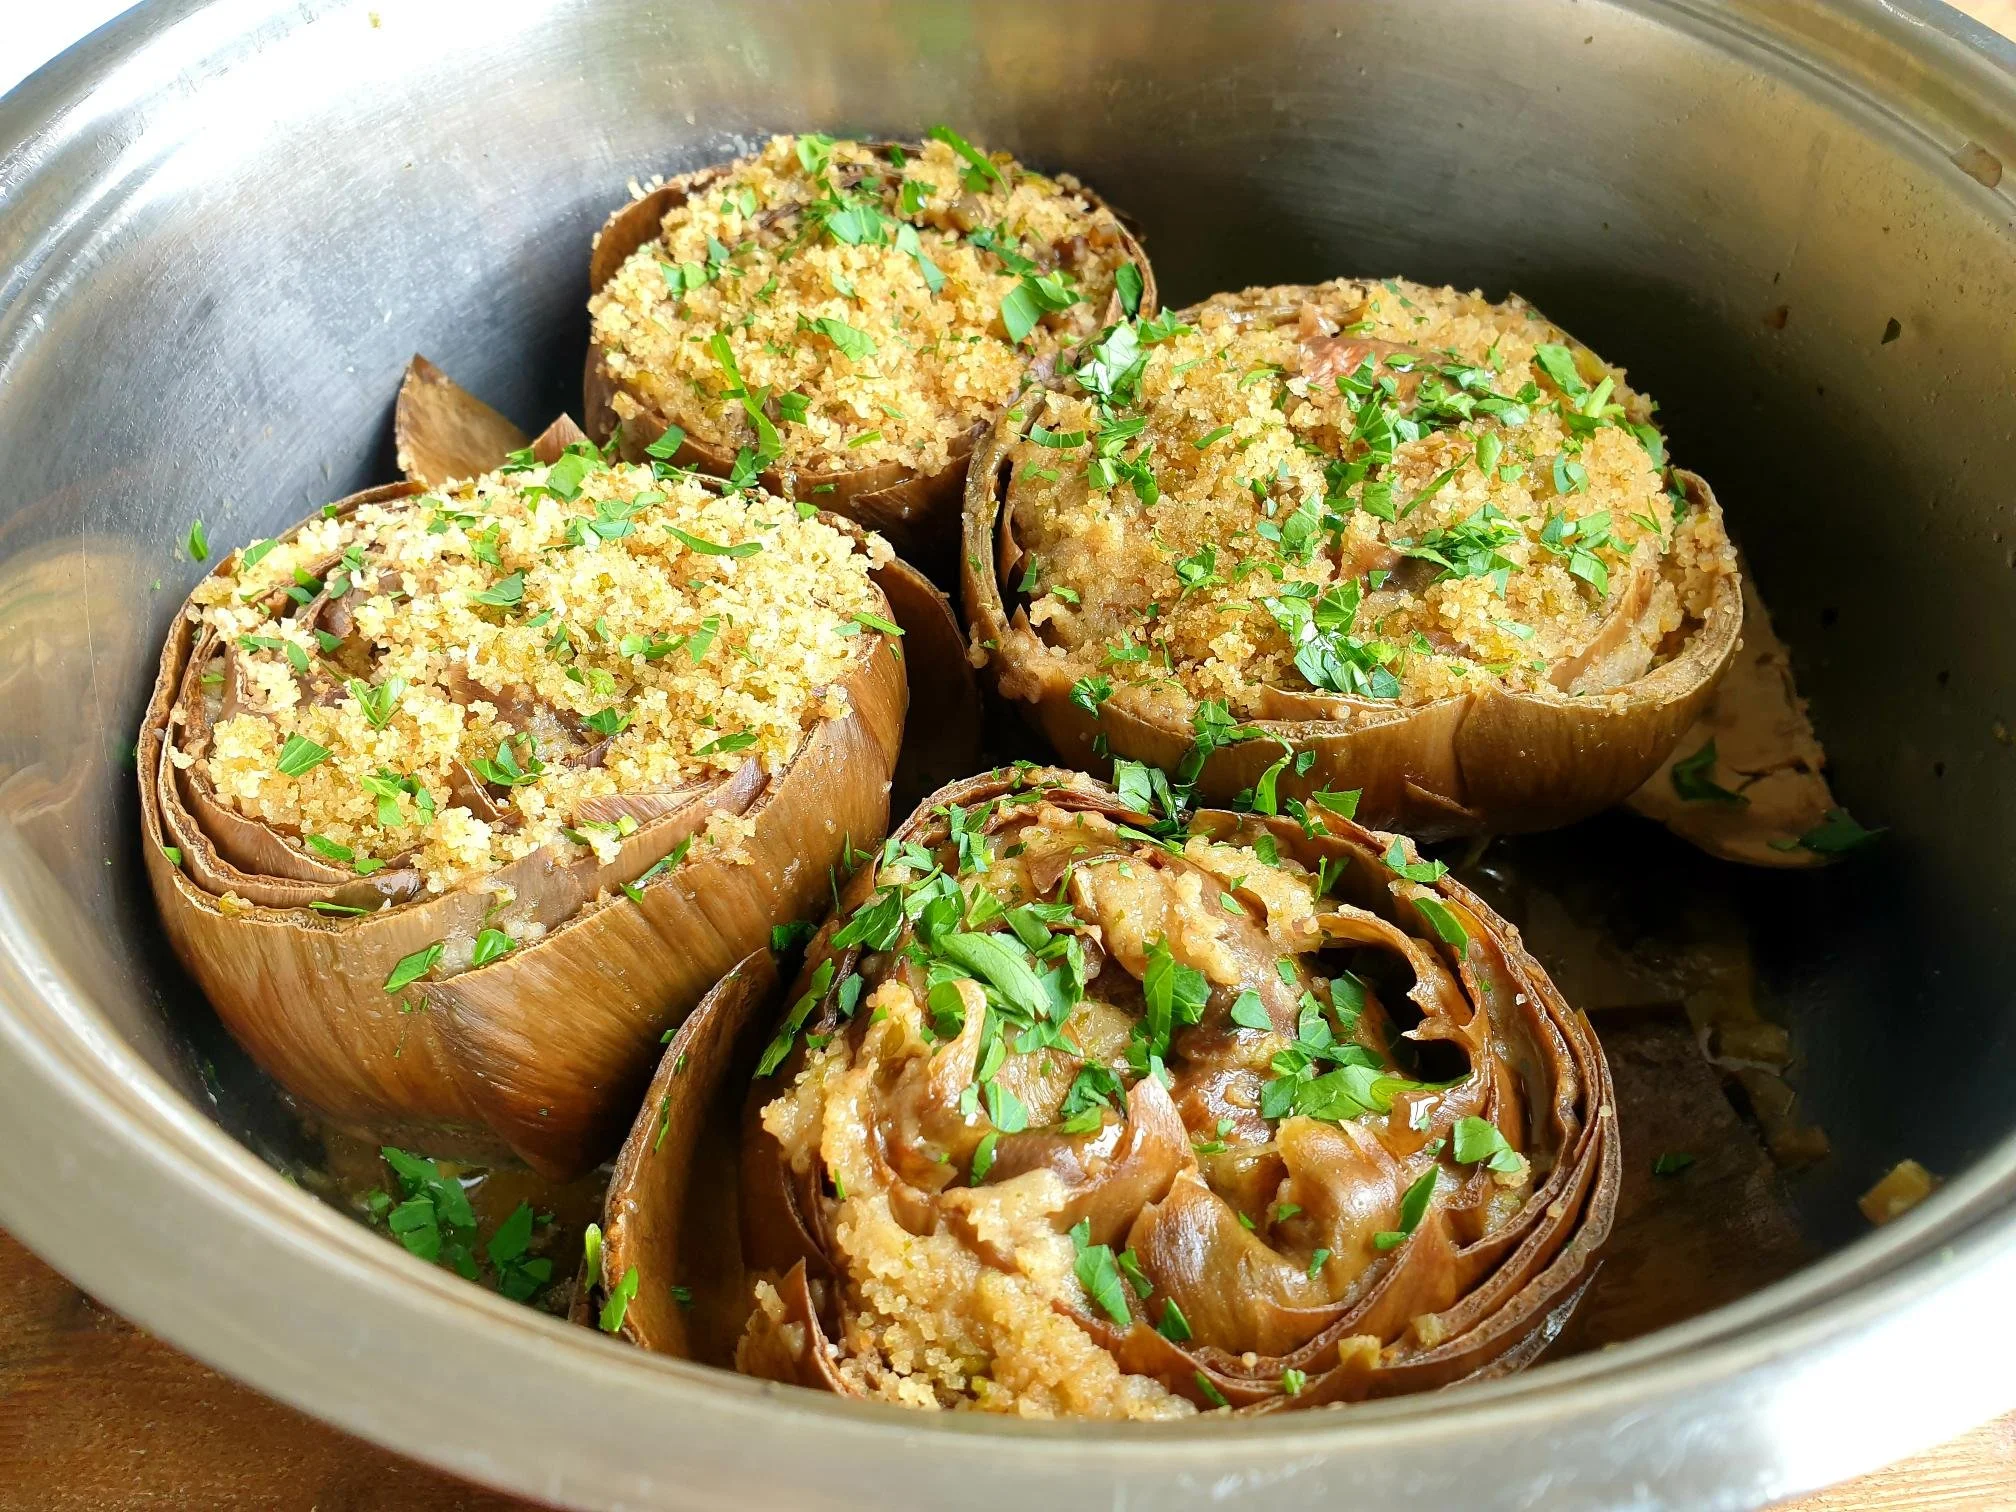
This dish is rustic and informal, artichokes are trimmed and stuffed with garlicky breadcrumbs, then cooked in a saucepan until tender.

Each leaf is then individually removed to scoop up a bit of the sauce, and with the top of your teeth you scrape the bottom of the leaf.

This recipe might look complicated to make but despite its elegant appearance there is nothing difficult or intimidating about it.

Artichokes have been hugely popular up and down Italy, and artichokes bottoms are a specifically Venetian delicacy.

Due to geographical proximity there is no surprise that this wonderful vegetable has been prepared and cooked in Slovenian Istria since forever, the area was dominated and gastronomically influenced by the Most Serene Republic of Venice.

In a coastal town of Strunjan, every year, towards the end of May, there is a festival called Dnevi Artičok (Artichoke Days) to honour this humble vegetable that is growing and thriving in this area due to a mild Mediterranean climate.

During the festival you can learn and taste a variety of artichoke dishes. This event values a still little know Istrian Artichokes, smaller than the common artichoke but packed with flavour and therefore greatly appreciated among the gourmets community.

I am sharing here my mum's recipe, I loved cleaning the artichokes with her, and as a child I found pulling the outer leaves such a great fun. I think sometimes I pulled away far too many, but of course, my mother never said anything, and when she cooked this dish it always somehow felt a special treat.

Ingredients

Serves 4 as a starter

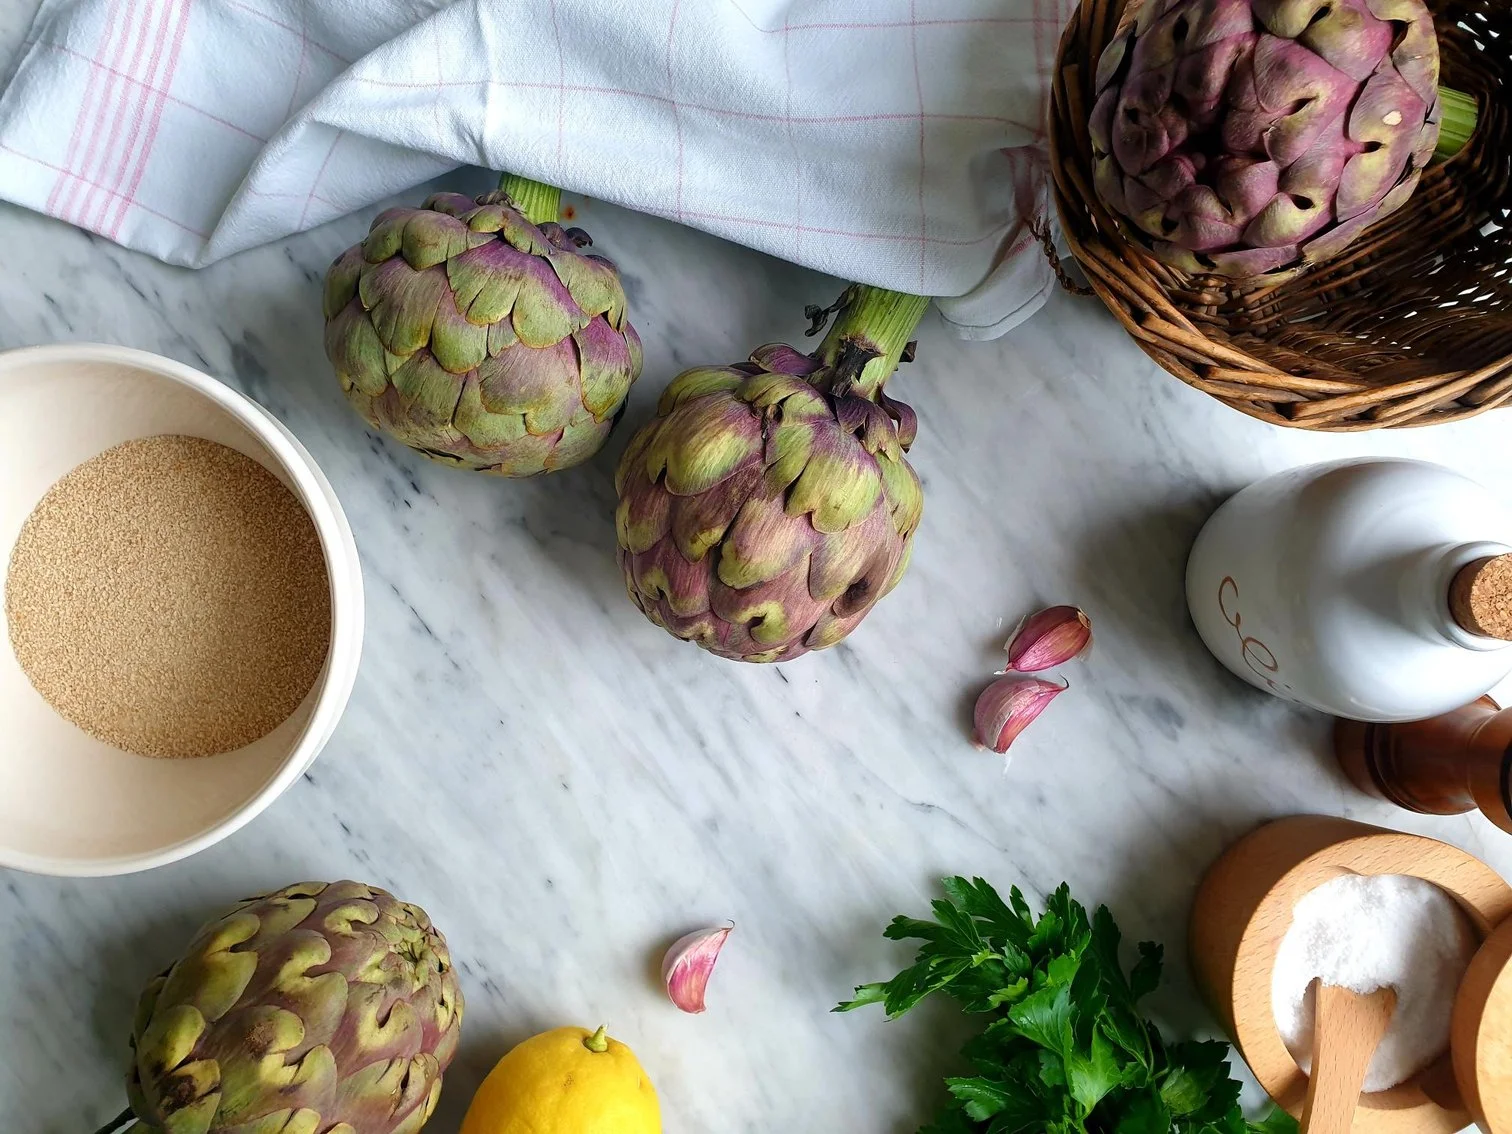
  • 4 fresh globe artichokes

  • dry breadcrumbs, 70g (approximately 6Tbsp)

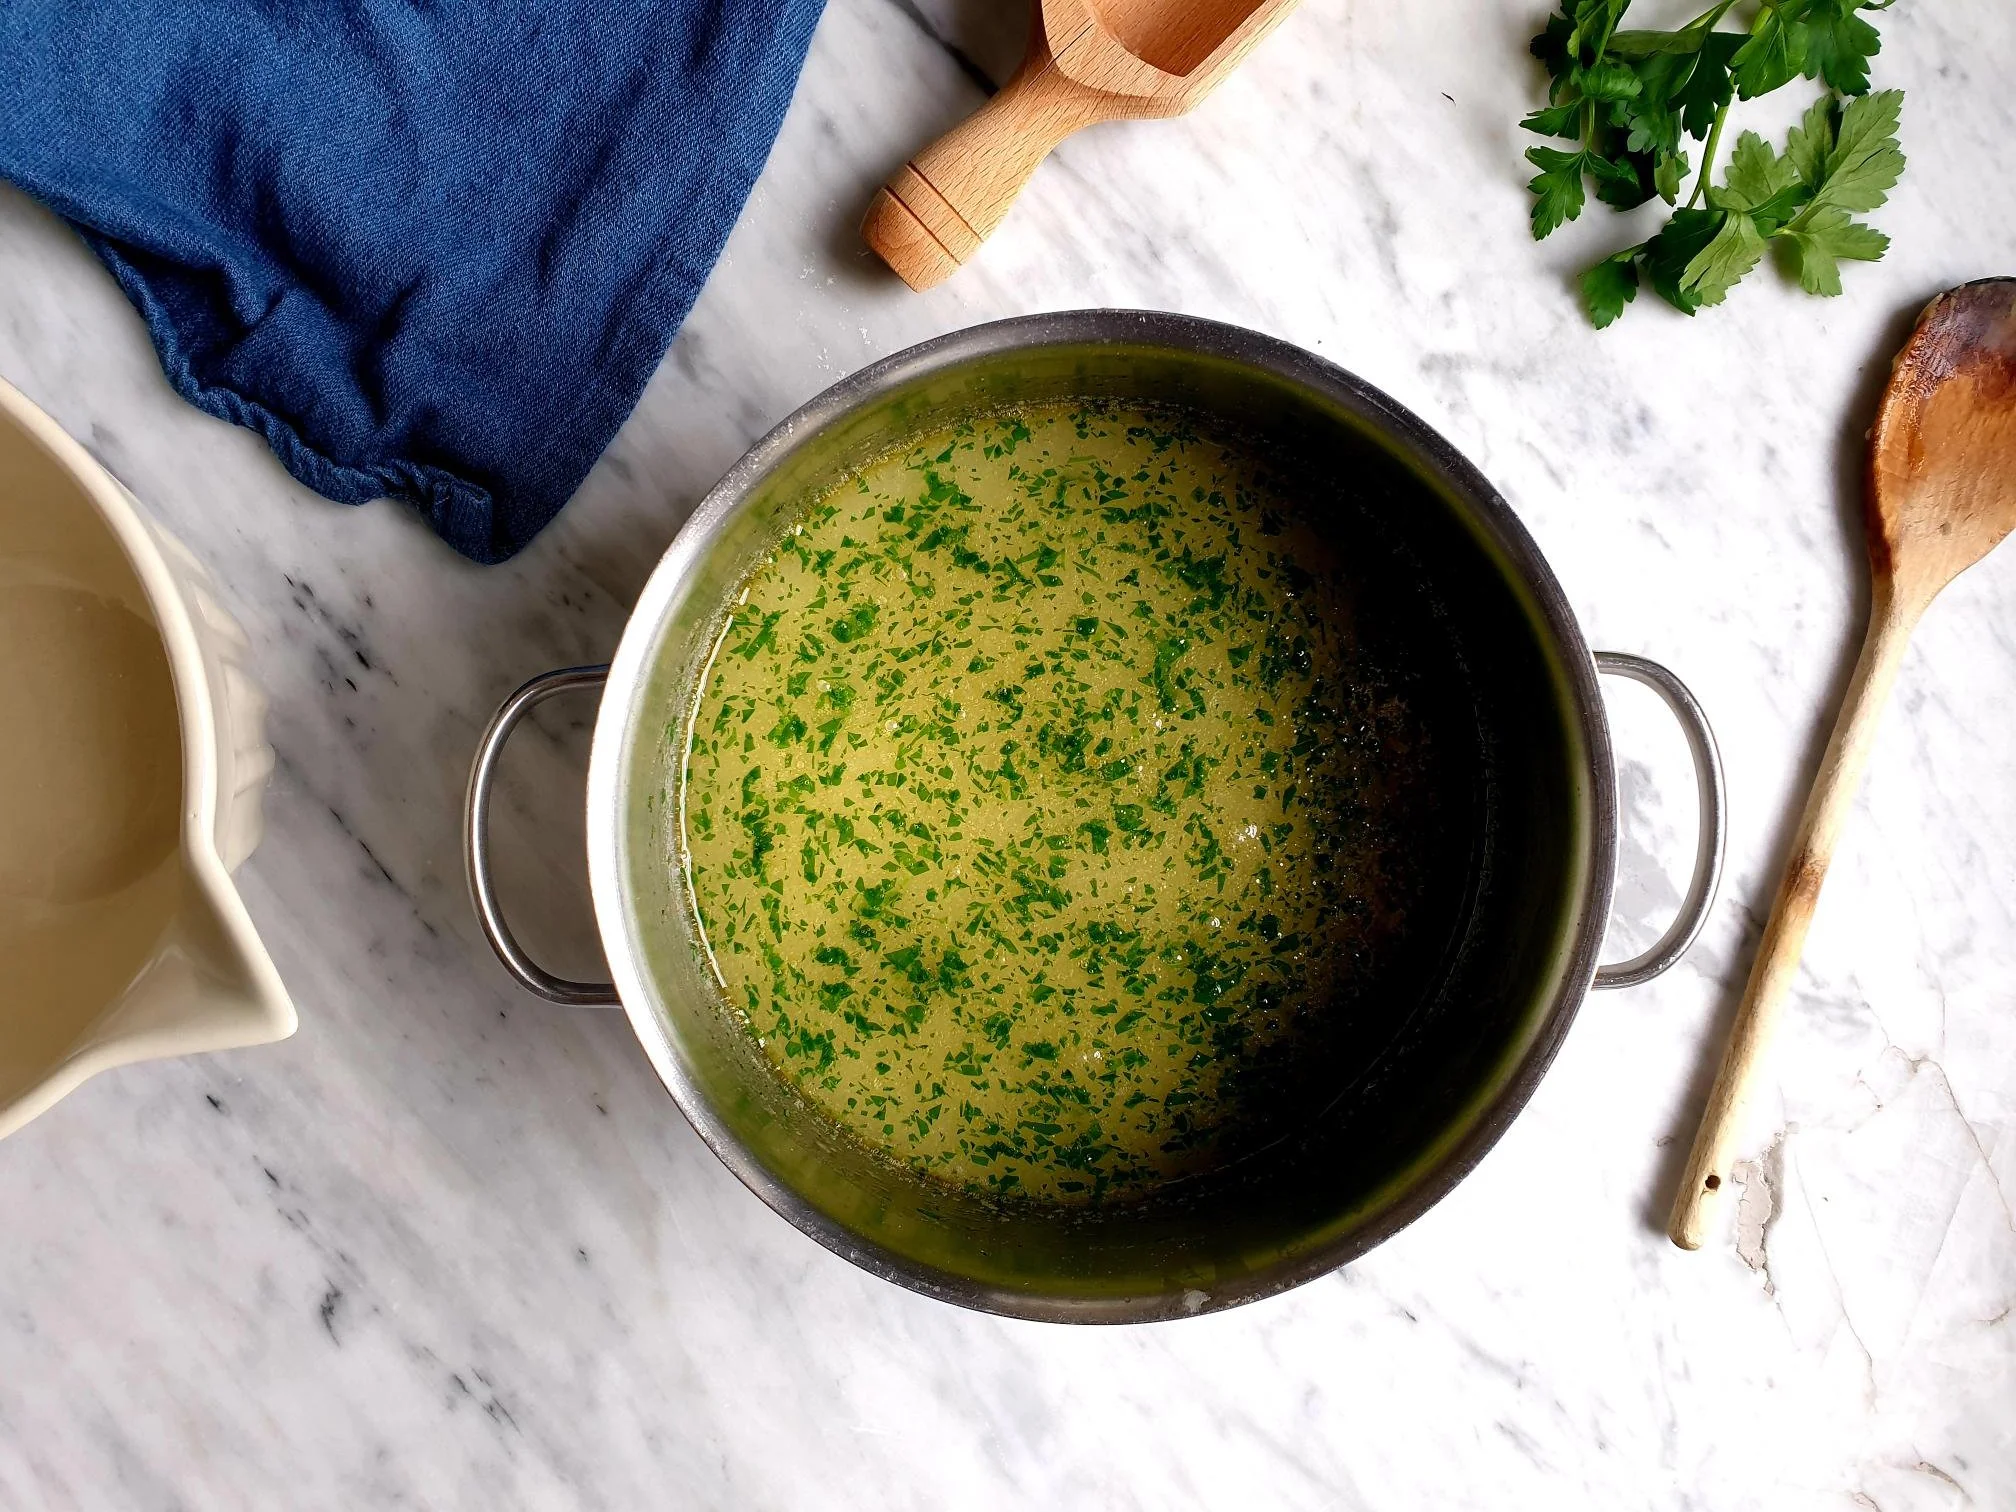
  • fresh flat leaf parsley, about a handful (7g roughly), finely chopped

  • extra virgin olive oil (about 6Tbsp) 4Tbsp for the stuffing and 2Tbsp for the sauce

  • 1 clove of garlic, peeled and pressed

  • Parmiggiano Reggiano or Grana Padano cheese, about 30g (or to taste), optional, finely grated (can use other types of cheeses to your liking)

  • water or vegetable stock 200ml (using a good quality instant vegetable stock is perfectly fine)

  • sea salt, to taste

  • black pepper, optional, to taste

  • lemon juice of 1 lemon

Method

Take a big bowl (big enough to accommodate the artichokes), fill it with cold water and add lemon juice of 1 lemon.

Reserve the lemon halves for later use.

Start by cleaning and preparing the artichokes, one at a time.

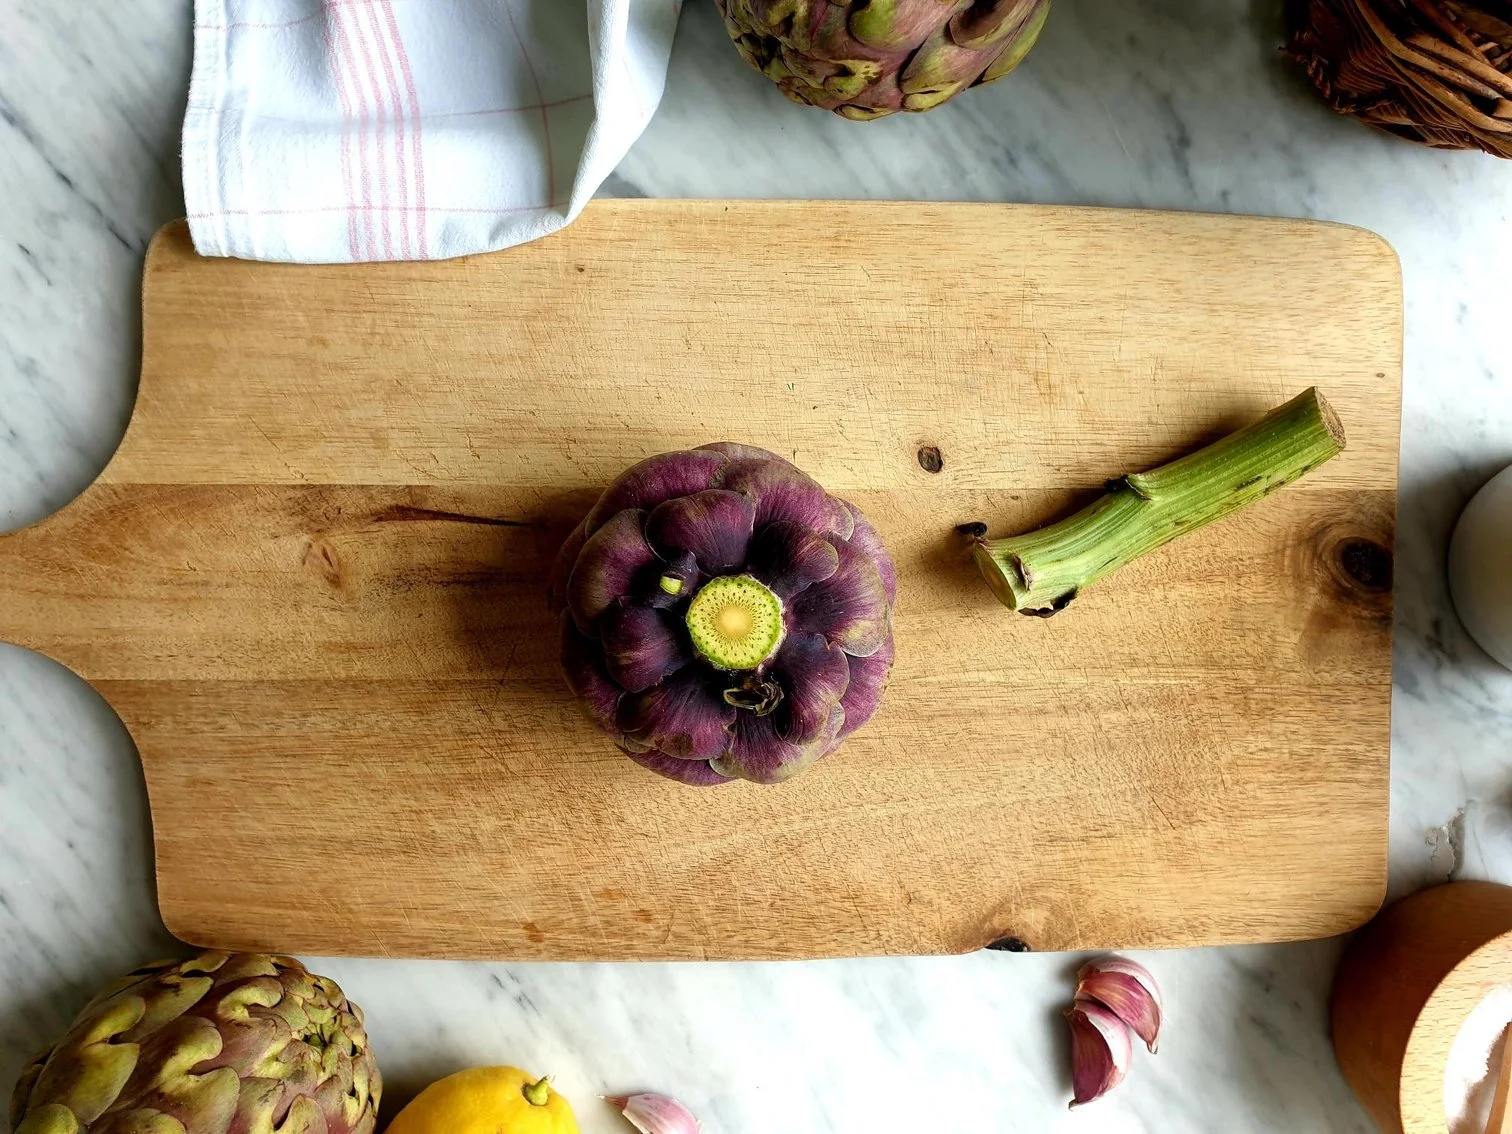
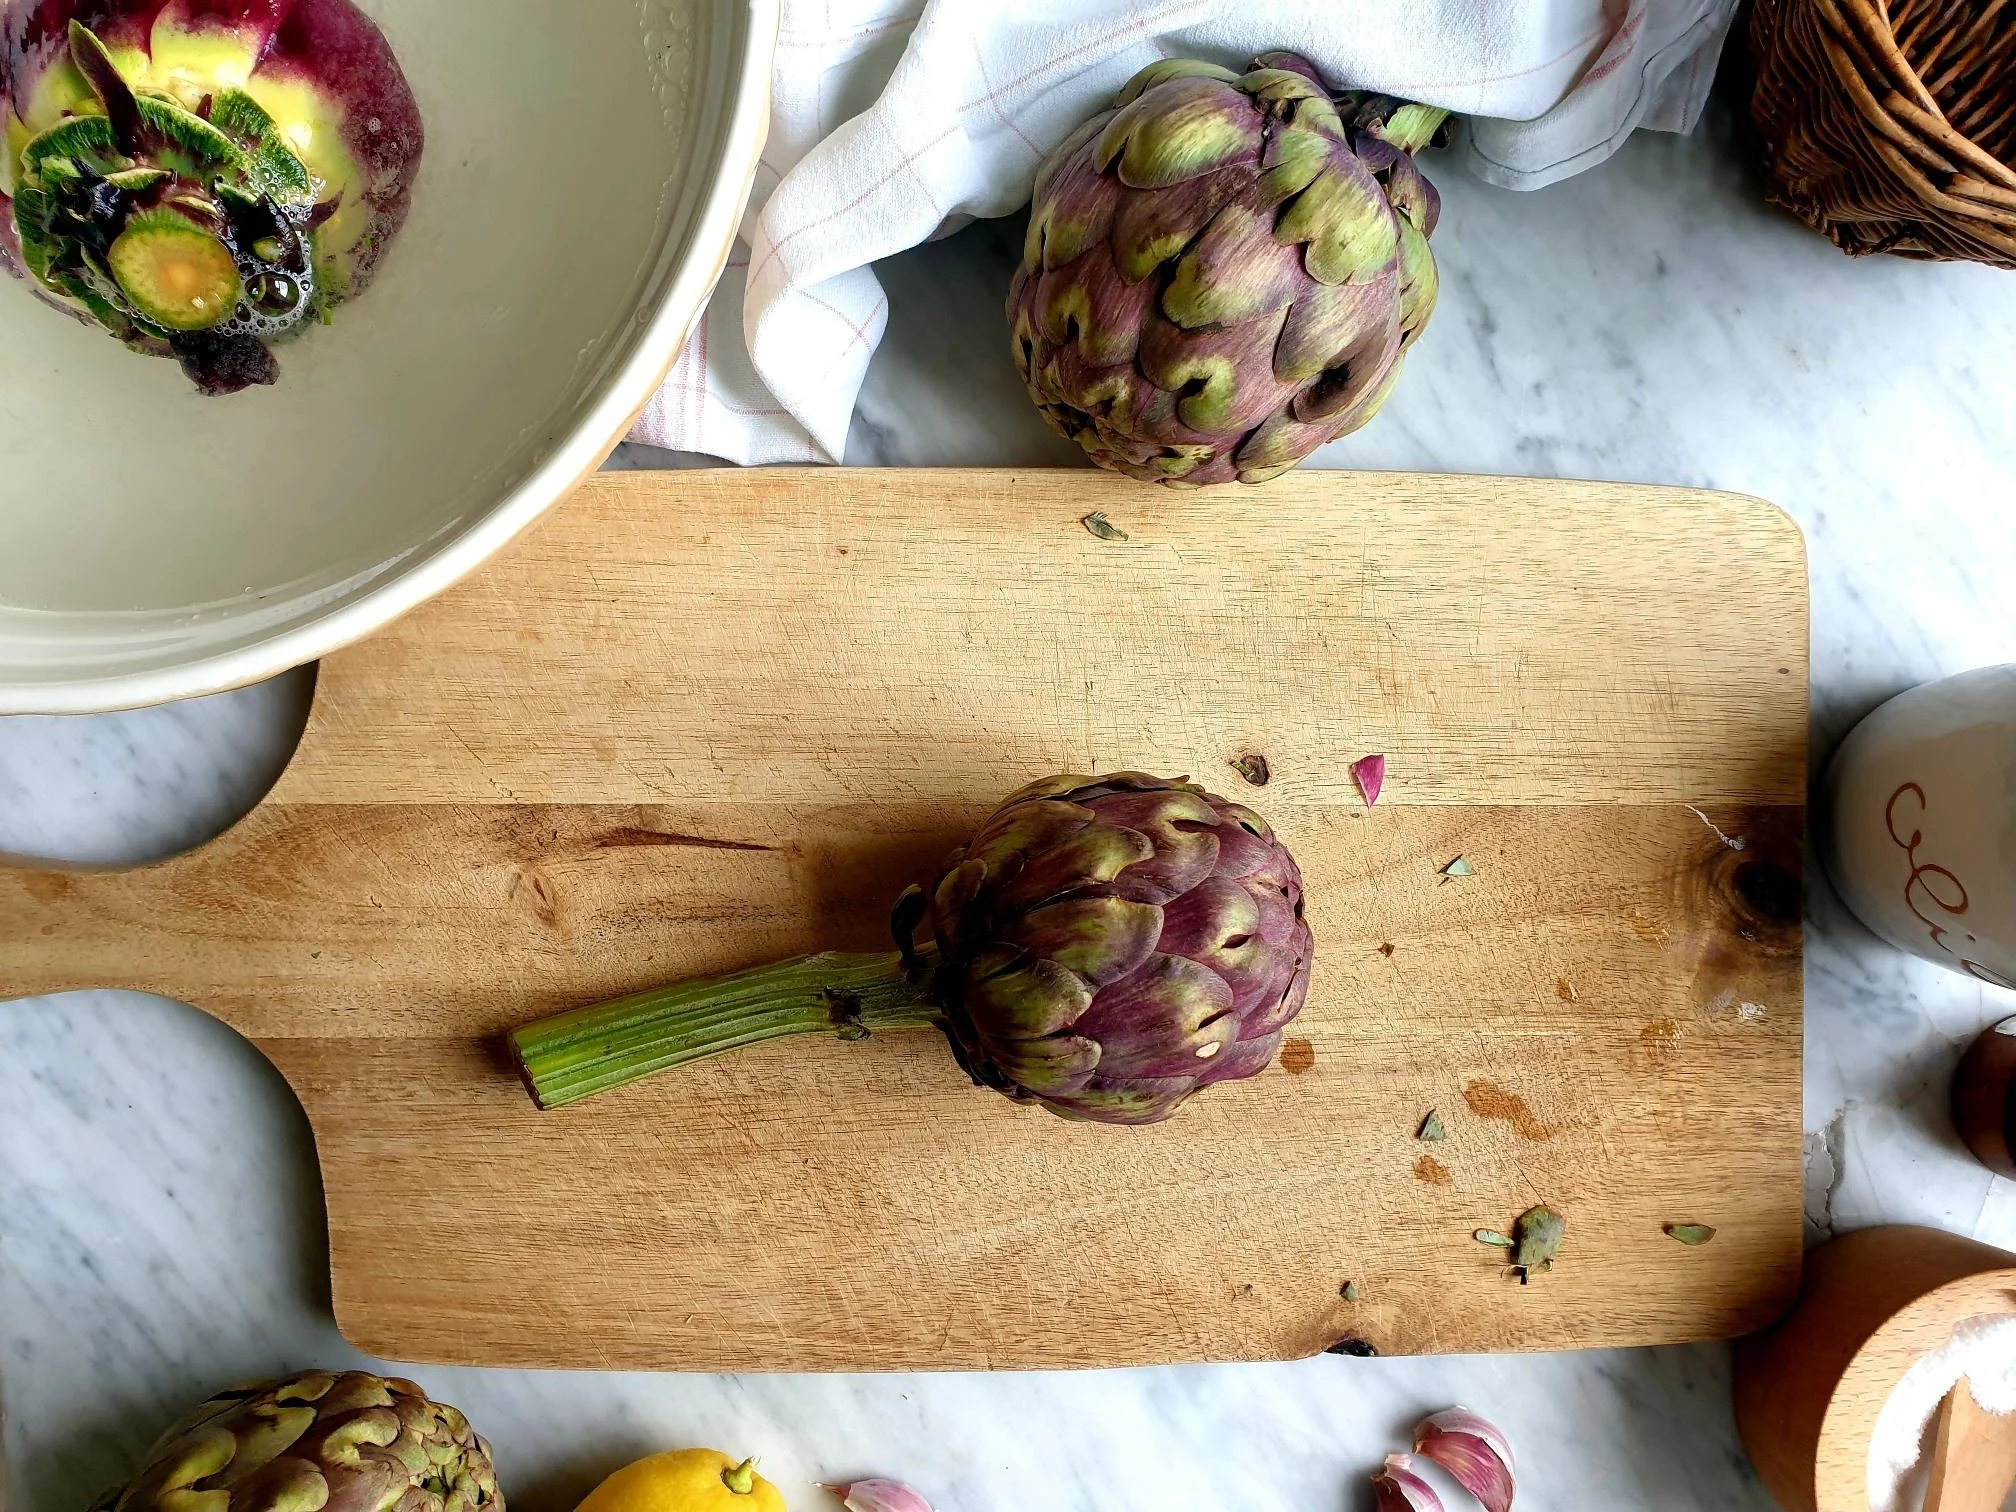
Trim off the stem of the artichoke so it can stand and sit upright without rolling over. Put the stem in the acidulated water and set aside for later use.

Rub the base of the artichoke with a lemon half, this will prevent from turning it brown.

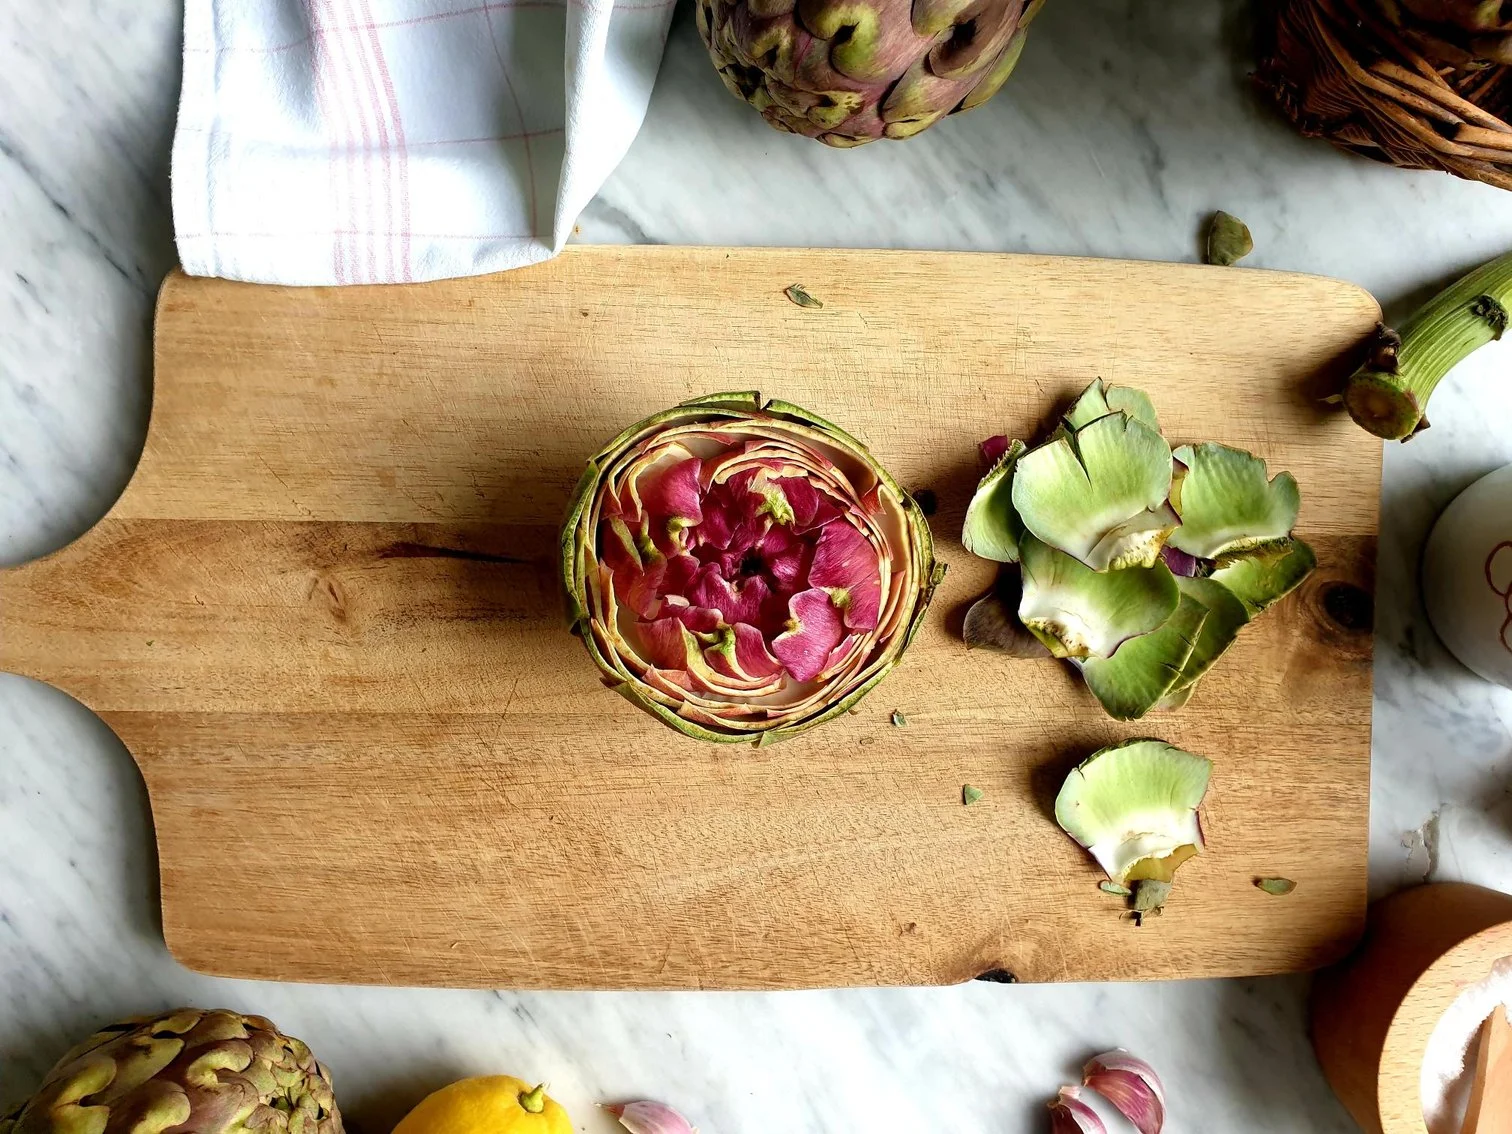
Tear off the outer toughest leaves, (one or two layers, depending on the artichokes) but leave most of the leaves on.

With the sharp knife cut off the tip of the artichoke, about 2-3cm (1inch).

View fullsize Stuffed Artichokes Istrian Style 4.jpg
View fullsize Stuffed Artichokes Istrian Style 7.jpg

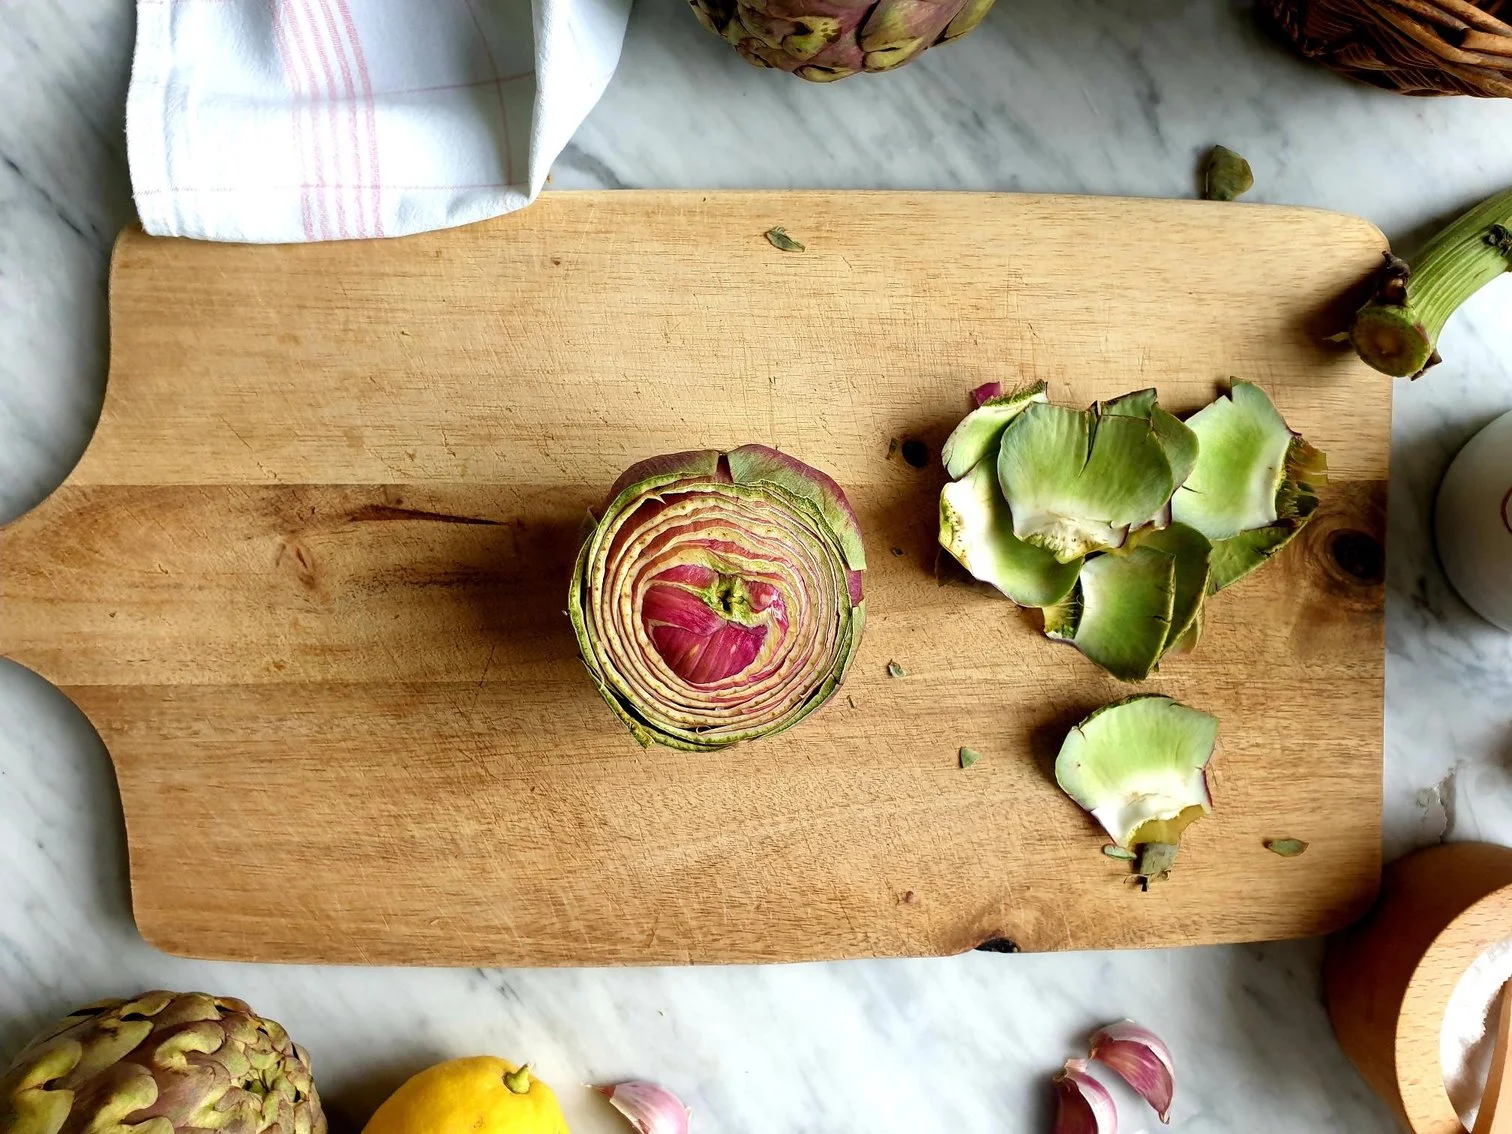
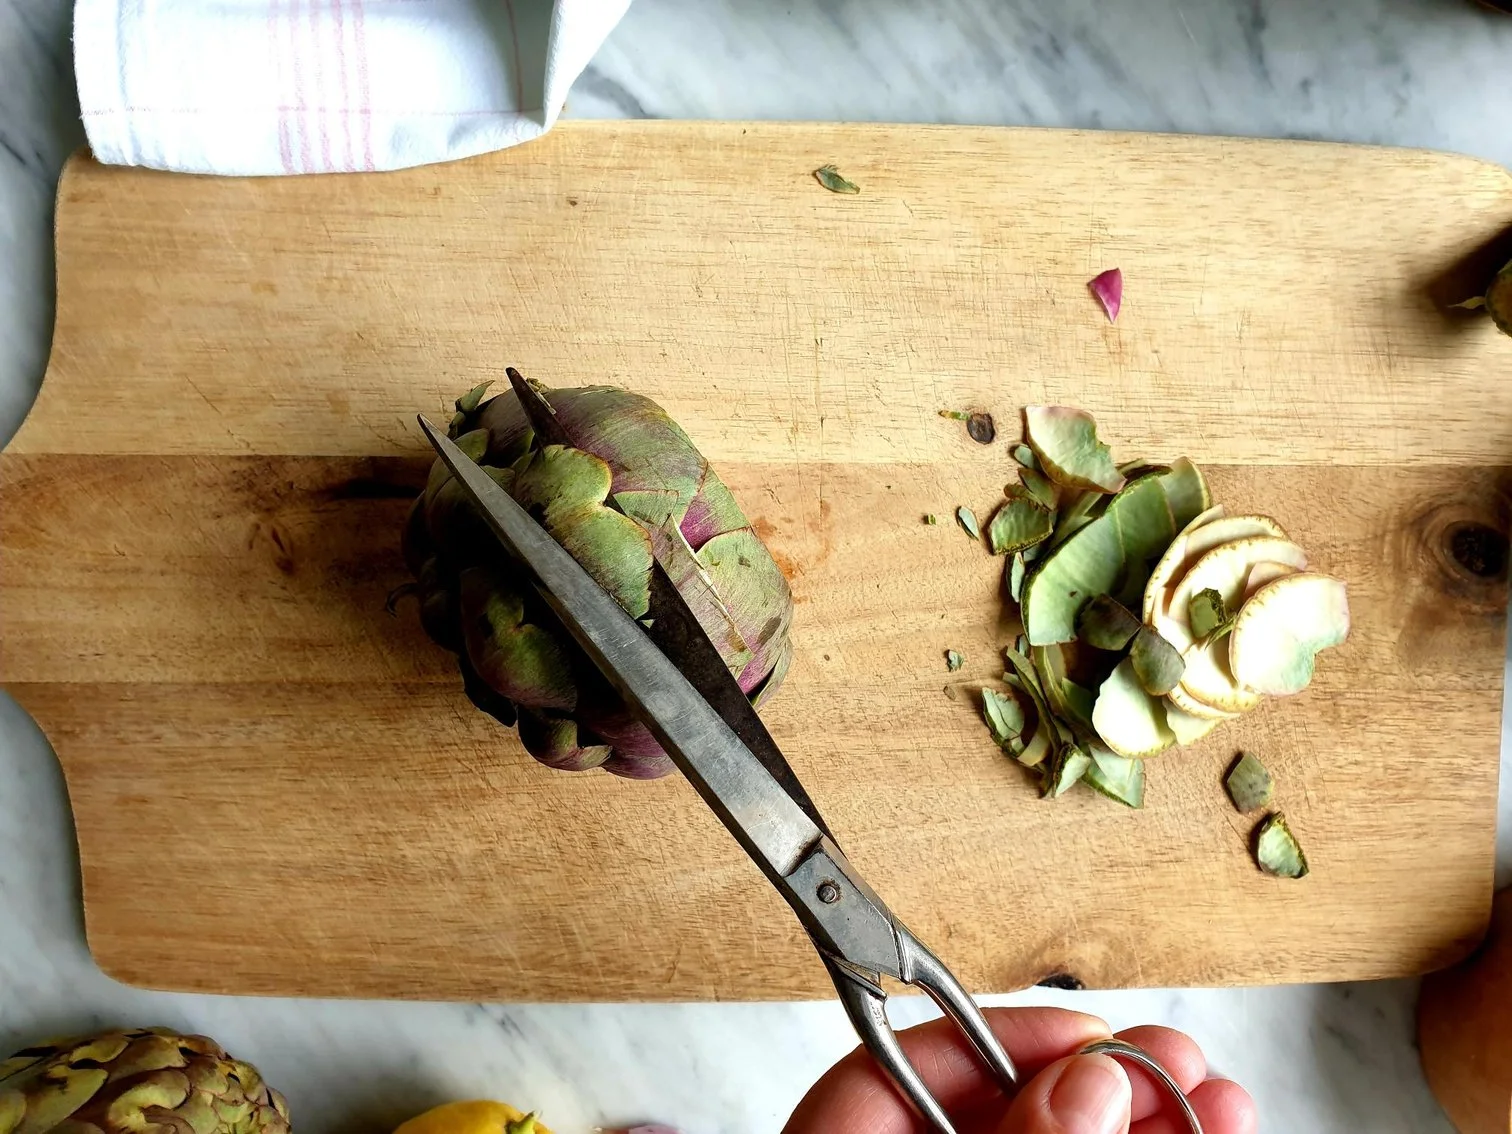
Take a pair of scissors and trim off the pointed and slightly prickly and spiky tips of the remaining outer leaves.

Place the artichoke on a working surface, and with your hands loose the leaves a bit, so you create little gaps between the leaves.

View fullsize Stuffed Artichokes Istrian Style 6.jpg
View fullsize Stuffed Artichokes Istrian Style 8.jpg

Rub the artichoke with the cut end of half a lemon and place treated and trimmed artichoke in a bowl with cold acidulated water previously prepared (this stops the artichokes from browning, and discolouring). Carry on with the process with the rest of the artichokes.

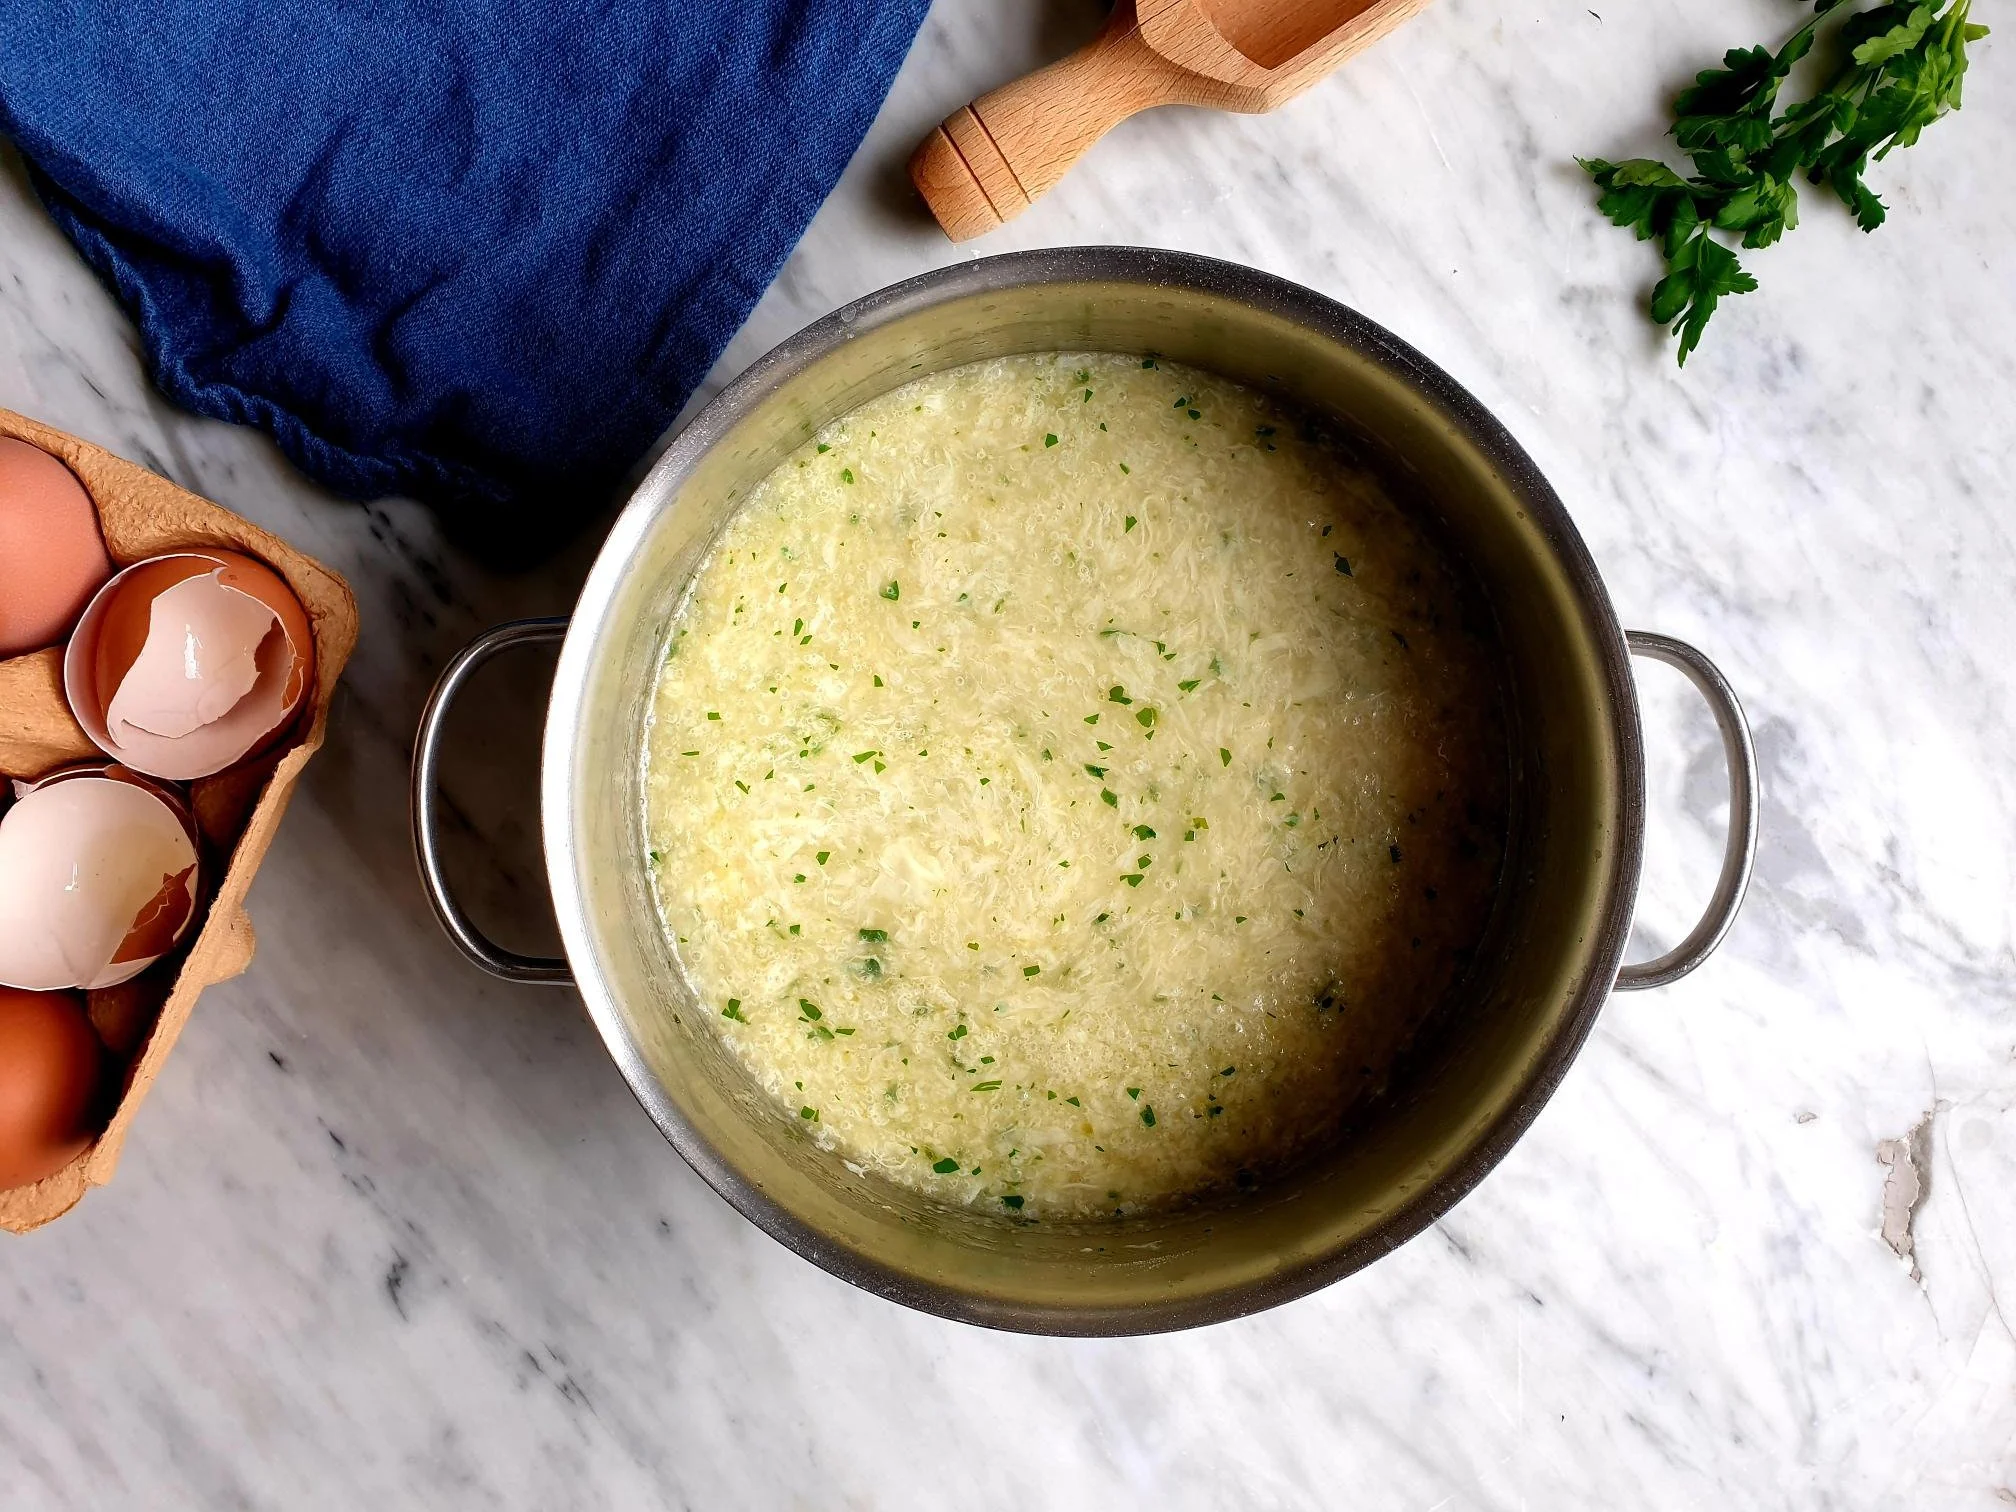
While the trimmed artichokes are in the bowl prepare the stuffing.

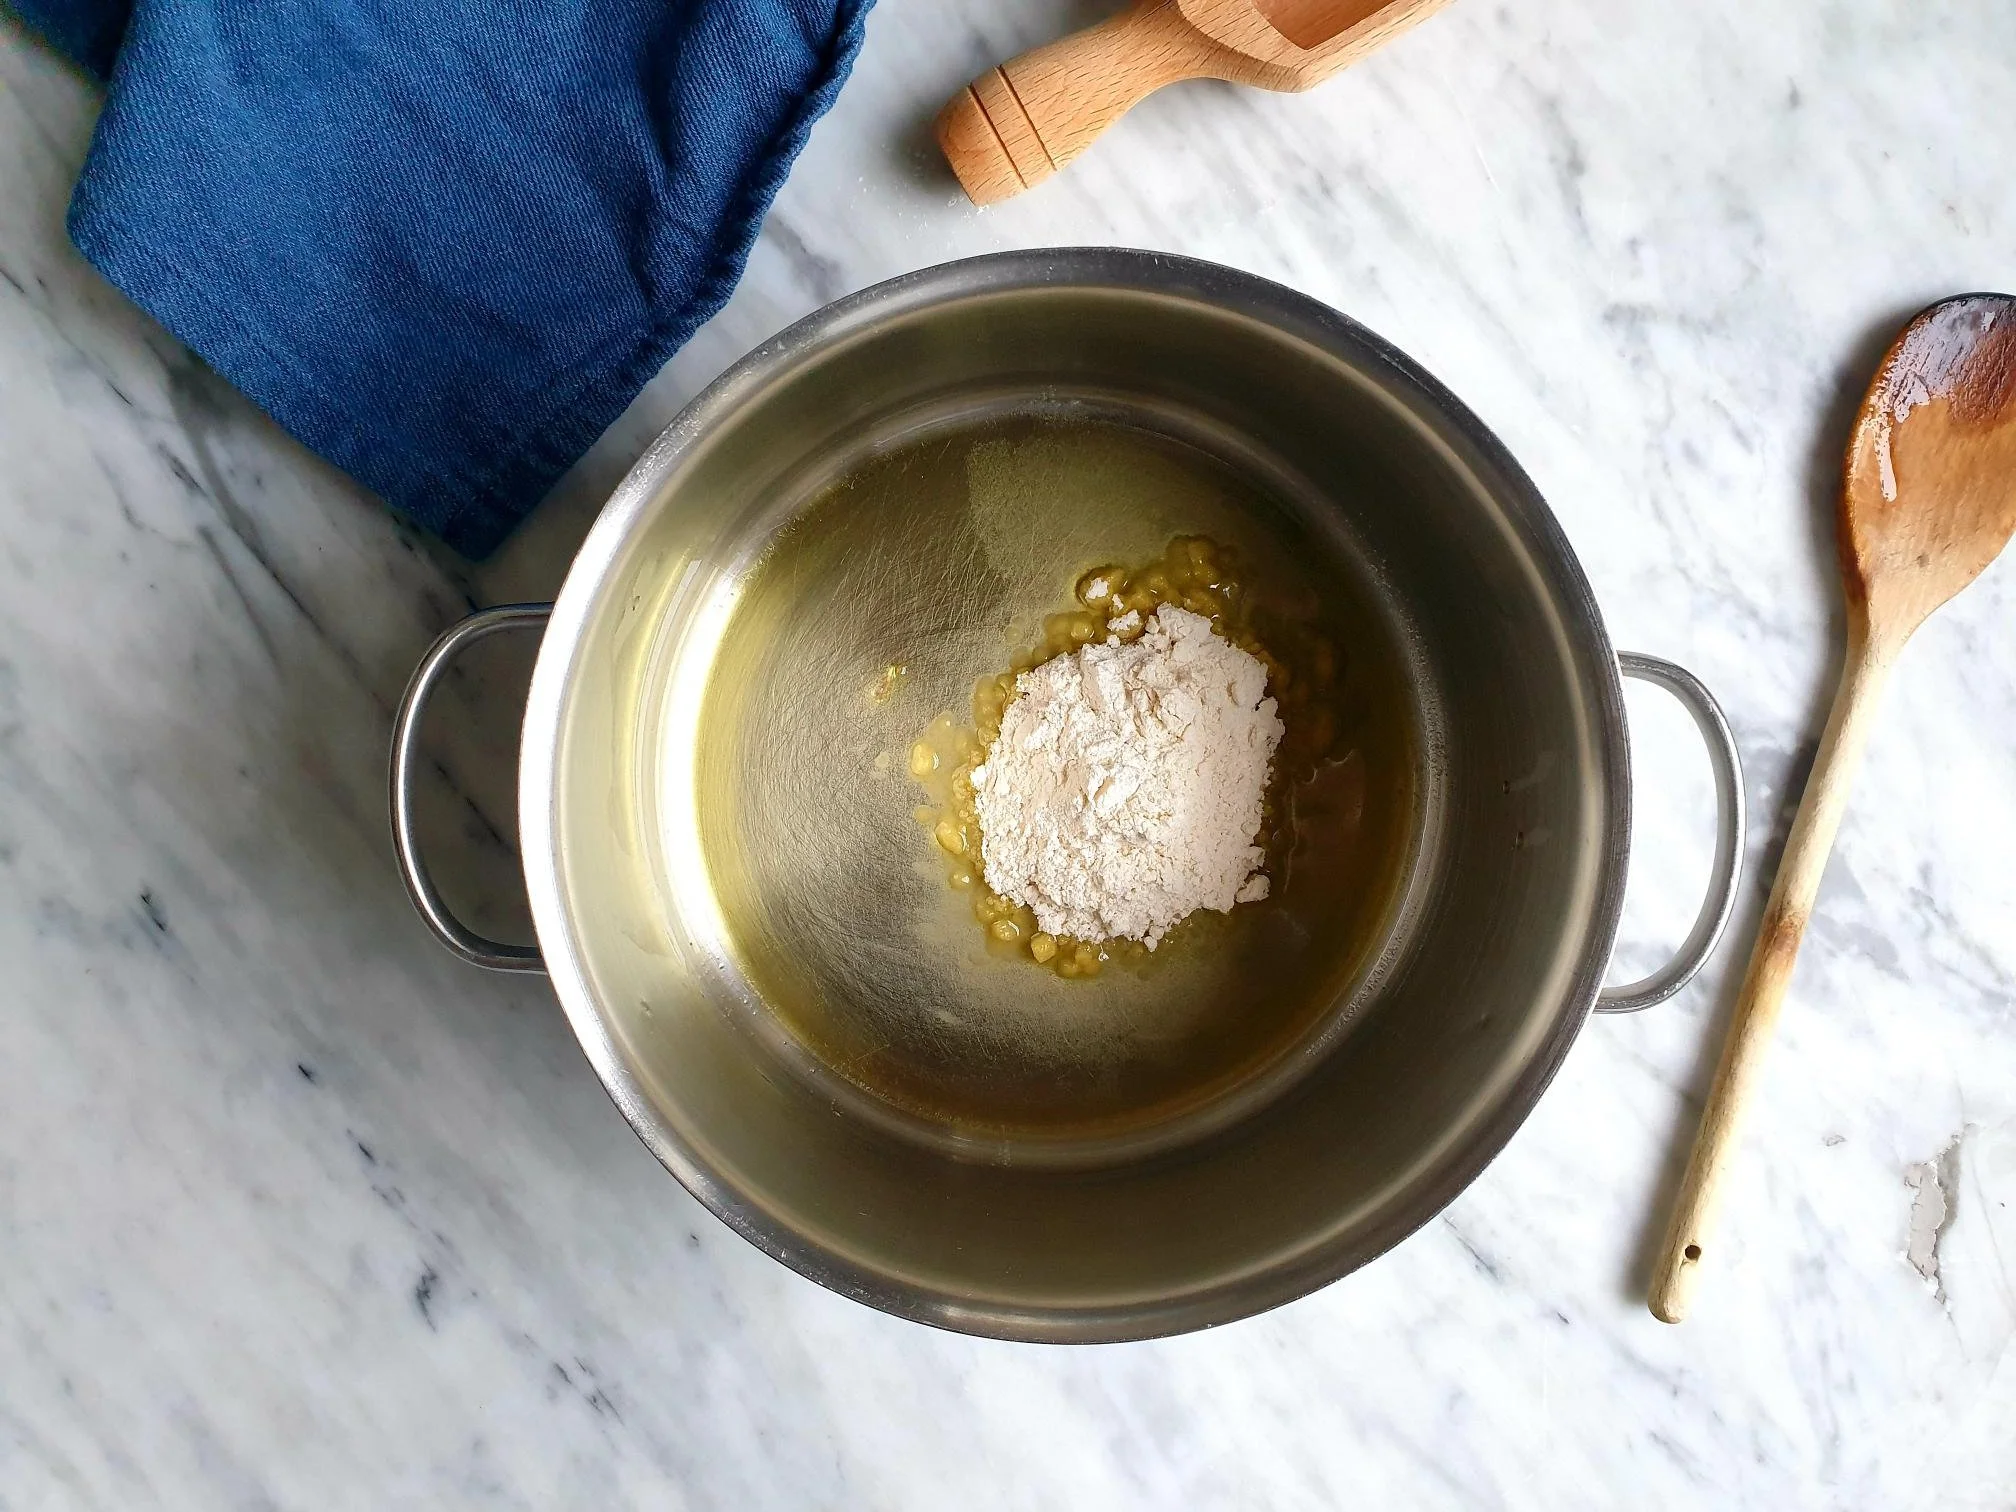
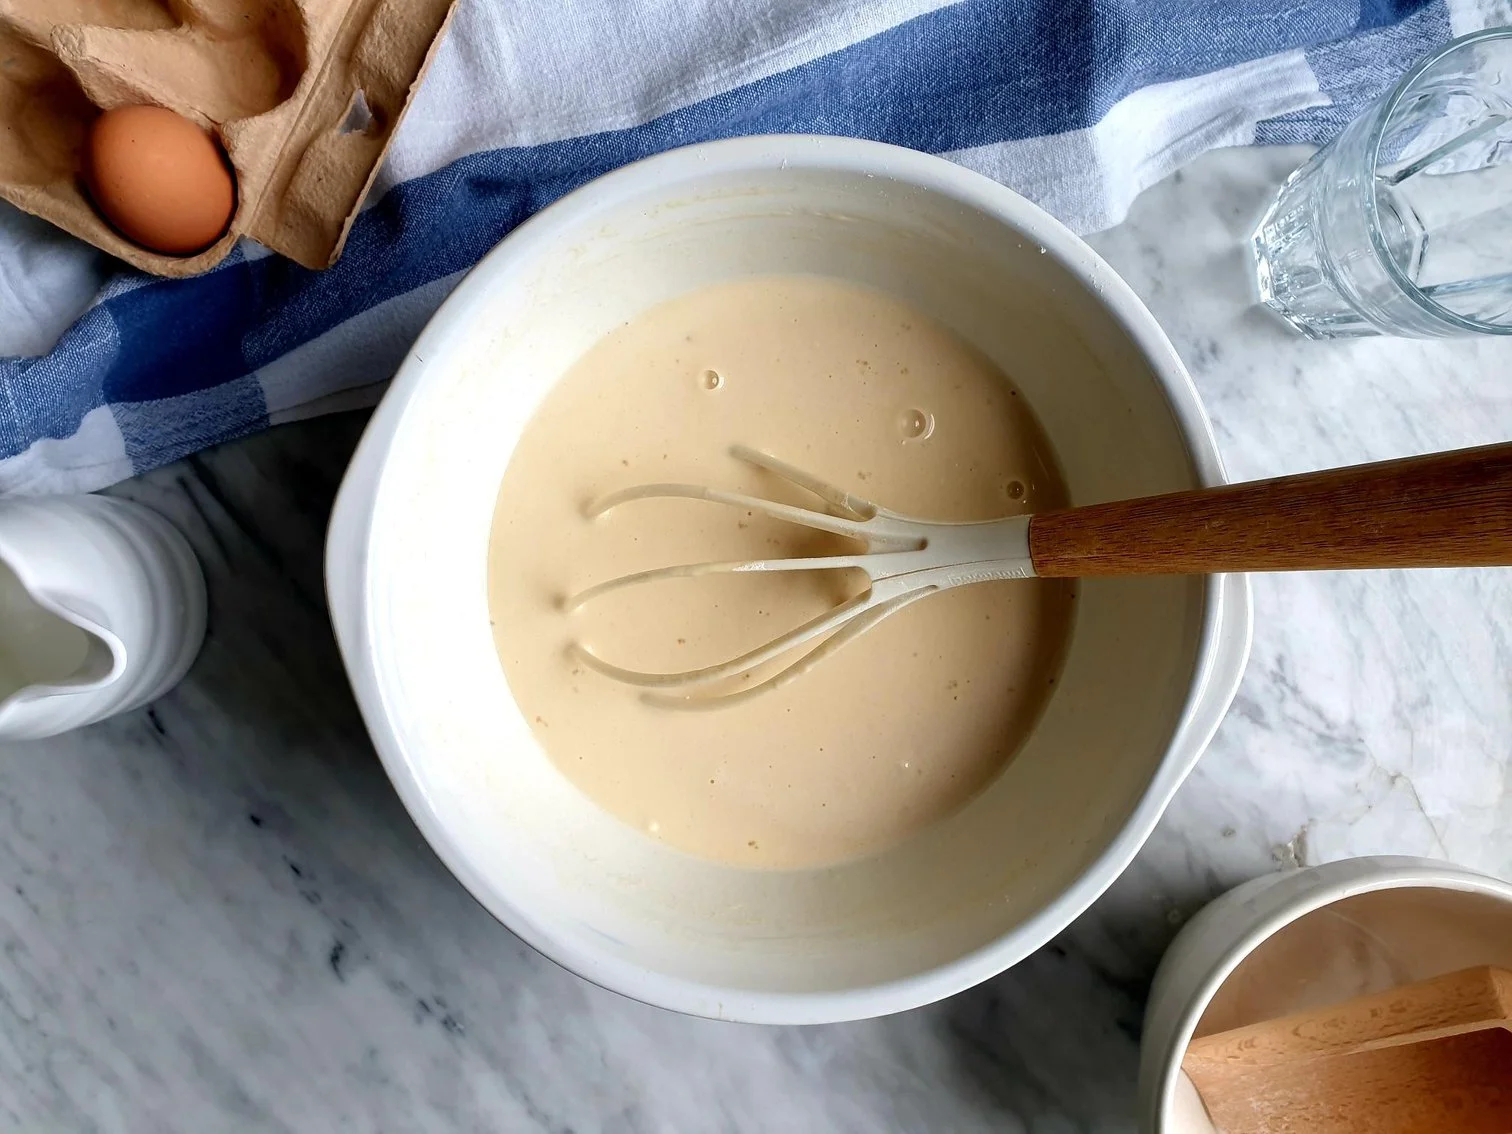
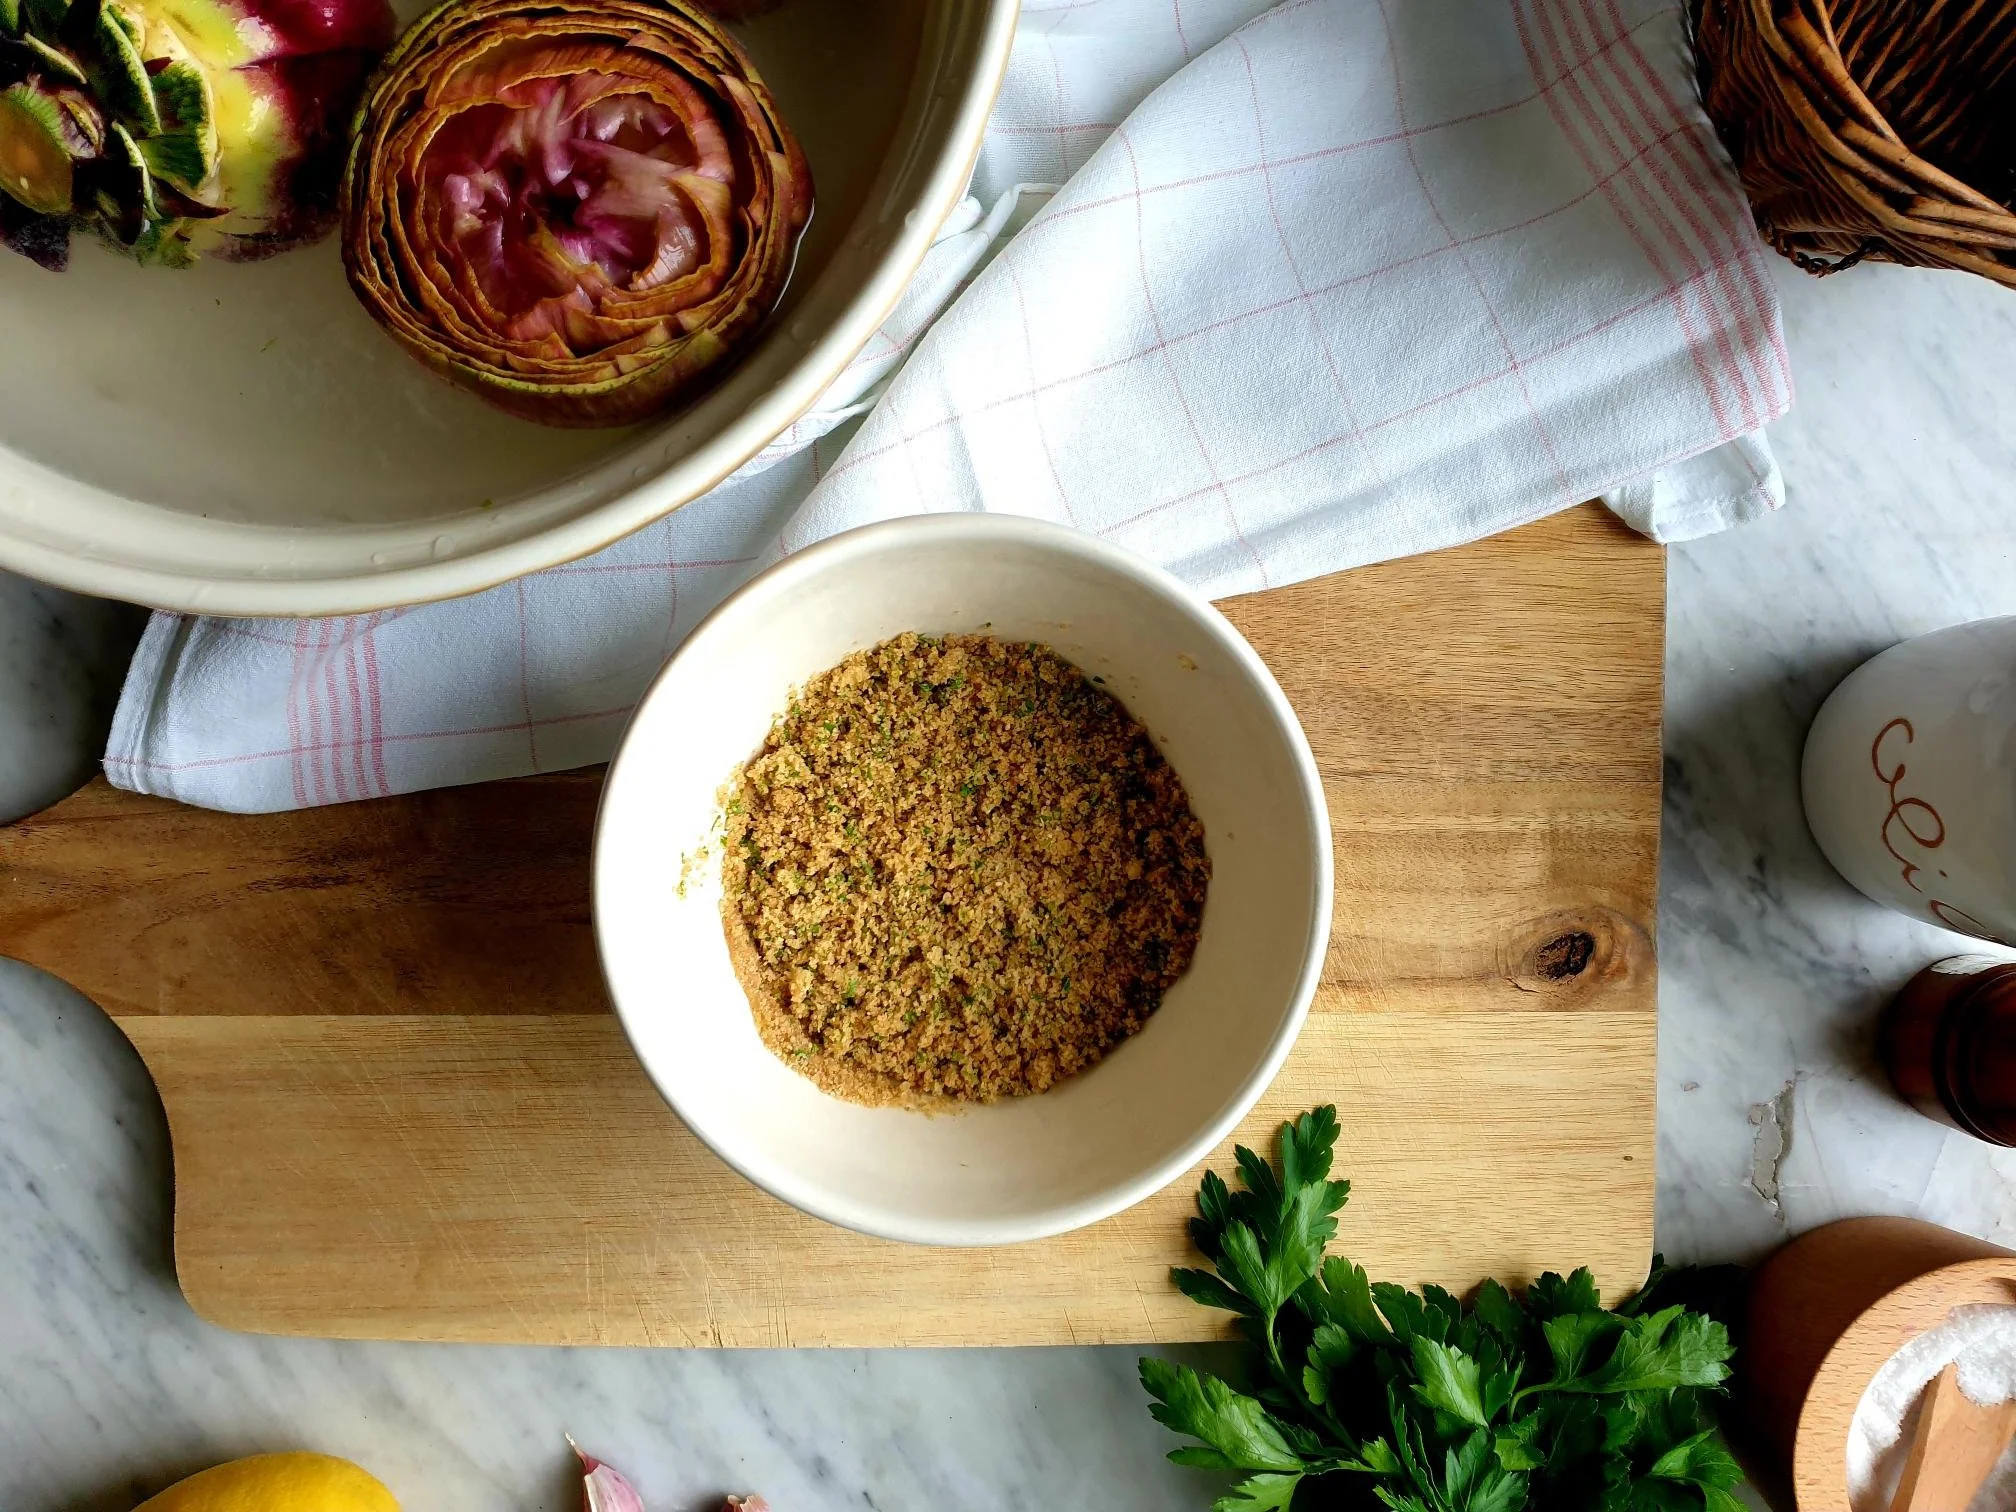
In a bowl place breadcrumbs, finely chopped parsley, pressed garlic, extra virgin olive oil, sea salt and black pepper and grated cheese, if using.

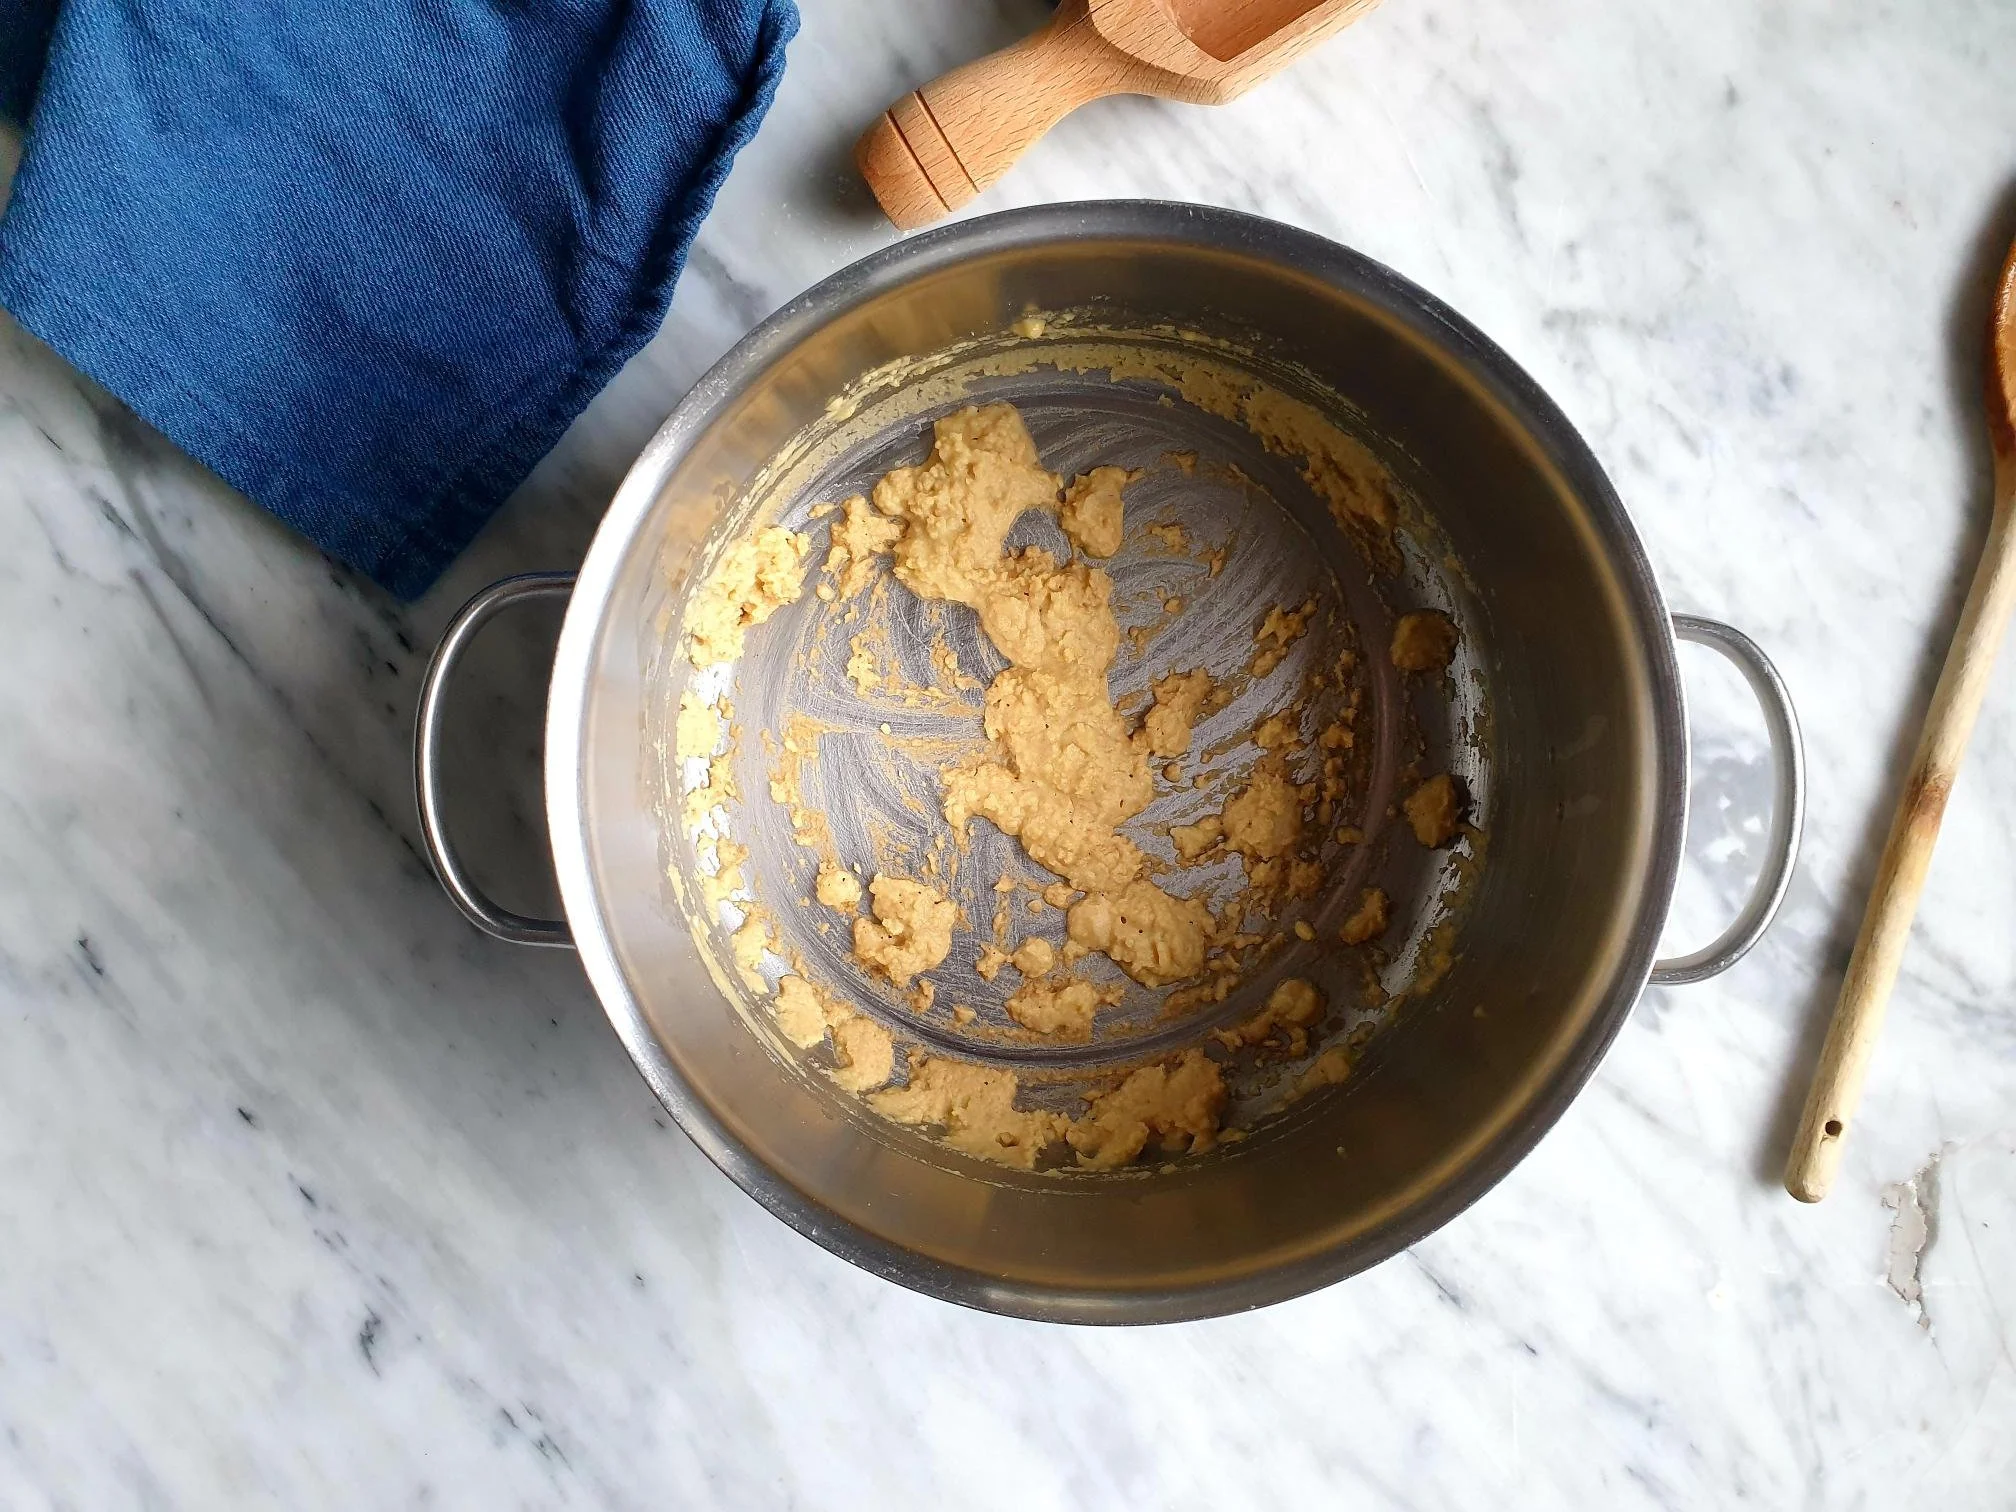
Mix well until all the ingredients are well combined, incorporated and amalgamated, set aside.

View fullsize Stuffed Artichokes Istrian Style 10.jpg
View fullsize Stuffed Artichokes Istrian Style 11.jpg

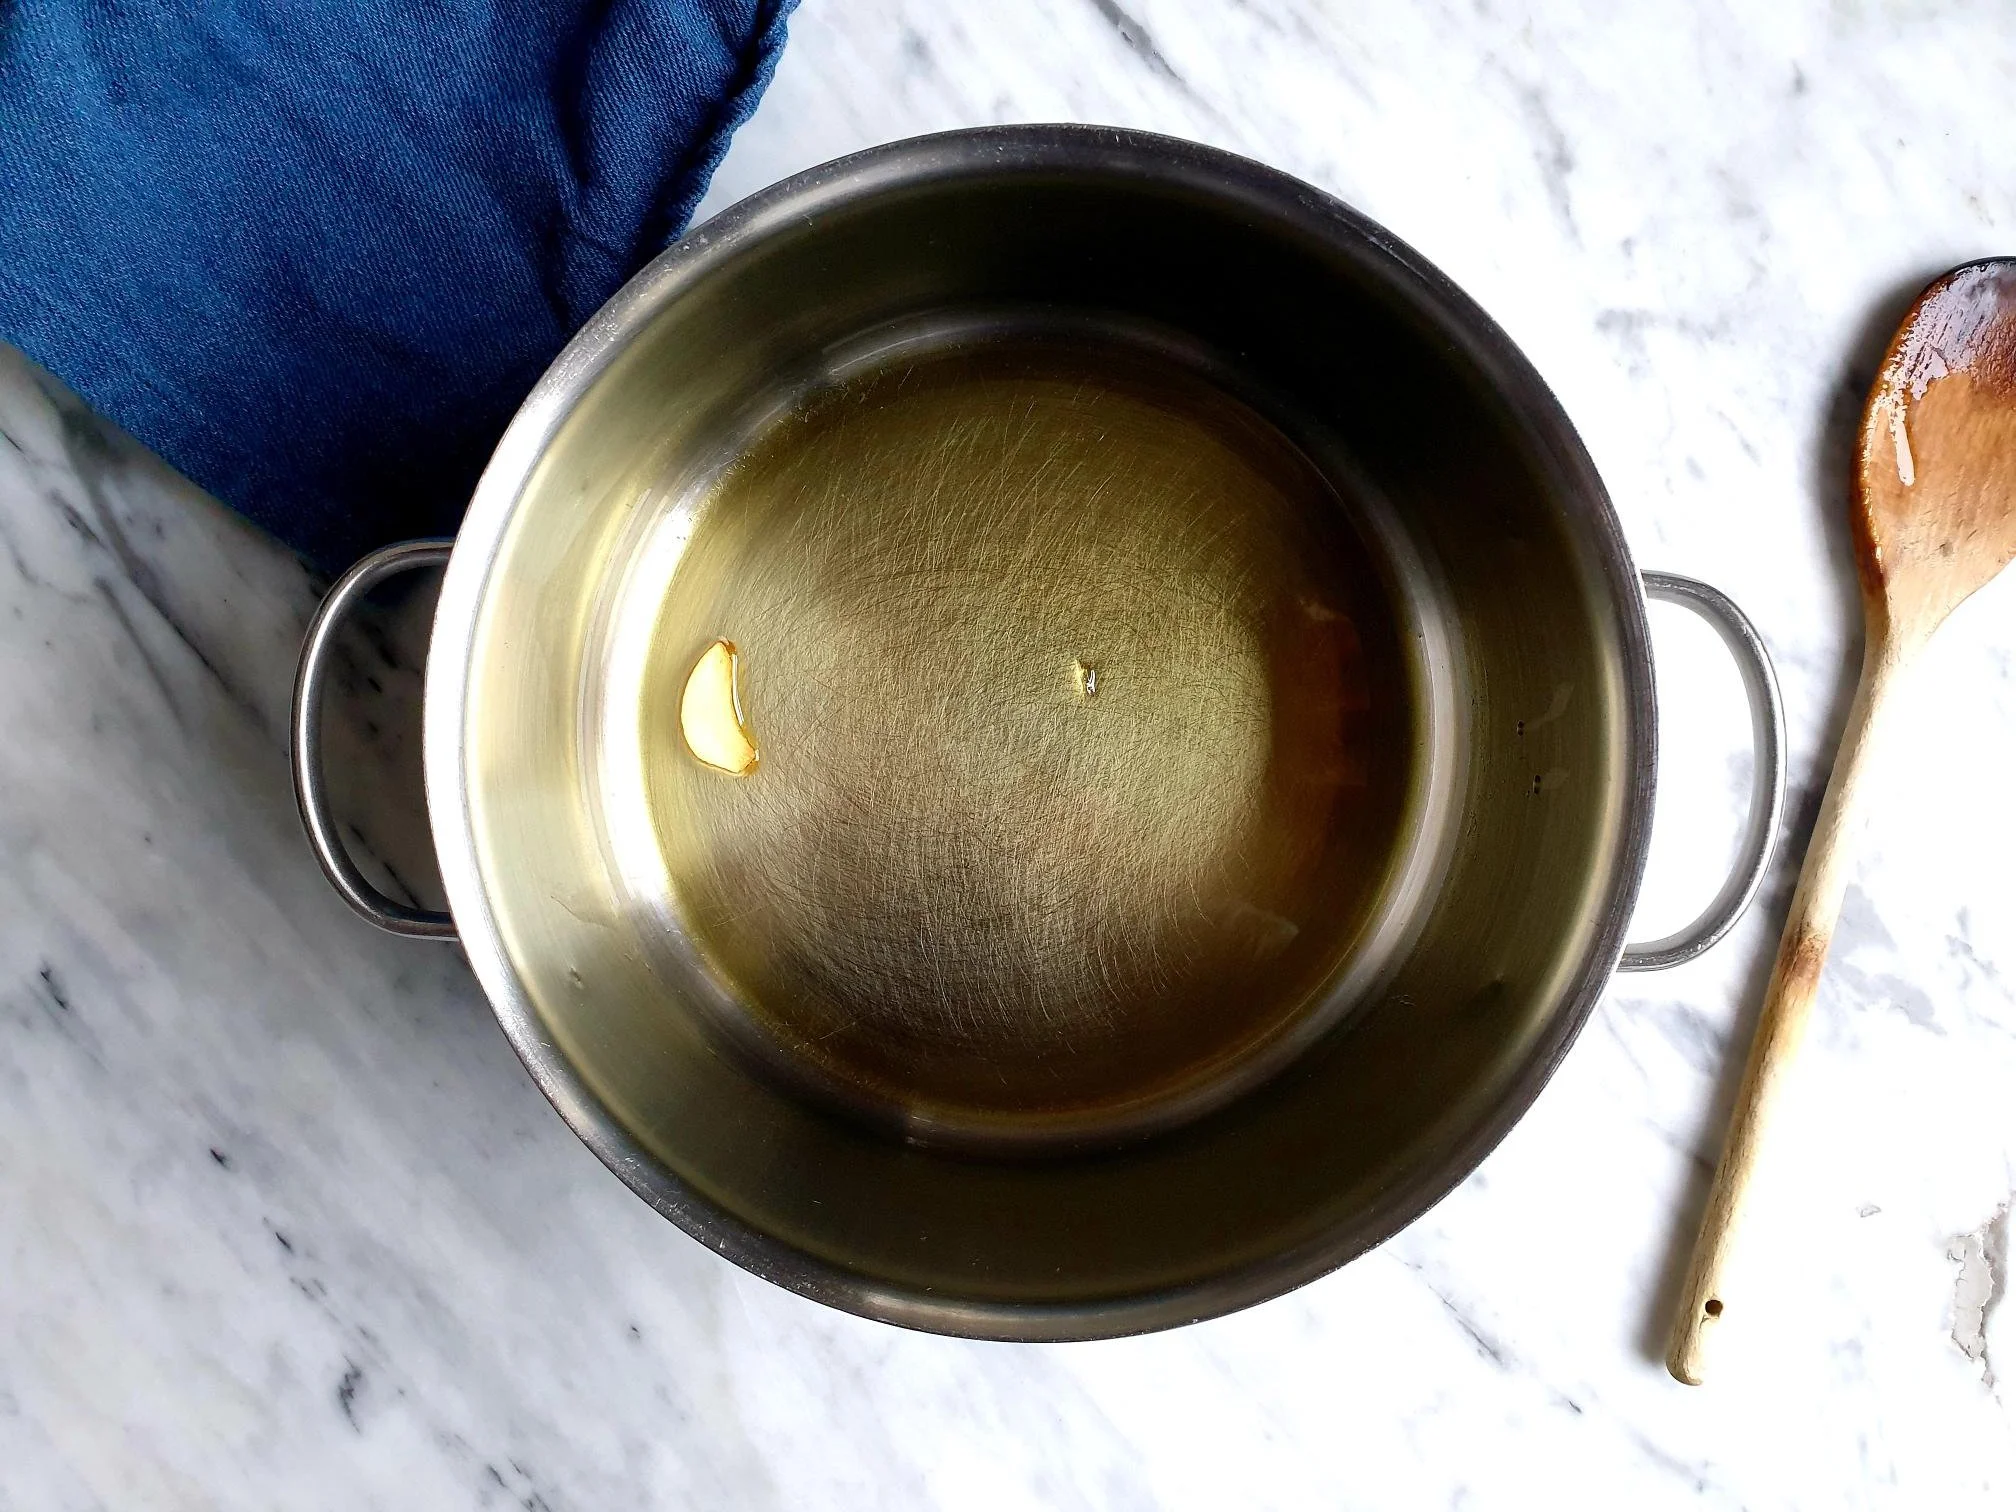
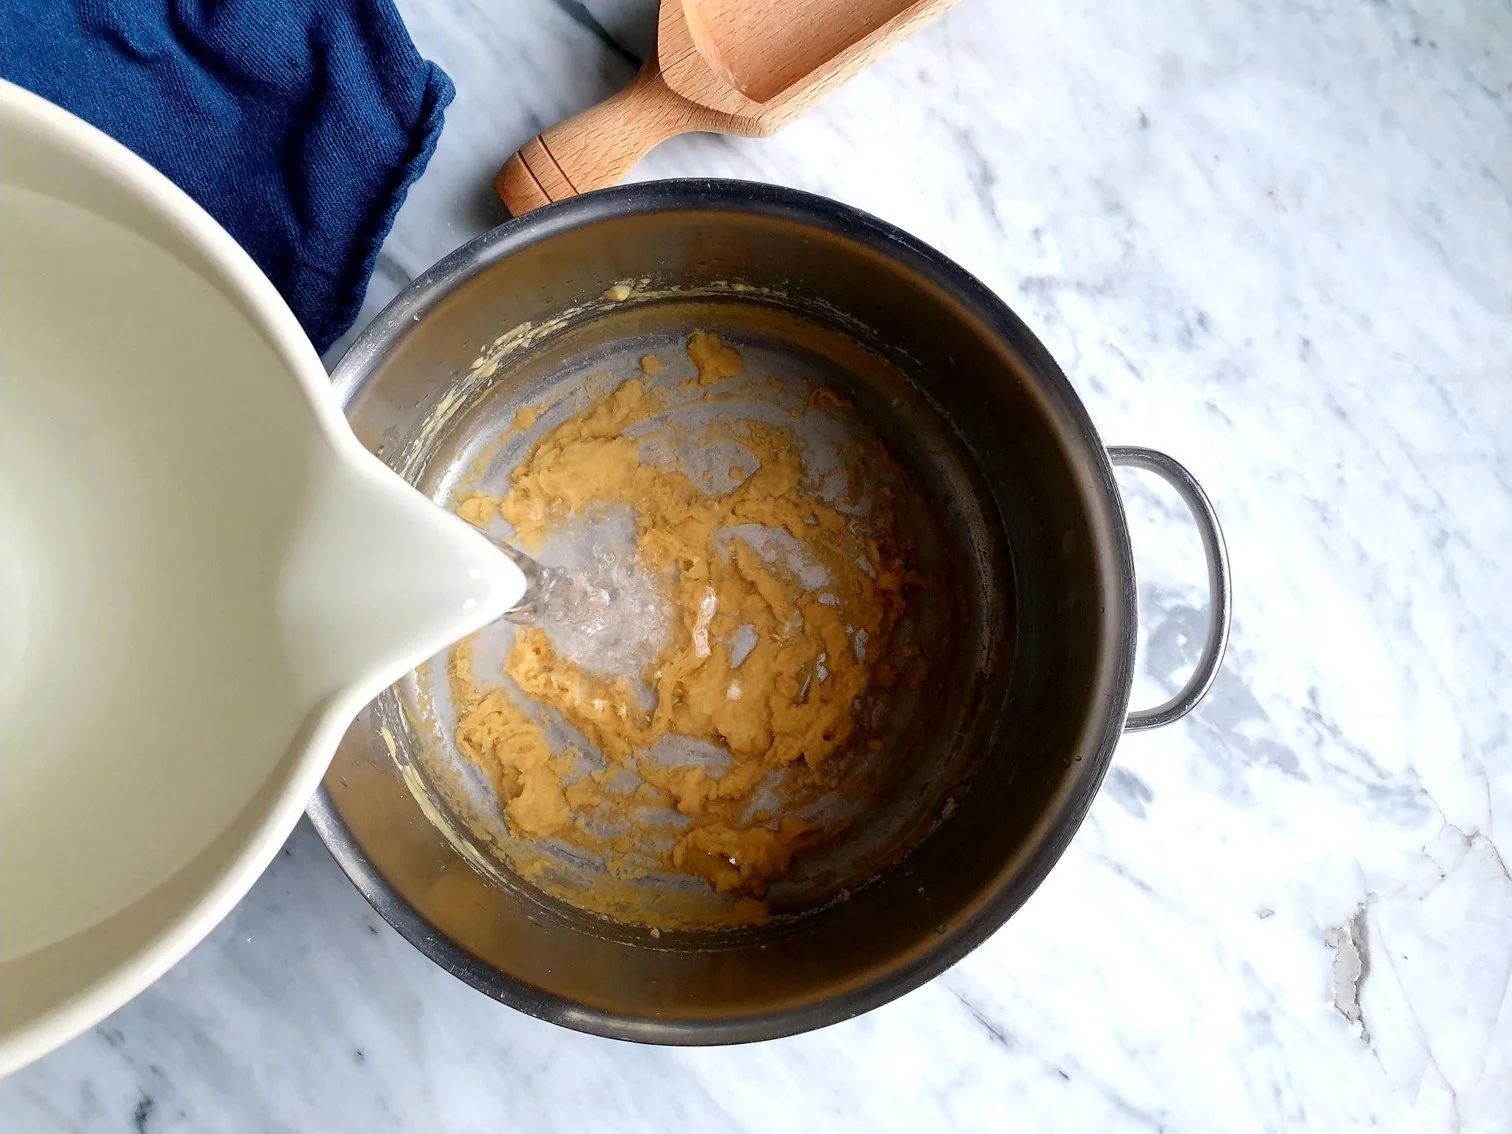
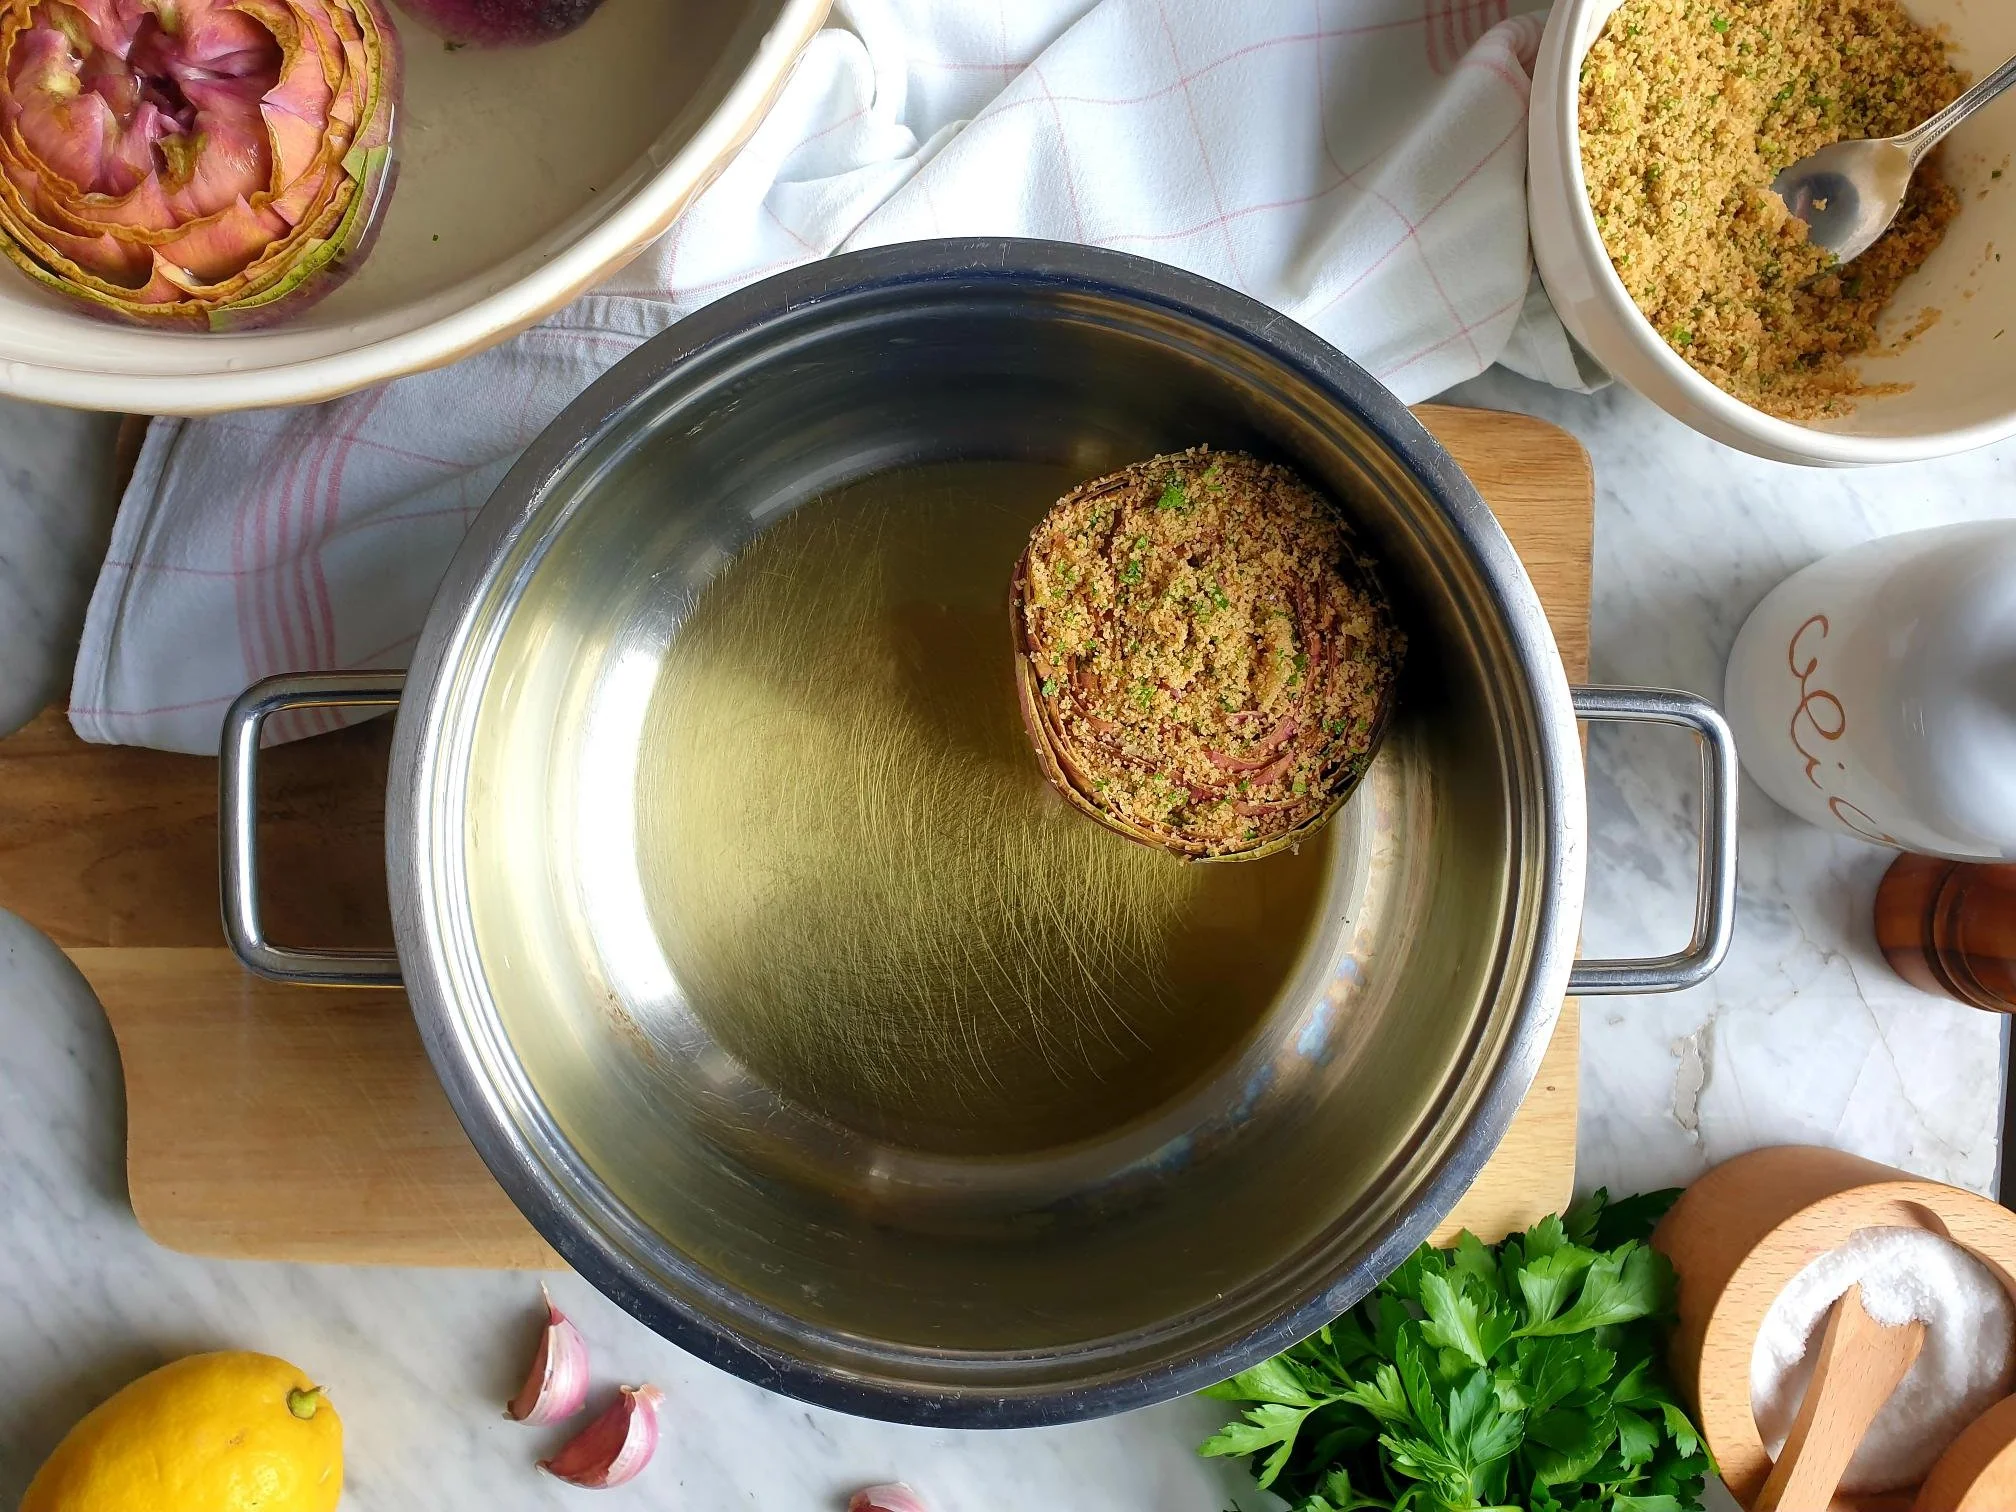
Place about 2-3Tbsp of extra virgin olive oil in a saucepan, big and large enough to accommodate all 4 artichokes.

Take the artichoke out of the bowl (one at the time), drain it a bit, and with your hands loose the leaves once again if necessary.

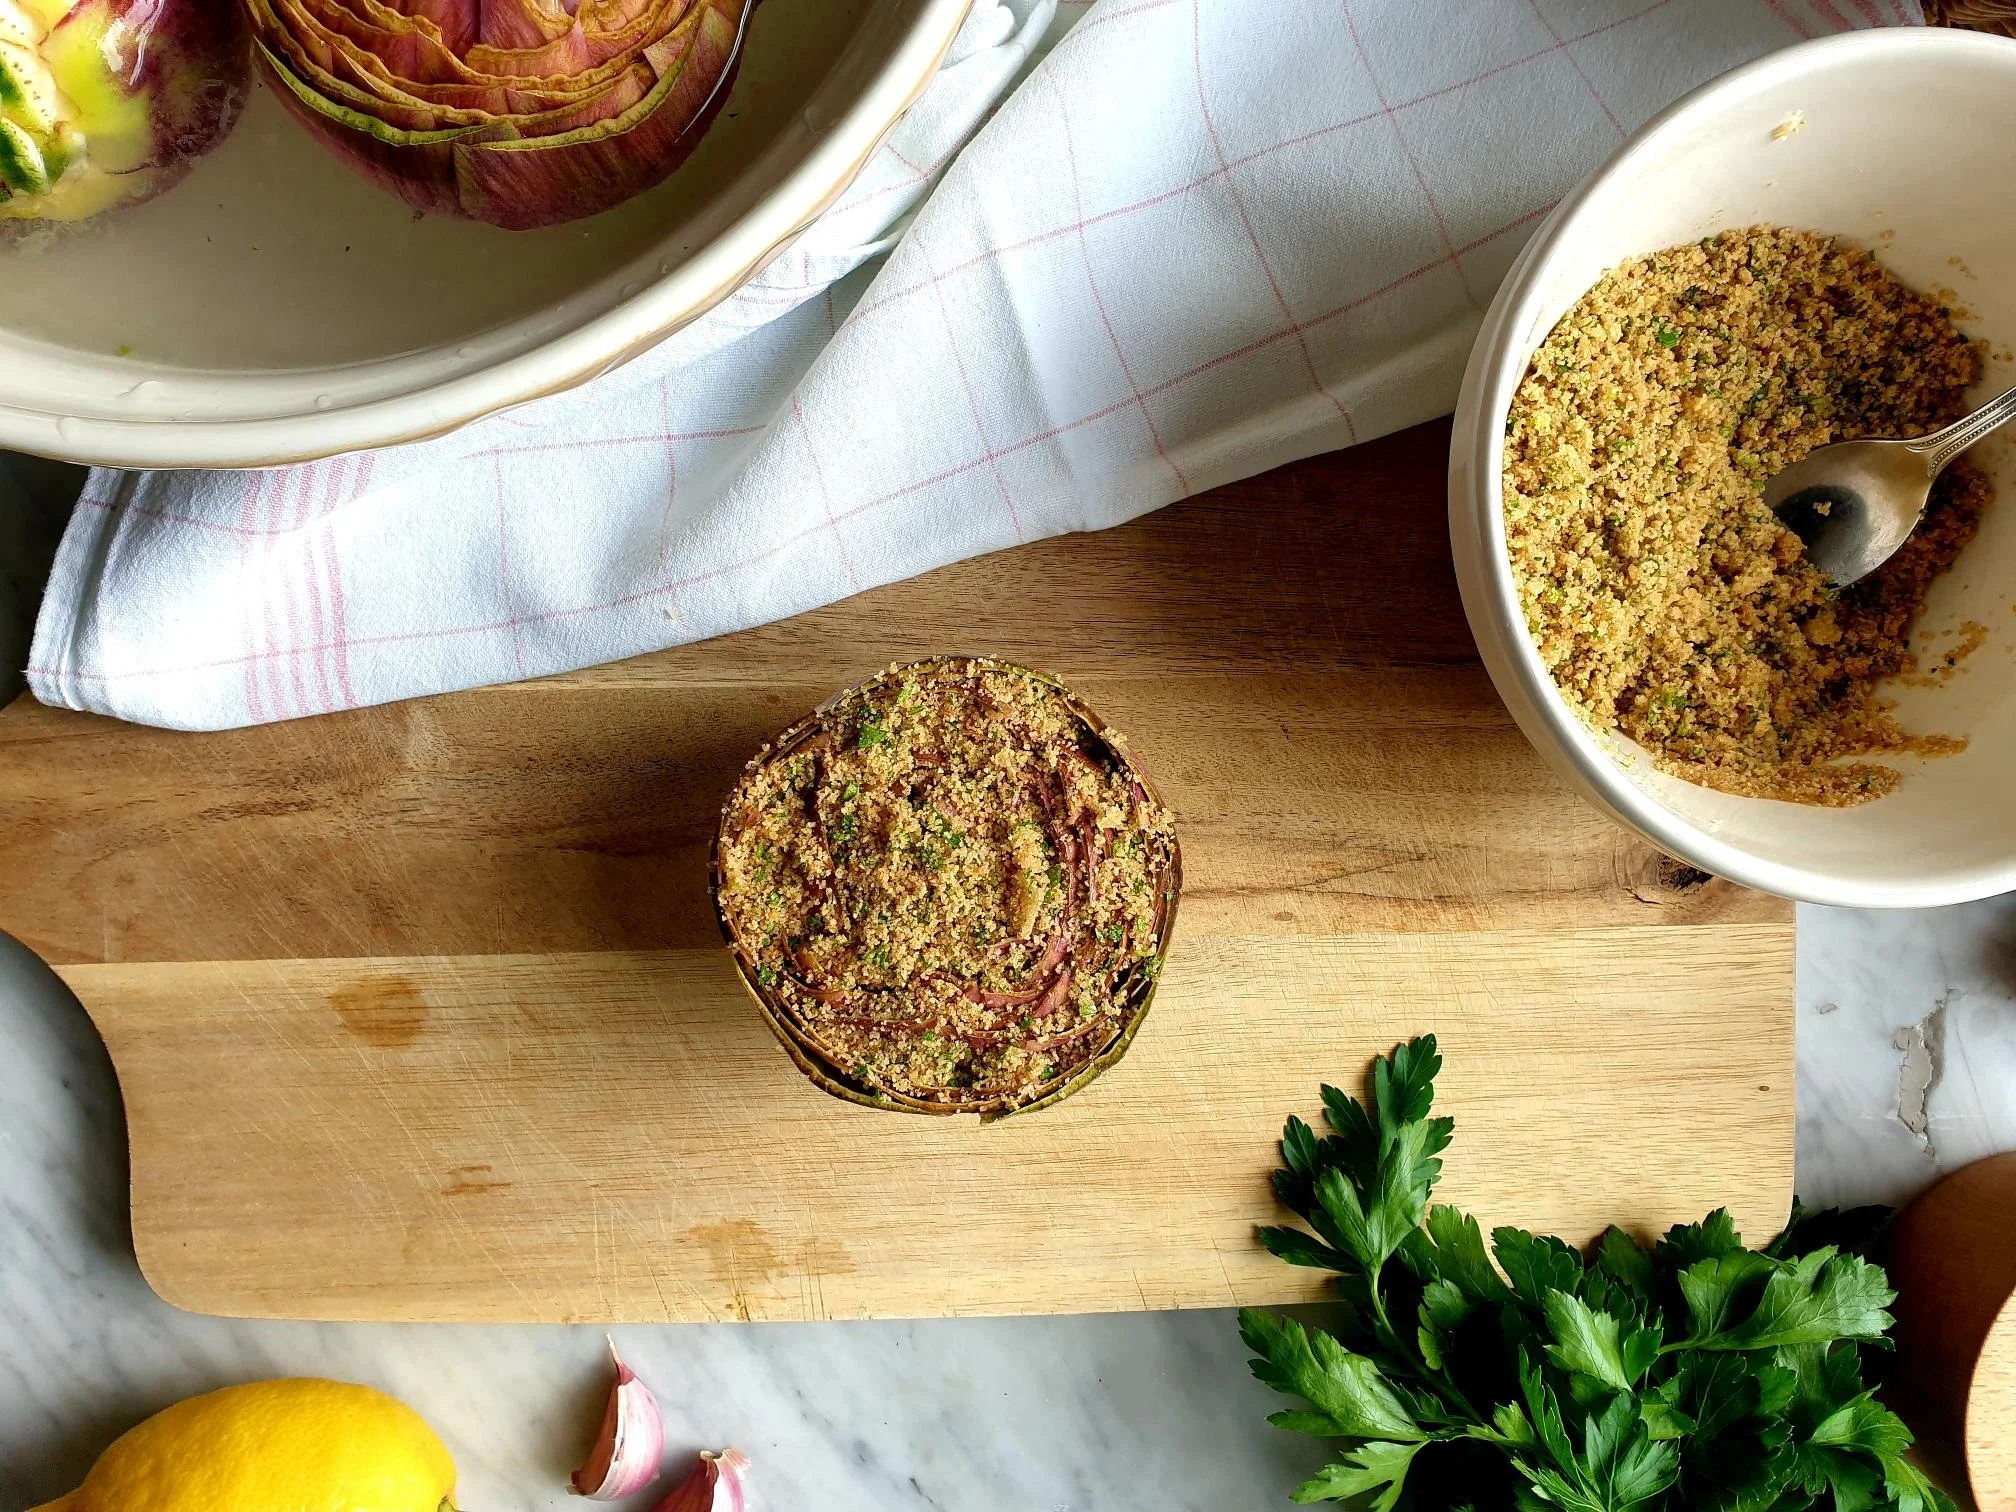
Using your hands (or a spoon) stuff the spaces between the leaves of the artichoke and put some filling on the top of the artichoke.

(do not worry if some of the stuffing falls around the artichoke on your working top, scoop it up and put it back on the top of the artichoke, slightly pressing it down).

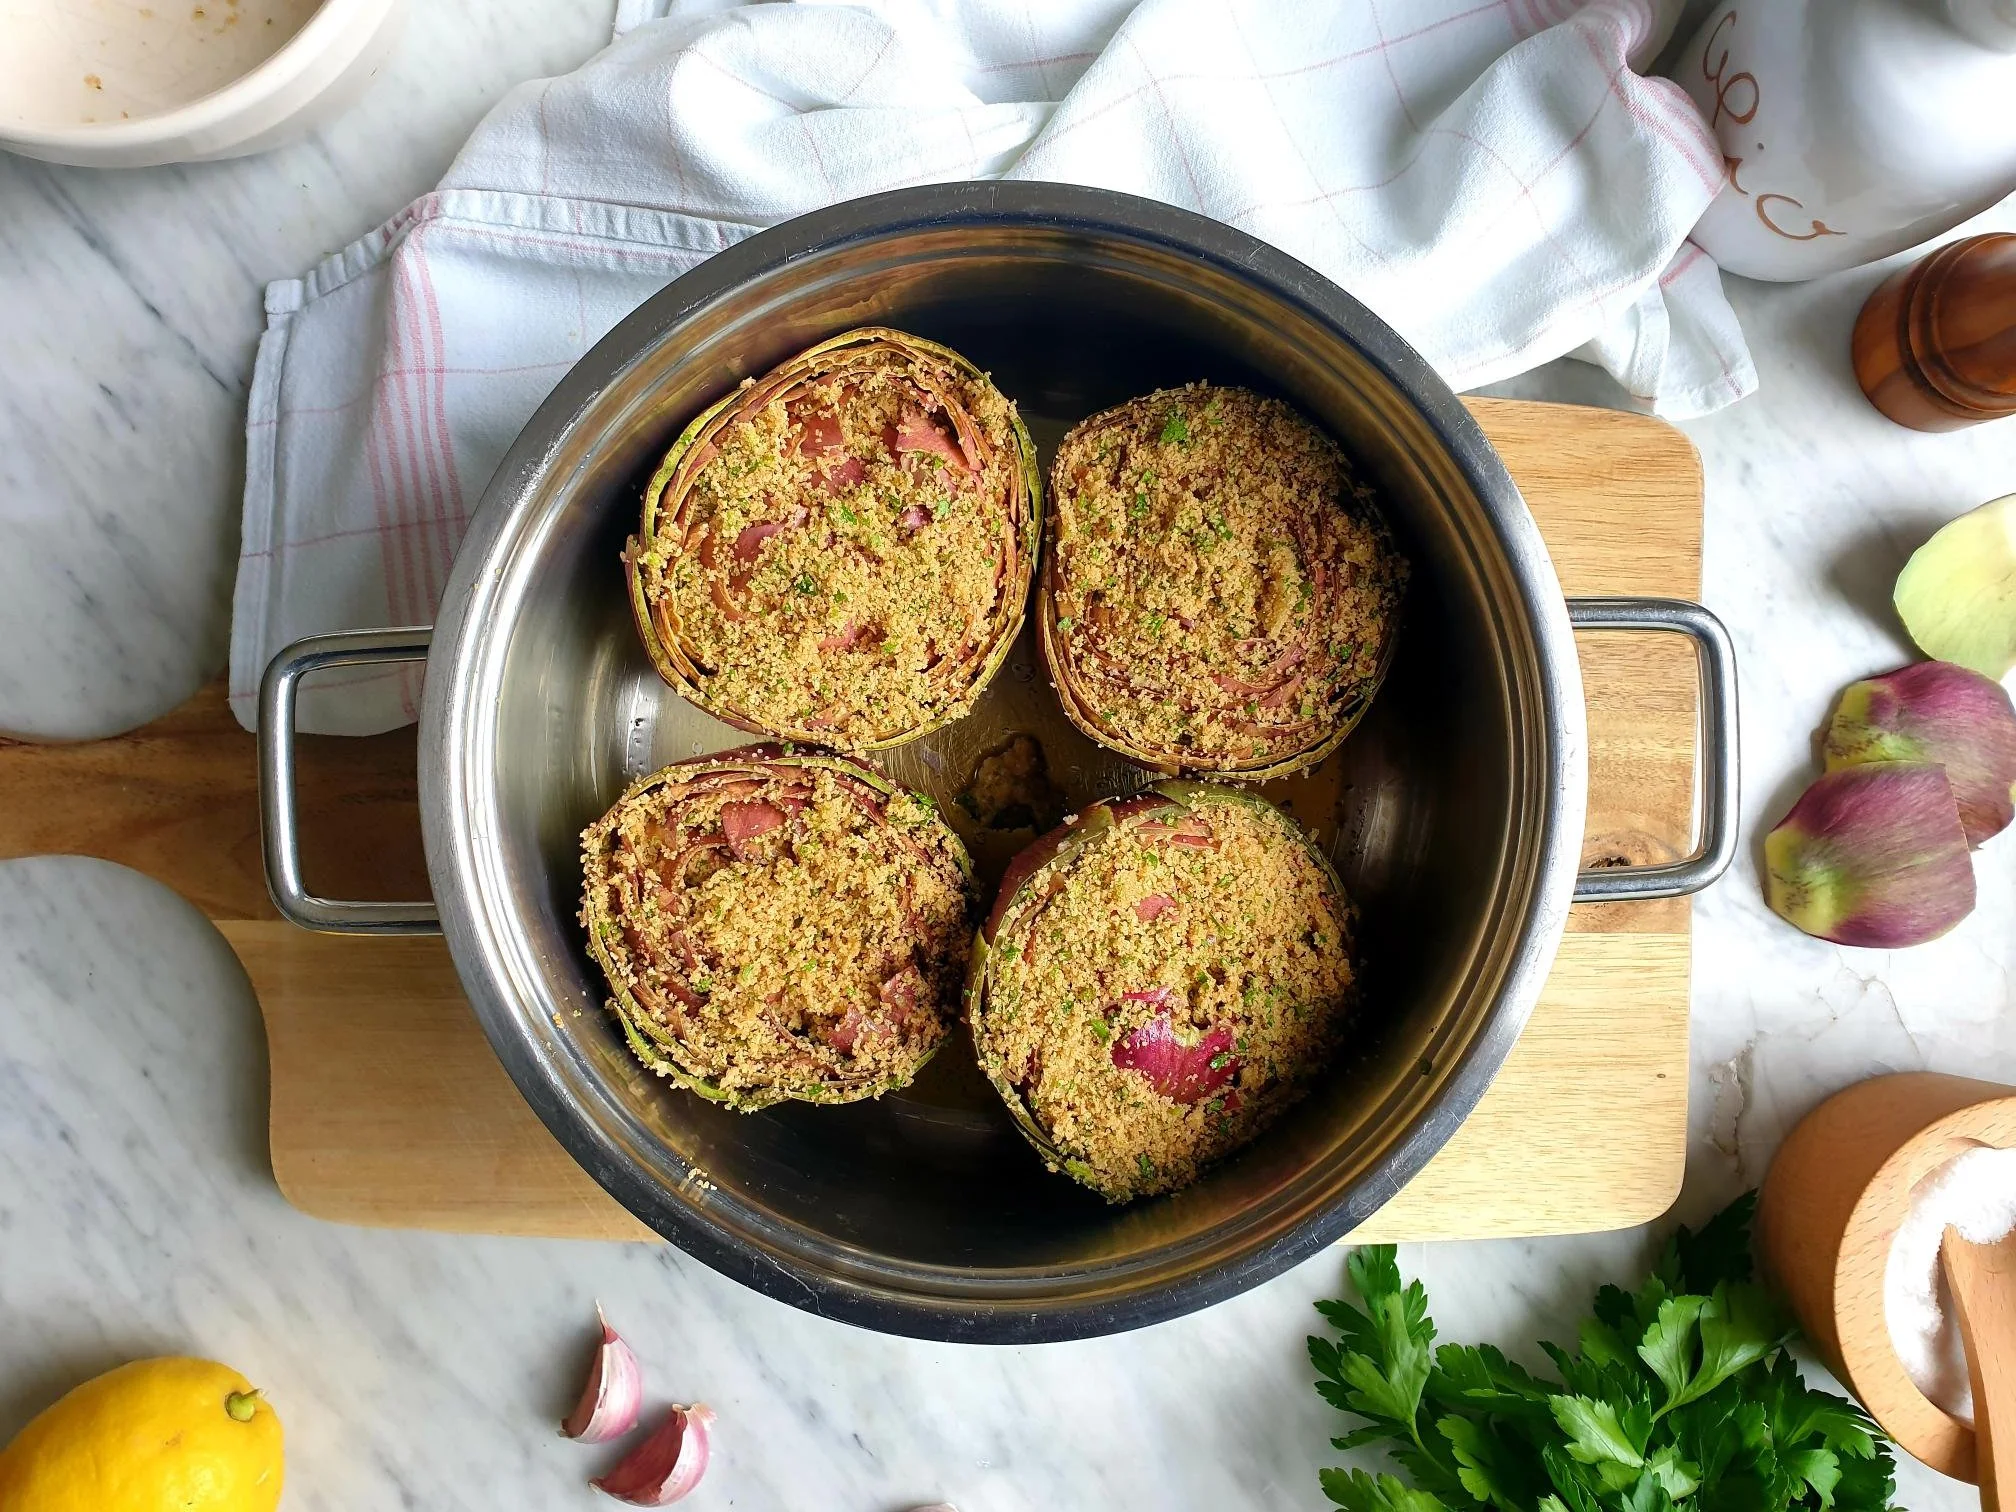
Place the stuffed artichoke in a saucepan, sitting upright, they should be snuggled together tightly.

View fullsize Stuffed Artichokes Istrian Style 12.jpg
View fullsize Stuffed Artichokes Istrian Style 13.jpg

Repeat the process until you stuff all the artichokes and they are all in the saucepan.

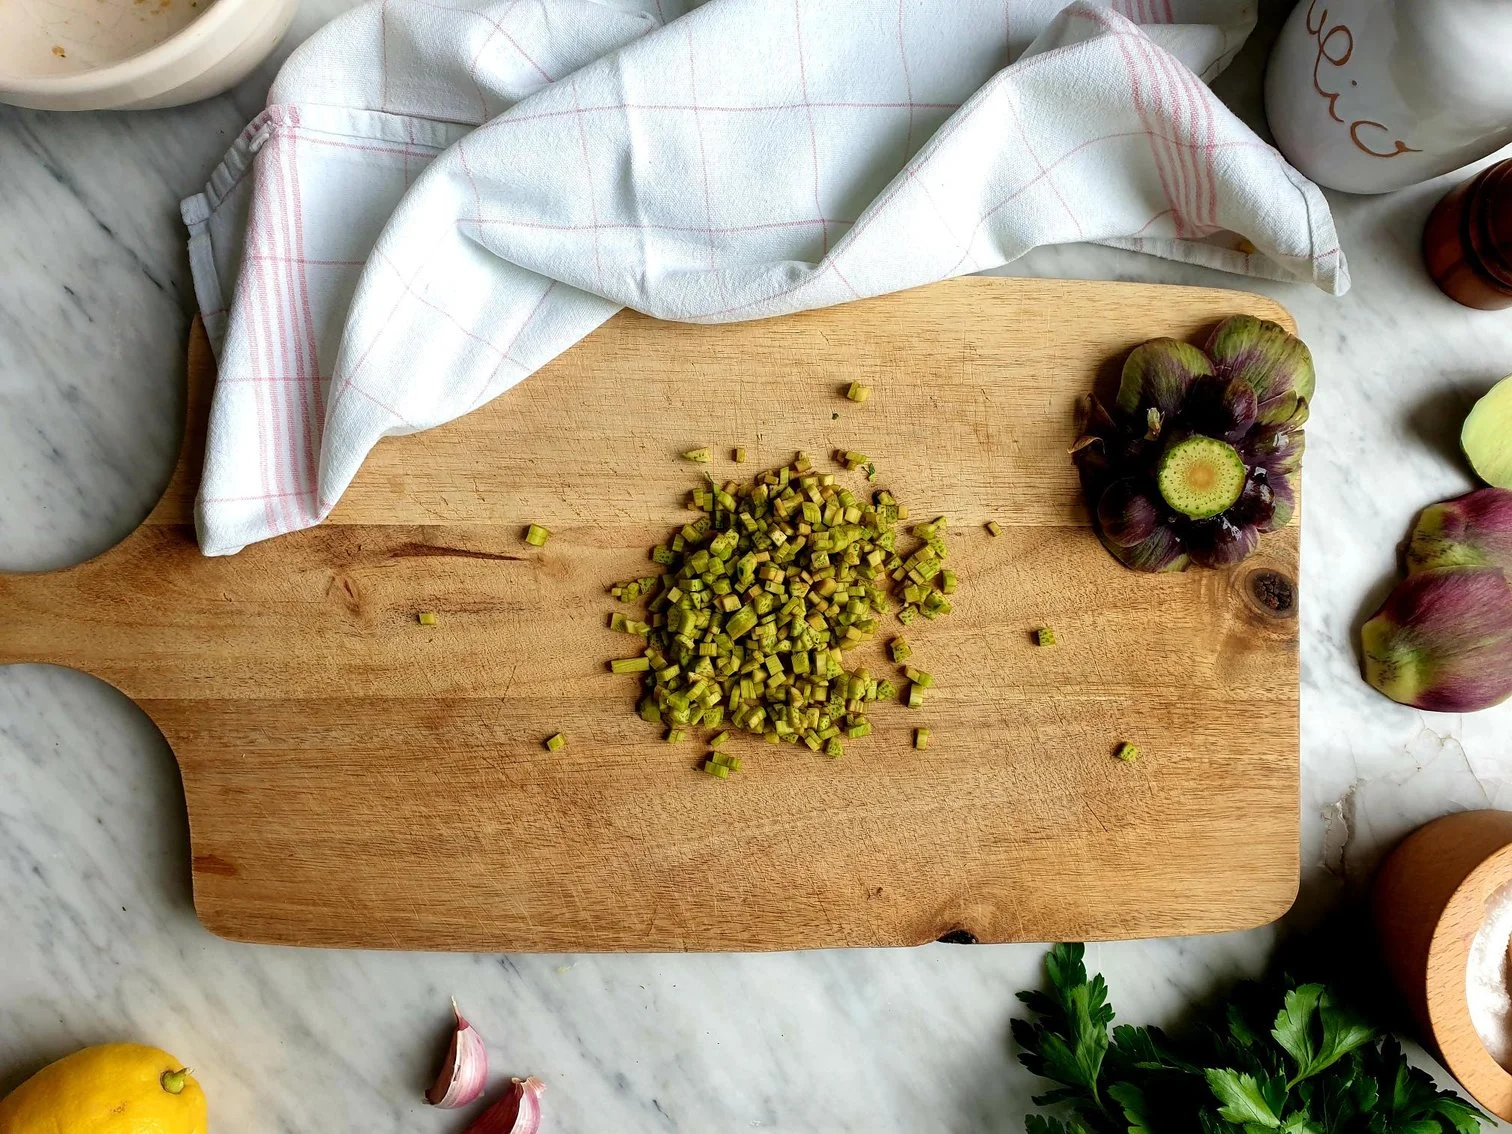
Take the stems out of the bowl, if using, I highly recommend you do, as it will create a wonderfully delicious sauce.

Peel and finely chop or dice the stems. Scatter them in the saucepan all around the stuffed artichokes.

View fullsize Stuffed Artichokes Istrian Style 16.jpg
View fullsize Stuffed Artichokes Istrian Style 17.jpg

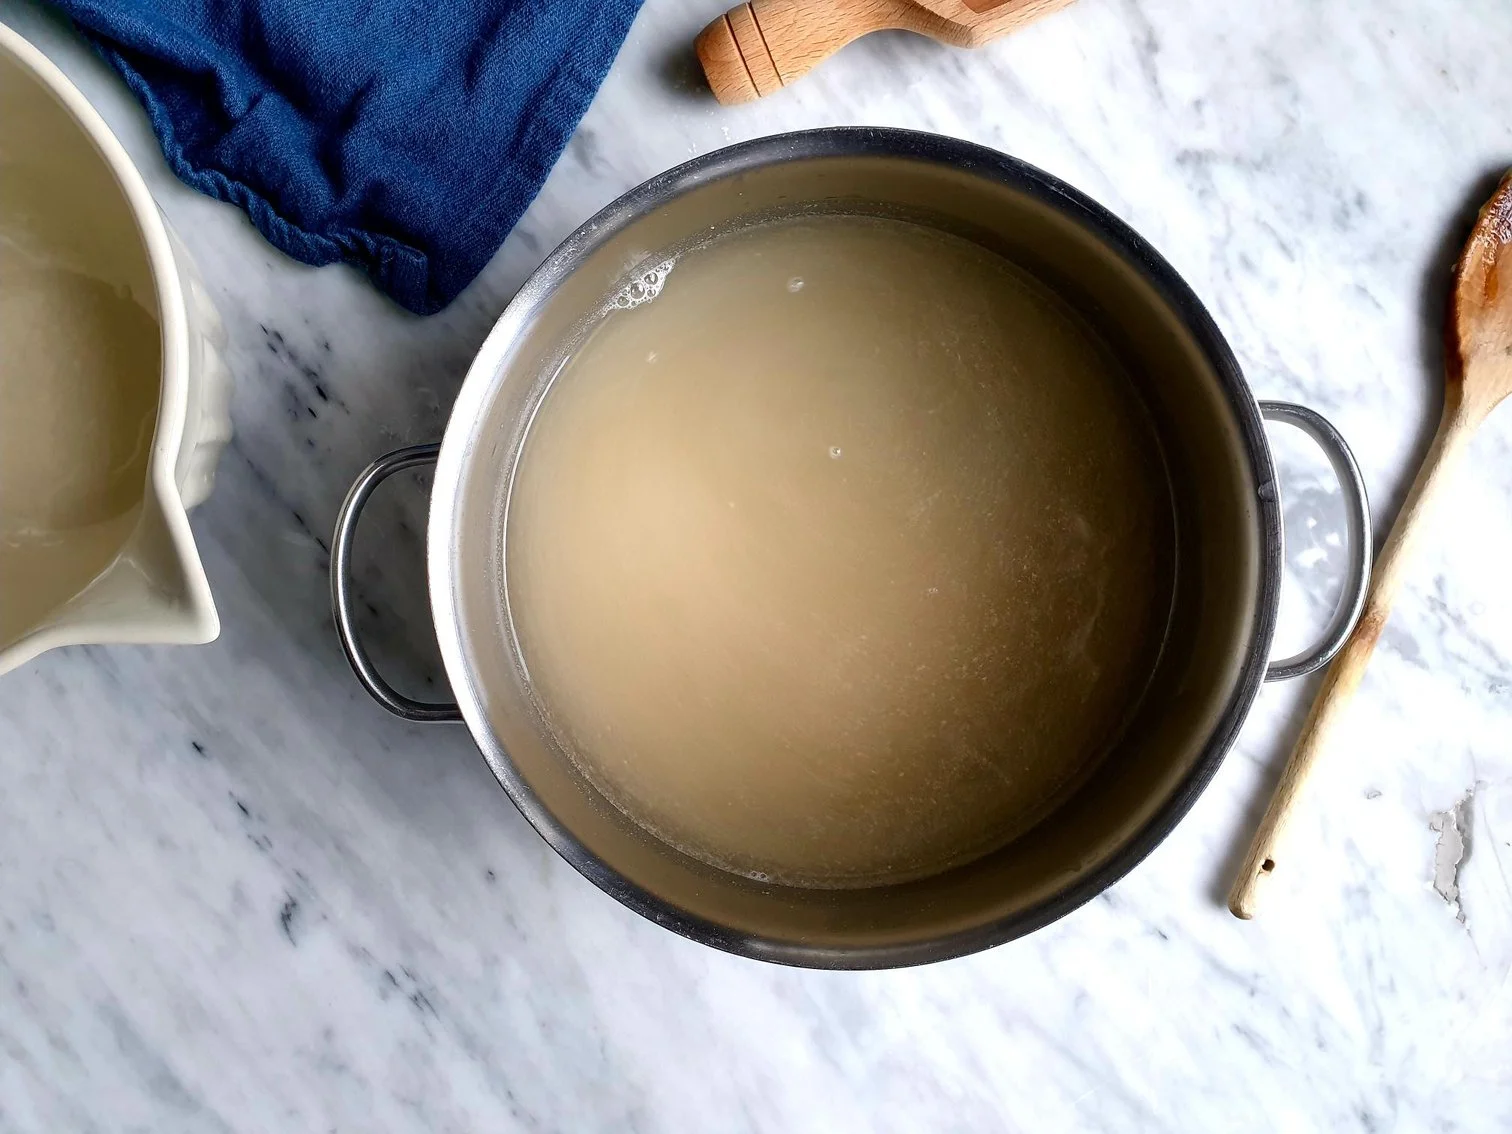
Carefully pour water or vegetable stock, cover with the lid and bring to the boil.

Lower the heat and gently cook and simmer for about 45 minutes. It can take up to 1 hour, this will depend on the age and the size of the artichokes.

Check now and again, give a saucepan a little shake. If the sauce is getting too thick simply add a splash of water or vegetable stock.

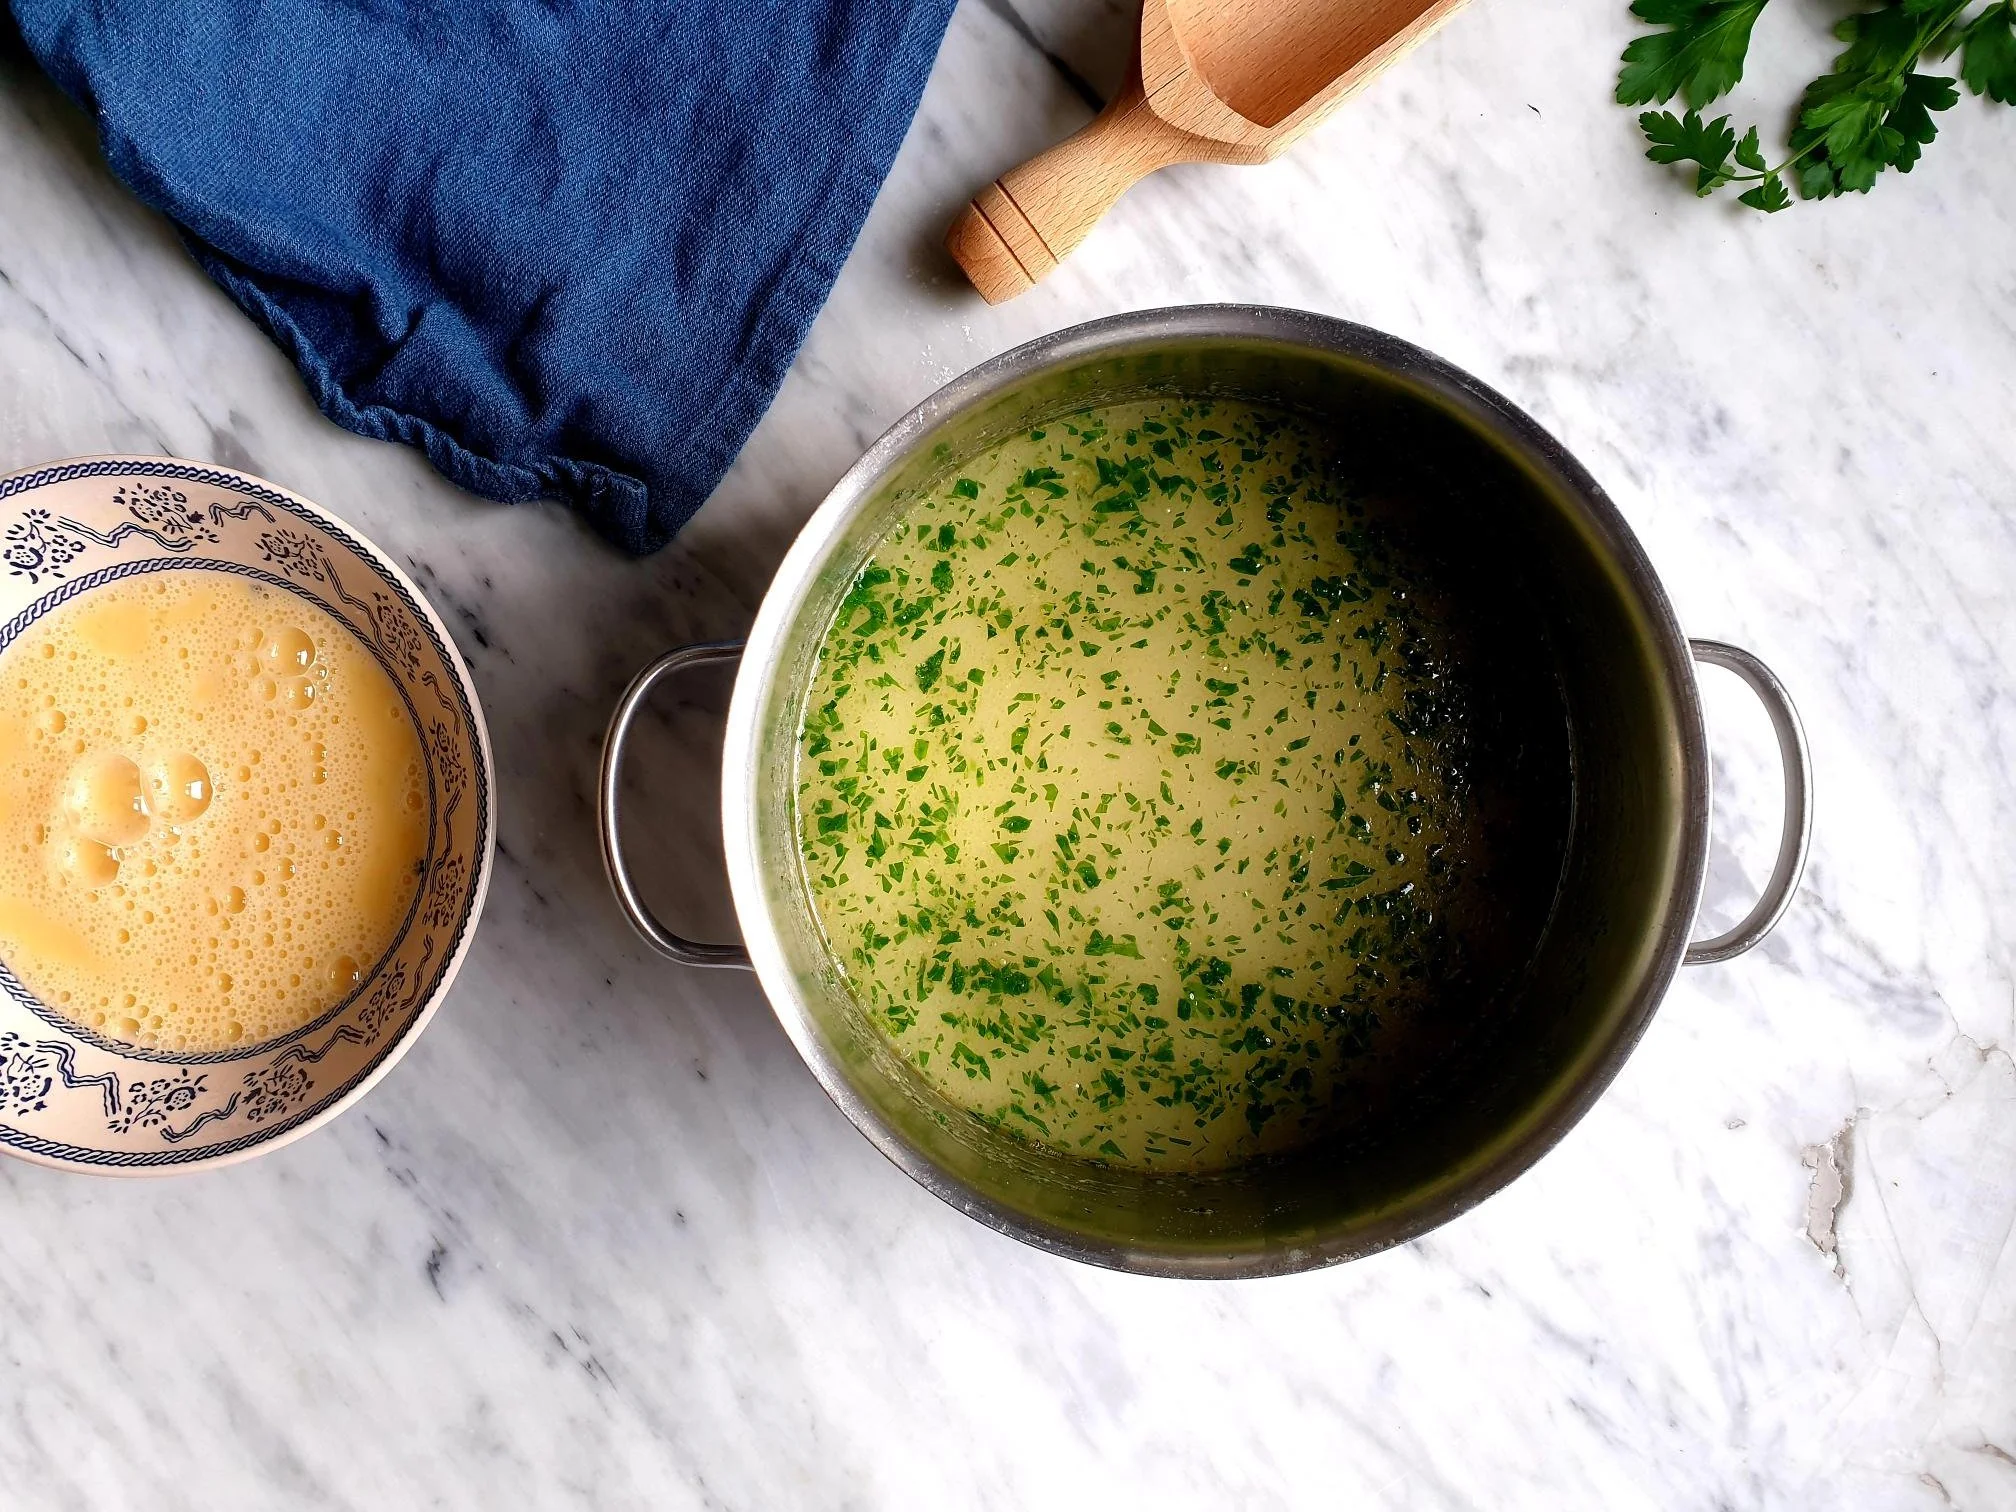
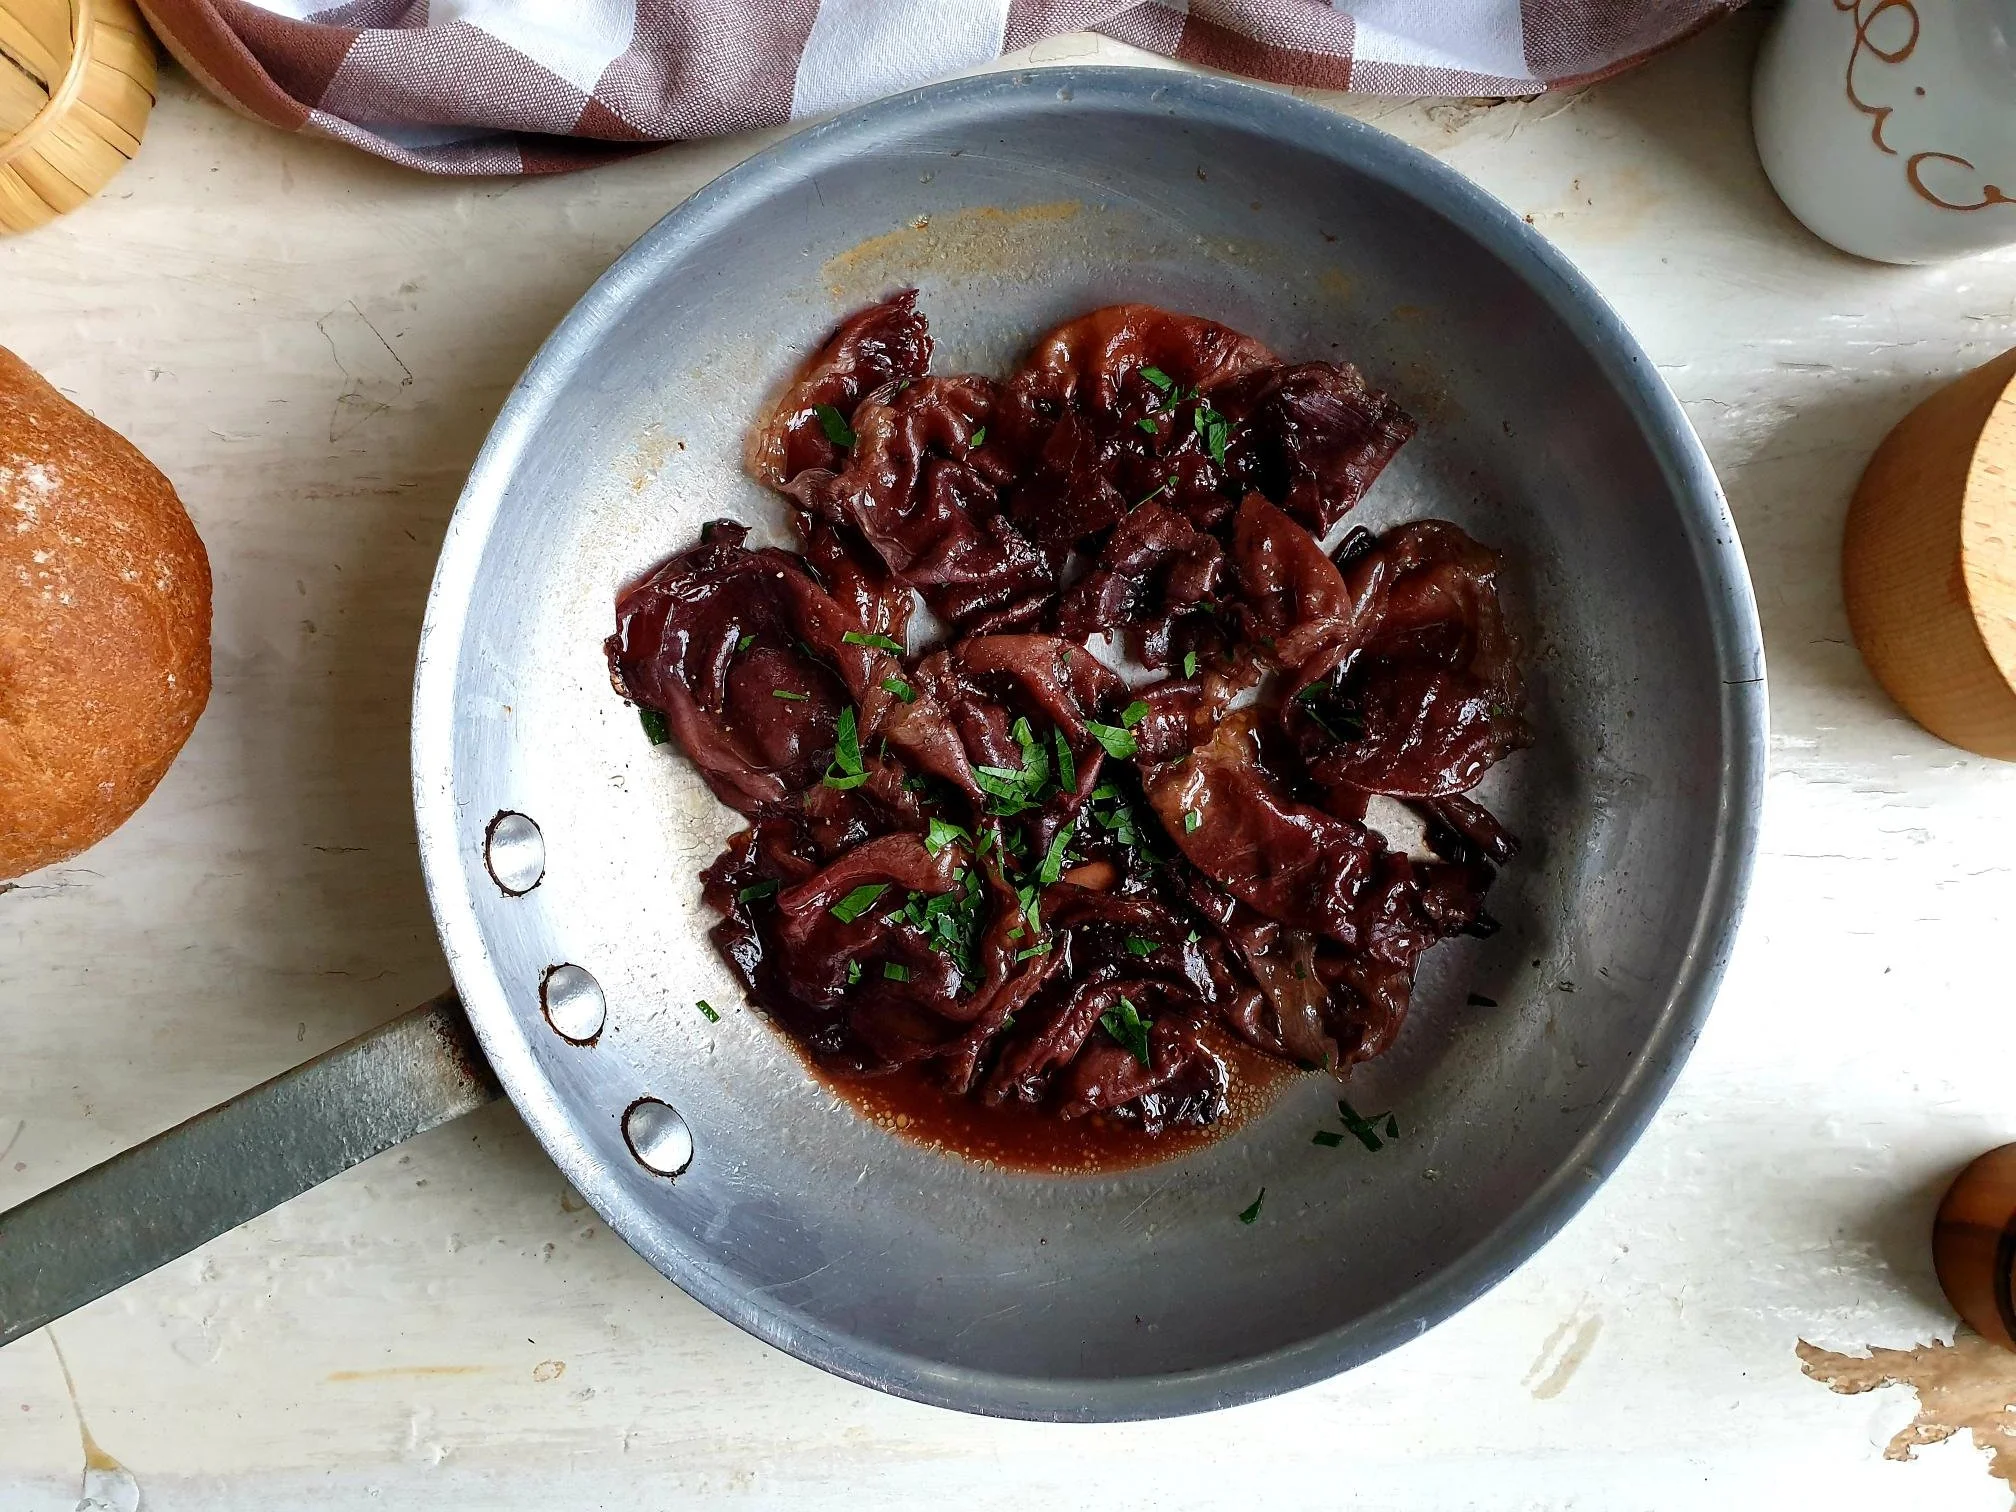
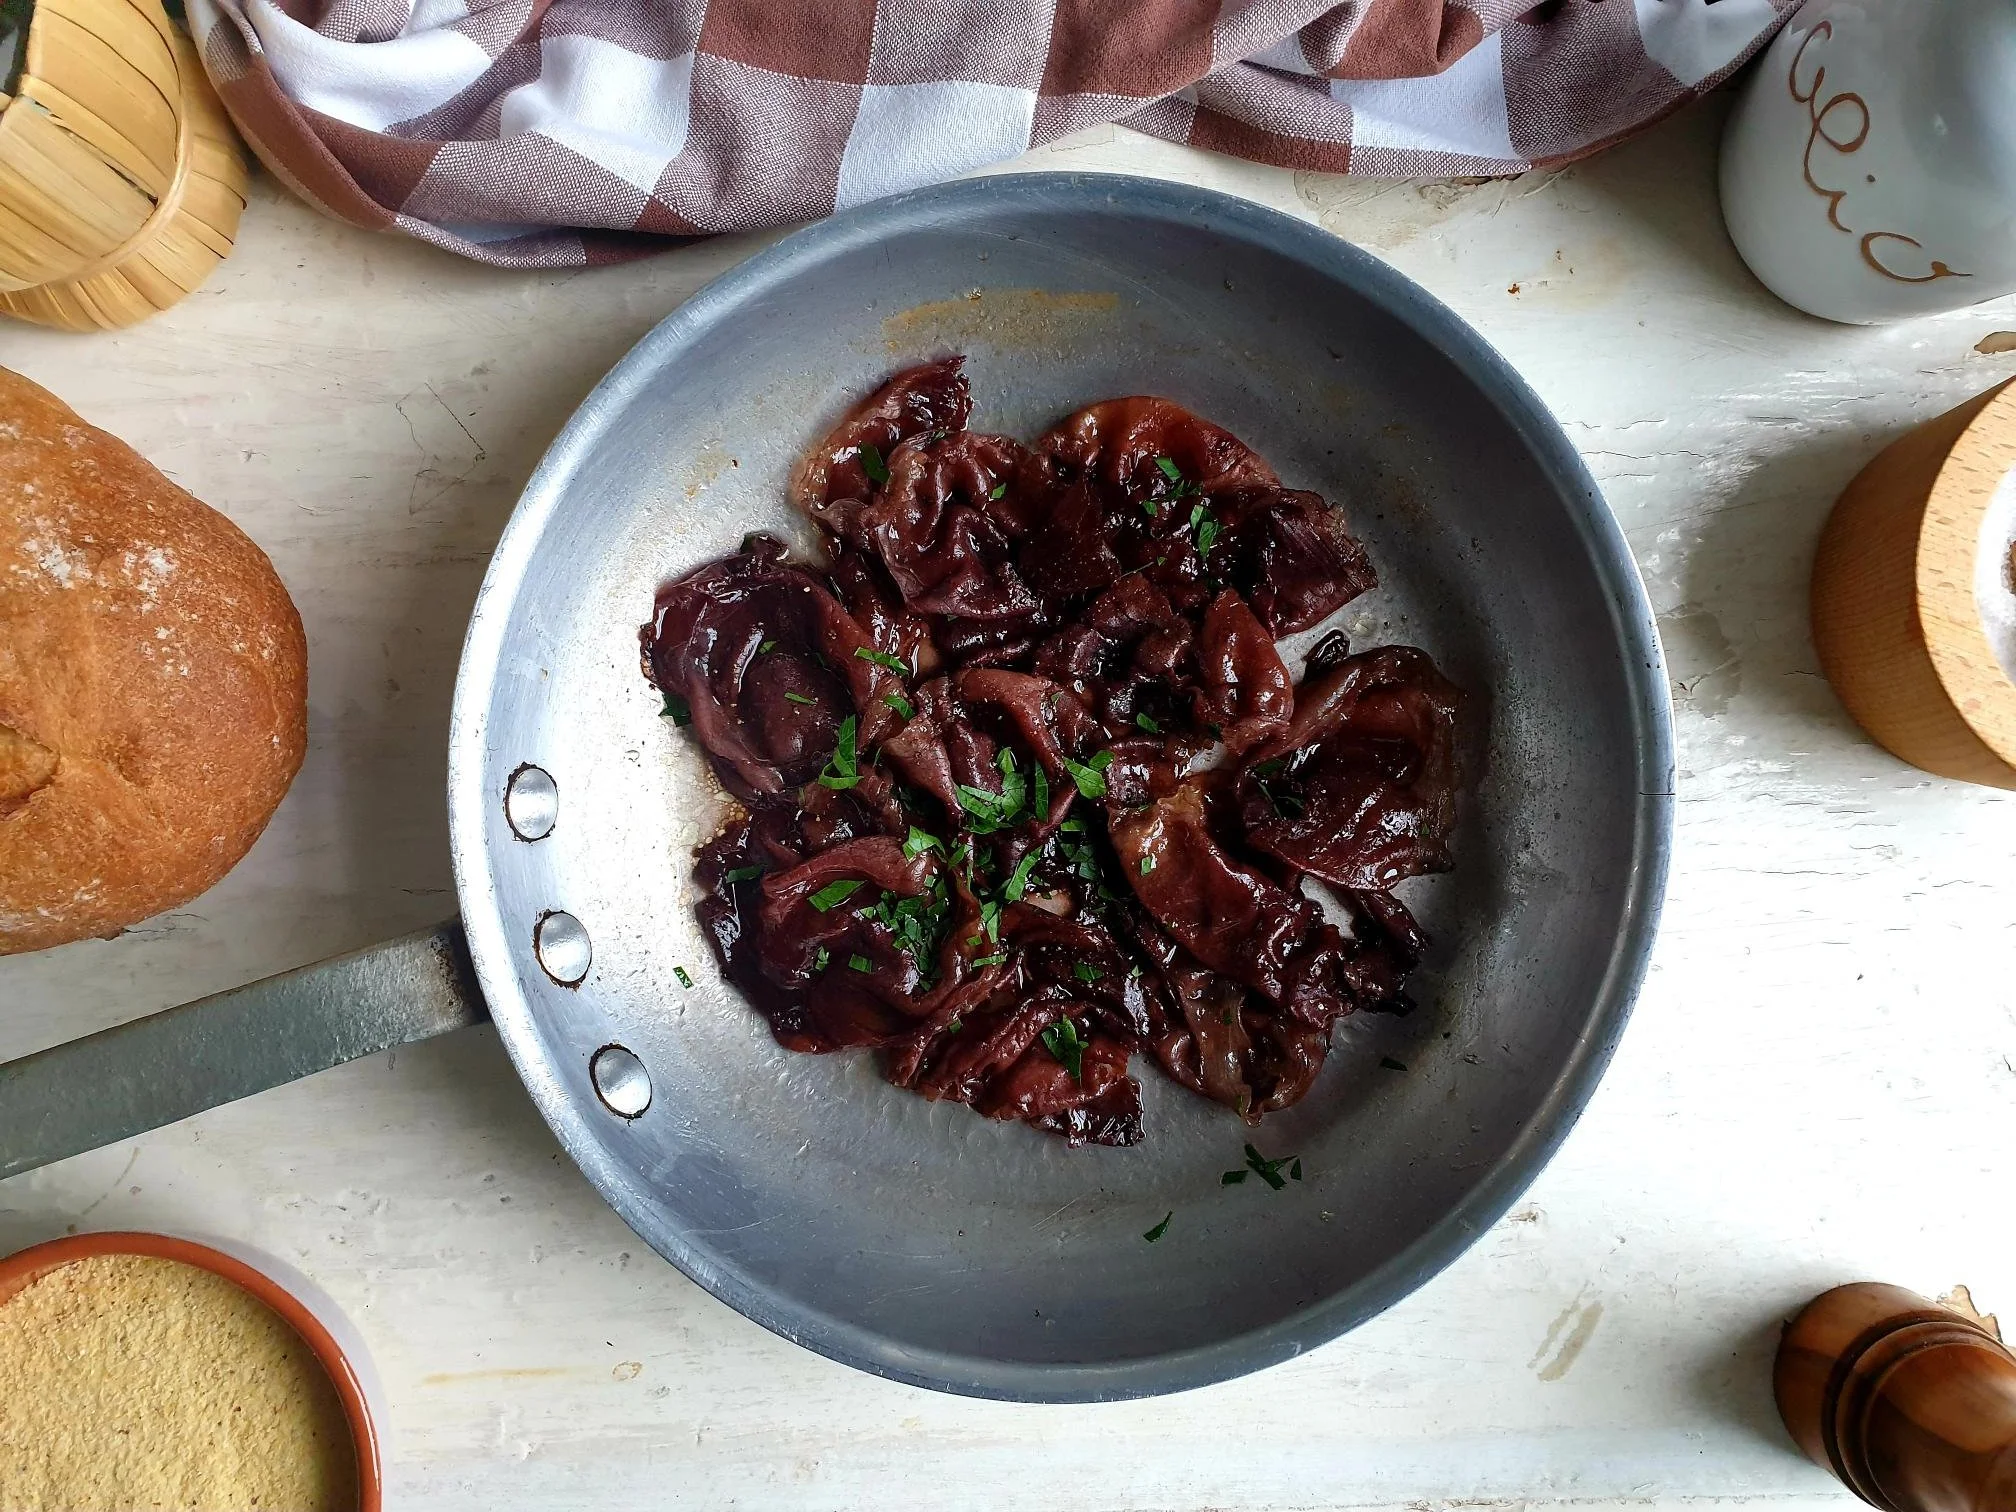
When cooked, artichokes should be nice and tender, the leaves should pull easily from the centre, most of the liquid should be evaporated, and you should be left with a sauce that is nor too thin or too thick.

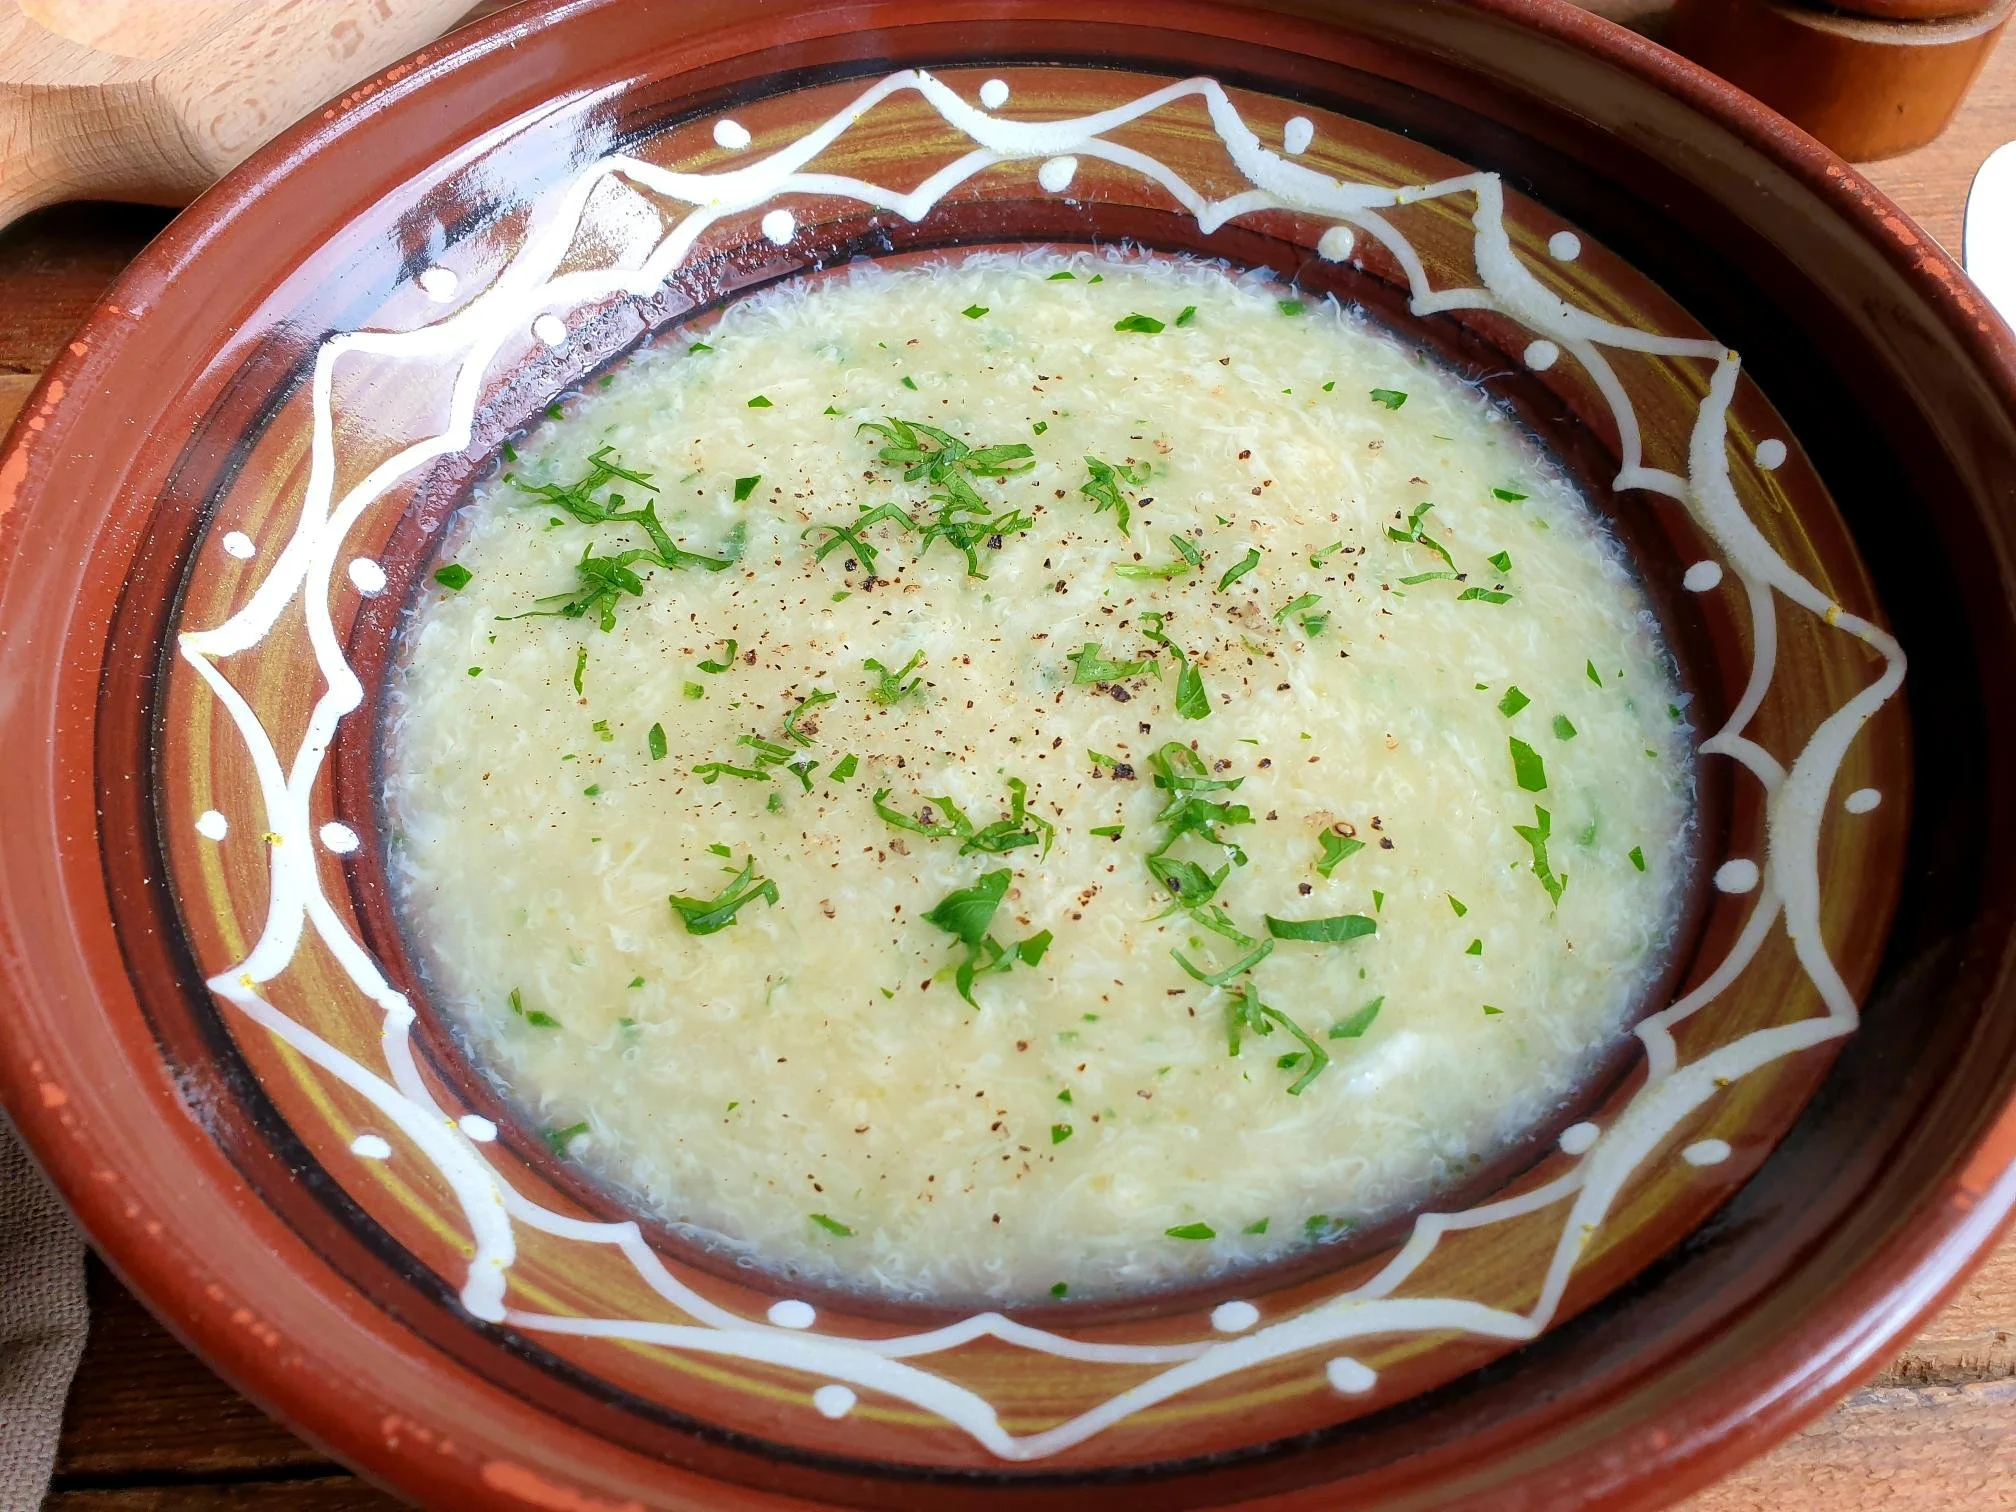
Remove from the heat and serve warm or at room temperature.

Spoon a bit of the sauce around and on the top of cooked artichokes.

June 26, 2025 /tina oblak
fresh artichokes, globe artichokes, stuffed artichokes, Istrian Artichokes
Adriatic Recipe, Appetizers, comfort, dinner, Easy recipe, family friendly meal, Istrian dish, light meal, recipe from Northern Ital, Rustic dish, simple recipe, Slovenian cuisine, Slovenian food, Slovenian gastronomy, Starters, stuffed dishes, supper, Vegan, Vegetable side dish, Vegetables, Vegetarian, weekend
Comment

Sgroppino – Venetian Style Lemon Sorbet Cocktail Recipe

Beans and Sardines
April 30, 2025 by tina oblak in Adriatic Recipe, All year round recipe, Christmas drinks, dessert, Drinks, Easy recipe, Festive drinks, festive sweet things, recipe from Northern Ital, simple recipe, Slovenian gastronomy, Sweet Things

Sgroppino is a type of alcoholic beverage traditionally made with lemon sorbet (or other types of fruit sorbet), Prosecco and chilled Vodka. It is incredibly simple and fast to prepare, and ready in a few minutes!

This Italian style cocktail is a real treat for lemon lovers, it can be served during rustic and more informal settings or during fancier and more formal dining parties.

Nowadays, this lemony and foamy delight is offered as a light and refreshing dessert, or as a cocktail after a heavier meal as a palate cleanser.

This sorbet-based cocktail is perfect for parties and different types of celebrations like weddings, birthdays, anniversaries, Christmas, New Year and Easter, and particularly appreciated during summer months because it is so refreshing.

Despite its modern appearance and taste, this drink originated hundreds of years ago in the northern region of Veneto in Italy. And it is in this part of Italy that the term for this sorbet style drink was“sgroppino” or “desgropante” which means to “untie or loosen knots”.

In fact, this cocktail was served to the elite and aristocrats as a digestif to help to “loosen” the stomach, and help with the digestion, during intervals of a rich and heavy meal.

However, the concept of sorbet takes us further back to Romans and Greeks, who used fruit juice, syrup and honey to flavour crashed ice.

This drink has been very popular throughout Italy, and the love for this cocktail, due to geographical proximity, stretched “across the border” along the Slovenian coast where it became part of local gastronomic tradition.

I fact, it is offered in just about any restaurant and you can find it on the menu as “Limonin Sorbet”. A lot of times restaurants nowadays would also offer a non-alcoholic version of it.

If you want to seriously impress your guests and entertain Italian style, this is the recipe to go for!

Recipe

Ingredients

Serves 2 (2 flute glasses)

  • 180g (about 6 scoops) lemon sorbet or other fruit sorbet like strawberry, raspberry, mango

  • 80ml Chilled Prosecco (Italian sparkling white wine)

  • 25ml Chilled Vodka (about 2Tbsp) (the best and easiest way to keep Vodka chilled is by keeping it and storing it in the freezer, it will not freeze solid due to its high content of alcohol).

Method

Put all the ingredients in an electric blender and blend for about one minute until the mixture becomes smooth cream.

Alternatively, you can make this lemony foamy treat by hand.

In a big bowl put lemon sorbet, or other fruit sorbet of your choice, and Prosecco, a little at a time and whisk together.

Gradually add more of each and keep whisking in the same direction, trying to avoid the mixture to collapse.

Continue to whisk until you obtain a slightly slushy and frothy consistency, and in the end, add a bit of chilled vodka to the mixture.

View fullsize Sorbetto 4.jpg
View fullsize Sorbetto 6.jpg

Pour into flute glasses or other type of long-stemmed glasses and serve.

You can garnish this drink using fresh basil or mint leaves, lemon slices, wedges or twist, and/ or lemon zest.

Just a thought

In the recipe above I am giving an approximate amount of the ingredients to make this super delicious cocktail.

You can play with the quantities of the ingredients and tailor make this beverage to suit your palate and desires.

Champagne or other white dry sparkling wine can be used instead of Prosecco, and Gin can be used instead of Vodka, and of course, you can be creative and use other types of drinks and use the basic concept of the recipe to make other types of fruit sorbet-based cocktails.

April 30, 2025 /tina oblak
Sgroppino, Lemon Sorbet Cocktail, Prosecco, Vodka, Lemon Sorbet, Refreshing Drink, Champagne, white dry sparkling wine, Gin, fruit sorbet-based cocktails, strawberry sorbet, raspberry sorbet, mango sorbet
Adriatic Recipe, All year round recipe, Christmas drinks, dessert, Drinks, Easy recipe, Festive drinks, festive sweet things, recipe from Northern Ital, simple recipe, Slovenian gastronomy, Sweet Things
Comment

Prežganka – Traditional Flour Based Soup Recipe

Beans and Sardines
February 26, 2025 by tina oblak in Adriatic Recipe, All year round recipe, Appetizers, breakfast, Central European recipes, child friendly dish, child friendly meal, comfort, dinner, Easy recipe, entrée course, family friendly dish, family friendly meal, first course, first course dish, first course meal, Hearty soups, Istrian cuisine, Istrian dish, Istrian food, Istrian gastronomy, Mitteleuropean cuisine, Mitteleuropean dish, Mitteleuropean food, Mitteleuropean recipes, Rustic dish, simple recipe, Slovenian cuisine, Slovenian food, Slovenian gastronomy, Soups, Starters, Vegetarian

This humble and modest flour-based soup, that used to feed the poorest of the poor, offers a lot more than eyes can meet. It is quite incredible how much taste this dish can deliver considering it only uses a handful of very basic cupboard ingredients.

It is an easy and super quick soup to cook when feeling a bit under the weather, it helps with indigestion problems and alleviates colds and flu.

In the olden days this soup used be served for breakfast along with some slices of bread, and offered to unexpected guest, if there was nothing else in the household, in fact, this dish was created when times were tough with not much available.

This type of soup is sometimes compared to the Roman Egg drop soup, or also known as, Stracciatella in brodo or Stracciatella alla Romana, and to the German variation Einbrennsuppe.

In Slovenia it is called Prežganka, from a word prežgati, meaning browning the flour in butter or oil.

It is very popular up and down the country, not found in the restaurants and exclusively made in the households, particularly liked by small children and elderly.

It offers variations from region to region, for example the use of olive oil, garlic and fresh parsley is more typical of the coastline region, while the use of butter and lard with addition of 1 teaspoon of whole caraway seeds or ground cumin is more typically found in inland, bay leaf and ground paprika are also used.

I am sharing here the recipe for Preažganka from Slovenian Istra how has been made in my family for generations.

Recipe

Ingredients

Serves 4

  • 2 Tbsp olive oil or butter

  • 1 clove of garlic, peeled

  • 3 Tbsp white all-purpose flour

  • 1litre water

  • 1 Tsp, or to taste, fresh flat leaf parsley, finely chopped (plus some extra to garnish, optional)

  • 2 eggs

  • sea salt, to taste

  • black pepper, to taste

  • bread croutons, to serve, optional

Method

Place olive oil or butter in a saucepan and heat up a bit. Add the garlic and fry it on a gentle heat until it becomes golden in colour. The oil or the butter, depending on what are you using, will be nicely infused with garlic.

Start adding the flour and stir constantly with a small whisk.

View fullsize Prezganka-Traditional Slovenian Flour Based Soup 1.jpg
View fullsize Prezganka-Traditional Slovenian Flour Based Soup 2.jpg

Cook for about 6 minutes, or until the flour roux becomes light to dark brown in colour. Be a bit mindful not to burn the flour!

View fullsize Prezganka-Traditional Slovenian Flour Based Soup 3.jpg
View fullsize Prezganka-Traditional Slovenian Flour Based Soup 4.jpg

While stirring the roux, gradually add and pour the water. Cook and keep stirring constantly until the mixture becomes thick and smooth.

View fullsize Prezganka-Traditional Slovenian Flour Based Soup 5.jpg
View fullsize Prezganka-Traditional Slovenian Flour Based Soup 6.jpg

Stir well and add fresh finely chopped parsley. Bring to a boil, lower the heat, season with sea salt, and gently simmer for about 10 to 15 minutes.

In meanwhile, crack the eggs in a small bowl, and gently beat with the fork.

View fullsize Prezganka-Traditional Slovenian Flour Based Soup 9.jpg
View fullsize Prezganka-Traditional Slovenian Flour Based Soup 10.jpg

When the soup is cooked, slowly pour the beaten eggs in the soup in a thin stream, making sure you stir gently the soup constantly with the fork. Cook further for another 1to 2 minutes.

Ladle the soup into the plates or bowls, sprinkle with freshly chopped parsley and ground black pepper, optional, and serve hot immediately. You can top it with croutons and turn this soup into even more substantial meal.

February 26, 2025 /tina oblak
white flour, all purpose flour, eggs, Prežganka, Roman Egg drop soup, Stracciatella in brodo, Stracciatella alla Romana, Einbrennsuppe, humble soup, modest soup, roux based soup
Adriatic Recipe, All year round recipe, Appetizers, breakfast, Central European recipes, child friendly dish, child friendly meal, comfort, dinner, Easy recipe, entrée course, family friendly dish, family friendly meal, first course, first course dish, first course meal, Hearty soups, Istrian cuisine, Istrian dish, Istrian food, Istrian gastronomy, Mitteleuropean cuisine, Mitteleuropean dish, Mitteleuropean food, Mitteleuropean recipes, Rustic dish, simple recipe, Slovenian cuisine, Slovenian food, Slovenian gastronomy, Soups, Starters, Vegetarian
Comment

Dry-Cured Ham in Red Wine Sauce Istrian Recipe

Beans and Sardines
December 17, 2024 by tina oblak in Adriatic Recipe, All year round recipe, Appetizers, breakfast, brunch, Canapés, Easy recipe, entrée course, Istrian cuisine, Istrian dish, Istrian food, main course, main dish, main meat course, Meat, Rustic dish, savory nibbles, simple recipe, Slovenian cuisine, Slovenian food, Slovenian gastronomy, Small bites, Snacks, Starters

This simple, uncomplicated and humble peasant dish must be one of the quickest and easiest recipes ever. You will only need three ingredients to make it, olive oil, red wine and some kind of dry-cured meat, and a couple of minutes to spare to cook it.The recipe originated in the Slovenian region of Karst, and it was prepared in the olden days by the housewives for their husbands upon their return home hungry after working all day in the fields and with the animals, and needed a quick and filling meal.

This dish was cooked using the ingredients that were exclusively homemade, types of dry cured meats changed according to what was available in the households.

It is a very much-loved simple dish that can be found in this region on the menus in local run family rustic restaurants referred to as Pršut z Refoškom, Pršut z vinom or Teranov toč (word vino meaning wine, and Refošk and Teran are the two typical full bodied red wines produced in the Karst region).

It is usually made with Kraški Pršut, a dry-cured non-smoked ham from the Kras (Karst) region in Slovenia, with a Protected Geographical Indication (PGI). This region is blessed with a continuous breeze and relatively low humidity, creating perfect conditions for drying meat, a strong tradition that has been kept alive among local people since the earliest settlements.

This is how a well renowned and famous Slovenian polymath John Weikhard Freiherr von Valvasor described in 1689 the Karst region and the traditions of its humble culinary customs.

This good people help

themselves as they can live

poorly: they are very happy if they

have a piece of pork fat (which they can digest due to their

ardours work), onion, and a

piece of plain, coarse, brown,

rolled bran bread.

I am sharing here a family recipe for this unique recipe that travel only a few kilometres from inland Karst region to the Slovenian Istrian coast, where it became part of local repertoire of recipes.

Recipe

Ingredients

Serves 4 as a starter

  • 1 Tbsp extra virgin olive oil or olive oil

  • 10 thinly sliced dry-cured ham (you can use dry-cured sausage like Italian salami or French Saucisson for example)

  • 100ml full-bodied red wine

  • knob of unsalted butter, optional

  • black pepper, optional

  • fresh flat leaf parsley, chopped, optional

Method

Put the olive oil in a fairly large frying pan and heat it up a bit.

Place the slices of dry-cured ham in a frying pan and cook them on a medium heat very briefly, just until they change the colour, it will literally take seconds.

View fullsize Dry-cured ham in red wine sauce Istrian Recipe 3.jpg
View fullsize Dry-cured ham in red wine sauce Istrian Recipe 4.jpg

Then pour the wine and cook for further a minute or two, or until the alcohol evaporates and the sauce thickens slightly. When it is cooked you can add a knob of butter if you wish to make the sauce creamier and richer.

View fullsize Dry-cured ham in red wine sauce Istrian Recipe 5.jpg
View fullsize Dry-cured ham in red wine sauce Istrian Recipe 6.jpg

Season with some black pepper if you wish, however, there is no need to season this dish with additional sea salt as dry-cured ham is already naturally quite salty.

Serve immediately hot or warm with slices of rustic bread or on a bed of soft, cooked polenta.

Just a thought

This dish is best eaten immediately after it has been prepared, and it is not suitable for freezing.

December 17, 2024 /tina oblak
dry cured ham, prosciutto crudo, Parma Ham, Pršut z Refoškom, Pršut z vinom, Teranov toč, Kraški Pršut, Kras, Karst region, full-bodied red wine, dry-cured non-smoked ham, Italian salami, French Saucisson
Adriatic Recipe, All year round recipe, Appetizers, breakfast, brunch, Canapés, Easy recipe, entrée course, Istrian cuisine, Istrian dish, Istrian food, main course, main dish, main meat course, Meat, Rustic dish, savory nibbles, simple recipe, Slovenian cuisine, Slovenian food, Slovenian gastronomy, Small bites, Snacks, Starters

Dry Fig and Almond Slice Istrian Recipe

Beans and Sradines
December 10, 2024 by tina oblak in Adriatic Recipe, Appetizers, Autumnal dish, Autumnal recipe, bite-sized nibbles, Canapés, Christmas, dessert, Easy recipe, festive dessert, festive dish, festive sweet things, Finger food, Healthy, Istrian cuisine, Istrian food, Istrian gastronomy, Rustic dish, simple recipe, Slovenian cuisine, Slovenian food, Slovenian gastronomy, Small bites, Snacks, Starters, sweet finger food, sweet nibbles, Sweet Things, Vegan, Winter recipe

Dry fig and almond slice is a sweet treat made with soft, sticky and delicious dried figs paste mixed with finely chopped nuts that is then formed into a log or oblong shape, and then dried until firm enough to slice.It is perfect to get the festivities rolling, slice it up and serve with assorted cheeses and crackers or as a sweet treat with coffee or tea, Brandy, Dark rum or some kind of sweet wine at the end of the meal. This dried fig delight contains no flour, so it is a fantastic gluten free option.

It is very popular and well known in the South of Italy where it is known as Lonzino di fico (loin of figs for its shape resembling pork loin) or as Salame di fichi (fig “salami”).

It used to be recurrently made in the households in Slovenian Istra where it is referred as Figov Hlebček, literally meaning Fig Loaf, as it is shaped into oblong like a loaf of bread.

This fig loaf was traditionally wrapped in bay leaves and allow to dry in the sun for at least a week. It used to be made straight after grape picking season using a bit of Must, which is a freshly crushed grape juice (from the Latin vinum mustum, meaning young wine) and a first step in winemaking.

To make this fig loaf Istrian style you would only use dried figs, raisins and almonds. Nothing is stopping you to play with the ingredients and make your own version of it, perhaps using different types of nuts like walnuts, pistachios, and a different variety of dried fruit like dried apricots, dates or similar.

Recipe

Ingredients

  • 250g dried figs, hard stalk removed, roughly chopped (for this recipe Turkish or Calymirna dried figs are the best)

  • 50g raisins

  • 100g peeled or unpeeled almond, (can use walnuts instead)

  • ½ Tbsp dark rum, Brandy, Italian sweet Marsala wine, Muscat sweet wine or other type of sweet wine, optional

Method

Place raisins in a small bowl and completely cover with warm water.

If you wish, you can add ½ Tbsp of dark rum, Brandy, Marsala or Muscat sweet wine or other type of sweet wine.

Leave to soak and plump up for at least 15 minutes, or until needed.

Place the almonds, or walnuts, in a food processor and pulse until most are finely chopped. Remove and transfer to a mixing bowl.

View fullsize Dried Fig and Almonds Slice Itrsian Recipe 4.jpg
View fullsize Dried Fig and Almonds Slice Itrsian Recipe 5.jpg

Put roughly chopped dried figs and soaked raisins into a food processor and whizz until they form a sticky paste (if the paste does not quite come together, add a splash of warm water).

View fullsize Dried Fig and Almonds Slice Itrsian Recipe 6.jpg
View fullsize Dried Fig and Almonds Slice Itrsian Recipe 7.jpg

Remove and transfer fig paste into the mixing bowl together with chopped nuts.

Mix well and shape the fig and nut mixture into a sausage/log or loaf. You can make thicker or thinner log according to the size slices you want.

View fullsize Dried Fig and Almonds Slice Itrsian Recipe 10.jpg
View fullsize Dried Fig and Almonds Slice Itrsian Recipe 11.jpg

Allow to dry, uncovered, in the fridge or a dry place (I put mine in a airing cabinet) for up to a week.

It should become firm and somewhat dried out but not completely hard.

Slice and serve alongside your favourite selection of cheeses or as a sweet treat/dessert at the end of the meal with a coffee or tea or a glass of sweet wine, Rum or Brandy.

Just a thought

Dried fig and almonds slice will keep in a cool place for up to two months.

This dried fig delight also makes a lovely and thoughtful give away present for your foodie friends and family. Wrap and tie in a baking parchment, fig leaves or bay leaves.

You can shape fig and nut mixture into small balls and have them as a healthy snack when the sugar levels gets a bit low.

December 10, 2024 /tina oblak
dry figs, almonds, walnuts, pistachios, dried apricots, Lonzino di fico, Salame di fichi, Figov Hlebček, dates, Turkish dried figs, Calymirna dried figs, raisins, peeled almonds, unpeeled almonds, make ahead, gluten free, Marsala wine, Brandy, Dark Rum, Muscat sweet wine, foodie give away present
Adriatic Recipe, Appetizers, Autumnal dish, Autumnal recipe, bite-sized nibbles, Canapés, Christmas, dessert, Easy recipe, festive dessert, festive dish, festive sweet things, Finger food, Healthy, Istrian cuisine, Istrian food, Istrian gastronomy, Rustic dish, simple recipe, Slovenian cuisine, Slovenian food, Slovenian gastronomy, Small bites, Snacks, Starters, sweet finger food, sweet nibbles, Sweet Things, Vegan, Winter recipe
Comment

Home-made Mulled Wine Recipe

Beans and Sardines
November 29, 2024 by tina oblak in Adriatic Recipe, Appetizers, dinner, Easy recipe, festive sweet things, simple recipe, Slovenian cuisine, Slovenian gastronomy, Winter recipe, Drinks, Festive drinks, Christmas, Christmas drinks

Mulled wine, sometimes refereed as spiced wine, is an alcoholic drink, most frequently made with strong, full bodied red wine that varies according to the area of origin, and sometimes with white wine. It is sweetened with sugar and enriched by aromatic array of mulling spices and citrus fruits. This drink is traditional during cold winter months, especially around Christmas, it is typical of Italian and central Europe mountain areas, and it is served hot or warm.

It is believed that mulled wine comes from English punch which was made using orange or lemon liqueur mixed with rum, but it originated, and was first invented by the Romans. It can be traced back to an early recipe written by a Roman gourmet Marcus Gavius Apicius, great lover of culinary arts, fine food and drink, and it used to be served after a feast or banquet

After many variations since Roam times, mulled wine has been enjoyed for hundreds of years in Italy, where it became gastronomic staple, and it is known as Vin Brulé.

If queuing at the Christmas market is not your thing, and equally you are not keen on sipping this traditional holiday sweet treat outdoors with below zero temperatures, frozen hands, and a red nose, then prepare and recreate this festive beverage in the comfort of your cosy and toasty kitchen and delight your family and friends, giving them an instant burst of energy. This fragrant and intensely flavoured drink will most certainly offer extra festive cheer during special holiday gatherings.

Here I am sharing the family recipe for this much-loved winter warmer that is super easy and quick to make, and feel free and creative to adjust the quantities of the ingredients to your taste.

It is perfect served and enjoyed on its own, and appreciated accompanied by roasted chestnuts or apple strudel.

Recipe

Ingredients

Serves 4-6

  • 1 bottle (750 millilitre) of full-bodied red wine like Cabernet Sauvignon, Merlot, Primitivo, Barolo and similar

  • 150g sugar (granulated or caster)

  • 10 whole cloves, or to taste

  • 2 pieces of cinnamon stick

  • peel of 1 unwaxed orange

  • peel of 1 unwaxed lemon

  • pinch of nutmeg

  • juice of 1 orange, optional

  • extra orange slices to garnish, optional

Method

Put all the ingredients in a saucepan and bring gently to the boil.

View fullsize Mulled Wine Recipe 3.jpg
View fullsize Mulled Wine Recipe 5.jpg

Simmer for about 5-10 minutes, stir occasionally making sure all the sugar has completely dissolved, and some of the alcohol burnt off allowing the liquid to absorb all the flavours from the spices (do not allow vigorous boil).

View fullsize Mulled Wine Recipe 11.jpg
View fullsize Mulled Wine Recipe 12.jpg

Remove from the heat and strain the liquid either through a very fine meshed sieve/colander or using a gauze.

View fullsize Mulled Wine Recipe 18.jpg
View fullsize Mulled Wine Recipe 21.jpg

Pour the drink in glasses, garnish with slices of orange, and serve hot immediately.

Just a thought

The quality of mulled wine depend on the quality of the wine. When choosing the wine for this recipe choose a good quality one with a moderate price tag, avoid cheap or high-end wines.

You can make mulled wine ahead of time, about 2 to 3 days before when you would like to consume it. When your mulled wine is cooked and prepared, let it cool completely, transfer to a glass bottle or sealed container and refrigerate.

Reheat on the stove over gentle heat when you are ready.

November 29, 2024 /tina oblak
red wine, Vin Brulé, full-bodied red wine, whole cloves, cinnamon stick, Cabernet Sauvignon, Merlot, Primitivo, Barolo, peel of orange, peel of lemon, mulling spices, citrus fruit, make ahead, festive beverage, flavoured drinks, cooked wine, spiced wine
Adriatic Recipe, Appetizers, dinner, Easy recipe, festive sweet things, simple recipe, Slovenian cuisine, Slovenian gastronomy, Winter recipe, Drinks, Festive drinks, Christmas, Christmas drinks
Comment

Grilled Squid (Calamari) Istrian Recipe

Beans and Sardines
August 14, 2024 by tina oblak in Adriatic Recipe, All year round recipe, Appetizers, child friendly dish, child friendly meal, Easy recipe, family friendly dish, family friendly meal, Fish & Seefood, fish starter, Healthy, healthy mael, Istrian cuisine, Istrian dish, Istrian food, Istrian gastronomy, light fish course, light meal, main course, main dish, main fish course, main fish meal, Rustic dish, simple recipe, Slovenian cuisine, Slovenian food, Slovenian gastronomy, Small bites, Starters, supper

Tender and succulent, grilled or pan-fried squid can be enjoyed all year round, but it is particularly popular during the hot weather, it is light and fresh and makes a perfect summer meal.

This classic Mediterranean dish can be served as an appetizer or part of a main dish, and it is incredibly easy and fast to make.

Some people are put off and maybe a bit reluctant cooking with squid maybe as a result of experiencing chewy and rubbery tasting squid.

For the squid to be tender it needs to be cooked very fast for only a few minutes or slow cooked, at least 30 minutes, and seasoned with sea salt at the very end.

Observe these two tricks and successful end result is guaranteed. For a very tender squid I have been suggested to soak the squid in milk prior cooking (I have not tried this yet).

This dish is very popular along the Slovenian coast and can be found on menus in just about any type of restaurant. Locals refer to this dish as Kalamari na žaru or called Lignji na žaru in standard Slovenian.

It is traditionally served with a simple garlic, parsley and olive oil sauce referred to by the locals as Tržaska omaka (Trieste sauce, Triestine sauce or salsa Triestina).

I am sharing here the family recipe for this seriously delicious grilled squid, after you try it, you will be checking out the fish counter for fresh squid a bit more often!

Recipe

Ingredients

Serves 4 as a starter or 2 as a main with a side dish

  • 1kg fresh squid, tubes and tentacles, cleaned (if daunted by the task of cleaning the squid yourself ask your fishmonger to do it for you). Alternatively you can use store bought already cleaned frozen squid, make sure it is defrosted safely before using.

  • extra virgin olive oil, a generous drizzle

  • sea salt

  • black pepper, optional

  • 1 lemon, cut in wedges to serve, optional

  • For the sauce, optional

  • 1 handful of fresh flat leaf parsley (about 10g) washed, dried and very finely chopped

  • 2 cloves of garlic or to taste, very finely chopped, as finely as you can

  • 3-5 Tbsp extra virgin olive oil

Method

Rinse well already cleaned squid under cold running water (make sure you rinse the inside of the tubes as well).

Dry well with kitchen paper and place in a dish, plate or bowl. Add a generous drizzle of extra virgin olive oil, toss the squid and leave to rest for about 15 minutes. Set aside.

View fullsize Grilled Squid 4.jpg
View fullsize Grilled Squid 5.jpg

While the squid is marinating in olive oil make the sauce if using. Place very finely chopped garlic and parsley in a small bowl and add extra virgin olive oil, mix well and set aside until needed. The quantities for this simple sauce in this recipe are approximate and you can adjust it and tweak it to your liking. Add more garlic if you wish, omit garlic altogether if not keen having raw garlic in the sauce, add more oil etc.

Take a griddle or regular non stick pan and heat very well.

When is very hot place the squid tubes and tentacles in a pan and cook for about 5 minutes, two and a half minutes on each side.

If you see the squid is drying out a bit just drizzle or brush a bit more olive oil.Season with sea salt at the very end.

Place the little bowl with garlic, parsley and olive oil sauce on the table, so everyone can spoon a bit of sauce on top of grilled squid if desired, and lemon wedges.

Serve grilled squid with boiled potatoes, chard with potatoes, chips or simply with some rustic bread. You can also serve it on a bed of rocket and make it into a main seafood salad dish.

Just a thought

The sauce should always be offered separately for everyone to be given a choice to spoon it over grilled squid if desired.

If you are left over with the sauce, you can spoon it on other types of grilled or pan-fried fish, great on grilled scallops and other sea food like prawns or langoustines.

Although not part of local costume this sauce can be spooned over grilled meat or pizza.

August 14, 2024 /tina oblak
fresh squid, fresh calamari, frozen squid, frozen calamari, quick squid dish, Kalamari na žaru, Lignji na žaru, Tržaska omaka, Trieste sauce, Triestine sauce, salsa Triestina
Adriatic Recipe, All year round recipe, Appetizers, child friendly dish, child friendly meal, Easy recipe, family friendly dish, family friendly meal, Fish & Seefood, fish starter, Healthy, healthy mael, Istrian cuisine, Istrian dish, Istrian food, Istrian gastronomy, light fish course, light meal, main course, main dish, main fish course, main fish meal, Rustic dish, simple recipe, Slovenian cuisine, Slovenian food, Slovenian gastronomy, Small bites, Starters, supper
Comment

My Mum's Celebratory Sponge Cake with Fresh Strawberries and Cream Recipe

Beans and Sardines
July 30, 2024 by tina oblak in Adriatic Recipe, All year round recipe, baked dish, baking, celebratory desserts, Celebratory dish, easy baking, easy cakes, Easy recipe, festive bakes, festive dessert, festive dish, festive sweet things, pudding, simple recipe, sweet course, patisserie

A classic simple sponge made with eggs, sugar and flour with no use of butter, filled with fresh whipped cream and fresh seasonal strawberries, a true classic celebratory cake that is difficult to beat. It is perfect for spring/summer birthdays and for all other summer special occasions, it is a top favourite with all ages.

This cake is delicious in taste with the lightest and fluffiest sponge; beautiful and elegant in its appearance, it looks like it has just come from the patisserie shop and yet could not be simpler to make.

With a few ingredients and a few simple steps you will impress your family and friends, and they will ask you for the recipe before they leave!

This celebratory cake would accompany all my childhood and my adulthood birthdays, baked exclusively by my mother.

In Slovenian Istra this type of sponge, refereed by the locals in the dialect as”Pandišpanija” (Pan di Spagna, translates literally as Spanish Bread) was the first form of the most simple celebratory cake, it was simply dusted with the sugar on the top and baked for special occasions like weddings. It is believed to originate during Napoleon's reign (19th century), and was first used in Croatian side of Istra, and then to then spread into a Slovenian part. Only later this type of sponge was cut horizontally in half and filled with different types of cream which resembles more to a modern concept of celebratory cake.

She would bake this type of cake for every birthday in the family and for her special friends, changing the fruits a bit to reflect the seasons. Peaches work very well and, in the winter, when the selection of fresh fruit is limited, she would use different types of tinned fruit which works amazingly well, the syrup from the tin was used to spoon the disc of the sponge.

No one will ever get fed up with this celebratory cake, we never had to struggle with any leftovers, bake it and see for yourself!

I am sharing the recipe for this special cake to remember and to honour my mother who recently died, so her legacy for this celebratory cake can live on for years to come.

Recipe

Ingredients

For the Sponge

  • 4 eggs (room temperature)

  • 4 Tbsp cold water

  • 200g icing sugar

  • 1 Tsp vanilla extract or 1 sachet of vanillin powder (very widely used in continental Europe baking)

  • 150g all purpose flour, sifted

  • 8g baking powder, sifted

For the filling and topping

  • 400g fresh strawberries, washed, pat dried and halved or quartered (reserve 100g fresh strawberries to decorate the top of the cake)

  • 2 Tbsp caster sugar (can use less or more depending on the taste and the sweetness of the strawberries)

  • 2 Tbsp water

  • 300ml fresh double cream, cold

  • 2 Tbsp caster sugar or to taste

Method

Preheat the oven to 180º static.

Lightly grease (I used butter) a 22cm (9in) loose-bottomed cake tin or spring form round cake tin and line the base with baking parchment.

Separate the egg whites and the yolks. Put the egg whites in a big clean bowl and the egg yolks in a small cereal type of bowl, whisk the egg yolks lightly with the fork.

View fullsize My Mum's Celebratory Sponge Cake with fresh strawberries and cream 1.jpg
View fullsize My Mum's Celebratory Sponge Cake with fresh strawberries and cream 3.jpg

Add 4 table spoons of cold water into a bowl with egg whites and start whisking with the hand whisker.

During the whisking start gradually adding, one spoon at a time of icing sugar and keep whisking until the egg whites become stiff and firm but not dry.

View fullsize My Mum's Celebratory Sponge Cake with fresh strawberries and cream 4.jpg
View fullsize My Mum's Celebratory Sponge Cake with fresh strawberries and cream 6.jpg

Add vanilla extract and egg yolks and mix well until fully incorporated.

My Mum's Celebratory Sponge Cake with fresh strawberries and cream 8.jpg
My Mum's Celebratory Sponge Cake with fresh strawberries and cream 9.jpg

Slowly and gradually start adding sifted flour together with baking powder.

Gently fold until thoroughly blended, do not mix with the hand mixer as you want to keep all the air inside the mixture which will make the cake incredibly soft and fluffy.

View fullsize My Mum's Celebratory Sponge Cake with fresh strawberries and cream 11.jpg
View fullsize My Mum's Celebratory Sponge Cake with fresh strawberries and cream 12.jpg

Transfer the mixture into the prepared tin and bake in the pre-heated oven for about 25 minutes or until golden in colour, well risen and the top of the cake springs back when lightly pressed with a finger.

View fullsize My Mum's Celebratory Sponge Cake with fresh strawberries and cream 13.jpg
View fullsize My Mum's Celebratory Sponge Cake with fresh strawberries and cream 14.jpg

While the cake is baking prepare the strawberries for the filling. Wash and pat dry 300g of strawberries, cut the smaller strawberries in half and the bigger ones in quarters. Place them in the bowl, add 2 table spoons of caster sugar (or to taste) and two table spoons of water.

View fullsize My Mum's Celebratory Sponge Cake with fresh strawberries and cream 24.jpg
View fullsize My Mum's Celebratory Sponge Cake with fresh strawberries and cream 25.jpg

Mix well and leave the strawberries to macerate, put aside until needed.

View fullsize My Mum's Celebratory Sponge Cake with fresh strawberries and cream 26.jpg
View fullsize My Mum's Celebratory Sponge Cake with fresh strawberries and cream 27.jpg

Filter the strawberries, put them in a sieve and collect the juices.

View fullsize My Mum's Celebratory Sponge Cake with fresh strawberries and cream 29.jpg
View fullsize My Mum's Celebratory Sponge Cake with fresh strawberries and cream 28.jpg

Leave the sponge to cool in the tin for a few minutes, then remove from the tin and peel off the baking parchment.

Finish cooling on a wire rack.

View fullsize My Mum's Celebratory Sponge Cake with fresh strawberries and cream 15.jpg
View fullsize My Mum's Celebratory Sponge Cake with fresh strawberries and cream 16.jpg

When the sponge is completely cool, take a sharp knife and cut the cake horizontally in half so you obtain two discs.

View fullsize My Mum's Celebratory Sponge Cake with fresh strawberries and cream 20.jpg
View fullsize My Mum's Celebratory Sponge Cake with fresh strawberries and cream 21.jpg

Place the bottom disk of the sponge on a cake stand of your choice.

Take fresh double cream from the fridge and pour it into a mixing bowl. Start whisking with the hand whisker.

During the whisking start adding caster sugar and whisk until the cream becomes stiff enough to be able to spread it on the cake.

View fullsize My Mum's Celebratory Sponge Cake with fresh strawberries and cream 31.jpg
View fullsize My Mum's Celebratory Sponge Cake with fresh strawberries and cream 32.jpg

Spoon strawberry juices over a bottom disk of the sponge.

View fullsize My Mum's Celebratory Sponge Cake with fresh strawberries and cream 34.jpg
View fullsize My Mum's Celebratory Sponge Cake with fresh strawberries and cream 36.jpg

Spread roughly 1/3 of whipped cream.

View fullsize My Mum's Celebratory Sponge Cake with fresh strawberries and cream 37.jpg
View fullsize My Mum's Celebratory Sponge Cake with fresh strawberries and cream 38.jpg

Then arrange the macerated strawberries over the disc to completely cover it.

Place the second disk of the sponge on the top.

View fullsize My Mum's Celebratory Sponge Cake with fresh strawberries and cream 39.jpg
View fullsize My Mum's Celebratory Sponge Cake with fresh strawberries and cream 40.jpg

Spread the rest of the cream on the top and on the sides of the cake.

Decorate to your liking the top of the cake with fresh strawberries, sliced or left whole.

View fullsize My Mum's Celebratory Sponge Cake with fresh strawberries and cream 43.jpg
View fullsize My Mum's Celebratory Sponge Cake with fresh strawberries and cream 44.jpg

Dust with a bit of icing sugar if desired and serve.

Just a thought

This cake must be eaten on the day of filling. You can prepare the sponge a day ahead, cool it completely and store it in an airtight container until the following day when is ready to be filled and decorated.

You can use tinned fruit of your choice instead of fresh strawberries. Make sure you reserve the syrup and use it to spoon over the bottom disc of the sponge as described in the recipe.

July 30, 2024 /tina oblak
sponge cake, double cream, whipped cream, fresh fruit, tinned fruit, celebratory cake, Pandišpanija, Pan di Spagna
Adriatic Recipe, All year round recipe, baked dish, baking, celebratory desserts, Celebratory dish, easy baking, easy cakes, Easy recipe, festive bakes, festive dessert, festive dish, festive sweet things, pudding, simple recipe, sweet course, patisserie
Comment

Easy Lamb Casserole Istrian Recipe

Beans and Sardines
June 07, 2024 by tina oblak in Adriatic Recipe, All year round recipe, baked dish, casserole, Celebratory dish, child friendly dish, child friendly meal, dinner, Easter, Easter dish, Easter recipes, Easy recipe, family friendly dish, family friendly meal, festive dish, hearty dish, Istrian cuisine, Istrian dish, Istrian food, Istrian gastronomy, main course, main dish, main meat course, Meat, one pot meal, one pot meat recipe, roasted dish, Rustic dish, simple recipe, Slovenian cuisine, Slovenian food, Slovenian gastronomy, supper, make ahead, weekend, slow cook, comfort, batch cooking

This slow-cooked lamb casserole recipe is absolutely amazing, it is incredibly easy to make using cheaper and tougher cuts of lamb that by the end of cooking become so tender they truly melt into your mouth.

It is a simple dish to put together, perfect for a cosy and satisfying meal, and great to make ahead of time as the flavours will have the chance to mingle, develop fully and intensify.

Along the Slovenian coast you might find this dish in more informal and rustic style restaurants called in local dialect Janje or Jančić na rošto or referred to as Pečeno Jagnje in standard Slovenian.

This very popular and much-loved dish is frequently prepared in the households during the weekends, and when the family and friends get together for special celebrations. It is also a recipe that is understandably appropriate for an Easter menu.

I am sharing here my family recipe with you. It only needs a few basic ingredients and you are ready to go.

You will come back to this recipe time and time again, as the best things about this incredibly flavourful lamb casserole is that the oven will take over and do the work for you.

Recipe

Ingredients

Serves 4

  • 1kg diced lamb meat of your choice (I used neck fillet). You can use boneless shoulder or leg of lamb, trimmed of excess fat and diced.

  • 1 medium onion (about 150g), peeled and finely chopped

  • 2 cloves of garlic, peeled and crushed

  • 3 Tbsp olive oil

  • 100 ml white wine, optional

  • 100g ripe and sweet tomatoes of your choice, roughly chopped (I used mini-San Marzano tomatoes)

  • If you cannot get hold of ripe and sweet tomatoes, you can use high quality tinned chopped tomatoes instead.

  • a sprig of fresh parsley, finely chopped

  • leaves from a small sprig of fresh rosemary (about 1 Tsp), very finely chopped or ¼ Tsp of dry rosemary

  • sea salt

  • black pepper

Method

Heat the oven to 250°C static or equivalent.

Trim off the excess fat from the diced meat if necessary to avoid the final dish being too greasy and potentially unpleasant to eat.

Put the olive oil in a fairly large flameproof casserole dish or Dutch Oven.

Add finely chopped onions, crushed garlic, a pinch of sea salt, and gently fry until soft and transparent.

View fullsize Lamb Roast 3.jpg
View fullsize Lamb Roast 4.jpg

Place diced lamb meat in a casserole dish and mix with the onions.

Transfer in the oven and bake for 15 minutes.

View fullsize Lamb Roast 5.jpg
View fullsize Lamb Roast 6.jpg

Remove from the oven and add chopped tomatoes, the herbs, and season with sea salt and black pepper.

Add white wine, if you are including it, and pour enough water to almost completely cover the meat.

Stir gently so all the ingredients are mixed together.

Turn the heat down to 220ºC.

Transfer the casserole dish back into the oven and cook for about 1 hour or until the meat is very tender.

Check the casserole now and again, giving it a good stir making sure there is always enough liquid.

If the casserole gets too dry, top up with a bit more water.

View fullsize Lamb Roast 7.jpg
View fullsize Lamb Roast 8.jpg

When the dish is ready you can spoon out any excess oil at the surface of the casserole.

Great served with oven baked potatoes, mashed potatoes, soft cooked polenta, some crusty rustic bread, sautéed peas, and other green vegetables like beans, broccoli, curly kale, and cavolo nero just to mention a few possible vegetables.

Just a thought

This lamb casserole is great for freezing. Once fully cooked, allow it to cool completely, and then freeze for up to three months.

June 07, 2024 /tina oblak
lamb, lamb meat, tougher cuts of lamb, cheap cuts of lamb, diced lamb neck fillet, lamb neck fillet, lamb shoulder, leg of lamb, Janje or Jančić na rošto, Pečeno Jagnje
Adriatic Recipe, All year round recipe, baked dish, casserole, Celebratory dish, child friendly dish, child friendly meal, dinner, Easter, Easter dish, Easter recipes, Easy recipe, family friendly dish, family friendly meal, festive dish, hearty dish, Istrian cuisine, Istrian dish, Istrian food, Istrian gastronomy, main course, main dish, main meat course, Meat, one pot meal, one pot meat recipe, roasted dish, Rustic dish, simple recipe, Slovenian cuisine, Slovenian food, Slovenian gastronomy, supper, make ahead, weekend, slow cook, comfort, batch cooking
Comment

Sea Bass Baked in Sea Salt Crust Recipe

Beans and Sardines
May 22, 2024 by tina oblak in Adriatic Recipe, All year round recipe, baked dish, baked fish, Celebratory dish, child friendly dish, child friendly meal, dinner, Easy recipe, family friendly dish, family friendly meal, Fish & Seefood, Healthy, healthy mael, Istrian cuisine, Istrian dish, Istrian food, Istrian gastronomy, light fish course, light meal, main course, main dish, main fish course, Nutritious, Nutritious dish, recipe from Northern Ital, Rustic dish, simple recipe, Slovenian cuisine, Slovenian food, Slovenian gastronomy, Venetian dish

Cooking sea bass, or any medium to large fish, covered in sea salt is one of the best ways of preparing it. The crust that forms during the baking helps to seal in the fish juices resulting in the fish meat having a very delicate taste and staying very moist and succulent which makes it incredibly flavoursome and deliciously tender to eat.

Sea salt crust prevents and shelters the fish in the oven from direct heat and allows it to bake evenly without the risk of overbaking it and therefore drying the fish. This recipe is also incredibly healthy as there is no need for additional fats or condiments.

This recipe for sure is a real showstopper and meant for special occasions. When you break the sea salt crust in front of your guests you create a bit of drama and bring a bit of theatre to your meal, it will leave them very impressed indeed!

The recipe has a very cheffy feel to it, but on the contrary to what you might think, the recipe is surprisingly simple.

This simple method of cooking the fish has been widely known and practised in various countries in the Mediterranean. It would have been expensive to prepare this dish, as quite a large amount of salt is needed. The dish would have been reserved as a feast dish for prosperous and wealthy, but it is believed that the recipe originated from the people on a more modest budget living in the areas where sea salt was produced.

This way of cooking is very popular in the Venetian area where preparing the fish this way is traced back before the end of the Roman Empire, during which time the salt pans were fully operating in the lagoon of Venice.

This practice of cooking the fish covered in sea salt crust has been also very popular along the Slovenian coastline since the time when La Serenissima (the Most Serene Republic of Venice) occupied this territory which is also blessed with the presence of the salt pans and the abundance of sea salt.

This recipe is not really suggested as your mid-week dinner. The locals would sometimes prepare the fish baked in sea salt crust in the households to mark and celebrate special occasions, but most of the time it would be enjoyed and ordered as a treat in the restaurants specialised in serving fish and sea food where you can find this dish on the menu in Slovenian as Brancin v soli or in Italian (due to present bilingualism) as Branzino al sale.

I am sharing here my family recipe to enjoy.

Recipe

Ingredients

Serves 2-4 people

  • 2 whole sea bass (each weighing about 400g), clean, gutted and ideally not scaled, however, you can use the fish that has been scaled already. Ask the fishmonger to help you with this task if uncomfortable tackling it yourself.

  • 2kg sea salt

  • fresh rosemary or parsley sprigs, optional

  • pepper, optional

Method

Preheat the oven to 180 °C.

Gut and clean the fish.

Rinse well the fish inside and out under cold running water and pat dry with kitchen paper.

If you wish you can stuff the inside of the fish belly (cavity) with fresh spring of parsley or rosemary and season with pepper.

Prepare the salt mixture to make the salt crust by putting the sea salt in a bowl and add enough water (about 100ml but you might need a bit more) so the mixture is wet and moist enough to be moulded. A bit like the sand on the beach when you are trying to build a sandcastle, if the sand is too dry or too wet you cannot shape it.

The principal for making sea salt mixture is similar, use a little bit of your judgment how much water you should use.

View fullsize Sea Bass Baked in sea salt crust Recipe 2.jpg
View fullsize Sea Bass Baked in sea salt crust Recipe 3.jpg

Line a baking tray (large enough to fit the fish comfortably) with baking parchment.

Put half of the salt mixture into a lined baking tray and flatten to make a bed for the fish.

Place the fish on top.

Cover completely with the remaining salt mixture.

Press with your hands to mould and seal.

View fullsize Sea Bass Baked in sea salt crust Recipe 5.jpg
View fullsize Sea Bass Baked in sea salt crust Recipe 6.jpg

Bake in the oven for about 50 minutes, or until the crust is crisp and lightly golden.

Remove the fish from the oven and bring it to the table in its crust.

Carefully crack the salt crust, remove it from the fish and discard.

Peel and remove the skin from the fish and discard that too.

Brush off any excess salt to avoid getting on to the fish.

View fullsize Sea Bass Baked in sea salt crust Recipe 7.jpg
View fullsize Sea Bass Baked in sea salt crust Recipe 10.jpg

Flake the fish from the bone in large pieces and place them onto a serving plate.

Spoon over a simple green sauce made with olive oil and finely chopped fresh parsley, and serve with some boiled new potatoes, spinach or chard with garlic and olive oil, salad, creamed spinach, bean salad, green beans salad, peperonata Istrian style.

Just a thought

You can stuff the cavity of the fish with herbs of your preference like fresh parsley, rosemary or thyme, or garlic and a slice of lemon, or a combination.

Wine suggestion

Vermentino di Sardegna DOC 2023 - Selezione Argiolas

May 22, 2024 /tina oblak
Sea Bass, Fresh whole Sea Bass, Fresh whole Sea Bream, sea salt, fresh herbs, Sea Salt Crust, Fresh whole fish in Sea Salt Crust
Adriatic Recipe, All year round recipe, baked dish, baked fish, Celebratory dish, child friendly dish, child friendly meal, dinner, Easy recipe, family friendly dish, family friendly meal, Fish & Seefood, Healthy, healthy mael, Istrian cuisine, Istrian dish, Istrian food, Istrian gastronomy, light fish course, light meal, main course, main dish, main fish course, Nutritious, Nutritious dish, recipe from Northern Ital, Rustic dish, simple recipe, Slovenian cuisine, Slovenian food, Slovenian gastronomy, Venetian dish
Comment

Oven Baked Ricotta (or curd cheese) Filled Crêpes Recipe

Beans and Sardines
March 01, 2024 by tina oblak in Adriatic Recipe, All year round recipe, Austrian inspired dishes, baked dish, baking, breakfast, brunch, Central European recipes, child friendly dish, child friendly meal, dessert, dinner, Eastern European dishes, Eastern European recipes, easy baking, Easy recipe, family friendly dish, festive dessert, festive sweet things, home baking, Hungarian inspired dishes, Istrian cuisine, Istrian dish, Istrian food, Istrian gastronomy, Mitteleuropean cuisine, Mitteleuropean dish, Mitteleuropean food, Mitteleuropean recipes, oven baked fish, Rustic dish, simple recipe, Slovenian cuisine, Slovenian food, Slovenian gastronomy

If you love your traditional pancakes but looking for a recipe that will elevate it a notch, look no further.

This recipe consists of frying thin pancakes (French style crêpe) and then filling them with sweetened ricotta, or curd cheese, flavoured with lemon and vanilla. The pancakes are then rolled up, placed in a greased baking tray, a custard-like mixture is then poured over them, and the whole dish gets baked in the oven for a bit.

The end result is truly divine, the steps to make this recipe are fairly simple and not at all complicated or lengthy, even though it may appear at first glance.

Usually these filled pancakes are served for breakfast or early dinner, or they make a great rustic style pudding, and can even be offered as a more formal type of dessert. Whichever way you decide to serve this sweet delight, they will most surely bring the smile to anyone having them.

This recipe, with slight variations, has been enjoyed around the world, and there is a very good reason – eating these pancakes hot or cold they are undeniably delicious.

This dish is sometimes refereed as Blintzes (or ricotta or curd cheese Blintzes). The recipe originated in Eastern Europe, and is part of Jewish cuisine, customarily eaten for the Jewish holiday of Shavuot.

The most common filling is curd or farmer's cheese but ricotta, mascarpone, cream cheese, cottage cheese or crème fraiche are also used. What you chose as a filling depends on your preference, but it will also depend on where you are in the world and types of ingredients available to you.

They are very popular and a much-loved dish in all the regions of Slovenia, as this land was ruled by the Austro-Hungarian Empire.

This sweet treat is prepared on a regular basis and is commonly offered in restaurants, and is called palačinke s skuto (word palačinka from German palatschinken).

This recipe is very special to me since it brings a lot of childhood memories that take me right back into my maternal grandmother's kitchen where she would make them quite often.

I am sharing here this much treasured family recipe where curd cheese is replaced by the use of ricotta cheese.

Recipe

Ingredients

Serves 6-8 people

For the crêpes (will make 10-12 crêpes if using 24cm, 9inch pan)

  • 250g white all purpose (plain) flour

  • 350 ml semi skimmed milk

  • 150 ml cold sparkling mineral water (can use regular cold water instead, sparkling water makes very light crêpes)

  • 2 medium eggs

  • sea salt, a pinch

For the filling

  • 500g ricotta cheese (or curd, farmer's cheese) If using curd cheese increase the amount of sugar to 100g or to your liking as more acidic in taste compared to ricotta.

  • 100g raisins or sultanas soaked in lukewarm water or dark rum

  • 1 medium egg

  • grated lemon zest of one unwaxed lemon

  • 1 Tsp vanilla bean extract

  • 80g sugar

For the custard sauce to pour over the pancakes

  • 250ml full fat milk or single cream (can use half milk and half cream)

  • 1 medium egg

  • 1 Tsp vanilla bean extract

  • 2 Tbsp sugar

Method

Before you start with the recipe, place the raisins or sultanas in a small bowl and cover completely with lukewarm water or dark rum and let them soak, absorb the water, and become plump for at least 20 minutes, or until needed (you can leave them to soak longer).

To make the crêpes

First make the crêpes by putting all the wet ingredients, eggs, milk and mineral sparkling water into a mixing bowl and whisk well until combined.

Start adding the flour, a bit at a time, a pinch of sea salt and whisk thoroughly until the batter is smooth and free of lumps. You can use an electric hand whisker, a food processor or a blender.

Set aside and leave it to rest for at least 15 minutes, ideally 30 minutes.

In a large non-stick frying pan or crêpe pan melt the butter over a medium heat (you can use a drizzle of oil instead).

Tilt the pan so the melted butter (or oil) covers and coats the whole surface of the pan.

Pour or ladle enough batter into the pan, swirling quickly, to thinly cover the base.

Cook for 1-2 minutes, or until golden brown, completely set on the upper part, or until it starts to come away from the sides of the pan.

Check that the pancakes are golden in colour underneath, then flip the pancake over and cook for 1 more minute or until cooked through.

Remove and place on a large plate and cook the rest.

Set aside to cool.

While the crêpes are cooling start making the filling.

To make the filling

Place ricotta or curd cheese in a bowl and stir.

Add the egg, grated lemon zest, sugar and vanilla bean extract and mix well all the ingredients.

Drain the raisins or sultanas, remove excess liquid and add to the mixture.

Set aside.

Preheat the oven to 180°C static or equivalent. Place about two tablespoons of ricotta filling in the centre of each crêpe and spoon evenly.

View fullsize 11.jpg
View fullsize 5.jpg

Fold in the side ends of the crêpe to prevent filling coming out during the rolling (if it does, it is not the end of the world).

View fullsize 6.jpg
View fullsize 12.jpg

Roll filled crêpe and place it in a greased oven proof dish seam side down in a single layer.

Repeat the process until you use all crêpes and all the filling.

View fullsize 13.jpg
View fullsize 15.jpg

To make custard sauce

Put the milk (or single cream if using), egg, sugar and vanilla bean extract in a jar and whisk well.

Pour the custard mixture over the filled crêpes until they are covered.Bake in the preheated oven for about 20 minutes.

View fullsize 17.jpg
View fullsize 18.jpg

Serve hot, warm or cold with a light dusting of sifted vanilla flavoured or regular icing sugar.

Just a thought

Ricotta filled crêpes can be assembled several hours in advance and baked just before serving.

March 01, 2024 /tina oblak
ricotta cheese, curd cheese, pancakes, French crêpe, Blintzes, ricotta cheese Blintzes, Curd cheese blintzes, mascarpone cheese, cream cheese, cottage cheese, crème fraiche, palačinke s skuto, palatschinken
Adriatic Recipe, All year round recipe, Austrian inspired dishes, baked dish, baking, breakfast, brunch, Central European recipes, child friendly dish, child friendly meal, dessert, dinner, Eastern European dishes, Eastern European recipes, easy baking, Easy recipe, family friendly dish, festive dessert, festive sweet things, home baking, Hungarian inspired dishes, Istrian cuisine, Istrian dish, Istrian food, Istrian gastronomy, Mitteleuropean cuisine, Mitteleuropean dish, Mitteleuropean food, Mitteleuropean recipes, oven baked fish, Rustic dish, simple recipe, Slovenian cuisine, Slovenian food, Slovenian gastronomy
1 Comment

Panada - Venetian Style Bread Soup Recipe

Beans and Sardines
January 31, 2024 by tina oblak in Adriatic Recipe, All year round recipe, child friendly dish, child friendly meal, dinner, Easy recipe, family friendly dish, family friendly meal, hearty dish, Hearty soups, Istrian cuisine, Istrian dish, Istrian food, Istrian gastronomy, main course, main dish, main vegetarian course, main vegetarian dish, one pot meal, recipe from Northern Ital, Rustic dish, simple recipe, Slovenian cuisine, Slovenian food, Slovenian gastronomy, Soups, supper, Vegan, Venetian dish

Panada is a bread soup that has porridge like consistency, it is smooth and delicate in flavour, it is perfect for colder months as it is filling, and great when you want to use up and recycle all that stale bread you are not quite sure what to do with it.

It is similar to other types of soups, where stale bread is used as a main ingredient, like Soupe valpellinentze (Valle d'Aosta), Suppa cauta from the Italian island of Sardegna and Tuscan Pancotto (pancotto literally meaning cooked bread) just to mention a few.

In all honesty, this dish would not quite qualify to fall into a category of the most appealing of dishes at a first glance. The recipe for this soup only calls for three main ingredients, stale bread, broth or stock and extra virgin olive oil, and the success of this dish, as it is so simple, really lies in using exceptionally good quality ingredients.

It is hard to imagine that this incredibly humble soup that fed the poorest of the poor was created in today's one of the wealthiest regions of Italy, Veneto. This was not always the case as Veneto used to be one of the least prosperous regions of Italy where people had to be incredibly resourceful and creative with the ingredients they had. This is the dish that older generations, including my nona, remembers with both great fondness and melancholy, as it was prepared very often in their youth, during the World War II, but also during the years that followed.It was ideal for small children and the elderly, and it was traditionally also prepared during the Lent.

My nona shared with me that in Slovenian Istra, Panada (without the use of cheese) used to be a common site on the dinner tables. This would come as no surprise as this part of land used to be ruled by the Serenissima, ‘The most Serene Republic of Venice,’ which significantly shaped the gastronomic habits in this region.

Nowadays, Panada is one of those dishes that most of the younger generation have never heard of or even never tasted. This is an almost forgotten dish, in this day and age, it is a rarely cooked soup in homes, and most certainly not offered, or found on the menus in restaurants.

I am sharing here this much treasured family recipe.

Recipe

Ingredients

Serves 4

  • 400g stale bread (rustic type of loaf is particularly indicated)

  • extra virgin olive oil, a generous drizzle or to taste, and some extra to serve

  • 1.5 litre beef, chicken or vegetable broth (preferably homemade but you can use a really good quality store bought stock)

  • sea salt

  • black pepper

  • grated Parmiggiano Reggiano cheese, to serve, optional (you can use any hard cheese you like)

Method

Thinly slice stale loaf of bread.

Place the slices in a pan in layers.

View fullsize 20240123_112603.jpg
View fullsize 20240123_112627.jpg

Cover with beef, chicken or vegetable warm broth or stock, and drizzle generously with extra virgin olive oil.

Leave to stand for about 40 minutes and allow the bread to thoroughly absorb the liquid.

View fullsize 20240123_112650.jpg
View fullsize 20240123_112714.jpg

Place the pan on a stove and cook on a very gentle heat for about 45 minutes stirring quite frequently but gently.

When is fully cooked you should end up with a smooth, creamy and velvety bread soup.

Taste and season with sea salt and black pepper.

Serve hot with grated Parmiggiano Reggiano cheese or other type of hard cheese of your preference, optional, and a drizzle with extra virgin olive oil.

Just a thought

If you want to make this recipe intentionally, and not because of the left over bread, you can also buy a fresh rustic loaf from the shop and keep it out until it dries a bit, and then use it.

January 31, 2024 /tina oblak
stale bread, dry bread, old bread, leftover bread, rustic loaf of bread, bread soup, cooked bread, Lent, Soupe valpellinentze, Suppa cauta, Pancotto
Adriatic Recipe, All year round recipe, child friendly dish, child friendly meal, dinner, Easy recipe, family friendly dish, family friendly meal, hearty dish, Hearty soups, Istrian cuisine, Istrian dish, Istrian food, Istrian gastronomy, main course, main dish, main vegetarian course, main vegetarian dish, one pot meal, recipe from Northern Ital, Rustic dish, simple recipe, Slovenian cuisine, Slovenian food, Slovenian gastronomy, Soups, supper, Vegan, Venetian dish
Comment

Steamed and Marinated Prawns Istrian style Recipe

Beans and Sardines
December 27, 2023 by tina oblak in Adriatic Recipe, All year round recipe, Appetizers, bite-sized nibbles, Canapés, Celebratory dish, child friendly dish, child friendly meal, dinner, Easy recipe, entrée course, family friendly dish, family friendly meal, festive dish, first course, Fish & Seefood, fish starter, Healthy, healthy mael, Istrian cuisine, Istrian dish, Istrian food, Istrian gastronomy, light fish course, light meal, main course, main dish, main fish course, recipe from Northern Ital, Rustic dish, simple recipe, Starters, supper, Venetian dish

This uncomplicated dish with its delicate flavour consists of quickly boiling, chilling and dressing the prawn tails with a simple dressing. This dressing is made with olive oil, finely chopped parsley, finely chopped garlic (optional), freshly squeezed lemon juice and seasoned with sea salt. Black pepper can also be added if desired.

It is perfect to make ahead of time and enjoyed as a starter or as a second course.

Traditionally, this recipe would call for Mantis shrimps (from Latin Squilla Mantis) which is a type of mantis shrimp, fished in the shallow sandy lagoons of the northern Adriatic and Mediterranean during colder months of the year. They represent a real seasonal treat and a type of seafood not typically seen anywhere else. This particular variety of shrimp is also widely used to make risotti, it is delicious in fish stew, and used to prepare pasta sauce.

This seafood delicacy is very much valued and appreciated along the north Adriatic coast from Venice to Trieste in Italy, in nearby inland towns, and along the Slovenian coast, where Mantis Shrimp is known as morska bogomolka or morska bogomoljka or in local dialect as kanoče (strong influence from nearby Venice, where these types of shrimp are referred to as canoce, also spelt canocce).

In Italy, this particular type of shrimp has many names, in standard Italian it is called Cannocchia, pannochia or cicala di mare, which literally translates into cicada of the sea.

I am sharing here the family recipe for this simple dish that can be prepared ahead of time and be ready when you are. Enjoy it with some rustic bread to soak up the juices.

Ingredients

Serves 4

  • 500g prawns

For the dressing

  • 5 Tbsp extra virgin olive oil (or to taste)

  • a small handful of fresh flat leaf parsley (about 3g), finely chopped

  • small clove of garlic, peeled and very finely chopped, optional

  • lemon juice, to taste, optional

  • sea salt

  • finely ground black pepper, optional

Method

Wash the prawns (or mantis shrimp, if you can get hold of them) under the cold running water.

Place them in a fairly large, shallow pot lying side by side, preferably in a single layer.

Add just enough water to cover the bottom of the pan.

Add a pinch of sea salt and bring to boil, then turn the heat down.

Cover with the lid and cook for about 3 minutes, or until the prawns turn pink in colour.

View fullsize Boiled shripms ( canocchie) with dressing 2.jpg
View fullsize Boiled shripms ( canocchie) with dressing 3.jpg

Remove from the pot and let them cool a bit, i.e. enough to handle them.

Remove the tails from the shell.

Place cleaned prawn tails in a serving dish in a single layer.

View fullsize Boiled shripms ( canocchie) with dressing 4.jpg
View fullsize Boiled shripms ( canocchie) with dressing 5.jpg

Prepare the dressing by putting in a small bowl finely chopped garlic (if using), fresh flat leaf parsley, extra virgin olive oil, a squeeze of half of lemon juice or to taste, sea salt to taste and finely ground black pepper to taste (optional).

Mix well so all the ingredients incorporate well.

Spoon over the cooked prawn tails and serve immediately with some fresh crunchy bread and some lemon wedges (optional).

View fullsize Boiled shripms ( canocchie) with dressing 6.jpg
View fullsize Boiled shripms ( canocchie) with dressing 7.jpg

If made in advance, cover with the cling film and put in the fridge.

Take out of the fridge half an hour before serving and add a little more extra virgin olive oil if needed, sprinkle with some freshly chopped parsley.

Serve with some bread to soak up the juices.

December 27, 2023 /tina oblak
Prawns, Mantis shrimps, Squilla Mantis, morska bogomolka, morska bogomoljka, kanoče, Cannocchia, pannochia, cicala di mare, extra virgin olive oil, fresh flat leaf parsley, lemon juice, dressing
Adriatic Recipe, All year round recipe, Appetizers, bite-sized nibbles, Canapés, Celebratory dish, child friendly dish, child friendly meal, dinner, Easy recipe, entrée course, family friendly dish, family friendly meal, festive dish, first course, Fish & Seefood, fish starter, Healthy, healthy mael, Istrian cuisine, Istrian dish, Istrian food, Istrian gastronomy, light fish course, light meal, main course, main dish, main fish course, recipe from Northern Ital, Rustic dish, simple recipe, Starters, supper, Venetian dish
Comment

Austrian inspired Linzer Cookie Recipe

Beans and Sardines
December 21, 2023 by tina oblak in All year round recipe, Austrian inspired dishes, baking, biscuits, Central European recipes, Christmas bakes, cookies, dessert, Eastern European recipes, easy baking, Easy recipe, festive bakes, festive sweet things, simple recipe, sweet nibbles, Sweet Things

This incredibly delicious and very pretty in appearance biscuits are made with flour, butter, sugar, eggs and vanilla. Almond flour is very often used to give these irresistible cookies a delicate and light texture. They are jammed together with different types of preserves.

Quick and easy to make, this little works of art can be a perfect holiday gift for your foodie friends and family.

Linzer style cookies are very popular type of biscuits and are traditionally prepared around Christmas holidays in all regions of Slovenia but can be eaten any time of the year.

You can buy them in food stores or bakeries, and they are enjoyed all year round. They are often seen sandwiched together by chocolate spread.

These biscuits are Austrian in origin, and are linked to Linzer Cake, a recipe takes us back to 1653, and so it is often called the oldest recipe in the world. There are speculations, guesses and different legends and stories as to where the Linzer cookies come from. It is believed that Linzer biscuits originated in the Austrian city of Linzer by a pastry chef, who mixed the ingredients for the cake but rather than making a cake cut out the cookies instead.

This recipe, like many others, has variations and adaptations, one of which does not include almond flour as an ingredient.

I am sharing here the family top favourite recipe for the festive baking.

Recipe

Ingredients

  • 125g soft butter (at room temperature)

  • 1 egg, small or medium (at room temperature)

  • 75g caster sugar

  • 1 ½ Tbsp vanilla sugar or ¼ Tsp vanilla extract

  • finely grated lemon zest of ½ lemon

  • 250g plain white (all purpose) flour, plus more for rolling out

  • 2 Tsp baking powder

  • a pinch of fine sea salt

  • icing sugar or vanilla icing sugar, to dust the biscuits

  • a pinch of ground cinnamon, optional

  • a pinch of ground nutmeg, optional

  • smooth apricot jam (can use strawberry, raspberry or red currant jam, or any jam of your preference)

Method

Place softened butter and sugar in a mixing bowl and beat until pale and fluffy.

Add the egg, finely grated lemon zest, vanilla sugar (or vanilla extract), and mix until all the egg is fully incorporated (if you happen to get a bit of “curdled appearance” at this stage do not worry).

View fullsize Linzer cookies 1.jpg
View fullsize Linzer cookies 2.jpg

Add sifted flour together with the baking powder and mix with the wooden spoon first until all the ingredients are incorporated and the dough comes together in large clumps.

Transfer to a lightly floured surface (or keep the mixture in the bowl) and with your hands gently knead the dough until it becomes soft and smooth (if the dough is too wet to handle add a bit of flour at the time until you get the dough that does not stick to your hands or to the working surface; the wetness of the dough will depend on the size of the egg you are using).

Shape the dough into a disc and wrap it tightly in cling film.

Put the dough in the fridge and let it rest and chill for at least 30 minutes.

Lay a baking tray with baking parchment.

View fullsize Linzer cookies 3.jpg
View fullsize Linzer cookies 4.jpg

Take the disc of the dough out of the fridge and place it onto a lightly floured working surface.

Lightly flour the rolling pin and gently roll out the dough to the thickness of about 4mm.

Stamp out rounds (circles) using a smooth or crinkle-edged cookie cutter and place on a baking tray.

(I decided to make quite big biscuits and used 9cm, 3 ½ - inch, fluted round cookie cutter).

If the dough sticks to the cookie cutters, deep them into the flour first.

Lift away the excess dough, form a ball and roll it out again.

Cut out as many more biscuits as you can.

Use a small round or select your favourite mini festive cookie cutters (heart, star, Christmas tree, flower for example) to stamp a circle, or other shapes, from the centre of the biscuits.

Remember you need to end up with an even number.

View fullsize Linzer cookies 5.jpg
View fullsize Linzer cookies 6.jpg

Place on a baking tray and bake in a preheated oven at 180°C static or equivalent for about 10 minutes or until light golden in colour (the baking time will depend on the size of the cookies).

View fullsize Linzer cookies 7.jpg
View fullsize Linzer cookies 8.jpg

When baked, leave to cool just for a few minutes on the tray, then transfer to a wire rack to cool completely.

View fullsize Linzer cookies 9.jpg
View fullsize Linzer cookies 10.jpg

When the biscuits are completely cold, they are ready to be sandwiched together.

Turn the whole biscuits upside down.

Spoon on top a bit of jam and spread it over the biscuits.

View fullsize Linzer cookies 12.jpg
View fullsize Linzer cookies 13.jpg

Dust with icing sugar or vanilla icing sugar the top part of the cookies you cut the shape out of.

View fullsize Linzer cookies 14.jpg
View fullsize Linzer cookies 15.jpg

Sandwich the biscuits together, use the other half of the biscuits with icing sugar and gently place them on top of the other bottom half of the biscuits.

When freshly baked this Linzer style biscuits are nice and crunchy but will become softer the following day and just melt in your mouth.

Just a thought

You can keep the biscuits in the airtight container for about six days.

December 21, 2023 /tina oblak
linzer cookies, Linzer biscuits, almond flour
All year round recipe, Austrian inspired dishes, baking, biscuits, Central European recipes, Christmas bakes, cookies, dessert, Eastern European recipes, easy baking, Easy recipe, festive bakes, festive sweet things, simple recipe, sweet nibbles, Sweet Things
Comment

Crispy Fried Squid (Calamari) Recipe

Beans and Sardines
December 13, 2023 by tina oblak in Adriatic Recipe, All year round recipe, Appetizers, bite-sized nibbles, Canapés, child friendly dish, child friendly meal, dinner, Easy recipe, entrée course, family friendly dish, family friendly meal, festive dish, Finger food, Fish & Seefood, fish starter, Istrian cuisine, Istrian dish, Istrian food, Istrian gastronomy, main course, main dish, main fish course, main fish meal, Rustic dish, simple recipe, Slovenian cuisine, Slovenian food, Slovenian gastronomy, Small bites, Starters, Venetian dish

This incredibly popular dish is a real crowd pleaser and will be the talk of the table. It can be served as a starter or as a main course and makes a great party food as its taste is pretty extraordinary.

With a few simple steps and a tiny bit of effort you can tackle this simple and quick recipe at home and end up with crispy calamari to delight your friends and family. There is nothing daunting and tricky about it.

Squid flourish in the Mediterranean and Adriatic sea where for the locals fried calamari are equivalent to British concept of “Fish and Chips”.

Along the Slovenian coast, this dish can be found on the menu in just about every restaurant (Ocvrti lignji or Ocvrti kalamari). It is served with chips and mayonnaise or tartar sauce or a traditional Istrian vegetable side dish made with spinach or chard and potatoes. During hotter months a mixed summer salad could be a great alternative to accompany this exquisite dish.

It is enjoyed as part of everyday meal or as a seafood feast during festivities, very popular on Christmas Eve when traditionally fish and seafood-based menu is served according to the tradition that originates from the Roman Catholic practice of not eating meat on Fridays.

Fried squid can be served on their own or with whitebait or other small fish, prawn tails or shrimp.

I am sharing here my mother's recipe how to make the best crispy calamari!

Ingredients

Serves 4

  • about 800g squid, tubes and tentacles, cleaned

  • 250-500g plain white flour

  • vegetable oil, for frying

  • sea salt

  • 2 lemons, quartered, to serve

Method

Prepare and clean the squid.

Remove from the squid tube the head, backbone and innards, and separate the tentacles.

(If you are uncomfortable with this task, ask the fishmonger to clean the squid for you).

Wash thoroughly under the cold running water.

Pat squid dry with the kitchen paper.

Cut the squid pouches into rings, roughly about 5mm.

View fullsize 20231128_120729 (1).jpg
View fullsize 20231128_120813.jpg

Put enough oil in a saucepan to come halfway up the pan.

Place on a medium heat and heat the oil for deep-frying to 190°C, if using a thermometer.

(if not using a thermometer, one way to check that the oil is at the right temperature is to drop a small cube of bread into the hot oil, it should become crispy and golden in 1minute)

While the oil is heating, put the flour into a shallow dish, bowl or a plate.

Coat lightly the squid in flour (work in small batches).

View fullsize 20231128_120853.jpg
View fullsize 20231128_120918.jpg

Transfer them into a sieve and gently shake off the excess.

Carefully drop into the hot oil.

Fry in batches (and do not overload the pan) for about 2 minutes or until the squid becomes golden in colour

(dropping bigger batches of floured squid in hot oil can bring the temperature of oil down, the squid will be “cooking and steaming” in oil rather than frying and potentially compromising its crunchiness).

Remove the squid from the pan with a slotted spoon.

Place on the kitchen paper to absorb excess oil and drain.

Sprinkle with sea salt to taste.

Serve with lemon quarters.

Serve as a starter or as a main dish with mayonnaise, garlic mayonnaise, tartar sauce, salad or chips and chard or spinach with potatoes Istrian style.

December 13, 2023 /tina oblak
crowd pleaser, fried squid, fried calamari, crispy calamari, Christmas Eve, Ocvrti lignji, ocvrti kalamari, fresh squid, frozen squid, deep fried calamari, deep fried squid
Adriatic Recipe, All year round recipe, Appetizers, bite-sized nibbles, Canapés, child friendly dish, child friendly meal, dinner, Easy recipe, entrée course, family friendly dish, family friendly meal, festive dish, Finger food, Fish & Seefood, fish starter, Istrian cuisine, Istrian dish, Istrian food, Istrian gastronomy, main course, main dish, main fish course, main fish meal, Rustic dish, simple recipe, Slovenian cuisine, Slovenian food, Slovenian gastronomy, Small bites, Starters, Venetian dish
2 Comments

Clear Beef Broth Soup Recipe

Beans and Srdines
November 22, 2023 by tina oblak in Adriatic Recipe, All year round recipe, Appetizers, Austrian inspired dishes, Celebratory dish, Central European recipes, child friendly dish, child friendly meal, Christmas dish, dinner, Eastern European dishes, Eastern European recipes, Easy recipe, entrée course, family friendly dish, family friendly meal, festive dish, first course, first course dish, first course meal, Healthy, healthy mael, hearty dish, Hearty soups, Istrian cuisine, Istrian dish, Istrian food, Istrian gastronomy, Italian soups, light meal, Rustic dish, simple recipe, Slovenian cuisine, Slovenian food, Slovenian gastronomy, Soups, Starters, supper

Beef broth is a strained, thin, clear type of a soup, cooked with meat, vegetables and fresh herbs. It is incredibly easy to make, and therefore, a perfect recipe for the beginners.

This soup is very comforting, hearty and delicate but incredibly flavoursome. It can be eaten as a hot starter or as a first course meal, instead of other types of soups, pasta, risotto or gnocchi dishes.

It is also recurrently used as a stock, to make risotto dishes for example, and in countless other recipes.

This is a staple dish in Slovenia where it is almost impossible to imagine a traditional family Sunday lunch without it. It will be prepared and served also during holidays including Christmas, New Year, Easter, and to mark special family celebrations. It is one of the basic dishes in Slovenia together with clear chicken or vegetable broth, and every household will have a little secret how to make the best one.

Slovenian households will almost always have some stored in the fridge or in the freezer, and you will have no trouble finding it on almost every menu as Goveje juha.

If you happen to fall ill with the cold or a flue in Slovenia, you will most surely be offered a hot clear broth to make you feel better as it is used like a “magic cure”.

Along the Slovenian coast the use of fresh marjoram will distinguish this broth from other regional varieties of the recipe found in neighbouring Italy and Austria for example, where this soup is also very popular and very much-loved dish.

I am sharing here my family recipe for this delicious soup.

Ingredients

It will make about 2 litres of broth.

  • about 800g beef meat (cheaper cuts like shin of beef/shank or shoulder/beef clod are normally used, these types of meats are quite tough but when slowed cooked over a low heat will result in tender, moist and rich in flavour). You can use chicken meat, with most of the skin removed, or a combination of chicken and beef.

  • about 450g oxtail or beef bones (beef marrow bone rings), optional

  • 1 parsnip, washed and peeled

  • 1 carrot, washed and peeled

  • 1 medium onion, peeled

  • a piece of celeriac (about 80g), peeled, optional

  • 1 celery stick, washed

  • a few celery leaves, optional

  • a handful of fresh flat leaf parsley sprigs (stalks included), washed

  • a few sprigs of fresh marjoram, optional

  • a few whole black peppercorns

  • sea salt

  • 4 l cold water

Method

Cut the onion in half and place the two halves of the onion in a small pan (flat sides facing down) without adding any oil or other types of fat.

Fry for a few minutes until blackened slightly, then set aside.

View fullsize Clear Beef Broth 3.jpg
View fullsize Clear Beef Broth 4.jpg

Wash the meat and the bones, and place them in a fairly large pot (big stock pot is ideal if you have one).

Add all the washed and prepared vegetables, and the herbs.

Add the black peppercorns, water and bring to the boil.

View fullsize Clear Beef Broth 5.jpg
View fullsize Clear Beef Broth 6.jpg

With the slotted spoon skim the foam from the surface.

Lower the heat to a minimum and partially cover with the lid.

Check the broth now and again and make sure it is not boiling aggressively, it should simmer very gently for about 3 hours.

Skim regularly the foam from the surface.

When the broth is cooked add sea salt to your taste.

Remove all the vegetables, the meat and the bones from the pot and set aside.

View fullsize Clear Beef Broth 7.jpg
View fullsize Clear Beef Broth 8.jpg

Filter the broth, if you want to end up with a very clear soup (this phase is optional if you do not want a “muddy” looking broth).

Place the colander, lined with clean kitchen towel, muslin cloth, or cheese cloth, over another large pot (big enough to contain all the broth) and gently pour,or ladle, the broth into the lined colander.

View fullsize Clear Beef Broth 9.jpg
View fullsize Clear Beef Broth 11.jpg

Beef broth can be enjoyed clear, on its own, or with a small, shaped pasta (like little stars or orzo pasta), egg type noodles (like vermicelli or tagliolini pasta), croutons, shredded pancakes, grated egg based pasta dough, semolina dumplings, little tortellini, capelletti or passatelli, and Austrian style bread dumplings, just to mention a few.

Vegetables and herbs removed from the broth get normally discarded (except the carrot, parsnip and other root vegetable, which sometimes are cut into smaller pieces and put back into the broth when served).

Meat can be shredded back into the broth, or sliced and eaten as a main dish separately, traditionally it is accompanied by horseradish cream sauce, freshly grated horseradish, mustard, mayonnaise and pan-fried potatoes with onions and pancetta.

Just a thought

You can store the broth in the fridge for 2/3 days. Make sure you cool it first completely and then store it in the fridge, leaving the broth in a pot or transferring it into an airtight container.

You can also freeze the broth for up to 3 months.

November 22, 2023 /tina oblak
clear beef broth soup, clear meat broth soup, clear chicken broth soup, clear vegetable broth soup, parsnip, carrots, meat based stock, made ahead, goveja juha, domaca goveja juha, brodo di carne, beef meat, shin of beef, beef shank, beef shoulder, beef clod, oxtail, beef bones, beef marrow bone rings, celeriac
Adriatic Recipe, All year round recipe, Appetizers, Austrian inspired dishes, Celebratory dish, Central European recipes, child friendly dish, child friendly meal, Christmas dish, dinner, Eastern European dishes, Eastern European recipes, Easy recipe, entrée course, family friendly dish, family friendly meal, festive dish, first course, first course dish, first course meal, Healthy, healthy mael, hearty dish, Hearty soups, Istrian cuisine, Istrian dish, Istrian food, Istrian gastronomy, Italian soups, light meal, Rustic dish, simple recipe, Slovenian cuisine, Slovenian food, Slovenian gastronomy, Soups, Starters, supper
Comment

German style Preserved Fruit in Rum (Rumtopf) Recipe

Beans and Sardines
October 04, 2023 by tina oblak in Adriatic Recipe, Austrian inspired dishes, celebratory desserts, Central European recipes, dessert, Easy recipe, festive dessert, festive sweet things, Istrian cuisine, Istrian food, Istrian gastronomy, Mitteleuropean recipes, simple recipe, Slovenian cuisine, Slovenian food, Slovenian gastronomy, Sweet Things

Rum-soaked fruit originated in Germany, where it is known as Rumtopf. It is a very simple recipe that consists in preserving seasonal fruit in sugar and rum, leaving it to mature for a few weeks, and then it is ready to be enjoyed.

Specialized ceramic rum pots (if keen to have one, they are available in specialized kitchen shops or online) are used to make this alcoholic dessert in countries with a strong Rumtopf making tradition, alternatively glass jars are used.

You can have rum soaked fruit on its own or create a more “sophisticated” dessert by serving rum preserved fruit with vanilla ice cream, whipped cream or custard, you can also pair it with a piece of cake or other sweet treats like pancakes or waffles.

You can also divide rum soaked fruit into smaller glass jars which makes a lovely foodie Christmas gift for your friends, family, work colleagues or neighbours.

It is believed that rum was imported to Europe, more specifically to Germany, in 18th century by a West Indies fleet, which traded with Virgin Islands, and was based in the German city of Flensburg, bordering with Denmark, and from here rum travelled to other European countries.

Together with rum, tropical fruit was also transported, but did not travel very well. Apparently, some of the fruit ended up by accident into the rum filled barrels, the fruit remained well preserved and perfectly edible, and this is how the Rumtopf was born.

This German style of preserving fruit in rum also spread to other European countries, among which Austria and Italy. In the latter it is also very common to soak the fruit in grappa (an Italian style grape based pomace brandy) rather then in rum.

This delightful liquor-based dessert became also very popular in Slovenia, where it is known as Rumov Lonec, meaning literally Rum Pot, and this comes as no surprise as Slovenia is geographically bordering with Italy and Austria, and was also ruled by the Austro-Hungarian Empire, the gastronomic influence is therefore inevitable.

As a child I have very vivid memories of my mother preparing Rumtopf every year, it used to be very in “fashion”. I am bringing it back as this rum-based dessert is delicious, very easy to make, and it will be ready to use when you are.

This recipe starts at the beginning of the summer and is finished by late September, or early October, traditionally is then enjoyed for the very first time when the Advent begins, and it is offered all the way through the entire holiday season.

Fruits during this period have time to mingle and develop their flavour, they soak up the rum, and the rum also absorbs all the fruity flavours, losing their previous sharp, alcoholic flavour, and start to taste more like a fruity liquor.

For this alcoholic treat I chose the type of fruits that my mother used for her Rumtopf. The idea behind this recipe is to use seasonal fruit that you can buy in the store, farmer's market, or pick from your garden or orchard. These days, of course, things are a bit different, you and can just walk to the supermarket any time of the year and find all types of fruits all year round from around the world, sometimes with little idea what it is in season and what isn't.

If you want to impress yourself and your guests this holiday season, give this recipe a go, and since it is prepared ahead of time it will take away all the stress. However, do remember that as much as the sugary fruit is tempting, this is not a child-friendly dessert, and avoid offering it to people that need to abstain from any alcohol consumption.

Recipe

Ingredients

Makes 1.5 litre jar

  • 1 kg fruit (I used strawberries, cherries, peaches, nectarines, red grapes, pears and apples)

Whatever fruit you choose make sure it is fresh, seasonal, undamaged with no rot or mould and nicely ripe but equally not overripe.

You can choose more exotic varieties of fruit like kiwi, mango, papaya and pineapple, and go for a tropical theme (try to avoid bananas and maybe raspberries and melons or other fruits that could go a bit mushy, and oranges and lemons as too acidic).

Just to give you an idea, here is the list of fruits you can use according to different months of the year.

May, June, July

  • strawberries (wash, remove stems and leaves, pat dry with kitchen paper and cut in half bigger berries)

  • cherries with pits (wash and pat dry)

  • peaches, nectarines and apricots (wash, blanch, peel and cut into bite size pieces)

August, September, October

  • blueberries (wash and pat dry)

  • plums with pits (wash and pat dry)

  • apples (wash, pat dry, peel, core and cut into bite size pieces)

  • pears (wash, pat dry, peel and cut into bite size pieces)

  • white or red seedless grapes (wash, pat dry, remove stems and cut in half)

  • pineapple, peeled and cut into bite size chunks (you can use canned pineapple)

  • 200-250g granulated sugar (a general rule in terms of sugar quantity used for a rum pot would be half the amount of sugar compared to the total amount of fruit used, I however used a lot less sugar as the fruit was nicely ripe and sweet enough for my taste).

  • about 1 bottle (750ml) Dark rum (I used 37.5% alcohol) you might need a bit more

If using more fruit to make a bigger Rum Pot, make sure you adjust the quantity of sugar and rum.

Method

For the rum pot you would use the fruits according to the seasons, starting with first strawberries and cherries following with other fruits.

Wash, pat dry and cut the fruits of your choice.

Place prepared fruit into a bowl, sprinkle with a bit of sugar and let it sit for about 30 minutes. This will allow the fruits to release its own juices.

View fullsize Rum Pot 3.jpg
View fullsize Rum Pot 6.jpg

Place the layer of sugared fruit into a jar and pour the rum over in order to completely cover the fruit. Continue to add a layer of sugared fruit and each time pour enough rum to completely cover the fruit.

(alternatively you can add a layer of prepared fruit directly into a rum pot or glass jar, add a bit of sugar and fill the jar with rum to completely cover the fruit. Continue to add a layer of fruit and sugar and each time pour enough rum to completely cover the fruit).

View fullsize Rum Pot 7.jpg
View fullsize Rum Pot 8.jpg

Close the jar with the lid.

Leave the flavours to mature and mingle for 6 to 8 weeks, or longer, in dark and cool place with no source of heat or light (pantry, cellar, garage).

Make sure the fruit is submerged in rum at all times, check now and again and top up with rum as necessary. Wait at least 2-3 weeks after the last fruit was added to be able to enjoy it.

You can have rum soaked fruit on its own or create a more “sophisticated” dessert by serving rum preserved fruit with vanilla ice cream, whipped cream or custard, you can also pair it with a piece of cake or other sweet treats like pancakes or waffles.

You can also divide rum soaked fruit into smaller glass jars which would make a lovely foodie Christmas gift for your friends, family, work colleagues or neighbours.

October 04, 2023 /tina oblak
preserved fruit in rum, Rumtopf, Rum-soaked fruit, Rumov Lonec, dark rum, rum, seasonal fruit, Rum Pot
Adriatic Recipe, Austrian inspired dishes, celebratory desserts, Central European recipes, dessert, Easy recipe, festive dessert, festive sweet things, Istrian cuisine, Istrian food, Istrian gastronomy, Mitteleuropean recipes, simple recipe, Slovenian cuisine, Slovenian food, Slovenian gastronomy, Sweet Things
1 Comment

Venetian style Rice and Peas Recipe (Risi e Bisi)

Beans and Sradines
September 20, 2023 by tina oblak in Adriatic Recipe, All year round recipe, Central European recipes, child friendly dish, child friendly meal, dinner, Easter, Easter dish, Easter recipes, Easy recipe, entrée course, family friendly dish, family friendly meal, festive dish, first course, first course dish, first course meal, healthy mael, hearty dish, Istrian cuisine, Istrian dish, Istrian food, Istrian gastronomy, main course, main dish, one pot meal, one pot meat recipe, recipe from Northern Ital, Risotti, Risotto, Rustic dish, simple recipe, Slovenian cuisine, Slovenian food, Slovenian gastronomy, Starters, supper, Vegetables, Venetian dish

This springtime speciality dish Risi e Bisi, meaning rice and peas in Venetian dialect, originated in the north-eastern region of Veneto in Italy. It is a dish that has been long disputed in the culinary world whether it is a very ‘runny’ risotto or a very ‘thick’ soup, and hence whether you should eat it with the fork or with a spoonBeing a risotto or a soup, this dish is absolutely delicious, incredibly satisfying and deeply rooted in the history of the region. It has such a profound cultural significance to the point of being celebrated by the Venetian poet Domenico Varagnolo:

To bless the holy spring,

which makes a garden a paradise,

all I need is a soup bowl,

a soup bowl of our own risi e bisi...

There, in hundreds of tiny little globes,

I savour a tender green jewel of the earth

scattered in a white sea of tender smiles.

Risi e Bisi was one of the key dishes, among a menu of more sophisticated foods and fine wines, that used to be served at the Doge's banquet (Doge is the highest official of the republic of Venice for more than 1,000 years, from the 8th to the 18th century, and symbol of the sovereignty of the Venetian state) on April 25th to mark and celebrate Venice's patron Saint, St. Mark, the Evangelist, since he is the saint who evangelised the people of the Veneto.

This traditional dish served on a feast day also marked the period approaching Easter, the end of winter, and the arrival of Spring, which provided the very first peas in the new season, renowned for being small, sweet and tender.

This dish has been very popular and very much loved along the Slovenian coastline where it is known as Rizi e Bizi. This should come as no surprise since this area is bordering with Italy and was once dominated and ruled by the majestic La Serenissima (‘The most Serene Republic of Venice’) which left behind a significant “foodprint” in the region.

A pea and rice dish is a very family friendly meal and was cooked by my mother on a regular basis when the peas where in season and at their best. Shelling the peas was worth the effort since the final dish is divine in its simplicity and humbleness.

This recipe has remained one of the top favourites among family and friends. Try to make it and you will understand what the fuss is all about and why the Doge requested it every year at his palace...

This is not the dish I would normally cook in springtime as peas are a long way off in the UK where I currently live, but are widely available a bit later in the season. It is well worth waiting for them, and you will end up with unbeatable (late) summer or early autumn supper!

Recipe

Ingredients

Serves 4

  • 1 kg fresh young peas in their pods, shelled (can use 400g of frozen petits pois)

  • 1.2 litres good vegetable, chicken or beef stock

  • 4 Tbsp olive oil

  • 1 small onion (about 100g), peeled and finely chopped

  • 50-100g pancetta (salt-cured pork belly) or ham, cubed

  • 250g risotto rice like Vialone Nano, Arborio or Carnaroli

  • 40-50g Parmiggiano Reggiano or Grana Padano cheese, freshly finely grated

  • small handful of fresh flat leaf parsley leaves (about 15g), finely chopped and some extra for garnish

  • a knob of butter, optional

  • sea salt

  • black pepper

Method

Before starting to make the risotto have your boiling hot stock ready to hand for later.

Pour the oil in a low-sided pan, add finely chopped onions and cubed pancetta.

Cook for a few minutes until the onions become soft and translucent and the pancetta begins to release its fat.

View fullsize Risi e Bisi 5.jpg
View fullsize Risi e Bisi 6.jpg

Add the peas and the chopped parsley, sauté for a few minutes, stirring constantly and making sure that the mixture does not start to stick to the bottom of the pan.

Season with black pepper and add roughly a glass of stock.

Cook the mixture over a fairly high heat so that the liquid evaporates quickly.

View fullsize Risi e Bisi 8.jpg
View fullsize Risi e Bisi 9.jpg

Add more stock and the rice. Cook, stirring constantly to prevent sticking to the pan, until the first amount of liquid is absorbed.

Start gradually adding ladles of hot stock, one at a time, allowing the liquid to be absorbed before adding more.

View fullsize Risi e Bisi 10.jpg
View fullsize Risi e Bisi 11.jpg

Cook on a medium heat, stirring almost constantly, until the rice is cooked and ready, and the mixture has a distinctly runny consistency.

Finish the dish with a typical Italian “mantecare phase” (when the rice is cooked, remove the saucepan from the heat, add a knob of butter (if using), and finely grated Parmiggiano Reggiano or Grana Padano cheese. Stir quite vigorously with a wooden spoon to obtain a creamy consistency).

Taste and adjust the seasoning with black pepper (if using) and the sea salt, but the latter might not be necessary since the stocks from the stores, generally speaking, pancetta and the cheese contain salt already.

View fullsize Risi e Bisi 13.jpg
View fullsize Risi e Bisi 14.jpg

Serve immediately while still hot and distinctly runny in consistency.

Ladle onto the plates and sprinkle with some roughly chopped fresh parsley to garnish (optional).

Just a thought

A variation of this recipe, which further refines the dish, involves the use of the empty pea pods which get washed, placed in pan with a plenty of cold water and boiled for roughly an hour.

Then they get drained in a colander and the inside of the shells get scraped with the spoon obtaining the green paste which is added to the onion, pancetta, pea and parsley mixture.

I have not been familiar with this process and made aware that this is only done if the peas are organically produced.

Apparently, all the pesticides residues concentrate on the inside of the pea shell and the farmers are very keen on the use of the chemicals as peas are particularly susceptible to pests.

Wine suggestion

Soave Classico DOC "Vin Soave" 2022 - Inama

September 20, 2023 /tina oblak
Risi e bisi, Rizi in bizi, Rice and Peas, fresh young peas, peas in pods, frozen petits pois, pancetta, salt-cured pork belly, ham, risotto, risotto rice, pea risotto, Vialone Nano rice, Arborio rice, Carnaroli rice, Parmiggiano Reggiano cheese, Grana Padano cheese
Adriatic Recipe, All year round recipe, Central European recipes, child friendly dish, child friendly meal, dinner, Easter, Easter dish, Easter recipes, Easy recipe, entrée course, family friendly dish, family friendly meal, festive dish, first course, first course dish, first course meal, healthy mael, hearty dish, Istrian cuisine, Istrian dish, Istrian food, Istrian gastronomy, main course, main dish, one pot meal, one pot meat recipe, recipe from Northern Ital, Risotti, Risotto, Rustic dish, simple recipe, Slovenian cuisine, Slovenian food, Slovenian gastronomy, Starters, supper, Vegetables, Venetian dish
Comment

Classic Tomato, Cucumber, Pepper and Onion Summer Salad Istrian Recipe

Beans and Sardines
July 20, 2023 by tina oblak in Adriatic Recipe, dinner, healthy mael, Istrian cuisine, Istrian dish, Istrian food, light meal, main course, main dish, main vegetarian course, main vegetarian dish, main vegetarian meal, Nutritious, Nutritious dish, Salads, Side Dishes, simple recipe, Slovenian cuisine, Slovenian food, Slovenian gastronomy, summer dish, summer recipe, supper, Vegetable side dish, Vegetables, Vegetarian

This colourful cucumber, tomato, pepper and onion salad is very refreshing, and it is made during the summer when the vegetables are at their best and in abundance.

It is absolutely delicious, so easy to make, it hardly takes any effort.

It is traditionally served as a side dish to accompany grilled meats, but can be enjoyed as a main meal on a hot summer's day when you want to keep things easy.

To make it more substantial, I simply toast a piece bread, cut it into cubes and mix it into the salad (resembling a concept of Italian, Tuscan, Panzanella salad).

If you ever had a chance to travel along the Istrian coast or Dalmatia (in Croatia) and asked in the restaurant for a side salad, it is most likely that you were brought this one. It is an absolute classic during the summer season as the vegetables in this salad have a very high content of water and therefore the salad is very cooling.

This type of salad has been on the dinner tables of the locals – well, since forever, during the summer months almost on a daily basis.

Recipe

Ingredients

Serves 4 (as a side salad)

  • 1 yellow bell pepper (can use orange, red or green bell pepper)

  • 1 medium-large cucumber

  • 2-4 tomatoes (depending on the size, I used vine tomatoes each weighing roughly 170g) Make sure you use in season, ripe and juicy tomatoes (can use San Marzano tomatoes, cherry tomatoes, beef tomatoes, grape tomatoes or a variety of your preference).

  • red onion or salad onion (about 40g), sliced

  • a few fresh basil leaves, torn, or dry oregano (optional)

    For the dressing

  • extra virgin olive oil, generous drizzle

  • red or white wine vinegar, a drizzle

  • sea salt, to taste

  • black pepper, to taste

Method

Peel and slice the cucumber into coins and place into a big salad bowl.

Cut the tomatoes into wedges and add to the bowl.

Slice the bell pepper and the onions and put into the bowl.

Mix gently all the vegetables.

Add a generous drizzle of olive oil, a drizzle of vinegar, season with sea salt and black pepper.

For extra dimension, in terms of flavour, sprinkle the salad with a bit of dried oregano or with a few freshly torn basil leaves.

Toss and serve.

July 20, 2023 /tina oblak
fresh tomatoes, bell peppers, cucumber, red onions, salad onions, fresh basil leaves, dried origano, red wine vinegar, white whine vinegar, Istrian summer salad, Croatian summer salad
Adriatic Recipe, dinner, healthy mael, Istrian cuisine, Istrian dish, Istrian food, light meal, main course, main dish, main vegetarian course, main vegetarian dish, main vegetarian meal, Nutritious, Nutritious dish, Salads, Side Dishes, simple recipe, Slovenian cuisine, Slovenian food, Slovenian gastronomy, summer dish, summer recipe, supper, Vegetable side dish, Vegetables, Vegetarian
Comment

My Mother's Marble Chocolate and Vanilla Ring Cake Recipe

Beans and Sardines
July 06, 2023 by tina oblak in Adriatic Recipe, All year round recipe, baking, breakfast, brunch, Central Europe cakes, Central European recipes, dessert, Eastern Europe cakes, Eastern European recipes, easy baking, easy cakes, Easy recipe, home baking, Istrian cuisine, Istrian dish, Istrian food, Istrian gastronomy, Mitteleuropean cuisine, Mitteleuropean recipes, Mitteleuropean food, pudding, Rustic dish, simple recipe, Slovenian cuisine, Slovenian food, Slovenian gastronomy, Snacks, Sweet Things

Perhaps, you know the old adage, which actually goes back to Tudor times, ‘You can’t have your cake and eat it (too)?’ Well, with this recipe – you can! All your baking dilemmas, should I go for a chocolate cake this time, or for a vanilla one, are solved with this one recipe – you can have both in one cake!

This chocolate and vanilla sponge cake is a classic childhood sweet treat. It is moist with a soft and fluffy texture, it looks pretty, and is still elegant, since the light and dark batter is blended lightly together giving it a marble appearance, and so, hence its name, marble cake, or it is sometimes called a zebra cake, due to its zebra-striped pattern (skunks are also striped, but I supposed that isn’t a very appealing name for a cake). It is also known as a ring cake or a Bundt cake, especially in the United States.

So, this cake delivers on appearance and flavour every single time, and if you want to impress your family and friends, this is the cake to go for. It is very easy to make and you can whizz it up in no time.

It originated in Germany, where it is still very popular, from a Kugelhopf, a two-coloured sweet yeast bread.

This impressive cake has been frequently baked in Austrian households and other European countries, including in Slovenia (Šarkelj) where it represents one of the most frequently baked weekend sweet treats and it is enjoyed for breakfast as well, there is no wrong time to eat it!

This was a regular bake in my house when I was a small girl, all you need is a few simple ingredients and a few simple steps to follow, I promise you, you will think twice before reaching out for the store-bought version, and here it is, my mother's recipe.

Recipe

Ingredients

  • 4 medium eggs, room temperature

  • 250g caster sugar

  • 1 Tsp vanilla extract

  • 100ml milk, room temperature

  • 100ml sunflower oil, room temperature

  • 250g all purpose white flour (plain flour), sifted

  • 16g baking powder

  • 2 Tbsp cocoa powder, sifted

  • dusting sugar/vanilla powder sugar for dusting, optional

Method

Preheat the oven to 180°C static or equivalent.

Grease well with butter or oil a ring mould or a bundt cake tin. Make sure you cover every nook and cranny (alternatively you can use a 20cm cake tin or a 900g loaf tin, grease and line with baking parchment)

Dust with flour, shake off and tip out the excess.

View fullsize Marble Cake 2.jpg
View fullsize Marble Cake 4.jpg

Put in the mixing bowl the eggs and the sugar, and beat well until the mixture becomes golden pale in colour.

Add the milk, oil and vanilla extract, mix well.

View fullsize Marble Cake 5.jpg
View fullsize Marble Cake 6.jpg

Start adding, one spoonful at the time of sifted flour together with the baking powder.

View fullsize Marble Cake 7.jpg
View fullsize Marble Cake 8.jpg

Divide the batter, spoon half of the batter in a separate bowl.

Add in one half of the batter sifted cocoa and mix well.

View fullsize Marble Cake 10.jpg
View fullsize Marble Cake 11.jpg

Pour the white mixture into the base of the prepared ring mould first. Then pour the chocolate mixture on top.

View fullsize Marble Cake 12.jpg
View fullsize Marble Cake 13.jpg

Gently swirl a little with the knife.

Bake for about 35 minutes or until the cake has shrunk from the sides of the tin and is well risen, the top of the cake should ‘spring back’ when lightly pressed with your fingertips.

Leave to cool in the tin for a few minutes.

Turn out the cake and finish cooling on a wire rack.

Dust with icing sugar or vanilla icing sugar and serve.

July 06, 2023 /tina oblak
chocolate and vanilla ring cake, marble chocolate and vanilla cake, marble cake, zebra cake, Bundt cake, chocolate and vanilla Bundt cake, chocolate and vanilla zebra cake
Adriatic Recipe, All year round recipe, baking, breakfast, brunch, Central Europe cakes, Central European recipes, dessert, Eastern Europe cakes, Eastern European recipes, easy baking, easy cakes, Easy recipe, home baking, Istrian cuisine, Istrian dish, Istrian food, Istrian gastronomy, Mitteleuropean cuisine, Mitteleuropean recipes, Mitteleuropean food, pudding, Rustic dish, simple recipe, Slovenian cuisine, Slovenian food, Slovenian gastronomy, Snacks, Sweet Things
Comment
  • Newer
  • Older