Beans and Sardines

  • Home
  • About
  • Recipe of the week
  • Recipes
  • Wines
  • Contact

Whole baked Sea Bass on roasted potatoes Istrian Recipe

Beans and Sardines
July 06, 2022 by tina oblak in Adriatic Recipe, All year round recipe, baked dish, baked fish, child friendly dish, child friendly meal, dinner, Easy recipe, family friendly dish, family friendly meal, Fish & Seefood, Healthy, healthy mael, hearty dish, Istrian cuisine, Istrian dish, Istrian food, Istrian gastronomy, light fish course, light meal, main course, main dish, main fish course, main fish meal, Nutritious, Nutritious dish, roasted fish, Rustic dish, simple recipe, Slovenian cuisine, Slovenian food, Slovenian gastronomy, supper

Whole baked sea bass on a layer of potatoes is very simple, easy, and healthy recipe for oven-roasted fish that calls for only a few fresh simple ingredients, and it is a perfect choice for a light meal main course option. This delicate fish, baked whole in the oven, is effortless to make, flavoursome and never fails to impress your guests. The recipe gives you a superior taste, the flesh remains really tender and moist and the potatoes, during the baking, absorb all the wonderful flavours and aromas from the garlic, onions, olive oil and the juices from the fish.

This basic method of roasting the whole fish on the bone on a bed of sliced potatoes represents the most common and traditional way of preparing and eating fish along the Slovenian coast in restaurants as well as in the households. It is considered one of the best fish based recipes by the locals, very often made on Sundays as a Sunday roast choice, and as a alternative to a meat roast.

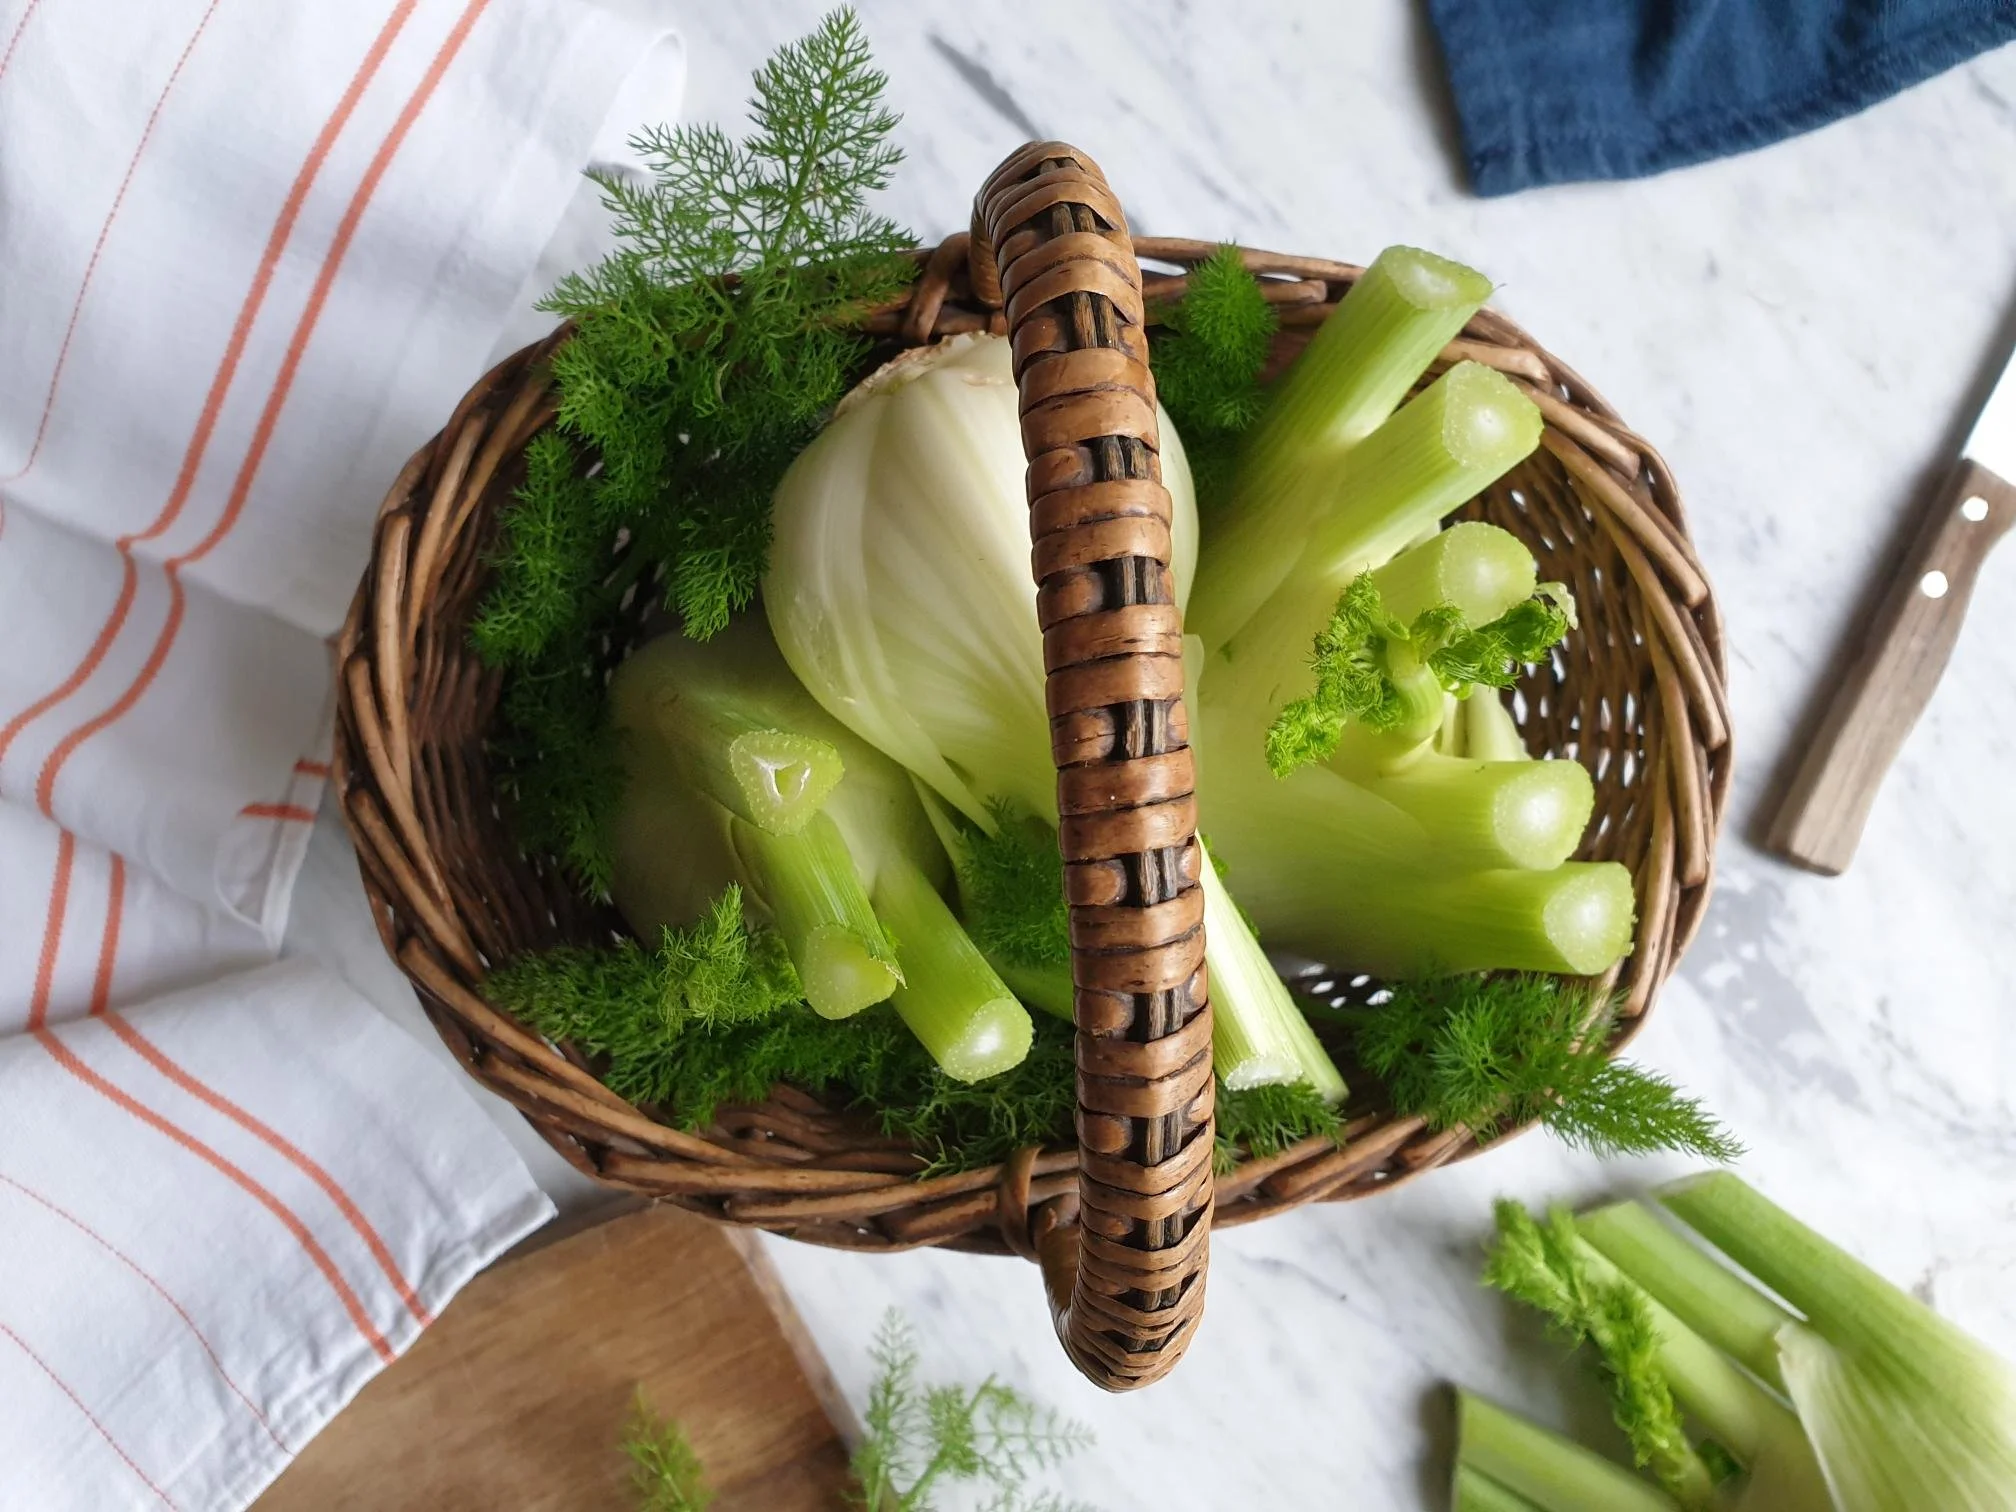
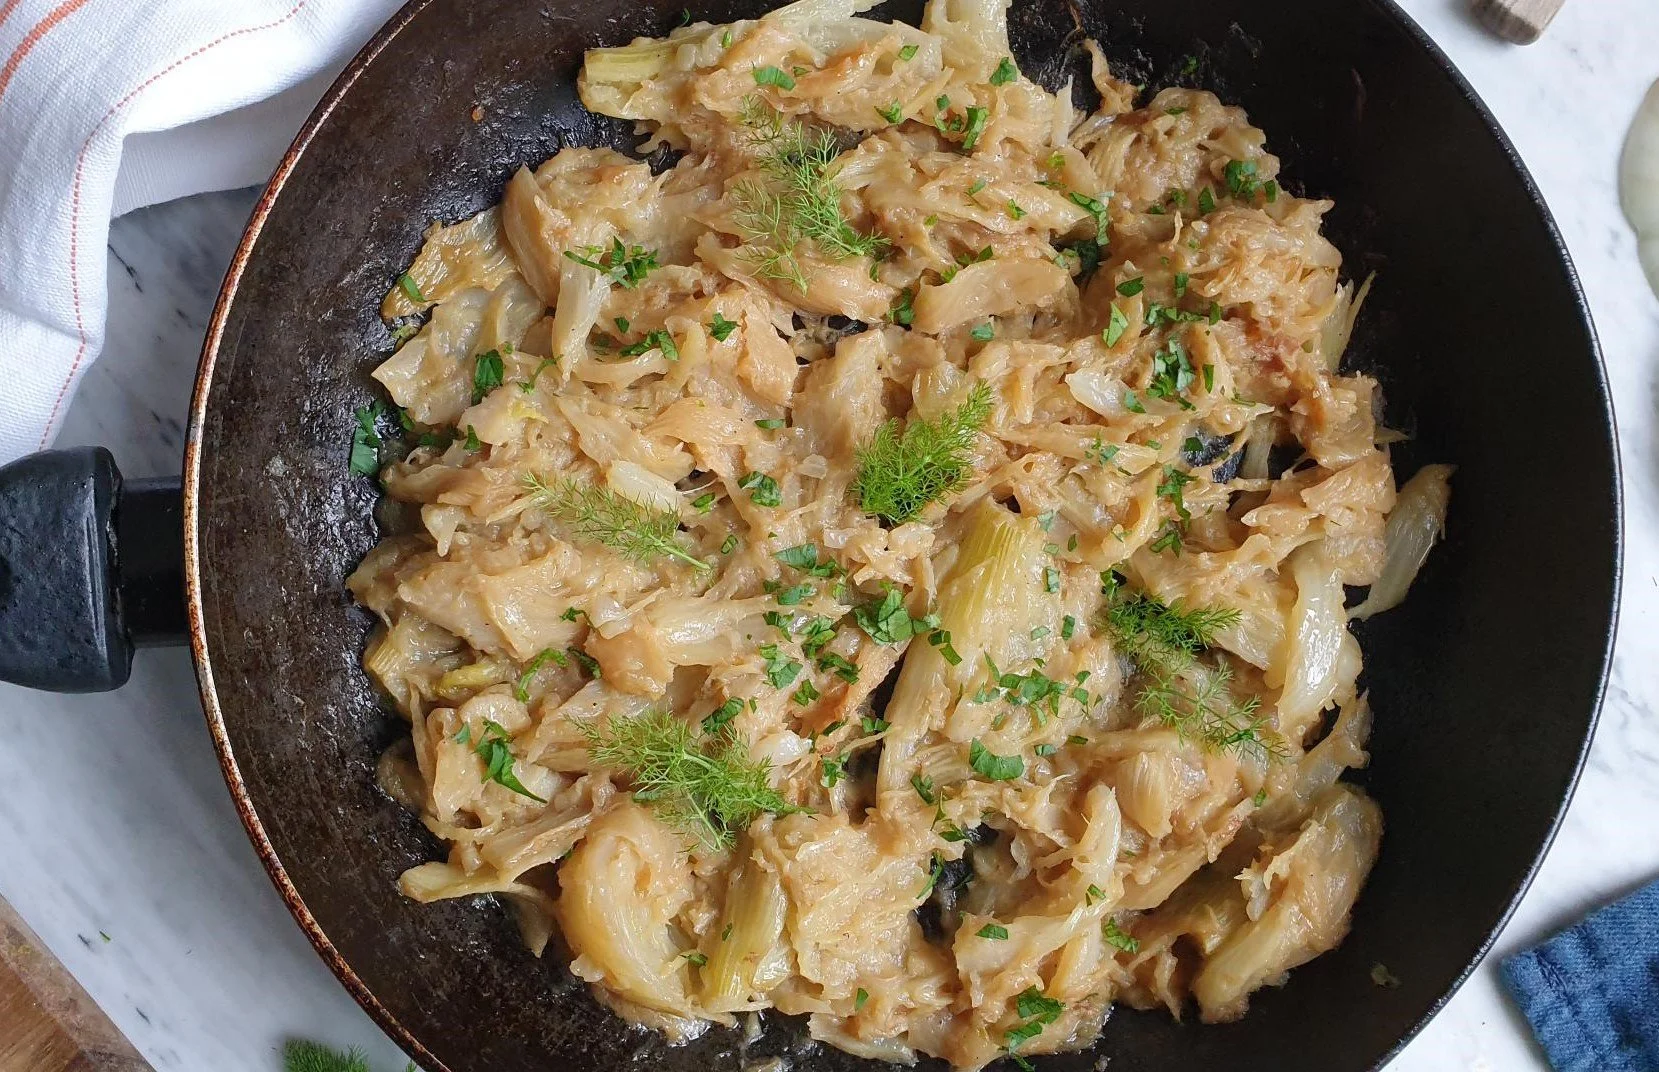
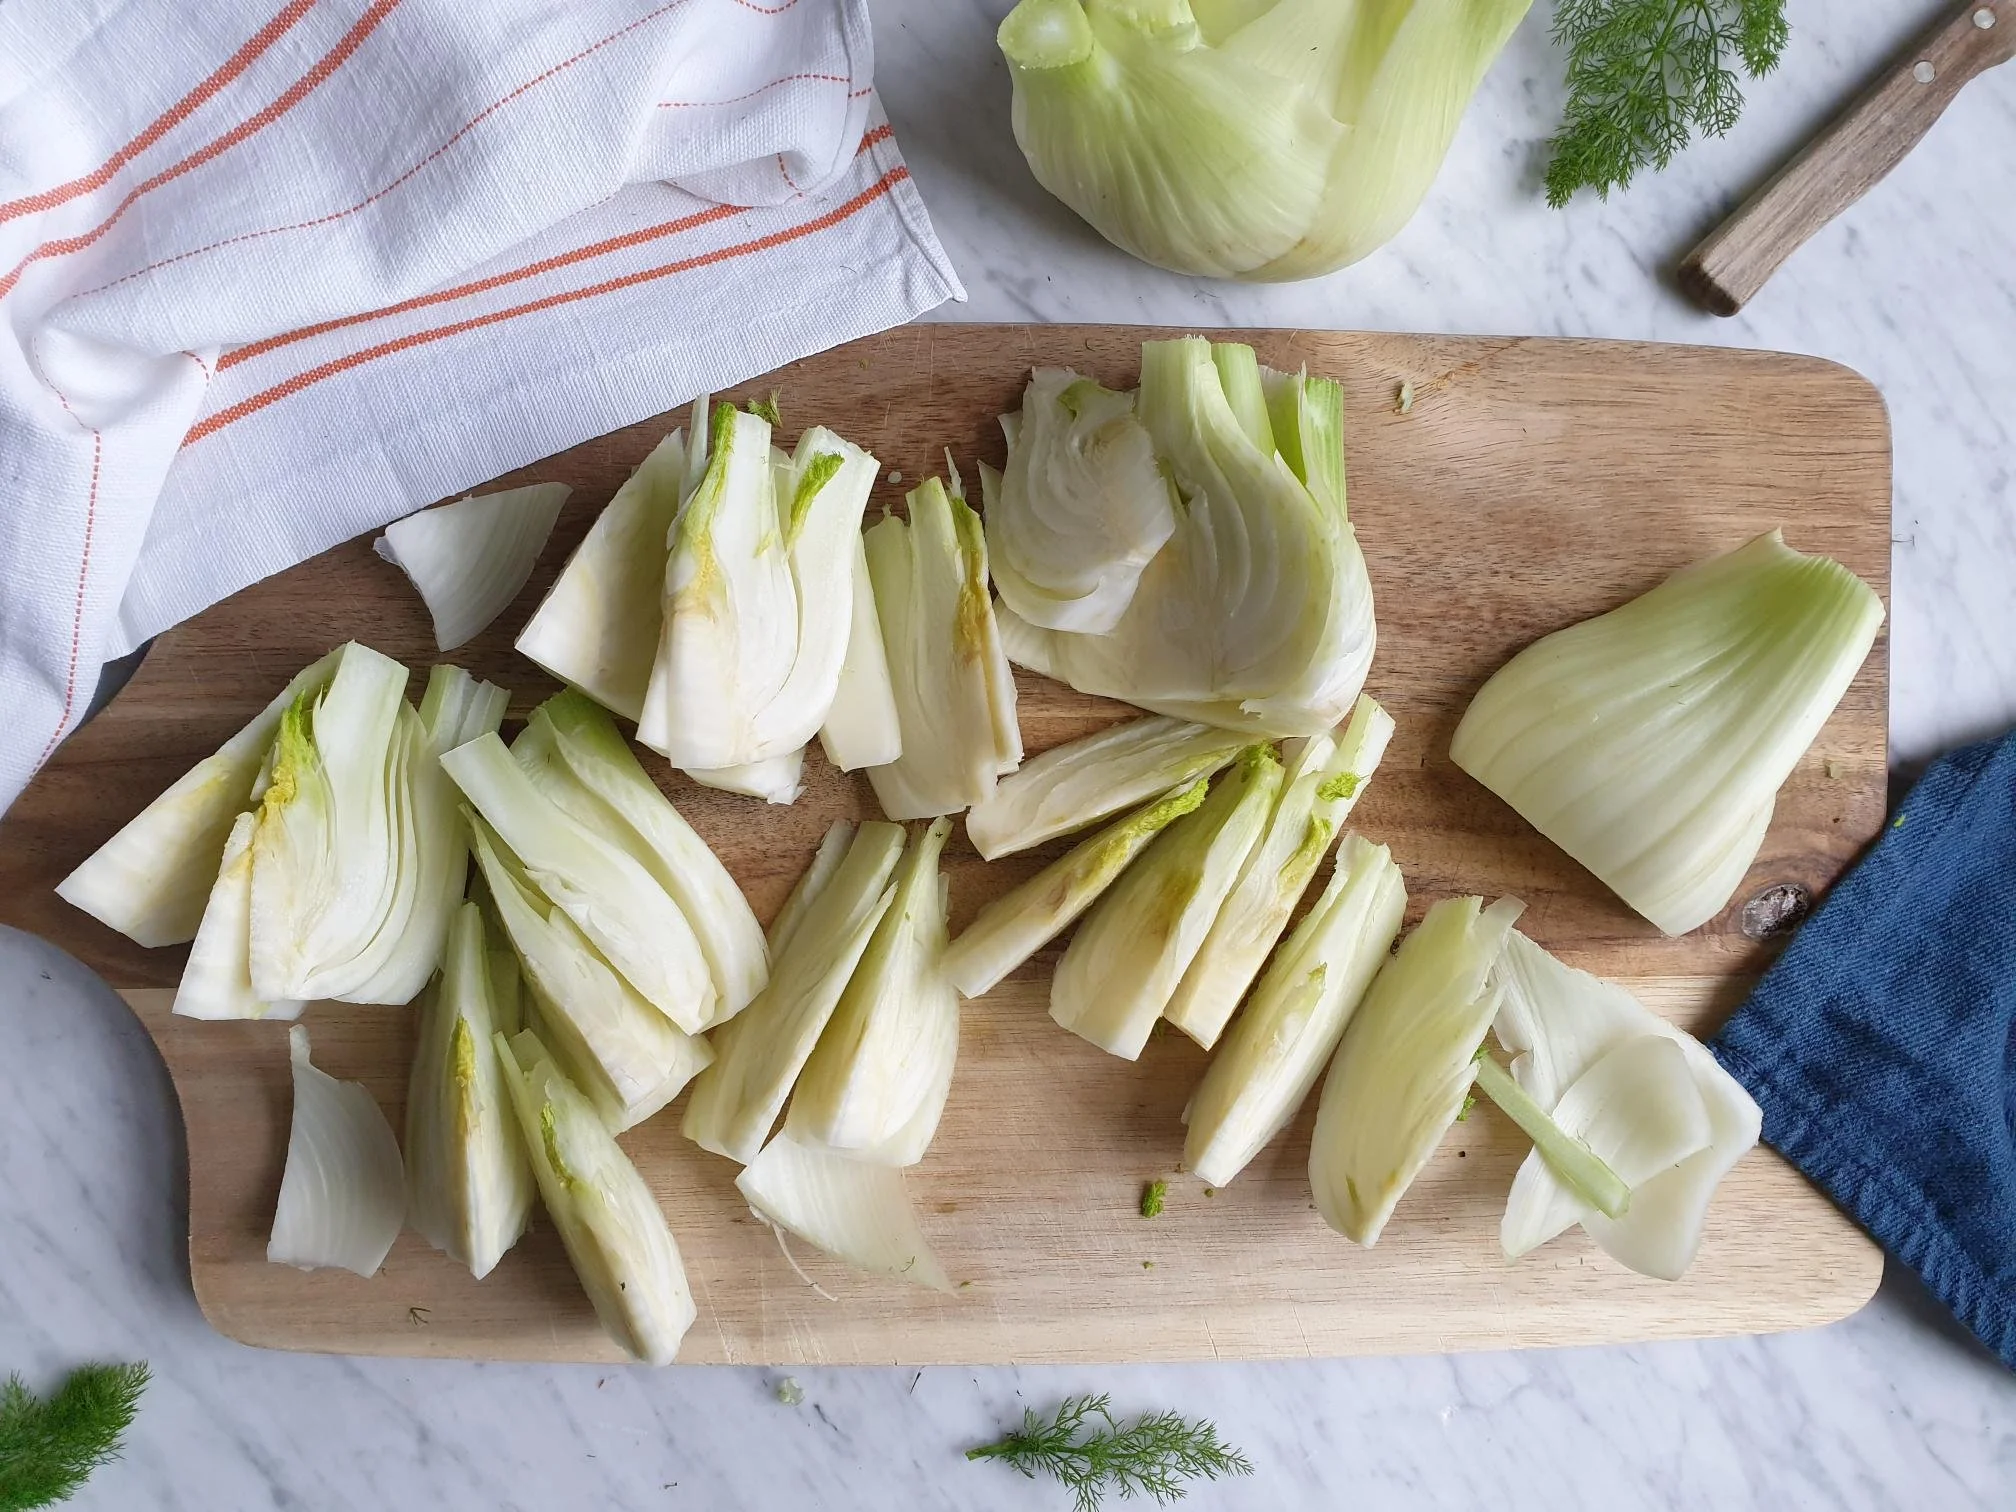
I am sharing here my family recipe for whole baked sea bass with potatoes that would traditionally be accompanied by a vegetable side dish such as (depending on what is available in the season) sautéed courgettes, peas or bell peppers, green beans with tomatoes, borlotti beans salad, creamed spinach, braised fennel and different types of seasonal salads, just to mention a few...

Ingredients

Serves 4

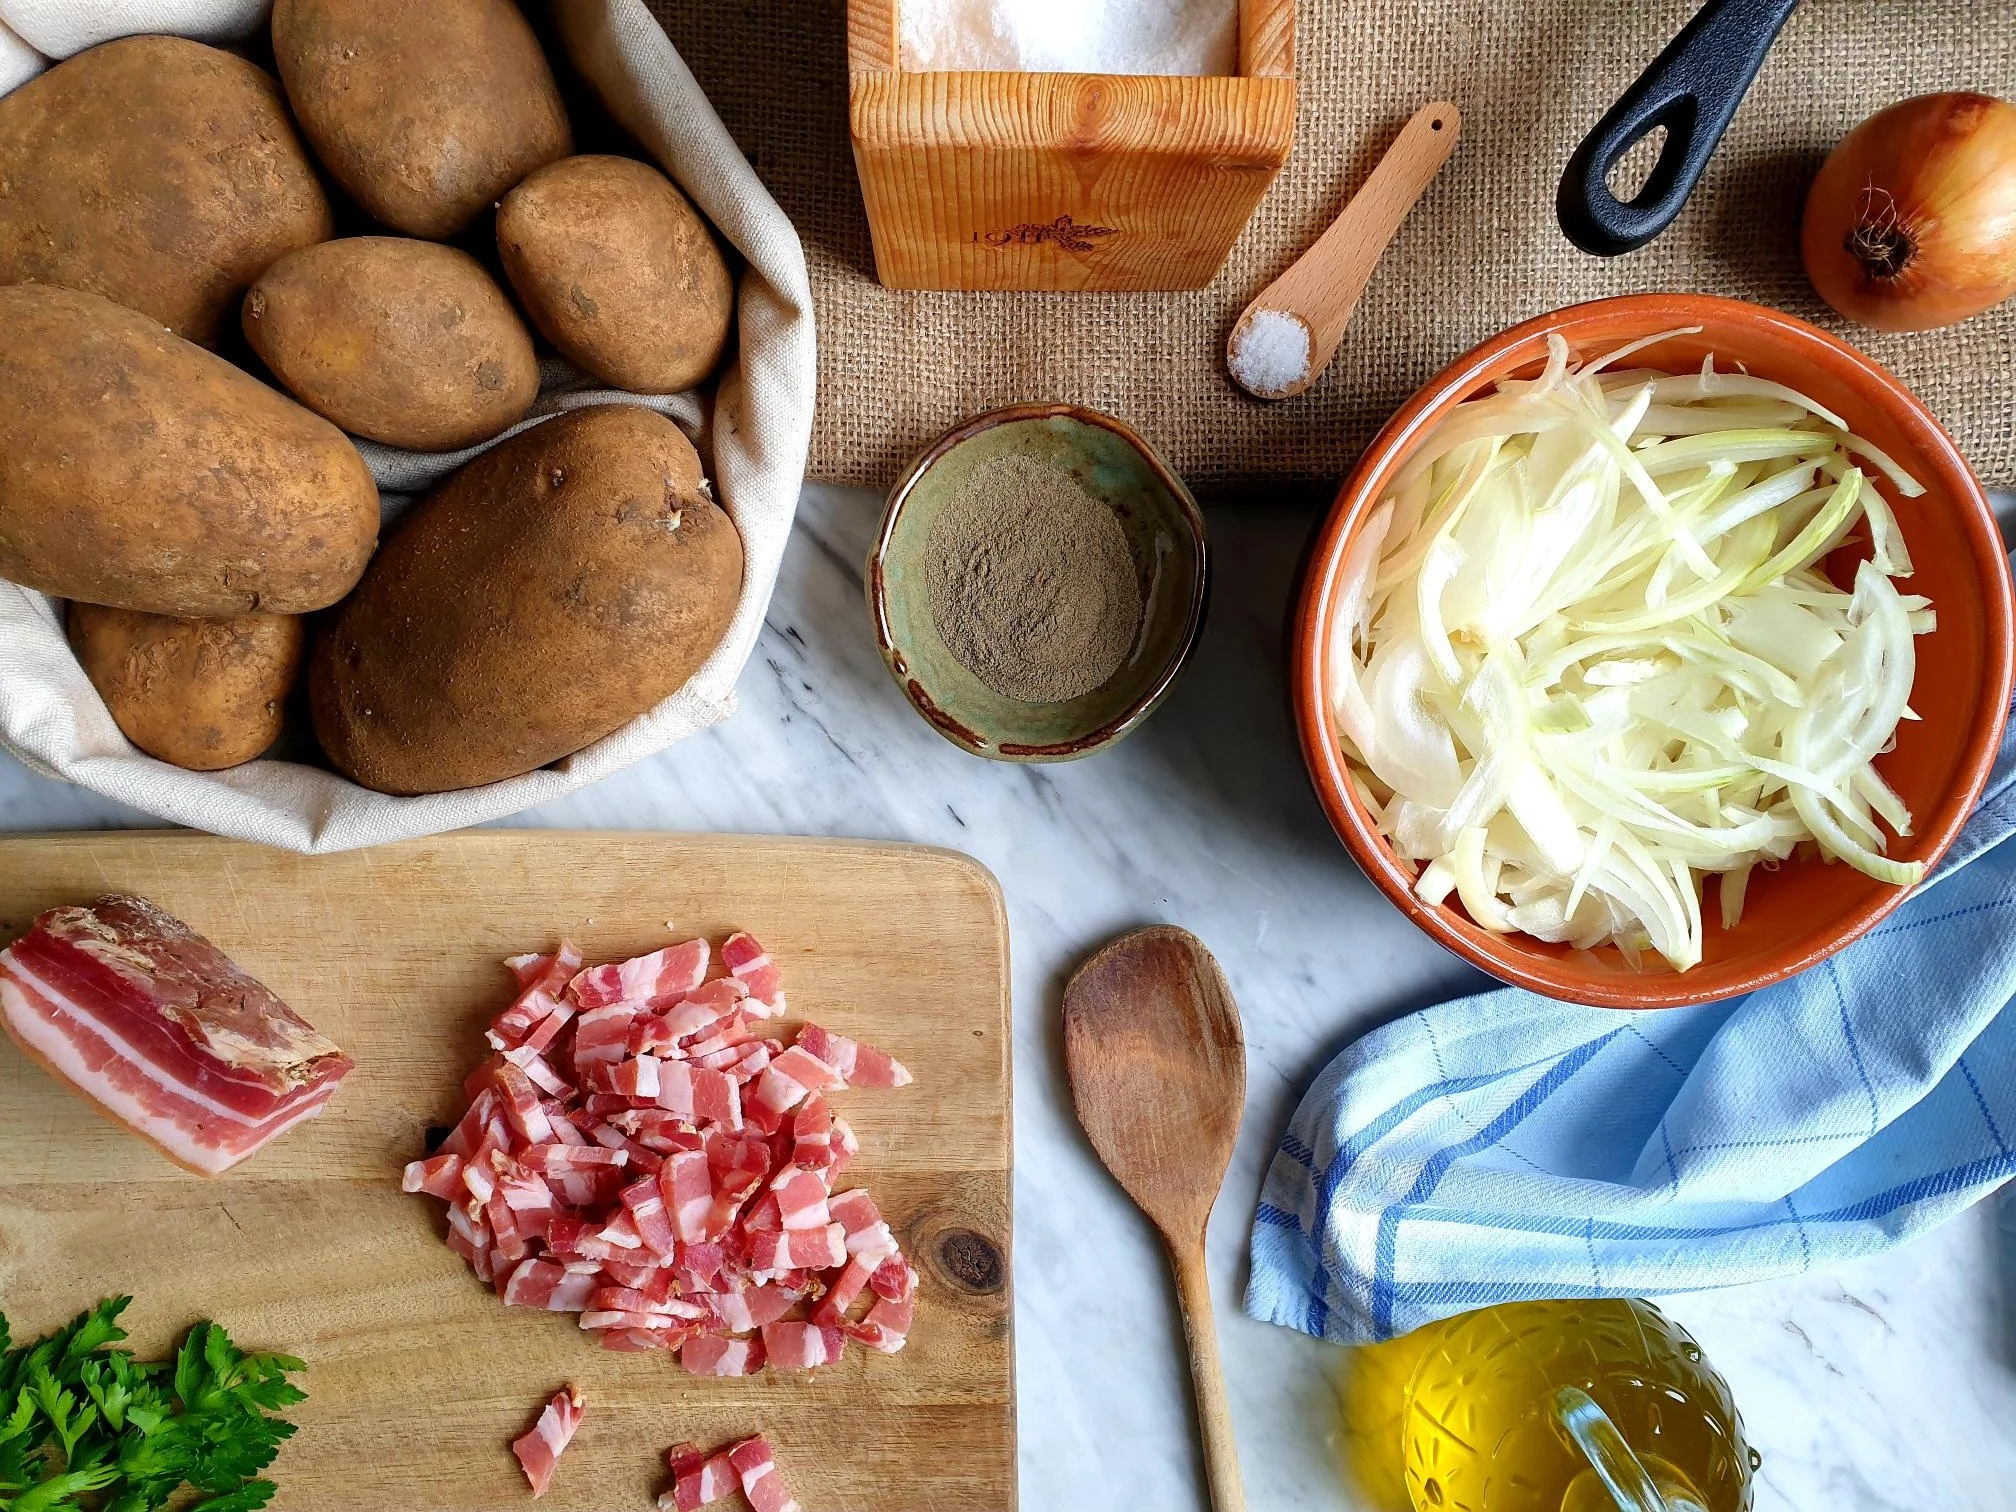
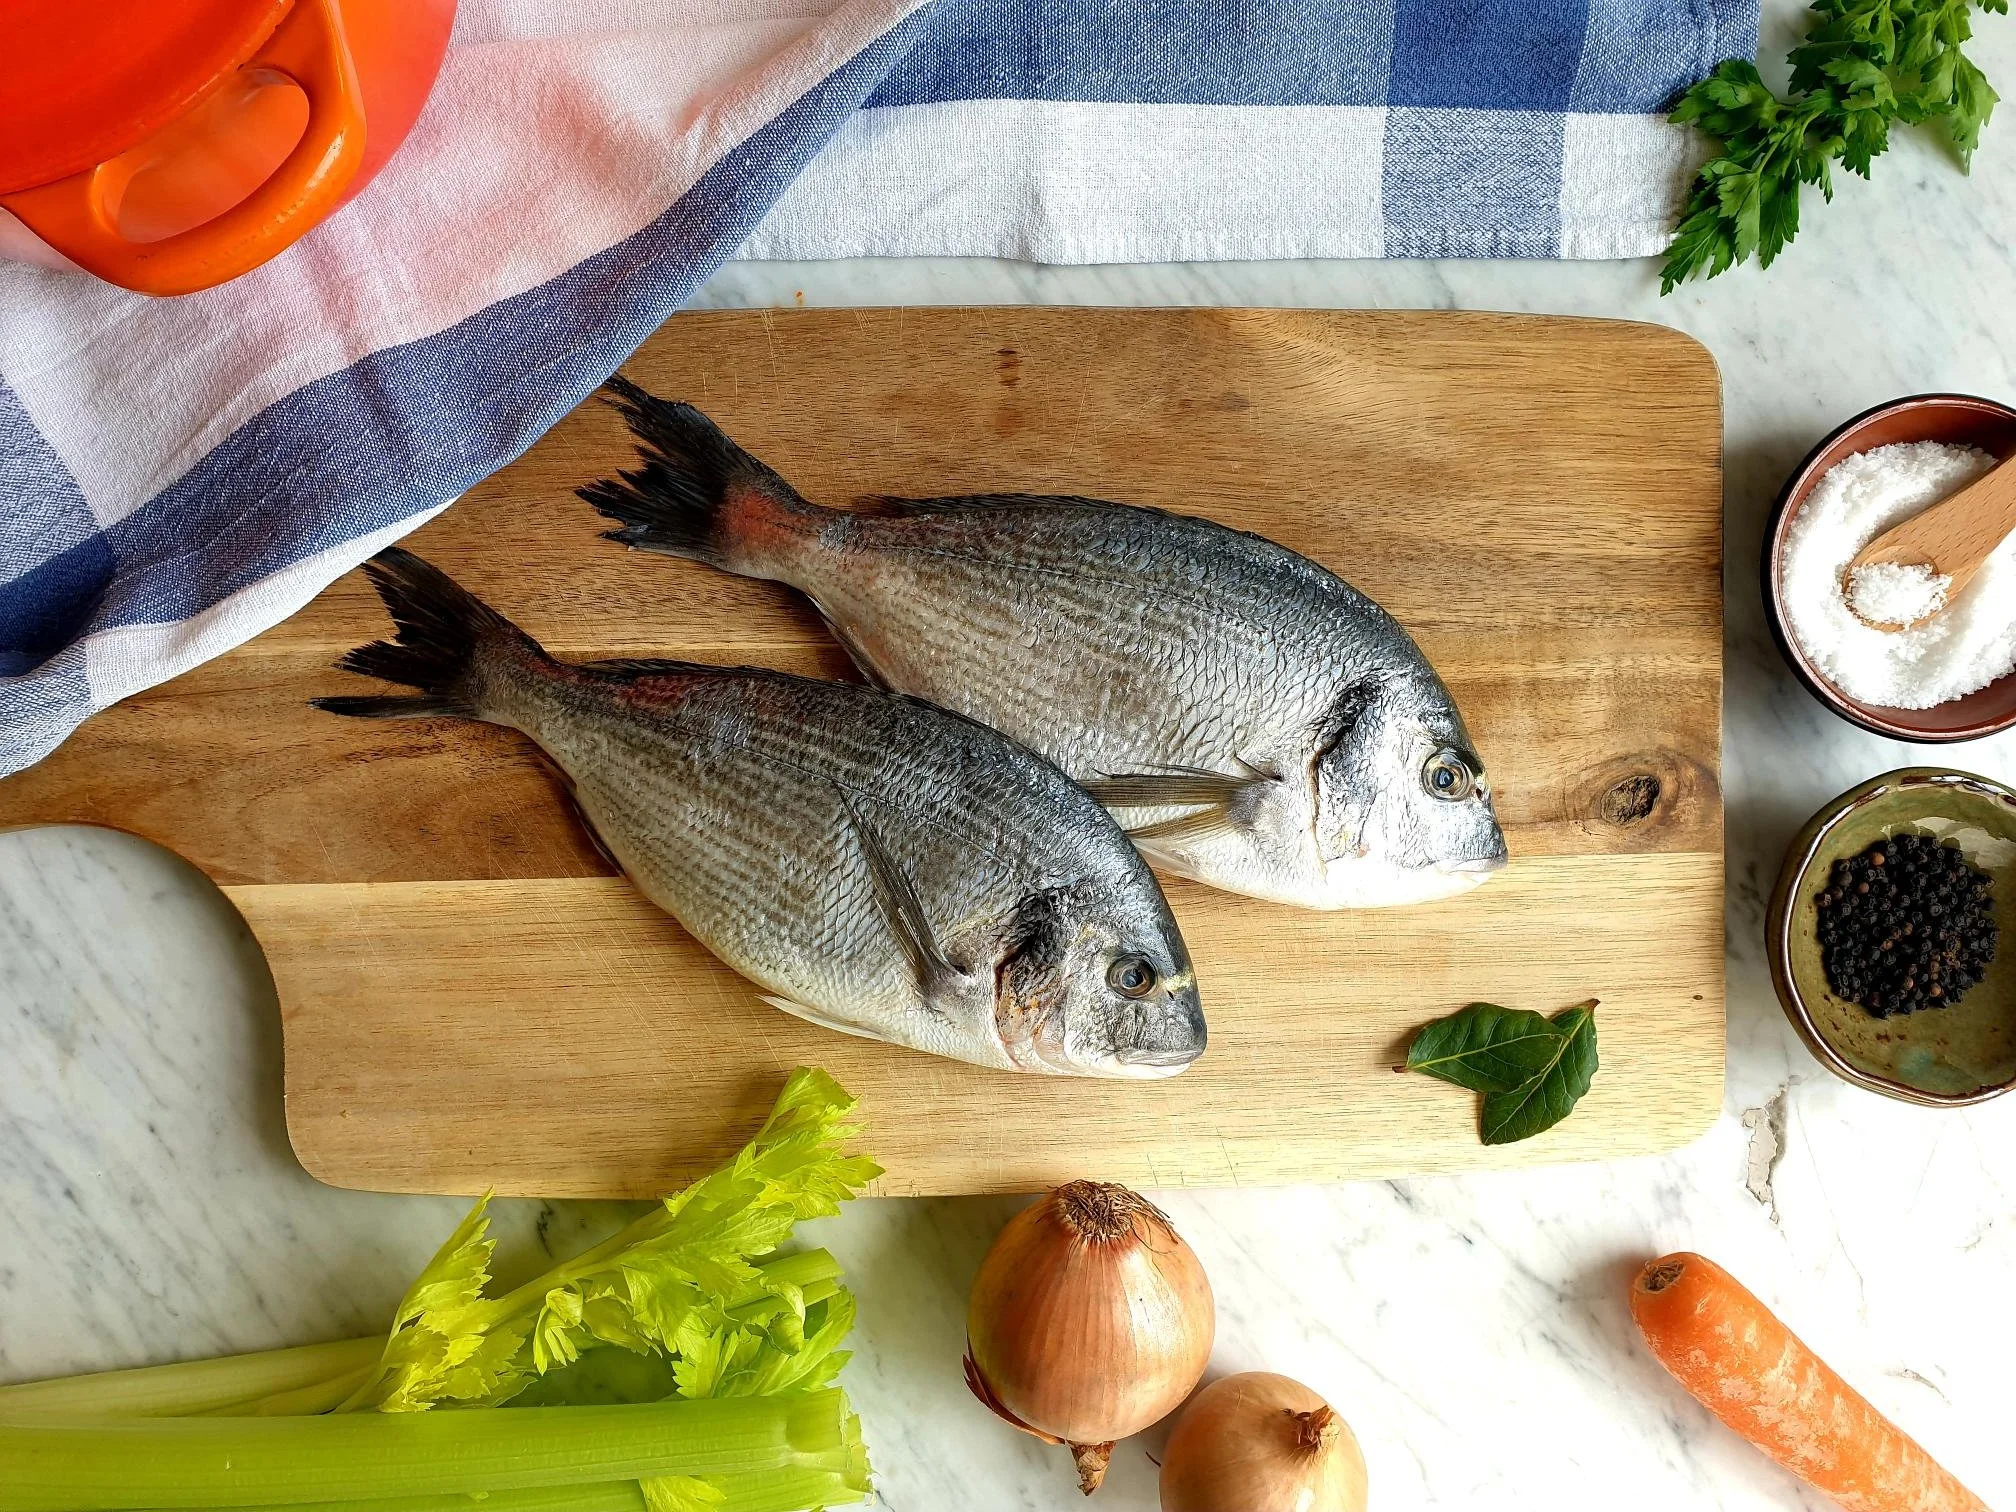
  • 4 fresh whole sea bass (each weighing around 300g), cleaned, scaled and gutted (your fishmonger will be happy to do this for you)

  • potatoes (about 800g), peeled and sliced (roughly3-5mm)

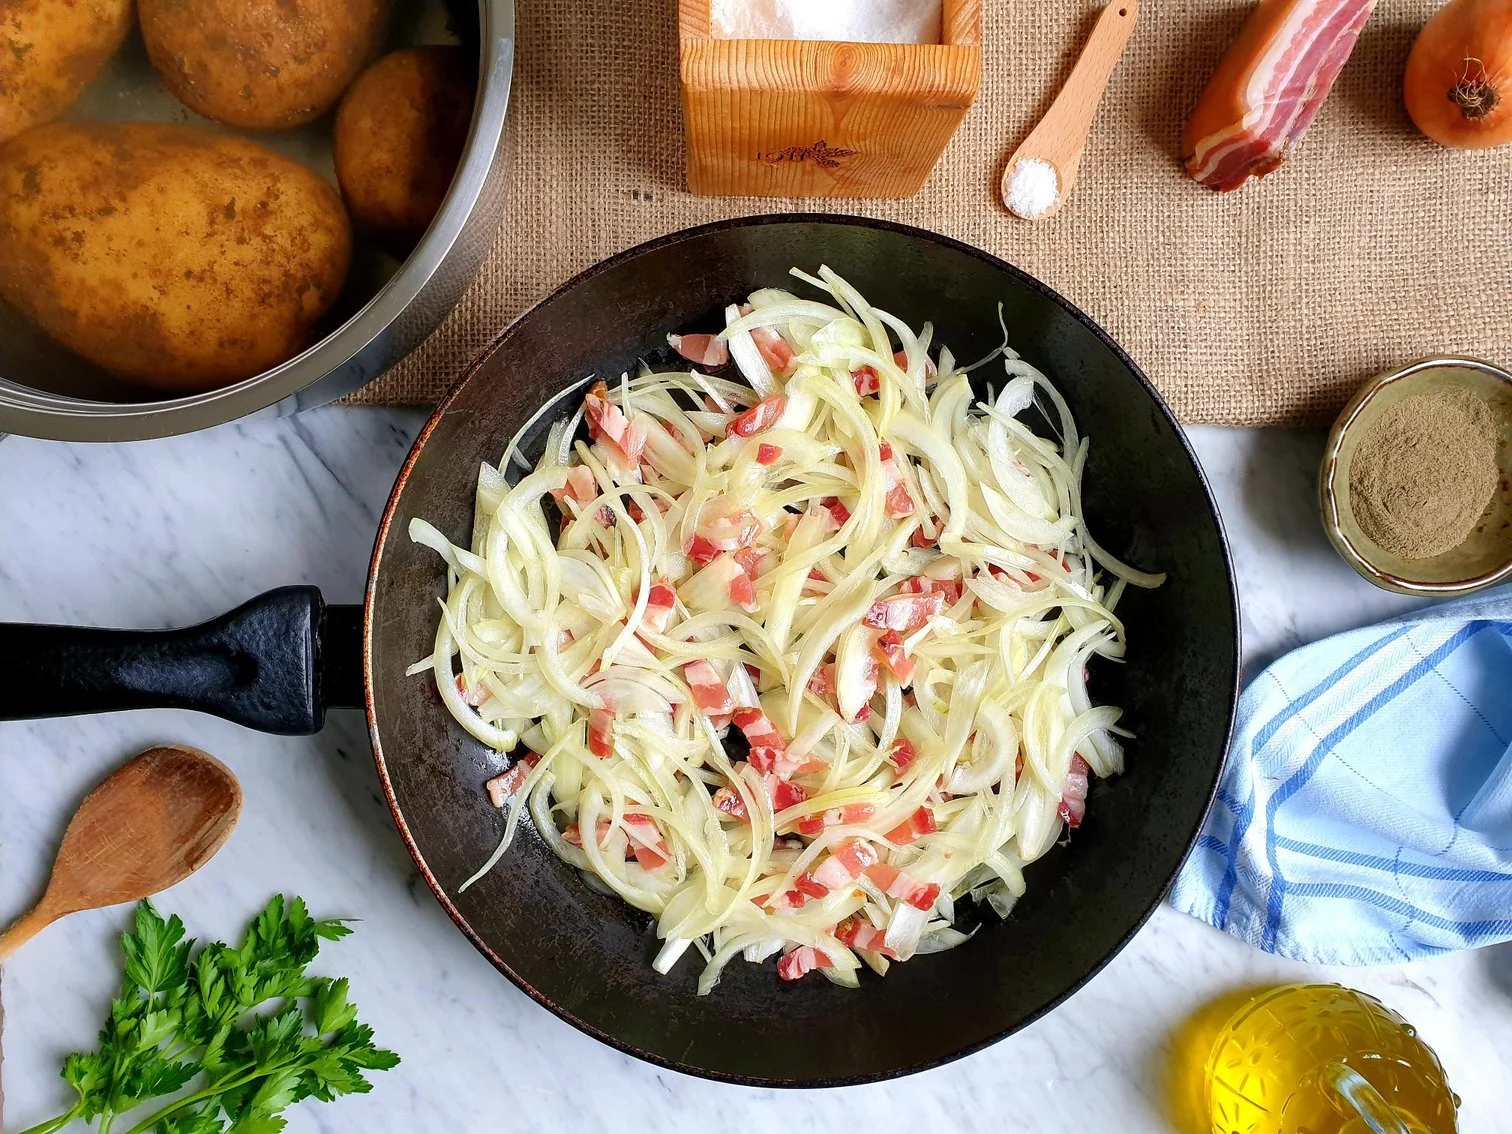
  • 1 small onion (about 50g), peeled and very finely chopped

  • 2 cloves of garlic, peeled and thinly sliced

  • 4 small sprigs of fresh rosemary (small enough to fit into the body cavity of the fish)

  • 4 Tbsp extra virgin olive oil (plus some extra for drizzling)

  • sea salt

  • black pepper

  • 100ml white wine, fish stock or water (I used a ¼ Tsp of dry granulated fish powder and dissolved it into a 100ml of hot water)

  • fresh flat leaf parsley, finely chopped, for serving, optional

  • fresh lemon, for serving, optional

Method

Preheat the oven to 220C static or equivalent.

Line a baking tray with non stick baking parchment.

Peel the potatoes and cut them with the knife or a mandolin slicer into slices the thickness of about 3-5mm.

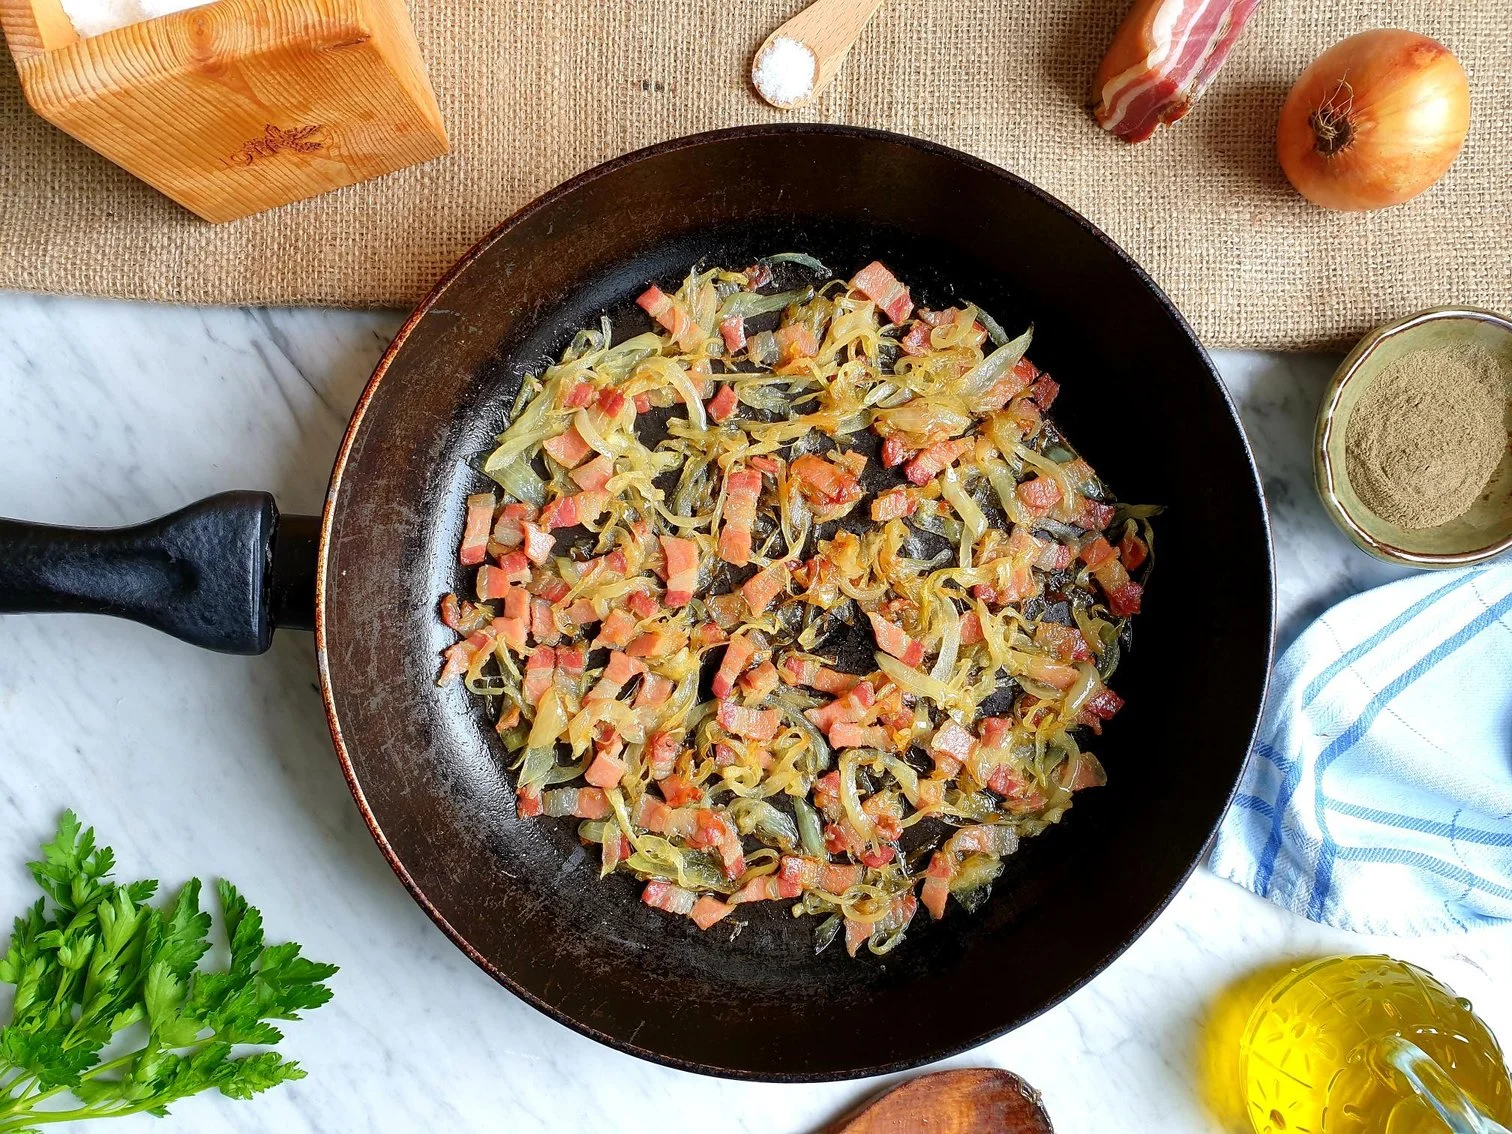
Place sliced potatoes into a bowl and add finely chopped onions, sliced garlic, extra virgin olive oil, season with sea salt and black pepper and mix well.

Transfer the potato mixture onto a baking tray and with your hands arrange them, distribute evenly more or less, into a single layer (they will overlap a bit).

Put in the oven and bake for 15-20 minutes.

While the potatoes are baking prepare the fish.

View fullsize Roasted sea bass with potatoes 7.jpg
View fullsize Roasted sea bass with potatoes 8.jpg

Wash the fish thoroughly inside and out under cold running water and pat dry well the fish with the kitchen paper.

With a sharp knife, slash the fish 3 to 5 times through the flesh, about 5mm deep, almost to the bone.

Season with sea salt and black pepper and put a small sprig of fresh rosemary into the body cavity of each fish.

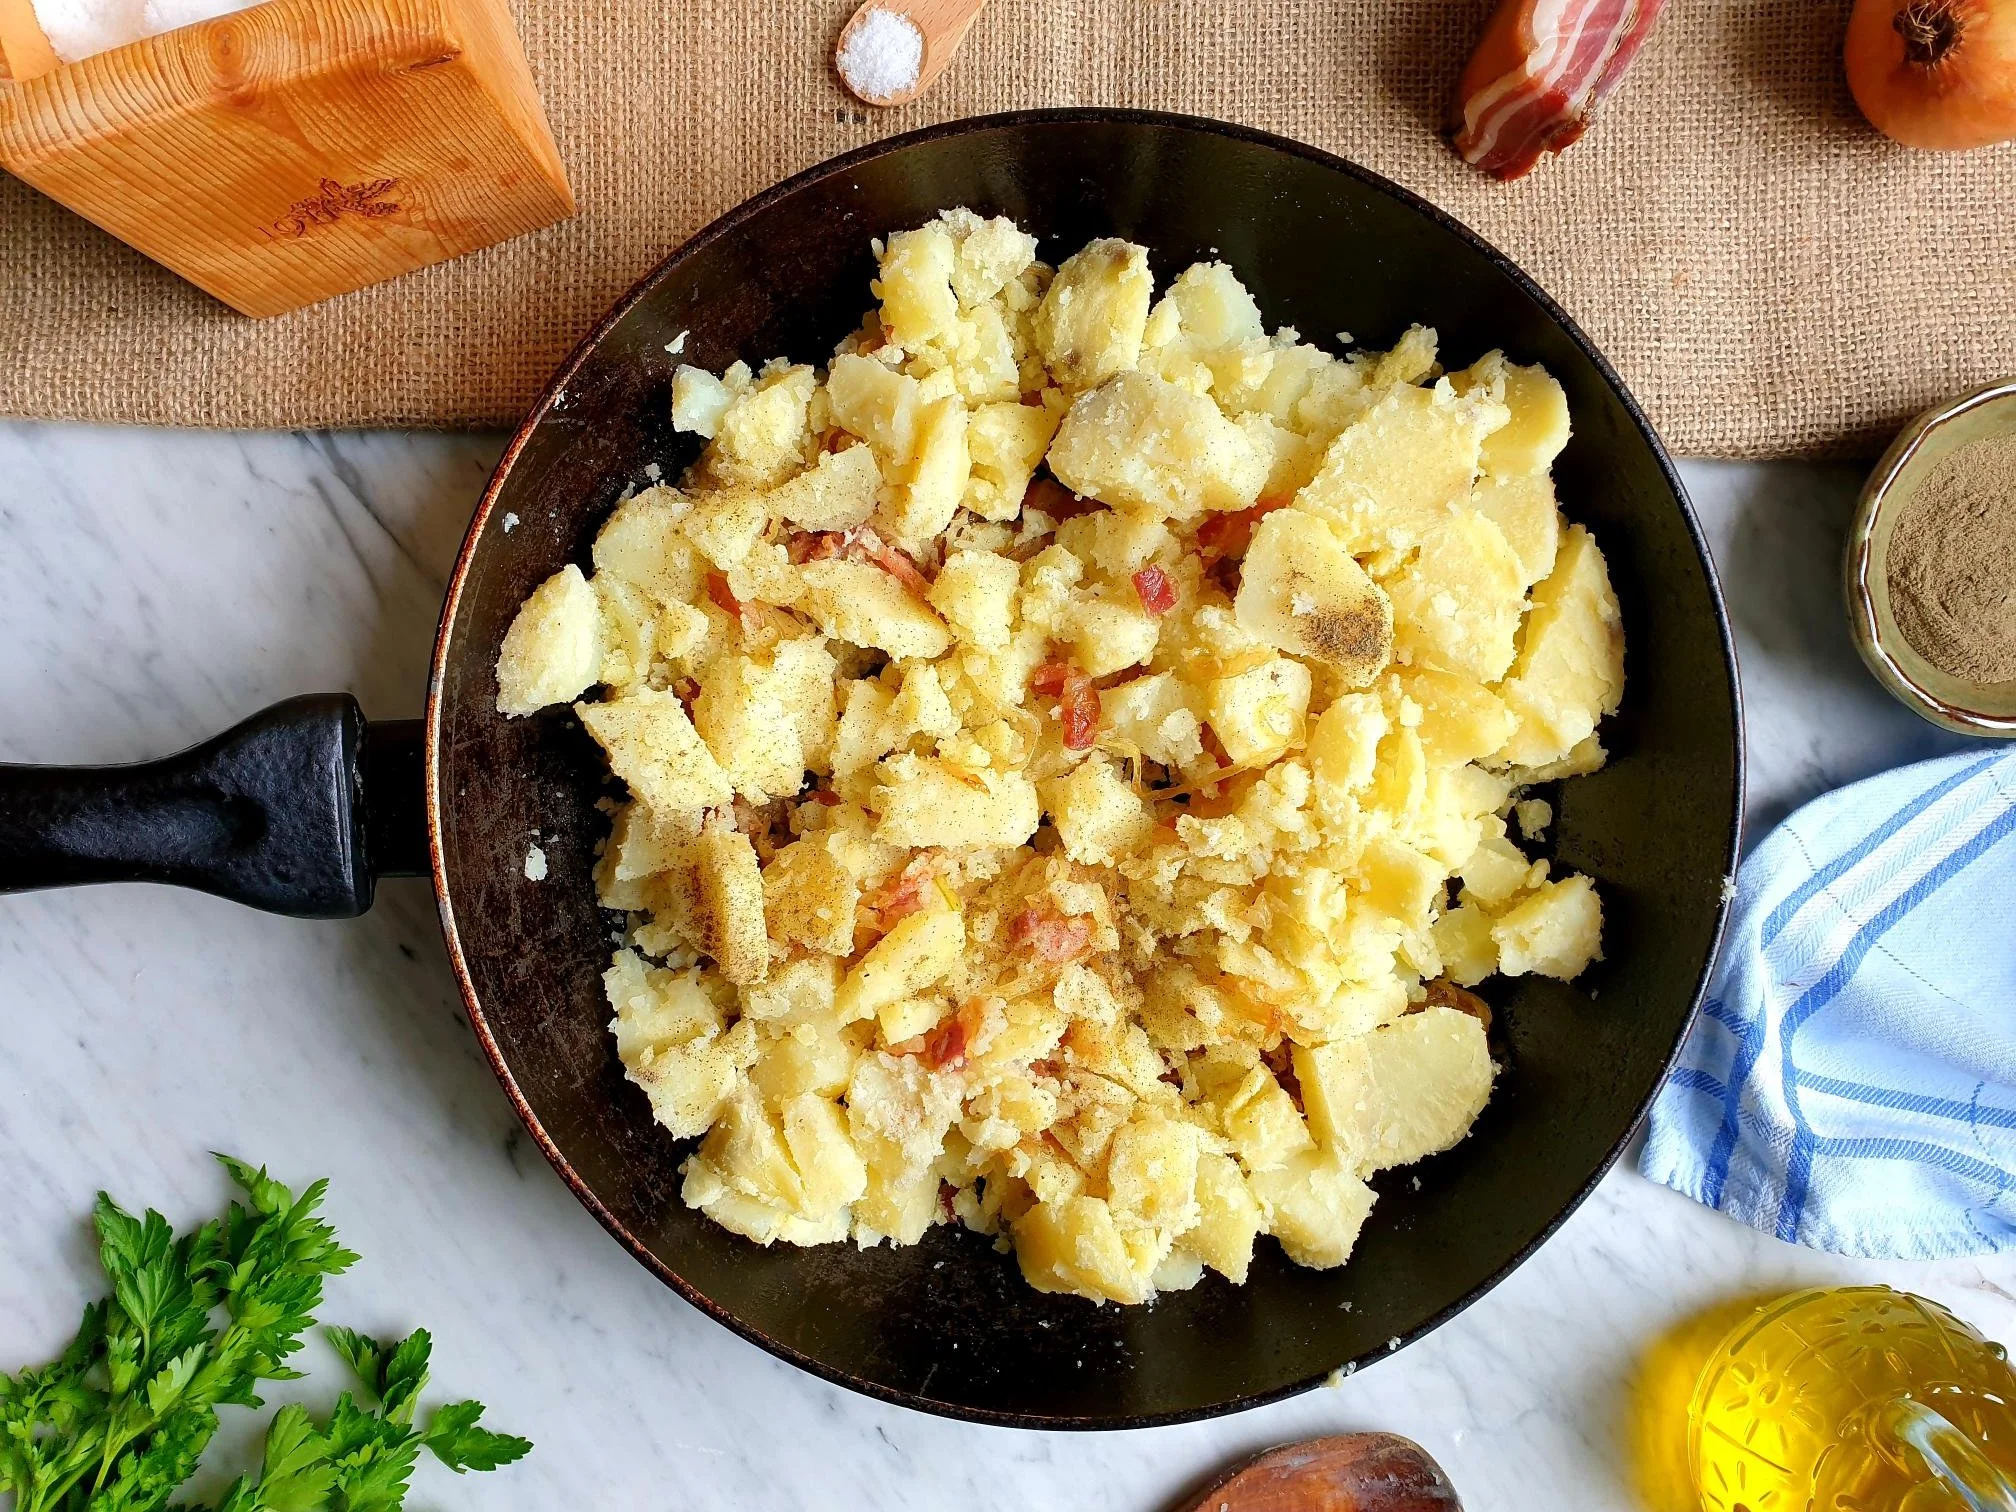
Take the potatoes out of the oven (after 15-20 minutes) and place the sea bass on top of the potatoes, side by side, scored side up and drizzle each fish with a bit of extra virgin olive oil.

Cover the baking tray with the aluminium foil, put it back into the oven and bake for 30 minutes.

View fullsize Roasted sea bass with potatoes 9.jpg
View fullsize Roasted sea bass with potatoes 10.jpg

Remove the aluminium foil and bake further for 10 minutes.

View fullsize Roasted sea bass with potatoes 11.jpg
View fullsize Roasted sea bass with potatoes 12.jpg

Pour white wine, fish stock or water over the fish and potatoes and bake further for about 5-6 minutes.

Serve hot with a sprinkle of finely chopped fresh flat leaf parsley and an extra drizzle of extra virgin olive oil and a squeeze of lemon.

Just a thought

If you end up with a leftover baked sea bass, it is delecious eaten cold or at a room temeprature with a drizzle of olive oil and finely chopped fresh flat parsley and accompanied with some cruncy bread, or alternatively you can make a fish spread (see my recipe for Rustic Sea Bream spread)

Wine suggestion

Fiano di Avellino DOCG “Ciro 906” 2019 - Ciro Picariello

July 06, 2022 /tina oblak
fresh sea bass, whole sea bass, whole baked sea bass, whole roasted sea bass, roasted sliced potatoes, branzino al forno con le patate, brancin v pecici s krompirjem, roasted fish
Adriatic Recipe, All year round recipe, baked dish, baked fish, child friendly dish, child friendly meal, dinner, Easy recipe, family friendly dish, family friendly meal, Fish & Seefood, Healthy, healthy mael, hearty dish, Istrian cuisine, Istrian dish, Istrian food, Istrian gastronomy, light fish course, light meal, main course, main dish, main fish course, main fish meal, Nutritious, Nutritious dish, roasted fish, Rustic dish, simple recipe, Slovenian cuisine, Slovenian food, Slovenian gastronomy, supper
Comment

Cherry strudel Istrian Recipe

Beans and Sardines
June 29, 2022 by tina oblak in Adriatic Recipe, All year round recipe, Austrian inspired dishes, baked dish, baking, breakfast, child friendly dish, dessert, easy baking, Easy recipe, home baking, Hungarian inspired dishes, Istrian cuisine, Istrian dish, Istrian food, Istrian gastronomy, Mitteleuropean cuisine, Mitteleuropean dish, Mitteleuropean food, Mitteleuropean recipes, pudding, Rustic dish, simple recipe, Slovenian cuisine, Slovenian food, Slovenian gastronomy, Snacks, sweet course, Sweet Things, sweet nibbles

Cherry Strudel is a variation of a traditional and well known Viennese Apple Strudel, it is a very scrumptious dessert made with very thin elastic pastry, and the filling contains fresh cherries, a bit of sugar, lemon zest and breadcrumbs. If you are thinking that you cannot be bothered pitting the cherries and making your own dough, I can guarantee you an equal delicious results using store bought pastry and jarred, tinned or frozen cherries, no hassle involved!

Apple strudel dates back to1696, when it was first mentioned, and “conquered” all the countries that were once part of Austro-Hungarian Empire, but it is believed that strudel originated from baklava (a famous Turkish pastry based dessert) and travelled to Austria with Ottoman's Empire and through Hungarian cuisine.

Apple strudel has been a big hit in all the countries that were once ruled by Austro-Hungarian Empire, but it is in the North Adriatic that this new variation was created giving originality to a very unique and less known type of strudel. A cherry strudel, is a very much loved seasonal dessert in Slovenian Istra, (Češnjev štrudelj or Češnjev zavitek) where I come from, and neighbouring Trieste in Italy.

Cherry strudel has always been very popular, and when fresh cherries are in season, this dessert is regularly baked in the households, and if you are lucky enough, sometimes you can find it on the menus of informal family run restaurants.

This irresistible dessert really takes me back to my childhood. My mother frequently baked it with fresh cherries picked by ourselves in the garden, or were very generously given by our neighbours, it is the garden where I, as a child, spent a lot of time when my parent were working in the restaurant. Along with the girl next door, who was only a year older than me, we used to pick cherries from the tree that had the reddest and ripest cherries, climbed up it, found a comfortable branch to sit on and munch on cherries until we were completely full, chatting and giggling...

When we were called for lunch, there was little appetite left for it, no matter how delicious it was, and my mother would only looked at us and had the answer, our T-shirts were stained, our lips and mouths deep red in colour from the cherry juices...she never got cross with us, just smiled and shook her head...since my mother used to do exactly the same when she was small...

Looking back, it just made me realize how lucky I was, the first time I ever had the chance to buy fresh cherries was when as an adult I moved to England...

Cherry strudel is traditionally served warm and generously dusted (there is no sugar in pastry) with regular icing sugar or vanilla flavoured icing sugar.

You can turn this simple and rustic pudding into an elegant dessert and serve it with whipped cream, vanilla ice cream or vanilla sauce.

I am sharing here my mother's recipe, which is slightly off the beaten track, for cherry strudel made with home-made pastry and fresh cherries, however you can still indulge yourself and cut corners a bit by using a store bought ready made puff pastry and frozen, tinned or jarred cherries.

Ingredients

Serves 10-12

You can use store bought ready made puff pastry, shortcrust or filo pastry.

Ingredients for home-made strudel dough

  • 250g all purpose flour

  • 1 egg, lightly beaten

  • 3 Tbsp neutral tasting vegetable oil (I used sunflower oil)

  • 2 Tbsp white wine vinegar or lemon juice

  • sea salt, a pinch

  • 50ml-60ml lukewarm water, or as needed

Ingredients for cherry filling

  • 700g fresh cherries, washed and pitted (can also use tinned or jarred cherries or store bought frozen cherries, defrost and drain well)

  • 100g caster sugar

  • 1 unwaxed lemon, grated zest

  • 20g butter plus, some extra for brushing

  • 80g dry fine breadcrumbs

  • sea salt, a pinch

  • icing sugar, for dusting

Method

To make the dough

Place the flour in a big mixing bowl and make a well.

In a separate, smaller bowl, mix slightly beaten egg, oil, vinegar or lemon juice, (the acidity will help to relax gluten in the flour making the dough more stretchy) a pinch of sea salt and lukewarm water. Pour the mixture into a flour well.

With the fork, stir the mixture with the flour until well combined. Add a little bit of flour at a time, until the dough comes nicely together, then work the dough with your hands.

Transfer the dough on a lightly floured working surface and knead the dough for about 10 minutes or until nice and smooth.

After this time, the dough should be moist and elastic and not sticky. Add a little more flour if the dough is too sticky to knead.

In order to further encourage the development of the gluten, resulting in a very elastic dough, slam the dough onto the working surface a few times.

Shape the dough into a smooth ball and place it in a clean bowl, previously brushed with oil.

Cover the bowl with cling film and let the dough rest for about 1 hour at room temperature (strudel dough has no yeast, so do not expect the dough to rise or double in size, it needs to rest for gluten to relax).

View fullsize Apple Strudel 4.jpg
View fullsize Apple Strudel 5.jpg

To make the filling

In a small pan melt the butter over medium-low heat. When the butter is melted add breadcrumbs, toast them, stirring constantly until golden-brown in colour. Remove from the heat, cool and set aside.

Wash the cherries, dry them a bit, take the stalks off and pit them. Place them in a colander and leave them to drain until needed.

Preheat the oven to 200C static or equivalent.

Divide the dough in half to make two separate strudels as easier to work with.

Place half of the dough on a clean and lightly floured table cloth. Flour the rolling pin and start rolling out the dough. While rolling, to prevent sticking, flour the dough and the surface every now and then.

When the dough reaches about 20 cm in diameter pick it up and keep stretching it. The best way to do so is to use the back of your hands and in particular the knuckles but make sure you remove any sharp jewellery first.

When the dough becomes difficult to handle as it becomes bigger and thinner, place it on a lightly floured tablecloth.

With your hands (tip of the fingers) keep stretching gently the dough on the tablecloth to paper thin consistency, from the inside to the outside working your way round the sheet of dough.

Keep stretching until the sheet of dough starts to look almost translucent and you will be able to see a pattern of your tablecloth through it.

You should end up with a thin sheet of dough stretched more or less into a rectangular shape with a diameter of approximately 40 cm which will fit into a standard 40 cm baking tray.

If you notice that the edges are still a bit thick, stretch them further very gently or cut them off. If you leave the edges thick, when rolling the strudel, they will form quite a thick layer at the very centre of the strudel risking to remain slightly underbaked.

View fullsize Apple Strudel 9.jpg
View fullsize Cherry Strudel 16.jpg

Transfer the cherries into a bowl, add sugar, breadcrumbs mixture, lemon zest and mix well to incorporate all the ingredients.

View fullsize Cherry Strudel 11.jpg
View fullsize Cherry Strudel 12.jpg
View fullsize Cherry Strudel 13.jpg
View fullsize Cherry Strudel 14.jpg

Place and spoon evenly the cherry mixture over one half of the dough sheet leaving about 2-3cm to the edge. Fold in the side ends of the sheet to prevent filling coming out during rolling.

View fullsize Cherry Strudel 17.jpg
View fullsize Cherry Strudel 18.jpg

Using the tablecloth to help you, roll the dough all the way and roll it directly onto a sheet of baking parchment, seam side down.

View fullsize Cherry Strudel 19.jpg
View fullsize Cherry Strudel 20.jpg

Transfer very gently the baking parchment with the rolled strudel on a baking tray.

Repeat the process with the other half of the dough.

View fullsize Cherry Strudel 21.jpg
View fullsize Cherry Strudel 22.jpg

Brush it with a bit of melted butter.

Bake on the middle shelf for 40-45 minutes.

View fullsize Cherry Strudel 23.jpg
View fullsize Cherry Strudel 24.jpg

Cherry Strudel is ready when the crust turns nice and golden.

Take it out of the oven and let it cool completely. Dust it with icing sugar, cut into slices and serve it on its own or with vanilla ice cream or cream.

Just a thought

You can make the strudel dough ahead and keep it refrigerated for up to two days. Before using the dough take it out of the fridge allowing it to come to a room temperature.

Cherry strudel is best eaten the day is made. You can keep cherry strudel in an airtight container in the fridge for 3-4 days or overnight on the counter.

Wine suggestion

Friuli Colli Orientali Verduzzo Sottozona Cialla DOC "Verduzzo di Cialla" 2016 - Ronchi di Cialla

June 29, 2022 /tina oblak
fresh cherries, Češnjev štrudelj, Češnjev zavitek, jarred cherries, tinned cherries, frozen cherries, store bought pastry, filo pastry, ready made puff pastry, shortcrust pastry, strudel pastry, strudel dough, homemade strudel dough, strudel di ciliege
Adriatic Recipe, All year round recipe, Austrian inspired dishes, baked dish, baking, breakfast, child friendly dish, dessert, easy baking, Easy recipe, home baking, Hungarian inspired dishes, Istrian cuisine, Istrian dish, Istrian food, Istrian gastronomy, Mitteleuropean cuisine, Mitteleuropean dish, Mitteleuropean food, Mitteleuropean recipes, pudding, Rustic dish, simple recipe, Slovenian cuisine, Slovenian food, Slovenian gastronomy, Snacks, sweet course, Sweet Things, sweet nibbles
Comment

Elderflower fritters Recipe

Beans and Sardines
June 22, 2022 by tina oblak in Adriatic Recipe, Appetizers, Austrian inspired dishes, breakfast, Central European recipes, child friendly dish, child friendly meal, dessert, Easy recipe, family friendly dish, family friendly meal, foraging, Istrian cuisine, Istrian dish, Istrian food, Istrian gastronomy, main course, main dish, main fish course, Rustic dish, Slovenian cuisine, Slovenian food, Slovenian gastronomy, Small bites, Snacks, Spring dish, Spring recipe, sweet course, sweet finger food, sweet nibbles, Sweet Things, Vegetarian

Bring the sunshine and the scent of summer in your kitchen with these elderflower fritters which are lightly fried elderflowers in a pancake batter like, they are golden, crunchy and a delicious dessert with a difference, they are a real treat and a delightful seasonal delicacy.

The culinary use of elderflower has been revolutionized in the past few years, but in the whole of Slovenia, including the Slovenian coast where I come from, elderflower fritters are a dish that is very old and traditional.

Those of you that have been reading my posts on this blog for a while, will know that I come from a family of very passionate foragers, and so there should be no surprise that this fragrant flower ends up on a plate. My maternal grandmother, stara mama Iva, would make them when we were little.

We children got away with eating just that, with a glass of milk, and skipping altogether a main evening meal, which is quite a common practice in neighbouring Austria.

If you are not too familiar with the elderflower, please go and read my page with the recipe for elderflower cordial where I explain a bit more in detail where, when, and how to pick this edible, fragrant, and sweet flower.

What can be better than going on a walk on a sunny day and bring home a free meal...try these elderflower fritters, you will be hooked, and will have another reason to look forward to a following spring/summer.

Ingredients

Serves 4-6 as a dessert (2-3 heads per person)

  • about 10-14 elderflower heads with their stems

  • 100g all purpose (plain) flour

  • 1egg

  • 70ml milk

  • 70ml very cold sparkling water

  • sea salt, a pinch

  • 2 tsp caster sugar, optional

  • oil for frying (neutral tasting, I used sunflower oil)

  • icing sugar or vanilla icing sugar, for dusting

Method

Prepare elderflower heads by cutting the stems with the scissors but leaving at least 5cm of stem for easy handling (in other words enough stem to hold them by). Very gently shake any insects and dirt off your flower heads, but do not be tempted to wash the flower heads as you will loose the flavour.

In a mixing bowl, using a hand whisk, whisk the egg, add milk, sea salt and sugar, if using, and mix until well combined.

Add the flour gradually and whisk until smooth with no lumps, then add sparkling water which will help lighten the batter, set aside an leave it to rest for about 30 minutes.

Heat about 5cm of oil a pan (big enough to accommodate the largest elderflower head) until hot (180C on a temperature probe). You will know the oil is ready when a drop of batter bubbles immediately and turns golden in about 5 seconds.

Holding the elderflower by their stems, dip each elderflower head into the batter, so they are coated all over, gently shake off excess batter.

View fullsize Elderflowers fritters 10.jpg
View fullsize Elderflowers fritters 17.jpg

Drop the flowers into the pan with hot oil (flower side down) and fry for about 30 seconds. Fry one flower at a time.

They should be lightly golden in colour and not too brown.

Remove with a slotted spoon and dry on kitchen paper.

Dust generously with icing sugar, serve and eat while still warm and crunchy.

Delicious also drizzled with honey, accompanied with vanilla ice cream, lemon sorbet or fresh strawberries, cherries or other seasonal fresh fruit of your choice.

Just a thought

Elderflower fritters ideally should not be made well in advance as the batter, which should be crisp, will become soft.

Wine suggestion

Friuli Colli Orientali Traminer Aromatico DOC 2021-Zorzettig

June 22, 2022 /tina oblak
edible flower, elderflower, deep fried desserts, deep fried elerflower, fiori di sanbuco fritti, ocvrti bezgovi cvetovi
Adriatic Recipe, Appetizers, Austrian inspired dishes, breakfast, Central European recipes, child friendly dish, child friendly meal, dessert, Easy recipe, family friendly dish, family friendly meal, foraging, Istrian cuisine, Istrian dish, Istrian food, Istrian gastronomy, main course, main dish, main fish course, Rustic dish, Slovenian cuisine, Slovenian food, Slovenian gastronomy, Small bites, Snacks, Spring dish, Spring recipe, sweet course, sweet finger food, sweet nibbles, Sweet Things, Vegetarian
Comment

Egg frittata with wild herbs Istrian Recipe

Beans and Sardines
June 16, 2022 by tina oblak in Adriatic Recipe, All year round recipe, Appetizers, baked dish, bite-sized nibbles, breakfast, brunch, Canapés, dinner, Easy recipe, entrée course, family friendly dish, family friendly meal, Finger food, first course, first course dish, first course meal, foraging, Healthy, healthy mael, Istrian cuisine, Istrian dish, Istrian food, Istrian gastronomy, light meal, main course, main dish, Nutritious, Nutritious dish, Rustic dish, simple recipe, Slovenian cuisine, Slovenian food, Slovenian gastronomy, Small bites, Snacks, Spring dish, Spring recipe, Starters, supper, Vegetarian, Fresh herbs

Egg frittata with wild herbs is a very simple and rustic dish, quick to make and a perfect recipe choice for an easy and uncomplicated midweek or weekend lunch, dinner, brunch or breakfast.

It is delicious when eaten hot, but equally very tasty at room temperature or cold, it can be made ahead, providing a great picnic solution, and frittata cut into small bite size pieces will make a brilliant finger food feeding larger groups served together with some drinks.

This humble frittata is a very traditional dish in the Slovenian Istra where I grew up, it is similar to an omelette, it is Italian in origin (Italian word frittata roughly translates to “fried”) and to me, is more than just a quick meal solution.

This type of frittata together with other two most common variations (frittata with dry sausage and frittata with wild asparagus and pancetta) represent a real speciality in Slovenian Istra which, due to close geographical proximity to Italy, made this dish very popular and is referred by locals as Fritaia de erbe, Fritaja, Fritata or Frtalja, Fritaia, and all of these words derive from the Venetian word fritaia, given Venice's domination of the region.

Both my paternal and maternal grandfathers loved all variations of frittata and would have them for merenda (a dialect word, from Italian meaning snack) indicating in the past a quite substantial late morning breakfast (a slightly less sophisticated version of a “modern” brunch) for pheasants, farmers, fishermen and workers. They all started work at dawn, so by mid morning, when they finished working, and before returning home for lunch, they were all quite hungry, and more than ready to have some food to replenish the energy. Nowadays, merenda indicates a light mid morning or mid afternoon snack, that can be savoury or sweet, and of course, children always push for a sweet option...

Both my grandfathers would pick up wild herbs (spring providing the widest range) when returning home from spending a morning working in their vegetable gardens, orchards or olive groves, in which case egg frittata with wild herbs would be prepared for lunch or dinner.

Wild herbs frittata and other types of frittata were for a long time considered a dish for only the poorest people, but thanks to new gastronomic traditions, they are very proudly back on the menus of many homes and restaurants, and given the true dignity they deserve. They are quick and cheap to prepare, have low caloric intake, and are abundant with nutrients from freshly picked herbs in the local area.

I am sharing here a very easy family recipe for this modest frittata. All you need to do is take a nice walk in the natural world around you - forests, meadows etc., and pick some seasonal wild herbs. What can be easier than that?

Well, if you are mainly in an urban area, you can skip the walk and use store bought baby spinach, wild rocket, some fresh basil and flat leaf parsley and you are ready to go...

Ingredients

Serves 4

  • 100g-150g (about 4 full handfuls) fresh mixed wild herbs, washed and finely chopped

    In this recipe I used wild garlic leaves, wild fennel, stinging nettle, dandelion leaves, mint, chives, lemon balm, sage, marjoram, flat leaf parsley, basil.

    You can also use store bought baby spinach, wild rocket, any combination, proportion does not really matter as long as you have more or less the total amount of fresh herbs stated in the ingredients list.

  • 2 Tbsp extra virgin olive oil

  • 8 medium sized eggs (in this recipe I calculated 2 eggs per person)

  • sea salt

  • black pepper

Method

Wash thoroughly fresh mixed herbs, dry them using a salad spinner, if you have one.

Finely chop the herbs and set aside.

View fullsize Egg frittata with wild herbs 4.jpg
View fullsize Egg frittata with wild herbs 6.jpg

Crack the eggs into a mixing bowl and whisk well, add sea salt and black pepper.

Add finely chopped herbs into a mixing bowl and mix well with the egg mixture.

Put extra virgin olive oil in a fairly large non stick frying pan (28cm or 30cm) and heat it up a bit.

Pour the egg and wild herbs mixture into a pan, cover with a lid (glass lid with steam hole works very well if you have it) and cook on a gentle heat.

The frittata is ready and cooked when the underside is set and the egg mixture on the surface no longer has “runny and raw” consistency.

View fullsize Egg frittata with wild herbs 7a.jpg
View fullsize Egg frittata with wild herbs 10.jpg

Hold a plate upside-down over the pan and turn the two over together so that the frittata inverts on to the plate. Slide the frittata back into the pan and cook for a further minute or so.

Fresh herbs frittata can be eaten and enjoyed warm, room temperature or cold and will make a complete meal accompanied by some salad, fresh crunchy bread, soft cooked or grilled polenta and it also makes a great sandwich filler.

If you want to enjoy it Istrian style, pour yourself a small glass of red wine.

Just a thought

This type of frittata will keep in the fridge in an air tight container for about two days and is not suitable for freezing.

In this recipe, I have chosen to cook the frittata in a traditional way, on the stove with a lid, as my family has always used this method. However, if you are familiar cooking the frittata in the oven, and that is your preferred method, it is perfectly fine to do so.

Wine suggestion

Friuli Colli Orientali Ribolla Gialla DOC 2021 - Torre Rosazza

June 16, 2022 /tina oblak
fresh herbs, fresh wild herbs, wild herbs, fresh parsley, fresh basil, fresh sage, fresh wild dill, fresh wild garlic, stinging nettle, dandelion leaves, fresh mint, Frtalja z zelišči, Fritaia z zelišči, Fritaia de erbe, meadow herbs, edible plants, wild garlic leaves
Adriatic Recipe, All year round recipe, Appetizers, baked dish, bite-sized nibbles, breakfast, brunch, Canapés, dinner, Easy recipe, entrée course, family friendly dish, family friendly meal, Finger food, first course, first course dish, first course meal, foraging, Healthy, healthy mael, Istrian cuisine, Istrian dish, Istrian food, Istrian gastronomy, light meal, main course, main dish, Nutritious, Nutritious dish, Rustic dish, simple recipe, Slovenian cuisine, Slovenian food, Slovenian gastronomy, Small bites, Snacks, Spring dish, Spring recipe, Starters, supper, Vegetarian, Fresh herbs
Comment

Pork risotto Venetian inspired Recipe

Beans and Sardines
June 08, 2022 by tina oblak in Adriatic Recipe, All year round recipe, Autumnal dish, Autumnal recipe, child friendly dish, child friendly meal, dinner, Easy recipe, entrée course, family friendly dish, family friendly meal, first course, first course dish, first course meal, hearty dish, Istrian cuisine, Istrian dish, Istrian food, Istrian gastronomy, main course, main dish, Meat, recipe from Northern Ital, Risotti, Rustic dish, Spring dish, Spring recipe, Starters, supper, Venetian dish, Winter dish, Winter recipe, Risotto, simple recipe

Pork risotto is a perfect recipe when you want to rustle up a quick meal, using only a few fresh simple ingredients. This risotto is easy and uncomplicated to make, and is a delicious, creamy, and very comforting meal. I would not be surprised if it becomes your all time favourite risotto recipe.

The actual name for this pork risotto is Risotto all'Isolana that originated, and is famous in the area of Isola della Scala, situated between Verona and Mantua, in the region of Veneto in Italy. This is where Vialone Nano (type of short grain risotto rice) is widely cultivated. The authentic recipe for this risotto includes the use of two types of meat, a combination of veal and pork, and ground cinnamon, and this is how it is also cooked and eaten in Venice.

In Slovenian Istra, however, where I grew up, and where numerous dishes were inspired from Venetian cooking, it should be no surprise that an Istrian variation of this risotto was created using only pork and omitting ground cinnamon, as this exotic spice was difficult to get hold of, and was out of reach for most locals, and only used to make desserts and puddings.

This type of risotto is a risotto of my childhood and is the one that my mother used to prepare very often, and here I am sharing her recipe.

Ingredients

Serves 4

  • 400g pork shoulder steaks, trimmed off excessive fat and diced

  • 300g risotto rice (like Arborio, Vialone Nano or Carnaroli)

  • 1 medium onion (about 150g), peeled and finely chopped

  • 1 clove of garlic, peeled and crushed

  • 2 Tbsp extra virgin olive oil

  • 1 litre of beef or other meat stock (home made or good quality store bought stock)

  • few leaves of fresh sage, finely chopped

  • one sprig of fresh rosemary, needles removed and finely chopped

  • sea salt

  • black pepper

  • Parmiggiano Reggiano or Grana Padano cheese, finely grated, to serve (optional)

Method

Before starting making risotto have your boiling hot beef or other meat stock ready to hand for later.

Place in a pan extra virgin olive oil, finely chopped onions, crushed garlic and trimmed and diced pork shoulder steaks.

Add a pinch of salt, a bit of black pepper and gently fry on a fairly low heat until the onions become soft and translucent and the meat light brown in colour.

View fullsize Pork risotto Venetian inspired Recipe 2.jpg
View fullsize Pork risotto Venetian inspired Recipe 4.jpg

Add finely chopped herbs and about 100ml of water. With a wooden spoon mix and scrap all the bits and pieces from the bottom of the pan, deglaze and cook further for a few minutes on a gentle heat until all the water evaporates.

View fullsize Pork risotto Venetian inspired Recipe 5.jpg
View fullsize Pork risotto Venetian inspired Recipe 6.jpg

Add risotto rice and toast briefly, stirring constantly to avoid sticking to the pan.

View fullsize Pork risotto Venetian inspired Recipe 7.jpg
View fullsize Pork risotto Venetian inspired Recipe 8.jpg

Start gradually adding ladles of hot stock, one at a time, allowing the liquid to be absorbed before adding more.

Cook on a medium heat, stirring almost constantly, until the rice is cooked al dente, meaning fully cooked but still a bit firm when bitten, it should roughly take between 15-18 minutes for a risotto to be cooked.

Taste and adjust the seasoning with sea salt and black pepper, but this might not be necessary since the store bought stocks are, generally speaking, salty already.

Serve immediately while risotto is still hot and rather liquidy, smooth and runny or as the Italians would describe it, all'onda, meaning on the wave.

Ladle the risotto onto the plates and sprinkle with freshly grated Parmiggiano Reggiano or Grana Padano cheese.

Just a thought

Pork risotto is not suitable for freezing.

Wine suggestion

Marca Trevigiana Raboso IGT 2018 - Gatti

June 08, 2022 /tina oblak
Pork risotto, Venetian style posrk risotto, Istrian style pork risotto, meat based risotto, simple risotto, rustic risotto, Risotto all'Isolana, Arborio, Vialone Nano rice, Carnaroli rice, risotto rice, Rižota s svinjskim mesom
Adriatic Recipe, All year round recipe, Autumnal dish, Autumnal recipe, child friendly dish, child friendly meal, dinner, Easy recipe, entrée course, family friendly dish, family friendly meal, first course, first course dish, first course meal, hearty dish, Istrian cuisine, Istrian dish, Istrian food, Istrian gastronomy, main course, main dish, Meat, recipe from Northern Ital, Risotti, Rustic dish, Spring dish, Spring recipe, Starters, supper, Venetian dish, Winter dish, Winter recipe, Risotto, simple recipe
Comment

Green asparagus with pancetta and scrambled eggs Istrian Recipe

June 01, 2022 by tina oblak in Adriatic Recipe, breakfast, brunch, child friendly dish, child friendly meal, dinner, Easy recipe, entrée course, family friendly dish, family friendly meal, first course, first course dish, first course meal, hearty dish, Istrian cuisine, Istrian dish, Istrian food, Istrian gastronomy, main course, main dish, Rustic dish, Slovenian cuisine, Slovenian food, Slovenian gastronomy, Spring dish, Spring recipe, Starters, supper, Vegetarian, Vegetables

This extraordinarily simple and humble dish is really easy to make and truly sublime. It consists of cooking down the asparagus with some crunchy pancetta and then adding whisked eggs and cooking them to a creamy and smooth consistency, and when served with some fresh crunchy bread, this dish becomes a perfect choice for breakfast, brunch, lunch or dinner.

Green asparagus with pancetta and scrambled eggs (Umešana jajca s šparglji) or Green asparagus frittata with pancetta, know locally as Fritaja s špargljo, Fritata s šparglji or Fritaia coi sparesi, are probably the two of the most representative dishes and part of a unique gastronomic offers of Slovenian Istra, so much so, that a Festival called Šparga Fest is dedicated to these two dishes, traditionally using exclusively wild asparagus (divji šparglji).

Wild asparagus, like store bought ones, have a fairly short season, but are more aromatic and they are ready to be picked around Easter period and one can commonly find them growing on the south facing pieces of land close to dry stone walls, on the edges of the forests, among the bushes, and although they are free in Slovenia to be foraged and enjoyed, there is a legal limit of how much wild asparagus someone can pick for personal use and consumption.

This is not quite the case in the United kingdom, where I currently live, as I found out, according to Janet Lister (Wildlife and Countryside Advisor for the National Trust). Wild asparagus, once a plentiful plant, is now a very rare coastal plant that only grows and can only be found in a handful of counties (Glamorgan, Pembrokeshire, Cornwall and Dorset). In fact, it is in decline and classed as an “endangered” species on the GB Red List.

Wild asparagus

In the olden days, along the coats in Slovenia, these green delicacies were only known to the locals who used to invent and create dishes that were born out of necessity, with the ingredients available only during a particular season. This, once again, is a testimony and a reminder of the great resourcefulness of local people, who proved time and time again the ability to find clever ways to overcome hunger.

Nowadays, this type of asparagus has reached such a popularity that the inhabitants from inland Slovenia make a special day trip to the coast to enjoy this truly seasonal speciality.

Green asparagus with pancetta and scrambled eggs is a very much loved dish in many households, and so it is made very often. However, since it can only be made during asparagus season, it is also during this time that it is found in many informal family run restaurants.

I am sharing here the family recipe I grew up with, made with wild asparagus, which was picked by the family during many enjoyable and very memorable walks in nature. In this recipe I have replaced wild asparagus for the cultivated alternative, and you can also transform this recipe into a vegetarian and vegan friendly variation by using and frying the onions instead of pancetta, bacon or lardons. For this recipe you can also use fresh white asparagus.

View fullsize Green Asparagus with pancetta and scrambled eggs Istrian Recipe 3.jpg
View fullsize Green Asparagus with pancetta and scrambled eggs Istrian Recipe 5.jpg

Ingredients

Serves 4

  • about 500g fresh green asparagus

  • 180g roughly, pancetta, bacon or lardons, finely sliced

  • 2 Tbsp extra virgin olive oil

  • 8 fresh eggs

  • sea salt

  • black pepper

Method

Wash the asparagus under cold running water and chop each asparagus into smaller sections.

Put extra virgin olive oil in a fairly large frying pan, add finely sliced pancetta, bacon or lardons and fry until fully cooked and slightly crispy.

Add chopped asparagus and cook for a few minutes together with pancetta, until they soften a bit and deepen in colour.

Add small amounts of water, about 50ml at a time, this will help to cook down the asparagus.

Cook the asparagus until they are fully cooked, deepen in colour, and tender but not overcooked and falling apart.

View fullsize Green Asparagus with pancetta and scrambled eggs Istrian Recipe 13.jpg
View fullsize Green Asparagus with pancetta and scrambled eggs Istrian Recipe 14.jpg

Cook the asparagus until they are fully cooked and tender but not overcooked and falling apart.

Crack the eggs into a bowl, add sea salt, black pepper and whisk.

View fullsize Green Asparagus with pancetta and scrambled eggs Istrian Recipe 10.jpg
View fullsize Green Asparagus with pancetta and scrambled eggs Istrian Recipe 12.jpg

Take the pan off the heat and pour the eggs over the asparagus mixture.

Put the pan back on the heat, stir and cook the eggs to the desired consistency stirring with a wooden spoon or spatula, lifting and folding the egg and asparagus mixture from the bottom of the pan.

Cook the eggs until they are softly set and slightly runny in places or cook further until they reach the desired consistency.

Taste and adjust the seasoning with sea salt and black pepper.

Sprinkle with roughly chopped fresh parsley, if desired, and serve hot immediately with fresh crunchy bread.

Just a thought

This dish is not suitable for freezing.

Cooked asparagus and pancetta mixture, without adding the eggs, makes a fantastic base for risotto.

You can also turn cooked asparagus and pancetta base into a scrumptious sauce for a pasta dish by simply adding a bit of single cream to it and dilute it, if it gets too thick, with a bit of water where you cooked the pasta.

Wine suggestion

Lugana DOC "Le Fornaci" 2021 - Tommasi

June 01, 2022 /tina oblak
green asparagus, cultivated green asparagus, wild asparagus, scrambled eggs with asparagus, scrambled eggs, pancetta, bacon, lardons, asparagi verdi con pancetta e uova strapazzate, Umešana jajca s šparglji, divji šparglji, Umešana jajca z divjimi šparglji
Adriatic Recipe, breakfast, brunch, child friendly dish, child friendly meal, dinner, Easy recipe, entrée course, family friendly dish, family friendly meal, first course, first course dish, first course meal, hearty dish, Istrian cuisine, Istrian dish, Istrian food, Istrian gastronomy, main course, main dish, Rustic dish, Slovenian cuisine, Slovenian food, Slovenian gastronomy, Spring dish, Spring recipe, Starters, supper, Vegetarian, Vegetables
Comment

Pan-fried potatoes with onions and pancetta Istrian Recipe

Beans and Sardines
May 25, 2022 by tina oblak in Adriatic Recipe, All year round recipe, Autumnal dish, Autumnal recipe, brunch, child friendly dish, child friendly meal, dinner, Easy recipe, family friendly dish, family friendly meal, Istrian cuisine, Istrian dish, Istrian food, Istrian gastronomy, Root vegetables, Rustic dish, Side Dishes, Slovenian cuisine, Slovenian food, Slovenian gastronomy, Spring dish, Spring recipe, supper, Vegetables, Winter dish, Winter recipe, hearty dish

If you are searching for a slightly different potato side dish from the usual and delicious mashed or roast potatoes, look no further.

This modest, simple and humble, but hearty and scrumptious potato side dish, pairs perfectly with just about anything, but it is the most loyal companion to meat or vegetable based dishes.

This recipe consists of boiling the potatoes, then cutting them into small pieces and pan-fry them together with salty and crispy bits of pancetta and caramelised, sweet and mellow onions. During this process the light crust will form at the bottom of the pan and when the mixture gets broken into pieces and mixed, you end up with the combination of smooth, creamy potatoes and brown crispy pieces of potato crust, heavenly texture! During this pan-frying phase, the stock gets gradually added for extra flavour and moisture.

You really cannot find a more Slovenian dish than this. It is cooked recurrently in every household and found regularly on the menus (Pražen krompir) in a family run restaurants, nurseries and school canteens up and down the country. Traditionally it is served with roasted meats, sausages and sauerkraut, boiled sheen of beef cooked in broth or simply eaten on its own with a salad or fried eggs.

I grew up with this dish and I am sharing with you my mum's recipe, a variation developed on the coastal part of Slovenia (Kromper v teći, Patate in tecia) where pancetta and olive oil is used instead of lard and pork cracklings, still a very popular choice, but most commonly perhaps ingredients used in inland Slovenia.

This potato dish really unites all the regions of Slovenia, it is a part of very strong gastronomic culture in Istria and Dalmatia (in Croatia) and stretches across and beyond the “borders” with Italy.

This very popular and very much loved potato side dish is traditional in the whole region of Friuli- Venezia Giulia in Italy, where the city of Trieste with its inhabitants particularly prides itself for exceptionally good Patate in tecia.

It is in the dialect of this region and the Veneto region that the word tecia has a double meaning; it can indicate a type of a pan that would normally be used to cook this dish and it can refer to a method of slow cooking on a fairly low heat.

Other recipes and dishes can have a word tecia in them, so for example you can have Zucchine in tecia (Pan- fried courgettes) or Verze in tecia (Pan-fried Savoy cabbage) etc.

This dish, made from scratch, is incredible in its simplicity, but it is also made and can be prepared using leftover boiled potatoes and no vegetarian or vegan friend or family member will be excluded from the dinner table as you can cook this dish by omitting the meaty element and using vegetable broth or stock.

Ingredients

Serves 4

  • 1kg of potatoes

  • 100g unsmoked pancetta or bacon, cut into small strips or finely diced, bacon lardons or pork cracklings

  • onions (about 240g), peeled and finely sliced

  • 2 Tbsp extra virgin olive oil or lard

  • sea salt

  • black pepper

  • 200ml meat or vegetable broth or stock (you can make a simple stock using a good quality instant vegetable or meat stock powder)

  • flat leaf parsley, roughly chopped, for garnish

Method

Wash whole unpeeled potatoes under the cold running water and put them in a big pot of boiling water.

Add sea salt and gently boil the potatoes until fully cooked, this will depend on the size of the potatoes you are using.

Drain cooked potatoes and allow to cool.

Peel the potatoes and slice or cut them into irregular shape smaller chunks, set aside.

Put the olive oil or lard, if using, in a fairly large frying pan.

Add finely sliced onions and pancetta and gently fry on a fairly low heat until the onions become golden brown in colour, soft and caramelised, and pancetta fully cooked and slightly crisp. This might take around 40 minutes but it is important not to rush this phase of the recipe as the onions might not get as sweet.

View fullsize Pan-fried potatoes with onions and pancetta Istrian Recipe 4.jpg
View fullsize Pan-fried potatoes with onions and pancetta Istrian Recipe 5.jpg

Turn the heat up a bit, add pieces of potatoes and season with sea salt and black pepper (bear in mind that the use of pancetta and broth in this recipe, will partially provide the seasoning).

Cook the potatoes with the onion and pancetta mixture and break down a bit bigger pieces of potatoes with the back of the wooden spoon or or a fork, avoiding to end up with mashed potatoes, you still want bits of potatoes in the texture.

Cook for a few minutes allowing the mixture to catch a bit at the bottom of the pan forming a light crust, but try and avoid to get it burnt (although if it does burn slightly it is not the end of the world).

Scrape the layer of golden brown bits and break the crust with the wooden spoon, stir the mixture.

Cook further for a few minutes until the crust forms again, break it and stir.

Repeat the process a few times adding small amounts of broth or stock to avoid potatoes getting too dry.

The whole idea behind repeating this process of allowing the crust to form, then breaking it and stirring the mixture is to end up with a final dish that will have a combination of crusty and crispy bits of potatoes that are stirred back, mixed with the rest of soft/mushy potatoes, caramelised onions and pancetta.

View fullsize Pan-fried potatoes with onions and pancetta Istrian Recipe 6.jpg
View fullsize Pan-fried potatoes with onions and pancetta Istrian Recipe 7.jpg

Taste, adjust the seasoning with sea salt and black pepper.

Sprinkle with roughly chopped fresh flat leaf parsley and serve hot.

Just a thought

This dish is not suitable for freezing.

When reheating this dish you will need to add some moisture back, as it gets quite dry when cooled down and kept in a fridge, adding more stock or broth.

You can cook this dish with leftover boiled potatoes or using left over mashed potatoes.

Wine suggestion

Friuli Venezia Giulia Friulano DOC "San Pietro" 2020 - I Clivi

May 25, 2022 /tina oblak
potato dish, rustic potato meal, potato side dish, Pan-fried potatoes with onions and pancetta, pan-fried potatoes woth onions and bacon, pan-fried potatoes with onions and bacon, Patate in tecia, Kromper v teći, Pražen krompir, potatoes, pancetta, bacon, lardons
Adriatic Recipe, All year round recipe, Autumnal dish, Autumnal recipe, brunch, child friendly dish, child friendly meal, dinner, Easy recipe, family friendly dish, family friendly meal, Istrian cuisine, Istrian dish, Istrian food, Istrian gastronomy, Root vegetables, Rustic dish, Side Dishes, Slovenian cuisine, Slovenian food, Slovenian gastronomy, Spring dish, Spring recipe, supper, Vegetables, Winter dish, Winter recipe, hearty dish
Comment

Sea Bream broth Istrian Recipe

Beans and Sardines
May 18, 2022 by tina oblak in Adriatic Recipe, All year round recipe, Appetizers, Autumnal dish, Autumnal recipe, Celebratory dish, child friendly dish, child friendly meal, dinner, Easy recipe, entrée course, family friendly dish, family friendly meal, first course, first course dish, first course meal, Fish & Seefood, fish starter, Healthy, healthy mael, Istrian cuisine, Istrian dish, Istrian food, Istrian gastronomy, light fish course, light meal, main course, main dish, main fish course, main fish meal, Nutritious, Nutritious dish, Rustic dish, Slovenian cuisine, Slovenian food, Slovenian gastronomy, Soups, Spring dish, Spring recipe, Starters, supper, Winter recipe, winter soup

This clear fish broth is very light and has a very pleasant, delicate and mild fish flavour, it is very nutritious and incredibly easy to make as it consists of cooking fresh whole fish in plenty of water together with the onions, celery, bay leaves, parsley, carrots, black peppercorns and seasoned with sea salt, then strained and served hot with fillets of fish and some cooked white rice if desired.

This fish broth can be as rustic or as elegant and sophisticated as you want it to be, it is a very family friendly dish and perfect for any occasion.

It would be normally eaten as a hot starter, however, you can turn this clear soup into a bit more substantial main course by cooking some white rice separately and add it into a broth, and sprinkle some freshly grated Parmiggiano Reggiano (or Padano) cheese on top, which is a very customary thing to do along the Slovenian coast, where this type of soup is very much loved by the locals, cooked recurrently in the households and found on menus in fish restaurants (Ribja juha).

This type of broth would be most commonly cooked using fresh whole Sea bream or Sea bass, but other type of fish can be used like Red mullet, John Dory, Small red scorpionfish and similar fish that have a delicate flavour, and you can also mix and match the fish that you like and found available fresh when deciding to cook the broth.

Fish that is quite strong in taste and quite oily, like mackerel, for example, is not the best choice for the broth, also fish fillets are not particularly recommended (although you can use them for practical reasons) as they will give you a slightly blander tasting broth, and that is because the real flavour comes out of the heads and the bones of the fish.

Recipe for this broth is timeless, it has been cooked and loved by the whole family since I was very little and really does take me right back to my childhood when my family used to run a small fish based restaurant.

This type of fish broth would be cooked in large quantities as it is also a fantastic base to use for sauces and for fish and seafood risotto, as it adds bags of extra flavour.

Ingredients

Serves 4

  • fresh whole sea bream, one big in size or a few smaller ones (total weight roughly between 400-600g), cleaned, scaled and gutted

  • 1 medium onion, peeled and halved

  • 1 medium carrot, peeled

  • 1 fresh celery stick, washed (with or without the leaves on)

  • 2 fresh bay leaves, fresh or dry

  • 2 branches of fresh flat leaf parsley, washed (plus some extra when serving the dish)

  • sea salt

  • few black peppercorns

  • extra virgin olive oil, for drizzling, optional

  • white rice, optional

  • Parmiggiano Reggiano or Padano cheese, freshly grated, optional

Method

Place sea bream in a pan or stock pot large enough to accommodate the fish lying flat (if using more than one sea breams they can overlap a bit but avoid laying them one on top of the other).

Add onion, carrot, celery stick, bay leaves, fresh parsley and a pinch of salt.

Add 2 litres of cold water and bring to boil.

Lower the heat and gently cook for about 1 hour with the lid partially uncovered.

Check occasionally so the broth does not boil too vigorously (this can break the fish into pieces) and skim off any scum if it forms.

Cook the rice as instructed on the pack, if using to add to the broth (a small handful of rice per person).

Carefully remove the fish from the pan, the use of slotted or unslotted turner spatula on each end of the fish will help to lift the fish out of the pan and place it on a big plate or chopping board.

Allow the fish to cool a bit to a manageable temperature.

Clean sea bream by removing the tails, heads, the skin and all the bones in order to obtain small fillets of fish.

Put the fillets in a dish and cover with the aluminium foil to prevent drying and set aside for later use.

Pour the broth through a fine strainer or sieve into another pan.

View fullsize Sea Bream broth Istrian Recipe 12.jpg
View fullsize Sea Bream broth Istrian Recipe 13.jpg

Add previously cleaned pieces of fish (small fillets) back into a pan with a filtered broth.

Discard bits and pieces caught in the strainer or in the sieve.

Taste and adjust the seasoning with sea salt.

Ladle the broth into serving soup plates or bowls, sprinkle with roughly chopped fresh parsley, drizzle of extra virgin olive oil, add a small handful of cooked rice if desired, and serve hot, immediately with some fresh crunchy bread.

Just a thought

Freshly cooked fish broth will keep in the fridge for a few days in the airtight container and is suitable for freezing.

You can cook this broth using only the heads and the bones of the fish and use the fillets for a different recipe or make a second course with them.

Wine suggestion

Vino Bianco "Turno Belo" - Movia

May 18, 2022 /tina oblak
Clear Sea Bream broth, clear fish soup, Sea Bream, Sea Bass, Red mullet, John Dory, Small red scorpionfish, Ribja juha, Cista ribja juha, Brodo di pesce, Brodo di branzino
Adriatic Recipe, All year round recipe, Appetizers, Autumnal dish, Autumnal recipe, Celebratory dish, child friendly dish, child friendly meal, dinner, Easy recipe, entrée course, family friendly dish, family friendly meal, first course, first course dish, first course meal, Fish & Seefood, fish starter, Healthy, healthy mael, Istrian cuisine, Istrian dish, Istrian food, Istrian gastronomy, light fish course, light meal, main course, main dish, main fish course, main fish meal, Nutritious, Nutritious dish, Rustic dish, Slovenian cuisine, Slovenian food, Slovenian gastronomy, Soups, Spring dish, Spring recipe, Starters, supper, Winter recipe, winter soup
Comment

White asparagus with hard boiled eggs Venetian style Recipe

Beans and Sardines
May 11, 2022 by tina oblak in Adriatic Recipe, Appetizers, brunch, child friendly dish, child friendly meal, dinner, Easter dish, Easter recipes, Easy recipe, family friendly dish, family friendly meal, first course, first course dish, first course meal, Healthy, healthy mael, Istrian cuisine, Istrian dish, Istrian food, Istrian gastronomy, light meal, main course, main dish, Nutritious, Nutritious dish, recipe from Northern Ital, Rustic dish, Salads, Side Dishes, Slovenian cuisine, Slovenian food, Slovenian gastronomy, Spring dish, Spring recipe, Starters, Vegetable side dish, Vegetables, Vegetarian, Venetian dish

This exquisite recipe is so easy and quick to prepare you can hardly call it a recipe. It consist of gently boiling the asparagus and dress them with oil, sea salt and pepper to allow the delicate and mild sweet taste of white asparagus to be fully enhanced and appreciated. Asparagus prepared this way can be served as a starter, main course or as a side dish and is a great meal for vegetarians.

White asparagus grow with the absence of sunlight which prevents the photosynthesis to take place and therefore stops the asparagus turning green in colour.

Back home, where I come from, on the Slovenian coast, this dish, (Beli beluši s trdo kuhanimi jajci / Beli šparglji s trdo kuhanimi jajci) among other asparagus dishes, is very popular during the fairly short asparagus season and the locals make the best of it.

My nona shared with me a very touching story about white asparagus. She very modestly confessed to me that when she was a little girl, her father was the first farmer in the village (Marezige), and the first in the surrounding area to grow white asparagus. She also told me the story that when the asparagus were almost ready to be harvested, he would guard them during the night as these vegetables were very precious source of income for the family and were almost never consumed for domestic use. Only a very small amount of the asparagus, the ones that broke during the harvest, were used by the family for cooking, and this was a real treat for everyone.

White asparagus were, and still are, more difficult and more laborious to grow, therefore they fetch a higher price when they are sold on the market. The asparagus would be taken by my great grandmother to Trieste, just across the border, a big port city with Imperial style cafes, and important theatres where a fairly high number of wealthy noble families used to live, families that could easily afford to buy this type of vegetable and appreciate its gastronomic use.

My nona also told me that the locals used to say that the white asparagus were so cherished they were considered to be vegetable fit for the queen.

Even nowadays, white asparagus, although more accessible, are still pricier compared to the green ones, and they are enjoyed as a “festive food” especially around Easter celebrations when they are in season.

There is a very close geographical proximity between my home town and the Italian region of Veneto, where this flavoursome and elegant dish is typical, (Asparagi bianchi con uova sode alla Veneta) and where in the foothills of the town of Bassano, and along the whole stretch of the river Brenta, the best, renowned, plump white asparagus are produced in terms of size and flavour.

I am sharing here this simple and very much loved family recipe which traditionally calls for white asparagus, and is a very much anticipated vegetable in the spring season. However, if you have difficulty buying them, then just use green asparagus, the dish will be equally delicious.

Ingredients

Serves 4

  • 1kg white asparagus (you can use green asparagus)

  • 8 eggs, soft or hard boiled and quartered, sliced or chopped

  • extra virgin olive oil (sunflower oil or a neutral tasting oil of your preference)

  • sea salt

  • black pepper

  • red or white vinegar, optional

Method

First of all prepare the asparagus. Chop off the ends which are normally hard, woody and fibrous.

With the potato peeler, peel the asparagus starting from just underneath the tips.

View fullsize White asaparagus 4.jpg
View fullsize White asaparagus 6.jpg

Place the asparagus in a pan with a small amount of boiling water.

Gently boil for about 10-15 minutes or until just tender. Test by inserting the tip of a small sharp knife into the end of the asparagus as this part takes the longest to cook. The cooking times will vary according to the size and thickness of the asparagus.

With a slotted spoon gently remove the asparagus from the pan and place them, one next to each other, on paper kitchen towel. Allow the asparagus to drain and cool.While removing the asparagus be careful not to break the tips, they cook quicker than the ends and will be much softer, if they do break, however, it is not the end of the world, they will just not look quite as nice on the plate.

Alternatively, you can steam the asparagus or cooked them tied in a bundle and placed upright in a tall pot with two thirds of their length immersed in cold water. Bring the water to boil and cook for about 10-15 minutes (the steam will cook the tips). Remove and untie the bundle.

Transfer the cooked asparagus and lay them on a serving plate.

Place the soft or hard boiled eggs on the top or between the asparagus.

Dress liberally with oil, sea salt and black pepper.

Serve with crunchy bread to soak up the juices.

Just a thought

You can use the water in which you cooked the asparagus as a stock. Just add the ends you cut off the asparagus and the peels and add them to the water, gently boil for about half and hour and strain.

You will end up with a delicious and delicate asparagus flavoured stock to be used for asparagus risotto, minestrone primavera or asparagus soup.

If you are not using the stock straight away it is perfect for freezing.

Wine suggestione

Collio Sauvignon DOC 2020 - Schiopetto

May 11, 2022 /tina oblak
fresh white asparagus, fresh green asparagus, white asparagus, green asparagus, dressed white asparagus, dressed green asparagus, hard boiled eggs, soft boiled eggs, Asparagi bianchi e uova sode, Sparglji, Beli beluši s trdo kuhanimi jajci, Beli šparglji s trdo kuhanimi jajci, Asparagi bianchi con uova sode alla Veneta
Adriatic Recipe, Appetizers, brunch, child friendly dish, child friendly meal, dinner, Easter dish, Easter recipes, Easy recipe, family friendly dish, family friendly meal, first course, first course dish, first course meal, Healthy, healthy mael, Istrian cuisine, Istrian dish, Istrian food, Istrian gastronomy, light meal, main course, main dish, Nutritious, Nutritious dish, recipe from Northern Ital, Rustic dish, Salads, Side Dishes, Slovenian cuisine, Slovenian food, Slovenian gastronomy, Spring dish, Spring recipe, Starters, Vegetable side dish, Vegetables, Vegetarian, Venetian dish
Comment

Venetian-style Calf's liver with caramelised onions Recipe

Beans and Sardines
May 04, 2022 by tina oblak in Adriatic Recipe, All year round recipe, Appetizers, Autumnal dish, Autumnal recipe, bite-sized nibbles, brunch, Canapés, dinner, Easy recipe, family friendly dish, family friendly meal, Istrian cuisine, Istrian dish, Istrian food, Istrian gastronomy, main course, main dish, main meat course, Meat, recipe from Northern Ital, Rustic dish, Slovenian cuisine, Slovenian food, Slovenian gastronomy, Small bites, spreads, supper, Venetian dish, Winter dish, Spring dish, Spring recipe

Venetian style liver with onions, Fegato alla Veneziana, consists of thinly sliced liver cooked very quickly and combined with soft, mellow, sweet and caramelised onions, and gently sprinkled with fresh parsley, with white wine being sometimes added to balance the flavours.

It is nowadays acclaimed dish worldwide and it is one of the most classic and traditional Venetian dishes, but is has very humble and modest origins as it was created out of necessity and hunger which originally drove people to eat inner organs of fowls and beasts with great enjoyment.

If you ever had a chance to visit Venice and wondered around the calli (very narrow streets in Venice) you will be able to notice that just about every authentic family run restaurant will display on its menu Fegato alla Veneziana.

Venetian-style calf's liver is a recipe that not only is a staple dish in Venice, but also in the whole region of Veneto. It is also so popular “across the border” in Slovenian Istra, where I come from, that it has become part of a very strong gastronomic tradition there (Polenta z jetrci, Palenta z jetrci or Polenta e fegadini). This is quite understandable since its local recipes and eating habits were significantly shaped by the very lengthy presence of The Most Serene Republic of Venice in the region.

This dish, in its simplicity, when cooked properly, is simply divine, and might be enjoyed even by those who normally are not so keen on liver and thought they did not like it, and that is simply because organ meats unfortunately are very often not very well prepared and overcooked, a process which toughens the texture of the meat and accentuates the “mineral, or irony” taste of the organ meat.

Calf liver, compared to other types of liver, is delicate in flavour, tender and has a very high content of iron.

I am sharing here the recipe that has been in the family since forever - so, just try it, and I am sure that this dish will be nothing like any other liver dishes you might have had in the past and disliked. I encourage you to be brave and open minded, but if your aversion to organ meats is really strong you might just want to skip this post.

Ingredients

Serves 4

  • 500g very fresh calf's liver, trimmed and sliced into thin strips

  • 500g onions, peeled and thinly sliced

  • 8 Tbsp extra virgin olive oil (you can use neutral tasting oil of your choice or butter or a combination)

  • 100 ml white wine (optional)

  • handful of fresh flat leaf parsley (about 5-10g), roughly chopped

  • sea salt

  • black pepper

Method

If you are bothered by the slight bitter flavour from the liver a great way of reducing it, is to soak the liver in a dish or bowl of milk for about 1 hour, or overnight. Discard the milk after the soaking process.

Put extra virgin olive oil and thinly sliced onions in a fairly large frying pan and add a generous pinch of sea salt.

Slowly cook the onions on a gentle heat, stirring occasionally, until very soft, translucent, well wilted and caramelised. In order to prevent the onions getting too much colour and brown regulate the heat and maybe add a bit of water or wine to help the onions to wilt well and caramelize better. Be patient, this process might take up to 40minutes but it is crucial for the success of this dish.

View fullsize Venetian-style Calf's liver with caramelised onions Recipe 3.jpg
View fullsize Venetian-style Calf's liver with caramelised onions Recipe 4.jpg

When the onions are cooked completely and ready push them on the side of the frying pan and turn up the flame. Add the strips of liver and over high heat sauté and cook quickly just for a few minutes, mixing and turning liver strips regularly, until they loose their raw colour. Mix the onions and liver together.

View fullsize Venetian-style Calf's liver with caramelised onions Recipe 5.jpg
View fullsize Venetian-style Calf's liver with caramelised onions Recipe 6.jpg

Add finely chopped parsley, taste and adjust the seasoning with sea salt and black pepper.

Transfer cooked liver onto a serving plate, lightly sprinkle with roughly chopped fresh parsley and serve warm immediately.

If using white wine, deglaze the frying pan by pouring a good splash of wine and scrape up with the wooden spoon all the bits that have formed. Reduce the wine to the consistency of a syrup and pour over the liver.

Serve on soft cooked creamy polenta, grilled polenta, mashed potatoes or simply a nice crunchy bread to soak up the juices.

Just a thought

If you happen to have some left over cooked livers you can make a very delicious and economic liver pâté.

Simply weight the amount of left over livers, chop them very finely (if you like small bits in your pâté) and add the same same amount of very soft unsalted butter. Mix together and here is your Venetian style liver pâté, delicious spread on crostini (toasted bread).

If you prefer the pâté with a very smooth consistency place both livers and butter into a small food processor and mix until the mixture resembles smooth paste (you can also use a hand blender).

Wine suggestion

Valpolicella Ripasso Classico Superiore DOC 2019 - Speri

May 04, 2022 /tina oblak
Calf's liver, Venetian style calf's liver, Istrian style calf's liver, Fegato alla veneziana, Polenta e fegadini, Polenta z jetrci, Palenta z jetrci, Calf's liver with soft cooked polenta, Calf's liver with polenta
Adriatic Recipe, All year round recipe, Appetizers, Autumnal dish, Autumnal recipe, bite-sized nibbles, brunch, Canapés, dinner, Easy recipe, family friendly dish, family friendly meal, Istrian cuisine, Istrian dish, Istrian food, Istrian gastronomy, main course, main dish, main meat course, Meat, recipe from Northern Ital, Rustic dish, Slovenian cuisine, Slovenian food, Slovenian gastronomy, Small bites, spreads, supper, Venetian dish, Winter dish, Spring dish, Spring recipe
Comment

Green Asparagus Risotto Venetian style Recipe

Beans and Sardines
April 27, 2022 by tina oblak in Adriatic Recipe, child friendly dish, child friendly meal, dinner, Easy recipe, family friendly dish, family friendly meal, first course, first course dish, first course meal, foraging, Healthy, healthy mael, Istrian cuisine, Istrian dish, Istrian food, Istrian gastronomy, light meal, main course, main dish, Nutritious, Nutritious dish, recipe from Northern Ital, Risotti, Rustic dish, Slovenian cuisine, Slovenian food, Slovenian gastronomy, Spring recipe, Starters, supper, Vegan, Vegetables, Vegetarian

Green asparagus risotto with its pale green colour, is elegant in appearance, sweet and nutty taste of the asparagus makes this classic risotto delicate, simple, and clean in flavour, but a surprisingly tasty rice dish. It is creamy and very satisfying. This risotto celebrates the best of spring vegetable, making it a perfect choice for a quick week night dish.

The preparation and cooking of this risotto is particularly simple and quick, perfect for just about any occasion. It covers informal and more rustic eating settings, where risotto is served in a bowl and eaten with a spoon, as well as more formal settings, where risotto can be placed onto big white plates with maybe Parmiggiano Reggiano shavings, which can impress your slightly more demanding quests.

Asparagus risotto is very popular on the Slovenian coast, where I was born and grew up, and this is no surprise as the Veneto (region in Northern Italy) is where the greatest variety of risotto dishes can be found, and is a short car drive from my home town.

Asparagus back home is a very much celebrated spring vegetable and used to make a lot of different dishes, minestrone primavera, asparagus frittata, cooked asparagus with hard boiled eggs, sautéed asparagus with scrambled eggs, just to mention a few. Very frequently the bought variety of asparagus would be replaced by the wild variety since like mushrooms, it is also found in nature (without any concern about poisonous varieties!), and is very keenly foraged by the locals during their pick season in mid spring.

As a child I have vivid memories going with my mother to the market and seeing beautifully displayed bunches of asparagus which were than purchased to make the risotto.

I am sharing here my mother's recipe for the asparagus risotto with which I grew up, she told me that when I was little I used to pile a substantial amount of cheese on my risotto, making a mountain of cheese, apparently, I loved it that way, maybe not so appealing now...

Ingredients

Serves 4

  • 200-300g green asparagus

  • 300g risotto rice (like Vialone Nano, Arborio or Carnaroli)

  • 1 onion or shallots (about 80g) peeled and finely chopped

  • 4 Tbsp extra virgin olive oil

  • 1 litre hot vegetable or chicken stock (you can use Instant vegetable or chicken stock powder)

  • fresh flat leaf parsley, a handful (about 6g), finely chopped (plus some extra for garnish, optional)

  • sea salt

  • Parmiggiano Reggiano cheese, finely grated (about a generous handful or to taste)

Method

Before starting making risotto have your boiling hot vegetable or chicken stock ready to hand for later.

Wash the asparagus and pat dry them with the kitchen paper towel.

Cut off the tips of the asparagus and set aside.

Chop the stalk sections of the asparagus.

Put extra virgin olive oil in a pan, add finely chopped onions, a pinch of sea salt and sauté for a few minutes on a gentle heat until soft.

View fullsize Asparagus risotto 8.jpg
View fullsize Asparagus risotto 10.jpg

Add chopped sections of the asparagus, not the tips, and cook for a few minutes together with the onions until they soften a bit and deepen in colour

View fullsize Asparagus risotto 11.jpg
View fullsize Asparagus ristotto 12.jpg

Add the rice and toast for a bit, stirring constantly to avoid sticking to the pan.

View fullsize Asparagus ristotto 13.jpg
View fullsize Asparagus ristotto 14.jpg

Pour or ladle ½ litre (500ml) of hot vegetable or chicken stock and add chopped parsley.

Cook until the first amount of liquid is absorbed then start gradually adding ladles of hot stock, one at a time, allowing the liquid to be absorbed before adding more.

Cook on a medium heat, stirring almost constantly, until the rice is cooked al dente, meaning fully cooked but still a bit firm when bitten, it should roughly take between 15 -18 minutes for a risotto to be cooked.

Add the tips of the asparagus a few minutes before the end of cooking time.

Taste and adjust the seasoning with sea salt, but this might not be necessary since the stocks that come from the store generally speaking are salty already!

Serve immediately while the risotto is still hot and rather liquidy.

Ladle the risotto onto the plates, sprinkle with freshly grated Parmiggiano Reggiano cheese and garnish with some roughly chopped fresh parsley.

Just a thought

For even creamier texture, you can finish cooking the asparagus risotto with a typical Italian mantecare phase. Remove the saucepan from the heat, add grated cheese and a bit of cold butter or cream to the risotto when is almost finished and stir with a wooden spoon quite vigorously in order to develop that delicious creamy texture.

April 27, 2022 /tina oblak
green asparagus, green asparagus risotto, risotto rice, Vialone Nano, Arborio, Carnaroli, Venetian style asparagus risotto, wild asparagus
Adriatic Recipe, child friendly dish, child friendly meal, dinner, Easy recipe, family friendly dish, family friendly meal, first course, first course dish, first course meal, foraging, Healthy, healthy mael, Istrian cuisine, Istrian dish, Istrian food, Istrian gastronomy, light meal, main course, main dish, Nutritious, Nutritious dish, recipe from Northern Ital, Risotti, Rustic dish, Slovenian cuisine, Slovenian food, Slovenian gastronomy, Spring recipe, Starters, supper, Vegan, Vegetables, Vegetarian
Comment

Dandelion Salad with hard boiled eggs, boiled potatoes and crispy pancetta Recipe

Beans and Sardines
April 20, 2022 by tina oblak in Adriatic Recipe, Appetizers, dinner, Easter, Easy recipe, entrée course, Healthy, healthy mael, Istrian cuisine, Istrian dish, Istrian food, Istrian gastronomy, light meal, main course, main dish, Nutritious, Nutritious dish, Rustic dish, Salads, Side Dishes, Slovenian cuisine, Slovenian food, Slovenian gastronomy, Starters, Vegetarian, Vegan, Spring recipe, Spring dish, foraging

This very healthy and nutritious but incredibly tasty salad is made from young and tender dandelion leaves and enriched with hard boiled eggs, cooked potatoes and crispy pancetta that give us extra energy for the long spring walks in the nature and for completing all those chores in the garden and inside the house.

This salad can also easily become vegetarian and vegan friendly by simply omitting some of the ingredients.

Dandelion leaves, with their verdant colour, can be eaten cooked (customary on the Slovenian coast) or raw, they have a pleasant bitter taste, a bit like peppery rocket salad, and they should be picked small and tender before the plant blooms, then they turn seriously bitter.

When foraging for dandelion try to avoid the areas close to busy roads, lanes popular with dog walkers (no need to go into too much detail as to why), and fields close to farms that have potentially been sprayed with pesticides or fertilizers and antibiotics which get absorbed into the plant.

View fullsize Dandelion Salad 10.jpg
View fullsize Dandelion Salad 9.jpg

To pick dandelion you can use a small knife and cut around the plant root and then pull it out of the ground or just simply tear the leaves off the plant.

Dandelion is very rich in vitamins and minerals, very good for our body, and yes it might be a bit bitter, but it is this bitter substance in the dandelion leaves that helps to optimise the function of the gallbladder and the liver. They contain a lot of potassium which is very beneficial for the kidneys, and iron which enriches our blood and helps to purify it. .

This is of no coincidence since dandelion salad is very popular in early spring (around Easter), not only because this is the right time to pick the leaves, but also because this salad is also traditionally eaten with eggs, a symbol of purity, rebirth, and rejuvenation.

In Slovenia, where I come from, picking dandelion leaves in spring time during long walks and returning home with a free lunch or dinner is a great pastime, and almost an obsession.

But there is another tradition that is deeply rooted and much anticipated, especially with the children. It is colouring and decorating Easter eggs, and lots of them, they would be beautifully displayed in small wicker baskets and than used, yes, you guessed it, in the dandelion salad and of course other dishes.

I am sharing here the family recipe, that includes the use of crunchy pancetta or ocvirki (very commonly used in Slovenia, they are small pork cracklings in lard, usually home made, kept in glass jars in the fridge).

A small amount (about 2Tbsp) of pork cracklings in lard will be placed in a small frying pan and warmed up, by doing so, the lard melts and the cracklings get very crunchy, all of this would then be added to the dandelion salad substituting the oil and the pancetta.

If you never have this salad before, try it and play around with the ingredients to suit your taste, keep the ingredients you like and omit the ones you are less keen on. You can also forage a smaller amount of dandelion leaves than indicated in this recipe and mix with other salad leaves.

Have a go and make this super salad, next time you look at the dandelion you will not see it as a annoying weed...

Ingredients

Serves 4

  • 100-150g freshly picked young dandelion leaves, trimmed and picked through

  • 4 eggs, hard boiled

  • potatoes (about 400g) cooked and peeled (you can use baby potatoes or new potatoes with the skin on)

  • 150g pancetta rashers (sliced pancetta) or streaky bacon, smoked or unsmoked

  • extra virgin olive oil (or other type if prefer)

  • vinegar (I used balsamic vinegar, you can use red or white wine vinegar or cider vinegar works well too)

  • 1 clove of garlic, peeled and very finely chopped, optional (I did not use garlic I this recipe)

  • sea salt

  • black pepper

Method

Start by preparing all the ingredients needed for the salad.

Place the potatoes in a pot, cover with water, bring to boil and simmer until cooked.

Cut pancetta rashers or streaky pancetta into small pieces, place them in a small pan and gently fry until very crisp. Remove them from the pan, and place on to kitchen paper so they can drain, and the excess fat can be absorbed. Let the rashers cool and set them aside.

Cook the eggs in a small pan of simmering water until hard boiled, cool, peel and cut into quarters.

Clean dandelion leaves, wash and dry thoroughly (use salad spinner if you have one).

Wine suggestion

Collio Friulano DOC 2021 - Pighin

April 20, 2022 /tina oblak
dandelion salad, dandelion leaves, insalata di tarassaco, regratova solata, dandelion salad with crispy pancetta, dandelion salad with crispy bacon, dandelion salad with hard boiled eggs, dandelion salad with boiled potatoes, Istrian dandelion salad
Adriatic Recipe, Appetizers, dinner, Easter, Easy recipe, entrée course, Healthy, healthy mael, Istrian cuisine, Istrian dish, Istrian food, Istrian gastronomy, light meal, main course, main dish, Nutritious, Nutritious dish, Rustic dish, Salads, Side Dishes, Slovenian cuisine, Slovenian food, Slovenian gastronomy, Starters, Vegetarian, Vegan, Spring recipe, Spring dish, foraging
Comment

Lamb Peka – One pot slow roasted lamb with potatoes and vegetables Istrian style Recipe

Beans and Sardines
April 13, 2022 by tina oblak in Adriatic Recipe, All year round recipe, baked dish, baking, Celebratory dish, child friendly dish, child friendly meal, dinner, Easter, Easter dish, Easter recipes, Easy recipe, family friendly dish, family friendly meal, Festive dish, Istrian cuisine, Istrian dish, Istrian food, Istrian gastronomy, main dish, main meat course, Meat, one pot meal, one pot meat recipe, Rustic dish, Slovenian cuisine, Slovenian food, Slovenian gastronomy

The word Peka, in Slovenian (also called črpinja) and in Croatian, refers to a large metal baking dish with a lid that resembles a bell-shaped dome but it is also a name given to the finished dish (lamb peka, octopus peka etc.) cooked with this very ancient method (in an open fireplace) and the oldest roasting technique which ensures the slow and even cooking as hot coals and embers are placed on top of the dome.

Any Peka type of recipe, traditionally, is usually for a large number of people, when family and friends come together to mark a special occasion. It is a very informal and rustic way of cooking, and yet, feels very special and celebratory. Various types of meats and poultry, as well as fish, octopus being the most popular choice, can be cooked this way, always paired with potatoes and vegetables to soak up the juices, preparation for which takes minimal effort but offers a spectacular one pot meal feast and an unforgettable experience.

Food prepared with the “peka method” recipe, typically found in Slovenian and Croatian Istria and along Dalmatian coast, will give you the finished dish that it is neither baked or cooked, but something in between, will be slightly crispy outside and very tender inside, it falls apart and almost melts in your mouth.

Most of you, including myself, as I currently live in England, will not have the possibility to make this dish with the authentic and traditional peka method, but where there is a will there is a way.

Here I am sharing with you the recipe for lamb peka in the oven, using a Dutch oven or cast iron casserole dish, even a baking tray and aluminium foil will do, that will give us the possibility to come as close as we can can to a “real deal lamb peka”, just as delicious and aromatic!

This is probably the easiest recipe for the “roast”, you can use chicken thighs, or smaller chunks of any other meat, lamb chops for example, in which case the cooking time will be between 1 -2 hours.

You really need to adjust the cooking time according to the type and size of the meat you are using.

Serve this dish hot, place the pot in the centre of the table and make sure there is plenty of crunchy bread to soak up the juices, prepare a mixed salad to accompany the dish, and you are ready to go.

Try this recipe, this is one of those dishes you will get a lot of 'oohs' and 'aahs'!

Ingredients

Serves 6 people

  • 2 – 2.5kg lamb meat (lamb shoulder with bone in or leg of lamb) For this recipe I used shoulder of lamb with the bone weighing 2.350kg.

  • 1kg baby potatoes (or regular potatoes, peeled and quartered)

  • 1 medium onion (about 150g) peeled and quartered (you can use red onion or shallots)

  • 3 cloves of garlic, peeled

  • carrots (about 150g) peeled and cut into chunks

  • small courgette (about 220g) cut into chunks

  • small aubergine (about 240g) quartered

  • small green pepper (about 130g) deseeded and quartered

  • fresh rosemary sprig

  • 100ml white wine, optional

  • sea salt

  • black ground pepper

Method

Marinating the meat (optional)

Before making this dish you can marinate the meat the evening before for extra flavour (I always do it but this is not necessary).

Put the lamb in a container, drizzle with extra virgin olive oil and with your hands rub the oil into the meat.

Season with sea salt and pepper and add 2 peeled cloves of garlic and some fresh herbs like rosemary and sage.

Close the lid, put in the fridge for a few hours or ideally overnight.

Take the meat out of the fridge and bring it to the room temperature at least an hour before cooking it.

Preheat the oven to 170C static or equivalent.

Prepare the vegetables, wash them, quarter them or cut them into bigger chunks (if you are using baby potatoes cut the bigger ones in half lengthwise).

View fullsize Lamb Peka 2.jpg
View fullsize Lamb Peka 3.jpg

Place the potatoes and roughly half of the vegetables in the Dutch oven, stick the fresh rosemary sprig in the middle of the potatoes and vegetables, season with sea salt and black pepper, pour white wine if using, and place the meat on the top.

Arrange the rest of the vegetables around the meat.

Close Dutch oven with the lid, or cover well with the aluminium foil if using a baking tray, put in the oven and bake for 4 hours until the meat becomes so tender it falls off the bone.

Turn the meat half way cooking time.

Remove the meat from the Dutch oven or baking tray, and wrap it into the aluminium foil to rest and keep warm.

While the lamb is resting, take a big spoon and scoop/spoon out the excessive fat.

View fullsize Lamb Peka 5.jpg
View fullsize Lamb Peka 6.jpg

Return the Dutch oven or baking tray back in the oven (without the lid or aluminium foil) and bake further for a few minutes allowing the potatoes to colour a bit and and liquids to dry.

Take the potatoes and the vegetables from the oven, unwrap the lamb, place it back in the Dutch oven, or tray, on top of the potatoes and vegetables.

Place the pot in the middle of the table and serve or let everyone help themselves.

Just a thought

You can play around with this recipe a bit, use the vegetables that you particularly like and adjust the quantity of the potatoes and the vegetables according to the size of a pot or a dish/tray you are using.

Wine suggestion

Alto Adige Cabernet Riserva DOC 2019 - Alois Lageder

April 13, 2022 /tina oblak
lamb peka, peka, one post slow roasted lamb, Istrian lamb peka, izpod peke, jagenček izpod peke, roasted lamb in Dutch oven, lamb meat, shoulder of lamb, slow roasted shoulder of lamb peka, shoulder of lamb bone in
Adriatic Recipe, All year round recipe, baked dish, baking, Celebratory dish, child friendly dish, child friendly meal, dinner, Easter, Easter dish, Easter recipes, Easy recipe, family friendly dish, family friendly meal, Festive dish, Istrian cuisine, Istrian dish, Istrian food, Istrian gastronomy, main dish, main meat course, Meat, one pot meal, one pot meat recipe, Rustic dish, Slovenian cuisine, Slovenian food, Slovenian gastronomy
Comment

Cooked ham in bread dough Recipe

Beans and Sardines
April 06, 2022 by tina oblak in Adriatic Recipe, All year round recipe, Appetizers, baked dish, baking, breakfast, brunch, Celebratory dish, Central European recipes, child friendly dish, child friendly meal, Easter dish, Easter treats, easy baking, Easy recipe, Enriched dough, entrée course, family friendly dish, family friendly meal, festive bakes, Festive dish, Finger food, home baking, Istrian cuisine, Istrian dish, Istrian food, Istrian gastronomy, main course, main dish, Meat, Mitteleuropean cuisine, Mitteleuropean dish, Mitteleuropean food, Mitteleuropean recipes, Rustic dish, Slovenian cuisine, Slovenian food, Slovenian gastronomy, Starters, Easter, Easter recipes

Cooked ham in bread dough is a real show stopper and a crowd pleaser, this recipe goes back to medieval times when it was customary cooking various types of meats in bread dough.

This dish consists of a piece of ham being cooked first and then wrapped in bread dough and baked in the oven allowing the aroma and the flavours of the ham to travel into the dough during the baking process.

On the Slovenian coast, where I come from, there is no Easter without this dish. This baked delicacy is so deeply rooted in Slovenian gastronomic culture that it is traditionally cooked and eaten around Easter period (with freshly grated horseradish or horseradish cream and mustard) and served as part of Easter breakfast on actual Easter day, in just about every corner of the country, together with hard boiled eggs, Pinca (Easter sweet bread) and Potica (traditional Slovenian festive nut roll).

This dish is also typically found in Trieste, and province of Trieste in Italy, in local osterie (informal, usually family run eating places serving simple local specialities), on a daily basis and typically served with a a glass of wine or locally produced artisan beer.

I studied in Trieste and had this dish on my graduation day as part of the buffet.

This recipe is so popular and delicious that it is nowadays enjoyed all year round, it is also ideal for picnics, as it can be made ahead of time and travels well.

Ingredients

Serves

For the dough

  • 500g strong white bread flour

  • 7g (one sachet) fast-action dried yeast

  • sea salt, a pinch

  • 300ml lukewarm milk (full fat, semi skimmed or skimmed)

  • 25g butter, unsalted or slightly salted, melted

You also need

  • 1.4kg, roughly, unsmoked or smoked Gammon joint

  • 1 carrot, optional

  • 1 celery stick, optional

  • ½ onion, optional

  • 1egg, beaten

  • a bit of extra milk (about 2 Tbsp)

Method

Place the ham in a big pot and add enough cold water to completely cover the ham.

Add a whole carrot, celery stick and half an onion for extra flavour, if desired.

Bring to boil, lower the heat, cover with the lid and gently boil for required time, this will depend on the size of the ham. (Weight your meat to calculate and work out your cooking times, allow 20 minutes per 450g)

While the ham is cooking, make the dough. (You can cook the ham in advance and wrap it in aluminium foil to keep it moist, and use when needed.

Drain cooked ham in a colander and let it cool completely.

Pat dry the ham well with the kitchen paper.

Put the flour in a large mixing bowl, add dried yeast on one side of the bowl and sea salt on the other. Add the milk, melted butter and mix to combine well all the ingredients.

View fullsize Ham in bread dough 2.jpg
View fullsize Ham in bread dough 3.jpg

The dough at this point will be a bit sticky, but should not be soggy. The dough will become less sticky as you knead.

View fullsize Ham in bread dough 4.jpg
View fullsize Ham in bread dough 5.jpg

Transfer the mixture on to a lightly floured (or lightly oiled) work surface and knead for about 10-15 minutes until the dough is nice and smooth and has an elastic texture. Your hands should not stick to the dough, if they do add a bit of flour at a time.

Put the dough in a lightly oiled large bowl and cover with a cling film. Stand in a warm place, free of drafts, and let it rise for at least 1-1 ½ hours until the dough has doubled or tripled in size.

Turn the dough on to lightly floured surface and knock back by hand for few minutes. Flour well the surface and with the rolling pin roll the dough to about 2cm thick. At this point you can pinch a bit of dough for decorating if you wish (I made a little dough plait, as it is done traditionally).

View fullsize Ham in bread dough 10.jpg
View fullsize Ham in bread dough 11.jpg

Preheat the oven to 180C static or equivalent and line the baking tray with the non stick baking parchment.

In a small bowl mix the beaten egg with a bit of milk and brush the centre of the rolled dough.

Place the ham in the centre on the brushed area.

Brush the rest of the ham with egg and milk mixture.

Wrap the ham with the dough all around, a bit like a parcel. Seal well the edges to avoid the dough opening up during the baking.

View fullsize Ham in bread dough 8.jpg
View fullsize Ham in bread dough 9.jpg

Place your ham and dough parcel on a baking tray with the junctions facing downwards.

Glaze the ham and dough parcel on all sides with the egg and milk mixture.

Prick the ham and dough parcel with a toothpick.

If you created a small Easter themed dough decoration, place it on top of the dough parcel and brush with egg and milk mixture.

Put the ham dough parcel in the preheated oven and bake for 60 minutes. Half way the baking time cover with aluminium foil and bake further until golden in colour.

View fullsize Ham in bread dough 13.jpg
View fullsize Ham in bread dough 14.jpg

Take out of the oven, leave to cool on the baking tray for a few minutes, then remove from the baking tray and leave to cool on a wire rack.

Best served warm with horse radish sauce, freshly grated horse radish root or/and mustard.

Wine suggestion

Collio Pinot Bianco DOC 2020 - Doro Princic

April 06, 2022 /tina oblak
ham, cooked ham, gammon joint, unsmoked gammon joint, smoked gammon joint, Easter bread, cooked ham in bread dough, prosciutto in crosta, kuhana sunka v testu, Easter breakfast, Easter brunch
Adriatic Recipe, All year round recipe, Appetizers, baked dish, baking, breakfast, brunch, Celebratory dish, Central European recipes, child friendly dish, child friendly meal, Easter dish, Easter treats, easy baking, Easy recipe, Enriched dough, entrée course, family friendly dish, family friendly meal, festive bakes, Festive dish, Finger food, home baking, Istrian cuisine, Istrian dish, Istrian food, Istrian gastronomy, main course, main dish, Meat, Mitteleuropean cuisine, Mitteleuropean dish, Mitteleuropean food, Mitteleuropean recipes, Rustic dish, Slovenian cuisine, Slovenian food, Slovenian gastronomy, Starters, Easter, Easter recipes
Comment

Squid Risotto Adriatic style Recipe

Beans and Sardines
March 30, 2022 by tina oblak in Adriatic Recipe, Appetizers, All year round recipe, brunch, child friendly dish, child friendly meal, dinner, Easy recipe, family friendly dish, family friendly meal, Fish & Seefood, fish starter, Healthy, healthy mael, Istrian cuisine, Istrian dish, Istrian food, Istrian gastronomy, light fish course, light meal, main course, main dish, recipe from Northern Ital, Risotti, Rustic dish, Starters, first course, first course dish, first course meal

Squid or calamari risotto is very delicate in taste, yet flavoursome, hearty and filling, very quick and easy to make, which makes it a perfect choice for a light lunch or dinner and a staple mid-week dish.

Fresh squid (not cleaned yet)

This risotto is an absolute winner, it will delight the whole family, and it is very pleasant to eat with its creamy texture and sweet and tender squid. It is simply delicious, and it is packed with Mediterranean ingredients that recall holidays by the sea.

I grew up on this type of risotto, it has been made in my family since as long as I can remember. My mother told me I was partially weaned on this risotto, she obviously made sure the squid chunks were cut in miniscule pieces to make it safe for me to eat. I loved it, apparently, and I still do.

The frequency with which this risotto, among many other types of risotti, has been made should come as no surprise. The area where I was born and grew up, the Slovenian coast, it is just under two hours drive from northern region of Veneto in Italy, where the greatest number and variety of risotto recipes can be found.

Squid risotto is very often prepared and cooked in the households, and regularly printed on the menus in the local restaurants, where you will find it as Rižota s kalamari or Rižota z lignji.

I am sharing here my mother's recipe, and do not be put off by the task of cleaning the squid, ask your fishmonger to do it for you and try this fantastic risotto dish.

Ingredients

Serves 4

  • 500g roughly, fresh squid, cleaned and cut into smaller pieces or rings (keep the tentacles). For this recipe you can also use frozen raw already cleaned squid tubes available in most bigger supermarkets.

  • 1 small onion (about 80g), peeled and finely chopped

  • 1 clove garlic, peeled and crushed

  • 4 Tbsp extra virgin olive oil

  • 1 Tbsp tomato purée

  • 300g risotto rice (like Vialone Nano, Arborio or Carnaroli)

  • fresh flat leaf parsley, about a handful (roughly 8g), some extra for garnish

  • 1 litre hot vegetable stock or hot water

  • sea salt

  • ground black pepper

View fullsize Squid risotto 2.jpg
View fullsize Squid risotto 3.jpg

Method

Before starting making risotto, it is a good idea to have your boiling hot stock or hot water ready to hand for later.

Put extra virgin olive oil in a pan, add finely chopped onions and sauté on a gentle heat until soft.

Add crushed garlic and cook for about a minute together with the onions.

Place clean pieces of squid in a pan and cook for about three minutes or so, until opaque.

Add the rice, mix well with the onion, garlic and squid mixture, and toast it for few minutes stirring constantly to avoid sticking to the pan.

Add tomato purée, pour in the pan all the hot stock or hot water and add chopped parsley.

If you have made a risotto before and have a clear idea of how moist you like it to be, you can control the moisture of the risotto by gradually adding ladles of hot stock or water, one at a time, allowing the liquid to be absorbed before adding more, rather than pouring the whole quantity of liquid over toasted rice, like I did in this recipe.

Cook on a medium heat, stirring almost constantly, until the rice is cooked al dente (fully cooked but still firm when bitten). It will generally take about 15-18 minutes for a risotto to be cooked.

There should be enough liquid just to cover the risotto, the Italians say that risotto should be smooth and runny enough to be described as all'onda, on the wave. Quite right, eating dry risotto is not particularly enjoyable.

Taste and adjust the seasoning with sea salt and ground pepper.

Serve hot and garnish with roughly chopped fresh flat parsley.

Just a thought

You can add to the risotto a small amount of chilli to give it an extra kick, but in small amounts, as you do not want to overpower the delicate flavour of the squid and of the dish in general.

Wine suggestion

Colli di Luni Vermentino “Etichetta Nera” 2021 - Lunae

March 30, 2022 /tina oblak
fresh squid, frozen squid, fresh calamari, frozen calamari, squid risotto
Adriatic Recipe, Appetizers, All year round recipe, brunch, child friendly dish, child friendly meal, dinner, Easy recipe, family friendly dish, family friendly meal, Fish & Seefood, fish starter, Healthy, healthy mael, Istrian cuisine, Istrian dish, Istrian food, Istrian gastronomy, light fish course, light meal, main course, main dish, recipe from Northern Ital, Risotti, Rustic dish, Starters, first course, first course dish, first course meal
Comment

Bread dumplings Recipe

Beans and Sardines
March 23, 2022 by tina oblak in Adriatic Recipe, Austrian inspired dishes, Autumnal dish, Autumnal recipe, casserole, Celebratory dish, Central European recipes, dinner, Dumplings, Eastern European dishes, Eastern European recipes, Easy recipe, Istrian cuisine, Istrian dish, Istrian food, Istrian gastronomy, main course, main dish, Mitteleuropean cuisine, Mitteleuropean dish, Mitteleuropean food, Mitteleuropean recipes, one pot meal, Rustic dish, Side Dishes, Slovenian cuisine, Slovenian food, Slovenian gastronomy, stew, supper, Vegetarian, Winter dish, Winter recipe, family friendly meal, child friendly meal, child friendly dish, family friendly dish

Bread dumplings are a real crowd pleaser, they are made from a mixture of stale bread soaked in milk and combined with fresh parsley, marjoram, onions, pancetta, beaten egg, seasoned with sea salt and black pepper, then formed into a ball shape and gently cooked in simmering water.

They can be easily turned into a vegetarian friendly option by simply omitting the meaty element and adding, if prefer, a bit of grated cheese, depending on your preference.

They are served as a perfect companion to stews, braised meats and roasted meats with a gravy. The idea behind these dumplings is to squash them with the fork, and this will soak up all the juices of whatever is accompanying them. In other words, it is an ideal side dish for almost anything that has some kind of sauce with it.

Bread dumplings with Venison stew

I simply love the recipes that provide some kind of a solution to the “problem” of avoiding food waste, and in this case the recipe is a brilliant side dish that uses - nothing more than stale bread as the key ingredient.

This is one of those recipes that you do not really need to plan since you can make bread dumplings when you simply end up with old bread and do not know what to do with it. If you have quite a bit of it to use up, then double or triple the ingredients since you can freeze a big batch of bread dumplings.

These rustic and elegant bread dumplings became a staple dish in a lot of cuisines of Eastern and Central Europe where stale bread has been very cleverly turned into a pure delicacy.

In Slovenia, where I was born and grew up, bread dumplings, called Kruhovi cmoki, have been so popular they almost became a national dish, and this recipe is most similar, or actually almost identical to the Austrian and South German( Bavarian) variety, where it is believed bread dumplings originated from, and are referred to as Semmelknödel.

There are a variety of bread dumpling recipes, for example, in the Czech Republic, fresh herbs, onions and the meaty element is not added to the bread mixture, which is also not shaped into small balls, but instead into a roll, then boiled and sliced.

Similar to bread dumplings are Canederli, found in Italy, in Trentino Alto Adige, an autonomous province of Italy, and in Austria, where small pieces of speck (lightly smoked cured meat) and cheese are added to the basic bread mixture, then they are shaped into small balls and typically cooked and served in hot beef or chicken broth.

This dish was one of my favourite dishes when I was a child, and it really does take me down memory lane. My mother would prepare them quite often, and I am sharing here her recipe, a typical Istrian variation of bread dumplings, in which fresh marjoram is added to the basic bread mixture.

Ingredients

Will make about 8 dumplings, depending on the size.

  • 310g roughly of stale bread (for this recipe I used 5 stale white baps)

  • 250-300ml milk (skimmed, semi skimmed or full fat)

  • 1 egg, beaten

  • 2 Tbsp olive oil

  • a handful of fresh flat leaf parsley (about 10g), finely chopped

  • 1 medium onion (about 100g), peeled and finely chopped

  • sea salt

  • ground black pepper

  • 40-50g sliced pancetta, cut into very small pieces (can use bacon or lardons), optional

  • 1 Tbsp fresh marjoram, very finely chopped, optional

  • all purpose flour (enough to coat the bread dumplings)

  • 1 Tbsp white dry breadcrumbs (only if needed)

Method

Cut or tear with your hands white baps (or any other type of stale bread you are using) into small pieces and put them in a fairly large bowl. Pour over the milk, mix well and leave to soak for about 20-30 minutes or until the bread is completely softened.

View fullsize Bread Dumplings 2.jpg
View fullsize Bread Dumplings 3.jpg

While the bread is soaking in milk, prepare the onion and pancetta mixture.

Put olive oil, finely chopped onions and small pieces of pancetta in a frying pan. Gently fry the mixture until the onions become nice and soft and transparent but not brown. Cool the pancetta and onion mixture and set aside.

View fullsize Bread Dumplings 4.jpg
View fullsize Bread Dumplings 5.jpg

Add to the bowl with the soaked bread, the beaten egg, onion and pancetta mixture, finely chopped parsley and marjoram and season with sea salt and black pepper.

With your hand(s) mix very well all the ingredients, almost using a squeezing action, to thoroughly combine the mixture. You should end up with a bread mixture that is soft, and with a fairly smooth consistency (if you end up with bigger bread pieces just break them with your fingers).

Adjust the mixture, adding a bit of breadcrumbs (and never the flour, as the mixture will get too sticky and will become unworkable), one tablespoon at the time, if the bread mixture is too wet.

On the contrary, if you feel the mixture is too hard and dry, add a bit of milk.

It is important to use a bit of personal judgment and intuition here. The idea behind this recipe is using the stale bread or a combination of different types of stale bread which will absorb a slightly different quantity of liquid, therefore the moisture of the bread mixture needs to be adjusted accordingly.

View fullsize Bread Dumplings 6.jpg
View fullsize Bread Dumplings 7.jpg

Wet you hands (this will prevent the dough to stick to your hands).

Take roughly a handful of the mixture and shape it into a compact ball, about the size of a tennis ball.

Repeat the process until you run out of the mixture.

Put some flour into a deep plate or a bowl.

Gently coat each dumpling into a flour and remove excess flour (this will prevent sticking).

View fullsize Bread Dumplings 8.jpg
View fullsize Bread Dumplings 9.jpg

Fill a large pot of water and bring to boil. Turn down the heat and leave the water to a gentle boil.

With a slotted spoon, drop one dumpling at the time in a simmering water and cook for about 15 minutes. Do not allow the dumplings to cook in a strong boiling water as they might loose the shape and fall apart.

Remove cooked dumplings with a slotted spoon and transfer onto a serving plate or directly on the plates, serve warm.

Just a thought

Bread dumplings are suitable for freezing.

You can freeze uncooked dumplings by freezing them individually first, and then transfer them into freezing bags or containers. Do not defrost the dumplings when you need them, just plop them frozen directly into a simmering water and cook them slightly longer, and they are cooked when they float on the surface.

Alternatively, you can freeze already cooked dumplings. Cool them first, freeze them individually and place in freezing bags or containers. When you want to use the dumplings, let them thaw first and then reheat covered, in order to get some steam, using a microwave works well.

You can “recycle” this dish even further, if you end up with some left over cooked dumplings, slice them up and fry the slices on both sides lightly in a frying pan with some butter or olive oil.

You really could not ask anything more from stale bread!

Wine suggestion

Alto Adige Schiava DOC "Menzen" 2020 - Colterenzio

March 23, 2022 /tina oblak
stale bread, old bread, dumplings, savory dumplings, Kruhovi cmoki, Semmelknödel, Canederli
Adriatic Recipe, Austrian inspired dishes, Autumnal dish, Autumnal recipe, casserole, Celebratory dish, Central European recipes, dinner, Dumplings, Eastern European dishes, Eastern European recipes, Easy recipe, Istrian cuisine, Istrian dish, Istrian food, Istrian gastronomy, main course, main dish, Mitteleuropean cuisine, Mitteleuropean dish, Mitteleuropean food, Mitteleuropean recipes, one pot meal, Rustic dish, Side Dishes, Slovenian cuisine, Slovenian food, Slovenian gastronomy, stew, supper, Vegetarian, Winter dish, Winter recipe, family friendly meal, child friendly meal, child friendly dish, family friendly dish

Venison Stew with red wine and fresh herbs - Istrian Recipe

Beans and Sardines
March 16, 2022 by tina oblak in Adriatic Recipe, Autumnal dish, Autumnal recipe, casserole, Central European recipes, dinner, Easy recipe, healthy mael, Istrian cuisine, Istrian dish, Istrian food, Istrian gastronomy, main course, main dish, main meat course, Meat, Mitteleuropean cuisine, Mitteleuropean dish, Mitteleuropean food, Mitteleuropean recipes, one pot meal, one pot meat recipe, Rustic dish, Slovenian cuisine, Slovenian food, Slovenian gastronomy, stew, supper, Winter recipe, Wild game meat, Game meat

Venison goulash is simply a lovely dish, perfect for colder days, and is very comforting and warming. It is slow cooked and braised for a long time with onions, garlic, fresh herbs, juniper berries, and red wine until the meat becomes so soft and tender it almost melts, and falls apart easily.

Venison meat, as it is very lean and low in saturated fat, works great in recipes requiring long cooking times which prevents drying the meat too much and helps to further develop the flavour.

Venison goulash is a great alternative to most common lamb or beef stews cooked on a more regular basis, and it is really super delicious as venison meat is packed with flavour because wild deer feed on apples, chestnuts, fruits, berries and acorns.

Venison Stew with Bread Dumplings

I am sharing here my paternal grandmother's recipe that has been in the family since .... forever. I grew up eating game meat that was provided very generously by my paternal grandfather's friends who were hunters. My nono, as I used to call him, would provide his hunter friends with a delicious extra virgin olive produced by him, and in exchange he would receive venison meat, an easy, uncomplicated trade, which everyone seemed to be happy with, especially the beneficiaries of the cooked venison goulash!

Ingredients

Serves 4-6

  • 1kg stewing venison (I used ready-cubed venison for stewing and a small shank)

  • 4 Tbsp olive oil

  • 1 medium size onion (about 180g), peeled and finely chopped

  • 2 big (or 4 small) cloves of garlic, peeled and crushed

  • 2 Tbsp tomato purée

  • 2 Tbsp all purpose flour

  • 100 ml red wine

  • 1 small whole carrot, peeled

  • few juniper berries (about 4), crushed

  • 1 sprig of fresh rosemary, made in bouquet garni or leaves picked and finely chopped

  • 1 bay leaf, fresh or dry, made in bouquet garni or just placed in a pot

  • few fresh sage leaves, made in bouquet garni or finely chopped

  • sea salt

  • black pepper, freshly ground

Method

In a large pot put the oil, finely chopped onions, a pinch of salt, and cook on a gentle heat, stirring quite often, until the onions are soft.

Add crushed garlic and cook for a further minute.

Add the venison meat, turn up the heat a bit and brown it and seal it on all sides, stirring and turning quite frequently.

Pour in the pot red wine and deglaze the pan, scrap with the wooden spoon all the bits and pieces that have stuck to the bottom of the pan.

Stir in the flour, add tomato purée, a carrot, juniper berries, bouquet garni or finely chopped herbs, sea salt and black pepper.

Add water, just enough to cover the meat, bring to boil, turn the heat down and gently simmer for about 2-3 hours, with the lid partially uncovered, or until the meat falls apart easily.

Keep an eye on the goulash during the simmering, and add splashes of water if you think it gets too thick and dry.

On the contrary, if you think the sauce is too thin, make a paste with some more flour and a bit of water, and add as much of the paste to venison goulash as needed to thicken the sauce.

Taste and adjust the seasoning with sea salt and black pepper.

Serve hot with some crusty bread, potato gnocchi, soft cooked polenta or grilled polenta, mashed, boiled or roasted potatoes, rice or with bread dumplings.

Just a thought

This is a great dish to make ahead of time and suitable for freezing.

If you have a bit of leftover goulash, shred the meat and use it as a venison ragù, delicious served with your favourite shape of pasta or potato gnocchi.

Wine suggestion

Teroldego Rotaliano DOC 2019 - De Vescovi Ulzbach

March 16, 2022 /tina oblak
Venison stew, slow cooked venison, braised venison, venison goulash, venison shank, cubed venison, venison for stewing, venison in red wine sauce, venison with fresh herbs, venison stew on a hob, juniper berries, jelenov golaz
Adriatic Recipe, Autumnal dish, Autumnal recipe, casserole, Central European recipes, dinner, Easy recipe, healthy mael, Istrian cuisine, Istrian dish, Istrian food, Istrian gastronomy, main course, main dish, main meat course, Meat, Mitteleuropean cuisine, Mitteleuropean dish, Mitteleuropean food, Mitteleuropean recipes, one pot meal, one pot meat recipe, Rustic dish, Slovenian cuisine, Slovenian food, Slovenian gastronomy, stew, supper, Winter recipe, Wild game meat, Game meat
1 Comment

Hungarian style Creamy Potato and Beef Goulash Soup Recipe

Beans and Sardines
February 23, 2022 by tina oblak in Appetizers, Autumnal dish, Autumnal recipe, casserole, Central European recipes, dinner, Eastern European recipes, Easy recipe, entrée course, main course, main dish, Mitteleuropean recipes, one pot meal, Slovenian cuisine, Slovenian food, Slovenian gastronomy, Starters, stew, supper, Vegan, Winter dish, Winter recipe, winter soup, Hungarian inspired dishes

This soup, warm, wholesome, and rich in flavour, can be used as a main meal, especially on those cold days when it will be much appreciated. It is made with only a few simple ingredients, and when cooked well and simmered slowly, it makes a perfect meal choice for body and soul, it is also quite filling, so there is no need to plan a main course.

This Hungarian soup, Gulyásleves, is generally made of beef, vegetables, ground paprika and other spices, but originates from a dish, a thicker stew (what is commonly known as beef goulash) that was cooked outside in the cauldron over an open fire, by the cattlemen, the Hungarian cowboys, who camped with their cattle in the Great Hungarian Plain.

This dish, although native to Hungary, became very popular in the countries around Hungary, which, like in most cases, gave a little twist to the original recipe, and is the origin of variety of new regional variations.

For example in Austria, where this dish is called Goulaschsuppe, it is common to cook this soup without its meat component, which makes a fantastic vegetarian and vegan friendly meal.

In Slovenia, where I come from however, this soup (called kromprjev golaž) which is a real crowd pleaser and became part of Slovenian food culture, testimony of the strong presence of the Austro-Hungarian Empire in the the territory, is almost always cooked with the meat component, where beef can be substituted by dry meats, i.e. some sort or sausages (smoked varieties are often used for a deeper, smokier, and more “imperial” flavour).

In Slovenia, like in Italy (mountainous parts of some regions like of Trentino-Alto Adige, Veneto and Friuli-Venezia Giulia bordering with Austria), this soup is generally served in the informal mountainside restaurants to the delight of hikers and skiers, as well as cooked in the households.

This seriously delicious one pot meal is quite nostalgic for me and reminds me of my childhood. It was served in the school canteens for lunch, and what were called 'dinner ladies, cooked the soup from scratch with fresh ingredients, and the aroma would travel around the school, into the classrooms, destructing the minds of us children struggling with some impossible maths sexercises, especially when approaching lunch time, when you could hear growling in the little tummies.

The soup would be followed by the Austrian inspired pudding, Buchteln, sweet yeast buns filled with apricot jam. This is the type of lunch, among many others, we children really looked forward to...

When I moved to England, goulash soup is one of those dishes, which for some strange reason has been a bit forgotten, and it was not until our skiing trip to Austria, when I saw this soup on the menu that all my childhood memories suddenly came back to me, this is what food does...

As soon as we got back to England I cooked this wonderful tasting goulash soup, it was a hit. I have been making it on a regular basis since then, and I will most definitely make sure this time it stays on the menu.

It is just so hearty, comforting and cosy, the whole family loves this one pot soup and it is cooked very often for my husband and my son who simply adore it. When I serve it, we get transported to the skiing memories we created together as a family, and the table conversations would start ....

I am sharing here a family recipe how my maternal grandmother used to make it, and how my mother still makes it. If you never had this soup before, try it and it will become one of your favourites, and all you need to serve the soup with is a nice rustic bread to dunk it, yes .... this is 'home' for me...

Ingredients

Serves 4

  • 4 Tbsp extra virgin olive oil

  • 3 medium size potatoes (about 500g) peeled and chopped into small cubes

  • 1 onion (about 120g) peeled and finely chopped

  • 1 clove of garlic, peeled and crushed

  • 2 Tbsp Hungarian sweet paprika

  • 2 Tsp red or white wine vinegar

  • 2 Tbsp tomato purée

  • 1 Tsp fresh marjoram (a few springs) finely chopped, (can use dry marjoram)

  • 3 Tsp caraway seeds, crashed with mortar and pestle (can use spice or coffee grinder)

    whole caraway seeds can be used if you have none of the above ways to ground the seeds

  • 400-500g braising steak or shin of beef, trim any hard fat off the beef and dice finely

  • sea salt

  • black pepper, freshly ground

  • 2 fresh or dry bay leaves

  • 2l water or vegetable stock

  • sour cream (optional)

  • fresh flat leaf parsley, roughly chopped, for garnish (optional)

Method

Put the oil in a fairly large pan, add chopped onions, crushed garlic, a pinch of salt and gently sauté until the onions are soft and translucent.

Pour wine vinegar and cook for a minute or so stirring the onion and garlic mixture. The vinegar will help to deglaze and release any bits stuck to the bottom of the pan.

Add diced beef and continue to cook, turning and stirring regularly, until the meat is nicely browned on all sides.

View fullsize Goulash soup 4.jpg
View fullsize Goulash soup 5.jpg

Add cubed potatoes and cook briefly for a few minutes together with meat and onions mixture.

View fullsize Goulash soup 7.jpg
View fullsize Goulash soup 8.jpg
View fullsize Goulash soup 9.jpg
View fullsize Goulash soup 10.jpg

Add paprika, tomato purée, fresh or dry marjoram, crushed caraway seeds and bay leaves, sea salt and black pepper.

Add water or vegetable stock, bring to a boil.

View fullsize Goulash soup 11.jpg
View fullsize Goulash soup 12.jpg
View fullsize Goulash soup 13.jpg
View fullsize Goulash soup 14.jpg

Cover with the lid and simmer on a gentle heat for about 2 hours. After this time, the soup will become slightly thicker and the meat will become so tender it will just melt in your mouth.

To make the goulash soup slightly “creamier” in consistency, you can press with a fork few cubes of potatoes on the side of the casserole pan and give it a good stir.

Taste and adjust the seasoning with sea salt and black pepper and add more paprika to your liking, if you wish.

Serve hot with a spoonful of sour cream, if desired, sprinkle some roughly chopped fresh parsley for garnish and a bit more paprika. Place some crunchy rustic bread on the table to dunk in the goulash soup and life just cannot get any better.

Just a thought

Double the amount of the ingredients in the recipe, if serving for 6-8 people or, if you wish to make a bigger batch and freeze.

Like most stews and soups, this goulash soup is best made in advance, as it tastes better every time you reheat it.

Wine suggestion

Vigneti delle Dolomiti Rosso IGT "Fojaneghe" 2015 - Bossi Fedrigotti, Masi

February 23, 2022 /tina oblak
potatoes, beef, stewing beef, shin of beef, caraway seeds, paprika, sweet Hungarian paprika, Gulyásleves, Goulaschsuppe, kromprjev golaž, Goulash soup, Goulash soup without meat, Hungarian beef and potato stew
Appetizers, Autumnal dish, Autumnal recipe, casserole, Central European recipes, dinner, Eastern European recipes, Easy recipe, entrée course, main course, main dish, Mitteleuropean recipes, one pot meal, Slovenian cuisine, Slovenian food, Slovenian gastronomy, Starters, stew, supper, Vegan, Winter dish, Winter recipe, winter soup, Hungarian inspired dishes
Comment

Austrian style Curd Cheesecake Recipe

Beans and Sardines
February 16, 2022 by tina oblak in Adriatic Recipe, baked dish, baking, celebratory desserts, dessert, Easy recipe, festive bakes, festive dessert, festive sweet things, pudding, Sweet Things, easy cakes, no flour cakes, home baking, easy baking, Central Europe cakes, Eastern Europe cakes

This Austrian style Curd Cheesecake is a sweet dessert, delicious in its simplicity, consisting of one main layer mixture of curd cheese or ricotta, flavoured with sugar, lemon zest, vanilla extract, eggs and the raisins that have been luxuriously soaked in dark rum.

This cake is quite moist, therefore refreshing and perfect for any occasion, it is very easy to make and a great recipe to keep in the repertoire for cakes that require minimum effort but deliver maximum satisfaction.

In Slovenia, where I come from, curd cheese, in Slovenian called skuta (also referred to as farmer's cheese or baker's cheese) has always been a very popular and commonly used ingredient in baking.

For this recipe, you can easily replace curd cheese for ricotta, which is what I used to do when I first arrived in England, and struggled to find curd cheese, but it is now available these days in most bigger supermarkets or Polish food stores.

Curd cheese

My mother and my maternal grandmother would make this cake very often, this is proper home made rustic baking, and I am sharing here this nostalgic and special family recipe.

Give it a go and try this wonderful cake, but please do remember, despite the temptation, it is really important to completely cool down the cake before cutting it into slices.

Ingredients

Serves 10

  • 120g butter, softened

  • 200g caster sugar

  • 4 eggs, separated

  • 1kg curd cheese or ricotta

  • 100g semolina

  • 3 Tsp vanilla bean extract or seeds of one vanilla pod

  • finely grated lemon zest of 2 unwaxed lemons

  • 120g raisins or sultanas

  • 4 Tbsp dark rum or lukewarm water (for soaking the raisins)

  • icing sugar for dusting

Curd Cheese

Method

Place the raisins in a small bowl, pour dark rum or lukewarm water over them and let them soak and plump up for about 30 min.

Preheat the oven to 200C static or equivalent. Lightly grease a 23cm springform tin or loose-bottomed tin and line the base with baking parchment.

Put the softened butter and sugar in a large bowl and mix well. Beat together until light and creamy.

Start adding to the sugar and butter mixture the egg yolks, one at a time, making sure the egg yolk is fully absorbed before adding the next one.

View fullsize Curd cheescake 7.jpg
View fullsize Curd cheescake 8.jpg

Add grated lemon zest, curd cheese or ricotta, semolina and vanilla extract and mix well all the ingredients.

View fullsize Curd cheescake 9.jpg
View fullsize Curd cheescake 10.jpg

Drain the raisins, remove excess liquid, and add them to the mixture.

View fullsize Curd cheescake 11.jpg
View fullsize Curd cheescake 12.jpg

Put the egg whites in a separate large bowl, add a pinch of salt and whisk the egg whites until stiff but not dry.

View fullsize Curd cheescake 13.jpg
View fullsize Curd cheescake 14.jpg

Fold very gently and lightly into the mixture.

View fullsize Curd cheescake 15.jpg
View fullsize Curd cheescake 16.jpg

Turn the mixture into a prepared tin.

Bake the cake in a preheated oven for 30min on 200C then lower the temperature to 180C and bake further for another 30min. Cake should be golden in colour on the surface and firm to the touch.

If halfway through baking time the cake is browning too fast, cover the top of the cheesecake loosely with the aluminium foil, to prevent the top from becoming too brown.

When the cake is baked, turn off the oven but leave the cheesecake in the oven for about 1 hour allowing it to cool a bit.

Take the cake out of the oven and allow it to cool completely.

View fullsize Curd cheescake 17.jpg
View fullsize Curd cheescake 18.jpg

Loosen the sides of the cake, using a palette knife if needed, and remove the tin.

Invert the cheesecake, then remove the base of the tin and the baking parchment.

Turn the cake back the right way up.

Dust with sifted icing sugar just before serving. This cake is very moist and the icing sugar will dissolve if you dust the cake too soon, no permanent damage though.

Wine suggestion

Montefalco Sagrantino Passito DOCG 2015 - Lungarotti


February 16, 2022 /tina oblak
curd cheese, ricotta, skuta, no flour cakes, moist cakes, baker's cheese, farmer's cheese
Adriatic Recipe, baked dish, baking, celebratory desserts, dessert, Easy recipe, festive bakes, festive dessert, festive sweet things, pudding, Sweet Things, easy cakes, no flour cakes, home baking, easy baking, Central Europe cakes, Eastern Europe cakes
Comment

Braised Fennel Istrian Recipe

Beans and Sardines
February 09, 2022 by tina oblak in Adriatic Recipe, Autumnal dish, Autumnal recipe, brunch, Central European recipes, Easy recipe, Healthy, healthy mael, Istrian cuisine, Istrian dish, Istrian food, Istrian gastronomy, main dish, Nutritious, Nutritious dish, Rustic dish, Side Dishes, Slovenian cuisine, Slovenian food, Slovenian gastronomy, supper, Vegan, Vegetarian, Winter recipe, Vegetable side dish, Vegetables, Root vegetables

Braised fennel is made with fresh fennel bulbs, a humble and very often underrated and forgotten vegetable, and if you were ever put off by maybe a slightly “assertive” liquorice taste of a raw fennel, try this dish, it is like eating a completely different vegetable.

Fennel, during braising process, becomes mellow and sweet, very tender, and develops soft and mild aniseed and slightly caramelized flavour, sincerely gorgeous!

For this dish, perhaps, we can apply the famous saying “do not judge the book by its cover.”

With its appearance, maybe it does not belong to the privileged club of the most appealing looking dishes, but the taste of braised fennel is simply luxurious and elegant, worthy to be served as a part of Sunday roast.

Back home, on the Slovenian coast, where I come from, braised fennel is a very popular, very much loved dish and served with dignity for a simple midweek lunch or dinner.

Here I am sharing my mother's recipe for a traditional and regional braised fennel recipe. Try it, and next time you are shopping for your vegetables, you will be reaching out for fresh fennel...

Ingredients

Serves 4 as part of meal

  • few fresh fennel bulbs (1200g approximately)

  • 5 Tbsp extra virgin olive oil (the best you can afford)

  • sea salt

  • black pepper

  • fresh flat leaf parsley, roughly chopped

  • 100ml water or vegetable stock

Method

Wash fennel bulbs under cold running water and dry them with clean kitchen paper or towel. Place the bulbs on the chopping board and trim the hard hollow stalks which are quite tough and very fibrous. You can discard the stalks or put in the compost, or trim the stalks, cut them into pieces and use them instead of, or as an addition to the celery in soups and stews, or use them as a bed for roasted chicken, or other meats, and roasted fish.

Cut the feathery fronds from the stalks, you can use these as a garnish for this dish, or as a herb to make others dishes. Trim off the root end of the the bulb (the base of the fennel bulb) and cut it into wedges.

View fullsize Braised fennel 4.jpg
View fullsize Braised fennel 3.jpg

The layers may separate and fall apart, do not worry, this is normal.

Put extra virgin olive oil in a large frying pan, preferably non stick, and heat it up a bit.

Place the fennel wedges into a pan.

Add a pinch of sea salt and sauté for few minutes on a fairly high heat, stirring occasionally, until golden brown in colour.

View fullsize Braised fennel 7.jpg
View fullsize Braised fennel 8.jpg

Add 100ml of water, black pepper, lower the heat to fairly low, cover with the lid.

Cook on a gentle heat for about 40 minutes, then uncover the lid.

Turn the heat to medium and cook further uncovered until all the water evaporates.

At this stage the fennel might catch a bit and turn slightly mushy, oozy and creamy in the middle.

Taste and adjust the seasoning with sea salt and black pepper.

View fullsize Braised fennel 9.jpg
View fullsize Braised fennel 10.jpg

Add a sprinkle of fresh chopped parsley for extra flavour and some fennel fronds for garnish.

Serve hot or at room temperature.

Just a thought

This dish freezes very well, so it might be a good idea to cook in bigger quantities when the fennel is in season and freeze it.

February 09, 2022 /tina oblak
Fresh fennel, Fresh fennel bulb, Fennel bulb, Braised fennel, Slow cooked fennel, Fennel cooked in frying pan, Braised fennel with fresh parsley, Fennel fronds, Braised fennel garnished with fennel fronds
Adriatic Recipe, Autumnal dish, Autumnal recipe, brunch, Central European recipes, Easy recipe, Healthy, healthy mael, Istrian cuisine, Istrian dish, Istrian food, Istrian gastronomy, main dish, Nutritious, Nutritious dish, Rustic dish, Side Dishes, Slovenian cuisine, Slovenian food, Slovenian gastronomy, supper, Vegan, Vegetarian, Winter recipe, Vegetable side dish, Vegetables, Root vegetables
1 Comment
  • Newer
  • Older