Beans and Sardines

  • Home
  • About
  • Recipe of the week
  • Recipes
  • Wines
  • Contact

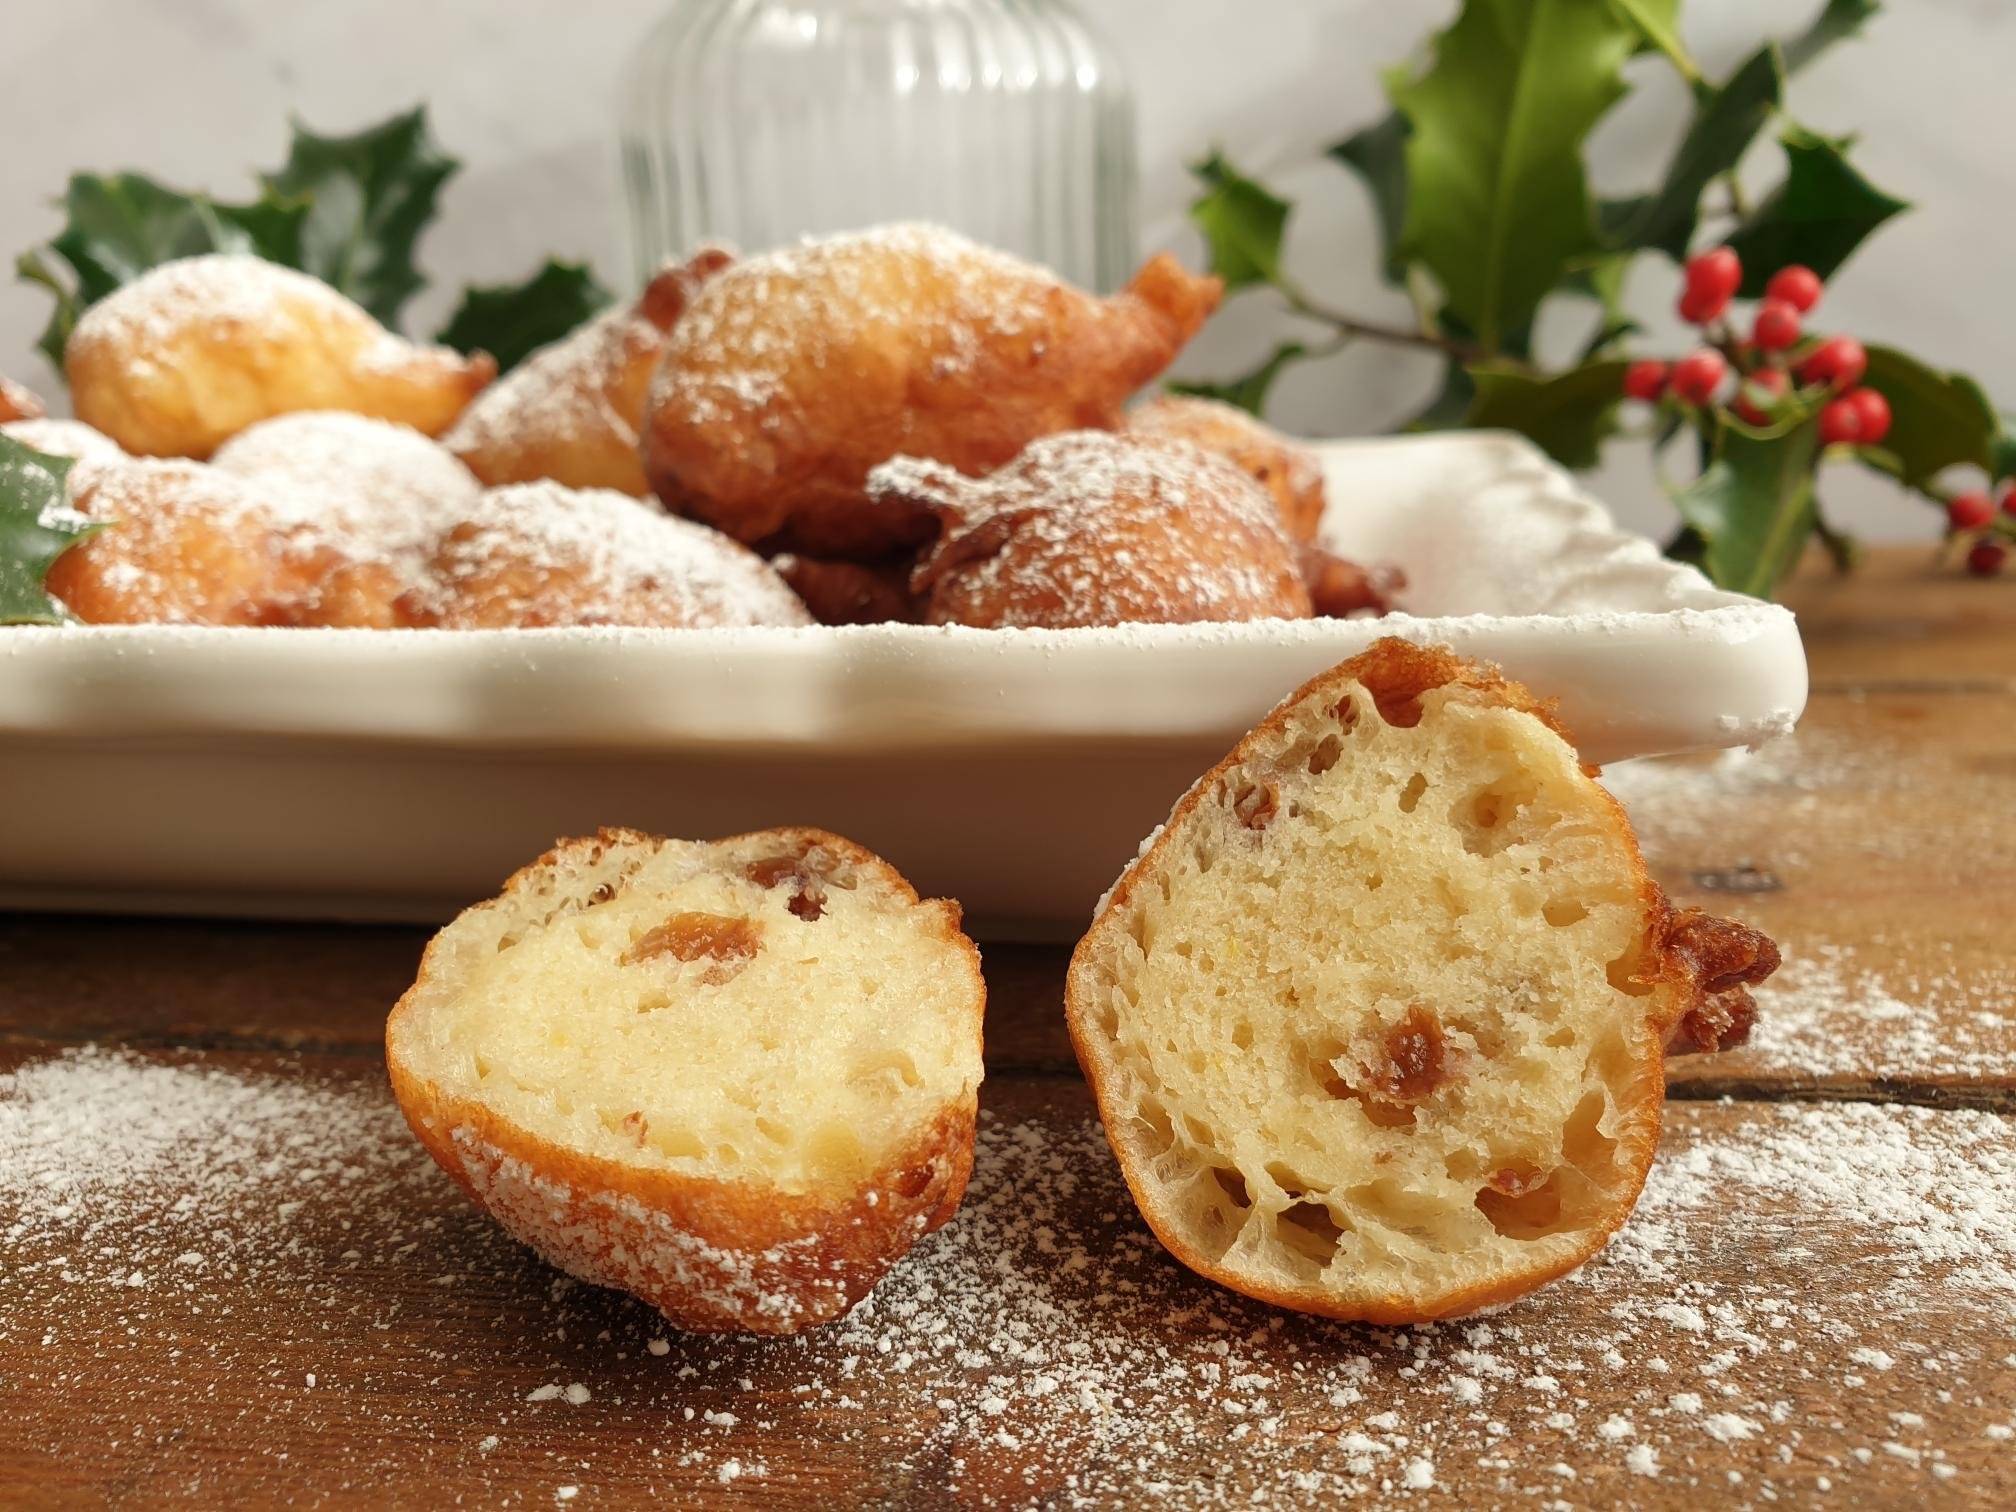
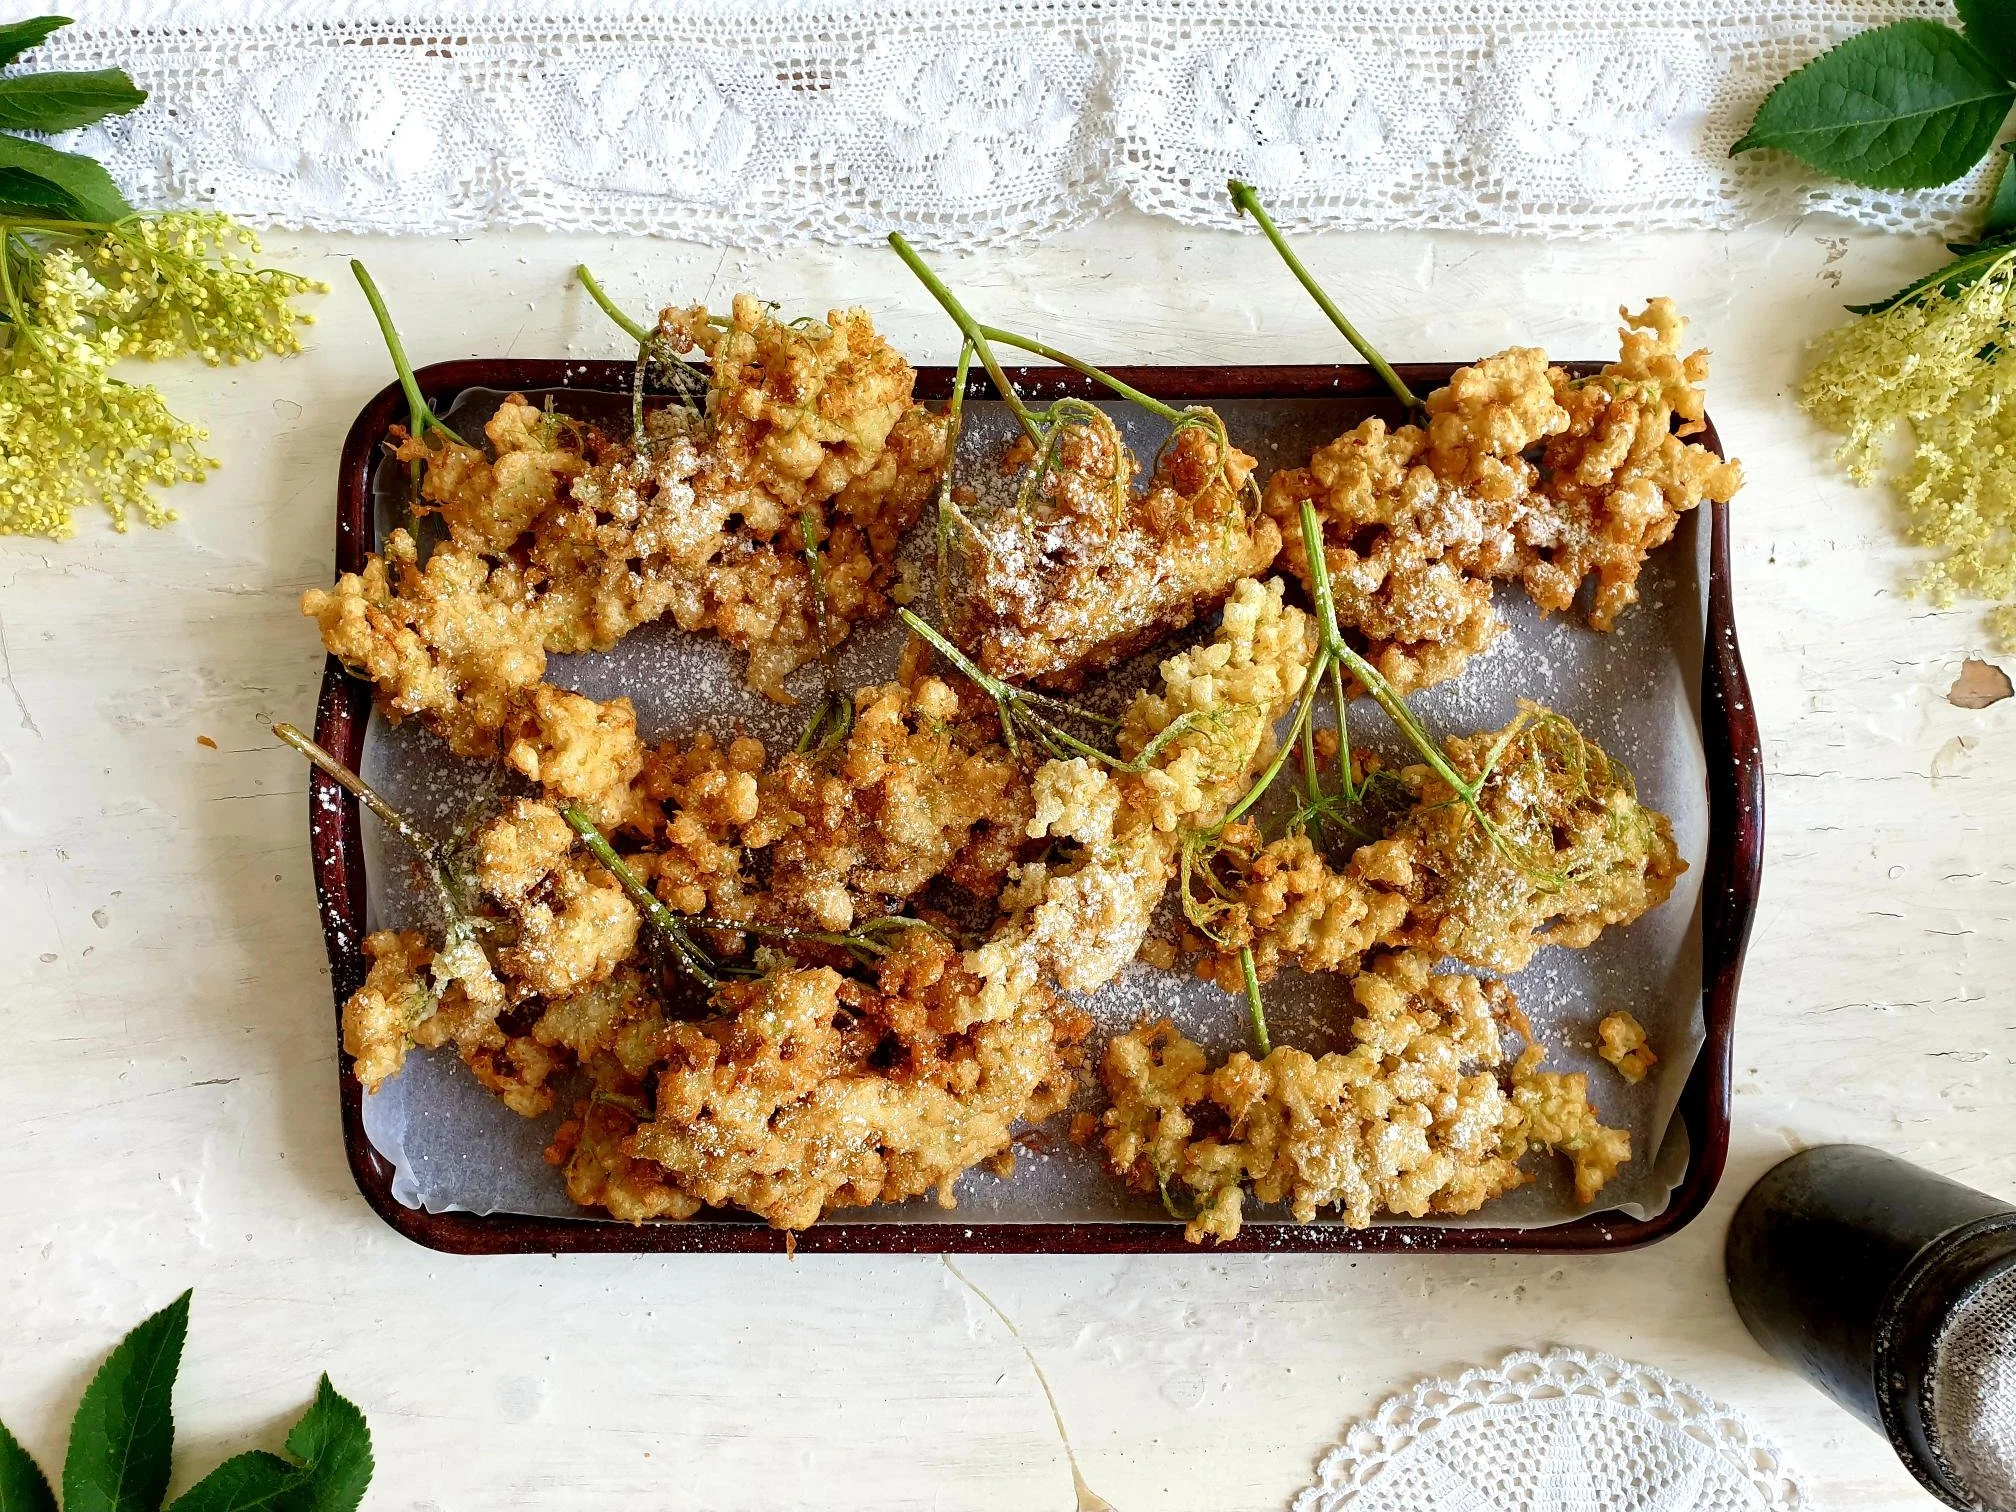
Elderflower fritters Recipe

Beans and Sardines
June 22, 2022 by tina oblak in Adriatic Recipe, Appetizers, Austrian inspired dishes, breakfast, Central European recipes, child friendly dish, child friendly meal, dessert, Easy recipe, family friendly dish, family friendly meal, foraging, Istrian cuisine, Istrian dish, Istrian food, Istrian gastronomy, main course, main dish, main fish course, Rustic dish, Slovenian cuisine, Slovenian food, Slovenian gastronomy, Small bites, Snacks, Spring dish, Spring recipe, sweet course, sweet finger food, sweet nibbles, Sweet Things, Vegetarian

Bring the sunshine and the scent of summer in your kitchen with these elderflower fritters which are lightly fried elderflowers in a pancake batter like, they are golden, crunchy and a delicious dessert with a difference, they are a real treat and a delightful seasonal delicacy.

The culinary use of elderflower has been revolutionized in the past few years, but in the whole of Slovenia, including the Slovenian coast where I come from, elderflower fritters are a dish that is very old and traditional.

Those of you that have been reading my posts on this blog for a while, will know that I come from a family of very passionate foragers, and so there should be no surprise that this fragrant flower ends up on a plate. My maternal grandmother, stara mama Iva, would make them when we were little.

We children got away with eating just that, with a glass of milk, and skipping altogether a main evening meal, which is quite a common practice in neighbouring Austria.

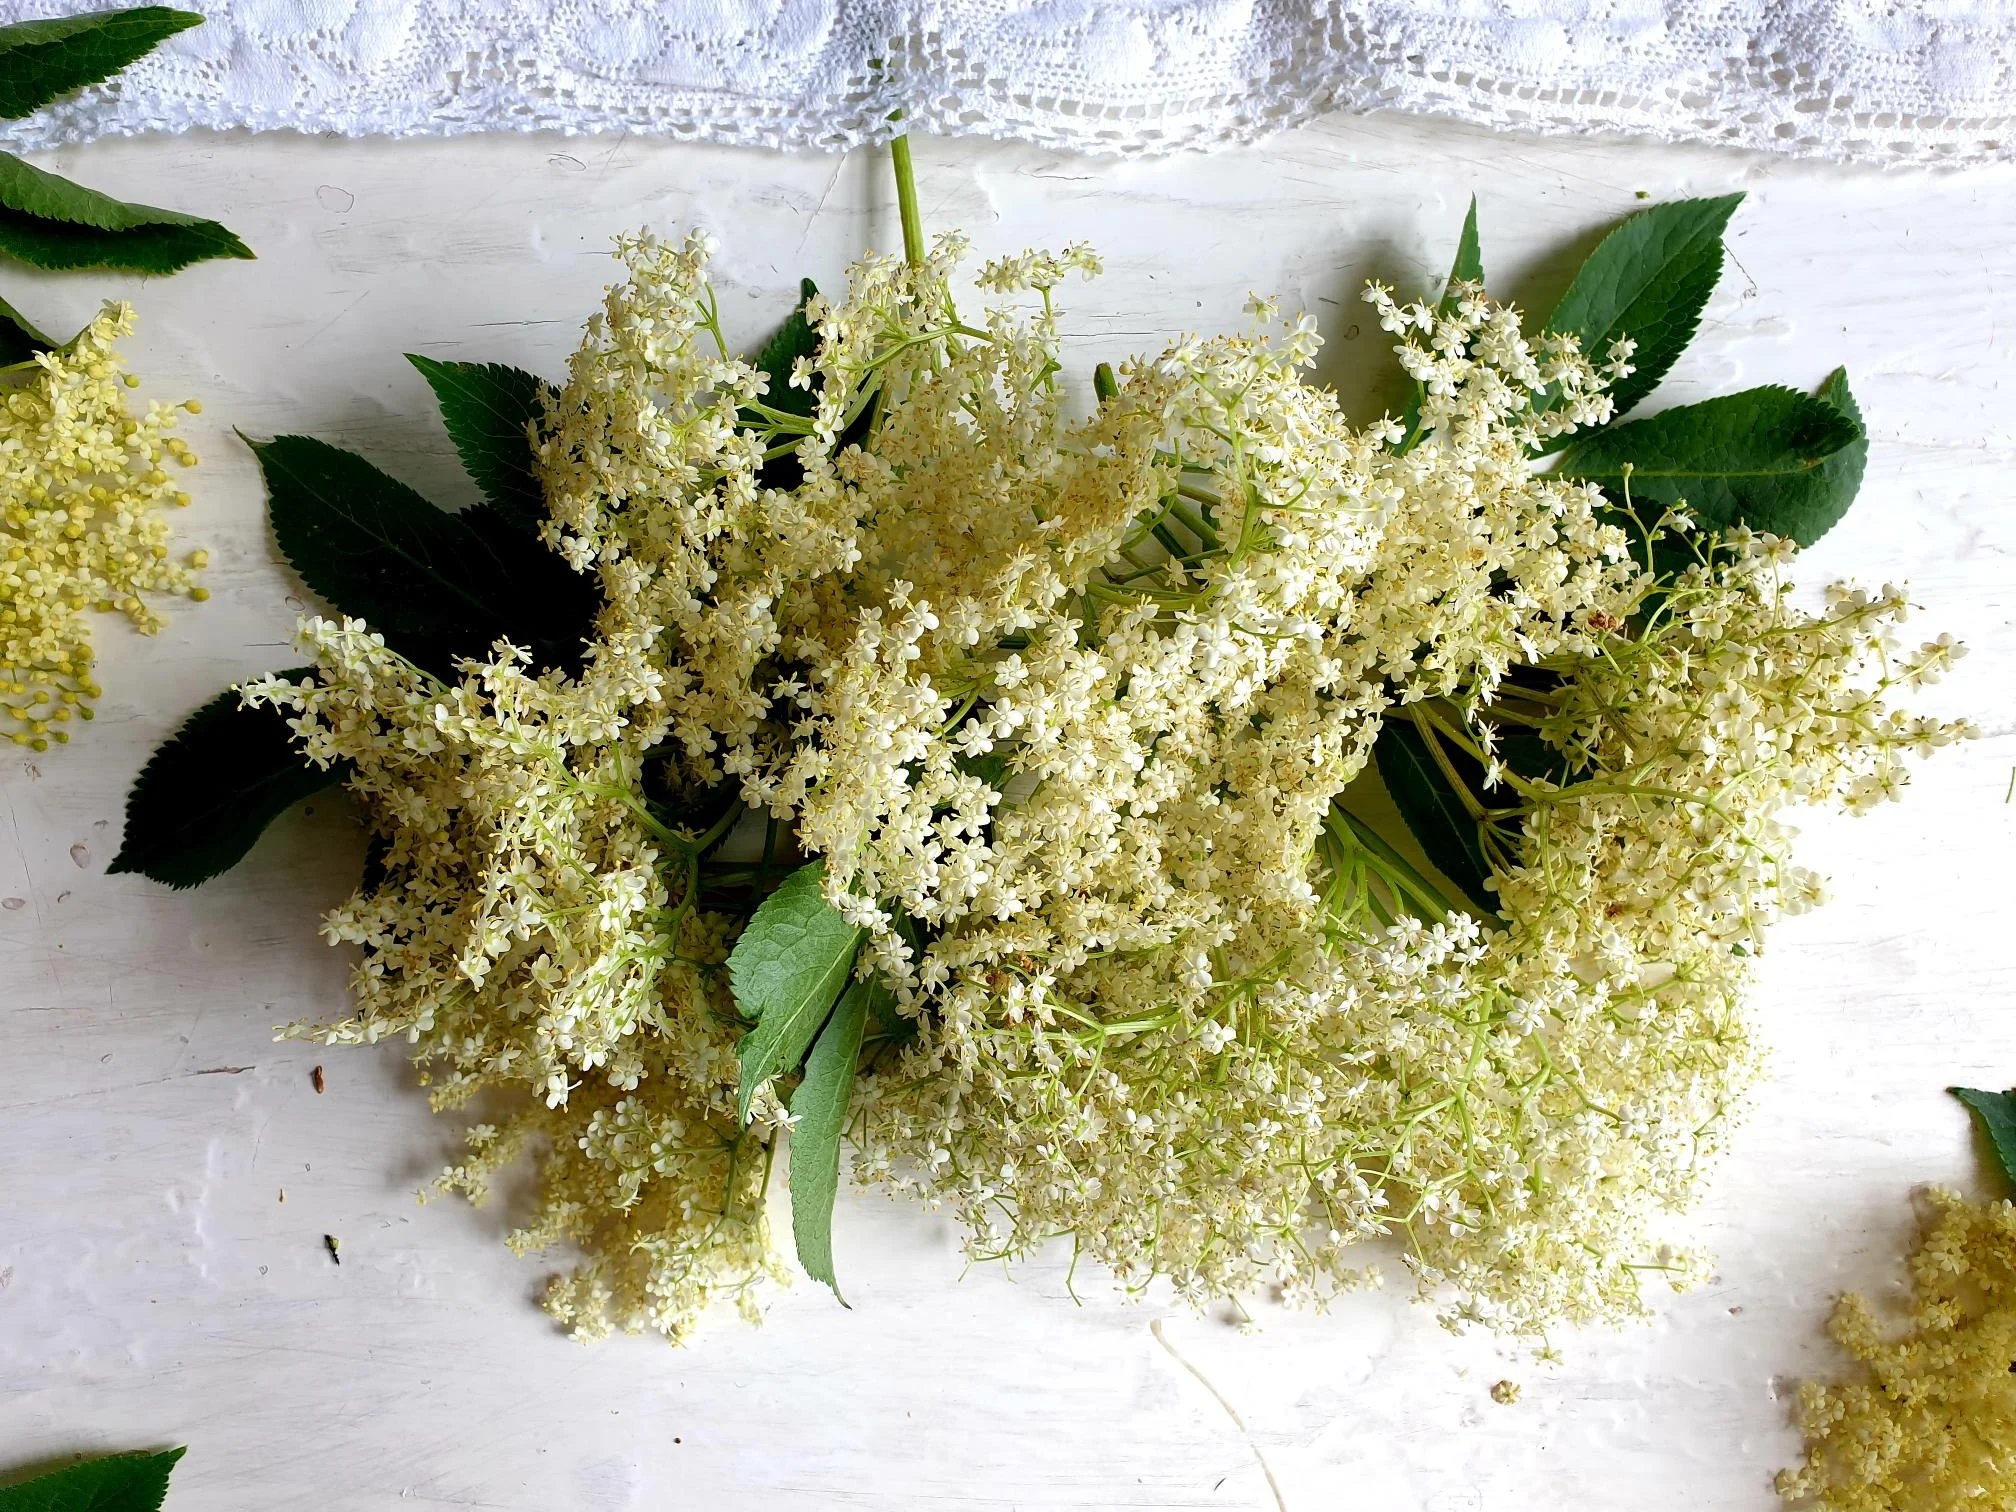
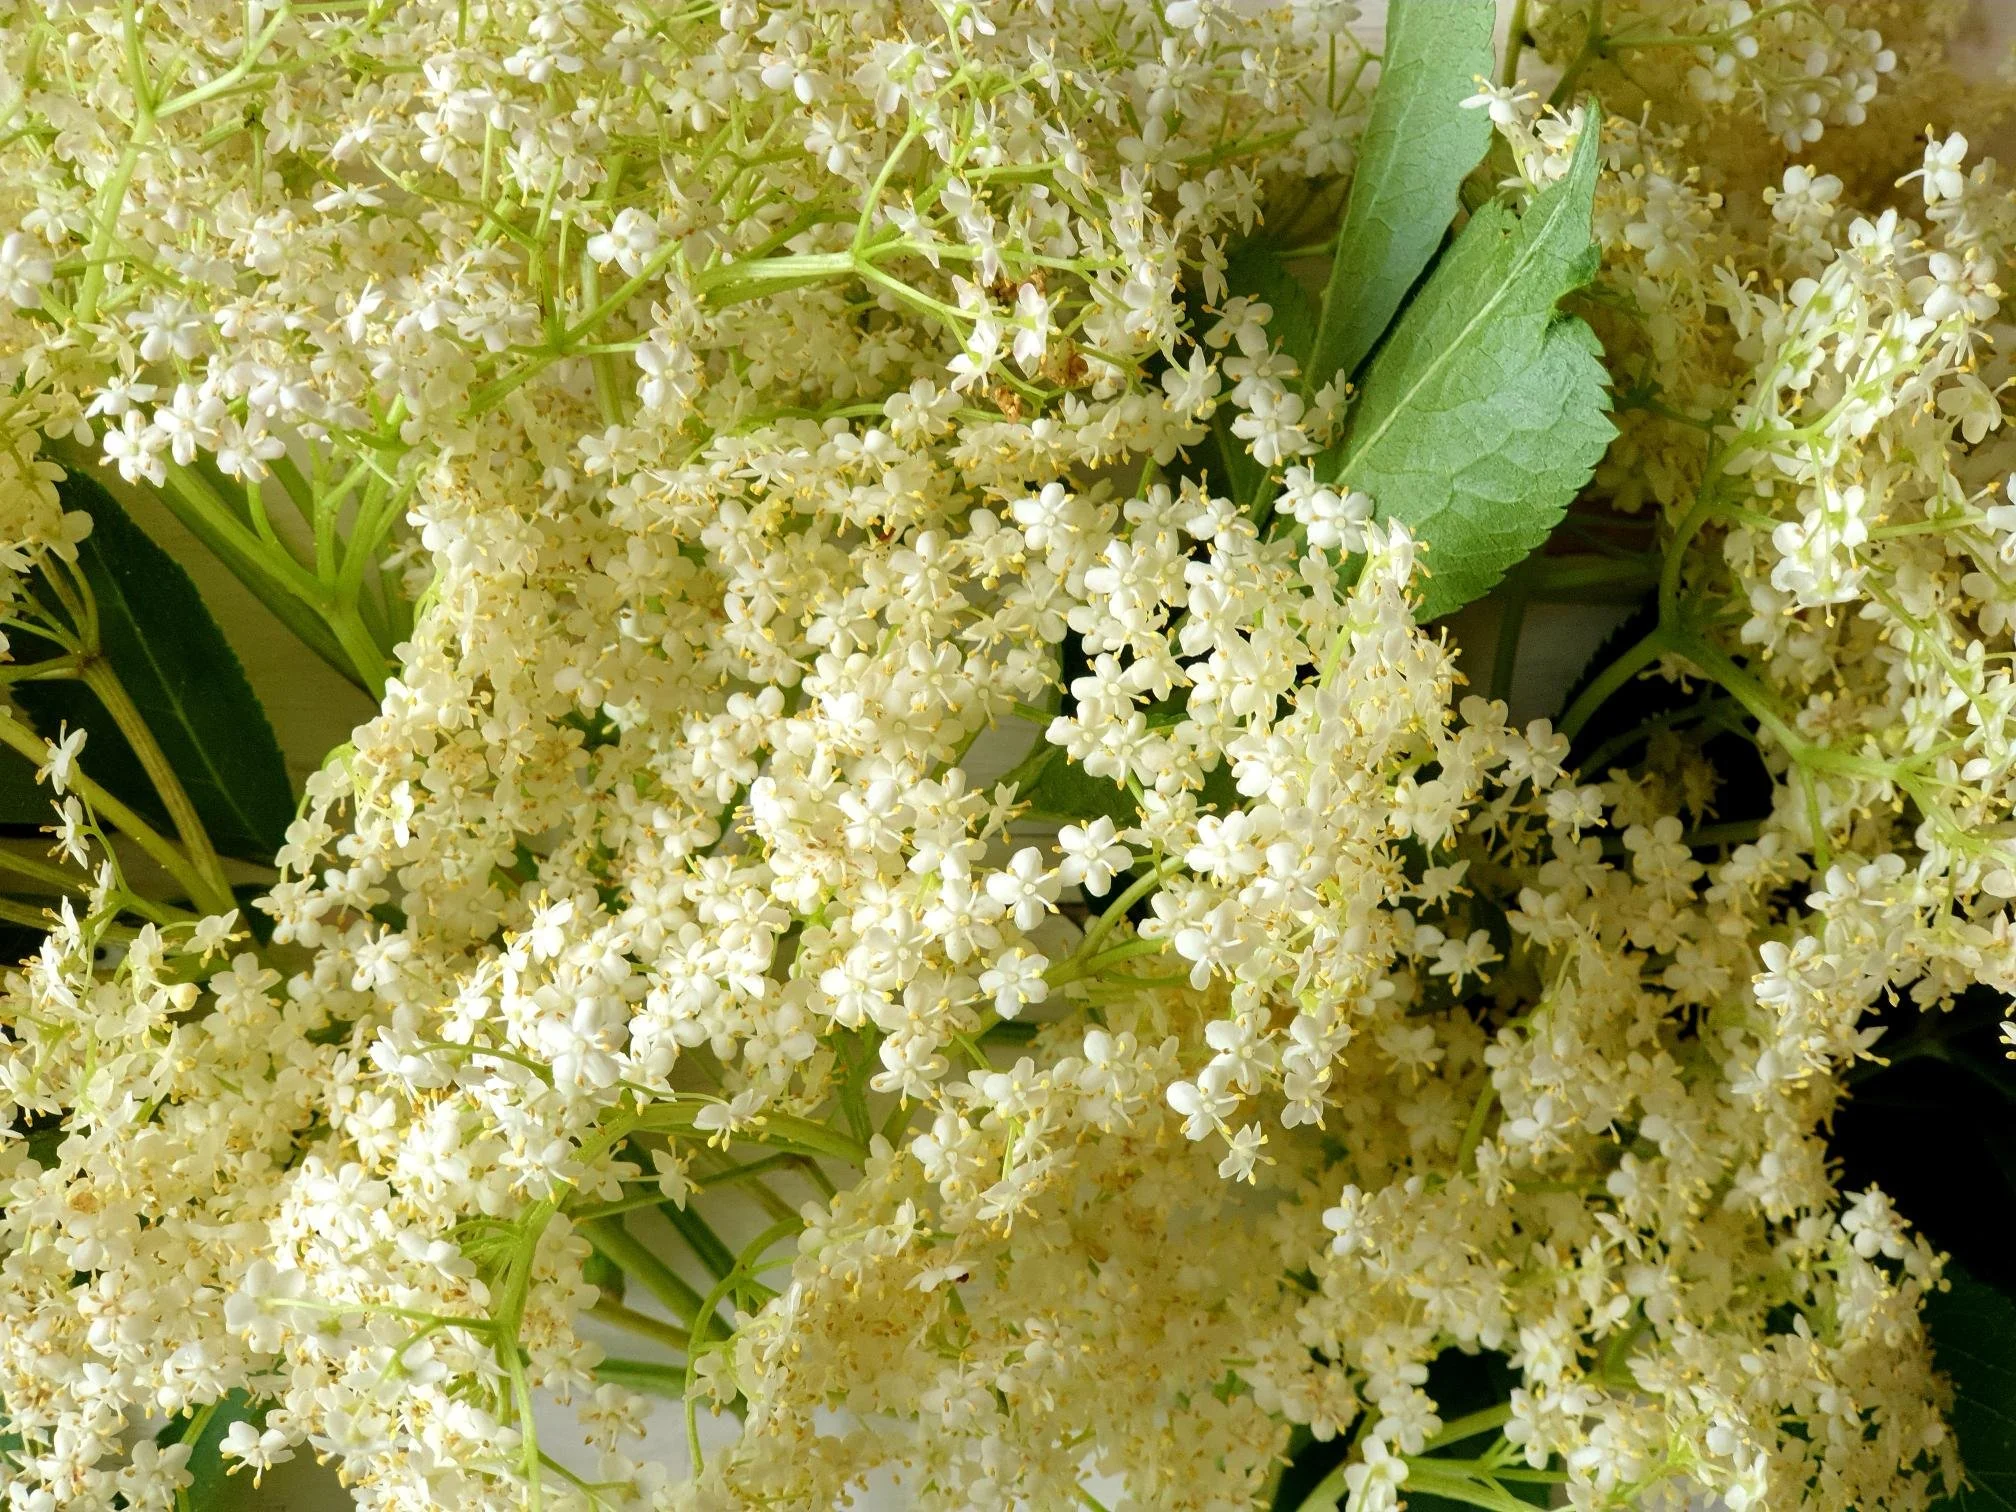
If you are not too familiar with the elderflower, please go and read my page with the recipe for elderflower cordial where I explain a bit more in detail where, when, and how to pick this edible, fragrant, and sweet flower.

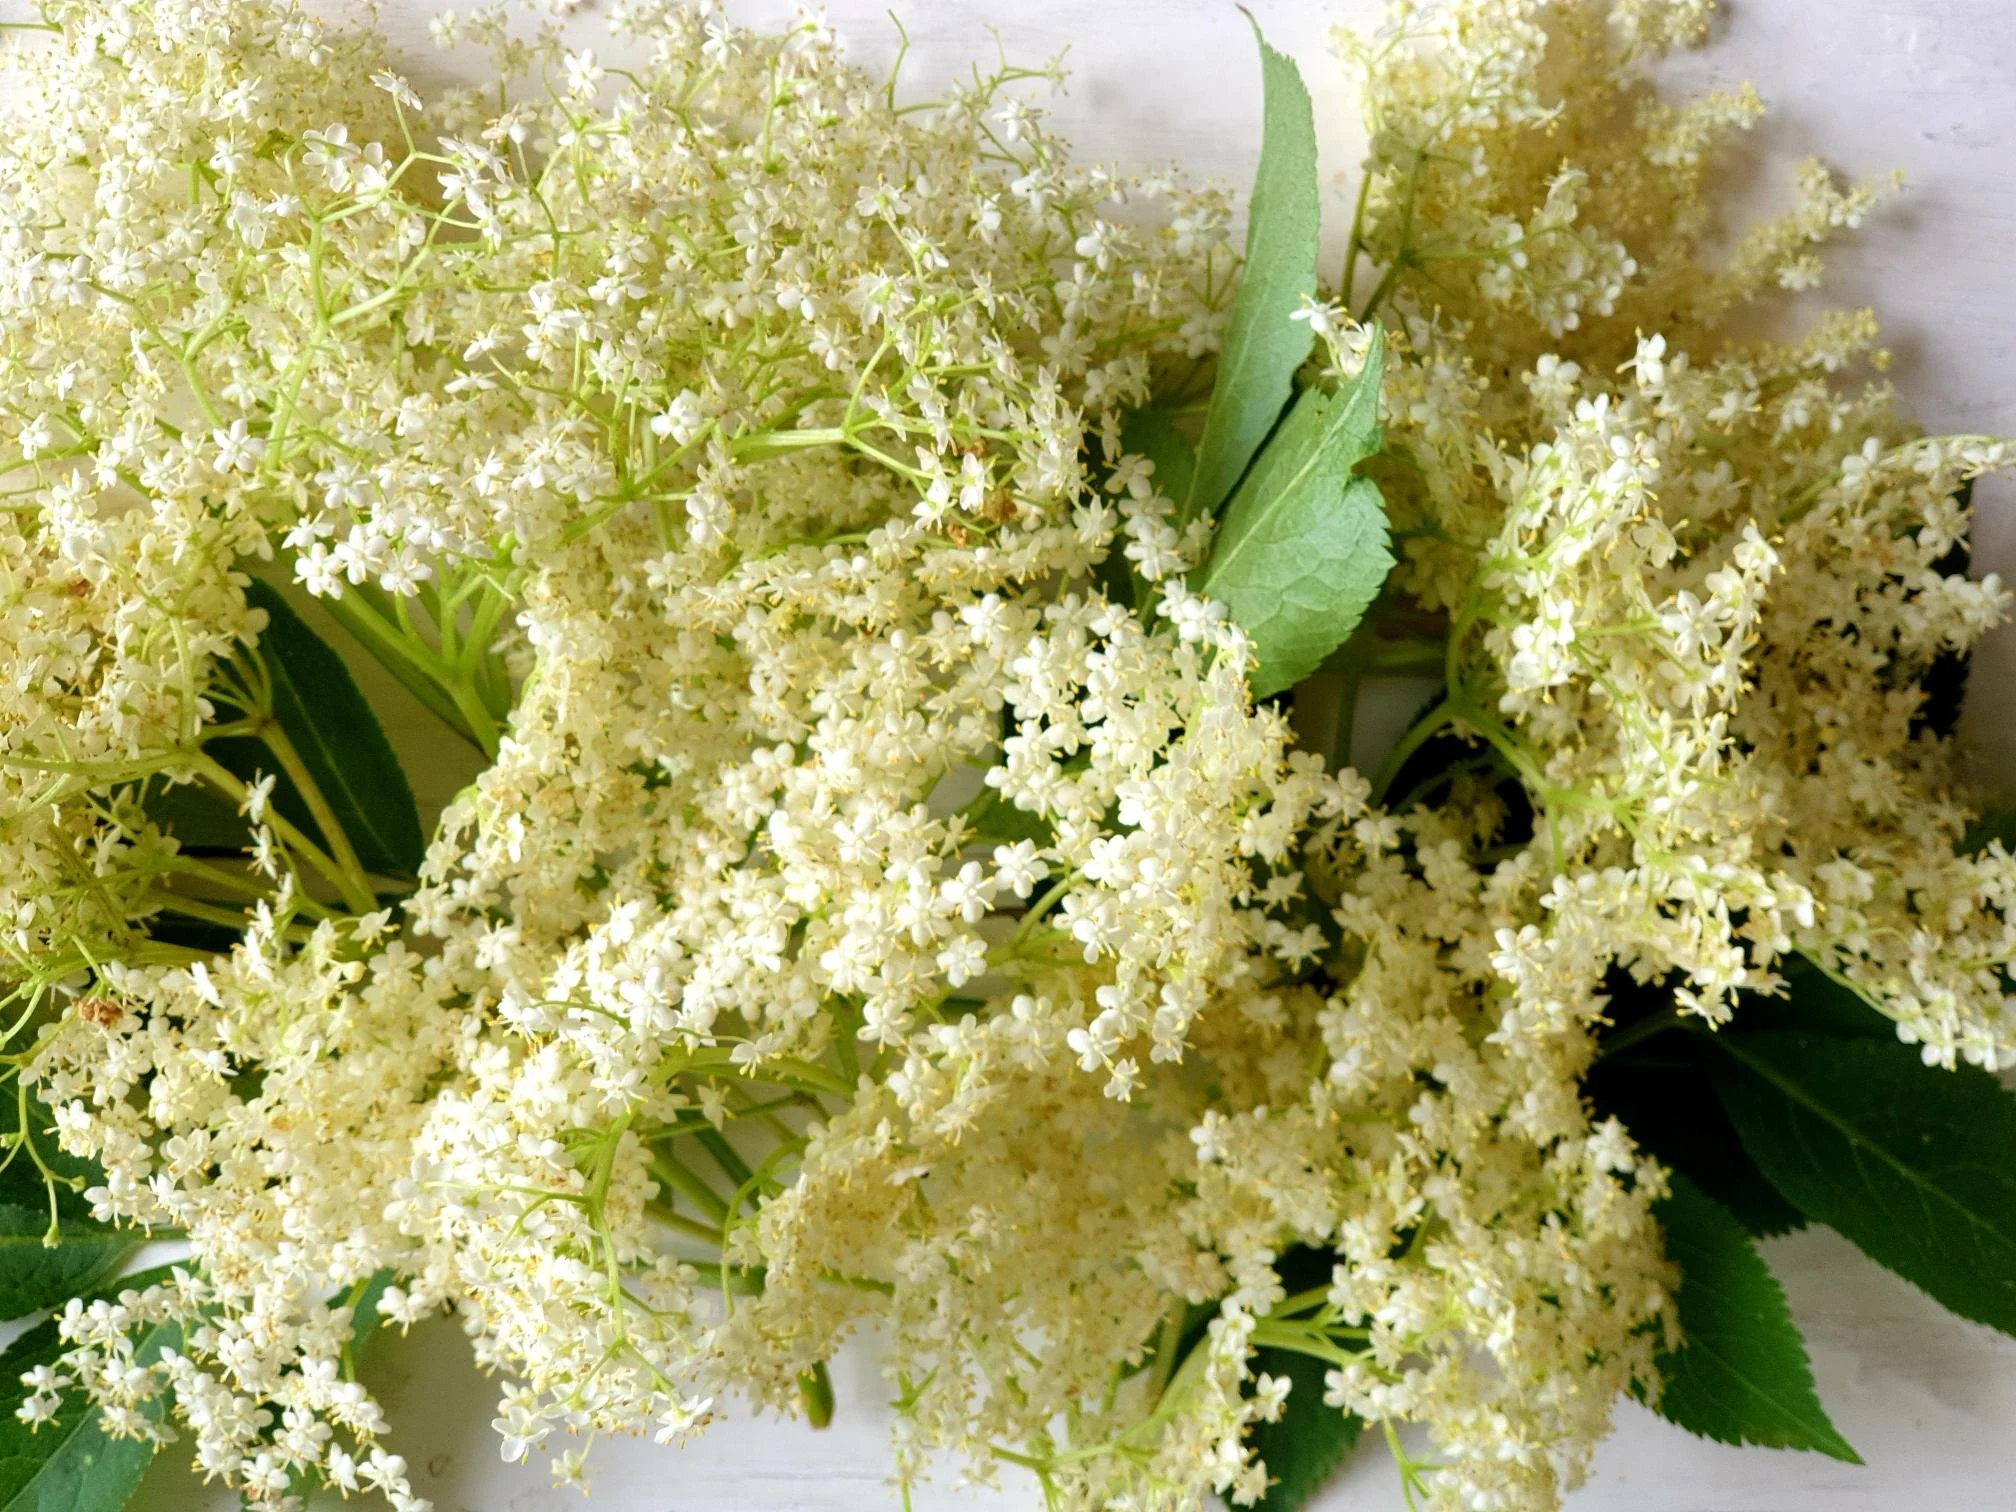
What can be better than going on a walk on a sunny day and bring home a free meal...try these elderflower fritters, you will be hooked, and will have another reason to look forward to a following spring/summer.
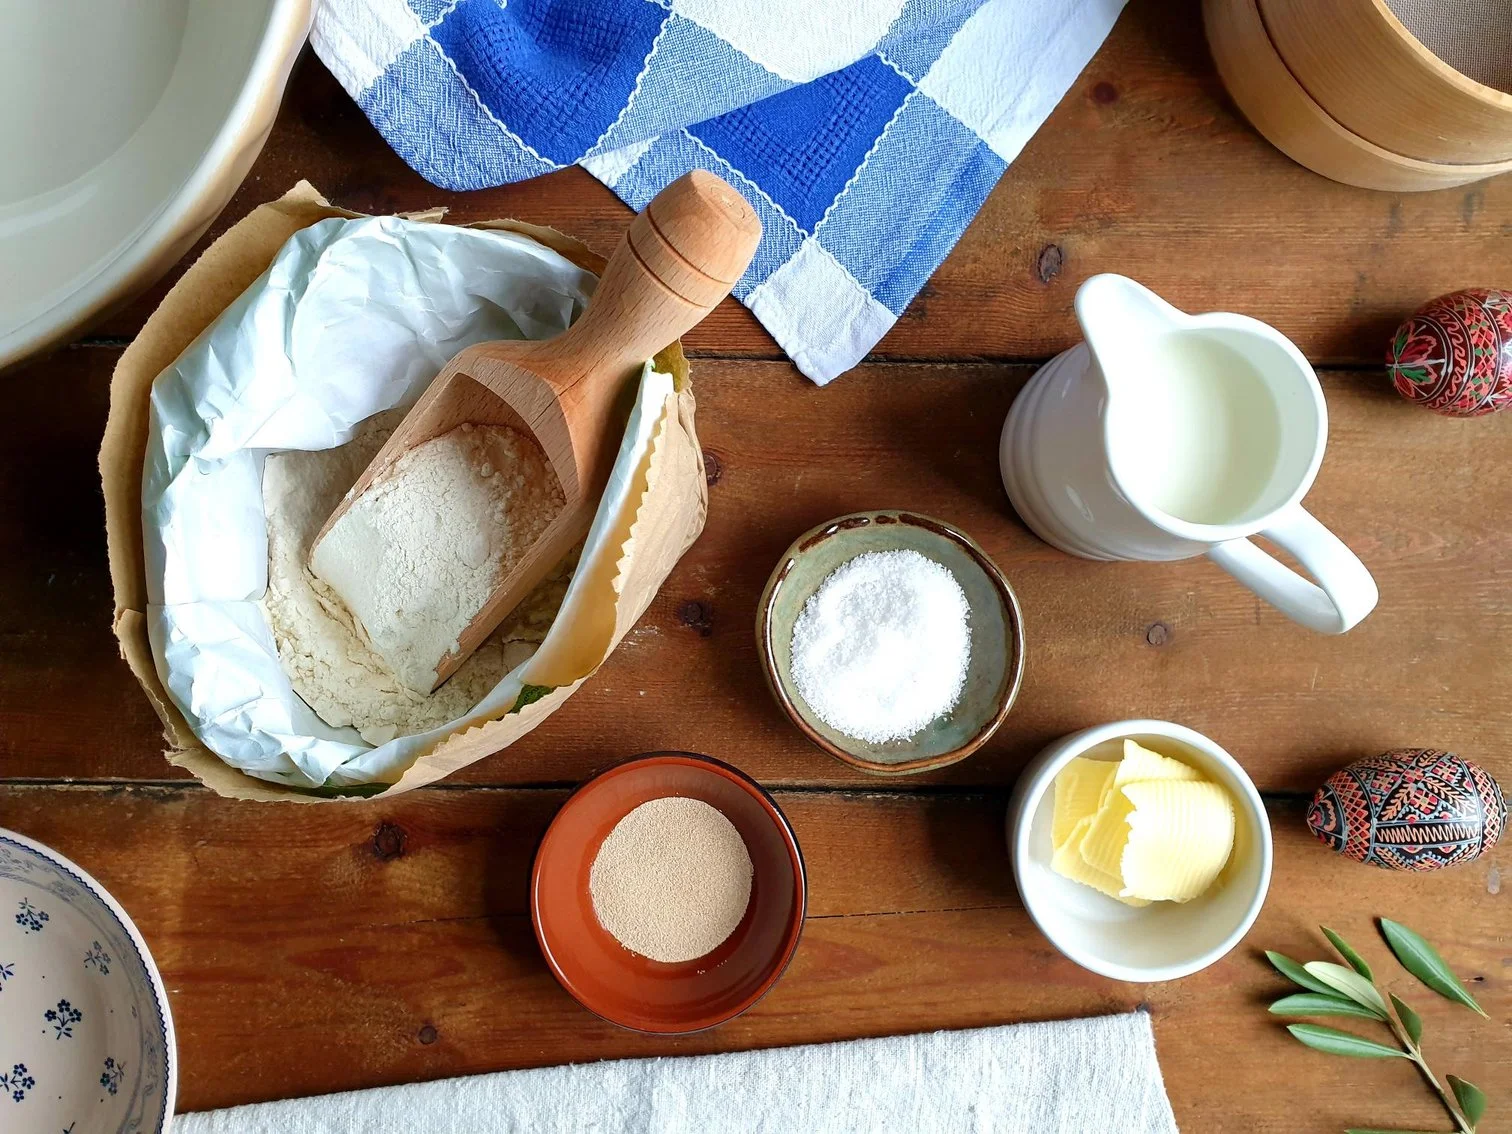
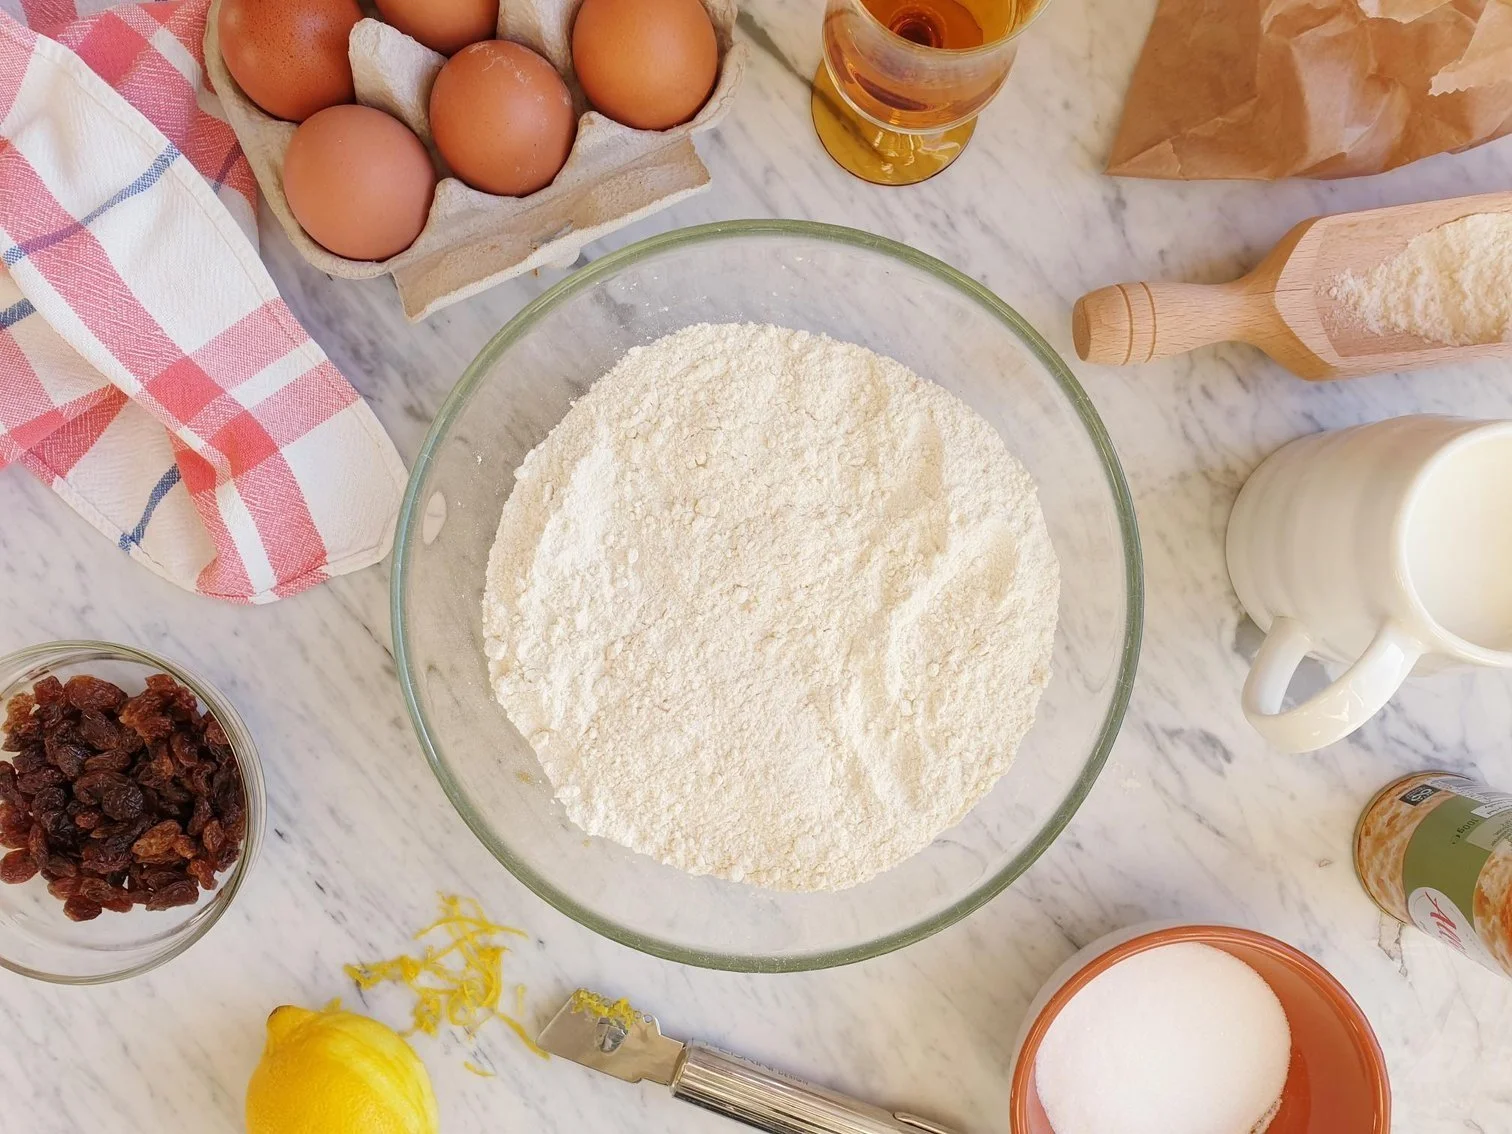
Ingredients

Serves 4-6 as a dessert (2-3 heads per person)

  • about 10-14 elderflower heads with their stems

  • 100g all purpose (plain) flour

  • 1egg

  • 70ml milk

  • 70ml very cold sparkling water

  • sea salt, a pinch

  • 2 tsp caster sugar, optional

  • oil for frying (neutral tasting, I used sunflower oil)

  • icing sugar or vanilla icing sugar, for dusting

Method

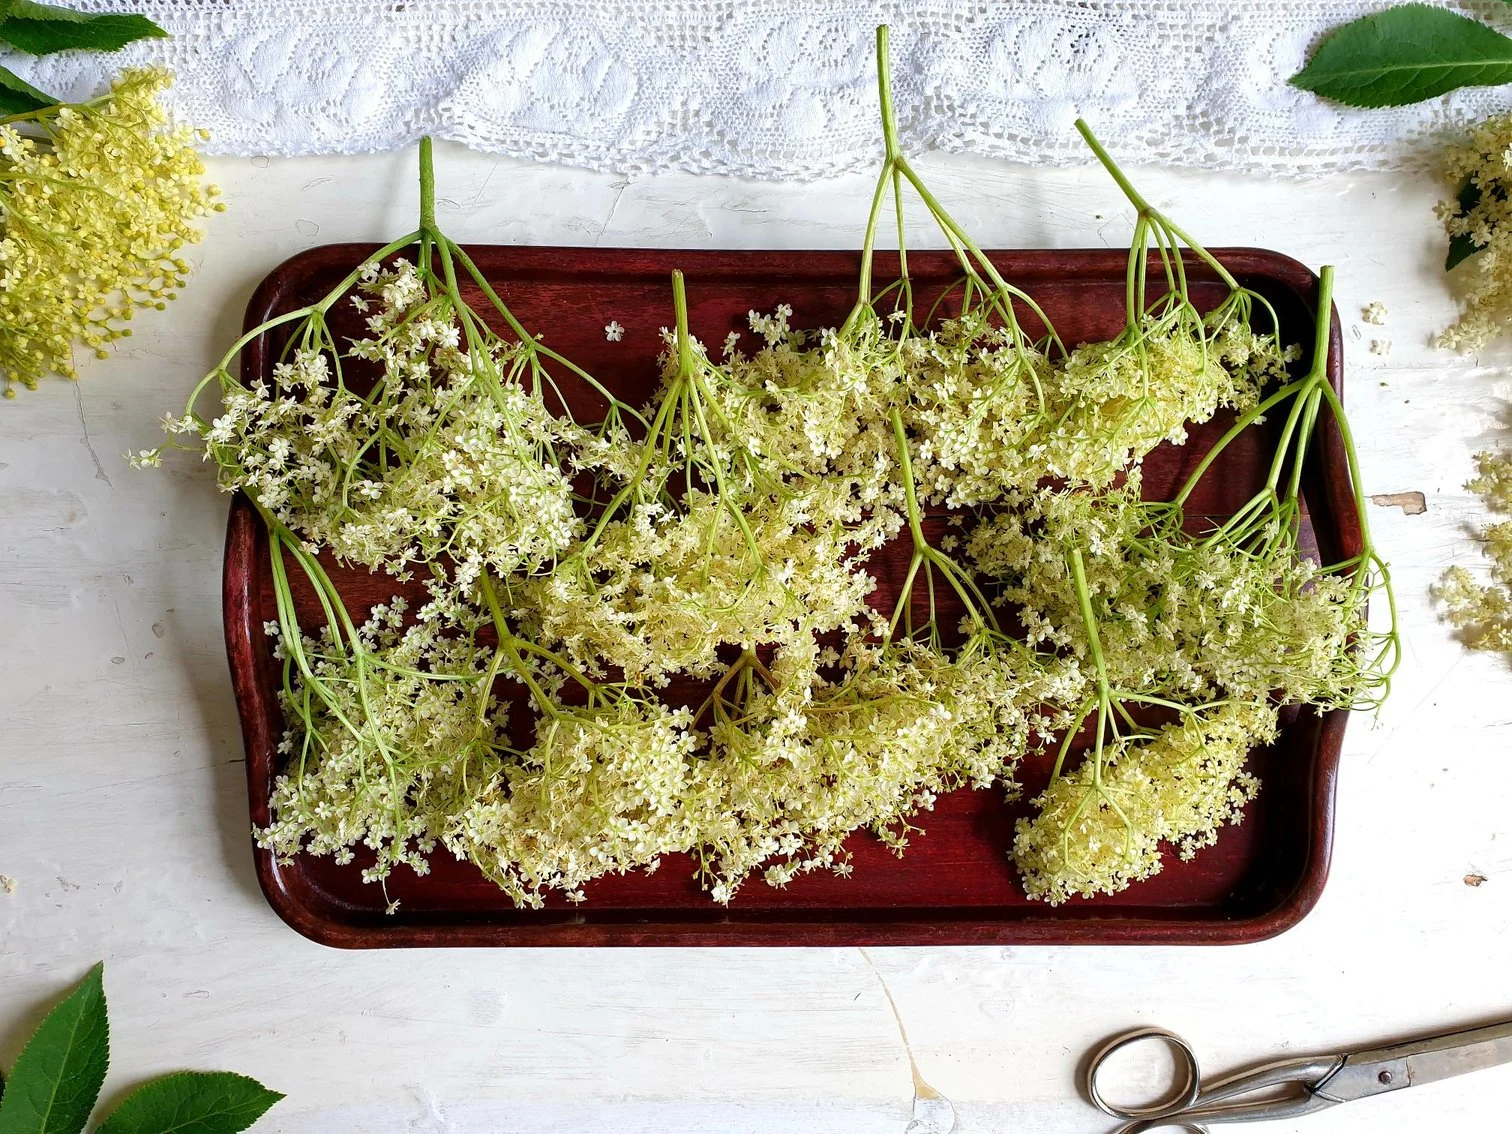
Prepare elderflower heads by cutting the stems with the scissors but leaving at least 5cm of stem for easy handling (in other words enough stem to hold them by). Very gently shake any insects and dirt off your flower heads, but do not be tempted to wash the flower heads as you will loose the flavour.

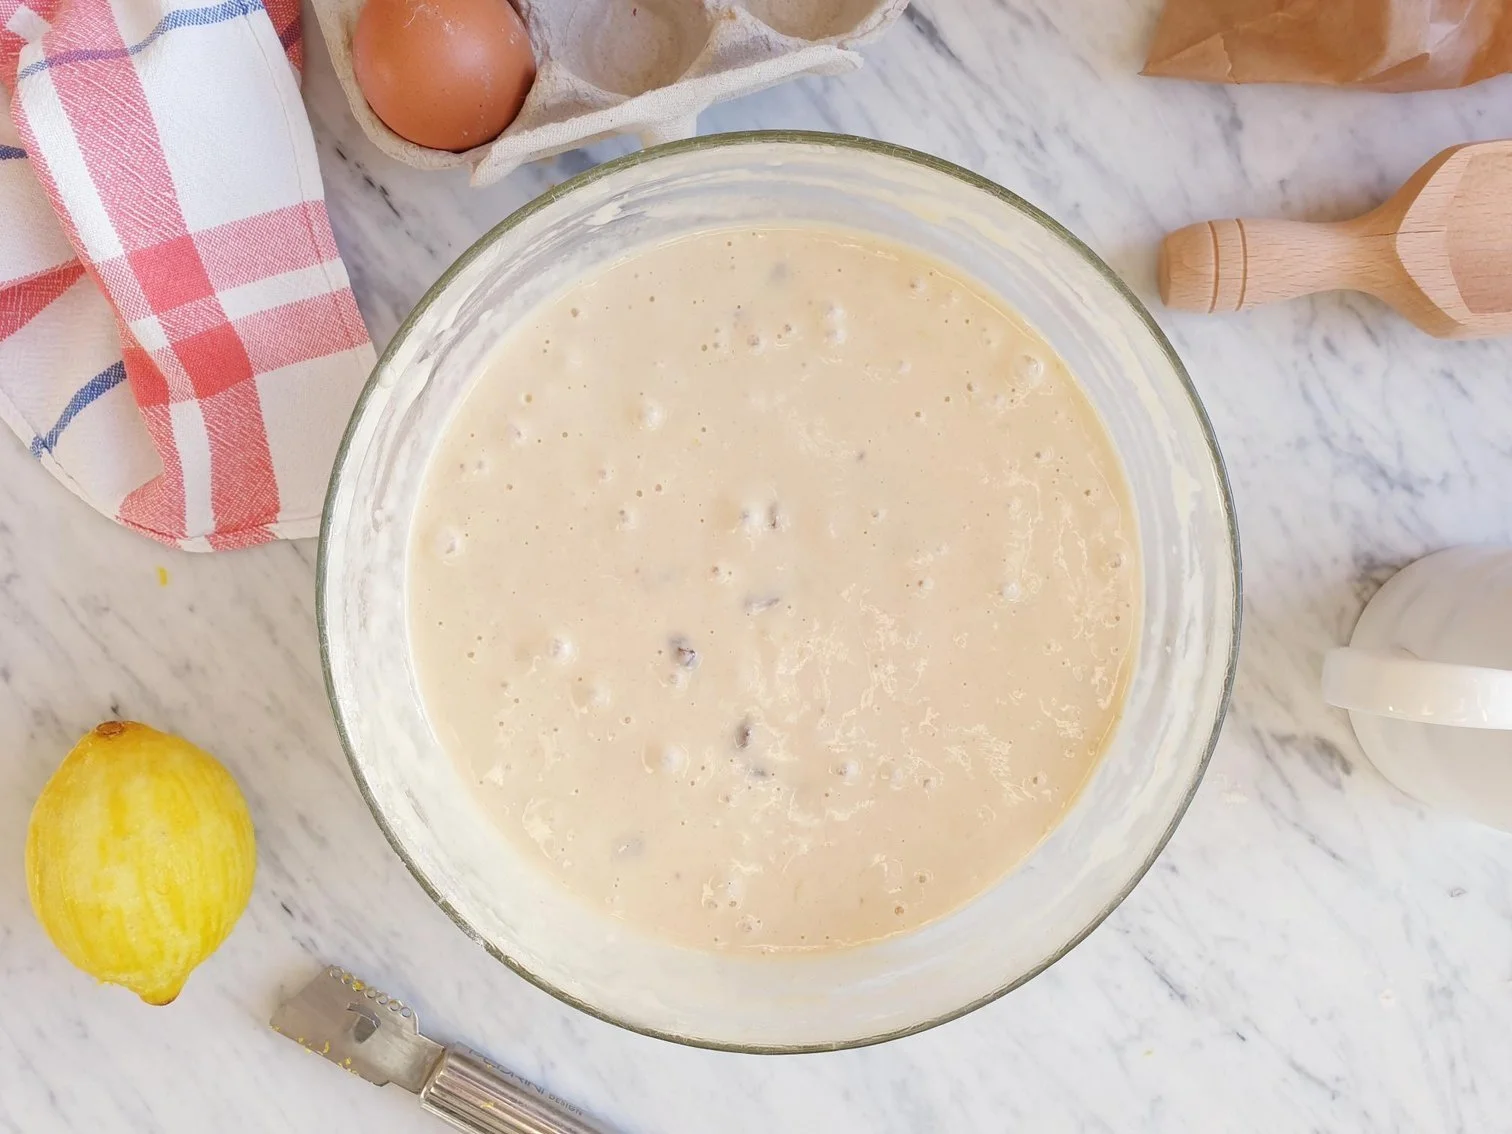
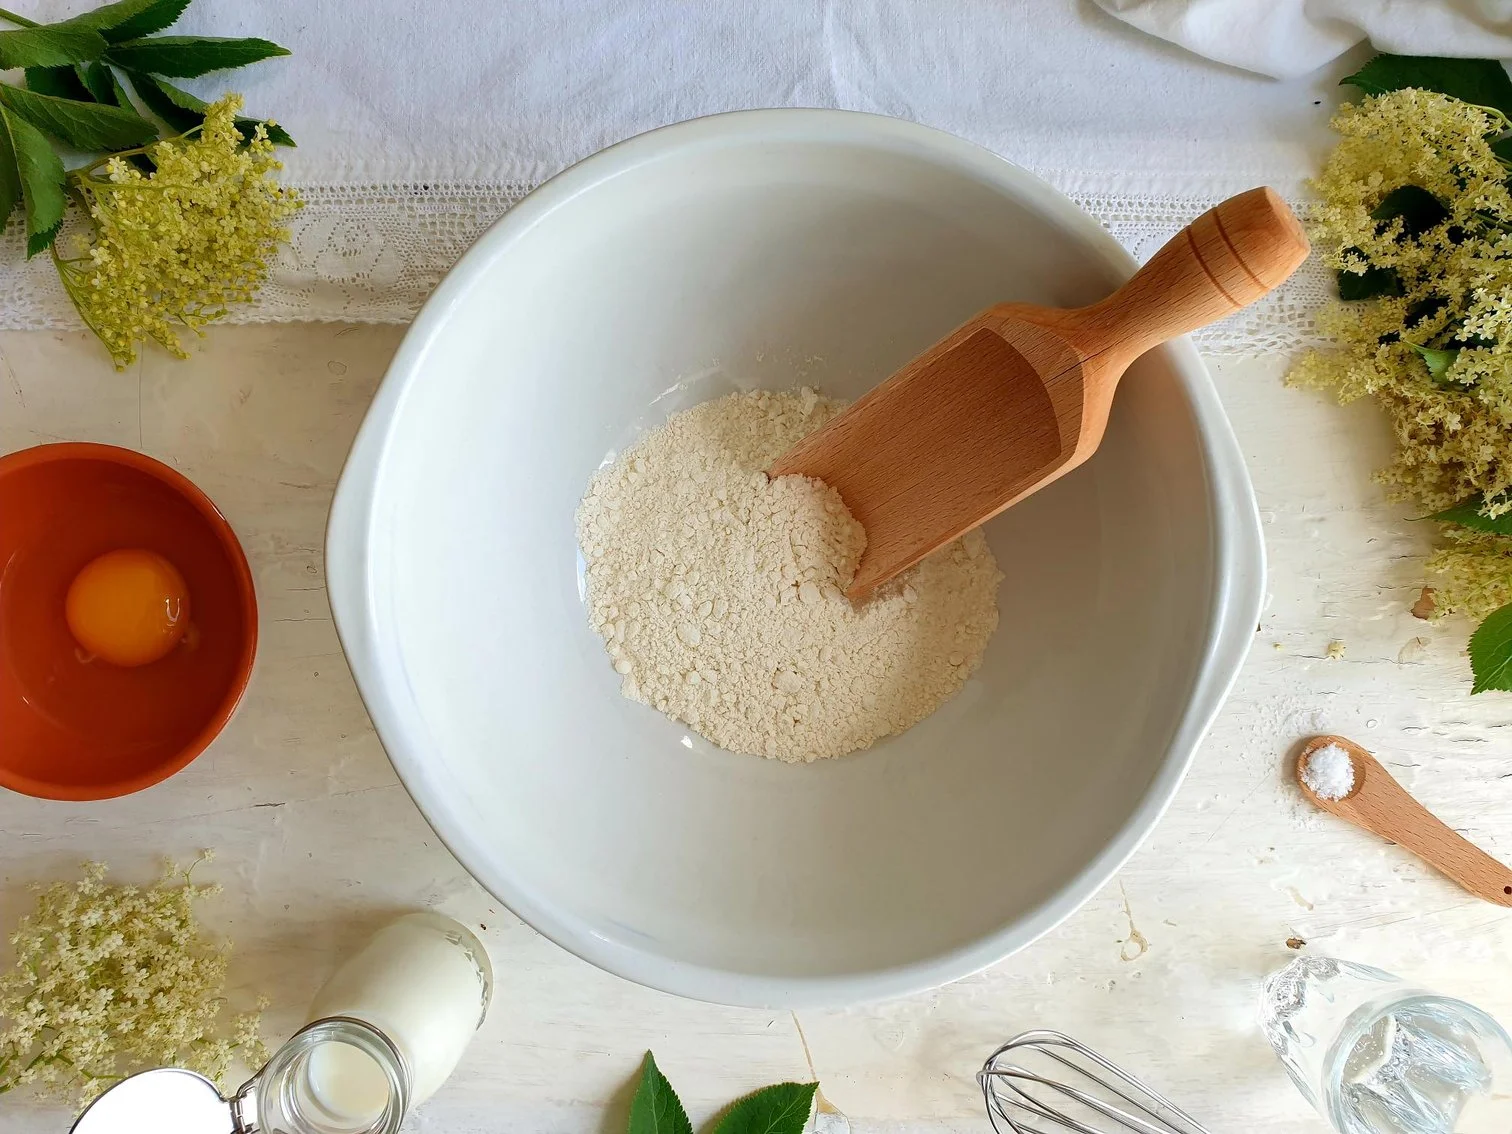
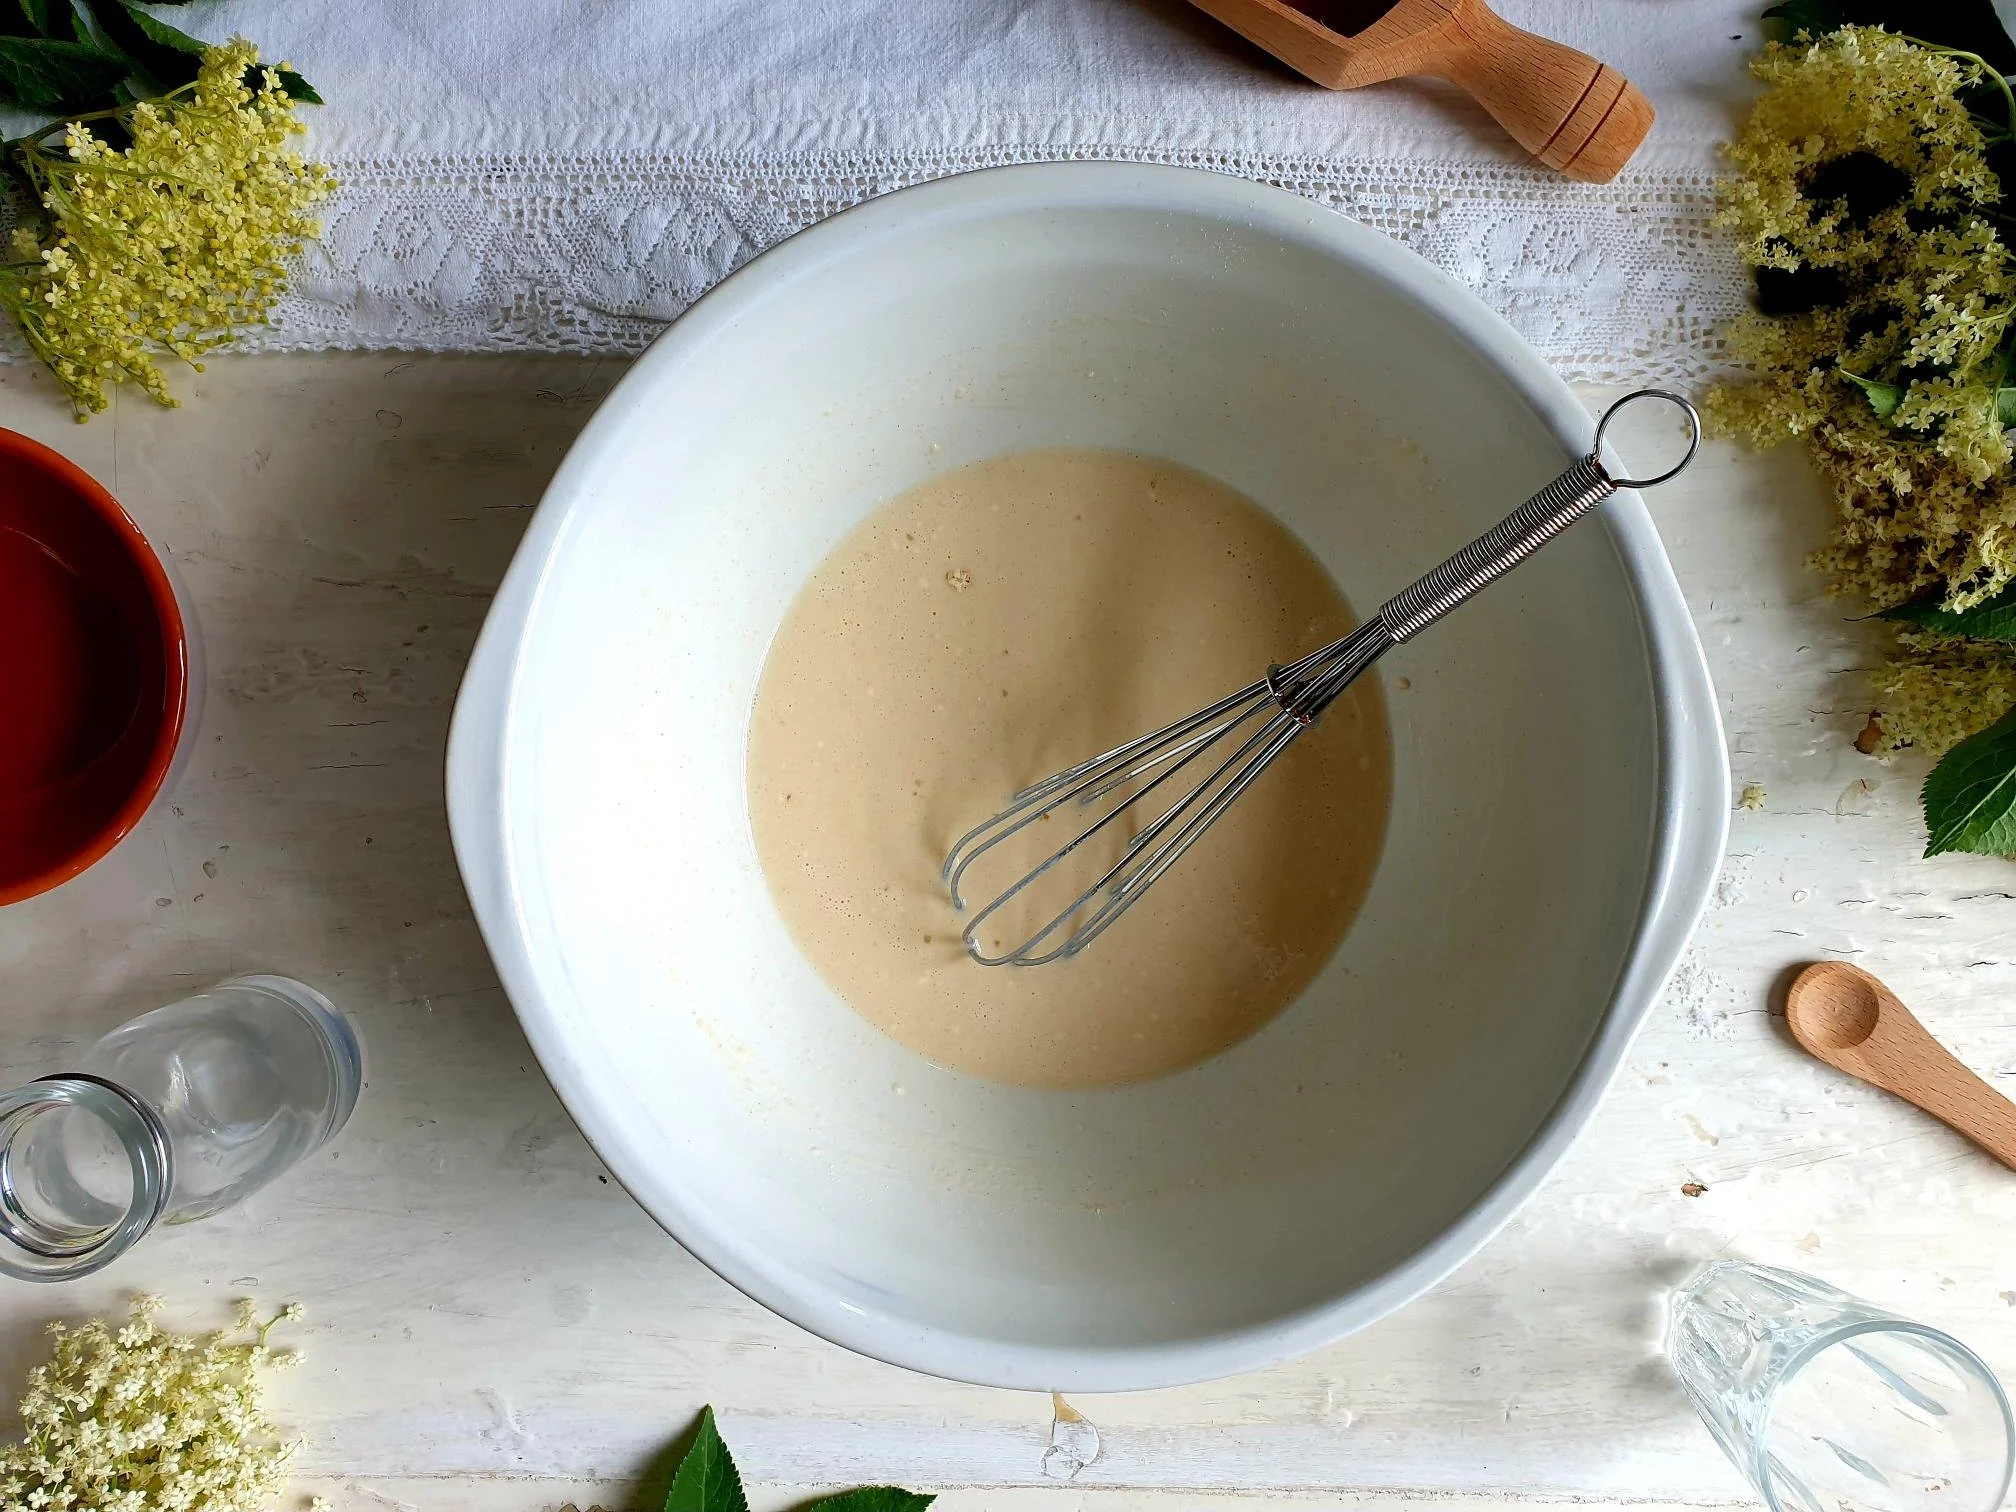
In a mixing bowl, using a hand whisk, whisk the egg, add milk, sea salt and sugar, if using, and mix until well combined.

Add the flour gradually and whisk until smooth with no lumps, then add sparkling water which will help lighten the batter, set aside an leave it to rest for about 30 minutes.

Heat about 5cm of oil a pan (big enough to accommodate the largest elderflower head) until hot (180C on a temperature probe). You will know the oil is ready when a drop of batter bubbles immediately and turns golden in about 5 seconds.

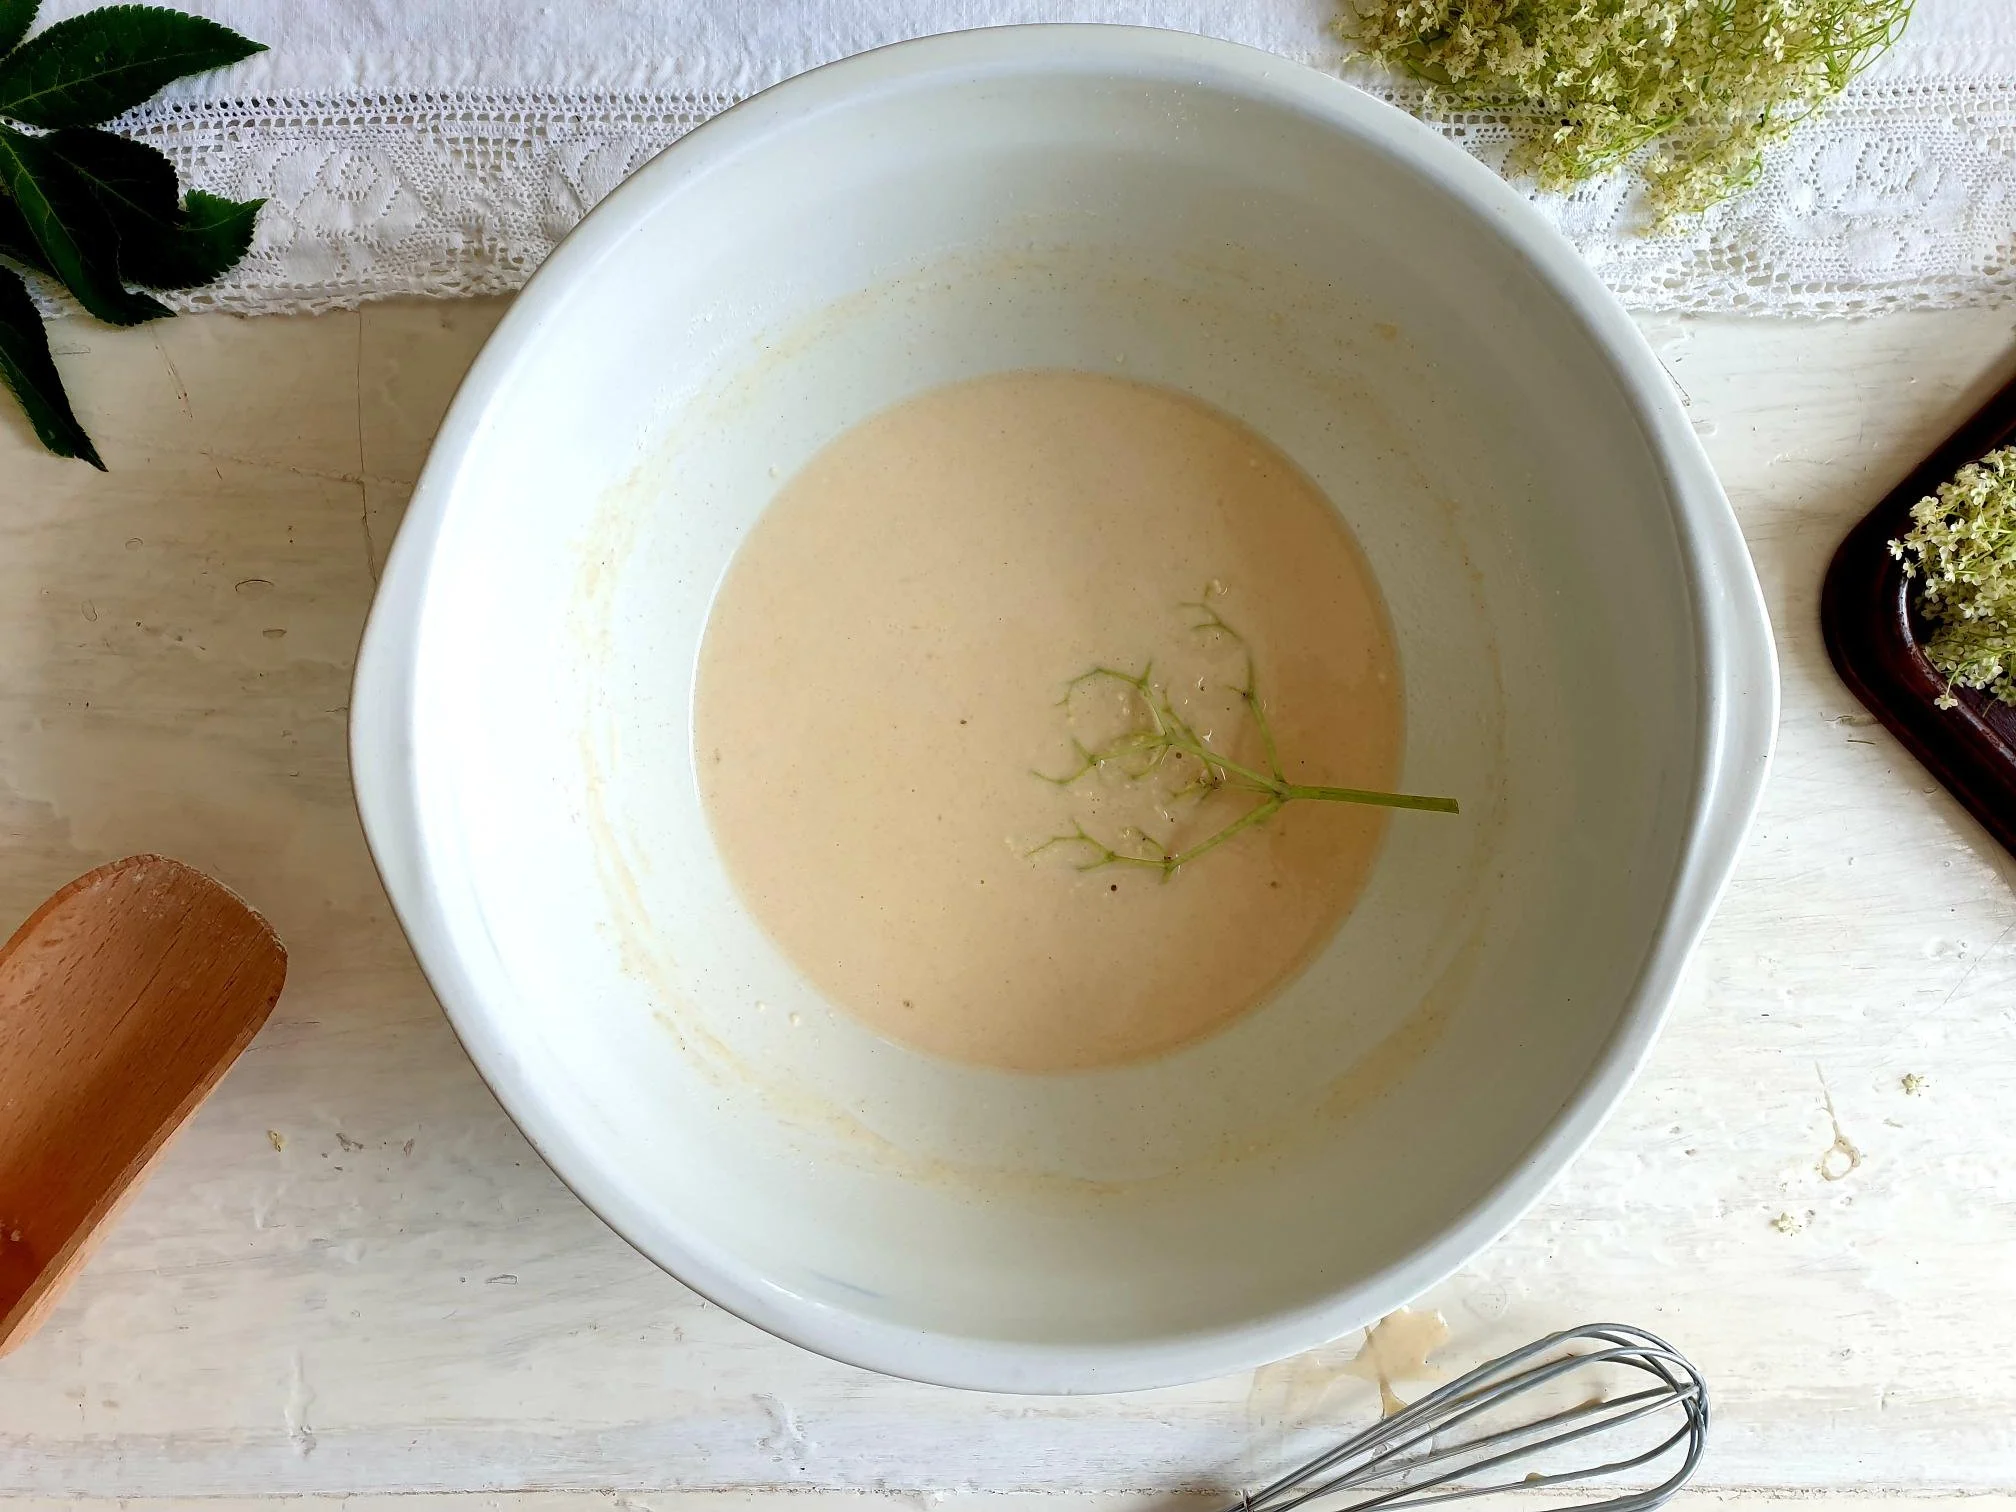
Holding the elderflower by their stems, dip each elderflower head into the batter, so they are coated all over, gently shake off excess batter.

View fullsize Elderflowers fritters 10.jpg
View fullsize Elderflowers fritters 17.jpg

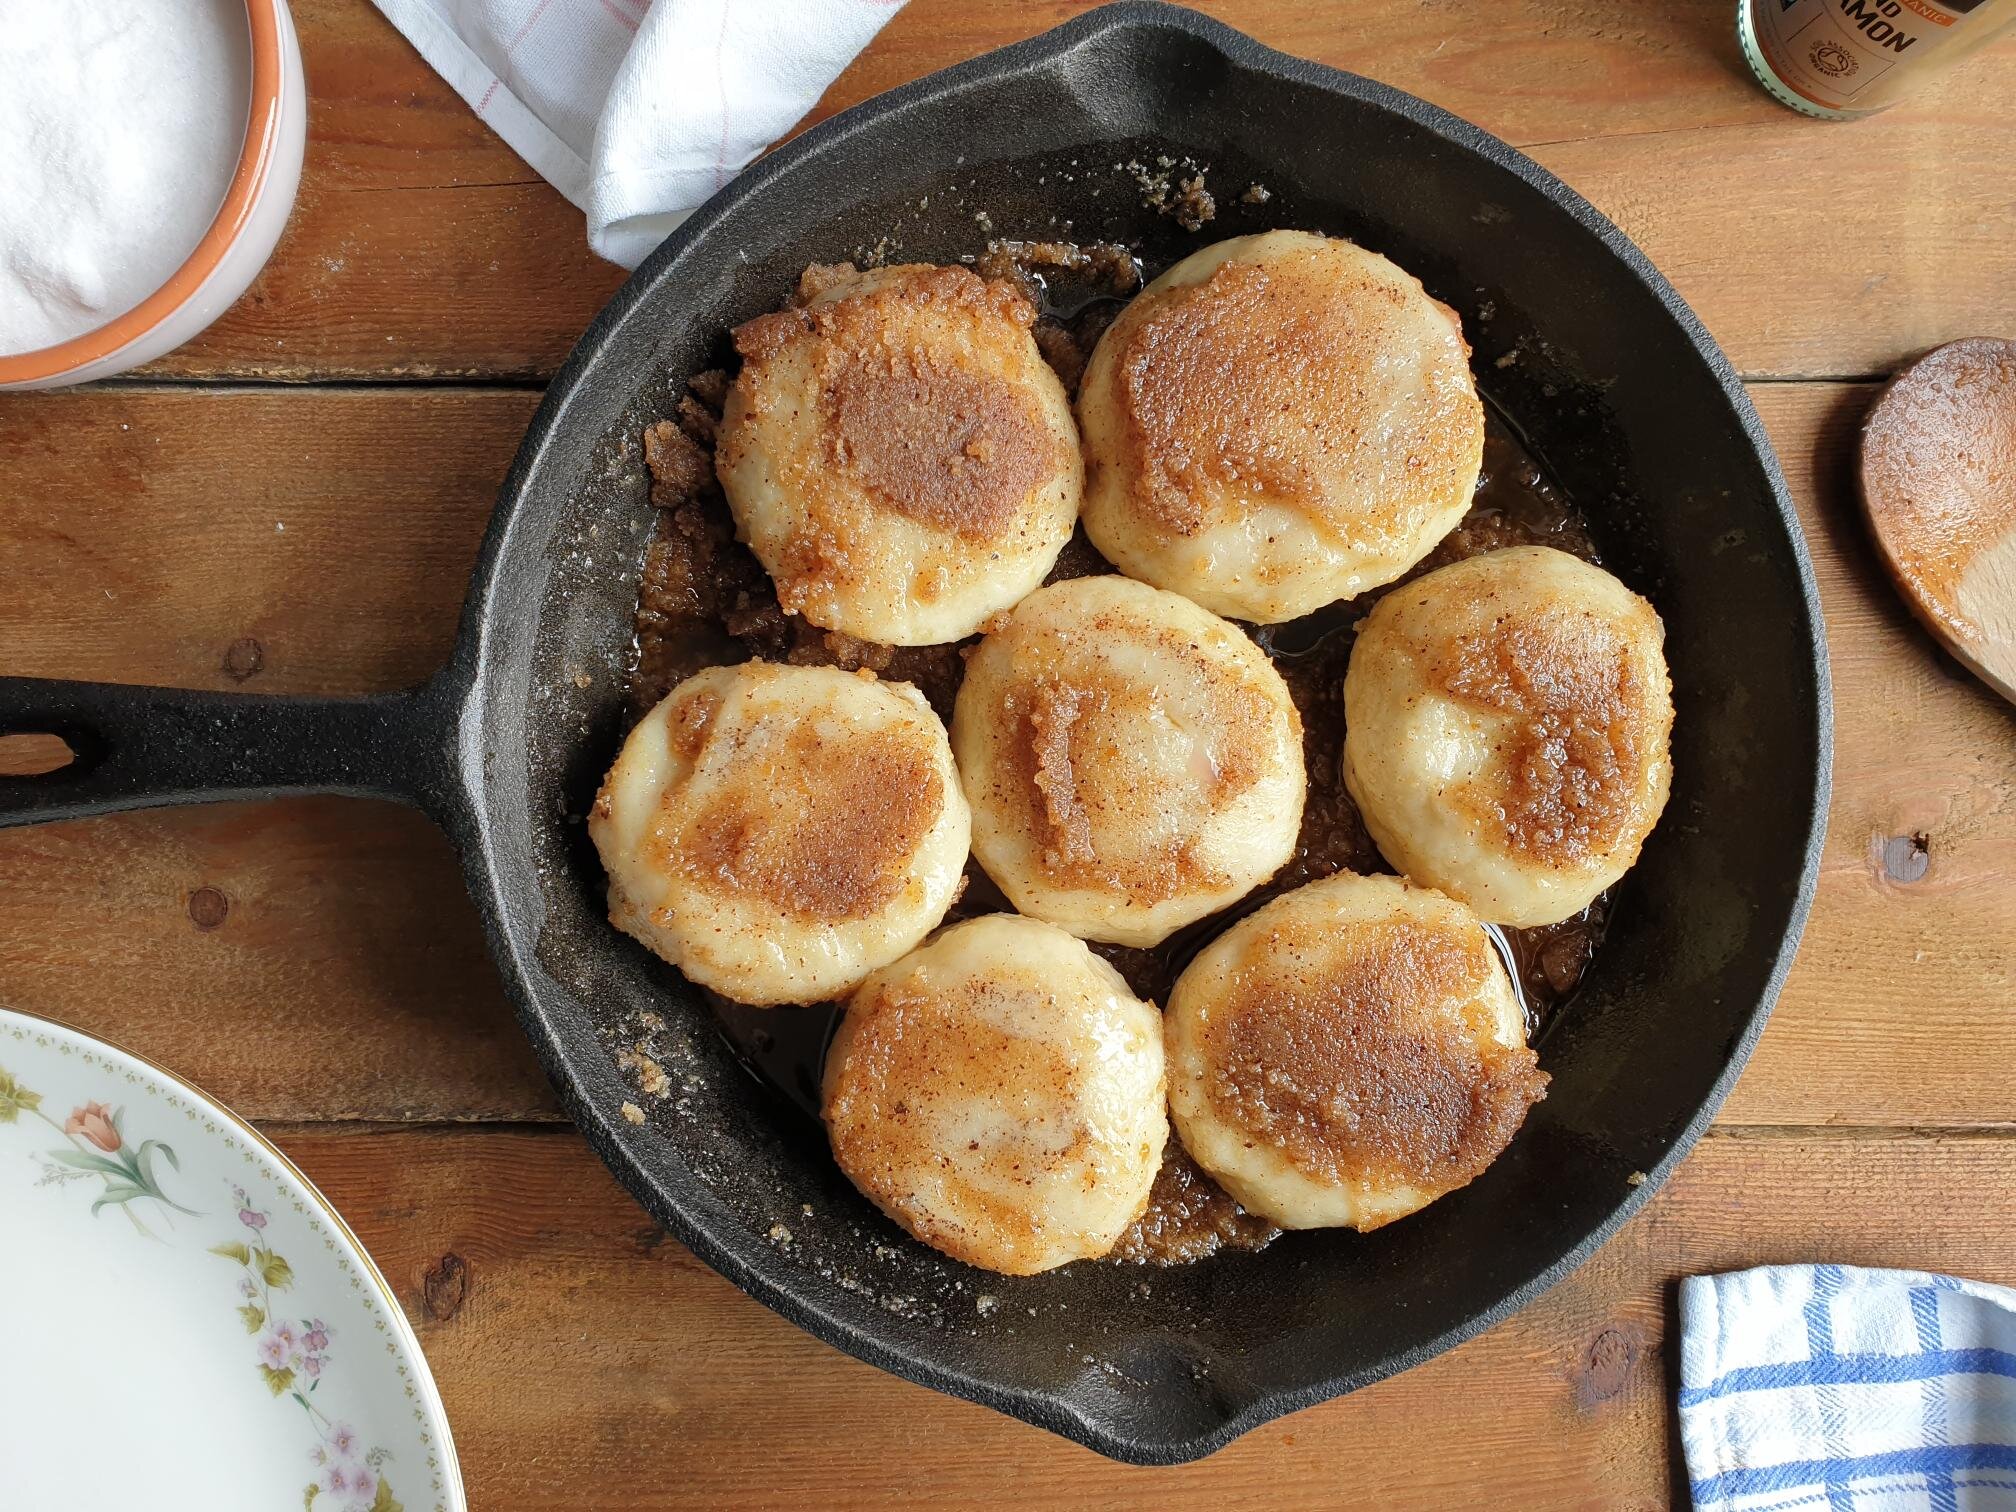
Drop the flowers into the pan with hot oil (flower side down) and fry for about 30 seconds. Fry one flower at a time.

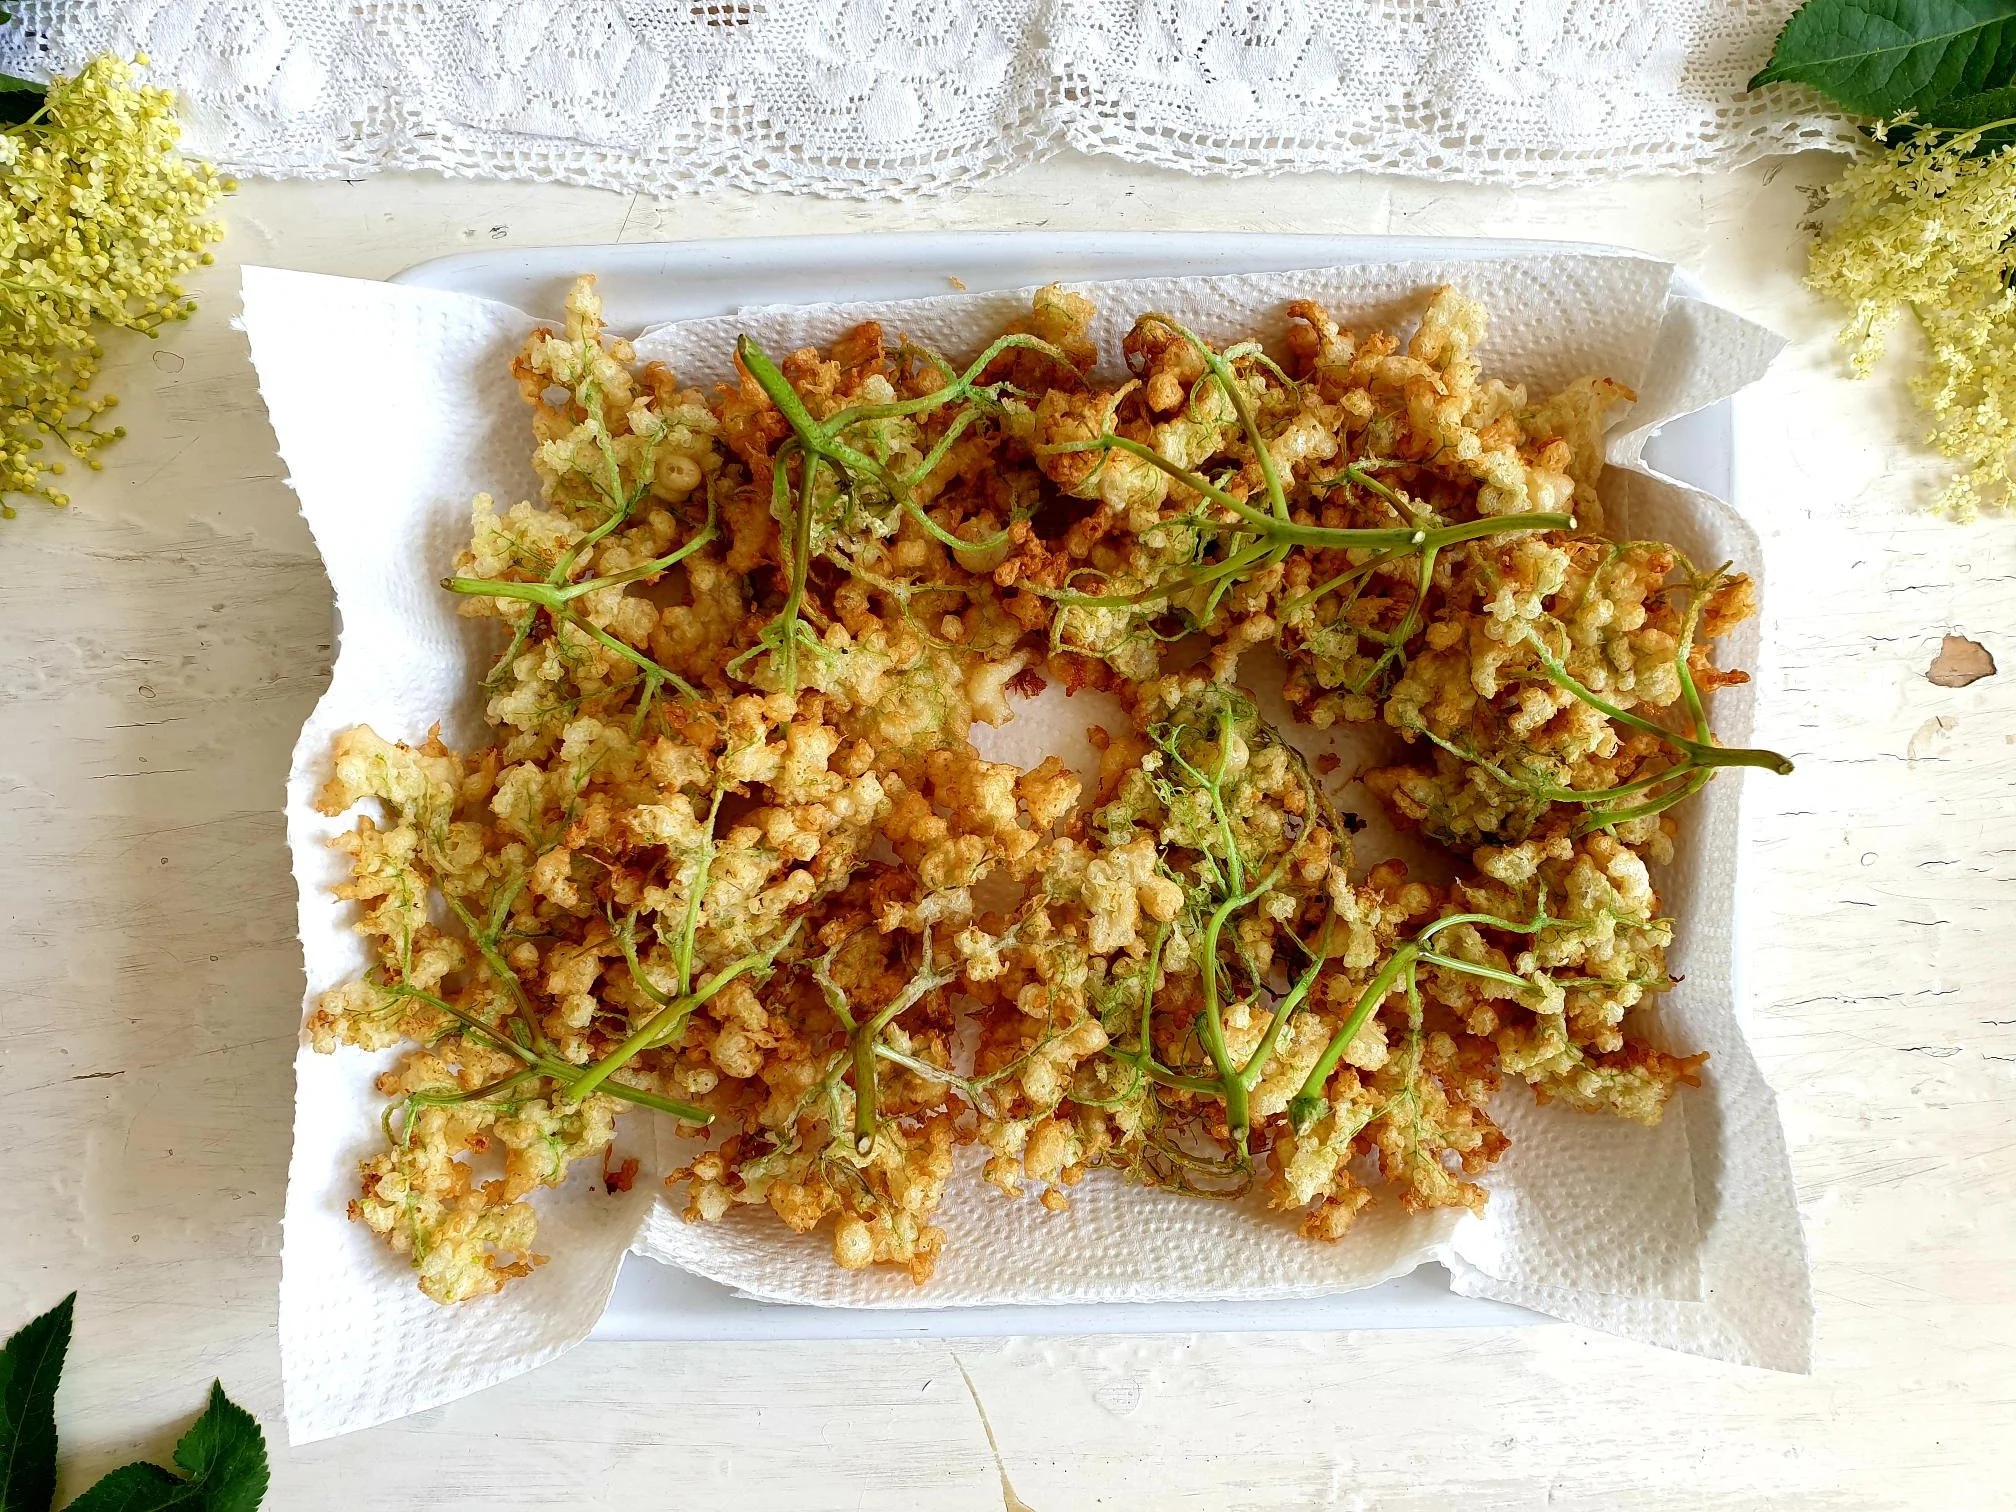
They should be lightly golden in colour and not too brown.

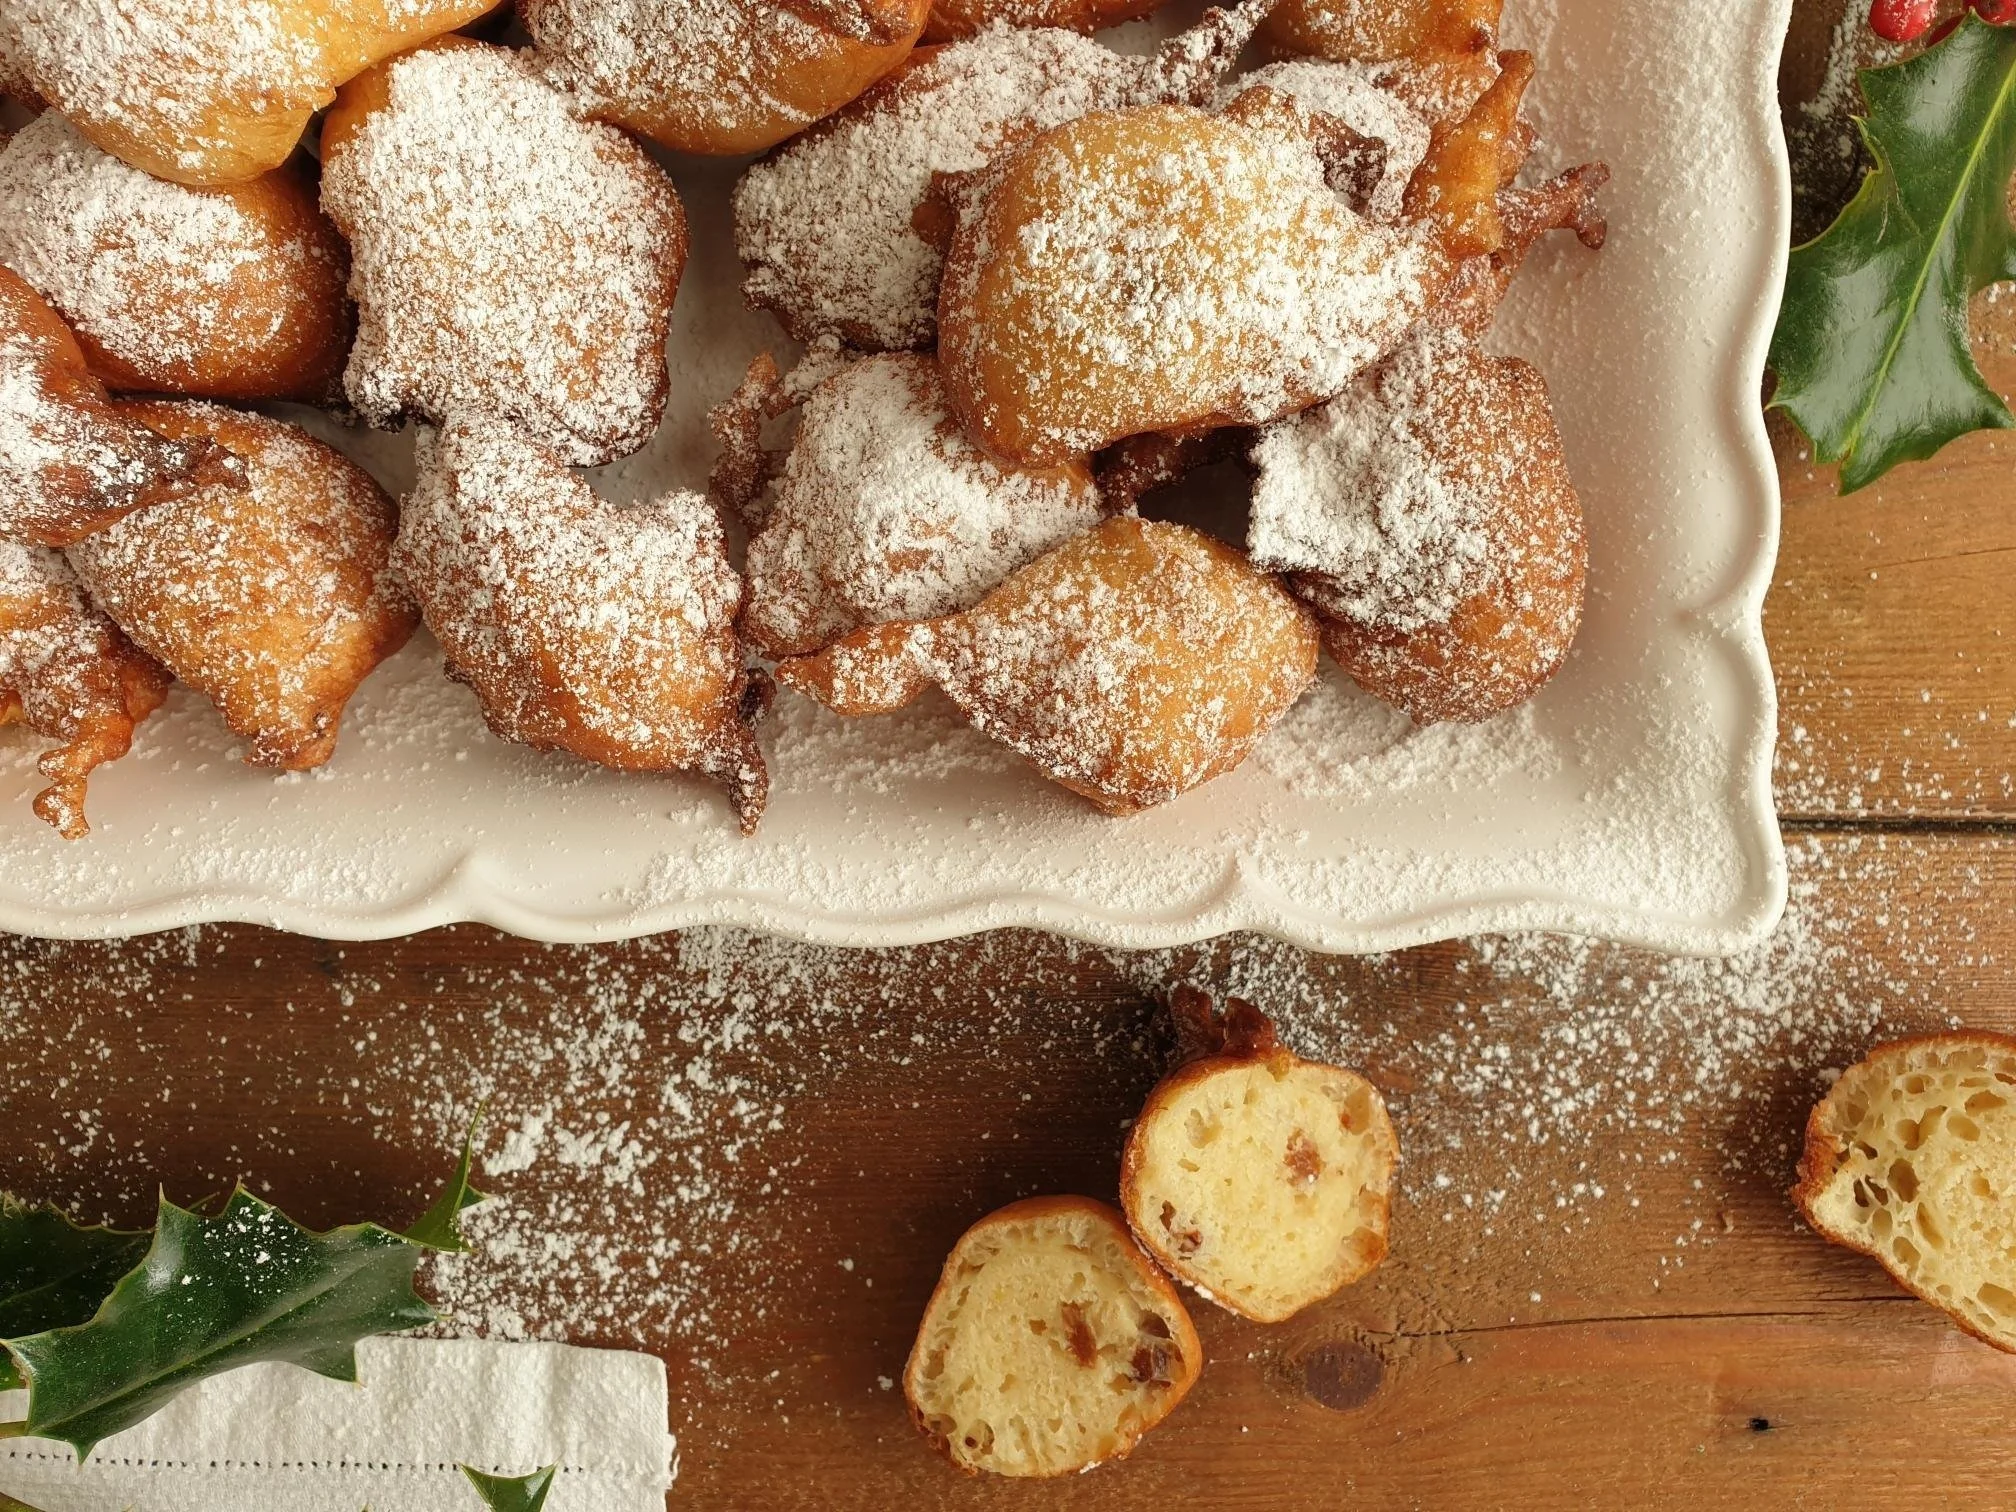
Remove with a slotted spoon and dry on kitchen paper.

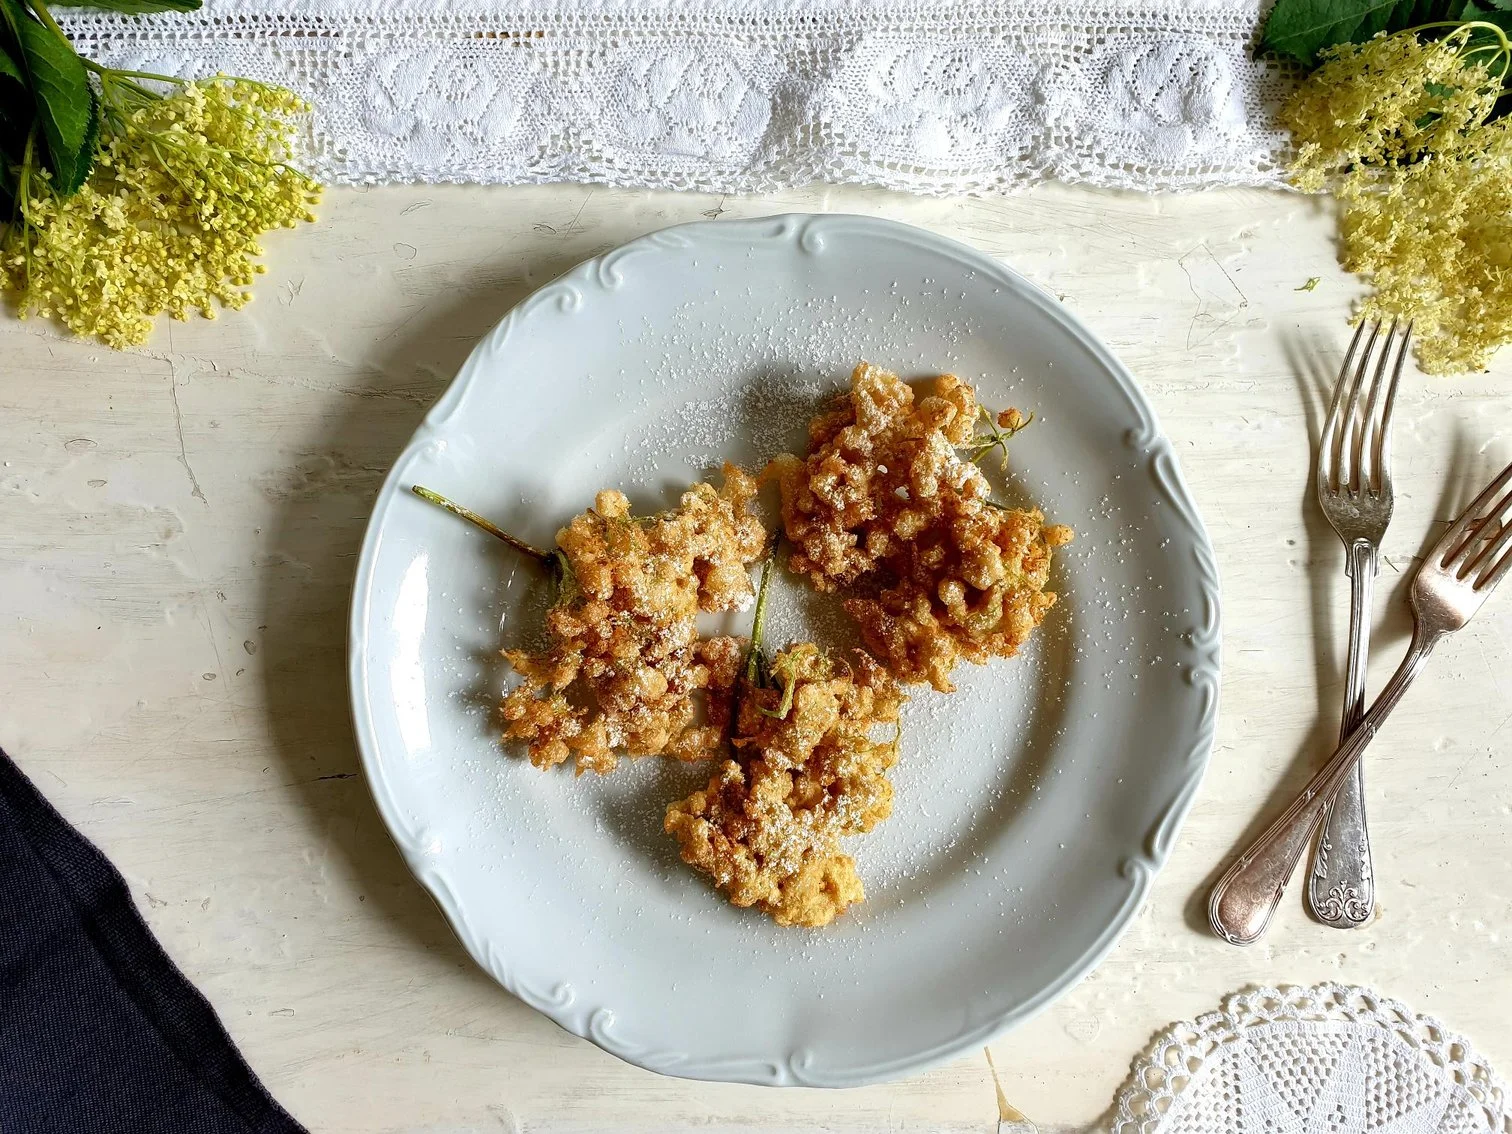
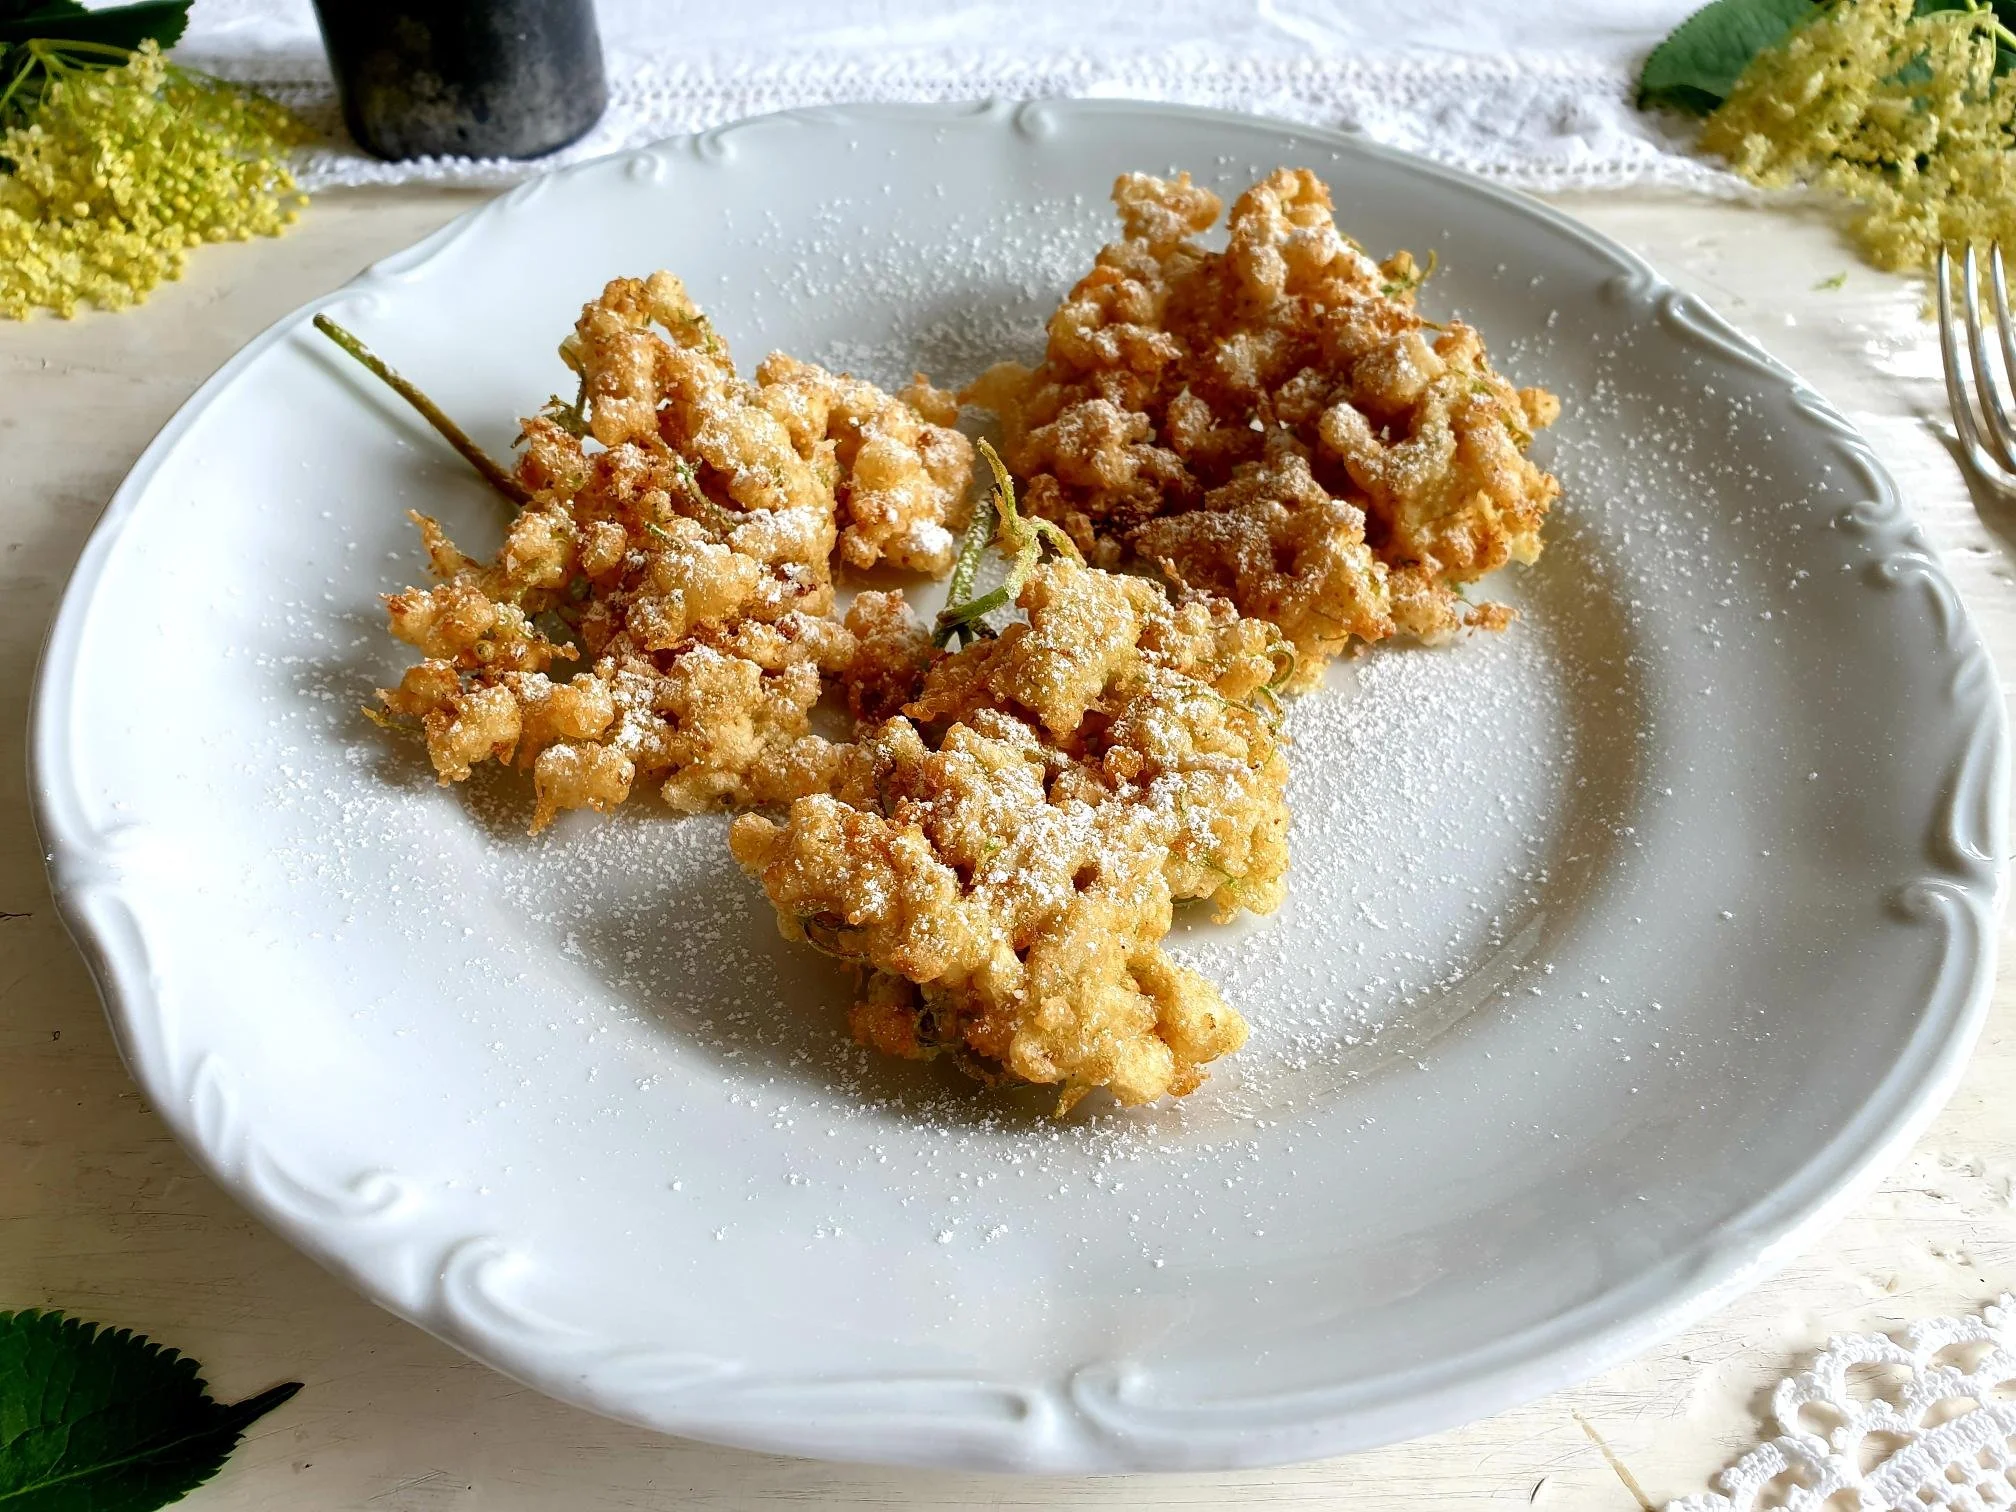
Dust generously with icing sugar, serve and eat while still warm and crunchy.

Delicious also drizzled with honey, accompanied with vanilla ice cream, lemon sorbet or fresh strawberries, cherries or other seasonal fresh fruit of your choice.

Just a thought

Elderflower fritters ideally should not be made well in advance as the batter, which should be crisp, will become soft.

Wine suggestion

Friuli Colli Orientali Traminer Aromatico DOC 2021-Zorzettig

June 22, 2022 /tina oblak
edible flower, elderflower, deep fried desserts, deep fried elerflower, fiori di sanbuco fritti, ocvrti bezgovi cvetovi
Adriatic Recipe, Appetizers, Austrian inspired dishes, breakfast, Central European recipes, child friendly dish, child friendly meal, dessert, Easy recipe, family friendly dish, family friendly meal, foraging, Istrian cuisine, Istrian dish, Istrian food, Istrian gastronomy, main course, main dish, main fish course, Rustic dish, Slovenian cuisine, Slovenian food, Slovenian gastronomy, Small bites, Snacks, Spring dish, Spring recipe, sweet course, sweet finger food, sweet nibbles, Sweet Things, Vegetarian
Comment

Cooked ham in bread dough Recipe

Beans and Sardines
April 06, 2022 by tina oblak in Adriatic Recipe, All year round recipe, Appetizers, baked dish, baking, breakfast, brunch, Celebratory dish, Central European recipes, child friendly dish, child friendly meal, Easter dish, Easter treats, easy baking, Easy recipe, Enriched dough, entrée course, family friendly dish, family friendly meal, festive bakes, Festive dish, Finger food, home baking, Istrian cuisine, Istrian dish, Istrian food, Istrian gastronomy, main course, main dish, Meat, Mitteleuropean cuisine, Mitteleuropean dish, Mitteleuropean food, Mitteleuropean recipes, Rustic dish, Slovenian cuisine, Slovenian food, Slovenian gastronomy, Starters, Easter, Easter recipes

Cooked ham in bread dough is a real show stopper and a crowd pleaser, this recipe goes back to medieval times when it was customary cooking various types of meats in bread dough.

This dish consists of a piece of ham being cooked first and then wrapped in bread dough and baked in the oven allowing the aroma and the flavours of the ham to travel into the dough during the baking process.

On the Slovenian coast, where I come from, there is no Easter without this dish. This baked delicacy is so deeply rooted in Slovenian gastronomic culture that it is traditionally cooked and eaten around Easter period (with freshly grated horseradish or horseradish cream and mustard) and served as part of Easter breakfast on actual Easter day, in just about every corner of the country, together with hard boiled eggs, Pinca (Easter sweet bread) and Potica (traditional Slovenian festive nut roll).

This dish is also typically found in Trieste, and province of Trieste in Italy, in local osterie (informal, usually family run eating places serving simple local specialities), on a daily basis and typically served with a a glass of wine or locally produced artisan beer.

I studied in Trieste and had this dish on my graduation day as part of the buffet.

This recipe is so popular and delicious that it is nowadays enjoyed all year round, it is also ideal for picnics, as it can be made ahead of time and travels well.

Ingredients

Serves

For the dough

  • 500g strong white bread flour

  • 7g (one sachet) fast-action dried yeast

  • sea salt, a pinch

  • 300ml lukewarm milk (full fat, semi skimmed or skimmed)

  • 25g butter, unsalted or slightly salted, melted

You also need

  • 1.4kg, roughly, unsmoked or smoked Gammon joint

  • 1 carrot, optional

  • 1 celery stick, optional

  • ½ onion, optional

  • 1egg, beaten

  • a bit of extra milk (about 2 Tbsp)

Method

Place the ham in a big pot and add enough cold water to completely cover the ham.

Add a whole carrot, celery stick and half an onion for extra flavour, if desired.

Bring to boil, lower the heat, cover with the lid and gently boil for required time, this will depend on the size of the ham. (Weight your meat to calculate and work out your cooking times, allow 20 minutes per 450g)

While the ham is cooking, make the dough. (You can cook the ham in advance and wrap it in aluminium foil to keep it moist, and use when needed.

Drain cooked ham in a colander and let it cool completely.

Pat dry the ham well with the kitchen paper.

Put the flour in a large mixing bowl, add dried yeast on one side of the bowl and sea salt on the other. Add the milk, melted butter and mix to combine well all the ingredients.

View fullsize Ham in bread dough 2.jpg
View fullsize Ham in bread dough 3.jpg

The dough at this point will be a bit sticky, but should not be soggy. The dough will become less sticky as you knead.

View fullsize Ham in bread dough 4.jpg
View fullsize Ham in bread dough 5.jpg

Transfer the mixture on to a lightly floured (or lightly oiled) work surface and knead for about 10-15 minutes until the dough is nice and smooth and has an elastic texture. Your hands should not stick to the dough, if they do add a bit of flour at a time.

Put the dough in a lightly oiled large bowl and cover with a cling film. Stand in a warm place, free of drafts, and let it rise for at least 1-1 ½ hours until the dough has doubled or tripled in size.

Turn the dough on to lightly floured surface and knock back by hand for few minutes. Flour well the surface and with the rolling pin roll the dough to about 2cm thick. At this point you can pinch a bit of dough for decorating if you wish (I made a little dough plait, as it is done traditionally).

View fullsize Ham in bread dough 10.jpg
View fullsize Ham in bread dough 11.jpg

Preheat the oven to 180C static or equivalent and line the baking tray with the non stick baking parchment.

In a small bowl mix the beaten egg with a bit of milk and brush the centre of the rolled dough.

Place the ham in the centre on the brushed area.

Brush the rest of the ham with egg and milk mixture.

Wrap the ham with the dough all around, a bit like a parcel. Seal well the edges to avoid the dough opening up during the baking.

View fullsize Ham in bread dough 8.jpg
View fullsize Ham in bread dough 9.jpg

Place your ham and dough parcel on a baking tray with the junctions facing downwards.

Glaze the ham and dough parcel on all sides with the egg and milk mixture.

Prick the ham and dough parcel with a toothpick.

If you created a small Easter themed dough decoration, place it on top of the dough parcel and brush with egg and milk mixture.

Put the ham dough parcel in the preheated oven and bake for 60 minutes. Half way the baking time cover with aluminium foil and bake further until golden in colour.

View fullsize Ham in bread dough 13.jpg
View fullsize Ham in bread dough 14.jpg

Take out of the oven, leave to cool on the baking tray for a few minutes, then remove from the baking tray and leave to cool on a wire rack.

Best served warm with horse radish sauce, freshly grated horse radish root or/and mustard.

Wine suggestion

Collio Pinot Bianco DOC 2020 - Doro Princic

April 06, 2022 /tina oblak
ham, cooked ham, gammon joint, unsmoked gammon joint, smoked gammon joint, Easter bread, cooked ham in bread dough, prosciutto in crosta, kuhana sunka v testu, Easter breakfast, Easter brunch
Adriatic Recipe, All year round recipe, Appetizers, baked dish, baking, breakfast, brunch, Celebratory dish, Central European recipes, child friendly dish, child friendly meal, Easter dish, Easter treats, easy baking, Easy recipe, Enriched dough, entrée course, family friendly dish, family friendly meal, festive bakes, Festive dish, Finger food, home baking, Istrian cuisine, Istrian dish, Istrian food, Istrian gastronomy, main course, main dish, Meat, Mitteleuropean cuisine, Mitteleuropean dish, Mitteleuropean food, Mitteleuropean recipes, Rustic dish, Slovenian cuisine, Slovenian food, Slovenian gastronomy, Starters, Easter, Easter recipes
Comment

Bread dumplings Recipe

Beans and Sardines
March 23, 2022 by tina oblak in Adriatic Recipe, Austrian inspired dishes, Autumnal dish, Autumnal recipe, casserole, Celebratory dish, Central European recipes, dinner, Dumplings, Eastern European dishes, Eastern European recipes, Easy recipe, Istrian cuisine, Istrian dish, Istrian food, Istrian gastronomy, main course, main dish, Mitteleuropean cuisine, Mitteleuropean dish, Mitteleuropean food, Mitteleuropean recipes, one pot meal, Rustic dish, Side Dishes, Slovenian cuisine, Slovenian food, Slovenian gastronomy, stew, supper, Vegetarian, Winter dish, Winter recipe, family friendly meal, child friendly meal, child friendly dish, family friendly dish

Bread dumplings are a real crowd pleaser, they are made from a mixture of stale bread soaked in milk and combined with fresh parsley, marjoram, onions, pancetta, beaten egg, seasoned with sea salt and black pepper, then formed into a ball shape and gently cooked in simmering water.

They can be easily turned into a vegetarian friendly option by simply omitting the meaty element and adding, if prefer, a bit of grated cheese, depending on your preference.

They are served as a perfect companion to stews, braised meats and roasted meats with a gravy. The idea behind these dumplings is to squash them with the fork, and this will soak up all the juices of whatever is accompanying them. In other words, it is an ideal side dish for almost anything that has some kind of sauce with it.

Bread dumplings with Venison stew

I simply love the recipes that provide some kind of a solution to the “problem” of avoiding food waste, and in this case the recipe is a brilliant side dish that uses - nothing more than stale bread as the key ingredient.

This is one of those recipes that you do not really need to plan since you can make bread dumplings when you simply end up with old bread and do not know what to do with it. If you have quite a bit of it to use up, then double or triple the ingredients since you can freeze a big batch of bread dumplings.

These rustic and elegant bread dumplings became a staple dish in a lot of cuisines of Eastern and Central Europe where stale bread has been very cleverly turned into a pure delicacy.

In Slovenia, where I was born and grew up, bread dumplings, called Kruhovi cmoki, have been so popular they almost became a national dish, and this recipe is most similar, or actually almost identical to the Austrian and South German( Bavarian) variety, where it is believed bread dumplings originated from, and are referred to as Semmelknödel.

There are a variety of bread dumpling recipes, for example, in the Czech Republic, fresh herbs, onions and the meaty element is not added to the bread mixture, which is also not shaped into small balls, but instead into a roll, then boiled and sliced.

Similar to bread dumplings are Canederli, found in Italy, in Trentino Alto Adige, an autonomous province of Italy, and in Austria, where small pieces of speck (lightly smoked cured meat) and cheese are added to the basic bread mixture, then they are shaped into small balls and typically cooked and served in hot beef or chicken broth.

This dish was one of my favourite dishes when I was a child, and it really does take me down memory lane. My mother would prepare them quite often, and I am sharing here her recipe, a typical Istrian variation of bread dumplings, in which fresh marjoram is added to the basic bread mixture.

Ingredients

Will make about 8 dumplings, depending on the size.

  • 310g roughly of stale bread (for this recipe I used 5 stale white baps)

  • 250-300ml milk (skimmed, semi skimmed or full fat)

  • 1 egg, beaten

  • 2 Tbsp olive oil

  • a handful of fresh flat leaf parsley (about 10g), finely chopped

  • 1 medium onion (about 100g), peeled and finely chopped

  • sea salt

  • ground black pepper

  • 40-50g sliced pancetta, cut into very small pieces (can use bacon or lardons), optional

  • 1 Tbsp fresh marjoram, very finely chopped, optional

  • all purpose flour (enough to coat the bread dumplings)

  • 1 Tbsp white dry breadcrumbs (only if needed)

Method

Cut or tear with your hands white baps (or any other type of stale bread you are using) into small pieces and put them in a fairly large bowl. Pour over the milk, mix well and leave to soak for about 20-30 minutes or until the bread is completely softened.

View fullsize Bread Dumplings 2.jpg
View fullsize Bread Dumplings 3.jpg

While the bread is soaking in milk, prepare the onion and pancetta mixture.

Put olive oil, finely chopped onions and small pieces of pancetta in a frying pan. Gently fry the mixture until the onions become nice and soft and transparent but not brown. Cool the pancetta and onion mixture and set aside.

View fullsize Bread Dumplings 4.jpg
View fullsize Bread Dumplings 5.jpg

Add to the bowl with the soaked bread, the beaten egg, onion and pancetta mixture, finely chopped parsley and marjoram and season with sea salt and black pepper.

With your hand(s) mix very well all the ingredients, almost using a squeezing action, to thoroughly combine the mixture. You should end up with a bread mixture that is soft, and with a fairly smooth consistency (if you end up with bigger bread pieces just break them with your fingers).

Adjust the mixture, adding a bit of breadcrumbs (and never the flour, as the mixture will get too sticky and will become unworkable), one tablespoon at the time, if the bread mixture is too wet.

On the contrary, if you feel the mixture is too hard and dry, add a bit of milk.

It is important to use a bit of personal judgment and intuition here. The idea behind this recipe is using the stale bread or a combination of different types of stale bread which will absorb a slightly different quantity of liquid, therefore the moisture of the bread mixture needs to be adjusted accordingly.

View fullsize Bread Dumplings 6.jpg
View fullsize Bread Dumplings 7.jpg

Wet you hands (this will prevent the dough to stick to your hands).

Take roughly a handful of the mixture and shape it into a compact ball, about the size of a tennis ball.

Repeat the process until you run out of the mixture.

Put some flour into a deep plate or a bowl.

Gently coat each dumpling into a flour and remove excess flour (this will prevent sticking).

View fullsize Bread Dumplings 8.jpg
View fullsize Bread Dumplings 9.jpg

Fill a large pot of water and bring to boil. Turn down the heat and leave the water to a gentle boil.

With a slotted spoon, drop one dumpling at the time in a simmering water and cook for about 15 minutes. Do not allow the dumplings to cook in a strong boiling water as they might loose the shape and fall apart.

Remove cooked dumplings with a slotted spoon and transfer onto a serving plate or directly on the plates, serve warm.

Just a thought

Bread dumplings are suitable for freezing.

You can freeze uncooked dumplings by freezing them individually first, and then transfer them into freezing bags or containers. Do not defrost the dumplings when you need them, just plop them frozen directly into a simmering water and cook them slightly longer, and they are cooked when they float on the surface.

Alternatively, you can freeze already cooked dumplings. Cool them first, freeze them individually and place in freezing bags or containers. When you want to use the dumplings, let them thaw first and then reheat covered, in order to get some steam, using a microwave works well.

You can “recycle” this dish even further, if you end up with some left over cooked dumplings, slice them up and fry the slices on both sides lightly in a frying pan with some butter or olive oil.

You really could not ask anything more from stale bread!

Wine suggestion

Alto Adige Schiava DOC "Menzen" 2020 - Colterenzio

March 23, 2022 /tina oblak
stale bread, old bread, dumplings, savory dumplings, Kruhovi cmoki, Semmelknödel, Canederli
Adriatic Recipe, Austrian inspired dishes, Autumnal dish, Autumnal recipe, casserole, Celebratory dish, Central European recipes, dinner, Dumplings, Eastern European dishes, Eastern European recipes, Easy recipe, Istrian cuisine, Istrian dish, Istrian food, Istrian gastronomy, main course, main dish, Mitteleuropean cuisine, Mitteleuropean dish, Mitteleuropean food, Mitteleuropean recipes, one pot meal, Rustic dish, Side Dishes, Slovenian cuisine, Slovenian food, Slovenian gastronomy, stew, supper, Vegetarian, Winter dish, Winter recipe, family friendly meal, child friendly meal, child friendly dish, family friendly dish

Venison Stew with red wine and fresh herbs - Istrian Recipe

Beans and Sardines
March 16, 2022 by tina oblak in Adriatic Recipe, Autumnal dish, Autumnal recipe, casserole, Central European recipes, dinner, Easy recipe, healthy mael, Istrian cuisine, Istrian dish, Istrian food, Istrian gastronomy, main course, main dish, main meat course, Meat, Mitteleuropean cuisine, Mitteleuropean dish, Mitteleuropean food, Mitteleuropean recipes, one pot meal, one pot meat recipe, Rustic dish, Slovenian cuisine, Slovenian food, Slovenian gastronomy, stew, supper, Winter recipe, Wild game meat, Game meat

Venison goulash is simply a lovely dish, perfect for colder days, and is very comforting and warming. It is slow cooked and braised for a long time with onions, garlic, fresh herbs, juniper berries, and red wine until the meat becomes so soft and tender it almost melts, and falls apart easily.

Venison meat, as it is very lean and low in saturated fat, works great in recipes requiring long cooking times which prevents drying the meat too much and helps to further develop the flavour.

Venison goulash is a great alternative to most common lamb or beef stews cooked on a more regular basis, and it is really super delicious as venison meat is packed with flavour because wild deer feed on apples, chestnuts, fruits, berries and acorns.

Venison Stew with Bread Dumplings

I am sharing here my paternal grandmother's recipe that has been in the family since .... forever. I grew up eating game meat that was provided very generously by my paternal grandfather's friends who were hunters. My nono, as I used to call him, would provide his hunter friends with a delicious extra virgin olive produced by him, and in exchange he would receive venison meat, an easy, uncomplicated trade, which everyone seemed to be happy with, especially the beneficiaries of the cooked venison goulash!

Ingredients

Serves 4-6

  • 1kg stewing venison (I used ready-cubed venison for stewing and a small shank)

  • 4 Tbsp olive oil

  • 1 medium size onion (about 180g), peeled and finely chopped

  • 2 big (or 4 small) cloves of garlic, peeled and crushed

  • 2 Tbsp tomato purée

  • 2 Tbsp all purpose flour

  • 100 ml red wine

  • 1 small whole carrot, peeled

  • few juniper berries (about 4), crushed

  • 1 sprig of fresh rosemary, made in bouquet garni or leaves picked and finely chopped

  • 1 bay leaf, fresh or dry, made in bouquet garni or just placed in a pot

  • few fresh sage leaves, made in bouquet garni or finely chopped

  • sea salt

  • black pepper, freshly ground

Method

In a large pot put the oil, finely chopped onions, a pinch of salt, and cook on a gentle heat, stirring quite often, until the onions are soft.

Add crushed garlic and cook for a further minute.

Add the venison meat, turn up the heat a bit and brown it and seal it on all sides, stirring and turning quite frequently.

Pour in the pot red wine and deglaze the pan, scrap with the wooden spoon all the bits and pieces that have stuck to the bottom of the pan.

Stir in the flour, add tomato purée, a carrot, juniper berries, bouquet garni or finely chopped herbs, sea salt and black pepper.

Add water, just enough to cover the meat, bring to boil, turn the heat down and gently simmer for about 2-3 hours, with the lid partially uncovered, or until the meat falls apart easily.

Keep an eye on the goulash during the simmering, and add splashes of water if you think it gets too thick and dry.

On the contrary, if you think the sauce is too thin, make a paste with some more flour and a bit of water, and add as much of the paste to venison goulash as needed to thicken the sauce.

Taste and adjust the seasoning with sea salt and black pepper.

Serve hot with some crusty bread, potato gnocchi, soft cooked polenta or grilled polenta, mashed, boiled or roasted potatoes, rice or with bread dumplings.

Just a thought

This is a great dish to make ahead of time and suitable for freezing.

If you have a bit of leftover goulash, shred the meat and use it as a venison ragù, delicious served with your favourite shape of pasta or potato gnocchi.

Wine suggestion

Teroldego Rotaliano DOC 2019 - De Vescovi Ulzbach

March 16, 2022 /tina oblak
Venison stew, slow cooked venison, braised venison, venison goulash, venison shank, cubed venison, venison for stewing, venison in red wine sauce, venison with fresh herbs, venison stew on a hob, juniper berries, jelenov golaz
Adriatic Recipe, Autumnal dish, Autumnal recipe, casserole, Central European recipes, dinner, Easy recipe, healthy mael, Istrian cuisine, Istrian dish, Istrian food, Istrian gastronomy, main course, main dish, main meat course, Meat, Mitteleuropean cuisine, Mitteleuropean dish, Mitteleuropean food, Mitteleuropean recipes, one pot meal, one pot meat recipe, Rustic dish, Slovenian cuisine, Slovenian food, Slovenian gastronomy, stew, supper, Winter recipe, Wild game meat, Game meat
1 Comment

Sarme - Pickled cabbage leaves stuffed with minced meat and rice in a light tomato sauce

Beans and Sardines
March 11, 2022 by tina oblak in Adriatic Recipe, Austrian inspired dishes, Hungarian inspired dishes, Autumnal dish, Autumnal recipe, Celebratory dish, Central European recipes, dinner, Eastern European dishes, Winter recipe, Winter dish, stew, Slovenian gastronomy, Slovenian food, Slovenian cuisine, Rustic dish, one pot meal, main dish, stuffed dishes, Mitteleuropean dish, Mitteleuropean cuisine, Mitteleuropean food

Sarme, which is a plural form of sarma, but also holding the name of the dish, is made of a mixture of minced meat and white rice wrapped in pickled cabbage leaves, and then slow cooked on a bed of shredded sauerkraut in a light tomato sauce.

This dish takes a special place in my recipe collection for comfort food, it is easy to make, hearty and satisfying, especially popular during colder months, it will wrap you in warmth like a woollen blanket. It used to be commonly served for lunch or dinner during the holidays and special occasions but nowadays it is also eaten as midweek meal.

Taking into account the historical context, it is quite clear, that Sarma probably originated in Turkey (the name sarma derives from a Turkish word sarmak, meaning to roll) and belongs to the dolma food family (stuffed dishes) spread in the cuisines in territories of the former Ottoman Empire from the Middle East to the Balkans and Central Europe, but like with most dishes, different places developed different versions of the same basic recipe.

When I first arrived to England, I was quite nostalgic about this dish as I could not find the whole sauerkraut head to buy. When my mother visited me she would buy it back home for me, put it in a suitcase and bring it with her on a plane. We would then prepare and cook sarme together. In Slovenia, where I come from, it is quite common to pickle large quantities of cabbage heads and buy them in the supermarkets in plastic bags or on farmer's markets directly from barrels available to make sarme during the winter.

View fullsize Sarme 1.jpg
View fullsize Sarme 3.jpg

In the family this dish would very often be made for big family gatherings in a big batch with the hope that some of it could be frozen and taken out on a lazy day, but that almost never happened!

I am Sharing here a version of sarme my maternal grandmother and my mother always cooked. It is highly recommended to make ahead as it tastes even better the following day, and serve sarme with mashed or boiled potatoes, or crusty bread and a dollop of sour cream on top.

It is very common to add in a pot of simmering sarme some lardons, bacon (thick cut), pancetta or pork ribs, smoked or unsmoked, this will give an additional meaty taste to the dish.

If you live in the UK and happened to watch on the television Rick's Steins Long Weekends short holiday and cooking series a few years ago, this dish was prepared for him in Vienna and described by him as one of his absolute favourites of all his long weekend programmes.

Ingredients

Serves 4-6 (about 12 rolls)

  • 1 pack of whole pickled cabbage head (you will find this on line or European delicatessens, especially Polish in the chilled section)

  • 250g minced beef

  • 250g minced pork

  • 100g white rice

  • 1 onion (about 100g), peeled and finely chopped

  • 2-3 cloves of garlic, peeled and crushed

  • 3 Tbsp olive oil

  • sea salt

  • ground black pepper

  • 2 bay leaves, fresh or dry

  • 2 Tbsp tomato concentrate

  • 1 Tbsp (or to taste) sweet Hungarian paprika

  • 1-2 Tbsp all purpose flour

  • sour cream for serving, optional

Method

The filling

Place the rice in a pan and cover with plenty of water.

Cook the rice as instructed on the pack, but cut the cooking time in half, as you only want the rice to be part-cooked.

Drain the rice in a colander and let it cool completely.

Put the oil, finely chopped onions and crushed garlic in a frying pan and sauté on a gentle heat until the onions become nice and soft.

Turn the heat to medium, add minced beef and pork, season with sea salt and black pepper and cook for about 20 minutes until the meat is browned.

Remove the frying pan from the heat, set aside and cool completely.

When both the rice and the meat mixture are cooled completely, put them in a bowl and mix them well together.

This is now your filling ready to fill the cabbage leaves.

Prepare the cabbage leaves for stuffing.

View fullsize Sarme 4.jpg
View fullsize Sarme 5.jpg

Carefully unpeel the leaves from the whole pickled cabbage head and gently open them up without breaking them. This is quite important so you do not have breakage and holes in the leaves, as the filling might come out once rolled. If you end up damaging quite badly the leaf, do not worry about it, just thinly shred it and use it later as a part of a sauce.

You will only need bigger and medium size leaves that come off the head quite easily. How many leaves you can obtain it really depends on the size of the whole pickled cabbage head (from the medium size cabbage head you should get around 12 leaves, this is the amount I used for this recipe).

View fullsize Sarme 8.jpg
View fullsize Sarme 9.jpg

Once you peel off the leaves, you will end up with smaller inner cabbage head. Shred it with a sharp knife and set aside, this will be part of your sauce later on.

Place each leaf on a chopping board and cut out the thick and hard part of the stem, this will allow you to roll the leaf easily.

View fullsize Sarme 10.jpg
View fullsize Sarme 11.jpg

Take one leaf, place it on a working surface and spoon the filling on the edge of each leaf. It is tricky to give the exact amount, maybe 3 Tbsp for bigger leaves and a bit less for smaller leaves. You really want to use a bit of judgement here and just put the amount of filling you think the size of the leaf you are using can hold.

First fold inwards (away from you) the leaf section.

View fullsize Sarme 15.jpg
View fullsize Sarme 16.jpg

Then fold over the two flaps on the side. Then you simply roll forward until you get a cabbage roll.

View fullsize Sarme 17.jpg
View fullsize Sarme 18.jpg

Set aside the rolls and keep repeating the process until you use up all the leaves.

Put half the shredded pickled cabbage over the base of a fairly large casserole dish or pan with a lid.

Place and arrange the stuffed leaves, fold-side down, next to each other, nice and tightly.

Scatter the other half of shredded cabbage on top of the rolls.

View fullsize Sarme 20.jpg
View fullsize Sarme 21.jpg

Add a bit of water, about half way to 1/3 way up the dish.

In a small cereal bowl put the flour, few tables spoons of lukewarm water and mix well to avoid lumps.

Add sweet paprika, tomato paste and mix.

Pour the mixture over the stuffed leaves.

Stick 1 or 2 bay leaf between sarma, add sea salt and black pepper.

Cover with the lid and gently simmer for about 2 hours. It is important not to stir and keeping the gas on a fairly low as high heat might cause aggressive boil causing the rolls to open up and break. Just shake the pot gently a few times during the cooking process.

If after two hours you think the sauce is too watery just dissolve 1 Tbsp of flour in a bit of lukewarm water, pour it in the pot and continue simmering. This should thicken a bit the sauce.

Taste and adjust the seasoning with sea salt and black pepper.

Lift the cabbage rolls gently out of the pot, with the help of the spoon and a fork and serve warm with mashed or boiled potatoes or plenty of crunchy bread to soak up the juices.

For extra flavour top the rolls with a dollop of sour cream.

Just a thought

Sarme will keep in the fridge up to 3-4 days in an airtight container.

The dish also freezes very well, but before using it, defrost in the fridge overnight and reheat well.

Wine suggestion

Venezia Giulia Malvasia Istriana IGT 2017 - Damijan Podversic

March 11, 2022 /tina oblak
Sarma, Sarme, sauerkraut, Sauerkraut recipe, minced meat, mince pork, mince beef, rice, shredded sauerkraut, pickled cabbage leaves, hearty dish
Adriatic Recipe, Austrian inspired dishes, Hungarian inspired dishes, Autumnal dish, Autumnal recipe, Celebratory dish, Central European recipes, dinner, Eastern European dishes, Winter recipe, Winter dish, stew, Slovenian gastronomy, Slovenian food, Slovenian cuisine, Rustic dish, one pot meal, main dish, stuffed dishes, Mitteleuropean dish, Mitteleuropean cuisine, Mitteleuropean food
Comment

Hungarian style Creamy Potato and Beef Goulash Soup Recipe

Beans and Sardines
February 23, 2022 by tina oblak in Appetizers, Autumnal dish, Autumnal recipe, casserole, Central European recipes, dinner, Eastern European recipes, Easy recipe, entrée course, main course, main dish, Mitteleuropean recipes, one pot meal, Slovenian cuisine, Slovenian food, Slovenian gastronomy, Starters, stew, supper, Vegan, Winter dish, Winter recipe, winter soup, Hungarian inspired dishes

This soup, warm, wholesome, and rich in flavour, can be used as a main meal, especially on those cold days when it will be much appreciated. It is made with only a few simple ingredients, and when cooked well and simmered slowly, it makes a perfect meal choice for body and soul, it is also quite filling, so there is no need to plan a main course.

This Hungarian soup, Gulyásleves, is generally made of beef, vegetables, ground paprika and other spices, but originates from a dish, a thicker stew (what is commonly known as beef goulash) that was cooked outside in the cauldron over an open fire, by the cattlemen, the Hungarian cowboys, who camped with their cattle in the Great Hungarian Plain.

This dish, although native to Hungary, became very popular in the countries around Hungary, which, like in most cases, gave a little twist to the original recipe, and is the origin of variety of new regional variations.

For example in Austria, where this dish is called Goulaschsuppe, it is common to cook this soup without its meat component, which makes a fantastic vegetarian and vegan friendly meal.

In Slovenia, where I come from however, this soup (called kromprjev golaž) which is a real crowd pleaser and became part of Slovenian food culture, testimony of the strong presence of the Austro-Hungarian Empire in the the territory, is almost always cooked with the meat component, where beef can be substituted by dry meats, i.e. some sort or sausages (smoked varieties are often used for a deeper, smokier, and more “imperial” flavour).

In Slovenia, like in Italy (mountainous parts of some regions like of Trentino-Alto Adige, Veneto and Friuli-Venezia Giulia bordering with Austria), this soup is generally served in the informal mountainside restaurants to the delight of hikers and skiers, as well as cooked in the households.

This seriously delicious one pot meal is quite nostalgic for me and reminds me of my childhood. It was served in the school canteens for lunch, and what were called 'dinner ladies, cooked the soup from scratch with fresh ingredients, and the aroma would travel around the school, into the classrooms, destructing the minds of us children struggling with some impossible maths sexercises, especially when approaching lunch time, when you could hear growling in the little tummies.

The soup would be followed by the Austrian inspired pudding, Buchteln, sweet yeast buns filled with apricot jam. This is the type of lunch, among many others, we children really looked forward to...

When I moved to England, goulash soup is one of those dishes, which for some strange reason has been a bit forgotten, and it was not until our skiing trip to Austria, when I saw this soup on the menu that all my childhood memories suddenly came back to me, this is what food does...

As soon as we got back to England I cooked this wonderful tasting goulash soup, it was a hit. I have been making it on a regular basis since then, and I will most definitely make sure this time it stays on the menu.

It is just so hearty, comforting and cosy, the whole family loves this one pot soup and it is cooked very often for my husband and my son who simply adore it. When I serve it, we get transported to the skiing memories we created together as a family, and the table conversations would start ....

I am sharing here a family recipe how my maternal grandmother used to make it, and how my mother still makes it. If you never had this soup before, try it and it will become one of your favourites, and all you need to serve the soup with is a nice rustic bread to dunk it, yes .... this is 'home' for me...

Ingredients

Serves 4

  • 4 Tbsp extra virgin olive oil

  • 3 medium size potatoes (about 500g) peeled and chopped into small cubes

  • 1 onion (about 120g) peeled and finely chopped

  • 1 clove of garlic, peeled and crushed

  • 2 Tbsp Hungarian sweet paprika

  • 2 Tsp red or white wine vinegar

  • 2 Tbsp tomato purée

  • 1 Tsp fresh marjoram (a few springs) finely chopped, (can use dry marjoram)

  • 3 Tsp caraway seeds, crashed with mortar and pestle (can use spice or coffee grinder)

    whole caraway seeds can be used if you have none of the above ways to ground the seeds

  • 400-500g braising steak or shin of beef, trim any hard fat off the beef and dice finely

  • sea salt

  • black pepper, freshly ground

  • 2 fresh or dry bay leaves

  • 2l water or vegetable stock

  • sour cream (optional)

  • fresh flat leaf parsley, roughly chopped, for garnish (optional)

Method

Put the oil in a fairly large pan, add chopped onions, crushed garlic, a pinch of salt and gently sauté until the onions are soft and translucent.

Pour wine vinegar and cook for a minute or so stirring the onion and garlic mixture. The vinegar will help to deglaze and release any bits stuck to the bottom of the pan.

Add diced beef and continue to cook, turning and stirring regularly, until the meat is nicely browned on all sides.

View fullsize Goulash soup 4.jpg
View fullsize Goulash soup 5.jpg

Add cubed potatoes and cook briefly for a few minutes together with meat and onions mixture.

View fullsize Goulash soup 7.jpg
View fullsize Goulash soup 8.jpg
View fullsize Goulash soup 9.jpg
View fullsize Goulash soup 10.jpg

Add paprika, tomato purée, fresh or dry marjoram, crushed caraway seeds and bay leaves, sea salt and black pepper.

Add water or vegetable stock, bring to a boil.

View fullsize Goulash soup 11.jpg
View fullsize Goulash soup 12.jpg
View fullsize Goulash soup 13.jpg
View fullsize Goulash soup 14.jpg

Cover with the lid and simmer on a gentle heat for about 2 hours. After this time, the soup will become slightly thicker and the meat will become so tender it will just melt in your mouth.

To make the goulash soup slightly “creamier” in consistency, you can press with a fork few cubes of potatoes on the side of the casserole pan and give it a good stir.

Taste and adjust the seasoning with sea salt and black pepper and add more paprika to your liking, if you wish.

Serve hot with a spoonful of sour cream, if desired, sprinkle some roughly chopped fresh parsley for garnish and a bit more paprika. Place some crunchy rustic bread on the table to dunk in the goulash soup and life just cannot get any better.

Just a thought

Double the amount of the ingredients in the recipe, if serving for 6-8 people or, if you wish to make a bigger batch and freeze.

Like most stews and soups, this goulash soup is best made in advance, as it tastes better every time you reheat it.

Wine suggestion

Vigneti delle Dolomiti Rosso IGT "Fojaneghe" 2015 - Bossi Fedrigotti, Masi

February 23, 2022 /tina oblak
potatoes, beef, stewing beef, shin of beef, caraway seeds, paprika, sweet Hungarian paprika, Gulyásleves, Goulaschsuppe, kromprjev golaž, Goulash soup, Goulash soup without meat, Hungarian beef and potato stew
Appetizers, Autumnal dish, Autumnal recipe, casserole, Central European recipes, dinner, Eastern European recipes, Easy recipe, entrée course, main course, main dish, Mitteleuropean recipes, one pot meal, Slovenian cuisine, Slovenian food, Slovenian gastronomy, Starters, stew, supper, Vegan, Winter dish, Winter recipe, winter soup, Hungarian inspired dishes
Comment

Braised Fennel Istrian Recipe

Beans and Sardines
February 09, 2022 by tina oblak in Adriatic Recipe, Autumnal dish, Autumnal recipe, brunch, Central European recipes, Easy recipe, Healthy, healthy mael, Istrian cuisine, Istrian dish, Istrian food, Istrian gastronomy, main dish, Nutritious, Nutritious dish, Rustic dish, Side Dishes, Slovenian cuisine, Slovenian food, Slovenian gastronomy, supper, Vegan, Vegetarian, Winter recipe, Vegetable side dish, Vegetables, Root vegetables

Braised fennel is made with fresh fennel bulbs, a humble and very often underrated and forgotten vegetable, and if you were ever put off by maybe a slightly “assertive” liquorice taste of a raw fennel, try this dish, it is like eating a completely different vegetable.

Fennel, during braising process, becomes mellow and sweet, very tender, and develops soft and mild aniseed and slightly caramelized flavour, sincerely gorgeous!

For this dish, perhaps, we can apply the famous saying “do not judge the book by its cover.”

With its appearance, maybe it does not belong to the privileged club of the most appealing looking dishes, but the taste of braised fennel is simply luxurious and elegant, worthy to be served as a part of Sunday roast.

Back home, on the Slovenian coast, where I come from, braised fennel is a very popular, very much loved dish and served with dignity for a simple midweek lunch or dinner.

Here I am sharing my mother's recipe for a traditional and regional braised fennel recipe. Try it, and next time you are shopping for your vegetables, you will be reaching out for fresh fennel...

Ingredients

Serves 4 as part of meal

  • few fresh fennel bulbs (1200g approximately)

  • 5 Tbsp extra virgin olive oil (the best you can afford)

  • sea salt

  • black pepper

  • fresh flat leaf parsley, roughly chopped

  • 100ml water or vegetable stock

Method

Wash fennel bulbs under cold running water and dry them with clean kitchen paper or towel. Place the bulbs on the chopping board and trim the hard hollow stalks which are quite tough and very fibrous. You can discard the stalks or put in the compost, or trim the stalks, cut them into pieces and use them instead of, or as an addition to the celery in soups and stews, or use them as a bed for roasted chicken, or other meats, and roasted fish.

Cut the feathery fronds from the stalks, you can use these as a garnish for this dish, or as a herb to make others dishes. Trim off the root end of the the bulb (the base of the fennel bulb) and cut it into wedges.

View fullsize Braised fennel 4.jpg
View fullsize Braised fennel 3.jpg

The layers may separate and fall apart, do not worry, this is normal.

Put extra virgin olive oil in a large frying pan, preferably non stick, and heat it up a bit.

Place the fennel wedges into a pan.

Add a pinch of sea salt and sauté for few minutes on a fairly high heat, stirring occasionally, until golden brown in colour.

View fullsize Braised fennel 7.jpg
View fullsize Braised fennel 8.jpg

Add 100ml of water, black pepper, lower the heat to fairly low, cover with the lid.

Cook on a gentle heat for about 40 minutes, then uncover the lid.

Turn the heat to medium and cook further uncovered until all the water evaporates.

At this stage the fennel might catch a bit and turn slightly mushy, oozy and creamy in the middle.

Taste and adjust the seasoning with sea salt and black pepper.

View fullsize Braised fennel 9.jpg
View fullsize Braised fennel 10.jpg

Add a sprinkle of fresh chopped parsley for extra flavour and some fennel fronds for garnish.

Serve hot or at room temperature.

Just a thought

This dish freezes very well, so it might be a good idea to cook in bigger quantities when the fennel is in season and freeze it.

February 09, 2022 /tina oblak
Fresh fennel, Fresh fennel bulb, Fennel bulb, Braised fennel, Slow cooked fennel, Fennel cooked in frying pan, Braised fennel with fresh parsley, Fennel fronds, Braised fennel garnished with fennel fronds
Adriatic Recipe, Autumnal dish, Autumnal recipe, brunch, Central European recipes, Easy recipe, Healthy, healthy mael, Istrian cuisine, Istrian dish, Istrian food, Istrian gastronomy, main dish, Nutritious, Nutritious dish, Rustic dish, Side Dishes, Slovenian cuisine, Slovenian food, Slovenian gastronomy, supper, Vegan, Vegetarian, Winter recipe, Vegetable side dish, Vegetables, Root vegetables
1 Comment

Home made Baked Beans Istrian Recipe

Beans and Sardines
January 26, 2022 by tina oblak in Adriatic Recipe, Appetizers, Autumnal dish, Autumnal recipe, brunch, Central European recipes, Eastern European recipes, Easy recipe, Healthy, healthy mael, Istrian cuisine, Istrian dish, Istrian food, Istrian gastronomy, main course, main dish, Nutritious dish, Nutritious, one pot meal, one pot meat recipe, Rustic dish, Side Dishes, Slovenian cuisine, Slovenian food, Slovenian gastronomy, Small bites, Starters, stew, Vegan, Vegetarian, Winter dish, Winter recipe, casserole

Home made baked beans is one of the most humble staple dishes in Slovenian Istra, the peninsula located at the head of the Adriatic Sea. This dish is nutritious, as full of fibre and protein, wholesome, super delicious, cheap and simple to make, and what it may lack in appearance it most certainly makes up in flavour.

This dish is classic comfort food, quintessentially rustic, a truly peasant food since it used to be made by farmers during colder months to help them to get warm, and to partially replenish their energy used up during the very hard, physical and laborious jobs required in the fields during the day.

This borlotti beans casserole is made with beautifully caramelized onions and sautéed pancetta and flavoured with garlic, bay leaf and a touch of tomato paste, it is typically served with polenta or crusty bread and a fantastic companion to grilled meats.

My nona grew up with this dish, as borlotti beans were consistently cooked as a part of the Mediterranean diet, the recipe was passed down to my father who adored baked beans and would prepare them regularly when there was a family barbecue, normally in such a huge quantities that we would eat them on a toasted bread for days to follow, nobody seemed to mind or complained about it, on the contrary...

This home made baked beans are known in standard Slovenian as Praženi Fižol, but the locals would refer to this dish simply in the dialect as Pražen Fežu.

This very traditional dish calls for dry borlotti beans, but you can use canned beans to cut down on time without compromising the deliciousness of the final dish, it can also be made with or without the meat component, in which case, this version makes an excellent vegetarian and vegan meal option.

I am sharing here the traditional, local family recipe which uses only few simple ingredients, however, you can take this dish slightly off the beaten track and jazz it up a bit by adding few chilli flakes or powdered sweet or smoked Hungarian paprika, which will give a more “Imperial” and “Balcanic” flavour. My father attempted this only once and was severely told off by his mother, my famous nona, for “corrupting” the traditional recipe making it too “exotic” for her to eat, this version of baked beans, although very delicious indeed, was never cooked again by my father in her presence...

Whether you go for a traditional or more exotic version of the recipe for home made baked beans, give it a go, a store bought tinned baked beans might just become a thing of a past...

Ingredients

Serves 6-8

  • 500g dry borlotti beans, (or other dry beans of your choice) soaked overnight or for about 8 hours

    For this recipe you can also use tinned borlotti beans or other tinned beans of your choice 4 x 400g)

  • 1 medium onion, (about 130g) finely chopped

  • 4 Tbsp extra virgin olive oil

  • 2 cloves of garlic, peeled and crushed

  • 100g pancetta, (smoked or unsmoked) thinly sliced and chopped

  • You can replace pancetta for smoked or unsmoked bacon or lardons

  • 1 Tsp white all purpose flour

  • 2 Tbsp tomato paste

  • 2 bay leaves (fresh or dry)

  • sea salt

  • black pepper

Method

Place dry borlotti beans, or other dry beans of your choice, in a big bowl, cover completely with plenty of cold water and soak for about 8 hours or overnight.

Drain soaked beans in a colander and rinse with cold running water.

View fullsize Baked borlotti beans 4.jpg
View fullsize Baked borlotti beans 5.jpg

Transfer soaked beans in a pot.

View fullsize Baked borlotti beans 6.jpg
View fullsize Baked borlotti beans 7.jpg

Add plenty of cold water, to completely cover the beans, a bay leaf and bring to boil.

Turn the heat down to medium-low and cook the beans for about 1 -1 ½ hour or until the beans are fully cooked and soft but not falling apart. Skim any foam if it rises to the surface. Towards the end of cooking time add sea salt.

Fish out the bay leaf and discard. Turn the heat off, leaving the pot with the beans in their liquid on the stovetop for later use.

View fullsize Baked borlotti beans 8.jpg
View fullsize Baked borlotti beans 11.jpg

Put extra virgin olive oil in a fairly large and deep skillet or casserole dish (both preferably non stick). Add finely chopped onion, crushed garlic, finely sliced and chopped pancetta or similar, if using, and sauté on a gentle heat, stirring occasionally, until the onions become soft and translucent.

Add the flour and stir well with the onion, garlic and pancetta mixture.

View fullsize Baked borlotti beans 10.jpg
View fullsize Baked borlotti beans 12.jpg

With the slotted spoon, (or a regular big serving spoon) transfer the beans to the skillet with the onion, garlic and pancetta mixture.

Pour the liquid from the beans into the skillet to completely cover the beans. If you are left with more liquid from the beans as needed at this stage, keep it aside and do not discard it. You might use it later on, if the beans during the cooking process get too dry. On the contrary, if you end up using all the liquid from the beans, and the beans get too dry, you can simply use water.

Add sea salt, black pepper, bay leaf, tomato paste and bring to a gentle boil.

View fullsize Baked borlotti beans 13.jpg
View fullsize Baked borlotti beans 14.jpg

Lower the heat and gently simmer for about 30 minutes stirring occasionally.

Taste and adjust the seasoning with sea salt and black pepper.

Serve hot or at room temperature.

Just a thought

Home made baked beans are suitable for freezing.

Wine suggestion

Schiava Alto Adige DOC "Kolbenhofer" 2020 - Hofstater

January 26, 2022 /tina oblak
borlotti beans, baked beans, baked borlotti beans, baked beans with pancetta, baked beans with lardons, baked beans with bacon, rustic baked beans, beaked beans on a hob, baked beans on stove, Stovetop baked beans, Skillet baked beans, baked beans in a frying pan, Praženi Fižol, Pražen Fežu, Istrian borlotti beans
Adriatic Recipe, Appetizers, Autumnal dish, Autumnal recipe, brunch, Central European recipes, Eastern European recipes, Easy recipe, Healthy, healthy mael, Istrian cuisine, Istrian dish, Istrian food, Istrian gastronomy, main course, main dish, Nutritious dish, Nutritious, one pot meal, one pot meat recipe, Rustic dish, Side Dishes, Slovenian cuisine, Slovenian food, Slovenian gastronomy, Small bites, Starters, stew, Vegan, Vegetarian, Winter dish, Winter recipe, casserole

Braised Pheasant with fresh herbs Recipe

Beans and Srdines
January 12, 2022 by tina oblak in Adriatic Recipe, Autumnal dish, Autumnal recipe, Celebratory dish, Central European recipes, Christmas dish, dinner, Eastern European recipes, Easy recipe, Festive dish, Istrian cuisine, Istrian dish, Istrian food, Istrian gastronomy, main dish, main meat course, Meat, one pot meal, Rustic dish, Slovenian cuisine, Slovenian food, Slovenian gastronomy, Winter dish, Winter recipe, one pot meat recipe

Braised pheasant is a fantastic winter warmer, comforting and hearty, made with only few fresh ingredients evoking seasonal flavours.

First, the pheasant meat is browned and then slowly cooked with fresh herbs in a beautiful sauce allowing the meat to be tenderised.

This simple and rustic dish offers and provides full and rich but delicate flavour and it is best made ahead of time as it improves when cooked in advance and then re-heated gently before serving.

Braised pheasant has been a very much loved traditional dish in Slovenian Istra where its gentle landscape has provided many opportunities for hunting, a pheasant representing one of the foremost preys among the local hunters.

This area was once part of The Republic of Venice, and it is believed that this gamebird with oriental plumage, was introduced to the West via Venice, as this majestic city had very close links with the Byzantine empire.

Moreover, some sources report that the name pheasant, Fasan, in venetian dialect, and Fazan, in standard Slovenian, comes from the fact that the pheasant was originally a native of the river Phasis in Colchis (in present day Western Georgia).

Cooking pheasant meat, in general, used to be a rare treat and was reserved for festivities and very special occasions, and although nowadays pheasant meat is a bit more accessible and affordable, it is still served to mark more special events, and is not presented on your plate as a average midweek dinner. Pheasant dishes can be enjoyed and found on menus in formal and informal restaurants during autumn and winter pheasant hunting months.

Braised pheasant is a very much appreciated dish in the family and here I am sharing my nona and my mother's recipe.

Ingredients

Serves 4-6

  • 2 small pheasants (about 1.5kg) jointed (your butcher will be more than happy to do this for you)

  • 3 Tbsp extra virgin olive oil

  • 1 medium onion (about 150g), roughly chopped

  • 2 celery sticks (about 40g), finely chopped

  • carrot (about 50g), finely grated

  • 2 cloves of garlic, peeled and crushed

  • sea salt

  • ground black pepper

  • 1 fresh rosemary spring (tied with the cooking string as this makes it easier to remove after cooking and prevents the needles to fall off the spring)

  • 2-3 fresh sage leafs

  • 100 ml white wine

  • chicken or vegetable stock (can use just water) It is perfectly fine to use a good quality instant stock .

Method

In a heavy, lidded casserole pan add extra virgin olive oil, chopped onions, finely grated carrot, finely chopped celery sticks, crushed garlic, jointed pheasants and mix well.

On a low and gentle heat, fry, stirring occasionally and moving around the meat. Scrape the bits off the bottom of the pan with the wooden spoon if it starts to catch to avoid burning (this will get deglazed later and become part of the sauce).

This stage of very gently frying and browning the meat on all sides can take up to one hour (the longer you brown the meat the darker the sauce will be).

View fullsize Braised pheasant 2.jpg
View fullsize Braised pheasant 3.jpg

Deglaze the pan with white wine and let it completely evaporate.

Add fresh spring of rosemary, fresh sage leafs and stock or water, just enough to cover halfway up.

Place the casserole pan over a medium heat and bring to a simmering point.

Cover with a lid, lower the heat and gently simmer for about 1 hour, stirring occasionally, until the pheasant meat is tender and cooked through. Cooking the pheasant with the lid covered partially or completely will ensure the pheasant meat stays moist as the moisture will be kept in the pan, gently steaming the meat during the simmering process.

If excess fat is formed during cooking process skim it off using a spoon.

Remove rosemary spring and sage leafs.

Taste and adjust the seasoning with sea salt and black pepper.

If the sauce is too liquidy, increase the heat allowing it to reduce and thicken slightly. On the contrary, if the sauce has a thick consistency dilute it a bit with the stock or water.

Serve hot with soft cooked or grilled polenta, mashed potato, potato gnocchi, egg based pasta like bleki or simply nice fresh crunchy rustic style bread to soak up the juices.

Just a thought

This is a great dish to make ahead of time and suitable for freezing.

Wine suggestion

Friuli Colli Orientali Merlot DOC 2017 - Livio Felluga

January 12, 2022 /tina oblak
Pheasant, Pheasant meat, game meat, Braised pheasant, Slow cooked pheasant, Istrian style braised pheasant
Adriatic Recipe, Autumnal dish, Autumnal recipe, Celebratory dish, Central European recipes, Christmas dish, dinner, Eastern European recipes, Easy recipe, Festive dish, Istrian cuisine, Istrian dish, Istrian food, Istrian gastronomy, main dish, main meat course, Meat, one pot meal, Rustic dish, Slovenian cuisine, Slovenian food, Slovenian gastronomy, Winter dish, Winter recipe, one pot meat recipe
Comment

Sautéed Savoy Cabbage with potatoes, garlic and olive oil Istrian Recipe

Beans and Srdines
December 27, 2021 by tina oblak in Adriatic Recipe, Autumnal dish, Autumnal recipe, brunch, Central European recipes, Christmas dish, dinner, Easy recipe, Festive dish, Healthy, healthy mael, Istrian cuisine, Istrian dish, Istrian food, Istrian gastronomy, Nutritious dish, Rustic dish, Side Dishes, Slovenian cuisine, Slovenian food, Slovenian gastronomy, supper, Vegan, Vegetarian, Winter dish, Winter recipe, one post fish recipe

Let's face it, not a lot of people I know will get particularly excited about the cabbage, but slowly cooked down and sautéed savoy cabbage with delicate boiled potatoes, fragrant garlic, excellent olive oil and seasoned well with sea salt, will most certainly made up in the taste for what maybe lacks in appearance. This comforting and rustic vegetable side dish is simply delicious, trusted and reliable gastronomic companion to just about any meat dish, very easy to prepare, healthy, nutritious and inexpensive.

When savoy cabbage is cooked well with just a few excellent quality and fresh ingredients tastes nothing like you imagine, and it might convert the most austere cabbage 'dislikers'. This recipe can become a new classic cabbage dish for your family, changing what they have in mind when thinking about cabbage - if they ever even think about cabbage! This recipe completely changes the taste and texture of the cabbage, and it becomes “sweet”, soft, and ever so slightly mushy and velvety in a pleasant way.

I have never thought about this aspect of the dish, nor have I ever been bothered about it, as I grew up with it and have always been fully aware of the reward you get on the palate when it is cooked properly.

This dish is deeply rooted in Slovenian Istra, and is one of the most traditional dishes to be cooked as part of everyday family meals during autumn and winter when savoy cabbage is in full season and is most full of flavour. When it tastes at its best, it takes nothing less than the central place on dining tables, and as tradition wants, especially on Christmas Eve, together with salted cod spread and fritole (Istrian small doughnuts).

It is during these colder months of the year that my mother and most other households would prepare this side dish. My brother and I have always found this dish somehow reassuring, we would eat it paired with breaded, pan fried chicken escallops or pork Wiener schnitzel, which is one of the most common ways of serving it.

If there were any leftovers, my mother would reheat them, and they would be served with fried eggs - no waste, no hassle, and another meal sorted, and so happy children, and also happy, or relieved mom!

This recipe is normally made with freshly cooked cabbage and potatoes but it is made, and it can be made, using left over cooked cabbage and boiled potatoes which is a fantastic way to reduce food waste.

If you are one of those cabbage non-lovers, and managed to read up to this point about my enthusiasm for this humble vegetable, I warmly invite you to try this recipe, you might have a revolutionary moment and convert, this dish might just become one of your favourite autumn/winter vegetable side dishes.

I am sharing here my family recipe, give it a chance to see how nice it tastes

Ingredients

Serves 4 as part of meal

  • 1 savoy cabbage, cored and roughly chopped

  • 2 medium size potatoes (about 380g), peeled and cubed

  • 2 cloves of garlic, peeled and cut lengthwise

  • 6 Tbsp extra virgin olive oil (the best quality you can afford)

  • sea salt

  • ground black pepper, optional

Method

Cut up the savoy cabbage into quarters, remove core, cut roughly into smaller pieces and wash thoroughly

Peel the potatoes, cut into cubes and wash under cold running water.

Place both cabbage and the potatoes in a fairly big pot and add water to completely cover.

Bring to boil, turn the heat down, add a pinch of salt and cook for about 8-10 minutes or until potatoes and cabbage are cooked but still a bit firm.

View fullsize Savoy cabbage 4.jpg
View fullsize Savoy cabbage 5.jpg

When cooked, drain in a colander and leave for a few minutes so the extra water can drain well.

Put the extra virgin olive oil and the garlic in a pan (you can use the same pan that you cooked the cabbage and potatoes in, just dry it well) or use a skillet.

Cook the garlic in the oil until golden in colour allowing to flavour the oil, then remove and discard the garlic.

Add potatoes and the cabbage to the pan or skillet and cook down for about 20 minutes on a gentle heat stirring occasionally until a nice soft and velvety consistency.

While cooking, break the potatoes a bit with a back of wooden spoon or a fork but do not mash it completely.

Taste and adjust the seasoning with sea salt and add ground black if using.

Serve hot immediately.

Just a thought

This side dish will keep very well in fridge in the airtight container for a few days. Reheat well before serving warm.

Not particularly suitable for freezing.

December 27, 2021 /tina oblak
savoy cabbage, royal cabbage, vrzota s krompirjem, verza e patate
Adriatic Recipe, Autumnal dish, Autumnal recipe, brunch, Central European recipes, Christmas dish, dinner, Easy recipe, Festive dish, Healthy, healthy mael, Istrian cuisine, Istrian dish, Istrian food, Istrian gastronomy, Nutritious dish, Rustic dish, Side Dishes, Slovenian cuisine, Slovenian food, Slovenian gastronomy, supper, Vegan, Vegetarian, Winter dish, Winter recipe, one post fish recipe
Comment

Fritole - Istrian small doughnuts Recipe

Beans and Sardines
December 23, 2021 by tina oblak in Adriatic Recipe, Autumnal dish, Autumnal recipe, Celebratory dish, Central European recipes, Christmas dish, dessert, Easter dish, Easter treats, Eastern European recipes, Easy recipe, Enriched dough, Festive dish, Finger food, Istrian cuisine, Istrian dish, Istrian food, pudding, Rustic dish, Slovenian cuisine, Slovenian food, Slovenian gastronomy, Small bites, Snacks, sweet course, Sweet Things, Winter dish, Winter recipe, festive sweet things, festive dessert, celebratory desserts

Fritole are a type of small fried doughnuts made of thick batter-like dough enriched with raisins and served warm covered in icing sugar, they are light and crunchy on the outside and soft and aromatic on the inside, they just melt in your mouth.

This sinfully delicious and fragrant little delights have a very deep connection with Christian, especially Catholic liturgical festivities like the Carnival season, the time of the year in which eating in excess, and gastronomic indulgence was allowed by the Church before the start of fasting and austerity during Lent, and ending with Easter.

In Venice, where this sweet treats are a synonym of Carnival, fritole used to be prepared and served strictly during the days of Carnival. Nowadays, they appear not only in Venice but also in the region of Veneto and north-east region of Friuli-Venezia Giulia, Italy, and Istria where fritole are also very popular and start appearing as soon as Christmas festivities are over and remain around on offer as a irresistible sweet temptation until Ash Wednesday begins the Lent season.

However, on the coastal part of Slovenian Istra, once being part of what was called, ‘The most Serene Republic of Venice,’ fritole hold a very special place on Christmas Eve and this is when my nona would make fritole as the tradition called upon her to do.

In dialect they could also be called Fritle, Fritule or miške, meaning little mice in standard Slovenian, as when you drop the batter in hot oil, there is a little trail on the end, resembling little mice.

My father adored them and everyone in the family simply loves fritole, and whoever also grew up with fritole knows this very well. I am sure they can share with me the fact that they get eaten far faster than they can ever be made! When my nona started to get ready for the frying process, the kitchen would suddenly get crowded, we would get louder, and more excited, and our eyes would sparkle with joy just waiting in anticipation for them to be finished, and ready to eat!

My nona would be carefully scooping fritole out of hot oil and they would be disappearing in front of her yes and my nona, being incredibly experienced and fast could hardly keep up with us.

My nona made fritole with raisins but like most recipes fritole have few variation where pine nuts, cinnamon and candied fruit is added to a basic batter.

We would eventually get full, our greediness would decrease, the kitchen would be less noisy and less crowded but she kept frying, ending up layering the fritole on a big plate and dusting them with sugar looking like a snowy mountain, and this vision will stay with me forever...

She would then lovingly packed them for us to take home...

I am miles away from her kitchen, and years have passed by, but when I close my eyes I get transported immediately right back there ... I can smell and feel all of it, and in the stillness of these thoughts I can fully recollect all the nostalgic flavours, and the emotions so closely tied to my family.

My nona is now 93 years old, and her hands sadly are no longer able to make fritole, and so I feel privileged to be have learned how to make them from her, and since she gave me the family recipe, I am to able to keep making them and keep this family tradition alive.

This is why for me these sweet treats hold a very special place in my heart, they are more than just another recipe, they are part of who I am, and who I have become as a person ...

I am sharing here my nona's recipe that was passed down to her by her nona, and so try to make them, and delight your family and friends.

Ingredients

Makes about 40 small doughnuts

  • 400g plain flour

  • 3 eggs, (room temperature) beaten

  • 50g granulated sugar

  • 60-70g raisins or sultanas

  • 3 Tsp fast action dried yeast (also called instant yeast) or 40 g of fresh yeast

  • 250ml milk, lukewarm (full fat or semi skimmed)

  • 4 Tbsp of dark rum or grappa

  • finely grated lemon zest of one unwaxed lemon

  • sea salt, a pinch

  • sunflower or corn oil for frying

  • icing sugar for dusting

Method

Put the raisins in a small bowl, add warm water to completely cover and soak them for at least 20 minutes or until they plump up.

In a large bowl place the flour, beaten eggs, sugar, pinch of salt, yeast, grated lemon zest.

Gradually start adding the milk, mixing constantly until all the ingredients are well incorporated and you end up with a sticky dough that will be soft but thick resembling batter-like dough or a thick cake mix.

Adjust the dough by adding more milk if the dough is too thick, on the contrary, if you find the dough too runny add a bit more flour.

Add to the dough drained soaked raisins (squeeze out the all the excess liquid).

Cover the bowl with cling film or clean tea towel and place it in a warm place free of drafts from any open window.

Let the dough rest for at least 1 hour.

After this time the dough should rise a bit and have a bubbly surface.

Take a medium- sized deep skillet. Add the oil and heat it up over a medium heat to about 180C.

(If you do not have a thermometer, drop a cube of bread into the oil, it is ready when bread turns golden brown in 15 seconds).

Fritole are fried by dropping a small spoonfuls of dough/batter into the hot oil.

Take two tablespoons, with the first spoon scoop up the sticky dough from the bowl, with the second spoon slip off the dough from the first spoon into the hot oil.

Do not overcrowd the skillet with fritole and fry them in small batches, a few at the time, (4-6) this will obviously depend on the size of your pan. Fry them on both sides, fitole are fried in no time, about a minute on each size, so help them to flip over by using a fork or some tongs, however fritole will sometimes flip over themselves.

Whne you drop the batter/dough into a hot oil they will most probably not form perfect shaped balls but instead will leave a little trail on the end.

Fry until dark-ish brown in colour, puffed and well cooked through. I suggest you do a little test to make sure they are not raw inside. Simply open up a cooked fritola, if still gooey inside the oil is probably too hot and the heat too high.

Line a large plate with absorbent kitchen paper towels. Drain fried fritole with a slotted spoon and transfer them on a plate.

Allow the fritole to cool a bit.

Dust them with icing sugar or roll them in caster sugar.

Serve warm or at room temperature.

Just a thought

Fritole are to best enjoyed served still warm, however they are still delicious at room temperature.

Fritole can be warmed up in a microwave or in the oven. My nona put a plate of fritole on the radiator.

Wine suggestion

Moscato del Veneto IGT "Dindarello"2020 - Maculan'

December 23, 2021 /tina oblak
fritole, fritule, deep fried desserts, miske, miške, Fritle, Traditional Istrian doughnuts, small doughnuts, doughnuts, Venetian desserts, Venetian frittole
Adriatic Recipe, Autumnal dish, Autumnal recipe, Celebratory dish, Central European recipes, Christmas dish, dessert, Easter dish, Easter treats, Eastern European recipes, Easy recipe, Enriched dough, Festive dish, Finger food, Istrian cuisine, Istrian dish, Istrian food, pudding, Rustic dish, Slovenian cuisine, Slovenian food, Slovenian gastronomy, Small bites, Snacks, sweet course, Sweet Things, Winter dish, Winter recipe, festive sweet things, festive dessert, celebratory desserts
Comment

Creamed salted cod (or stockfish) Recipe

Beans and Sardines
December 16, 2021 by tina oblak in Adriatic Recipe, Appetizers, Autumnal dish, Autumnal recipe, bite-sized nibbles, brunch, Canapés, Celebratory dish, Central European recipes, Christmas dish, dinner, Easter dish, Easy recipe, entrée course, Festive dish, Finger food, Fish & Seefood, healthy mael, Istrian cuisine, Istrian dish, Istrian food, Istrian gastronomy, main course, main dish, Nutritious dish, recipe from Northern Ital, Rustic dish, Slovenian cuisine, Slovenian food, Slovenian gastronomy, Small bites, Snacks, spreads, Starters, Winter dish, Winter recipe, fish spreads, fish starter

Venetian in origin, this light and creamy, almost mousse like spread, it is one of the most loved dishes, due to its very mild fishy flavour and no bones to worry about, and so it covers the whole family from the youngest children to the oldest members.

Spread on fresh or toasted slices of bread or it can be eaten with polenta, and it is a very convenient dish since it is served cold and it is prepared in advance. Creamed salted cod is rustic but it can soon turn into very elegant canapé served with a pre dinner drink.

I think that this recipe is one of the greatest recipes ever invented! Quite frankly, it takes a bit of a genius to turn an uneatable dry stockfish, which looks utterly unappealing, and is as dry as a plank of wood, into the most luxurious and delicious dishes ever created.

Venetian creamed cod, known in Italy as Baccalà mantecato, is a real speciality and a staple dish in Venice, where it was created, and it is very much appreciated and well known in the rest of Italy. Slightly less known however in the rest of the world, creamed salted cod certainly deserves greater international praise and renown.

This dish is one of my absolute top favourites, one of those dishes I am most grateful to the Venetians to have brought with them during the time they ruled my homeland in the North Adriatic, period during which dried stockfish was first introduced in Istria in 15th century from Venetian cuisine.

In Slovenian it is called Bakala na belo or Polenovka na belo or simply called by the locals Bakala or Bakalar.

My paternal grandfather, or my nono as I called him, used to always buy stockfish at the beginning of December, I have this image in my head of the dry long stockfish sticking heavily out of the shopping bag, I knew very well that it was the start of the Christmas festivities.

This recipe is a real classic holiday and festive dish in Slovenian Istra, and holds a very special place among the locals. Dried stockfish was once a food for the poor but nowadays is a staple dish and considered a delicacy, taking central stage on household tables during Christmas and Easter as it is cooked on holy days during the fasting time and not eating meat.

Traditionally, creamed stockfish is home made and served as part of Christmas Eve dinner, together with sautéed Savoy cabbage and polenta, and Istrian fritole (small fried doughnuts), of course.

These days you can find creamed stockfish on the supermarket shelves all year round, and especially during the holiday season and Easter, but unfortunately, the sad reality is, that very often, the quality of commercially produced cod spread leaves much to be desired, as very common practice is to add lard or potatoes to increase the weight

I have very vivid memories about the process of soaking the stockfish, this huge restaurant size pot was left outside in the back garden during the night and when the temperatures plummeted below 0, the ice formed on the top, and I just loved finding the sheet of ice the following morning, and braking it into pieces. My son does the same...what is it with the children and the ice, and love for breaking it ...

My son Jakob (age 9) with his gran grandmother (age91) making creamed stockfish with the help of a standard mixer

My nono was in charge of stockfish, year, after year, after year, until he sadly passed away, then my father took over and now it is down to myself, my brother, my husband, and the children, since my father sadly is longer around. Back home, according to tradition, stockfish and the preparation of it is still a male affair, however, maybe it is time for this to change!

My nono would sit on the chair, place a big pot containing pieces of cooked cod between the legs, a bottle of olive oil would be kept very close to him for an easy and frequent reach and as tradition requests, the cooked cod would then be beaten with big and long wooden flat spoon like, known locally as polentar or bat which resembles very much a cricket bat, but in my research I have found no connection between the two types of bats!

In honour of my family but in particular in honour of my nono and my father I am sharing here this very special generational family recipe. Give it a go, you will love it!

Ingredients

Serves 4

  • 500g salted cod or 1 dry stockfish

  • 170ml extra virgin olive oil (the very best you can afford) plus a bit of extra as needed

  • 1-2 cloves of garlic, peeled

  • 1 bay leaf, fresh or dry

  • fresh flat leaf parsley (about 7g) finely chopped, optional

  • sea salt, to taste

Method

For this recipe you can use either salted cod or dry stockfish, both need to be soaked and rehydrated first.

If you are using salted cod (I used this type for the recipe) first you need to rinse well the salted cod under very cold running water and soak it. Place rinsed cod in an airtight container, fill it completely with freezing cold water, and with some ice, if you have it, so the fillets are completely submerged. Close the lid and put the container in the fridge. Change the water after 24 hours and place in the fridge for another day. After 48 hours, the cod will be completely soaked. Remove the cod from the container, rinse well with cold water and cut the fillet/s into portion size.

Place pre-soaked pieces of cod in a pan and fill it with plenty of cold water so the pieces of fish are completely submerged in the water. Add bay leaf and bring to boil.

View fullsize Creamed Salted Cod 3.jpg
View fullsize Creamed Salted Cod 4.jpg

Turn the heat down and cook further on a gentle heat for about 20 to 30 minutes and skim the foam on the surface as needed.

After the fish is cooked drain in the colander.

As soon as it is cool enough to handle carefully remove the skin and the odd bone.

With your fingers break the flesh into smaller pieces and place them in a pan or in a bowl of a standard mixer if you are using one.

View fullsize Creamed Salted Cod 5.jpg
View fullsize Creamed Salted Cod 6.jpg

If using a whole dried stockfish, this needs to be soaked and rehydrated first. Place the whole stockfish in a big stock pot and fill completely with cold water and soak for 2-3 days, changing the water every day. If you do not have a very big pot to fit the whole stockfish in, you can use a smaller pot, like a regular 5 litre stock pot, and then place the stockfish in a pot where half of it will probably stick out, and half will be submerged in the water. Soak the submerged part of stockfish for 24 hours and after this time the soaked part of the stockfish will get soft enough to bend, which will allow you to bend it in a such a way for the whole stockfish to be completely submerged into the water in order to get properly rehydrated. No need for rinsing as the dried stockfish is not salted.

Soaked and rehydrated cod needs then to be cooked. Place it in a stock pot, the same one you used for soaking, fill it with plenty of cold water (the whole fish needs to be completely submerged), add bay leaf and bring to boil. Lower the heat and cook further on a gentle heat until the fish is tender, for about 1 hour or just over.

Drain the fish and as soon as is cold enough to handle carefully remove the skin and all the bones.

With your fingers break the flesh into smaller pieces and place them back into in big pan or into a bowl of a standard mixer if you are using one.

Whether you have decided to use salted cod or stockfish you are now left with cooked cleaned small pieces of cod in a big pan or in a bowl of a standard mixer, again only if you are using one.

Place 5 Tbsp of extra virgin olive oil in a small frying pan, add the garlic previously peeled and cut in half lengthwise. Fry the garlic on a gentle heat until golden in colour to infuse the oil then discard the garlic.

Add garlic infused oil to the bowl.

Now the magic can begin.

Take a wooden spoon and start beating the pieces of fish quite vigorously. If using a standard mixer, put it on the lowest and slowest setting.

Keep beating and poring gradually the rest of the oil until you obtain a whitish paste and until the creamy mixture can no longer absorb any more oil.

This action of beating and adding very gradually small quantities of oil will eventually turn the pieces of cod into a light and fluffy cream, this process, in order to get the best result, can take up to 30 minutes.

View fullsize Creamed salted Cod 7.jpg
View fullsize Creamed salted cod 9.jpg

Add sea salt to your taste and very finely 1 chopped clove of garlic, although this optional, mix well, taste, and adjust the seasoning.

Transfer cod spread on a serving plate.

Serve it accompanied with slices of fresh rustic bread, toasted slices of bread (bruschetta) or slices of grilled yellow polenta.

Wine suggestion

Venezia Giulia Malvasia IGT 2019 - Skerk

December 16, 2021 /tina oblak
creamed salted cod, creamed stockfish, creamed salted cod mousse, baccala mantecato, Bakala na belo, Bakala, Bakalar, Istrian fish delicacy, Venetian fish specialty
Adriatic Recipe, Appetizers, Autumnal dish, Autumnal recipe, bite-sized nibbles, brunch, Canapés, Celebratory dish, Central European recipes, Christmas dish, dinner, Easter dish, Easy recipe, entrée course, Festive dish, Finger food, Fish & Seefood, healthy mael, Istrian cuisine, Istrian dish, Istrian food, Istrian gastronomy, main course, main dish, Nutritious dish, recipe from Northern Ital, Rustic dish, Slovenian cuisine, Slovenian food, Slovenian gastronomy, Small bites, Snacks, spreads, Starters, Winter dish, Winter recipe, fish spreads, fish starter
Comment

Barley, potato and borlotti beans Istrian soup Recipe

Beans and Sardines
December 01, 2021 by tina oblak in Adriatic Recipe, Appetizers, Autumnal dish, Autumnal recipe, Central European recipes, dinner, Eastern European recipes, Easy recipe, entrée course, healthy mael, Istrian cuisine, Istrian dish, Istrian food, Istrian gastronomy, main course, main dish, Nutritious dish, one pot meal, Rustic dish, Slovenian cuisine, Slovenian food, Slovenian gastronomy, Soups, Starters, stew, supper, Vegan, Vegetarian, Winter dish, Winter recipe, winter minestrone, winter soup

This hearty and filling one pot barley soup is a traditional soup from Slovenian Istra, a perfect choice to warm you up on a cold day, delicious in its simplicity, and it could not be easier to make.

Barley soup is a very popular choice in many households and is found on the menus as Ječmenova mineštra in more rustic, informal, mountainside, and family run restaurants.

Barley soup together with other types of soups like Jota (sauerkraut, borlotti beans and potato stew), Bobići (Sweet corn soup), Pasta e fasoi (Pasta and borlotti beans soup) play an incredibly important role in Istrian cooking as the soups were eaten as a main dish and sometimes the only hot meal of the day. The choice of the ingredients to make mineštre/maneštre (Istrian dialect word, from Italian minestra, indicating thicker soup) would rely exclusively on the type of vegetables and pulses that were available during a particular season.

Barley soup is traditionally made during colder autumn and winter months using dry borlotti beans, potatoes and barley that were harvested by the end of summer and autumn and appropriately stored to be used later in the year when the cold weather did not allow you to grow a vast array of vegetables, unlike during the spring, when it was warmer, and you could grow them in abundance to make even a lighter Minetrone Primavera.

In Slovenian Istra it is very common to put in some soups, besides different pork cuts, dried ham bone or pešto or taca (smooth paste made with pancetta, crushed garlic and very finely chopped parsley) to boost the flavour of the dish.

Traditionally this recipe calls for some unsmoked or smoked pork meat cuts to be added to the soup however you can turn this soup into a vegetarian and vegan friendly dish by simply leaving out the meaty component.

This family recipe really goes back generations. I am sharing with you the recipe for barley soup from my paternal nona's grandmother.

Ingredients

Serves 8-12

  • 300g dried borlotti beans, soaked overnight

  • 300g pearl barley

  • 500g roughly of pork ribs, ham hock, pig trotters or similar (slab of pancetta or bacon, about 130g). You can use smoked version of the meats if you prefer a slightly deeper smoky flavour or a combination of both.

  • 2 medium size potatoes (about 300g), peeled and cubed

  • leaves from 2-3 sticks of celery

  • 1 medium size onion (about 130g), finely chopped

  • 1 clove of garlic, peeled and crushed

  • 1 medium size carrot (about80g) peeled and finely grated

  • handful of fresh flat leaf parsley (about 15g) finely chopped

  • 1 bay leaf, fresh or dry

  • sea salt

  • black pepper

Method

In a fairly big stock pot place all the ingredients, except the sea salt and black pepper, add 4 ½ litres of cold water and bring to boil.

Turn the heat down and skim the surface as needed.

Cover partially with the lid and cook the soup on a gentle heat for about 1h ½.

View fullsize Barley soup 2.jpg
View fullsize Barley soup 3.jpg

After this time the soup should have a nice thicker velvety consistency as the potatoes and the barley release the starch. If the soup gets too thick simply dilute it with a bit of water.

Season with sea salt and black pepper, taste and adjust the seasoning.

Just a thought

Barley soup will keep well in a fridge for few days and is suitable for freezing.

Wine suggestion

Search results for 'Refosco dal Peduncolo Rosso DOC "Villa Locatelli" 2019 - Tenuta di Angoris

December 01, 2021 /tina oblak
barley soup, barley, potato and borlotti beans soup, barley minestrone, barley potato and borlotti beans minestrone, one pot barley soup, Istrian barley soup, Istrian barley minestrone
Adriatic Recipe, Appetizers, Autumnal dish, Autumnal recipe, Central European recipes, dinner, Eastern European recipes, Easy recipe, entrée course, healthy mael, Istrian cuisine, Istrian dish, Istrian food, Istrian gastronomy, main course, main dish, Nutritious dish, one pot meal, Rustic dish, Slovenian cuisine, Slovenian food, Slovenian gastronomy, Soups, Starters, stew, supper, Vegan, Vegetarian, Winter dish, Winter recipe, winter minestrone, winter soup
Comment

Rabbit Goulash Istrian Recipe

Beans and Sardines
November 18, 2021 by tina oblak in Adriatic Recipe, Autumnal dish, Autumnal recipe, Central European recipes, dinner, Eastern European recipes, Easy recipe, Istrian cuisine, Istrian dish, Istrian food, Istrian gastronomy, main course, main dish, main meat course, Meat, one pot meal, Rustic dish, Slovenian cuisine, Slovenian food, Slovenian gastronomy, stew, Winter dish, Winter recipe

Rabbit goulash is a hearty, peasant meal, and a real comfort dish for the coming cold winter evenings. It is made with only few ingredients, but when cooked well, it makes a delicious one pot meal that is fit for a king (and not only a peasant), and even for these cooler autumn days, it will warm you up nicely and make you feel cosy.

This dish is a part of Istrian žgvacet, collective term indicating traditional stew or goulash made with pieces of meat like chicken, beef, or venison, and is cooked in a sauce.

In Istria, rabbit goulash is one of the staple dishes and can also be called by locals šugo z zajcem (zajec meaning wild rabbit) or kunčji golaž (kunec meaning home bred rabbit).

My paternal nona shared with me that in rural households it was very common to keep a small holding of chickens, rabbits, and turkeys, to name just a few animals, that represented a vital source of meat, although this hearty meat dish was almost strictly reserved for special occasions and festivities, and traditionally eaten accompanied with home made potato gnocchi or home made pasta like bleki or soft cooked polenta or some crunchy bread to soak up the sauce.

Serving rabbit goulash with mashed or roasted potatoes is less traditional but quite common.

Rabbit meat, which can be a great alternative to a chicken, is available to buy fresh at speciality markets and can be ordered by your local butcher who will be more than happy to prepare it for you.

In this recipe the whole rabbit is used, even the parts that have very little or no meat on them like the ribs. They will truly add crucial flavour to the goulash, even though you can remove them, and discard these bits later on.

This dish, like most stews, tastes almost better the following day when is reheated as the all the flavours get the chance to mix and fully develop.

Rabbit goulash has always been a classic in Istria and in my family during colder autumn and winter months, served very often during the days leading up the Christmas and New Year.

I am sharing here my family traditional recipe for rabbit goulash made with wild or farmed rabbit that can be replaced by chicken if you cannot get hold of a rabbit, or are simply not keen on this type of meat.

Ingredients

Serves 4-6

  • 1-1.5kg wild or farmed rabbit, skinned and jointed (your butcher will be more than happy to do that for you), even though you can use chicken instead.

  • 1 onion, medium size (about 200g), finely chopped

  • 1 clove of garlic, peeled and crushed

  • ½ carrot (about 40g) finely grated

  • 4 Tbps extra virgin olive oil

  • fresh herbs (about a handful), finely chopped (rosemary, sage, marjoram and thyme, tip of fresh or dry bay leaf)

  • 2-3 fresh plum tomatoes, quartered, or half of tomato, roughly chopped, optional

  • 1 Tbsp tomato purée

  • sea salt

  • round black pepper

Method

Place extra virgin olive oil in a big casserole or stewing pan, add finely chopped onions, finely grated carrot, crushed garlic and jointed pieces of rabbit.

On a gentle heat, fry all together until the onions are soft and caramelised and rabbit deep golden in colour on both sides, stir occasionally.

Add finely chopped fresh herbs, quartered tomatoes, tomato purée, sea salt and ground black pepper.

View fullsize Rabbit Goulash 2.jpg
View fullsize Rabbit Goulash 3.jpg

Add about 500ml water, or enough to almost cover the rabbit meat. Scrape with the wooden spoon all the bits that stuck to the bottom of the pan. Bring to boil and then lower the heat.

Cover partially with the lid and gently simmer for 1-1½ hour.

After this time, the meat will be so tender and just fall off the bone and the sauce should of a nice consistency, not too thick nor too thin. You should end up with enough sauce to be used for potato gnocchi or pasta.

Taste and adjust seasoning with sea salt and black ground pepper.

View fullsize Rabbit Goulash 4.jpg
View fullsize Rabbit Goulash 5.jpg

There are two ways of serving this dish.

You can leave whole pieces of rabbit and serve it with soft cooked polenta, roasted or mashed potatoes or simply with nice crunchy bread.

Alternatively, you can take all the meat off the bone, put it back in a pan and mix with the sauce adding to it potato gnocchi or pasta. Reserve some of the starchy cooking liquid from pasta or gnocchi to dilute the meaty sauce to obtain a velvety consistency. Dish served like this might not look the most attractive but you will be well reworded by the taste and flavours.

Just a thought

Rabbit goulash will keep in the fridge up to 3-4 days in an airtight container. This dish also freezes very well, but before using it, defrost in the fridge overnight and reheat well.

Wine suggestion

Friuli Colli Orientali Merlot DOC "Vigne Cinquant’anni" 2016 - Le Vigne di Zamò

November 18, 2021 /tina oblak
hearty dish, wild rabbit, rabbit, rabbit meat
Adriatic Recipe, Autumnal dish, Autumnal recipe, Central European recipes, dinner, Eastern European recipes, Easy recipe, Istrian cuisine, Istrian dish, Istrian food, Istrian gastronomy, main course, main dish, main meat course, Meat, one pot meal, Rustic dish, Slovenian cuisine, Slovenian food, Slovenian gastronomy, stew, Winter dish, Winter recipe
Comment

Jota – Sauerkraut, beans and potato stew Istrian Recipe

Beans and Sardines
November 10, 2021 by tina oblak in Adriatic Recipe, Central European recipes, dinner, Eastern European recipes, Easy recipe, entrée course, healthy mael, Istrian cuisine, Istrian dish, Istrian food, Istrian gastronomy, main course, main dish, Mitteleuropean recipes, Nutritious dish, one pot meal, recipe from Northern Ital, Rustic dish, Slovenian cuisine, Slovenian food, Slovenian gastronomy, Soups, Starters, stew, supper, Vegan, Vegetarian, Autumnal recipe, Autumnal dish, Winter recipe, Winter dish

Jota, pronounced 'yota,' is a very old recipe for a stew made of sauerkraut, dried borlotti beans, potatoes and some kind of pork cuts. It is believed that the word jota derives from Celtic word “jutta” indicating a liquidy soup.

Jota is filling and makes a perfect choice for a comfort food when the first cold starts as it will warm your body and soul. It is really easy to make, healthy, inexpensive, and it has become a staple and much loved dish in Slovenian households. Jota, being also very nutritious, is served in nurseries, schools, care homes for elderly, and family run informal restaurants, as well as being one of the most requested dishes from hikers and skiers in mountainside restaurants.

This hearty stew is incredibly humble and proper peasant food as it was born out of necessity and from what was available. My paternal nona told me that most of the households in the countryside, where she was growing up (a little village called Marezige just a few kilometres from the coastal town Koper), would have a wooden barrel of home made sauerkraut, sacks of potatoes and dried borlotti beans, and if you were lucky enough, a pig or a few pigs that would eventually get slaughtered and provided a very precious meat. The better cuts of pork meat were used for drying and curing and for what was considered a very rare and luxurious roasts while less prestigious cuts were put in soups and stews to enrich the flavour.

This very poor dish comes from the region of Primorska near the Adtriatic Sea and it is considered a quintessentially, one of the most famous Istrian peasant dishes, also enormously popular in Trieste and province of Trieste in Italy.

According to Anna Gosetti della Salda, in her book, Le ricette regionali Italiane, Jota (or Jote) was widely made over the whole region of Friuli (Italy), the area bordering with Slovenia, but towards the end of last century the use of jota was limited almost exclusively to the Valli di Gorto and Pesarina in Carnia.

The use of sauerkraut in all these regions, referred to as kapus in the Istrian dialect, is a testimony to how strongly the Austro-Hungarian Empire influenced the dishes in these areas.

Like with most dishes in the culinary world, it is no surprise that there are some variations in the recipe for Jota as well. The most common variation of Jota is without potatoes, and instead, a bit of flour is used to thicken the soup, and another common variation is making jota using sour turnip (called kisla repa in Slovenian).

In some variations, also used by both my mother and my nona, besides the use of different pork cuts, pešto or taca (smooth paste made with pancetta, crushed garlic and fresh, very finely chopped parsley) would be used. This was done, once again, to boost the flavour of the dish.

In some parts of Slovenia that are geographically closer to Hungary, a small quantity of powdered smoked sweet Hungarian paprika will be added to jota.

Before serving this sauerkraut stew, different cuts of pork, that have been cooked in jota, are removed from the bone, sometimes shredded and then returned and mixed into a soup. It is also very common to remove the meats from the soup and serve it later as a separate course.

Different cuts of pork can be used to enrich the flavour of this stew, but it is equally delicious without the meaty element and so it makes a lovely vegetarian and vegan meal.

My nona also “jokingly” shared with me, that to make a really good jota you need three days. The first day for soaking the beans, the second day for cooking Jota and the third for eating it, and enjoying it after it has rested, and all the flavours had a chance to fully develop. It is up to you whether you want to follow my nona three day rule.

I do, no wonder it turns out delicious...

Here I am sharing my family recipe for jota.

Ingredients

Serves 6-8

  • 300g dry borlotti beans, soaked overnight or least for 4 hours

  • 650g -1kg sauerkraut, drained and rinsed

    (I am giving you an approximate amount of sauerkraut to be used in this recipe as it can be flexible. The amount you use will depend on what you can find in your local food store. Sauerkraut is normally sold in either glass jars or sometimes in sealed plastic bags and they will indicate on the label both total net weight (with the liquid) and drained weight, and the latter is the weight you need to look for.

  • For this recipe I bought a glass jar of sauerkraut with total weight of 680g and 650g drained weight which is the amount of sauerkraut I used for the soup).

  • 2 bay leaves, fresh or dry

  • 500g or more, pork ribs (can use ham hocks or similar)

  • 100-200g g smoked bacon lardons (can use smoked cubed pancetta, a slab of bacon or pancetta, chopped strips of smoked bacon or similar)

    (The use of combination of smoked and unsmoked meat element is quite important, as it really gives that traditional and typical Jota flavour, but it is also very flexible. You can, if you prefer, only use unsmoked meats or all smoked for a deeper smoky flavour. Traditionally a bone or outer rind of dry cured ham would be used in order not to waist anything, and it is also packed full of flavour.

  • few black peppercorns, 4-6

  • 2 cloves of garlic, peeled and crushed

  • 3 fairly big potatoes about 600-800g, peeled and cubed

  • 2 Tbsp extra virgin olive oil

  • 2 tbsp tomato paste (optional)

  • sea salt

Method

There are three simple stages to make jota.

Stage 1

Drain previously soaked beans in a colander, rinse with cold running water and drain again.

Transfer the beans to a very big pot (5 litre at least, where jota will be cooked), add the meats, bay leaf and 5 litre of cold water. Bring to boil over high heat, turn the heat down to a medium low and cook the beans, partially covered with the lid for about 1 hour until the beans are just soft. Skim any foam that rises to the surface, you might have to repeat this process few times.

Do not add sea salt at this point as this will make the skin of the beans hard causing them to crack during the cooking.

Stage 2

Place the sauerkraut in a colander and drain, rinse briefly but thoroughly with cold running water and drain again.

Transfer the sauerkraut in a pan, add a pinch of salt, peppercorns, crashed garlic, bay leaf, olive oil and cold water just enough to cover the sauerkraut.

Bring to a boil, lower the heat and cook for about 30 minutes. After this time, transfer the sauerkraut to a big bean pot.

Stage 3

Peel, wash, cube the potatoes and place them in pan. Cover completely with water, bring to boil, turn the heat down and cook for about 30 minutes until the potatoes are soft when pierced with the tip of a knife.

Drain the potatoes in a colander or with the slotted spoon transfer the potatoes to a large plate or bowl. With the back of the fork coarsely mash half of the potatoes and leave the other half cubed.

Transfer coarsely mashed and cubed potatoes in a big pot with beans.

Partially cover with a lid the big pot with beans, sauerkraut and potatoes and continue cooking on a gentle heat for another hour. All three elements will mix and blend together and the soup will start thickening. Taste and adjust seasoning with sea salt and freshly ground black pepper.

The soup should be quite thick but still have enough liquid to be able to ladle it nicely on the plate.

If jota gets too thick just add a bit of water to dilute it.

When jota is cooked, depending on what type of meats you use, take the meat of the bones, discard skin and bones and transfer pieces of shredded meat to the soup if you wish.

Discard the bay leaves before serving jota hot with a nice piece of crunchy bread.

Just a thought

Jota will keep well in a fridge for few days and is suitable for freezing.

If jota gets too thick, simply dilute it adding a bit of water, bring to boil and serve hot.

Wine suggestion

Venezia Giulia Pinot GrigioIGT 2019 – Azienda Agricola Pierpaolo Pecorari

November 10, 2021 /tina oblak
Sauerkraut recipe, Istrian sauerkraut stew, Istrian sauerkraut soup, hearty stew, comforting stew, borlotti beans, potatoes, autumnal stew, winter stew, winter dish
Adriatic Recipe, Central European recipes, dinner, Eastern European recipes, Easy recipe, entrée course, healthy mael, Istrian cuisine, Istrian dish, Istrian food, Istrian gastronomy, main course, main dish, Mitteleuropean recipes, Nutritious dish, one pot meal, recipe from Northern Ital, Rustic dish, Slovenian cuisine, Slovenian food, Slovenian gastronomy, Soups, Starters, stew, supper, Vegan, Vegetarian, Autumnal recipe, Autumnal dish, Winter recipe, Winter dish
2 Comments

Apple Strudel with home made pastry Recipe

Beans and Sardines
November 05, 2021 by tina oblak in Adriatic Recipe, baked dish, baking, breakfast, Central European recipes, dessert, Eastern European recipes, Istrian cuisine, Istrian dish, Istrian food, Istrian gastronomy, Mitteleuropean recipes, pudding, recipe from Northern Ital, Rustic dish, Slovenian cuisine, Slovenian food, Slovenian gastronomy, sweet course, Sweet Things

Apple strudel is a traditional Viennese dessert, made of very thin elastic pastry, and the filling contains sliced apples, sugar, cinnamon, raisins (soaked in dark rum), lemon zest, lemon juice and bread crumbs. This popular pastry can also be found in the rest of Austria, Bavaria, Czech Republic, Northern Italy, and in many other countries in Europe that were once part of the Austro-Hungarian Empire.

It is believed that strudel originated from baklava, a very famous Turkish pastry based dessert, that came to Austria with the Ottoman's Empire and through Hungarian cuisine.

Records show that Strudel was first named in 1696 and gained popularity after it was served to Empress Maria Theresia who was the ruler of the Habsburg dominions and the only women to hold the position.

In Slovenia and in coastal Istria, areas that also once belonged to Austro-Hungarian Empire, apple strudel became, and today still is, a very well known sweet treat. It has gained such a high level of popularity that it is almost considered a national dessert. During autumn and winter months, this typical and very much loved dessert would be baked on a regular basis up and down the country, with little variations, and no Sunday roast lunch could be completed without a slice of strudel, dusted, of course, with a generous amount of icing sugar. When this task was left for us children, there would be so much icing sugar on the top that you could hardly see what type of dessert was hiding underneath it. Some things just never change...this is what happens when I leave my 11 year old son with the icing sugar task!

Apple strudel in Slovenia is called Jabolčni štrudelj or Jabolčni zavitek while along the coast of Northwest Istria, where the informal Istrian dialect is also spoken, it can be referred to as Strucolo de pomi.

Strudel made with apples is by far the most popular but in the North Adriatic two variations of strudel have been created and are also very well liked, strudel filled with ricotta cheese filling and strudel with cherries.

In my family we all knew when it was weekend, as apple strudel, this warming autumnal pudding, would be in the oven, and the aromas of apples and cinnamon would travel around the house. This dessert is not just part of my childhood but part of my adulthood as well. It has been the most frequently baked dessert by my mum and even today my friends and family cannot get enough of it. Now that I live abroad it is even more special, and it really does take me right back home to my childhood, and my mum's kitchen.

Apple strudel is traditionally served warm, dusted with regular icing sugar or vanilla floured icing sugar, and when accompanied with whipped cream, vanilla ice cream or vanilla sauce, this rustic pudding soon turns into a complete and very elegant dessert.

This recipe for apple strudel is made with home made pastry, however you can still indulge yourself and cut corners a bit by using a store bought ready made puff pastry, in which case only half the amount of apple filling is enough

Apples can be sliced or coarsely grated and lightly toasted walnuts can replace pine kernels.

View fullsize Apple Strudel 1.jpg
View fullsize Apple Strudel 2.jpg

In this recipe I will indicate which apples are appropriate to use for apple strudel, however, I have never used specific type of apples and that is simply because I always bake apple strudel when apples are in season and abundant in nature. Apples would be generously given from neighbours and friends with fruit orchards or apple trees in their gardens, I just make sure I taste them and pick a mixture of sweet and tart apples.

Ingredients

Serves 10-12

Dough

  • 250g all purpose flour or bread flour

  • 1 egg, lightly beaten

  • 3 Tbsp neutral tasting vegetable oil (I used sunflower oil)

  • 2 Tbsp white wine vinegar or lemon juice

  • sea salt, a pinch

  • 50ml-60ml lukewarm water, or as needed

Apple Filling

  • 1kg apples, peeled, cored, quartered and sliced (sweet-tart apples like MacIntosh and Gala in combination) Bramley

  • 1 unwaxed lemon, grated zest and juice (grate lemon zest first and then squeeze the lemon juice, trying to do it the other way round might prove a tricky task)

  • 1 Tsp ground cinnamon

  • 30g pine nut kernels, slightly toasted (can use walnuts)

  • 50g raisins or sultanas

  • 3 Tbsp dark rum or lukewarm water (for soaking the raisins)

  • 60g dry fine breadcrumbs

  • 20g unsalted butter plus extra for brushing

  • 80g caster sugar

  • icing sugar for dusting

Method

To make the dough

Place the flour in a big mixing bowl and make a well.

In a separate, smaller bowl, mix slightly beaten egg, oil, vinegar or lemon juice, (the acidity will help to relax gluten in the flour making the dough more stretchy) a pinch of sea salt and lukewarm water. Pour the mixture into a flour well.

With the fork, stir the mixture with the flour until well combined. Add a little bit of flour at a time, until the dough comes nicely together, then work the dough with your hands.

Transfer the dough on a lightly floured working surface and knead the dough for about 10 minutes or until nice and smooth.

After this time, the dough should be moist and elastic and not sticky. Add a little more flour if the dough is too sticky to knead.

In order to further encourage the development of the gluten, resulting in a very elastic dough, slam the dough onto the working surface a few times.

Shape the dough into a smooth ball and place it in a clean bowl, previously brushed with oil.

Cover the bowl with cling film and let the dough rest for about 1 hour at room temperature.

View fullsize Apple Strudel 4.jpg
View fullsize Apple Strudel 5.jpg

To make the filling

In a small pan, place pine nuts and toast them on a medium-low heat for a few minutes until golden-light brown in colour. Remove from the heat, cool and set aside.

In another pan melt the butter over medium-low heat. When the butter is melted add breadcrumbs, toast them, stirring constantly until golden-brown in colour. Remove from the heat, cool and set aside.

In a small bowl, place raisins or sultanas, add dark rum (traditionally used) or lukewarm water. Leave them to soak and plump up for at least 15 minutes, or until you need them.

Peel, core, quarter and slice the apples. Place sliced apples in a bowl, pour lemon juice over them, toss and mix well. The lemon juice will prevent apples from oxygenating and turning brown.

View fullsize Apple Strudel 6.jpg
View fullsize Apple Strudel 7.jpg

Add lemon zest, roasted pine nuts, breadcrumbs mixture, soaked raisins or sultanas (squeeze out excess rum or water), sugar and cinnamon. Mix well to incorporate all the ingredients.

Preheat the oven to 200C static or equivalent.

Place the dough on a clean and lightly floured table cloth. Flour the rolling pin and start rolling out the dough. While rolling, to prevent sticking, flour the dough and the surface every now and then.

When the dough reaches about 20 cm in diameter pick it up and keep stretching it. The best way to do so is to use the back of your hands and in particular the knuckles but make sure you remove any sharp jewellery first.

View fullsize Apple Strudel 9.jpg
View fullsize Apple Strudel 10.jpg

When the dough becomes difficult to handle as it becomes bigger and thinner, place it on a lightly floured tablecloth.

With your hands (tip of the fingers) keep stretching gently the dough on the tablecloth to paper thin consistency, from the inside to the outside working your way round the sheet of dough.

Keep stretching until the sheet of dough starts to look almost translucent and you will be able to see a pattern of your tablecloth through it.

You should end up with a thin sheet of dough stretched more or less into a rectangular shape with a diameter of approximately 40 cm which will fit into a standard 40 cm baking tray.

If you notice that the edges are still a bit thick, stretch them further very gently or cut them off. If you leave the edged thick, when rolling the strudel, they will form quite a thick layer at the very centre of the strudel risking to remain slightly underbaked.

Place and spoon evenly the apple mixture over one half of the dough sheet leaving about 2-3cm to the edge.

Fold in the side ends of the sheet to prevent filling coming out during rolling. Using the tablecloth to help you, roll the dough all the way and place the rolled strudel very gently on a baking tray previously lined with baking parchment, seam side down.

View fullsize Apple Strudel 11.jpg
View fullsize Apple Strudel 12.jpg
View fullsize Apple Strudel 13.jpg
View fullsize Apple Strudel 14.jpg

Brush it with a bit of melted butter.

View fullsize Apple Strudel 16.jpg
View fullsize Apple Strudel 17.jpg

Bake on the middle shelf for 40 45 min.

Apple Strudel is ready when the crust turns nice and golden.

Take it out of the oven, let it cool. Dust it with icing sugar, cut into slices and serve it on its own or with vanilla ice cream or cream.

Just a thought

You can make the strudel dough ahead and keep it refrigerated for up to two days. Before using the dough take it out of the fridge allowing it to come to a room temperature.

Wine suggestion

Alto Adige Gewürztraminer DOC Vendemmia Tardiva "Roen" 2019 - Cantina Tramin (0.375l)

November 05, 2021 /tina oblak
apples, strudel dough, Autumnal dessert, cinnamon, pine nuts kernels, raisins, Apple strudel home made, Strudel di mele, Jabolčni štrudelj, Jabolčni zavitek, Strucolo de pomi
Adriatic Recipe, baked dish, baking, breakfast, Central European recipes, dessert, Eastern European recipes, Istrian cuisine, Istrian dish, Istrian food, Istrian gastronomy, Mitteleuropean recipes, pudding, recipe from Northern Ital, Rustic dish, Slovenian cuisine, Slovenian food, Slovenian gastronomy, sweet course, Sweet Things
Comment

Borlotti beans salad Recipe

Beans and Sardines
October 29, 2021 by tina oblak in Adriatic Recipe, Appetizers, Central European recipes, dinner, Easy recipe, healthy mael, Istrian cuisine, Istrian dish, Istrian food, Istrian gastronomy, main course, main dish, Nutritious dish, Rustic dish, Slovenian cuisine, Slovenian food, Slovenian gastronomy, Small bites, Starters, supper, Vegan, Vegetarian

This filling and substantial salad is traditionally made with either fresh borlotti beans when they are in season (mid to end summer and early autumn) or dried borlotti beans, during colder months when fresh borlotti beans are no longer available to buy as a seasonal produce. To make this dish even more convenient and fast, the use of good quality tinned borlotti beans is a common practice when you want to rustle up a quick meal.

Both my paternal and maternal grandfathers would take this salad to the vegetable garden and have it for lunch there with some bread and a small glass of red wine that they always kept in the garden shed.

I am sharing here the recipe for the salad, how has always been made in my family, traditionally using borlotti beans, (fresh, dried or tinned) however, you can use other types of beans if you prefer.

Ingredients

Serves 4 as part of meal

  • Double the quantity of the beans if you wish to make a more substantial bean salad and serve it as a main dish for 4 people.

  • 250g fresh or dried borlotti beans (when buying fresh borlotti beans in their pods you will need about 500g)

  • If using dried borlotti beans, they need to be soaked overnight in a large bowl of cold water (for at least 8 hours), then drained and rinsed and then they are ready to be cooked.

  • For this recipe you can also use tinned borlotti beans (one tin of borlotti beans weighing 400g will give you 250g of beans after they have been drained). If the liquid in the can is very thick, thin it out with a little bit of water and save it, as it makes integral part of the dressing.

  • 1 small onion, peeled and thinly sliced (you can use yellow, white or red onions, shallots or spring onions)

  • fresh flat leaf parsley, finely chopped

  • extra virgin olive oil, generous drizzle

  • white or red wine vinegar (you can use balsamic vinegar or other types of vinegar)

  • sea salt

  • black pepper

  • bay leaf (fresh or dry)

Method

Place fresh borlotti beans (previously taken out of their pods) or dried borlotti beans (previously soaked overnight) in a big pot and add plenty of cold water until about 3cm (just over an inch) from the top.

Add bay leaf and bring to boil. Turn down the heat and gently boil the beans uncovered for up to 1 hour or until tender. If using dried borlotti beans the cooking time will be slightly longer.

When the beans are cooked season with sea salt.

Drain cooked beans keeping a bit of their liquid.

Transfer the beans to a salad dish.

Add finely sliced onions, finely chopped fresh flat leaf parsley, a generous drizzle of extra virgin olive oil, vinegar, black pepper and a bit of the liquid that you kept aside.

Taste and adjust the seasoning.

Enjoy warm, at room temperature or cold.

Just a thought

You can turn this simple bean salad into a more substantial meal, adding to the beans for example some tomatoes, carrots, celery, beetroot or tinned tuna, just to mention few options.

Store the bean salad in an airtight container and keep it refrigerated, it will last between 2 and 4 days.

Wine suggestion

Friuli Colli Orientali DOC “Friulano di Jacopo”2019 - Necotium

October 29, 2021 /tina oblak
fresh borlotti beans, dry borlotti beans, borlotti beans salad, dry borlotti beans salad, bean salad with fresh parsley and onion
Adriatic Recipe, Appetizers, Central European recipes, dinner, Easy recipe, healthy mael, Istrian cuisine, Istrian dish, Istrian food, Istrian gastronomy, main course, main dish, Nutritious dish, Rustic dish, Slovenian cuisine, Slovenian food, Slovenian gastronomy, Small bites, Starters, supper, Vegan, Vegetarian
Comment
Stuffed Peppers 7.jpg

Stuffed peppers with minced meat and rice in a tomato sauce Istrian Recipe

Beans and Sardines
October 20, 2021 by tina oblak in Adriatic Recipe, Appetizers, Balkan dish, Central European recipes, Eastern European recipes, Easy recipe, Istrian cuisine, Istrian dish, Istrian food, Istrian gastronomy, main dish, Rustic dish, Slovenian cuisine, Slovenian food, Slovenian gastronomy, Starters, one pot meal, baked dish

This Balkan dish made of peppers, stuffed with a mix of minced meat and rice and cooked or baked in a rich tomato sauce is very rustic, unpretentious, hearty and traditionally made during summer months, end of summer and early autumn.

Yes, there are a few steps to this recipe, but it is very simple to make and there is absolutely nothing complicated about it.

Stuffed peppers is a dish that is common in many cuisines around the world and generally consists of peppers getting halved or hollowed and then stuffed with a variety of different fillings such as meat, rice, vegetables, cheese, fish etc.

This dish, with its many variations, can be found in Greece, Central and Southeast Europe, Scandinavian and Baltic countries, Guatemala, North America Eastern Mediterranean, India and Spain.

It is in Eastern Mediterranean that stuffed peppers are part of Dolma, a word of Turkish origin, meaning “something stuffed” and it indicates a family of stuffed dishes originating from Ottoman Cuisine. The Ottoman Empire directly administered a vast territory, and eventually reached the Balkans and the area not far from the Istrian peninsula, where I come from, and this is why they strongly shaped the local cuisine.

As a result of this historical influence, there is no surprise that in the whole of Slovenia and in coastal Istria, stuffed peppers, known as Filana paprika or Polnjena paprika become integral part of the local diet and can be found on the menus informal family run restaurants, and it is one of the most frequently made dishes in many households.

I like to call this dish “a generational dish” since it is very much loved across different generations in the family, so when stuffed peppers are on the menu, everyone leaves the table happy.

Stuffed peppers are traditionally served with plenty of creamy mashed potatoes or just a lot of rice and bread. What is not to like about this dish?

Everyone in the family makes delicious stuffed peppers but this dish tastes super special and extra delicious when my brother cooks them. They are most often made a day in advance so all the flavours can fully develop and then gently reheat it. This is when they taste at their best.

I am sharing here my brother's recipe for stuffed peppers baked in the oven.

Ingredients

Serves 4-8 (depending if you are serving one or two stuffed peppers per person)

  • 7-9 bell peppers, mixed colour or use just the ones that you prefer. The number of the peppers will depend on their size and also on the size of the dish you will use for this recipe and into which they need to fit. I used 8 medium size mixed peppers. (Babura type of peppers is a variety of peppers most commonly used for this recipe).

  • 400g mince beef

  • 400 mince pork

  • 100g rice, any risotto type rice like Arborio, Vialone Nano, Carnaroli will work well

  • bigger size onion (about 170g), finely chopped

  • 4 cloves of garlic, peeled and crushed

  • 2 Tbsp extra virgin olive oil

  • sea salt

  • black pepper, finely ground

Sauce

  • 2 tinned finely chopped tomatoes (2x400g), the best quality you can afford

  • medium size onion, finely chopped

  • 2 cloves of garlic, peeled and crushed

  • 4 Tbsp extra virgin olive oil

  • few fresh basil leaves

  • sea salt

Method

Before starting this recipe, I suggest you do a little test to see how many peppers will you actually need. Take the ovenproof dish you intend to bake the stuffed peppers in and see how many peppers will fit in it.

For this recipe you can use a deep baking tray and cover stuffed peppers with an aluminium foil.

Stuffed Peppers 1.jpg

Start by making a simple tomato sauce. Put extra virgin olive oil in a pan, add finely chopped onions, a pinch of salt and fry on a gentle heat until the onions become soft. Add crushed garlic and fry gently together with the onions just for a minute or so. Add tinned tomatoes, few fresh basil leaves, bring to the boil, turn the heat down, partially cover with the lid and gently simmer for about 30 minutes, stirring occasionally. By this time, the sauce should have a nice rich velvety consistency.

Prepare and clean the peppers. Cut off the top part and remove white little seeds from inside the peppers. Rinse the outside and the inside of the peppers with cold running water. Dry the peppers a bit with a kitchen towel or kitchen paper.

Stuffed Peppers 2.jpg

Take a griddle pan (if you have it, otherwise non stick pan will work just fine) and heat it until very hot. Place the peppers in a pan and charcoal grill them on all sides. The skin of the peppers will burst slightly and turn a bit black giving the peppers a slightly smoky flavour. Cool the peppers and set aside.

Charcoal grilling the peppers first will really give and extra dimension in terms of the flavour to the dish, however, you can skip this step.

Stuffed Peppers 5.jpg

Cook the rice, following the instruction on the packet, but only halfway through. This will avoid the rice to become too mushy in the stuffing. Rinse in a small colander, cool and keep aside.

Put extra virgin olive oil in a pan, add finely chopped onions, a pinch of salt and fry on a gentle heat until the onions become soft. Add crushed garlic and fry gently together with the onions just for a minute or so. Place mince beef and mince pork in a pan and fry until brown, stirring occasionally. With the back of wooden spoon break bigger lumps of meat. Taste and adjust the seasoning with sea salt and finely ground black pepper. Cool a bit and set aside.

Transfer cooked rice and browned mince meat in a big mixing bowl. Mix well and set aside.

View fullsize Stuffed Peppers 3.jpg
View fullsize Stuffed Peppers 4.jpg

Transfer the tomato sauce in a ovenproof dish.

Turn the oven on and preheat it to 180C static or equivalent.

With the help of a spoon, fill each pepper with meat and rice mixture. With the back of the spoon press the mixture down as you go along, this will allow you to get more mixture in a pepper.

Place each filled pepper in the ovenproof dish filled with tomato sauce.

Stuffed Peppers 6.jpg

Cover with the lid and bake for 2 hours. Check occasionally giving a dish a gentle shake.

Stuffed Peppers 8.jpg

Just a thought

If you are left with meat and rice mixture you can use it in frittata or make scrambled eggs with it and there is another meal sorted.

You can store stuffed peppers for few days in an airtight container and they also freeze very well.

Wine suggestion

Collio Cabernet Sauvignon DOC 2018 - Muzic

October 20, 2021 /tina oblak
bell peppers, stuffed peppers, mince meat and rice, pepperoni ripieni, polnjene paprike, filane paprike, one pot meal, baked peppers
Adriatic Recipe, Appetizers, Balkan dish, Central European recipes, Eastern European recipes, Easy recipe, Istrian cuisine, Istrian dish, Istrian food, Istrian gastronomy, main dish, Rustic dish, Slovenian cuisine, Slovenian food, Slovenian gastronomy, Starters, one pot meal, baked dish
Comment
Spinach or chard with garlic and olive oil Istrian way 7.jpg

Spinach or chard with potatoes garlic and olive oil Istrian way Recipe

Beans and Sardines
October 02, 2021 by tina oblak in Adriatic Recipe, brunch, Central European recipes, Easy recipe, healthy mael, Istrian cuisine, Istrian dish, Istrian food, Istrian gastronomy, Nutritious dish, Rustic dish, Side Dishes, Slovenian cuisine, Slovenian food, Slovenian gastronomy, Vegan, Vegetarian

Spinach or chard with garlic and extra virgin olive oil is a peasant dish, hearty, rustic and nutritious. It is extremely easy to make, inexpensive and with its humble appearance it most certainly offers a lot more than meets the eye.

It is a perfect side dish to any grilled or fried fish, but equally delicious with pork, lamb or chicken and accompanied with fried egg makes a great vegetarian meal option.

Back home, on the Slovenian coast, this dish is a most frequent companion to grilled fish and grilled or deep fried squid, a bit like fish and chips and mushy peas in the United Kingdom.

Spinach or chard with garlic and olive oil is very popular in Dalmatia and on Dalmatian islands (Croatia) where it is believed it originated from. It is on this islands, where tomatoes, peppers, cucumbers and other summer vegetables are abundant during the summer, that chard would be the only green leaf vegetable that could grow during the scorching summer heat therefore it has been a very treasured vegetable containing a lot of vitamins and minerals and a lot of water make it very hydrating and easy to digest.

This dish travelled north along Dalmatian coastline to Istria where it has become as popular as in Dalmatia and is found on the menus in most restaurants and cooked in almost every household.

This is another dish that is part of my childhood and adulthood, it never came into the fashion, it never went out of the fashion, it has simply always been there...

I am sharing here my family recipe.

Spinach or chard with garlic and olive oil Istrian way 1.jpg

Ingredients

Serves 4-6 as part of meal

  • 1kg spinach, baby spinach or chard

  • 400-450g potatoes, peeled and cubed

  • 4 cloves of garlic, peeled

  • 5 Tbs extra virgin olive oil (the best you can afford)

  • sea salt

Method

Wash thoroughly spinach or chard, (no need to do so if bought already washed version) cut off the stalks and chop or just tear the leafs with your hands into smaller pieces. If you are not using the stalks for this recipe you can use them for vegetable minestrone, put them on a compost or simply discard.

If using chard remove tough centre stalks.

View fullsize Spinach or chard with garlic and olive oil Istrian way 2.jpg
View fullsize Spinach or chard with garlic and olive oil Istrian way 3.jpg

Place cubed potatoes in a pan, add water, a pinch of salt and boil until just tender, for about 10 minutes. Drain and set aside.

Fill a large pot with ¼ of hot water, add spinach or chard and cook only for few minutes until wilted.

Drain very well in a colander. When the spinach is in a colander, press down with a back of a wooden spoon to remove a bit of excess water. You can use a big colander to drain both potatoes and chard.

Spinach or chard with garlic and olive oil Istrian way 4.jpg

Rinse quickly and dry the pot where you cooked the spinach, add extra virgin olive oil and garlic.

Fry the garlic on a gentle heat until it becomes softer and golden in colour. The oil will be nicely infused with the garlic.

Remove and discard the garlic.

Add spinach and potatoes to the pan with garlic infused oil and sautéed on a medium heat for about 15 minutes, stirring occasionally or until you get a nice velvety consistency and you loose most of the water from the spinach.

Adjust the seasoning with sea salt and serve hot or at the room temperature.

View fullsize Spinach or chard with garlic and olive oil Istrian way 5.jpg
View fullsize Spinach and chard with garlic and olive oil 6.jpg

Just a thought

This vegetable side dish has a delicate garlicky flavour. If you are a big fan of garlic and keen on stronger garlicky taste, add crushed garlic to extra virgin olive oil without removing it instead of adding the whole garlic and removing it after the oil has been infused like suggested in the recipe.

You can also prepare this dish by cooking the potatoes and the spinach or chard in one big pot together rather then separately. Use one big pot, boil cubed potatoes first until just tender then add spinach or chard and cook until wilted, drain both in big colander.

October 02, 2021 /tina oblak
sautéed baby spinach with potatoes, easy spinach recipe, sautéed spinach with potatoes, fresh baby spinach, baby spinach in a skillet, quick spinach recipe, potatoes and spinach
Adriatic Recipe, brunch, Central European recipes, Easy recipe, healthy mael, Istrian cuisine, Istrian dish, Istrian food, Istrian gastronomy, Nutritious dish, Rustic dish, Side Dishes, Slovenian cuisine, Slovenian food, Slovenian gastronomy, Vegan, Vegetarian
Comment
Plum Dumplings 18.jpg

Plum Dumplings Recipe

Beans and Sardines
September 16, 2021 by tina oblak in Adriatic Recipe, Appetizers, breakfast, brunch, Central European recipes, dessert, dinner, Easter treats, Eastern European recipes, Easy recipe, entrée course, Istrian cuisine, Istrian dish, Istrian food, Istrian gastronomy, main course, main dish, Mitteleuropean recipes, pudding, Rustic dish, Slovenian cuisine, Slovenian food, Slovenian gastronomy, Starters, supper, sweet course, Sweet Things, Vegetarian, Dumplings

This is a great dish for Autumn that originated in the Austro-Hungarian Empire. It is made with potato gnocchi dough in which you stuff the plums, simmer them in water, and then coat them with breadcrumbs, sugar and cinnamon mixture.

These rustic plum dumplings will become a real treat in the family since they are super delicious and easy to make! This dish is traditionally offered as a dessert, however, it is very common as a main course for lunch or dinner.

Plum dumplings are very well known and common throughout the countries that were once part of the Austro-Hungarian Empire. This dish is therefore very popular in Eastern and Central Europe as well as in Trieste and the province of Trieste in Italy.

This historical influence made plum dumplings a very appreciated meal in Slovenia, and is referred to in Slovenian as češpljevi cmoki or slivovi cmoki (češplje and slive meaning plums and cmoki meaning dumplings). They are widely available to buy frozen in bags in the supermarkets, but nothing is comparable to making them at home with this simple recipe.

This dish is very familiar to me, I grew up with it, and it was prepared frequently in the late summer and early autumn when plums are in peak season, in abundance, and with the right level of sugar and sweetness in them.

In Slovenia, where I come from, plum trees are very common to have in the back garden or in a near by orchard and the sight of these beautiful, humble, bluish purple colour fruits, almost like jewels hanging from the branches, is simply heart warming. Plums are popular to use not only for plum dumplings but also for other desserts like bake trays, tarts, jams, and compotes.

Damsons plums, being oval and small, therefore easy to handle, are the preferred and most frequently used type of plums for this recipe. Other types of plums work very well too and fresh apricots are also used frequently to make the dumplings.

If you decide to offer plum dumplings as a dessert, I would suggest to serve 2, if you decide to prepare them as a main meal then 3 or 4 depending on the size.

Plum Dumplings 1.jpg

Ingredients

Serves 6- 8 (you will get about 16 dumplings)

Ingredients for the plum dumplings

  • 16 fresh plums, Damsons plums and prune plums most commonly used, you can use other variety (plums should be sweet, ripe and fairly firm to the touch, avoid overripe with soft pulp as it gets quite difficult and messy to pit them). You can use fresh apricots instead.

  • 1kg floury, yellow-fleshed potatoes, e.g. King Edward, Maris Piper, (avoid new potatoes). I use red skin potatoes.

  • 300g all purpose flour (plus extra for flouring the board and working surface)

  • 1 egg, slightly beaten

  • sea salt, a pinch

Ingredients for the breadcrumb coating

The ingredients stated here are to coat all the dumplings, if you wish to half the quantity of dumplings half the ingredients for the breadcrumb coating

  • 100g unsalted butter

  • 5 Tbsp natural dry breadcrumbs

  • 5 Tbsp caster sugar

  • 1 Tsp cinnamon

Method

Start this recipe by making a basic potato gnocchi dough. (For more details refer to my full step by step recipe for Potato gnocchi dough)

Wash the potatoes, with the skin on, under cold running water.

Place the potatoes in a saucepan or a pot, cover with cold water and bring to boil. After the water has come to a boil, cook for about 20 minutes or until tender. Cooking time will obviously vary depending on the size of the potatoes you are using.

Don't pierce them during cooking and don't overcook them allowing the skin to burst as they will absorb too much water, alternatively you can steam them.

Remove from the pot, drain them in a colander and let them cool enough to handle, then remove the skin. If the potatoes are still quite warm to handle, the best way to remove the skin is to stick the fork though the potato and peel it using a knife.

Put the flour on a working surface, add salt and mix with the fork.

Make a well in the middle and pass the potatoes through a potato ricer while still warm as they become stickier when cooler. Allow riced potatoes to cool for few minutes and then add the egg.

With your fingers work the flour into the potato and egg, bringing the dough together, until it becomes a soft, pliable dough and do not overwork it. If the dough is too sticky, wet and soft add a bit more flour. Make sure your working surface is always well floured.

When the dough is the right consistency it should not stick to your fingers.

Shape the potato dough into a log.

Plum Dumplings 4.jpg

Prepare your plums by washing them and pat dry them. Then cut each plum lengthwise all the way round in order to get two halves and remove the pits.

View fullsize Plum Dumplings 2.jpg
View fullsize Plum Dumplings 3.jpg

Flour well your working surface and divide and cut the potato dough log roughly into 16 portions.

With your hands slightly floured, flatten and shape each portion into a round circle.

View fullsize Plum Dumplings 4a.jpg
View fullsize Plum Dumplings 5.jpg

Place one half of the plum in the centre and fill it with half Tsp of sugar, then place the other half of the plum on top of it.

If your plums are quite big in size, you might want to use only one half, as you will end up with very big dumplings which are more difficult to handle and not looking particularly elegant on a serving plate.

View fullsize Plum Dumplings 6.jpg
View fullsize Plum Dumpling 7.jpg

Wrap the dough tightly around the plums.

Seal the edges properly and tightly and shape it into a ball, roughly the size of a peach.

If the edges do not stick properly, dampen the edges with your fingers previously dipped in a bit of water, this will act a bit like a glue.

This step is quite important to prevent the dumplings from bursting and losing the juices during cooking.

Make sure you place each dumpling on a well floured surface to avoid sticking.

View fullsize Plum dumplings 8.jpg
View fullsize Plum Dumplings 9.jpg

It is quite crucial, when making dumplings, that you start and finish the process without interrupting for too long, as the sauce from inside the dumplings (the sugar inside the plum starts dissolving) will start leaking from the dumplings making it quite a mission to rescue them, and this is from the first hand experience!

Repeat the process until you use all the dough.

View fullsize Plum Dumplings 10.jpg
View fullsize Plum Dumplings 11.jpg
Plum Dumplings 12.jpg

Fill a large pot with water, add a generous pinch of salt and bring to boil.

Place gently each plum dumpling in a pot making sure they do not stick to the bottom.

Cook the plum dumplings in simmering water for about 12 minutes (not strong boiling as that can damage the dumplings).

They are fully cooked when they float on the surface.

While the plum dumplings are simmering, make the breadcrumbs sauce.

In a large pan, ideally non stick, melt gently the butter, add the breadcrumbs and toast for few minutes on a medium-low heat until slightly darker in colour.

Add sugar and cinnamon and mix until all the ingredients are well combined. Remove the pan from the heat to avoid burning the breadcrumbs mixture.

View fullsize Plum Dumplings 13.jpg
View fullsize Plum Dumplings 14.jpg

With a slotted spoon, remove plum dumplings from the simmering water.

Transfer them and place them in a pan with breadcrumbs mixture.

View fullsize Plum Dumplings 15.jpg
View fullsize Plum Dumplings 16.jpg

Shake the pan gently so the dumplings can roll around and get fully coated in the breadcrumbs mixture.

Plum Dumplings 17.jpg

Place on the serving plate, dust them with a bit of extra icing sugar and serve immediately. They are best eaten hot but equally delicious at room temperature.

Plum Dumplings 19.jpg

Just a thought

If you decide to only make half a batch of plum dumplings, you can use half of the potato dough for the plum dumplings and the other half for potato gnocchi. (see my full recipe step by step for potato gnocchi).

You can store cooked plum dumplings for up to three days in a airtight container.

If you need and desire to warm them up, putting them in a microwave is a good option as they retain the moisture.

The great thing about plum dumplings is also that they freeze very well. It is very important that you spread the uncooked dumplings in a single layer, leaving a bit of space between each dumpling, so they don't stick together, on a well floured wooden board, baking sheet, serving tray laid with baking parchment or with well floured kitchen cloth or similar.

Put the tray with the freshly made dumplings into a freezer, for at least 20- 30 minutes, and once frozen, put them into a freezing bag.

When you want to cook them just drop them frozen directly into a boiling salted water without defrosting them first, bearing in mind that the cooking time will be slightly longer, around 15 minutes. They are ready when they are floating on the surface.

Wine suggestion

Moscato Rosa delle Venezie IGT 2014 - Foffani

September 16, 2021 /tina oblak
Autumn Recipe, autumnal recipe, plums, plum puddings, plum desserts, potato gnocchi dough, češpljevi cmoki, slivovi cmoki, sweet dumplings
Adriatic Recipe, Appetizers, breakfast, brunch, Central European recipes, dessert, dinner, Easter treats, Eastern European recipes, Easy recipe, entrée course, Istrian cuisine, Istrian dish, Istrian food, Istrian gastronomy, main course, main dish, Mitteleuropean recipes, pudding, Rustic dish, Slovenian cuisine, Slovenian food, Slovenian gastronomy, Starters, supper, sweet course, Sweet Things, Vegetarian, Dumplings
Comment
  • Newer
  • Older