Beans and Sardines

  • Home
  • About
  • Recipe of the week
  • Recipes
  • Wines
  • Contact

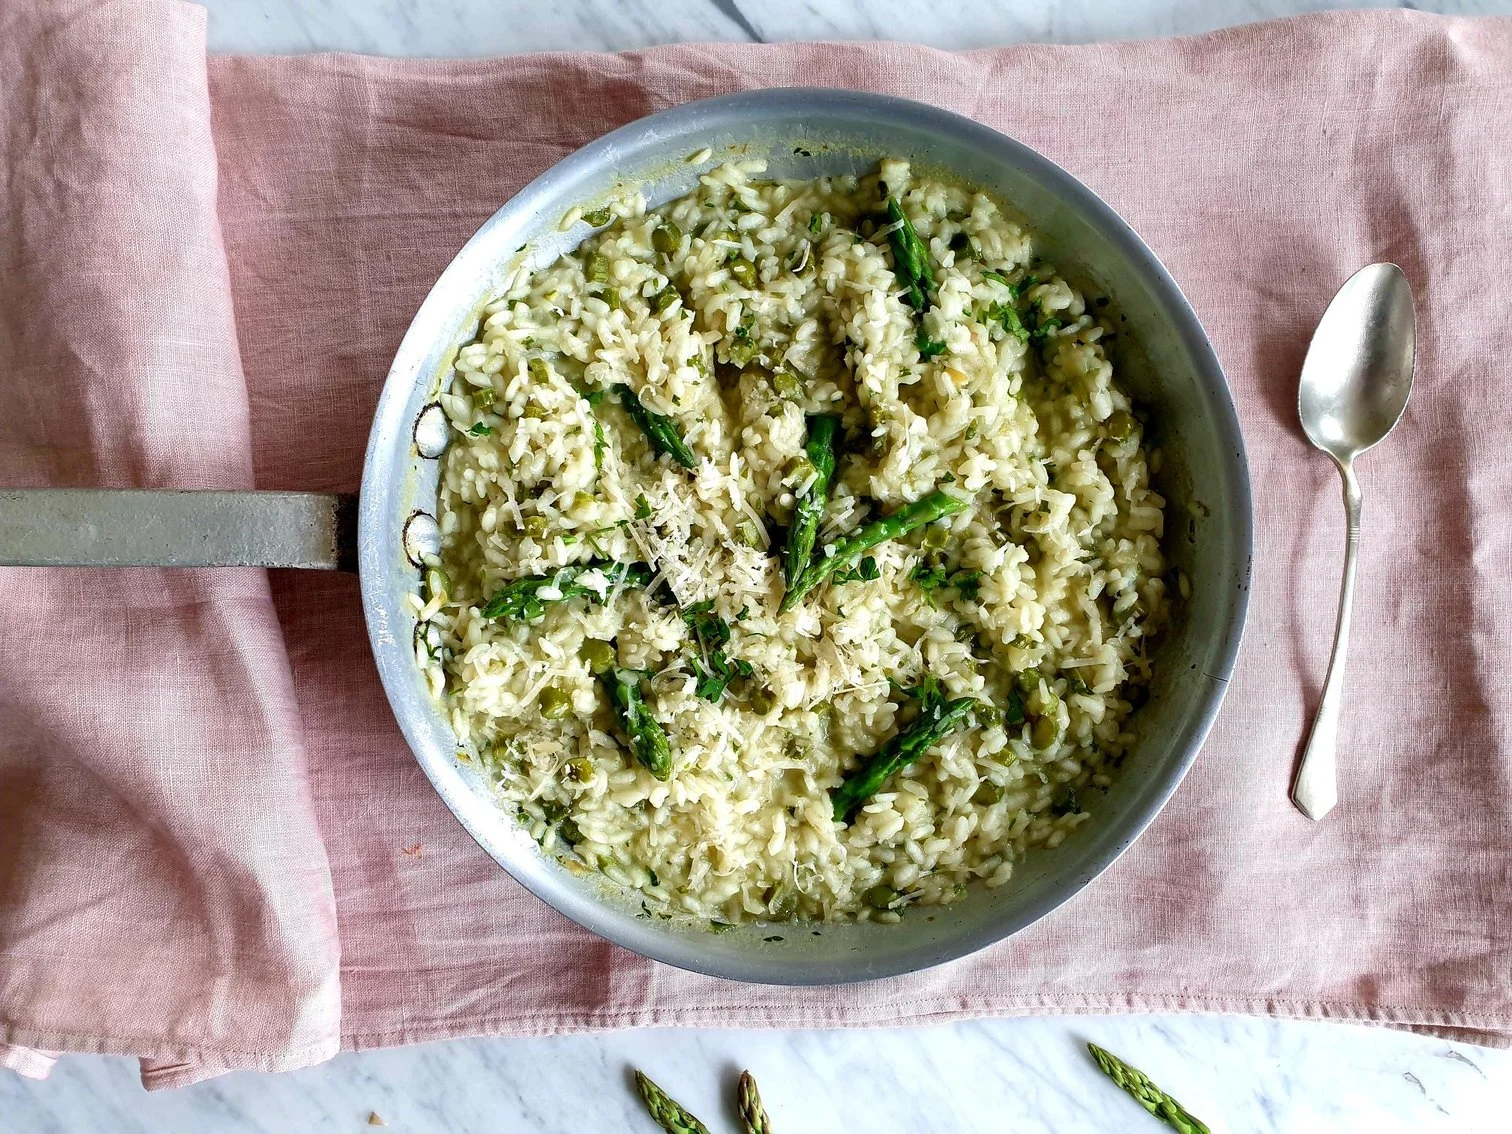
Green Asparagus Risotto Venetian style Recipe

Beans and Sardines
April 27, 2022 by tina oblak in Adriatic Recipe, child friendly dish, child friendly meal, dinner, Easy recipe, family friendly dish, family friendly meal, first course, first course dish, first course meal, foraging, Healthy, healthy mael, Istrian cuisine, Istrian dish, Istrian food, Istrian gastronomy, light meal, main course, main dish, Nutritious, Nutritious dish, recipe from Northern Ital, Risotti, Rustic dish, Slovenian cuisine, Slovenian food, Slovenian gastronomy, Spring recipe, Starters, supper, Vegan, Vegetables, Vegetarian

Green asparagus risotto with its pale green colour, is elegant in appearance, sweet and nutty taste of the asparagus makes this classic risotto delicate, simple, and clean in flavour, but a surprisingly tasty rice dish. It is creamy and very satisfying. This risotto celebrates the best of spring vegetable, making it a perfect choice for a quick week night dish.

The preparation and cooking of this risotto is particularly simple and quick, perfect for just about any occasion. It covers informal and more rustic eating settings, where risotto is served in a bowl and eaten with a spoon, as well as more formal settings, where risotto can be placed onto big white plates with maybe Parmiggiano Reggiano shavings, which can impress your slightly more demanding quests.

Asparagus risotto is very popular on the Slovenian coast, where I was born and grew up, and this is no surprise as the Veneto (region in Northern Italy) is where the greatest variety of risotto dishes can be found, and is a short car drive from my home town.

Asparagus back home is a very much celebrated spring vegetable and used to make a lot of different dishes, minestrone primavera, asparagus frittata, cooked asparagus with hard boiled eggs, sautéed asparagus with scrambled eggs, just to mention a few. Very frequently the bought variety of asparagus would be replaced by the wild variety since like mushrooms, it is also found in nature (without any concern about poisonous varieties!), and is very keenly foraged by the locals during their pick season in mid spring.

As a child I have vivid memories going with my mother to the market and seeing beautifully displayed bunches of asparagus which were than purchased to make the risotto.

I am sharing here my mother's recipe for the asparagus risotto with which I grew up, she told me that when I was little I used to pile a substantial amount of cheese on my risotto, making a mountain of cheese, apparently, I loved it that way, maybe not so appealing now...

Ingredients

Serves 4

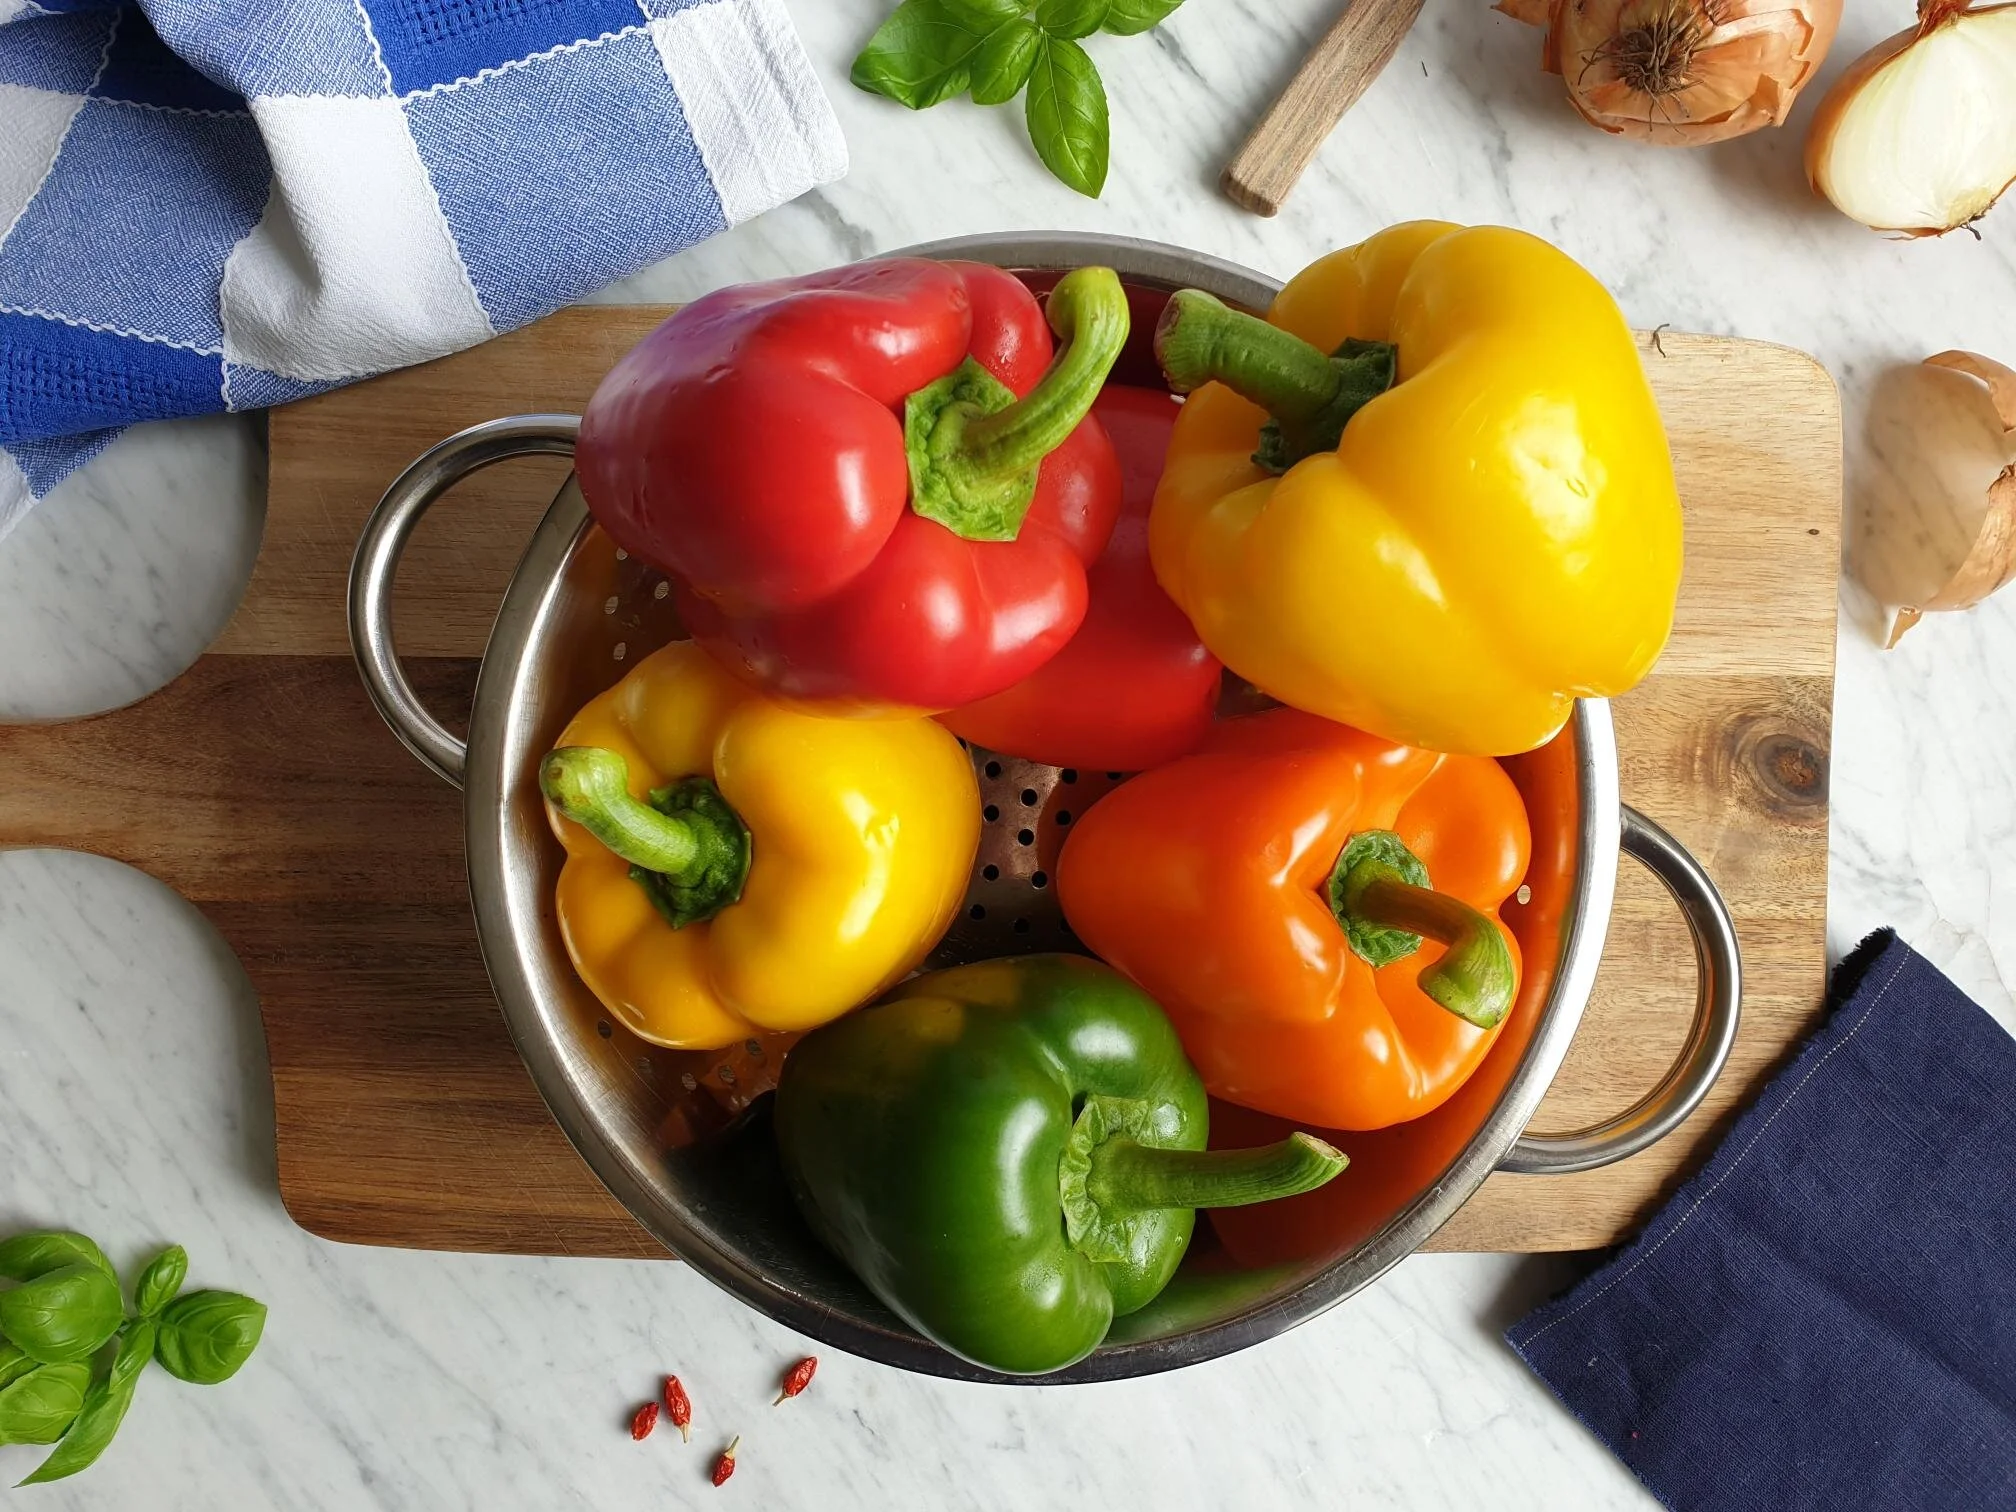
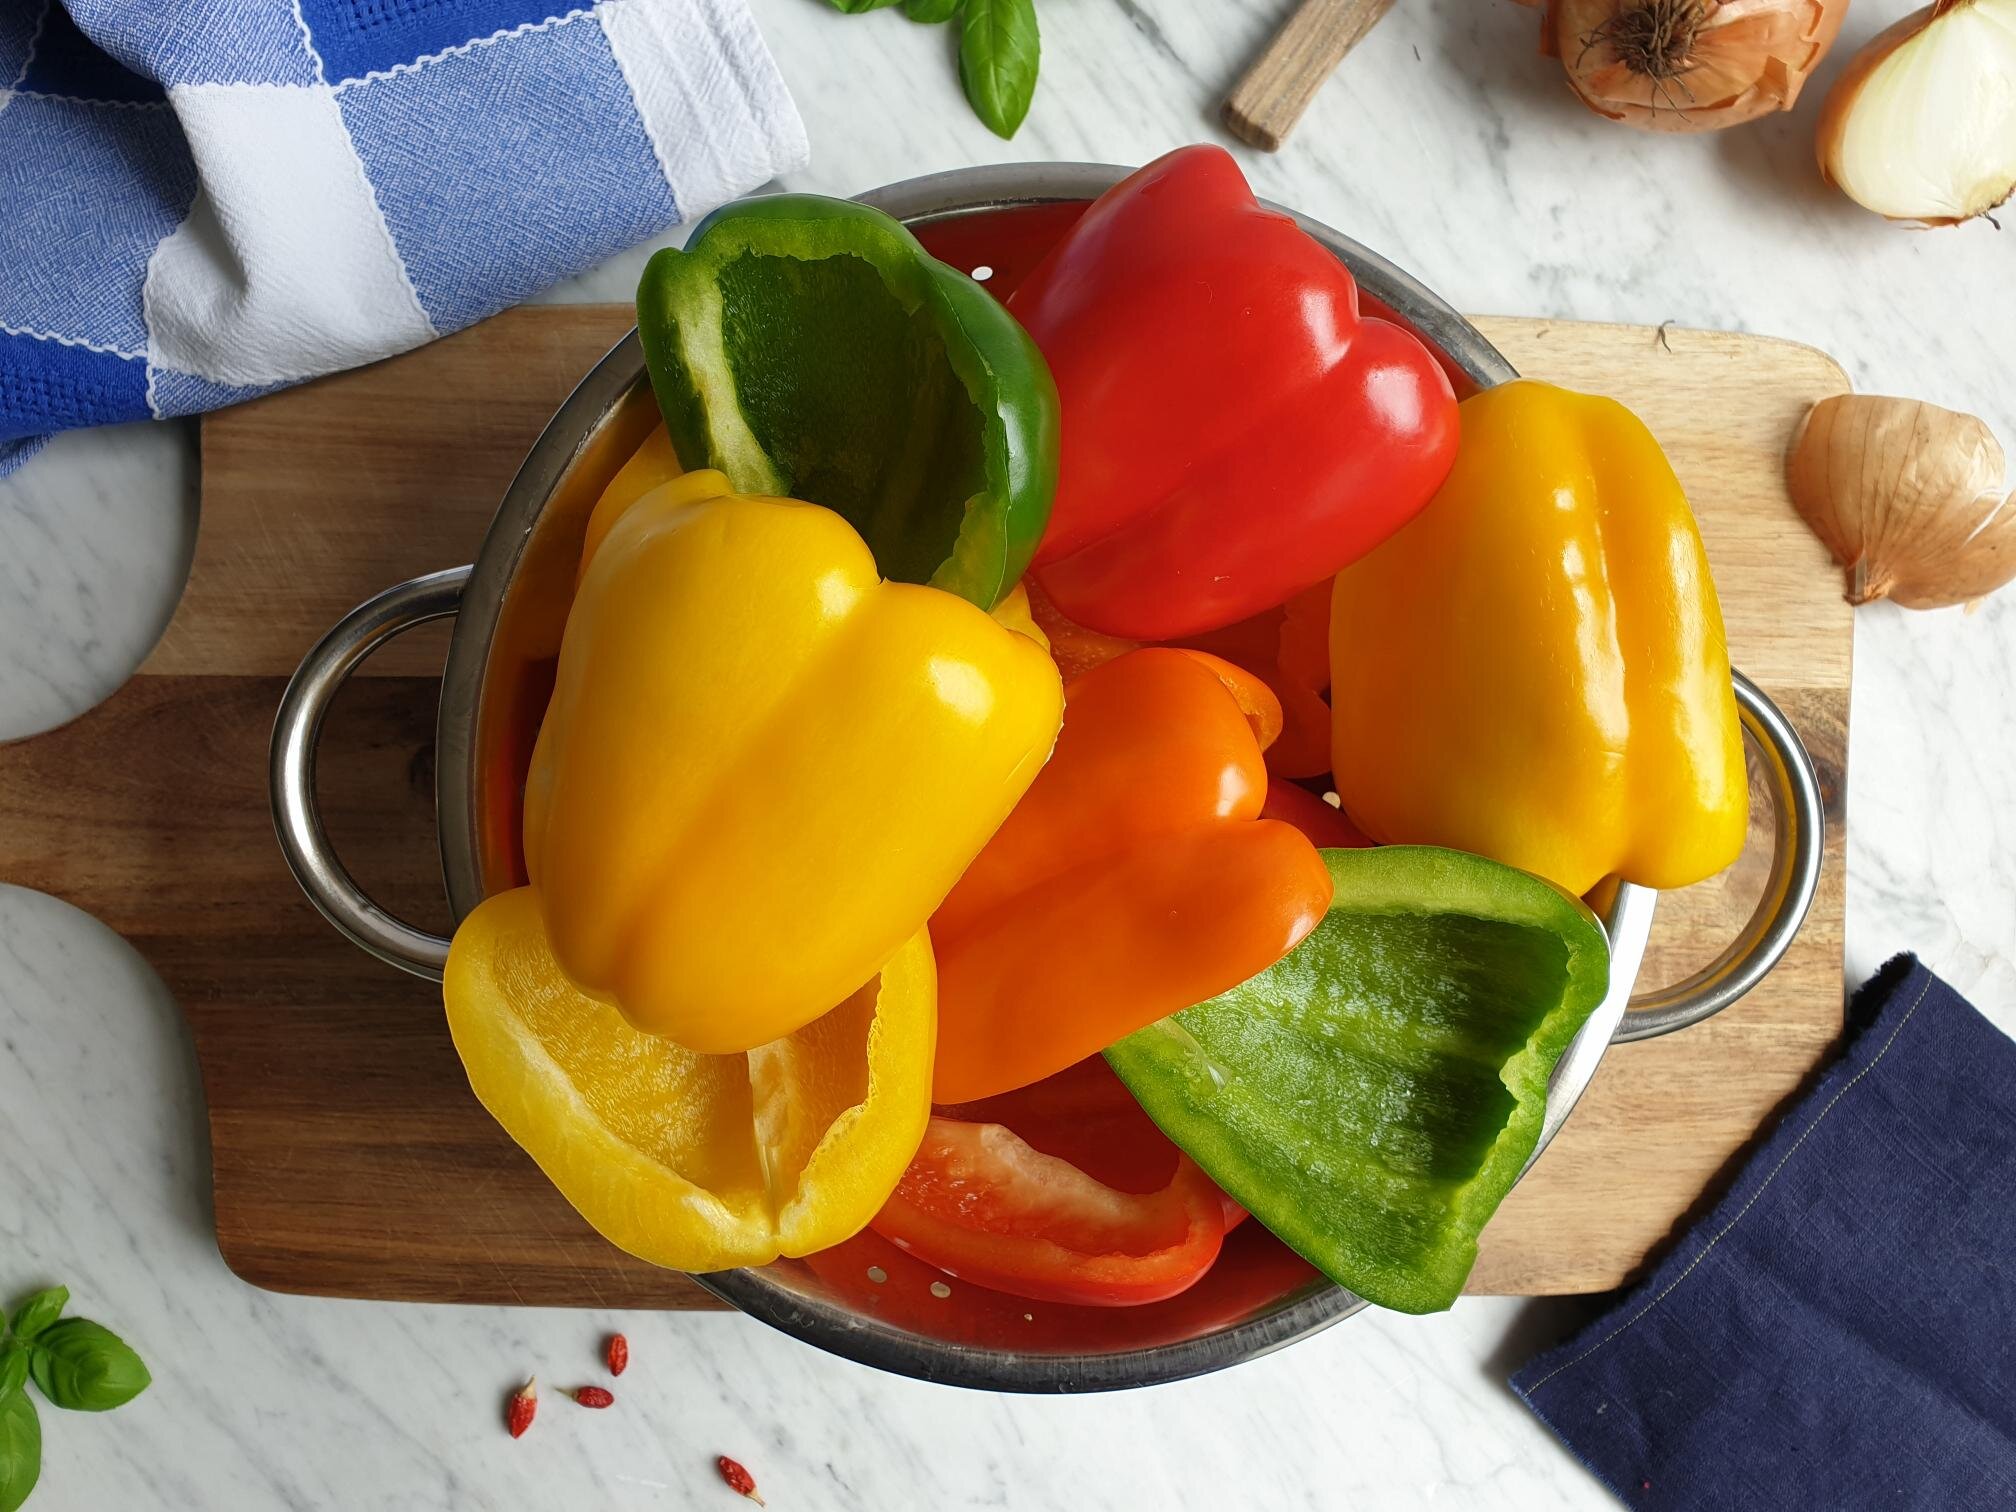
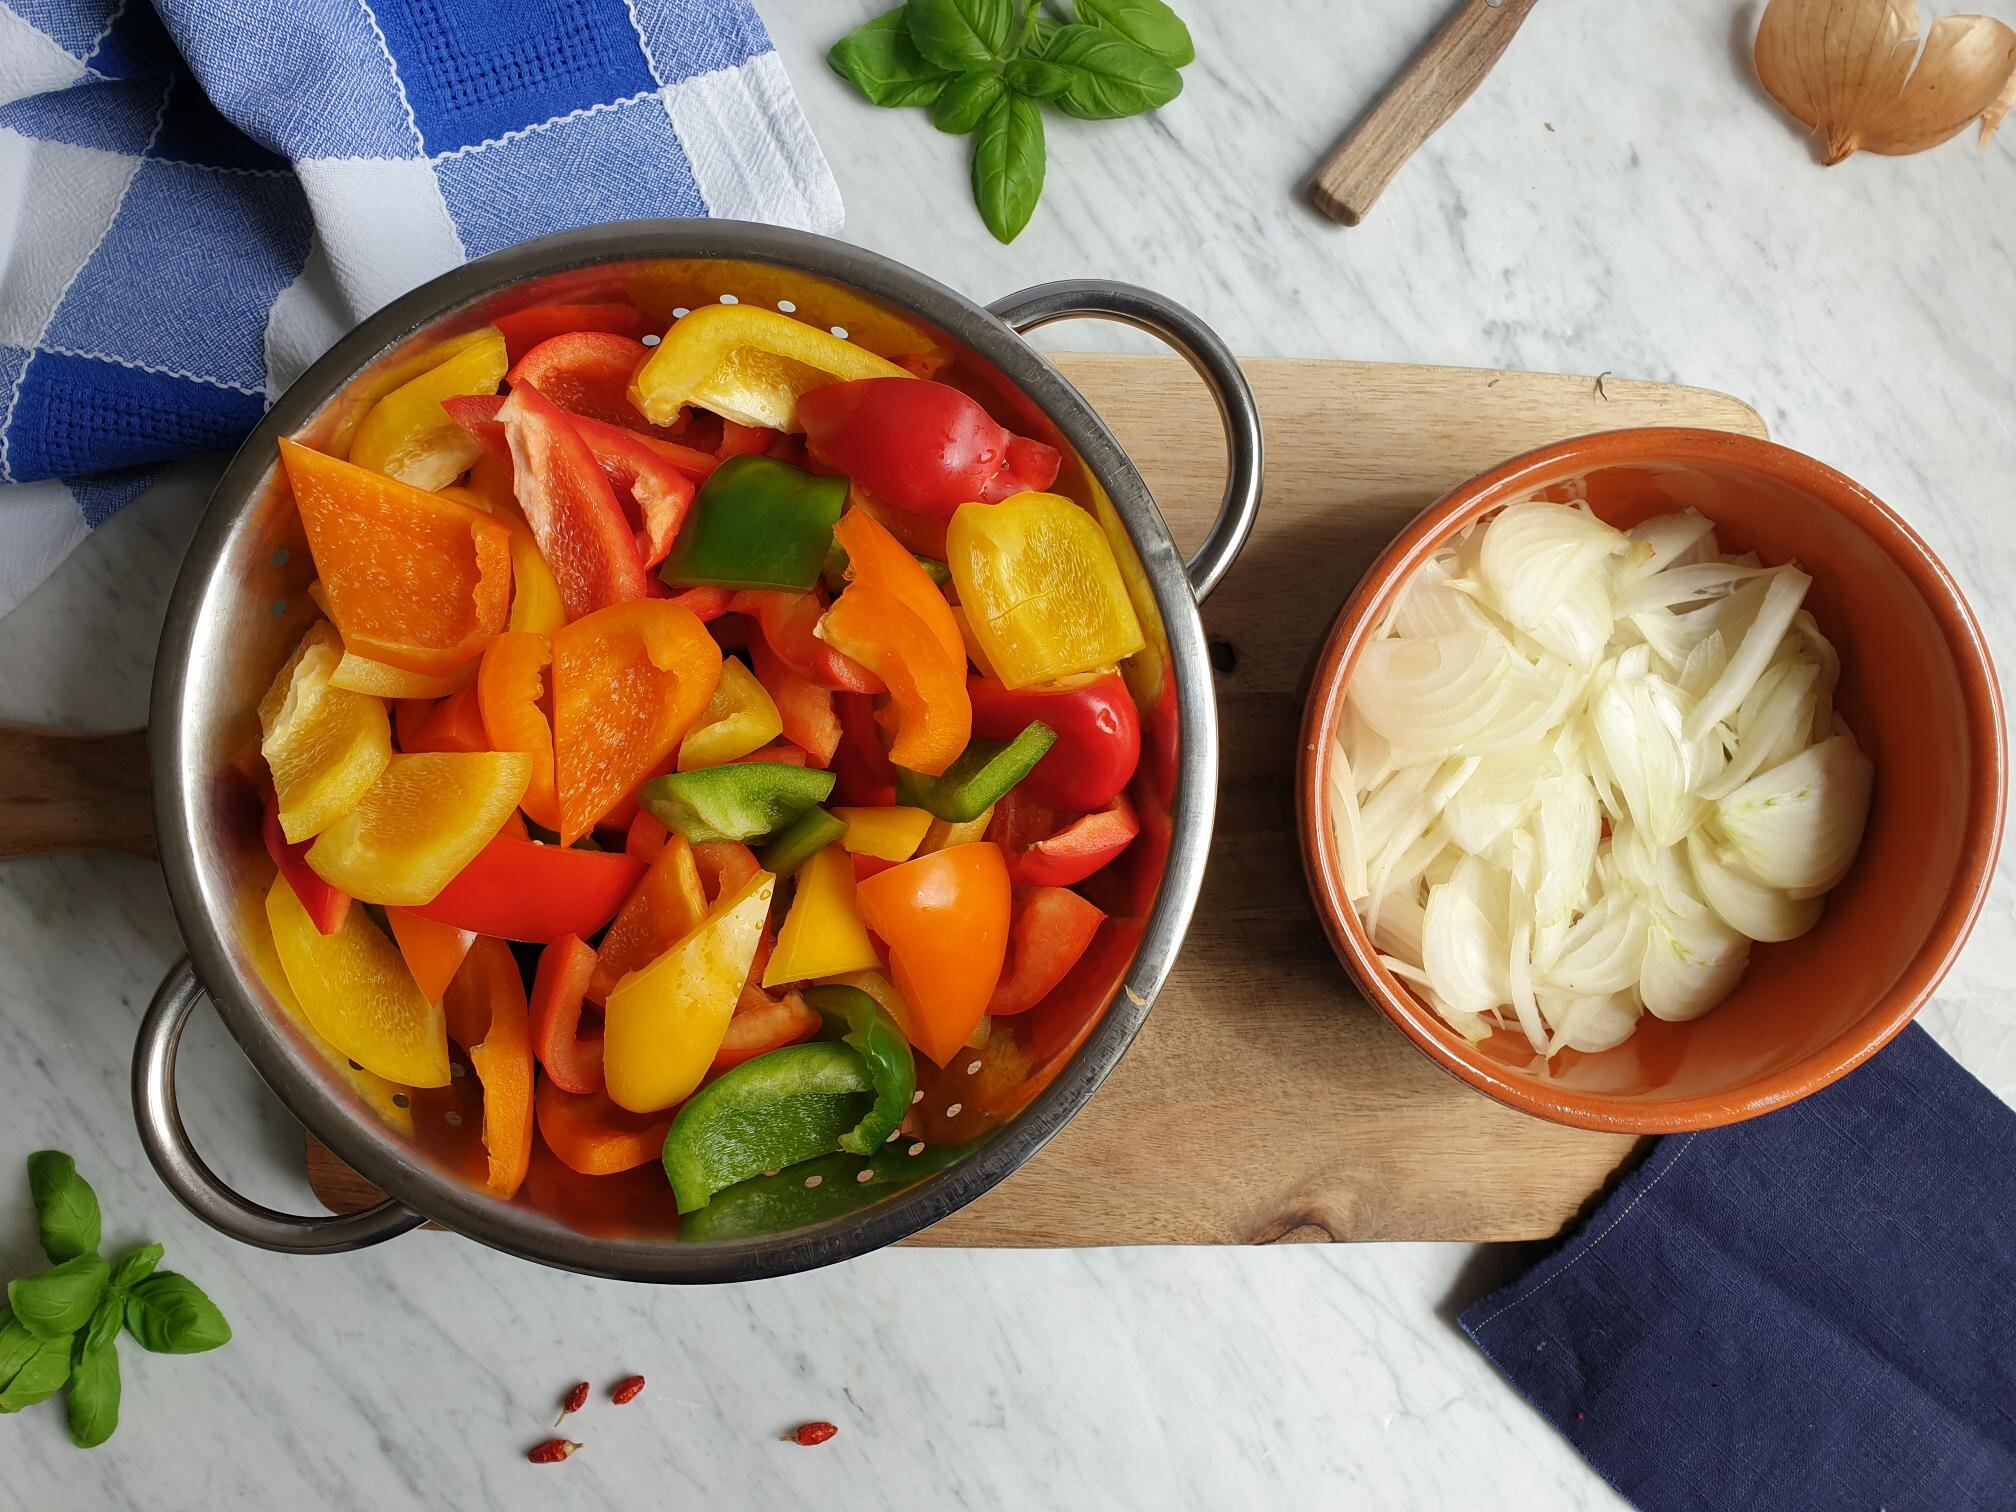
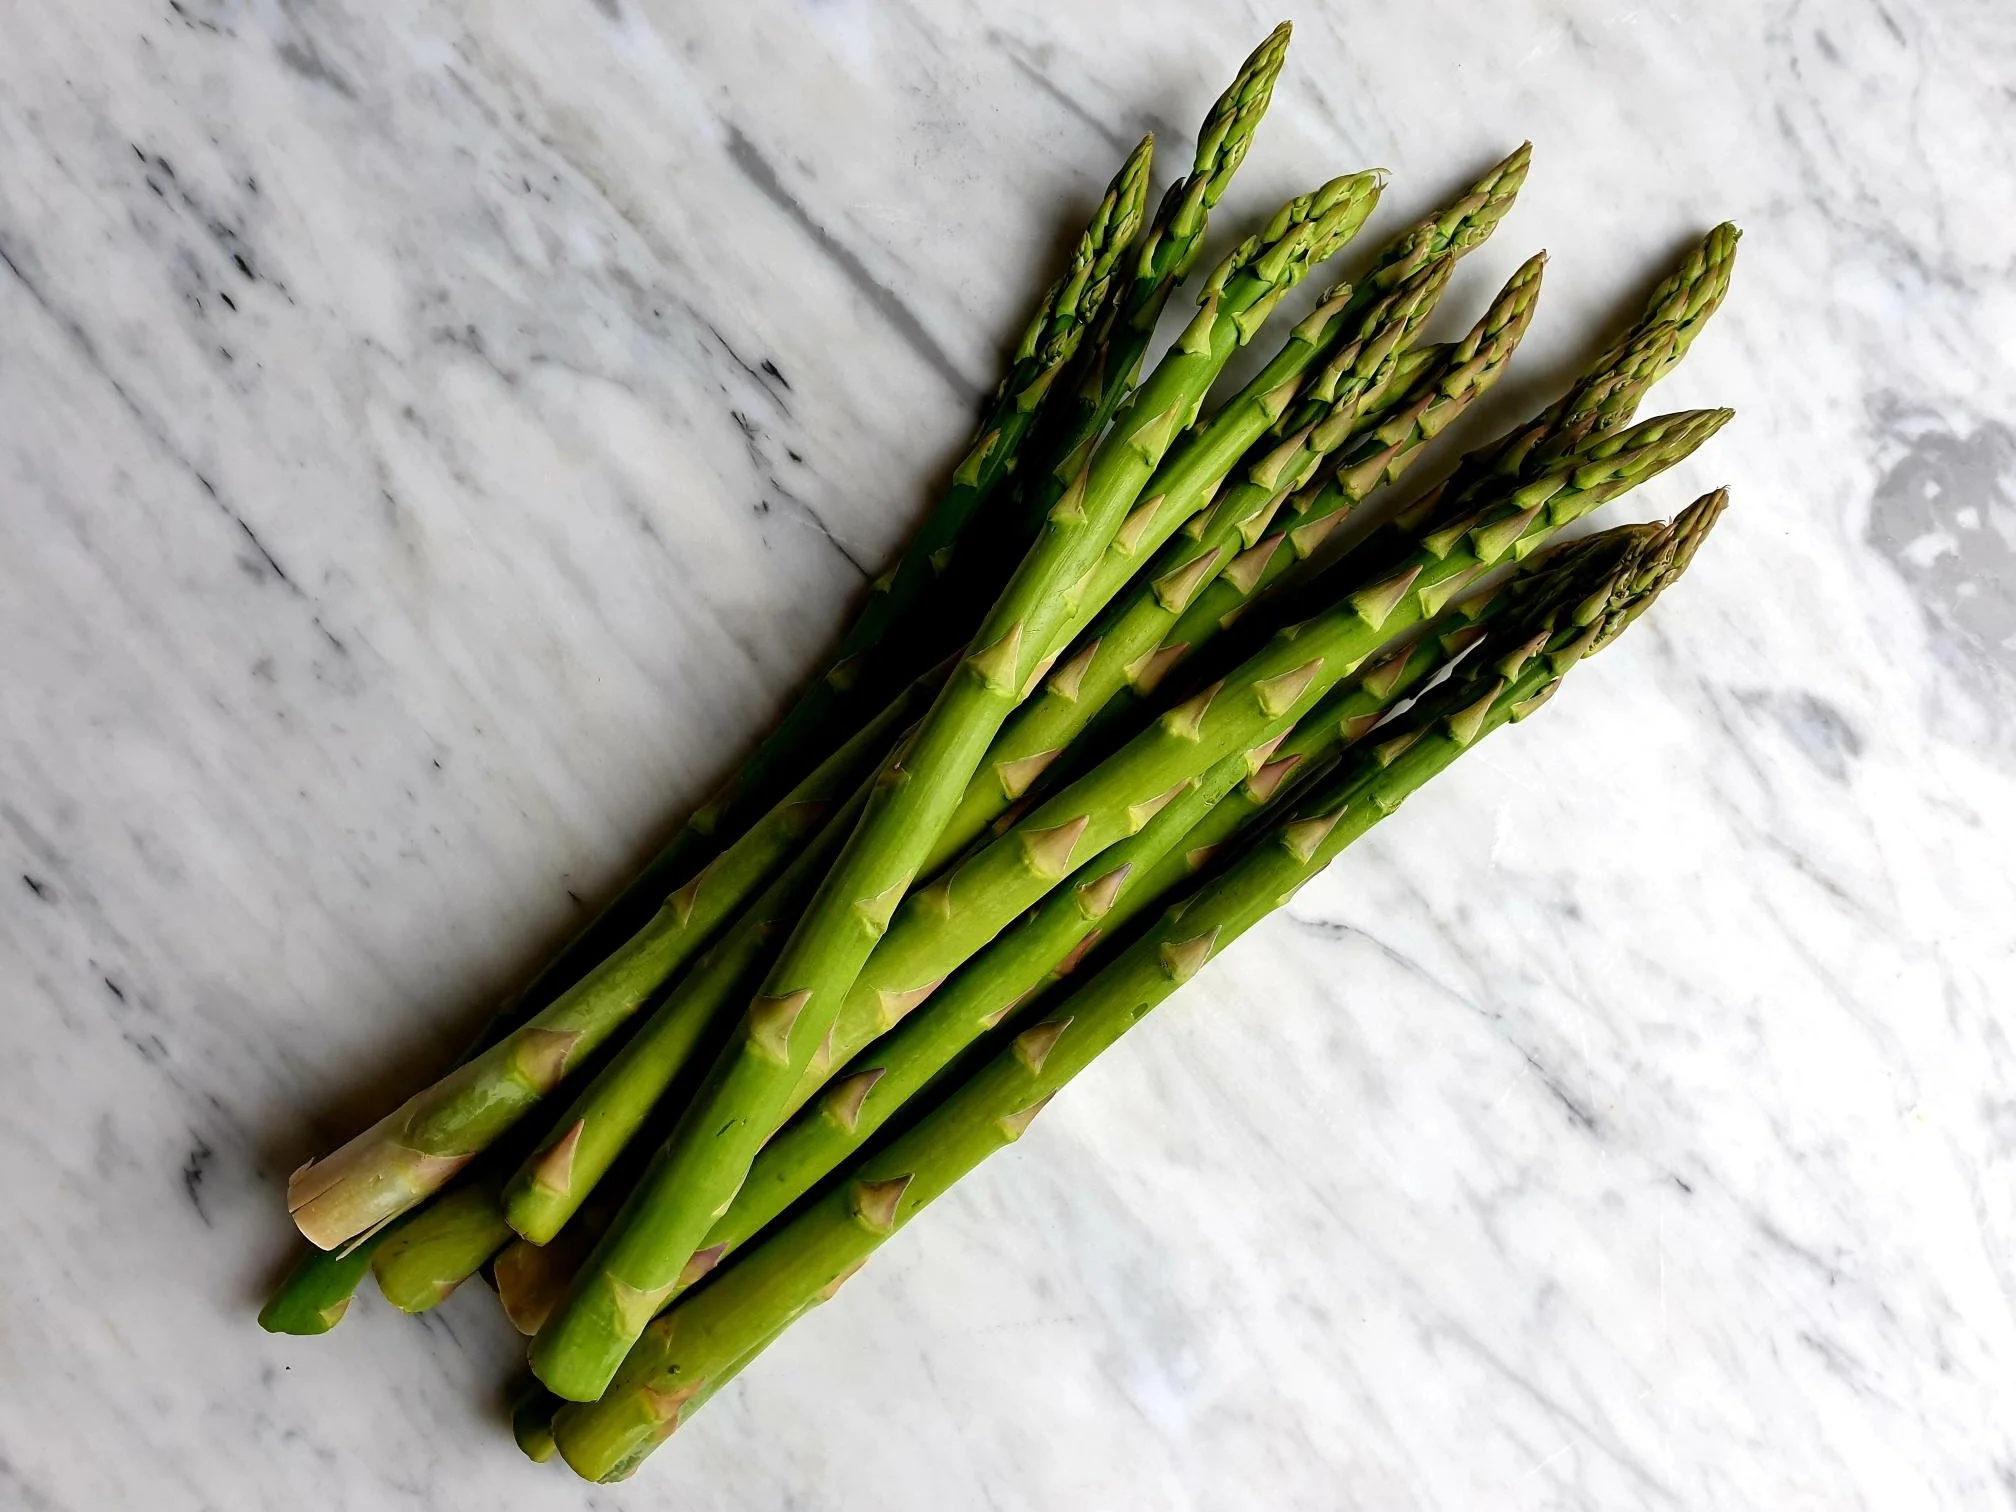
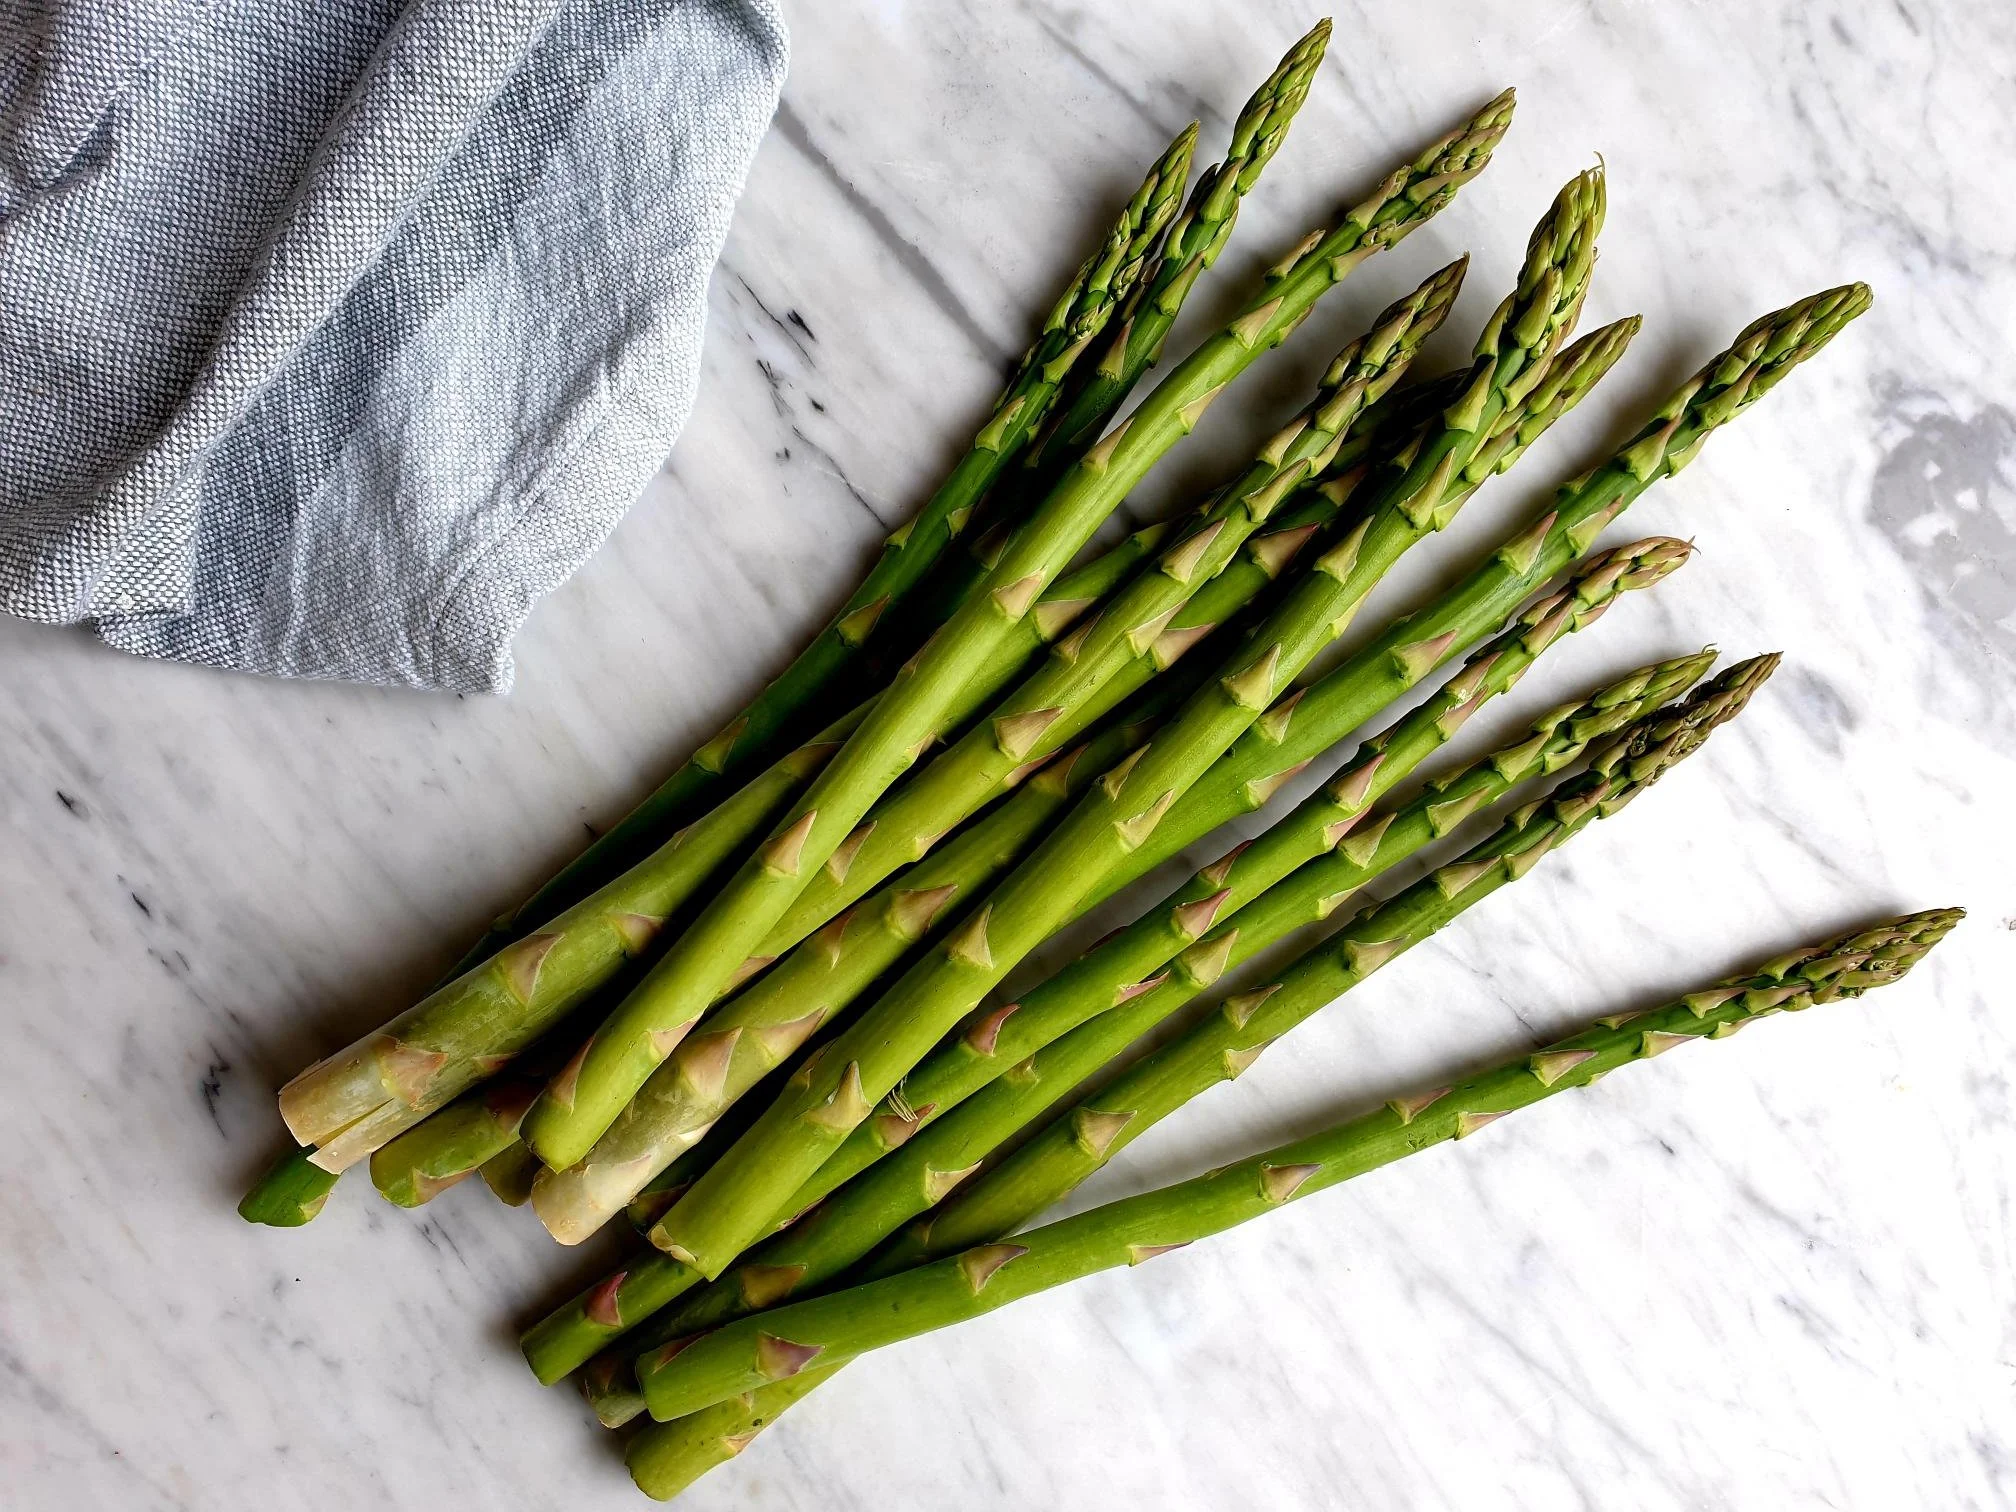
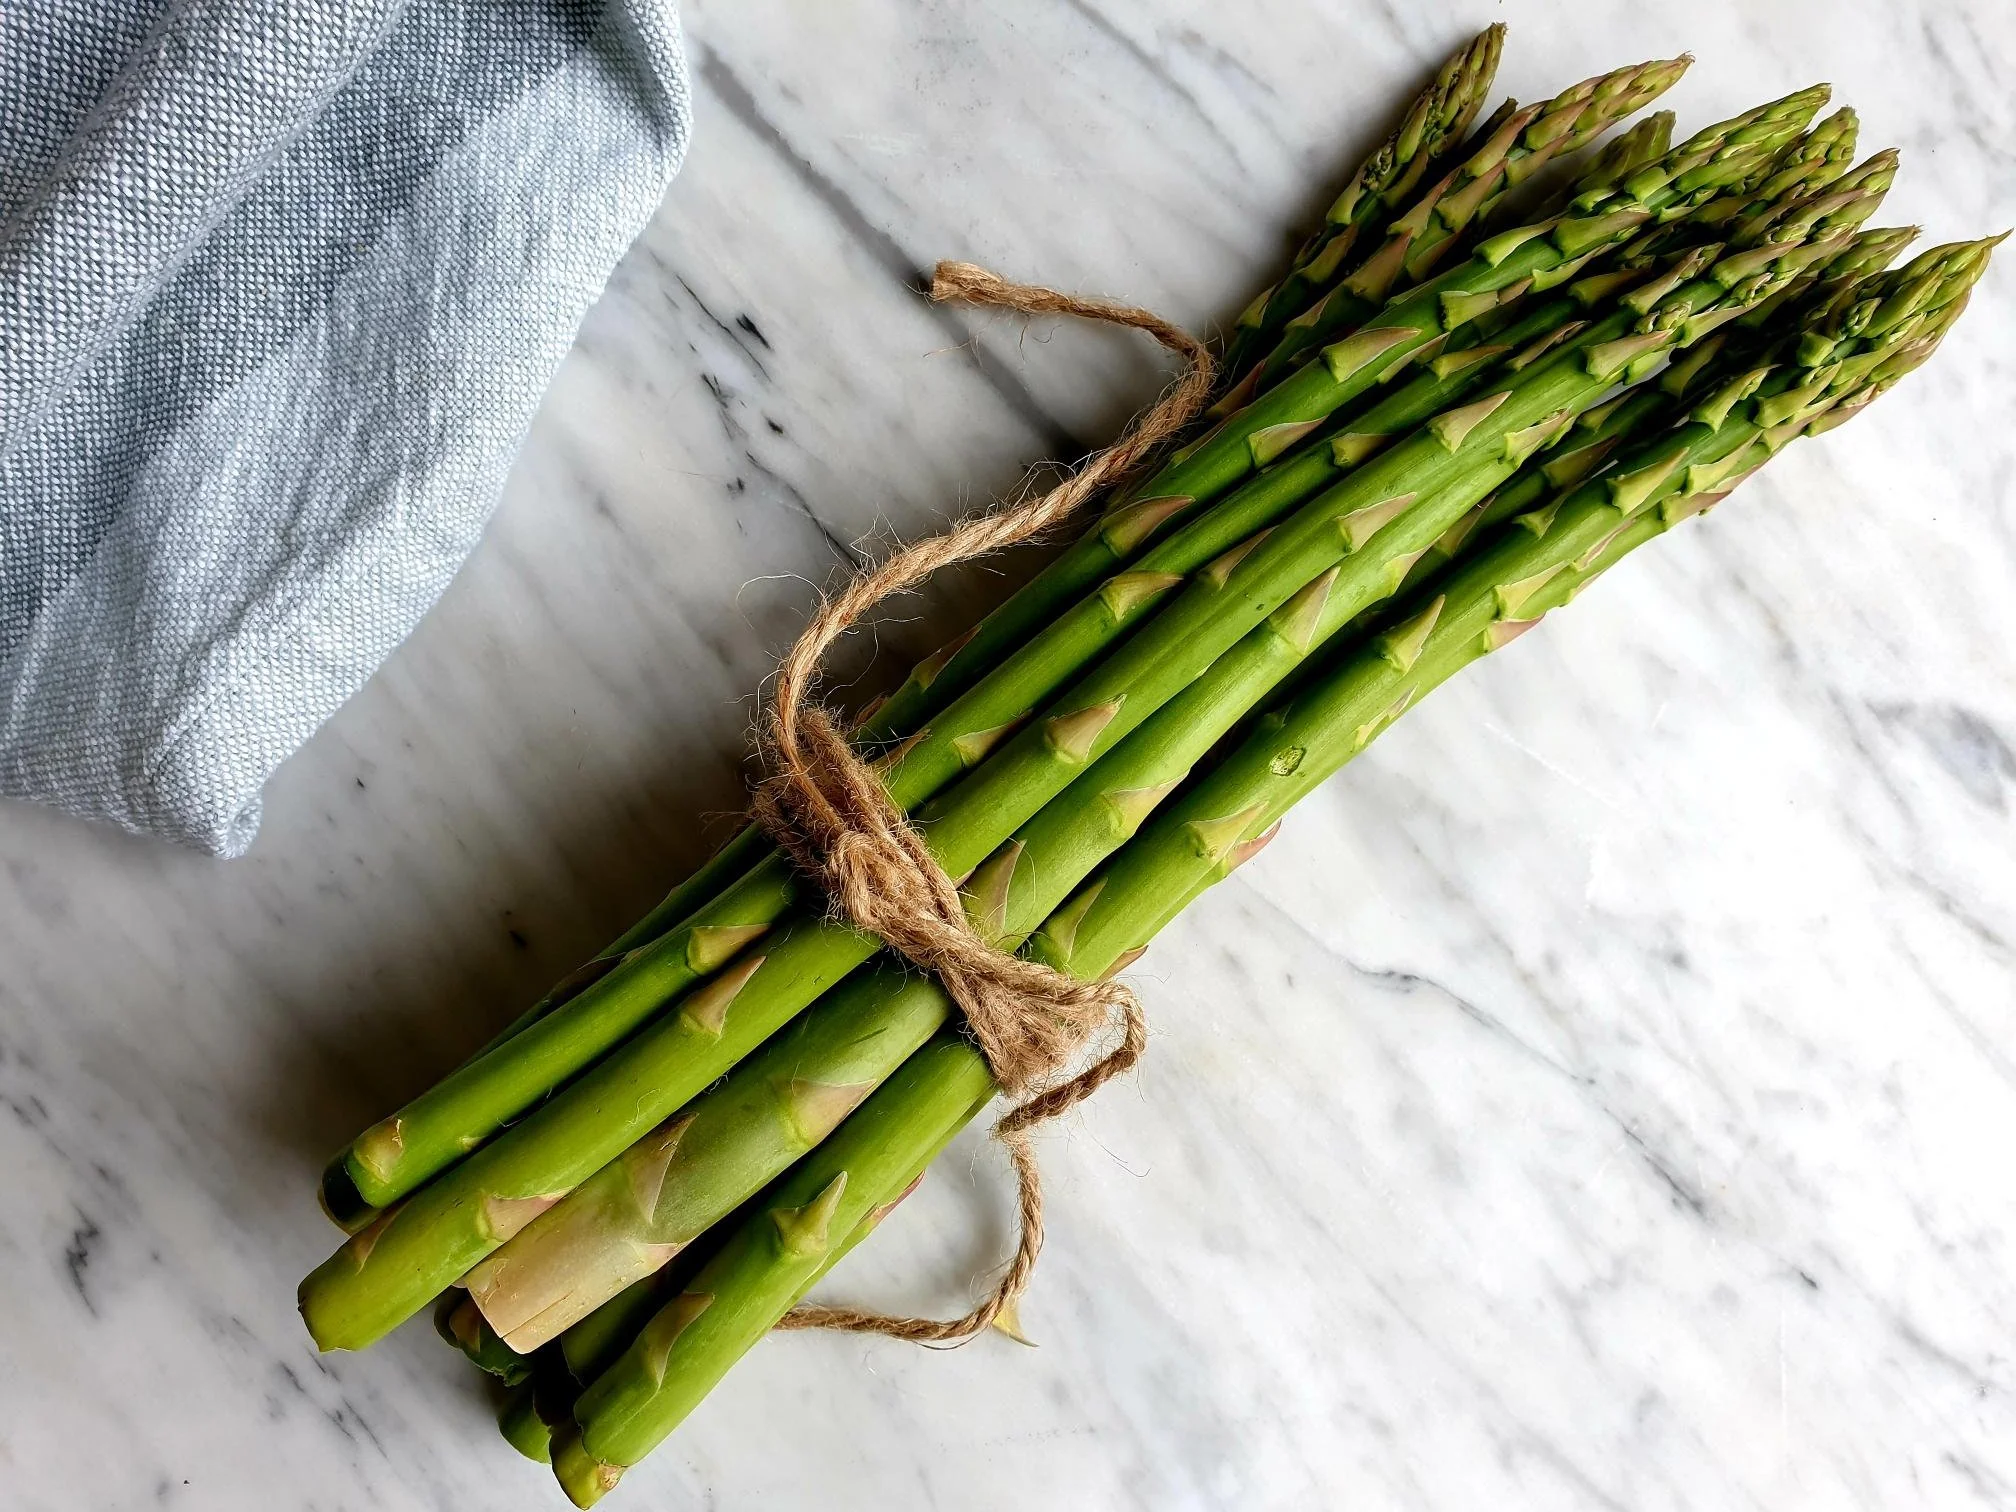
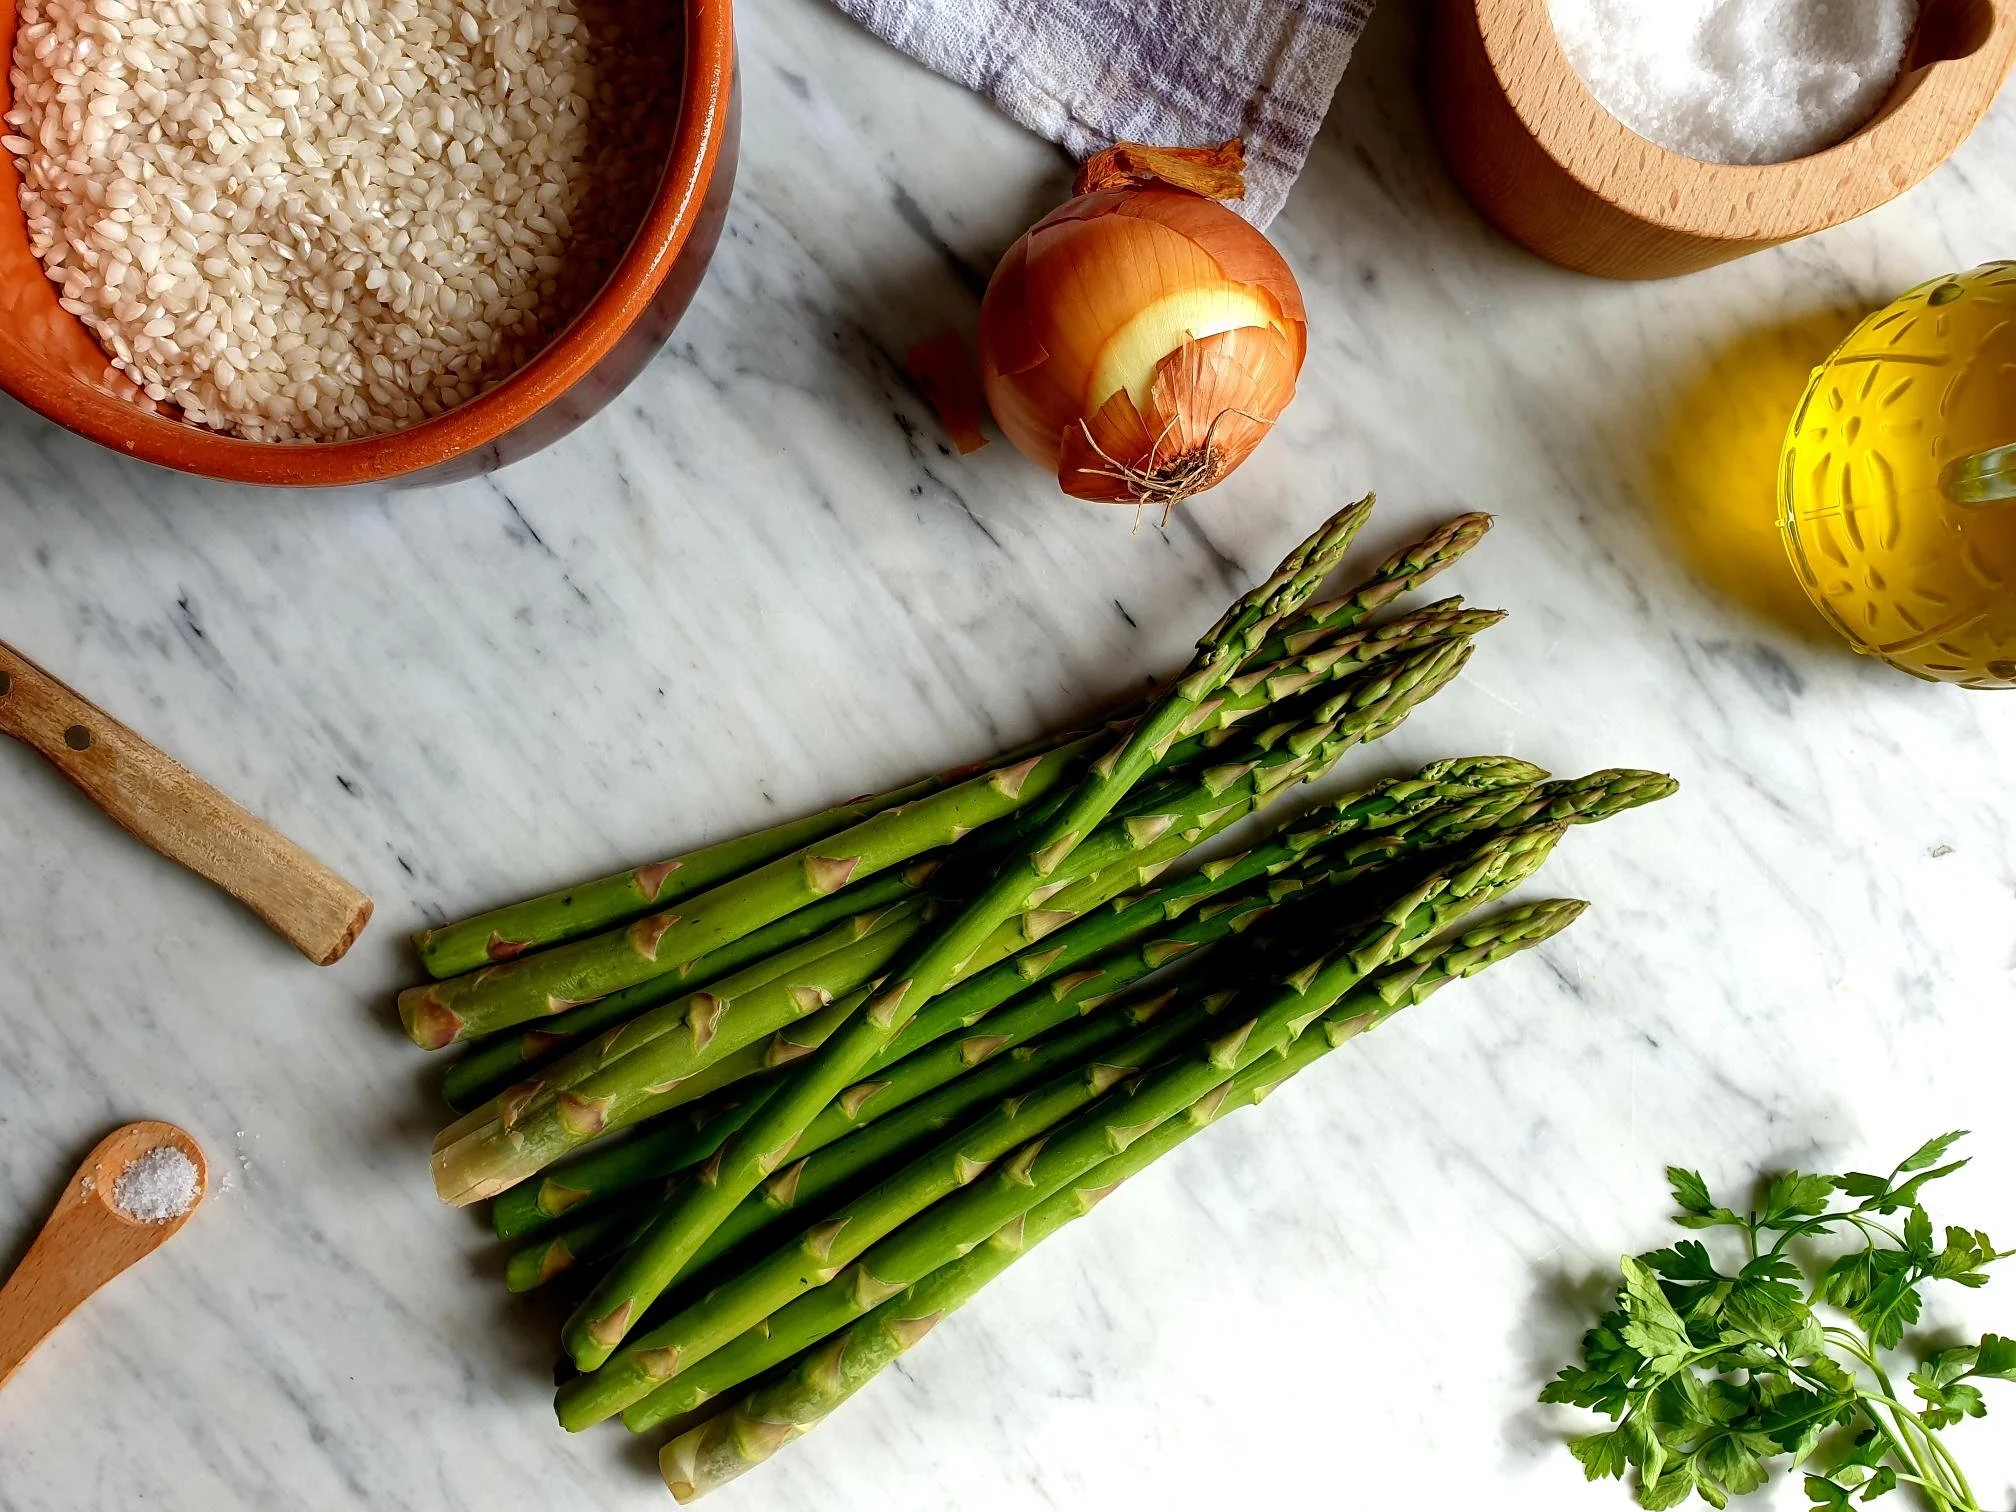
  • 200-300g green asparagus

  • 300g risotto rice (like Vialone Nano, Arborio or Carnaroli)

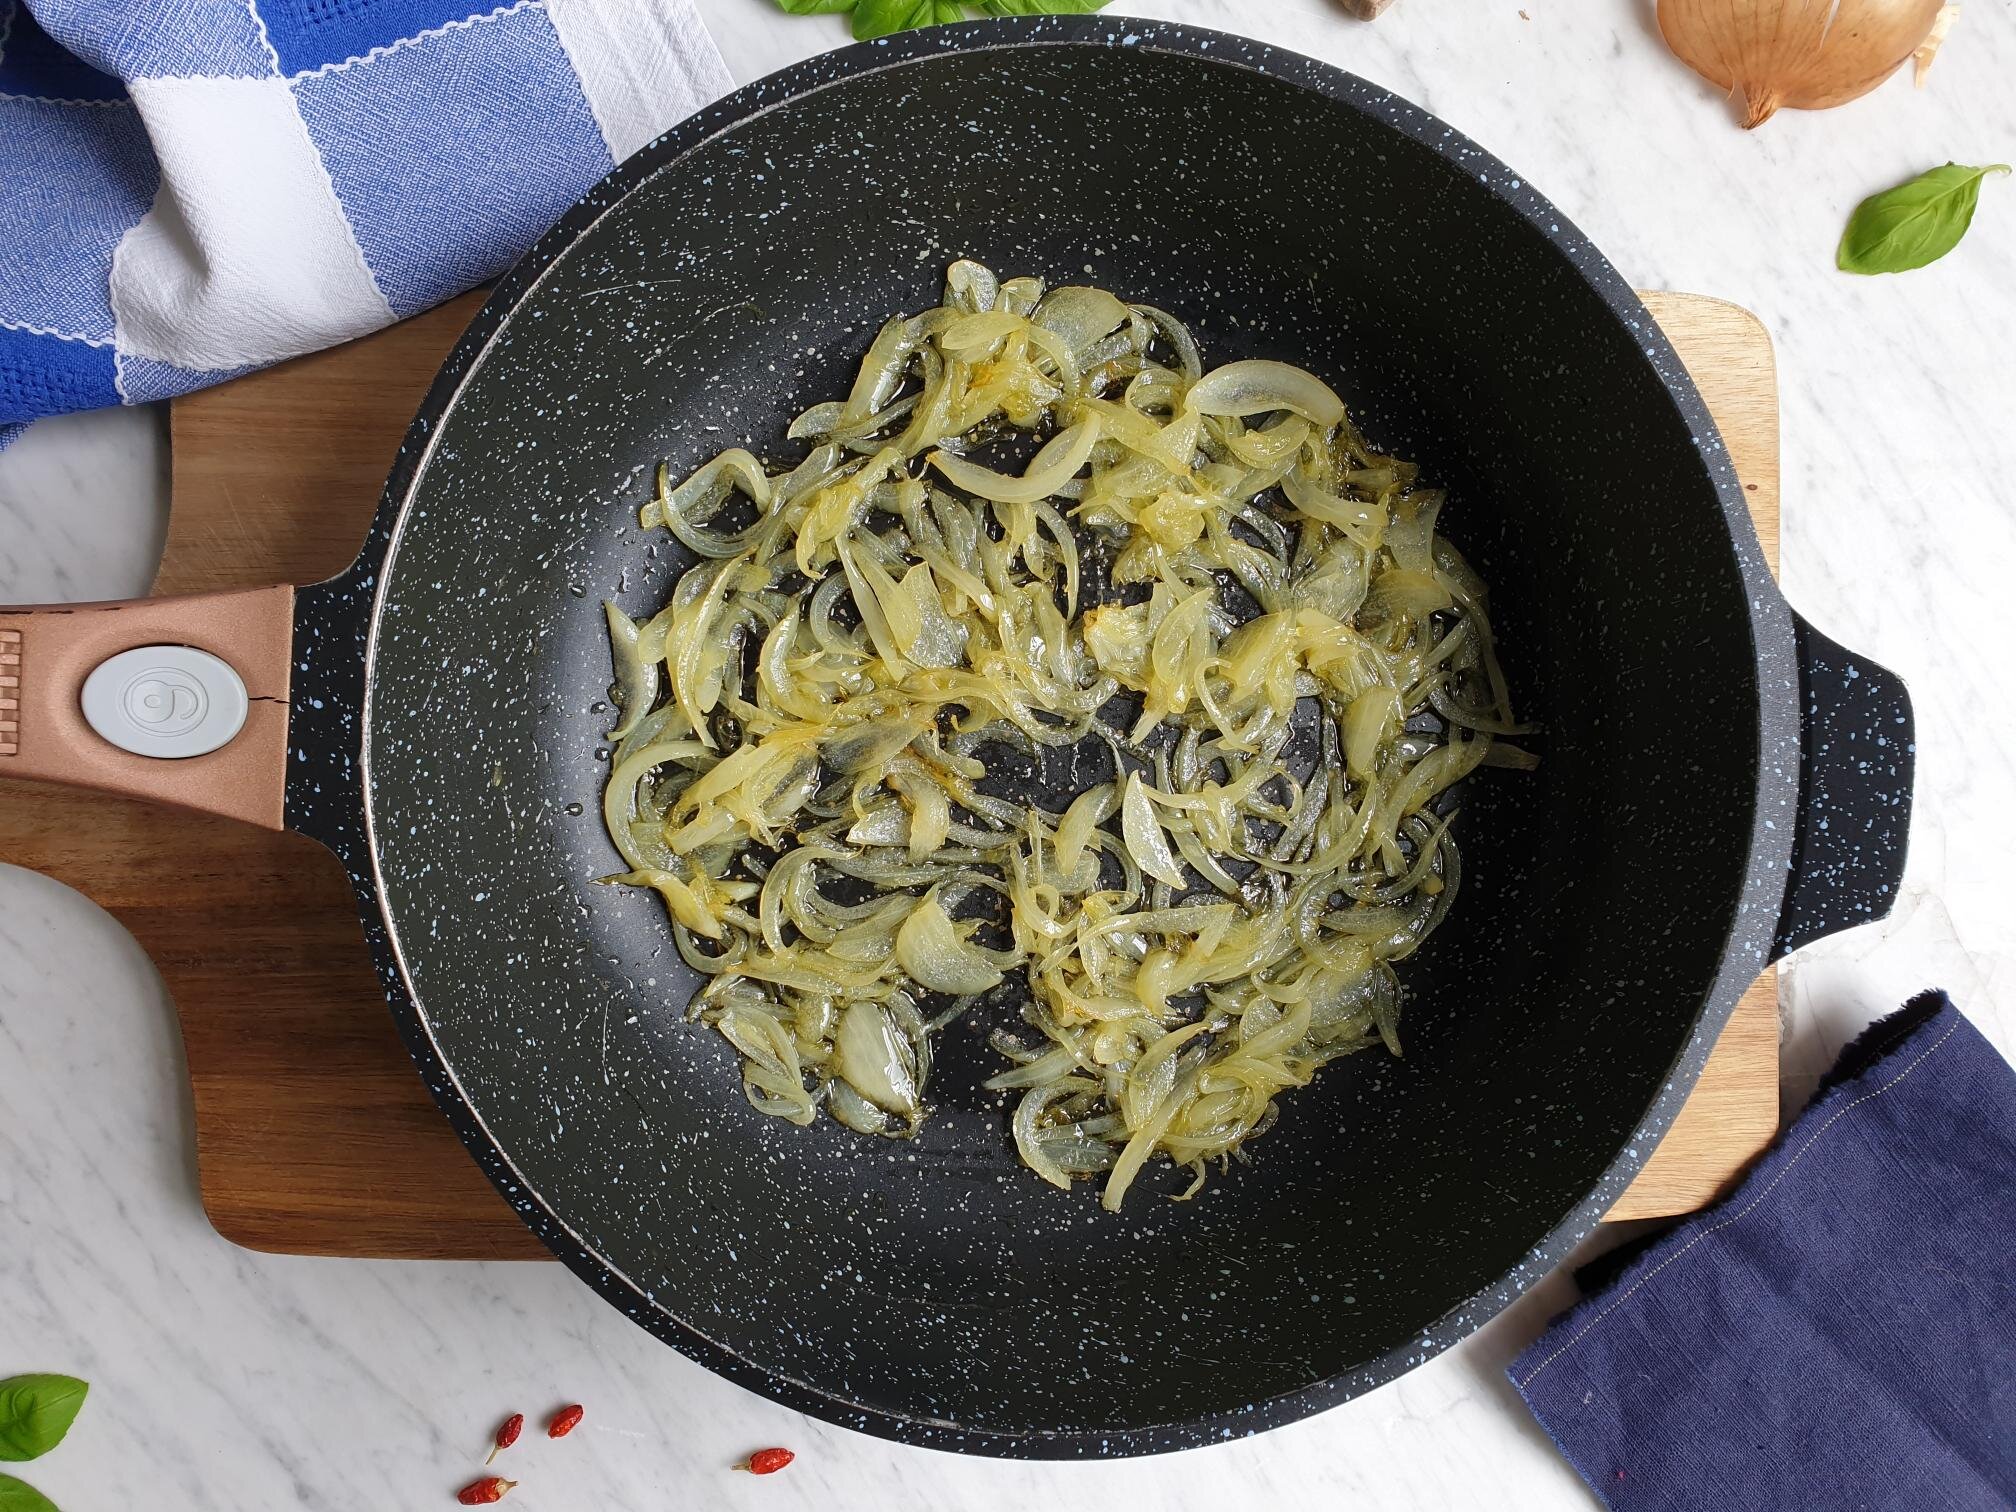
  • 1 onion or shallots (about 80g) peeled and finely chopped

  • 4 Tbsp extra virgin olive oil

  • 1 litre hot vegetable or chicken stock (you can use Instant vegetable or chicken stock powder)

  • fresh flat leaf parsley, a handful (about 6g), finely chopped (plus some extra for garnish, optional)

  • sea salt

  • Parmiggiano Reggiano cheese, finely grated (about a generous handful or to taste)

Method

Before starting making risotto have your boiling hot vegetable or chicken stock ready to hand for later.

Wash the asparagus and pat dry them with the kitchen paper towel.

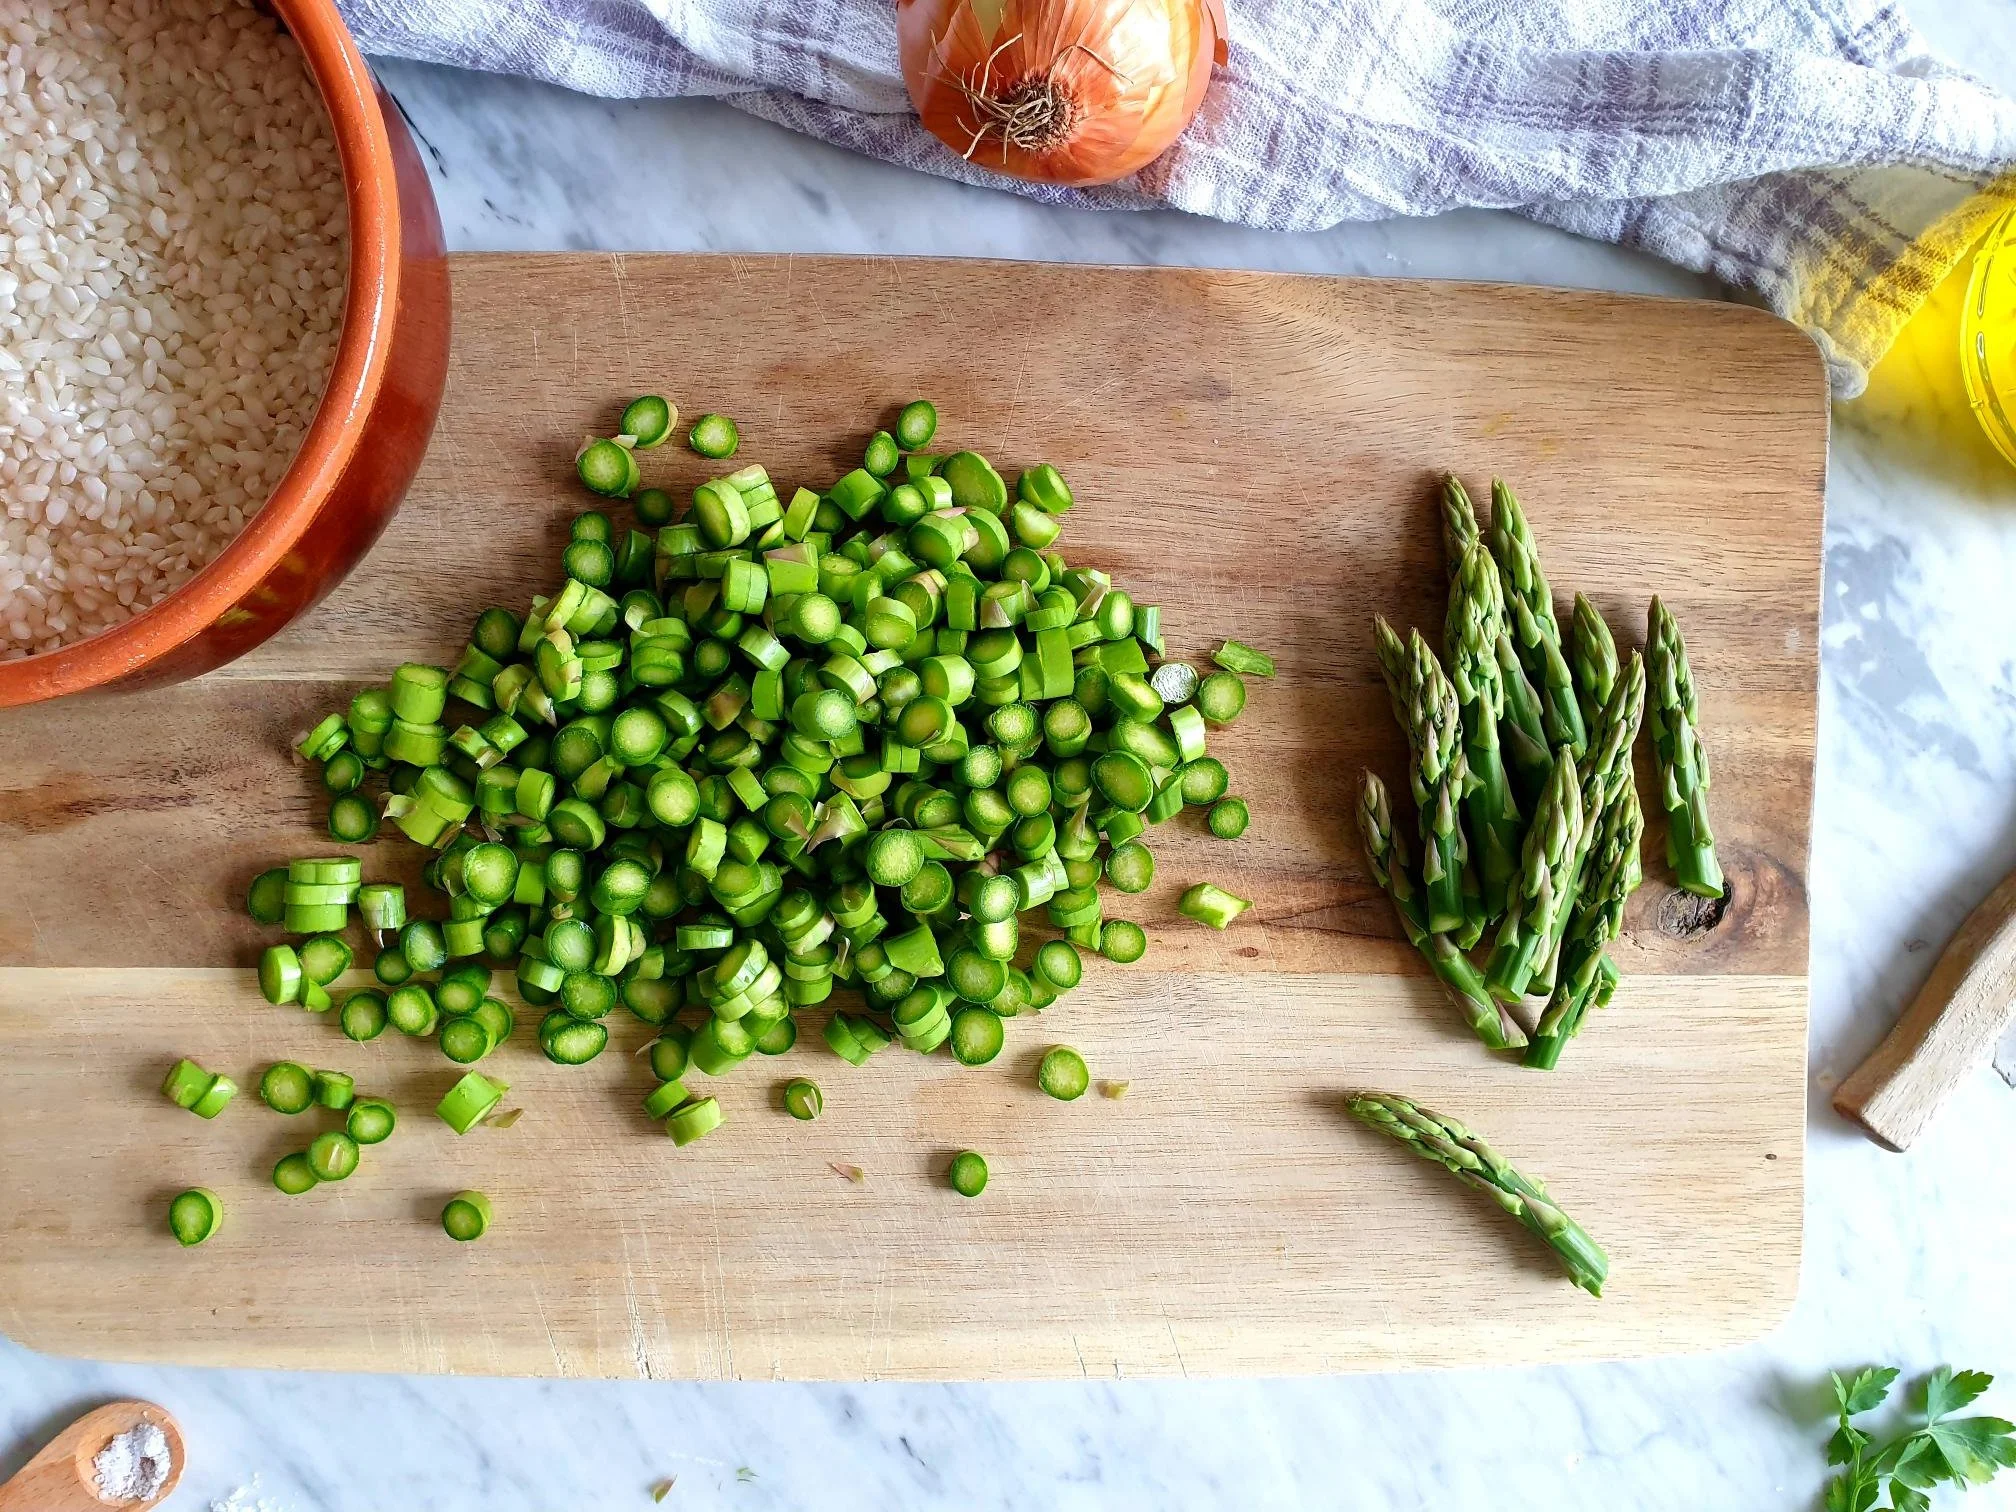
Cut off the tips of the asparagus and set aside.

Chop the stalk sections of the asparagus.

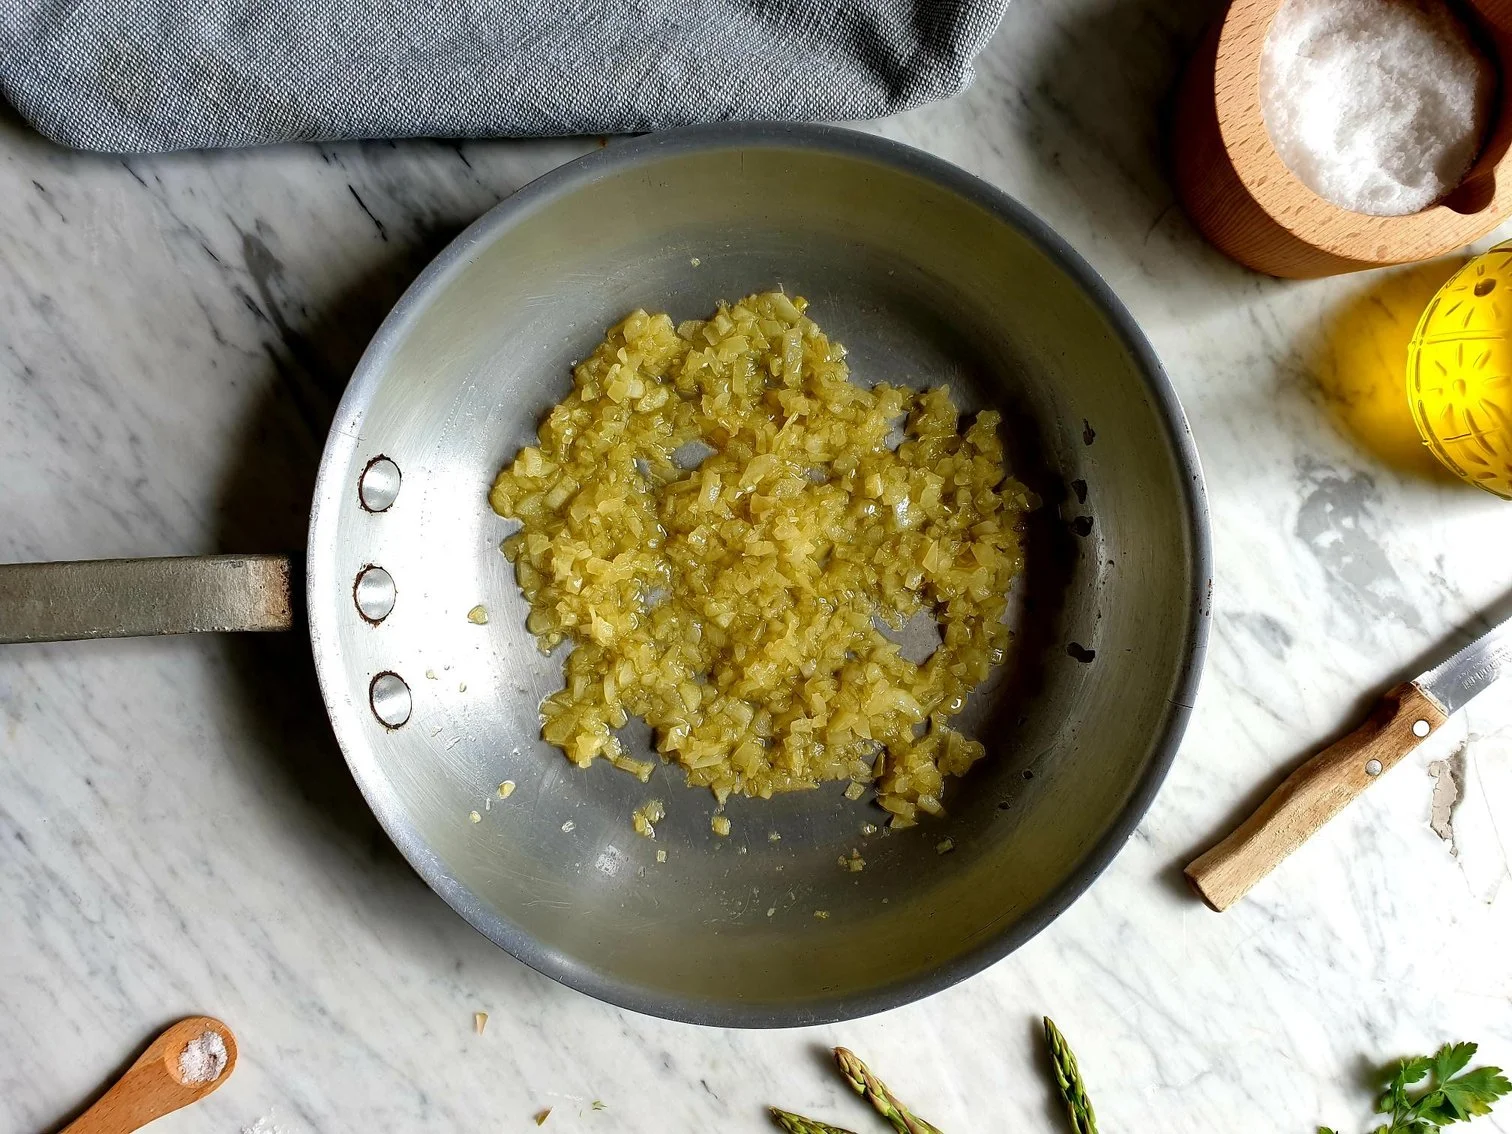
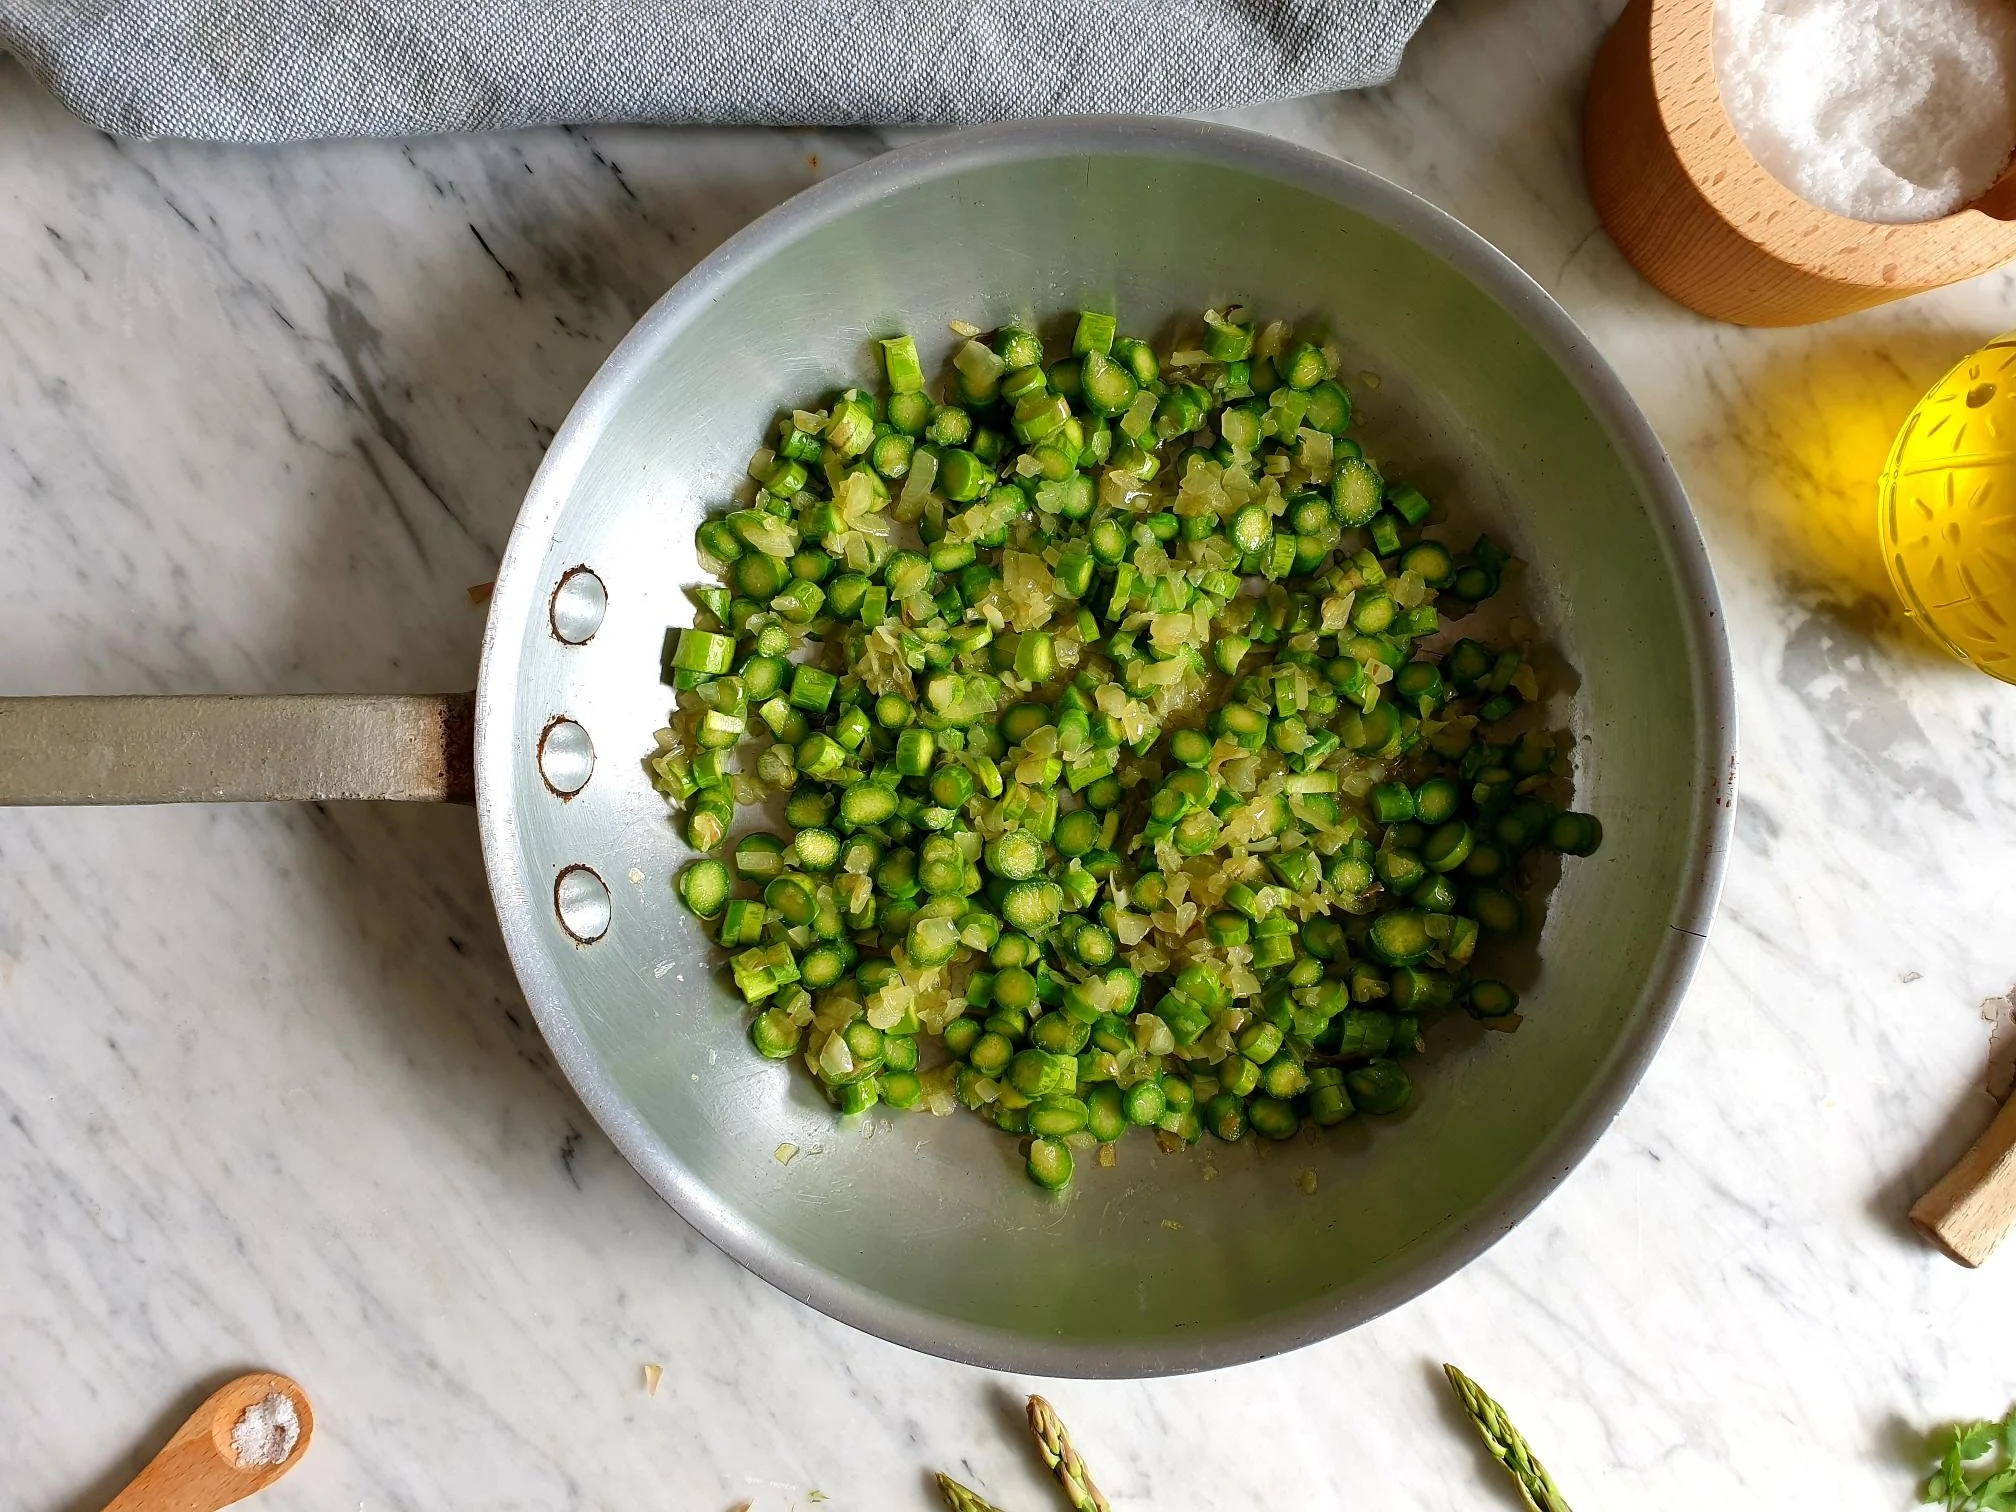
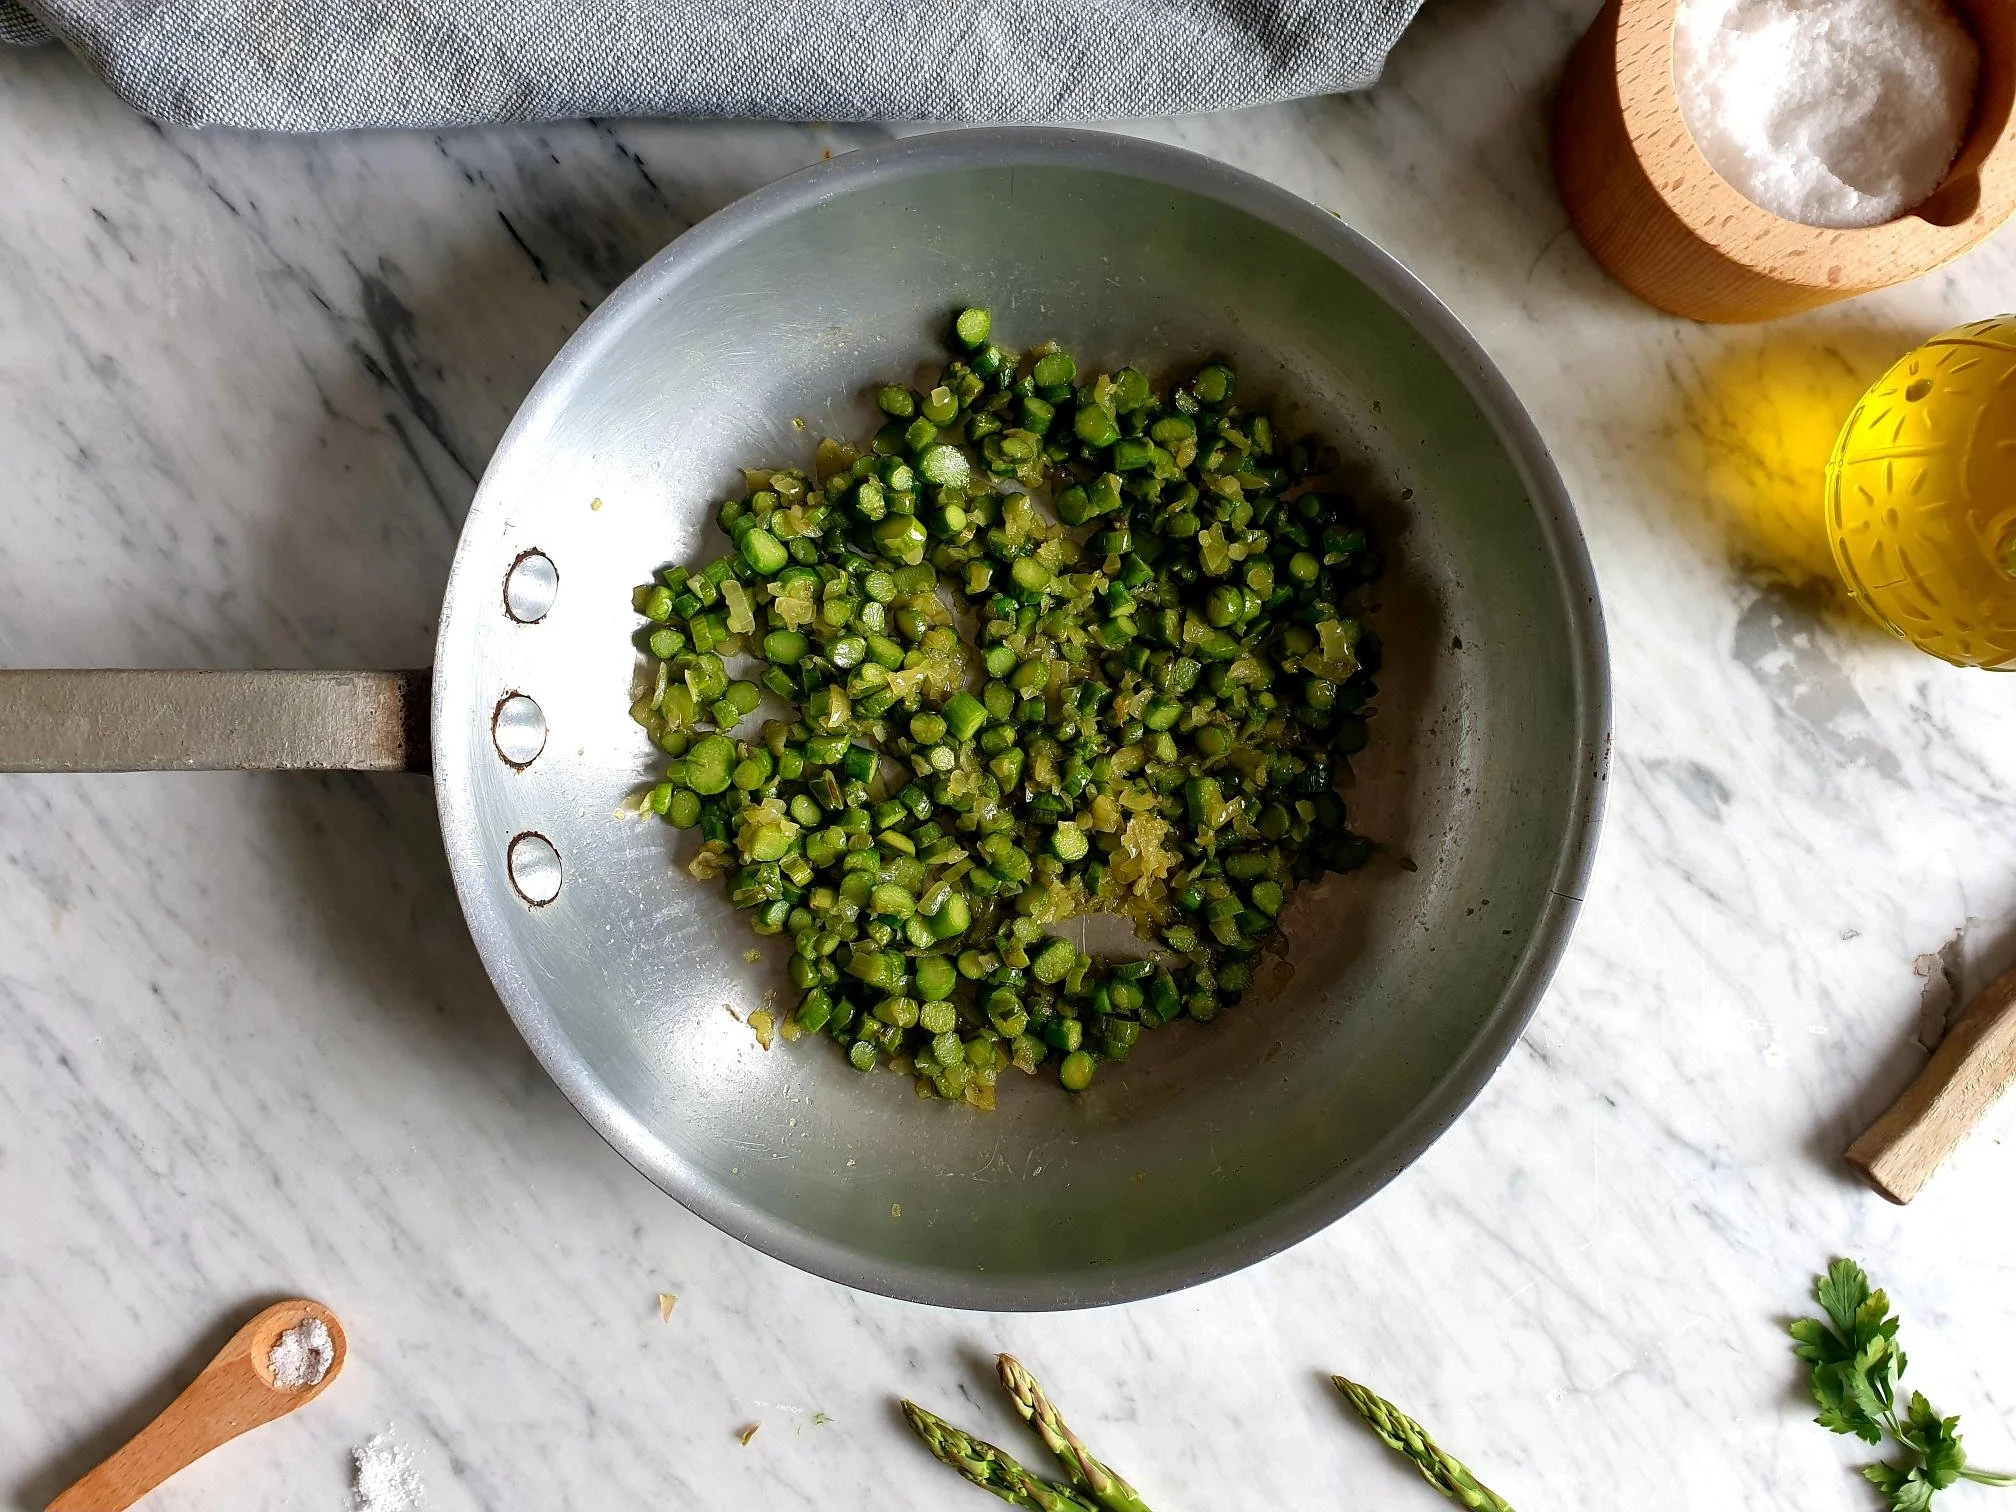
Put extra virgin olive oil in a pan, add finely chopped onions, a pinch of sea salt and sauté for a few minutes on a gentle heat until soft.

View fullsize Asparagus risotto 8.jpg
View fullsize Asparagus risotto 10.jpg

Add chopped sections of the asparagus, not the tips, and cook for a few minutes together with the onions until they soften a bit and deepen in colour

View fullsize Asparagus risotto 11.jpg
View fullsize Asparagus ristotto 12.jpg

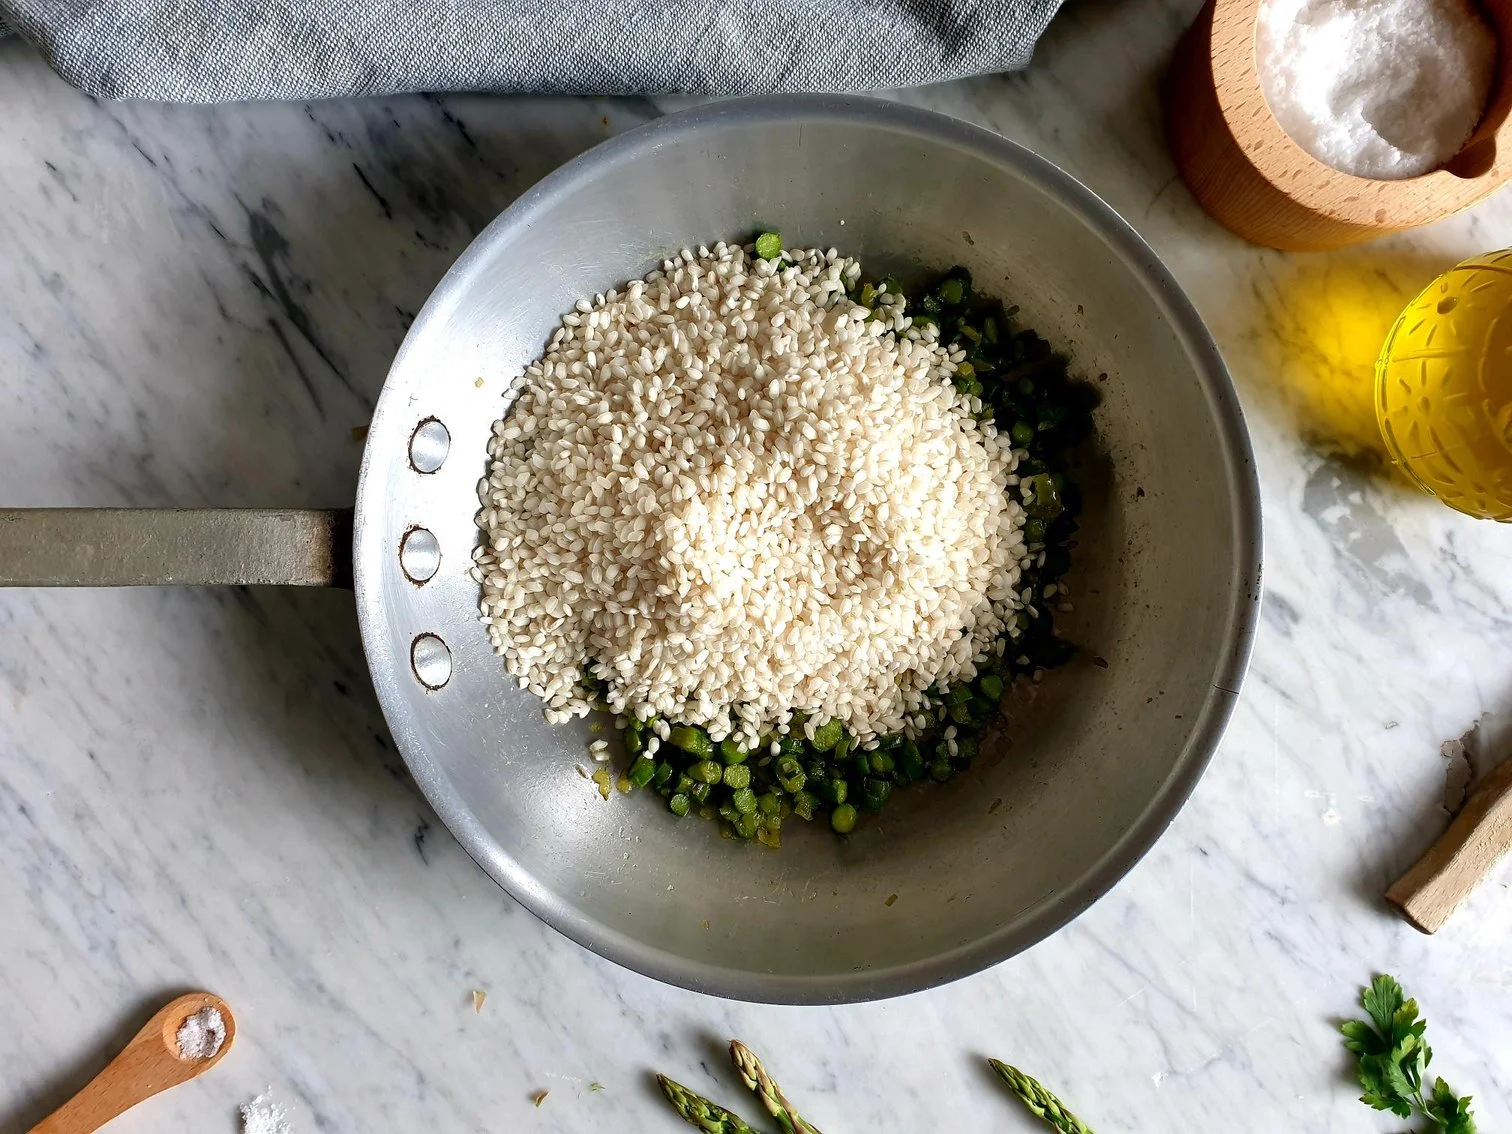
Add the rice and toast for a bit, stirring constantly to avoid sticking to the pan.

View fullsize Asparagus ristotto 13.jpg
View fullsize Asparagus ristotto 14.jpg

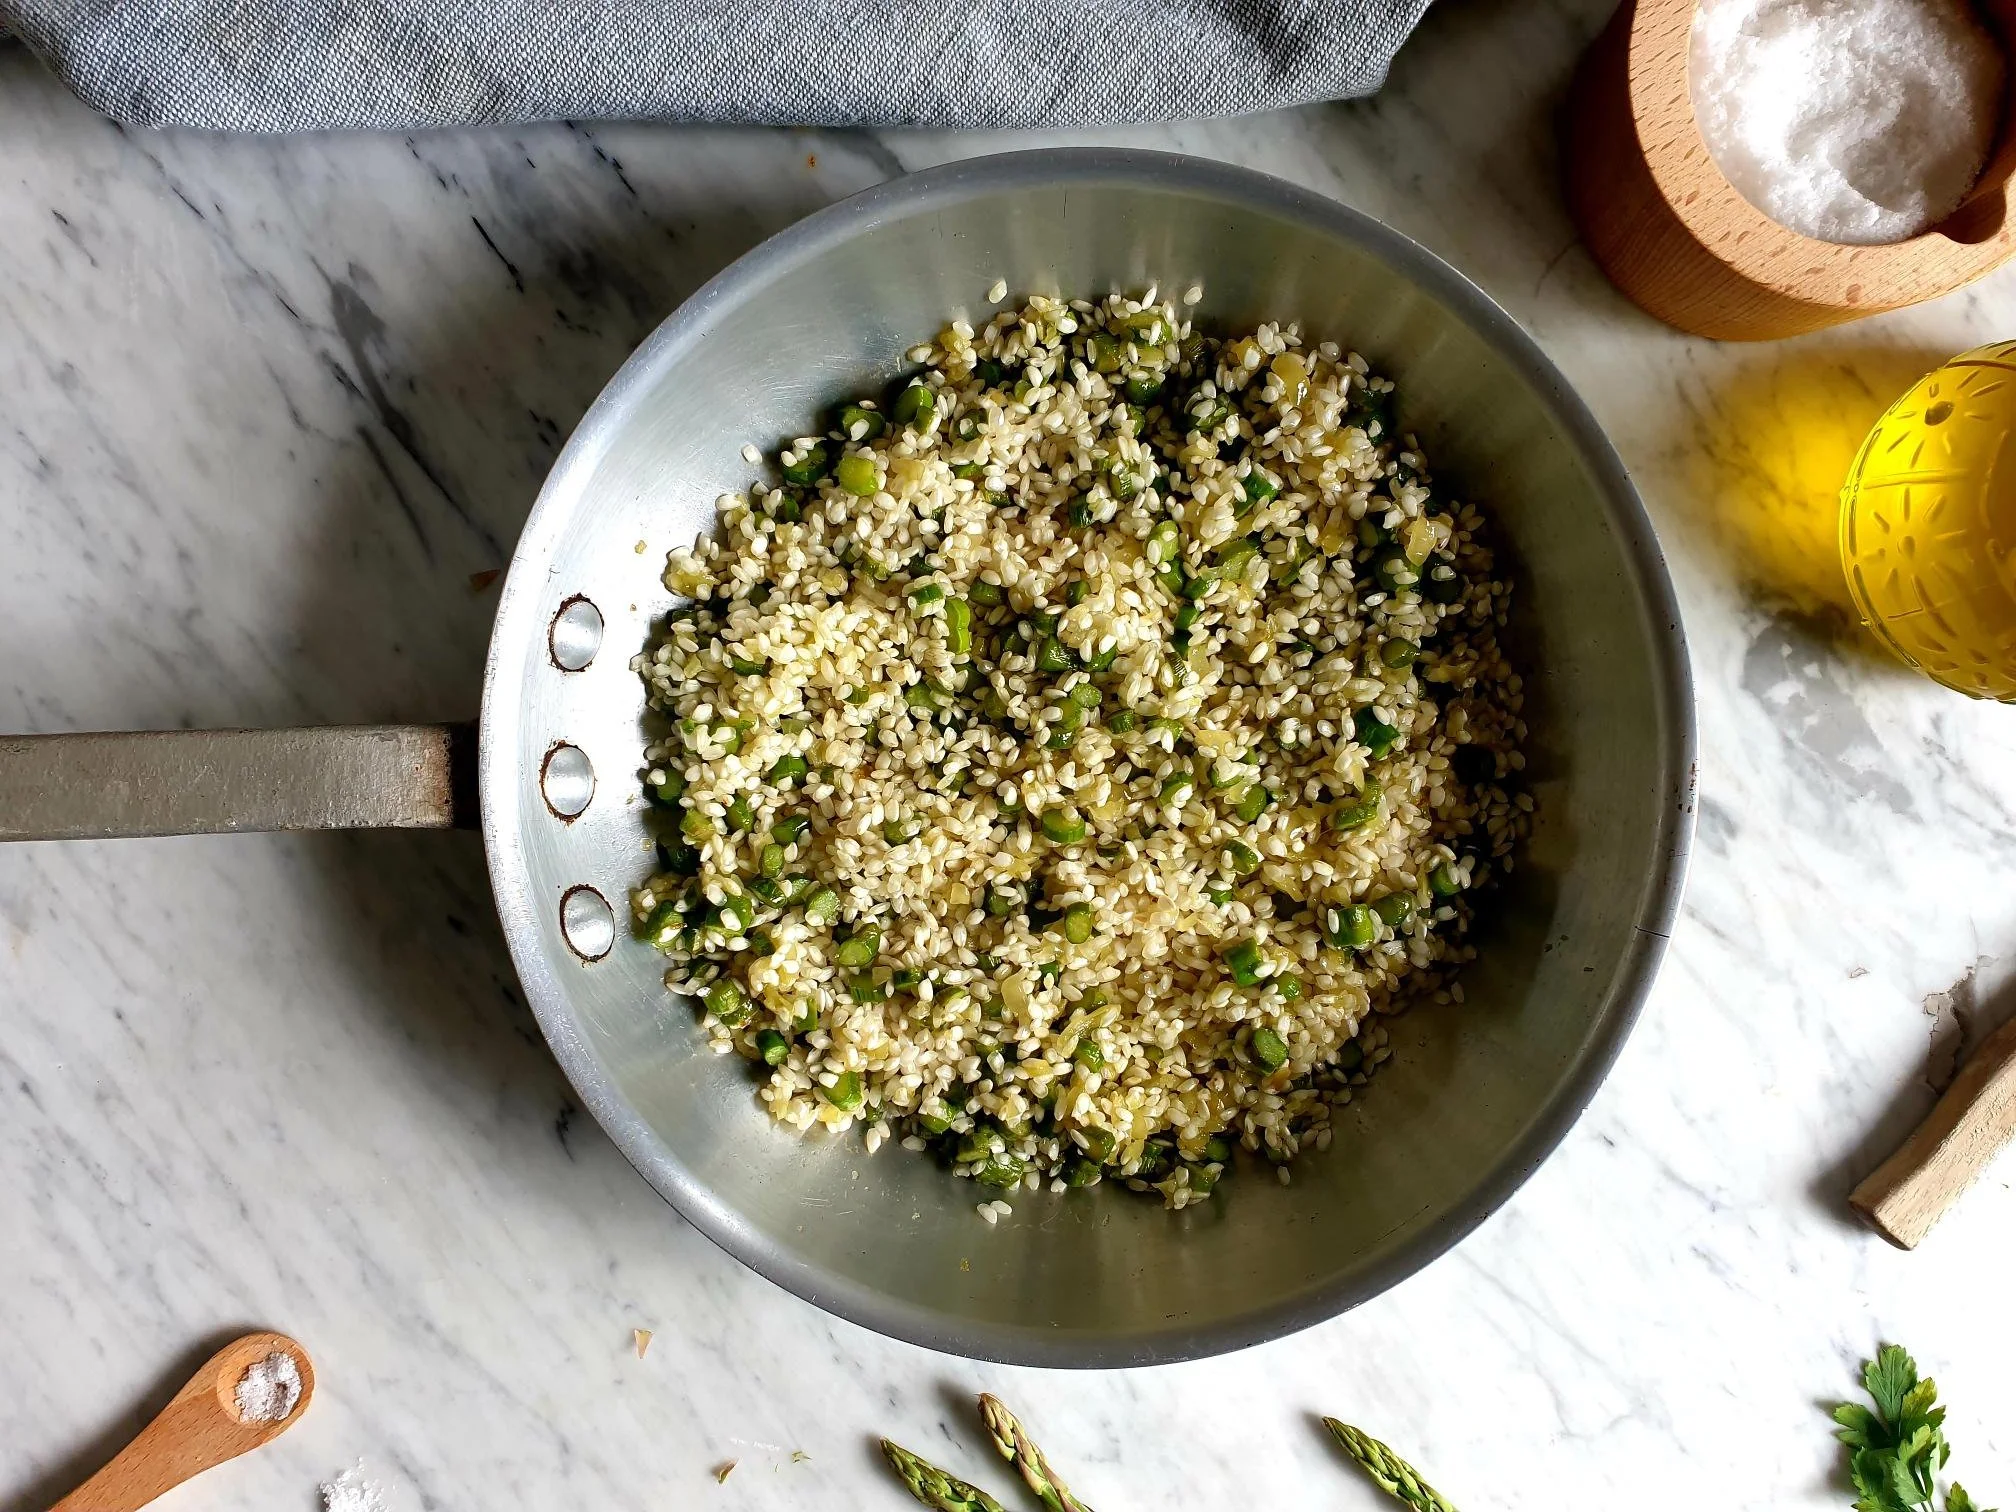
Pour or ladle ½ litre (500ml) of hot vegetable or chicken stock and add chopped parsley.

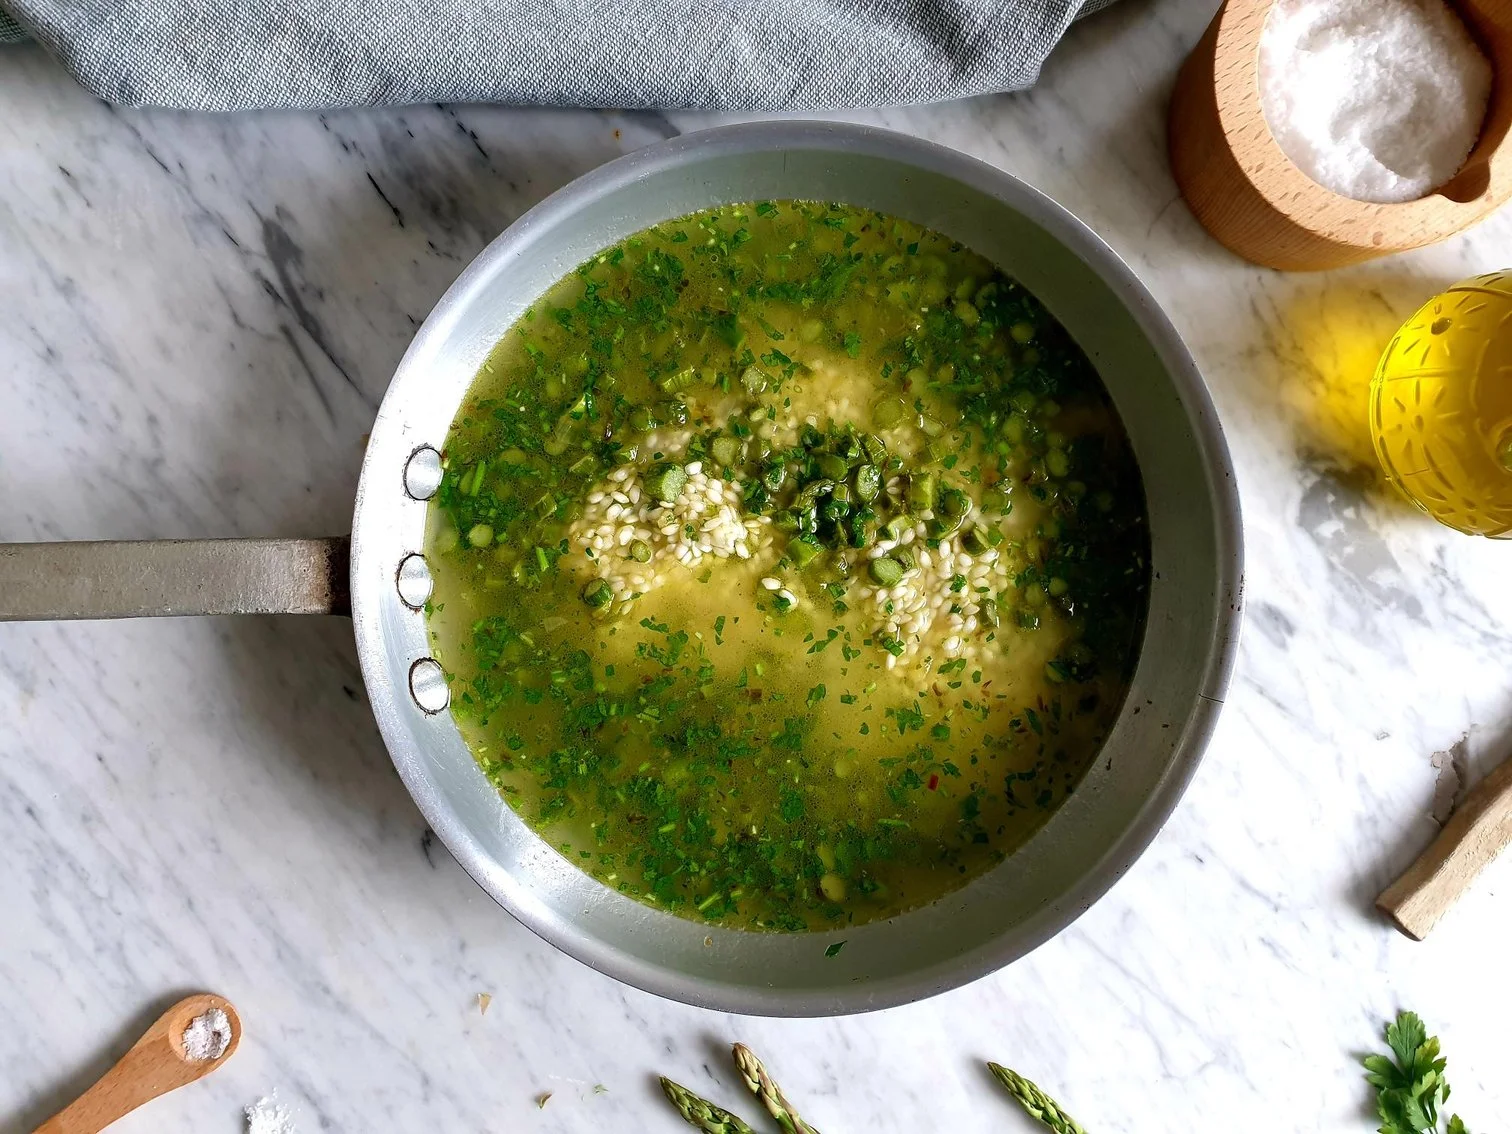
Cook until the first amount of liquid is absorbed then start gradually adding ladles of hot stock, one at a time, allowing the liquid to be absorbed before adding more.

Cook on a medium heat, stirring almost constantly, until the rice is cooked al dente, meaning fully cooked but still a bit firm when bitten, it should roughly take between 15 -18 minutes for a risotto to be cooked.

Add the tips of the asparagus a few minutes before the end of cooking time.

Taste and adjust the seasoning with sea salt, but this might not be necessary since the stocks that come from the store generally speaking are salty already!

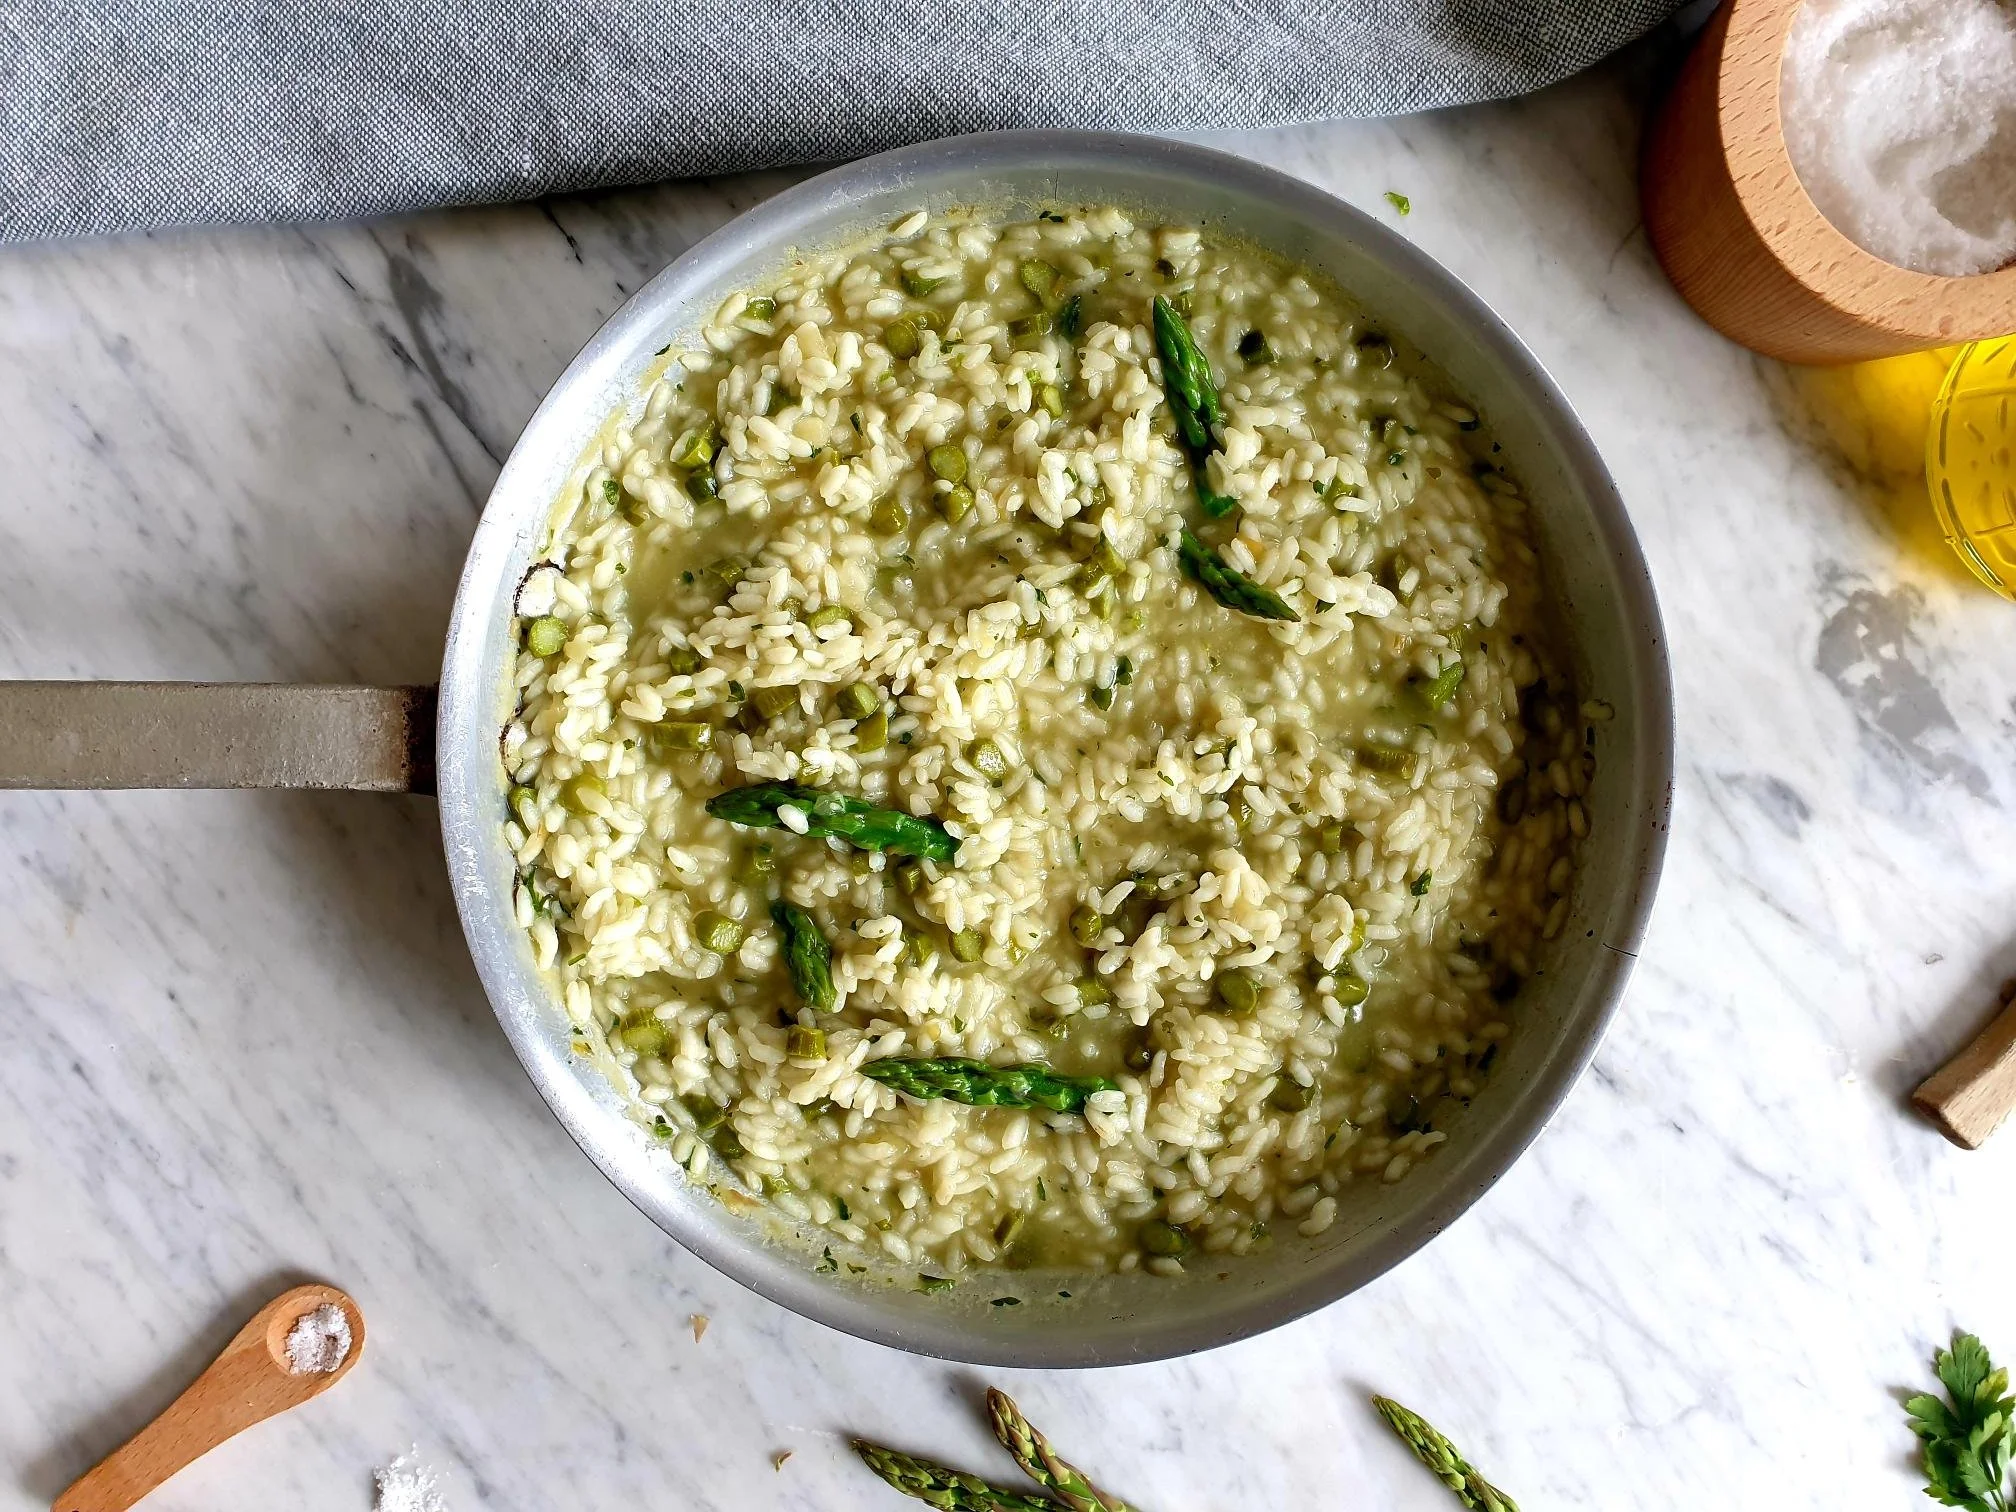
Serve immediately while the risotto is still hot and rather liquidy.

Ladle the risotto onto the plates, sprinkle with freshly grated Parmiggiano Reggiano cheese and garnish with some roughly chopped fresh parsley.

Just a thought

For even creamier texture, you can finish cooking the asparagus risotto with a typical Italian mantecare phase. Remove the saucepan from the heat, add grated cheese and a bit of cold butter or cream to the risotto when is almost finished and stir with a wooden spoon quite vigorously in order to develop that delicious creamy texture.

April 27, 2022 /tina oblak
green asparagus, green asparagus risotto, risotto rice, Vialone Nano, Arborio, Carnaroli, Venetian style asparagus risotto, wild asparagus
Adriatic Recipe, child friendly dish, child friendly meal, dinner, Easy recipe, family friendly dish, family friendly meal, first course, first course dish, first course meal, foraging, Healthy, healthy mael, Istrian cuisine, Istrian dish, Istrian food, Istrian gastronomy, light meal, main course, main dish, Nutritious, Nutritious dish, recipe from Northern Ital, Risotti, Rustic dish, Slovenian cuisine, Slovenian food, Slovenian gastronomy, Spring recipe, Starters, supper, Vegan, Vegetables, Vegetarian
Comment

Bread dumplings Recipe

Beans and Sardines
March 23, 2022 by tina oblak in Adriatic Recipe, Austrian inspired dishes, Autumnal dish, Autumnal recipe, casserole, Celebratory dish, Central European recipes, dinner, Dumplings, Eastern European dishes, Eastern European recipes, Easy recipe, Istrian cuisine, Istrian dish, Istrian food, Istrian gastronomy, main course, main dish, Mitteleuropean cuisine, Mitteleuropean dish, Mitteleuropean food, Mitteleuropean recipes, one pot meal, Rustic dish, Side Dishes, Slovenian cuisine, Slovenian food, Slovenian gastronomy, stew, supper, Vegetarian, Winter dish, Winter recipe, family friendly meal, child friendly meal, child friendly dish, family friendly dish

Bread dumplings are a real crowd pleaser, they are made from a mixture of stale bread soaked in milk and combined with fresh parsley, marjoram, onions, pancetta, beaten egg, seasoned with sea salt and black pepper, then formed into a ball shape and gently cooked in simmering water.

They can be easily turned into a vegetarian friendly option by simply omitting the meaty element and adding, if prefer, a bit of grated cheese, depending on your preference.

They are served as a perfect companion to stews, braised meats and roasted meats with a gravy. The idea behind these dumplings is to squash them with the fork, and this will soak up all the juices of whatever is accompanying them. In other words, it is an ideal side dish for almost anything that has some kind of sauce with it.

Bread dumplings with Venison stew

I simply love the recipes that provide some kind of a solution to the “problem” of avoiding food waste, and in this case the recipe is a brilliant side dish that uses - nothing more than stale bread as the key ingredient.

This is one of those recipes that you do not really need to plan since you can make bread dumplings when you simply end up with old bread and do not know what to do with it. If you have quite a bit of it to use up, then double or triple the ingredients since you can freeze a big batch of bread dumplings.

These rustic and elegant bread dumplings became a staple dish in a lot of cuisines of Eastern and Central Europe where stale bread has been very cleverly turned into a pure delicacy.

In Slovenia, where I was born and grew up, bread dumplings, called Kruhovi cmoki, have been so popular they almost became a national dish, and this recipe is most similar, or actually almost identical to the Austrian and South German( Bavarian) variety, where it is believed bread dumplings originated from, and are referred to as Semmelknödel.

There are a variety of bread dumpling recipes, for example, in the Czech Republic, fresh herbs, onions and the meaty element is not added to the bread mixture, which is also not shaped into small balls, but instead into a roll, then boiled and sliced.

Similar to bread dumplings are Canederli, found in Italy, in Trentino Alto Adige, an autonomous province of Italy, and in Austria, where small pieces of speck (lightly smoked cured meat) and cheese are added to the basic bread mixture, then they are shaped into small balls and typically cooked and served in hot beef or chicken broth.

This dish was one of my favourite dishes when I was a child, and it really does take me down memory lane. My mother would prepare them quite often, and I am sharing here her recipe, a typical Istrian variation of bread dumplings, in which fresh marjoram is added to the basic bread mixture.

Ingredients

Will make about 8 dumplings, depending on the size.

  • 310g roughly of stale bread (for this recipe I used 5 stale white baps)

  • 250-300ml milk (skimmed, semi skimmed or full fat)

  • 1 egg, beaten

  • 2 Tbsp olive oil

  • a handful of fresh flat leaf parsley (about 10g), finely chopped

  • 1 medium onion (about 100g), peeled and finely chopped

  • sea salt

  • ground black pepper

  • 40-50g sliced pancetta, cut into very small pieces (can use bacon or lardons), optional

  • 1 Tbsp fresh marjoram, very finely chopped, optional

  • all purpose flour (enough to coat the bread dumplings)

  • 1 Tbsp white dry breadcrumbs (only if needed)

Method

Cut or tear with your hands white baps (or any other type of stale bread you are using) into small pieces and put them in a fairly large bowl. Pour over the milk, mix well and leave to soak for about 20-30 minutes or until the bread is completely softened.

View fullsize Bread Dumplings 2.jpg
View fullsize Bread Dumplings 3.jpg

While the bread is soaking in milk, prepare the onion and pancetta mixture.

Put olive oil, finely chopped onions and small pieces of pancetta in a frying pan. Gently fry the mixture until the onions become nice and soft and transparent but not brown. Cool the pancetta and onion mixture and set aside.

View fullsize Bread Dumplings 4.jpg
View fullsize Bread Dumplings 5.jpg

Add to the bowl with the soaked bread, the beaten egg, onion and pancetta mixture, finely chopped parsley and marjoram and season with sea salt and black pepper.

With your hand(s) mix very well all the ingredients, almost using a squeezing action, to thoroughly combine the mixture. You should end up with a bread mixture that is soft, and with a fairly smooth consistency (if you end up with bigger bread pieces just break them with your fingers).

Adjust the mixture, adding a bit of breadcrumbs (and never the flour, as the mixture will get too sticky and will become unworkable), one tablespoon at the time, if the bread mixture is too wet.

On the contrary, if you feel the mixture is too hard and dry, add a bit of milk.

It is important to use a bit of personal judgment and intuition here. The idea behind this recipe is using the stale bread or a combination of different types of stale bread which will absorb a slightly different quantity of liquid, therefore the moisture of the bread mixture needs to be adjusted accordingly.

View fullsize Bread Dumplings 6.jpg
View fullsize Bread Dumplings 7.jpg

Wet you hands (this will prevent the dough to stick to your hands).

Take roughly a handful of the mixture and shape it into a compact ball, about the size of a tennis ball.

Repeat the process until you run out of the mixture.

Put some flour into a deep plate or a bowl.

Gently coat each dumpling into a flour and remove excess flour (this will prevent sticking).

View fullsize Bread Dumplings 8.jpg
View fullsize Bread Dumplings 9.jpg

Fill a large pot of water and bring to boil. Turn down the heat and leave the water to a gentle boil.

With a slotted spoon, drop one dumpling at the time in a simmering water and cook for about 15 minutes. Do not allow the dumplings to cook in a strong boiling water as they might loose the shape and fall apart.

Remove cooked dumplings with a slotted spoon and transfer onto a serving plate or directly on the plates, serve warm.

Just a thought

Bread dumplings are suitable for freezing.

You can freeze uncooked dumplings by freezing them individually first, and then transfer them into freezing bags or containers. Do not defrost the dumplings when you need them, just plop them frozen directly into a simmering water and cook them slightly longer, and they are cooked when they float on the surface.

Alternatively, you can freeze already cooked dumplings. Cool them first, freeze them individually and place in freezing bags or containers. When you want to use the dumplings, let them thaw first and then reheat covered, in order to get some steam, using a microwave works well.

You can “recycle” this dish even further, if you end up with some left over cooked dumplings, slice them up and fry the slices on both sides lightly in a frying pan with some butter or olive oil.

You really could not ask anything more from stale bread!

Wine suggestion

Alto Adige Schiava DOC "Menzen" 2020 - Colterenzio

March 23, 2022 /tina oblak
stale bread, old bread, dumplings, savory dumplings, Kruhovi cmoki, Semmelknödel, Canederli
Adriatic Recipe, Austrian inspired dishes, Autumnal dish, Autumnal recipe, casserole, Celebratory dish, Central European recipes, dinner, Dumplings, Eastern European dishes, Eastern European recipes, Easy recipe, Istrian cuisine, Istrian dish, Istrian food, Istrian gastronomy, main course, main dish, Mitteleuropean cuisine, Mitteleuropean dish, Mitteleuropean food, Mitteleuropean recipes, one pot meal, Rustic dish, Side Dishes, Slovenian cuisine, Slovenian food, Slovenian gastronomy, stew, supper, Vegetarian, Winter dish, Winter recipe, family friendly meal, child friendly meal, child friendly dish, family friendly dish

Venison Stew with red wine and fresh herbs - Istrian Recipe

Beans and Sardines
March 16, 2022 by tina oblak in Adriatic Recipe, Autumnal dish, Autumnal recipe, casserole, Central European recipes, dinner, Easy recipe, healthy mael, Istrian cuisine, Istrian dish, Istrian food, Istrian gastronomy, main course, main dish, main meat course, Meat, Mitteleuropean cuisine, Mitteleuropean dish, Mitteleuropean food, Mitteleuropean recipes, one pot meal, one pot meat recipe, Rustic dish, Slovenian cuisine, Slovenian food, Slovenian gastronomy, stew, supper, Winter recipe, Wild game meat, Game meat

Venison goulash is simply a lovely dish, perfect for colder days, and is very comforting and warming. It is slow cooked and braised for a long time with onions, garlic, fresh herbs, juniper berries, and red wine until the meat becomes so soft and tender it almost melts, and falls apart easily.

Venison meat, as it is very lean and low in saturated fat, works great in recipes requiring long cooking times which prevents drying the meat too much and helps to further develop the flavour.

Venison goulash is a great alternative to most common lamb or beef stews cooked on a more regular basis, and it is really super delicious as venison meat is packed with flavour because wild deer feed on apples, chestnuts, fruits, berries and acorns.

Venison Stew with Bread Dumplings

I am sharing here my paternal grandmother's recipe that has been in the family since .... forever. I grew up eating game meat that was provided very generously by my paternal grandfather's friends who were hunters. My nono, as I used to call him, would provide his hunter friends with a delicious extra virgin olive produced by him, and in exchange he would receive venison meat, an easy, uncomplicated trade, which everyone seemed to be happy with, especially the beneficiaries of the cooked venison goulash!

Ingredients

Serves 4-6

  • 1kg stewing venison (I used ready-cubed venison for stewing and a small shank)

  • 4 Tbsp olive oil

  • 1 medium size onion (about 180g), peeled and finely chopped

  • 2 big (or 4 small) cloves of garlic, peeled and crushed

  • 2 Tbsp tomato purée

  • 2 Tbsp all purpose flour

  • 100 ml red wine

  • 1 small whole carrot, peeled

  • few juniper berries (about 4), crushed

  • 1 sprig of fresh rosemary, made in bouquet garni or leaves picked and finely chopped

  • 1 bay leaf, fresh or dry, made in bouquet garni or just placed in a pot

  • few fresh sage leaves, made in bouquet garni or finely chopped

  • sea salt

  • black pepper, freshly ground

Method

In a large pot put the oil, finely chopped onions, a pinch of salt, and cook on a gentle heat, stirring quite often, until the onions are soft.

Add crushed garlic and cook for a further minute.

Add the venison meat, turn up the heat a bit and brown it and seal it on all sides, stirring and turning quite frequently.

Pour in the pot red wine and deglaze the pan, scrap with the wooden spoon all the bits and pieces that have stuck to the bottom of the pan.

Stir in the flour, add tomato purée, a carrot, juniper berries, bouquet garni or finely chopped herbs, sea salt and black pepper.

Add water, just enough to cover the meat, bring to boil, turn the heat down and gently simmer for about 2-3 hours, with the lid partially uncovered, or until the meat falls apart easily.

Keep an eye on the goulash during the simmering, and add splashes of water if you think it gets too thick and dry.

On the contrary, if you think the sauce is too thin, make a paste with some more flour and a bit of water, and add as much of the paste to venison goulash as needed to thicken the sauce.

Taste and adjust the seasoning with sea salt and black pepper.

Serve hot with some crusty bread, potato gnocchi, soft cooked polenta or grilled polenta, mashed, boiled or roasted potatoes, rice or with bread dumplings.

Just a thought

This is a great dish to make ahead of time and suitable for freezing.

If you have a bit of leftover goulash, shred the meat and use it as a venison ragù, delicious served with your favourite shape of pasta or potato gnocchi.

Wine suggestion

Teroldego Rotaliano DOC 2019 - De Vescovi Ulzbach

March 16, 2022 /tina oblak
Venison stew, slow cooked venison, braised venison, venison goulash, venison shank, cubed venison, venison for stewing, venison in red wine sauce, venison with fresh herbs, venison stew on a hob, juniper berries, jelenov golaz
Adriatic Recipe, Autumnal dish, Autumnal recipe, casserole, Central European recipes, dinner, Easy recipe, healthy mael, Istrian cuisine, Istrian dish, Istrian food, Istrian gastronomy, main course, main dish, main meat course, Meat, Mitteleuropean cuisine, Mitteleuropean dish, Mitteleuropean food, Mitteleuropean recipes, one pot meal, one pot meat recipe, Rustic dish, Slovenian cuisine, Slovenian food, Slovenian gastronomy, stew, supper, Winter recipe, Wild game meat, Game meat
1 Comment

Hungarian style Creamy Potato and Beef Goulash Soup Recipe

Beans and Sardines
February 23, 2022 by tina oblak in Appetizers, Autumnal dish, Autumnal recipe, casserole, Central European recipes, dinner, Eastern European recipes, Easy recipe, entrée course, main course, main dish, Mitteleuropean recipes, one pot meal, Slovenian cuisine, Slovenian food, Slovenian gastronomy, Starters, stew, supper, Vegan, Winter dish, Winter recipe, winter soup, Hungarian inspired dishes

This soup, warm, wholesome, and rich in flavour, can be used as a main meal, especially on those cold days when it will be much appreciated. It is made with only a few simple ingredients, and when cooked well and simmered slowly, it makes a perfect meal choice for body and soul, it is also quite filling, so there is no need to plan a main course.

This Hungarian soup, Gulyásleves, is generally made of beef, vegetables, ground paprika and other spices, but originates from a dish, a thicker stew (what is commonly known as beef goulash) that was cooked outside in the cauldron over an open fire, by the cattlemen, the Hungarian cowboys, who camped with their cattle in the Great Hungarian Plain.

This dish, although native to Hungary, became very popular in the countries around Hungary, which, like in most cases, gave a little twist to the original recipe, and is the origin of variety of new regional variations.

For example in Austria, where this dish is called Goulaschsuppe, it is common to cook this soup without its meat component, which makes a fantastic vegetarian and vegan friendly meal.

In Slovenia, where I come from however, this soup (called kromprjev golaž) which is a real crowd pleaser and became part of Slovenian food culture, testimony of the strong presence of the Austro-Hungarian Empire in the the territory, is almost always cooked with the meat component, where beef can be substituted by dry meats, i.e. some sort or sausages (smoked varieties are often used for a deeper, smokier, and more “imperial” flavour).

In Slovenia, like in Italy (mountainous parts of some regions like of Trentino-Alto Adige, Veneto and Friuli-Venezia Giulia bordering with Austria), this soup is generally served in the informal mountainside restaurants to the delight of hikers and skiers, as well as cooked in the households.

This seriously delicious one pot meal is quite nostalgic for me and reminds me of my childhood. It was served in the school canteens for lunch, and what were called 'dinner ladies, cooked the soup from scratch with fresh ingredients, and the aroma would travel around the school, into the classrooms, destructing the minds of us children struggling with some impossible maths sexercises, especially when approaching lunch time, when you could hear growling in the little tummies.

The soup would be followed by the Austrian inspired pudding, Buchteln, sweet yeast buns filled with apricot jam. This is the type of lunch, among many others, we children really looked forward to...

When I moved to England, goulash soup is one of those dishes, which for some strange reason has been a bit forgotten, and it was not until our skiing trip to Austria, when I saw this soup on the menu that all my childhood memories suddenly came back to me, this is what food does...

As soon as we got back to England I cooked this wonderful tasting goulash soup, it was a hit. I have been making it on a regular basis since then, and I will most definitely make sure this time it stays on the menu.

It is just so hearty, comforting and cosy, the whole family loves this one pot soup and it is cooked very often for my husband and my son who simply adore it. When I serve it, we get transported to the skiing memories we created together as a family, and the table conversations would start ....

I am sharing here a family recipe how my maternal grandmother used to make it, and how my mother still makes it. If you never had this soup before, try it and it will become one of your favourites, and all you need to serve the soup with is a nice rustic bread to dunk it, yes .... this is 'home' for me...

Ingredients

Serves 4

  • 4 Tbsp extra virgin olive oil

  • 3 medium size potatoes (about 500g) peeled and chopped into small cubes

  • 1 onion (about 120g) peeled and finely chopped

  • 1 clove of garlic, peeled and crushed

  • 2 Tbsp Hungarian sweet paprika

  • 2 Tsp red or white wine vinegar

  • 2 Tbsp tomato purée

  • 1 Tsp fresh marjoram (a few springs) finely chopped, (can use dry marjoram)

  • 3 Tsp caraway seeds, crashed with mortar and pestle (can use spice or coffee grinder)

    whole caraway seeds can be used if you have none of the above ways to ground the seeds

  • 400-500g braising steak or shin of beef, trim any hard fat off the beef and dice finely

  • sea salt

  • black pepper, freshly ground

  • 2 fresh or dry bay leaves

  • 2l water or vegetable stock

  • sour cream (optional)

  • fresh flat leaf parsley, roughly chopped, for garnish (optional)

Method

Put the oil in a fairly large pan, add chopped onions, crushed garlic, a pinch of salt and gently sauté until the onions are soft and translucent.

Pour wine vinegar and cook for a minute or so stirring the onion and garlic mixture. The vinegar will help to deglaze and release any bits stuck to the bottom of the pan.

Add diced beef and continue to cook, turning and stirring regularly, until the meat is nicely browned on all sides.

View fullsize Goulash soup 4.jpg
View fullsize Goulash soup 5.jpg

Add cubed potatoes and cook briefly for a few minutes together with meat and onions mixture.

View fullsize Goulash soup 7.jpg
View fullsize Goulash soup 8.jpg
View fullsize Goulash soup 9.jpg
View fullsize Goulash soup 10.jpg

Add paprika, tomato purée, fresh or dry marjoram, crushed caraway seeds and bay leaves, sea salt and black pepper.

Add water or vegetable stock, bring to a boil.

View fullsize Goulash soup 11.jpg
View fullsize Goulash soup 12.jpg
View fullsize Goulash soup 13.jpg
View fullsize Goulash soup 14.jpg

Cover with the lid and simmer on a gentle heat for about 2 hours. After this time, the soup will become slightly thicker and the meat will become so tender it will just melt in your mouth.

To make the goulash soup slightly “creamier” in consistency, you can press with a fork few cubes of potatoes on the side of the casserole pan and give it a good stir.

Taste and adjust the seasoning with sea salt and black pepper and add more paprika to your liking, if you wish.

Serve hot with a spoonful of sour cream, if desired, sprinkle some roughly chopped fresh parsley for garnish and a bit more paprika. Place some crunchy rustic bread on the table to dunk in the goulash soup and life just cannot get any better.

Just a thought

Double the amount of the ingredients in the recipe, if serving for 6-8 people or, if you wish to make a bigger batch and freeze.

Like most stews and soups, this goulash soup is best made in advance, as it tastes better every time you reheat it.

Wine suggestion

Vigneti delle Dolomiti Rosso IGT "Fojaneghe" 2015 - Bossi Fedrigotti, Masi

February 23, 2022 /tina oblak
potatoes, beef, stewing beef, shin of beef, caraway seeds, paprika, sweet Hungarian paprika, Gulyásleves, Goulaschsuppe, kromprjev golaž, Goulash soup, Goulash soup without meat, Hungarian beef and potato stew
Appetizers, Autumnal dish, Autumnal recipe, casserole, Central European recipes, dinner, Eastern European recipes, Easy recipe, entrée course, main course, main dish, Mitteleuropean recipes, one pot meal, Slovenian cuisine, Slovenian food, Slovenian gastronomy, Starters, stew, supper, Vegan, Winter dish, Winter recipe, winter soup, Hungarian inspired dishes
Comment

Braised Fennel Istrian Recipe

Beans and Sardines
February 09, 2022 by tina oblak in Adriatic Recipe, Autumnal dish, Autumnal recipe, brunch, Central European recipes, Easy recipe, Healthy, healthy mael, Istrian cuisine, Istrian dish, Istrian food, Istrian gastronomy, main dish, Nutritious, Nutritious dish, Rustic dish, Side Dishes, Slovenian cuisine, Slovenian food, Slovenian gastronomy, supper, Vegan, Vegetarian, Winter recipe, Vegetable side dish, Vegetables, Root vegetables

Braised fennel is made with fresh fennel bulbs, a humble and very often underrated and forgotten vegetable, and if you were ever put off by maybe a slightly “assertive” liquorice taste of a raw fennel, try this dish, it is like eating a completely different vegetable.

Fennel, during braising process, becomes mellow and sweet, very tender, and develops soft and mild aniseed and slightly caramelized flavour, sincerely gorgeous!

For this dish, perhaps, we can apply the famous saying “do not judge the book by its cover.”

With its appearance, maybe it does not belong to the privileged club of the most appealing looking dishes, but the taste of braised fennel is simply luxurious and elegant, worthy to be served as a part of Sunday roast.

Back home, on the Slovenian coast, where I come from, braised fennel is a very popular, very much loved dish and served with dignity for a simple midweek lunch or dinner.

Here I am sharing my mother's recipe for a traditional and regional braised fennel recipe. Try it, and next time you are shopping for your vegetables, you will be reaching out for fresh fennel...

Ingredients

Serves 4 as part of meal

  • few fresh fennel bulbs (1200g approximately)

  • 5 Tbsp extra virgin olive oil (the best you can afford)

  • sea salt

  • black pepper

  • fresh flat leaf parsley, roughly chopped

  • 100ml water or vegetable stock

Method

Wash fennel bulbs under cold running water and dry them with clean kitchen paper or towel. Place the bulbs on the chopping board and trim the hard hollow stalks which are quite tough and very fibrous. You can discard the stalks or put in the compost, or trim the stalks, cut them into pieces and use them instead of, or as an addition to the celery in soups and stews, or use them as a bed for roasted chicken, or other meats, and roasted fish.

Cut the feathery fronds from the stalks, you can use these as a garnish for this dish, or as a herb to make others dishes. Trim off the root end of the the bulb (the base of the fennel bulb) and cut it into wedges.

View fullsize Braised fennel 4.jpg
View fullsize Braised fennel 3.jpg

The layers may separate and fall apart, do not worry, this is normal.

Put extra virgin olive oil in a large frying pan, preferably non stick, and heat it up a bit.

Place the fennel wedges into a pan.

Add a pinch of sea salt and sauté for few minutes on a fairly high heat, stirring occasionally, until golden brown in colour.

View fullsize Braised fennel 7.jpg
View fullsize Braised fennel 8.jpg

Add 100ml of water, black pepper, lower the heat to fairly low, cover with the lid.

Cook on a gentle heat for about 40 minutes, then uncover the lid.

Turn the heat to medium and cook further uncovered until all the water evaporates.

At this stage the fennel might catch a bit and turn slightly mushy, oozy and creamy in the middle.

Taste and adjust the seasoning with sea salt and black pepper.

View fullsize Braised fennel 9.jpg
View fullsize Braised fennel 10.jpg

Add a sprinkle of fresh chopped parsley for extra flavour and some fennel fronds for garnish.

Serve hot or at room temperature.

Just a thought

This dish freezes very well, so it might be a good idea to cook in bigger quantities when the fennel is in season and freeze it.

February 09, 2022 /tina oblak
Fresh fennel, Fresh fennel bulb, Fennel bulb, Braised fennel, Slow cooked fennel, Fennel cooked in frying pan, Braised fennel with fresh parsley, Fennel fronds, Braised fennel garnished with fennel fronds
Adriatic Recipe, Autumnal dish, Autumnal recipe, brunch, Central European recipes, Easy recipe, Healthy, healthy mael, Istrian cuisine, Istrian dish, Istrian food, Istrian gastronomy, main dish, Nutritious, Nutritious dish, Rustic dish, Side Dishes, Slovenian cuisine, Slovenian food, Slovenian gastronomy, supper, Vegan, Vegetarian, Winter recipe, Vegetable side dish, Vegetables, Root vegetables
1 Comment

Green Split Peas Soup Istrian Recipe

Beans and Srdines
January 19, 2022 by tina oblak in Adriatic Recipe, Appetizers, Autumnal dish, Autumnal recipe, brunch, dinner, entrée course, healthy mael, Istrian cuisine, Istrian dish, Istrian food, Istrian gastronomy, main course, main dish, Nutritious dish, one pot meal, Rustic dish, Slovenian cuisine, Slovenian food, Slovenian gastronomy, Soups, Starters, supper, Vegan, Vegetarian, Winter dish, winter soup

This comforting, filling and hearty soup is a perfect winter warmer, incredibly easy to make, super delicious in its simplicity, and once you try it, you will add it to your soups recipe collection!

Split peas are quite different from their fresh counterpart, they are a specific kind of field pea, which are dried in order to be stored for a longer period. They are called split peas because after the outer hull is removed the peas are then split in half along a natural seam.

This wonderful soup is protein packed and here I am sharing my nona's recipe. For her, this dish represents a good “old fashioned” basic recipe and is a real staple in the gastronomic repertoire since she learned to make this soup from her grandmother, and so this is a very old family recipe.

She told me that when she was a child, this soup was very often on the tables, as it is a a traditional and classic soup made in Slovenian Istra, where locals refer to it in dialect as Maneštra iz biži špakaj while in standard Slovenian is called Mineštra iz suhega graha.

My nona also shared with me that when she was small, most of the ingredients were home made but this is not the case for dried green split peas, they were bought at the local food market or in a small family run food shop, since for both types of local businesses it was a crucial time for the local microeconomy.

This soup is normally home made and not typically found on the menus in the restaurants.

Try this very tasty one pot soup, and you will think twice before you open a can of soup bought in the supermarket!

Ingredients

  • 500g green split peas, soaked for about 8 hours or overnight

  • 1 medium potato (about 200g), peeled and roughly diced

  • 1 medium onion (about 100g), peeled and roughly chopped

  • few celery leaves

  • fresh flat leaf parsley, a handful (about 10g), roughly chopped

  • 1 small carrot (about 50g), peeled and finely grated

  • tip of fresh or dry bay leaf

  • 4 Tbsp extra virgin olive oil

  • sea salt

  • ground black pepper

  • 2l cold water

Method

Place dried green split peas in a bowl, cover completely with plenty of cold water and soak for about 8 hours or overnight.

Drain soaked peas in a colander and rinse with cold running water.

Transfer soaked peas in a soup pot and add peeled and roughly diced potato, peeled and roughly chopped onion, few celery leaves, roughly chopped parsley, peeled and finely grated carrot, tip of fresh or dry bay leaf, extra virgin olive oil, pinch of sea salt and ground black pepper.

Add 2 litres of cold water and bring to boil.

View fullsize Green split peas soup 5.jpg
View fullsize Green split peas soup 6.jpg

Turn the heat down, partially cover with the lid and gently simmer for about 1 ½ - 2 hours or until the peas are completely tender and disintegrated. Stir occasionally to avoid peas sticking to the bottom of the pan.

Taste and adjust the seasoning with sea salt and black pepper and fish out the tip of bay leaf.

View fullsize Green split peas soup 7.jpg
View fullsize Green split peas soup 8.jpg

You can serve this soup as it is with a bit of texture or if you prefer a creamier texture purée the soup using an immersion blender (like I did for this recipe) or a regular blender.

For a smoother texture you can also use food mill or pass the puréed soup through a sieve which will result in an exceptionally smooth soup.

The soup should generally have a nice thickish consistency, but not too thick, in which case, dilute it adding a bit of water.

This soup is great served hot with some bread croutons, roughly chopped parsley and a drizzle of extra virgin olive oil.

Traditionally it is served with small shaped pasta (ditalini, stelline, orzo, ect.) or rice, both cooked previously and separately and then added to the soup.

Just a thought

This soup is great made in advance and freezes very well.

Wine suggestion

Alto Adige Valle Isarco Sylvaner DOC 2020 - San Michele Appiano

January 19, 2022 /tina oblak
green split peas, dried split green peas, dried split peas creamed soup, cream of green split peas soup, Maneštra iz biži špakaj, Mineštra iz suhega graha
Adriatic Recipe, Appetizers, Autumnal dish, Autumnal recipe, brunch, dinner, entrée course, healthy mael, Istrian cuisine, Istrian dish, Istrian food, Istrian gastronomy, main course, main dish, Nutritious dish, one pot meal, Rustic dish, Slovenian cuisine, Slovenian food, Slovenian gastronomy, Soups, Starters, supper, Vegan, Vegetarian, Winter dish, winter soup
Comment

Sautéed Savoy Cabbage with potatoes, garlic and olive oil Istrian Recipe

Beans and Srdines
December 27, 2021 by tina oblak in Adriatic Recipe, Autumnal dish, Autumnal recipe, brunch, Central European recipes, Christmas dish, dinner, Easy recipe, Festive dish, Healthy, healthy mael, Istrian cuisine, Istrian dish, Istrian food, Istrian gastronomy, Nutritious dish, Rustic dish, Side Dishes, Slovenian cuisine, Slovenian food, Slovenian gastronomy, supper, Vegan, Vegetarian, Winter dish, Winter recipe, one post fish recipe

Let's face it, not a lot of people I know will get particularly excited about the cabbage, but slowly cooked down and sautéed savoy cabbage with delicate boiled potatoes, fragrant garlic, excellent olive oil and seasoned well with sea salt, will most certainly made up in the taste for what maybe lacks in appearance. This comforting and rustic vegetable side dish is simply delicious, trusted and reliable gastronomic companion to just about any meat dish, very easy to prepare, healthy, nutritious and inexpensive.

When savoy cabbage is cooked well with just a few excellent quality and fresh ingredients tastes nothing like you imagine, and it might convert the most austere cabbage 'dislikers'. This recipe can become a new classic cabbage dish for your family, changing what they have in mind when thinking about cabbage - if they ever even think about cabbage! This recipe completely changes the taste and texture of the cabbage, and it becomes “sweet”, soft, and ever so slightly mushy and velvety in a pleasant way.

I have never thought about this aspect of the dish, nor have I ever been bothered about it, as I grew up with it and have always been fully aware of the reward you get on the palate when it is cooked properly.

This dish is deeply rooted in Slovenian Istra, and is one of the most traditional dishes to be cooked as part of everyday family meals during autumn and winter when savoy cabbage is in full season and is most full of flavour. When it tastes at its best, it takes nothing less than the central place on dining tables, and as tradition wants, especially on Christmas Eve, together with salted cod spread and fritole (Istrian small doughnuts).

It is during these colder months of the year that my mother and most other households would prepare this side dish. My brother and I have always found this dish somehow reassuring, we would eat it paired with breaded, pan fried chicken escallops or pork Wiener schnitzel, which is one of the most common ways of serving it.

If there were any leftovers, my mother would reheat them, and they would be served with fried eggs - no waste, no hassle, and another meal sorted, and so happy children, and also happy, or relieved mom!

This recipe is normally made with freshly cooked cabbage and potatoes but it is made, and it can be made, using left over cooked cabbage and boiled potatoes which is a fantastic way to reduce food waste.

If you are one of those cabbage non-lovers, and managed to read up to this point about my enthusiasm for this humble vegetable, I warmly invite you to try this recipe, you might have a revolutionary moment and convert, this dish might just become one of your favourite autumn/winter vegetable side dishes.

I am sharing here my family recipe, give it a chance to see how nice it tastes

Ingredients

Serves 4 as part of meal

  • 1 savoy cabbage, cored and roughly chopped

  • 2 medium size potatoes (about 380g), peeled and cubed

  • 2 cloves of garlic, peeled and cut lengthwise

  • 6 Tbsp extra virgin olive oil (the best quality you can afford)

  • sea salt

  • ground black pepper, optional

Method

Cut up the savoy cabbage into quarters, remove core, cut roughly into smaller pieces and wash thoroughly

Peel the potatoes, cut into cubes and wash under cold running water.

Place both cabbage and the potatoes in a fairly big pot and add water to completely cover.

Bring to boil, turn the heat down, add a pinch of salt and cook for about 8-10 minutes or until potatoes and cabbage are cooked but still a bit firm.

View fullsize Savoy cabbage 4.jpg
View fullsize Savoy cabbage 5.jpg

When cooked, drain in a colander and leave for a few minutes so the extra water can drain well.

Put the extra virgin olive oil and the garlic in a pan (you can use the same pan that you cooked the cabbage and potatoes in, just dry it well) or use a skillet.

Cook the garlic in the oil until golden in colour allowing to flavour the oil, then remove and discard the garlic.

Add potatoes and the cabbage to the pan or skillet and cook down for about 20 minutes on a gentle heat stirring occasionally until a nice soft and velvety consistency.

While cooking, break the potatoes a bit with a back of wooden spoon or a fork but do not mash it completely.

Taste and adjust the seasoning with sea salt and add ground black if using.

Serve hot immediately.

Just a thought

This side dish will keep very well in fridge in the airtight container for a few days. Reheat well before serving warm.

Not particularly suitable for freezing.

December 27, 2021 /tina oblak
savoy cabbage, royal cabbage, vrzota s krompirjem, verza e patate
Adriatic Recipe, Autumnal dish, Autumnal recipe, brunch, Central European recipes, Christmas dish, dinner, Easy recipe, Festive dish, Healthy, healthy mael, Istrian cuisine, Istrian dish, Istrian food, Istrian gastronomy, Nutritious dish, Rustic dish, Side Dishes, Slovenian cuisine, Slovenian food, Slovenian gastronomy, supper, Vegan, Vegetarian, Winter dish, Winter recipe, one post fish recipe
Comment

Barley, potato and borlotti beans Istrian soup Recipe

Beans and Sardines
December 01, 2021 by tina oblak in Adriatic Recipe, Appetizers, Autumnal dish, Autumnal recipe, Central European recipes, dinner, Eastern European recipes, Easy recipe, entrée course, healthy mael, Istrian cuisine, Istrian dish, Istrian food, Istrian gastronomy, main course, main dish, Nutritious dish, one pot meal, Rustic dish, Slovenian cuisine, Slovenian food, Slovenian gastronomy, Soups, Starters, stew, supper, Vegan, Vegetarian, Winter dish, Winter recipe, winter minestrone, winter soup

This hearty and filling one pot barley soup is a traditional soup from Slovenian Istra, a perfect choice to warm you up on a cold day, delicious in its simplicity, and it could not be easier to make.

Barley soup is a very popular choice in many households and is found on the menus as Ječmenova mineštra in more rustic, informal, mountainside, and family run restaurants.

Barley soup together with other types of soups like Jota (sauerkraut, borlotti beans and potato stew), Bobići (Sweet corn soup), Pasta e fasoi (Pasta and borlotti beans soup) play an incredibly important role in Istrian cooking as the soups were eaten as a main dish and sometimes the only hot meal of the day. The choice of the ingredients to make mineštre/maneštre (Istrian dialect word, from Italian minestra, indicating thicker soup) would rely exclusively on the type of vegetables and pulses that were available during a particular season.

Barley soup is traditionally made during colder autumn and winter months using dry borlotti beans, potatoes and barley that were harvested by the end of summer and autumn and appropriately stored to be used later in the year when the cold weather did not allow you to grow a vast array of vegetables, unlike during the spring, when it was warmer, and you could grow them in abundance to make even a lighter Minetrone Primavera.

In Slovenian Istra it is very common to put in some soups, besides different pork cuts, dried ham bone or pešto or taca (smooth paste made with pancetta, crushed garlic and very finely chopped parsley) to boost the flavour of the dish.

Traditionally this recipe calls for some unsmoked or smoked pork meat cuts to be added to the soup however you can turn this soup into a vegetarian and vegan friendly dish by simply leaving out the meaty component.

This family recipe really goes back generations. I am sharing with you the recipe for barley soup from my paternal nona's grandmother.

Ingredients

Serves 8-12

  • 300g dried borlotti beans, soaked overnight

  • 300g pearl barley

  • 500g roughly of pork ribs, ham hock, pig trotters or similar (slab of pancetta or bacon, about 130g). You can use smoked version of the meats if you prefer a slightly deeper smoky flavour or a combination of both.

  • 2 medium size potatoes (about 300g), peeled and cubed

  • leaves from 2-3 sticks of celery

  • 1 medium size onion (about 130g), finely chopped

  • 1 clove of garlic, peeled and crushed

  • 1 medium size carrot (about80g) peeled and finely grated

  • handful of fresh flat leaf parsley (about 15g) finely chopped

  • 1 bay leaf, fresh or dry

  • sea salt

  • black pepper

Method

In a fairly big stock pot place all the ingredients, except the sea salt and black pepper, add 4 ½ litres of cold water and bring to boil.

Turn the heat down and skim the surface as needed.

Cover partially with the lid and cook the soup on a gentle heat for about 1h ½.

View fullsize Barley soup 2.jpg
View fullsize Barley soup 3.jpg

After this time the soup should have a nice thicker velvety consistency as the potatoes and the barley release the starch. If the soup gets too thick simply dilute it with a bit of water.

Season with sea salt and black pepper, taste and adjust the seasoning.

Just a thought

Barley soup will keep well in a fridge for few days and is suitable for freezing.

Wine suggestion

Search results for 'Refosco dal Peduncolo Rosso DOC "Villa Locatelli" 2019 - Tenuta di Angoris

December 01, 2021 /tina oblak
barley soup, barley, potato and borlotti beans soup, barley minestrone, barley potato and borlotti beans minestrone, one pot barley soup, Istrian barley soup, Istrian barley minestrone
Adriatic Recipe, Appetizers, Autumnal dish, Autumnal recipe, Central European recipes, dinner, Eastern European recipes, Easy recipe, entrée course, healthy mael, Istrian cuisine, Istrian dish, Istrian food, Istrian gastronomy, main course, main dish, Nutritious dish, one pot meal, Rustic dish, Slovenian cuisine, Slovenian food, Slovenian gastronomy, Soups, Starters, stew, supper, Vegan, Vegetarian, Winter dish, Winter recipe, winter minestrone, winter soup
Comment

Bleki – Fresh Istrian pasta Recipe

Beans and Srdines
November 25, 2021 by tina oblak in Adriatic Recipe, dinner, Easy recipe, entrée course, Istrian cuisine, Istrian dish, Istrian food, Istrian gastronomy, main course, main dish, Pasta, Rustic dish, Slovenian cuisine, Slovenian food, Slovenian gastronomy, Starters, supper, Fresh pasta, Egg based pasta

Bleki are one of the typical Istrian square shaped fresh pasta, similar to Italian Maltagliati. They are normally home made and hand rolled with a wooden rolling pin, but these days the pasta machine is often used instead.

The squares are traditionally cut from lasagna pasta sheets by hand with a sharp knife or with a fluted pastry wheel for a sightly more “modern”and decorative touch.

Due to its shape and thickness (bleki are slightly thicker compared to other types of pasta made from regular thin pasta lasagna sheets). This type of pasta is very pleasant to eat because when bleki are cooked they almost have a texture of a dumpling.

Bleki, this simple pasta, truly reflects the peasant life in Istria and represents real home rustic cooking. Bleki are very easy to make and if you have never made fresh pasta yourself at home and have been always temped, but find the task quite daunting, this is a perfect recipe to start with.

Traditional Istrian pasta holds a special place in Istrian gastronomy among other original dishes, and

changed its form and name through the journey from Italy to Istria.

There are two variations of bleki, the first made with white flour, pinch of sea salt and water. Bleki made like this are usually added to soups, like a typical Pasta e fasoi (Pasta and beans soup), to give soups thickness and velvety texture, as fresh pasta during cooking process releases the starch.

The second variation is often made with eggs, if a local family has a few chickens, so if you prefer egg-based pasta, and don’t raise your own chickens, you can buy organic eggs, or use ordinary eggs to make the pasta. However, traditionally, this egg based Bleki would only be made for special occasions like weddings, major holidays, special Sunday lunch, and other special events, as it was traditionally paired, and still is, with chicken or rabbit goulash, meat dishes equally reserved for celebratory occasions.

My paternal nona shared with me that bleki in her village and the surrounding area would be called blečiċi which is a diminutive and affectionate version of the word for bleks, which means krpica in standard Slovenian, indicating a small piece of cloth.

This type of pasta really represents a true gastronomic osmosis between Istria and Friuli, the most north-eastern region of Italy, where bleki are called blecs or referred to as biechi and are often made with a mixture of white flour and buckwheat flour.

This much loved pasta could be sometimes found on the menus in local family run restaurants on both sides of the border, but unfortunately not as frequently as a special dish of the day as I would have liked.

However, keep in mind that Bleki is a type of pasta that is made and consumed on the same day, and is not suitable for drying.

Ingredients

Serves 4-6

  • 400 g 00 pasta flour

  • 4 large free range or organic eggs

  • pinch of sea salt

Method

Place the flour directly on a working surface, wooden board or mixing bowl and make a well in the centre.

Crack the eggs directly into a well and add a pinch of salt.

Using a fork, mix the eggs with the flour, incorporating a little at a time, until everything is combined. At this stage you will end up with pieces of dough. Just keep working it until it comes together. You will get at first a rough and floury dough.

Start kneading the dough, which at first may feel a little dry, and at this stage you might think the recipe has go wrong. It could take around 10 min of kneading for the gluten to develop in the flour and to get a smooth lump of dough.

View fullsize Bleki 2.jpg
View fullsize Bleki 3.jpg

Wrap dough tightly with cling film or a clean cotton kitchen cloth and let it rest at the room temperature for about 30 minutes.

Unwrap the dough and cut it in half. Cover the half of the dough that you are not working with, with cling film to prevent it from drying and cracking.

With your hands flatten the other half of the dough to a thickness of about 0.5cm and lightly dust with flour as need it to prevent sticking.

Put the flattened half of the dough through pasta machine on the widest setting.

Fold the dough in half, keep rollers on the widest setting, and reroll the dough.

Flour as needed to prevent sticking, and keep rolling pasta dough through pasta machine reducing the width of rollers one setting at a time.

Continue rolling until pasta dough has been rolled through second thinnest setting.

View fullsize Bleki 4.jpg
View fullsize Bleki+5.jpg

Repeat the same process with the other half of pasta dough.

At this stage you should end up with a few pasta (lasagna) sheets. Place them on a lightly floured surface.

View fullsize Bleki+6.jpg
View fullsize Bleki+7.jpg

With a sharp knife (traditionally done) or fluted pastry cutter, cut pasta sheets into squares.

Place bleki on a lightly floured wooden board or baking tray making sure the pasta squares are dusted between the layers.

Pasta is ready to be cooked immediately, alternatively cover bleki well with cling and chill until ready to use, more or less up to four hours.

View fullsize Bleki+8.jpg
View fullsize Bleki 9.jpg
View fullsize Bleki 10.jpg
View fullsize Bleki+11.jpg

Just a thought

Normally, about 80-100g of pasta per person, with your choice of sauce will make a quite substantial plate of meal. If using pasta as a starter reduce the amount of pasta to 50-60g.

November 25, 2021 /tina oblak
bleki, traditional Istrian fresh pasta, Istrian pasta, bleks, blečiċi, blecs, biechi, eggs based fresh pasta, fresh pasta without eggs
Adriatic Recipe, dinner, Easy recipe, entrée course, Istrian cuisine, Istrian dish, Istrian food, Istrian gastronomy, main course, main dish, Pasta, Rustic dish, Slovenian cuisine, Slovenian food, Slovenian gastronomy, Starters, supper, Fresh pasta, Egg based pasta
Comment

Green Beans simple salad Recipe

Beans and Sardines
November 23, 2021 by tina oblak in Adriatic Recipe, Appetizers, Autumnal dish, Autumnal recipe, dinner, Easy recipe, healthy mael, Istrian cuisine, Istrian dish, Istrian food, Istrian gastronomy, Nutritious dish, Rustic dish, Side Dishes, Slovenian cuisine, Slovenian food, Slovenian gastronomy, Small bites, Starters, supper, Vegan, Vegetarian, Salads

This Green Bean salad is one of the quickest side dishes you can prepare using only four ingredients. It is incredibly simple to make, as the beans, after being cooked and still warm get tossed in delicious extra virgin olive oil and sliced garlic.

This salad, using fresh green beans, when they are in season, is an excellent choice to accompany almost any meat or fish dish.

In this recipe I slice the garlic, since this allows the option to remove it easily if someone would only like a hint of garlic flavour without a stronger one, even though traditionally the garlic is very finely chopped.

Best served still warm or at room temperature and in the summer is very refreshing dish taken out of the fridge.

This side dish is a perfect example of simplicity at its best and it has been with me as long as I can remember.

I am sharing here how it has been prepared in my family.

Ingredients

Serves 4 as part of meal

  • 500g fresh green beans

  • 3 Tbsp extra virgin olive oil (the best you can afford)

  • 1 Tbsp red or white wine vinegar (can use balsamic vinegar)

  • 1 clove of garlic(peeled and crushed or very finely sliced or chopped) You can replace garlic with finely sliced onion.

Method

Trim the stalk ends off the beans, place them in a colander and wash well with cold running water.

Place the beans in a pan with boiling unsalted water and cook the beans for about 15 minutes or just until al dente (tender but still with a bit of bite).

Drain well and place the beans in a large bowl. Add a pinch of sea salt, extra virgin olive oil, sliced, chopped or crushed garlic and toss well. Taste and adjust the seasoning.

Serve and enjoy!

November 23, 2021 /tina oblak
fresh green beans, simple salad, simple green beans salad
Adriatic Recipe, Appetizers, Autumnal dish, Autumnal recipe, dinner, Easy recipe, healthy mael, Istrian cuisine, Istrian dish, Istrian food, Istrian gastronomy, Nutritious dish, Rustic dish, Side Dishes, Slovenian cuisine, Slovenian food, Slovenian gastronomy, Small bites, Starters, supper, Vegan, Vegetarian, Salads
Comment

Jota – Sauerkraut, beans and potato stew Istrian Recipe

Beans and Sardines
November 10, 2021 by tina oblak in Adriatic Recipe, Central European recipes, dinner, Eastern European recipes, Easy recipe, entrée course, healthy mael, Istrian cuisine, Istrian dish, Istrian food, Istrian gastronomy, main course, main dish, Mitteleuropean recipes, Nutritious dish, one pot meal, recipe from Northern Ital, Rustic dish, Slovenian cuisine, Slovenian food, Slovenian gastronomy, Soups, Starters, stew, supper, Vegan, Vegetarian, Autumnal recipe, Autumnal dish, Winter recipe, Winter dish

Jota, pronounced 'yota,' is a very old recipe for a stew made of sauerkraut, dried borlotti beans, potatoes and some kind of pork cuts. It is believed that the word jota derives from Celtic word “jutta” indicating a liquidy soup.

Jota is filling and makes a perfect choice for a comfort food when the first cold starts as it will warm your body and soul. It is really easy to make, healthy, inexpensive, and it has become a staple and much loved dish in Slovenian households. Jota, being also very nutritious, is served in nurseries, schools, care homes for elderly, and family run informal restaurants, as well as being one of the most requested dishes from hikers and skiers in mountainside restaurants.

This hearty stew is incredibly humble and proper peasant food as it was born out of necessity and from what was available. My paternal nona told me that most of the households in the countryside, where she was growing up (a little village called Marezige just a few kilometres from the coastal town Koper), would have a wooden barrel of home made sauerkraut, sacks of potatoes and dried borlotti beans, and if you were lucky enough, a pig or a few pigs that would eventually get slaughtered and provided a very precious meat. The better cuts of pork meat were used for drying and curing and for what was considered a very rare and luxurious roasts while less prestigious cuts were put in soups and stews to enrich the flavour.

This very poor dish comes from the region of Primorska near the Adtriatic Sea and it is considered a quintessentially, one of the most famous Istrian peasant dishes, also enormously popular in Trieste and province of Trieste in Italy.

According to Anna Gosetti della Salda, in her book, Le ricette regionali Italiane, Jota (or Jote) was widely made over the whole region of Friuli (Italy), the area bordering with Slovenia, but towards the end of last century the use of jota was limited almost exclusively to the Valli di Gorto and Pesarina in Carnia.

The use of sauerkraut in all these regions, referred to as kapus in the Istrian dialect, is a testimony to how strongly the Austro-Hungarian Empire influenced the dishes in these areas.

Like with most dishes in the culinary world, it is no surprise that there are some variations in the recipe for Jota as well. The most common variation of Jota is without potatoes, and instead, a bit of flour is used to thicken the soup, and another common variation is making jota using sour turnip (called kisla repa in Slovenian).

In some variations, also used by both my mother and my nona, besides the use of different pork cuts, pešto or taca (smooth paste made with pancetta, crushed garlic and fresh, very finely chopped parsley) would be used. This was done, once again, to boost the flavour of the dish.

In some parts of Slovenia that are geographically closer to Hungary, a small quantity of powdered smoked sweet Hungarian paprika will be added to jota.

Before serving this sauerkraut stew, different cuts of pork, that have been cooked in jota, are removed from the bone, sometimes shredded and then returned and mixed into a soup. It is also very common to remove the meats from the soup and serve it later as a separate course.

Different cuts of pork can be used to enrich the flavour of this stew, but it is equally delicious without the meaty element and so it makes a lovely vegetarian and vegan meal.

My nona also “jokingly” shared with me, that to make a really good jota you need three days. The first day for soaking the beans, the second day for cooking Jota and the third for eating it, and enjoying it after it has rested, and all the flavours had a chance to fully develop. It is up to you whether you want to follow my nona three day rule.

I do, no wonder it turns out delicious...

Here I am sharing my family recipe for jota.

Ingredients

Serves 6-8

  • 300g dry borlotti beans, soaked overnight or least for 4 hours

  • 650g -1kg sauerkraut, drained and rinsed

    (I am giving you an approximate amount of sauerkraut to be used in this recipe as it can be flexible. The amount you use will depend on what you can find in your local food store. Sauerkraut is normally sold in either glass jars or sometimes in sealed plastic bags and they will indicate on the label both total net weight (with the liquid) and drained weight, and the latter is the weight you need to look for.

  • For this recipe I bought a glass jar of sauerkraut with total weight of 680g and 650g drained weight which is the amount of sauerkraut I used for the soup).

  • 2 bay leaves, fresh or dry

  • 500g or more, pork ribs (can use ham hocks or similar)

  • 100-200g g smoked bacon lardons (can use smoked cubed pancetta, a slab of bacon or pancetta, chopped strips of smoked bacon or similar)

    (The use of combination of smoked and unsmoked meat element is quite important, as it really gives that traditional and typical Jota flavour, but it is also very flexible. You can, if you prefer, only use unsmoked meats or all smoked for a deeper smoky flavour. Traditionally a bone or outer rind of dry cured ham would be used in order not to waist anything, and it is also packed full of flavour.

  • few black peppercorns, 4-6

  • 2 cloves of garlic, peeled and crushed

  • 3 fairly big potatoes about 600-800g, peeled and cubed

  • 2 Tbsp extra virgin olive oil

  • 2 tbsp tomato paste (optional)

  • sea salt

Method

There are three simple stages to make jota.

Stage 1

Drain previously soaked beans in a colander, rinse with cold running water and drain again.

Transfer the beans to a very big pot (5 litre at least, where jota will be cooked), add the meats, bay leaf and 5 litre of cold water. Bring to boil over high heat, turn the heat down to a medium low and cook the beans, partially covered with the lid for about 1 hour until the beans are just soft. Skim any foam that rises to the surface, you might have to repeat this process few times.

Do not add sea salt at this point as this will make the skin of the beans hard causing them to crack during the cooking.

Stage 2

Place the sauerkraut in a colander and drain, rinse briefly but thoroughly with cold running water and drain again.

Transfer the sauerkraut in a pan, add a pinch of salt, peppercorns, crashed garlic, bay leaf, olive oil and cold water just enough to cover the sauerkraut.

Bring to a boil, lower the heat and cook for about 30 minutes. After this time, transfer the sauerkraut to a big bean pot.

Stage 3

Peel, wash, cube the potatoes and place them in pan. Cover completely with water, bring to boil, turn the heat down and cook for about 30 minutes until the potatoes are soft when pierced with the tip of a knife.

Drain the potatoes in a colander or with the slotted spoon transfer the potatoes to a large plate or bowl. With the back of the fork coarsely mash half of the potatoes and leave the other half cubed.

Transfer coarsely mashed and cubed potatoes in a big pot with beans.

Partially cover with a lid the big pot with beans, sauerkraut and potatoes and continue cooking on a gentle heat for another hour. All three elements will mix and blend together and the soup will start thickening. Taste and adjust seasoning with sea salt and freshly ground black pepper.

The soup should be quite thick but still have enough liquid to be able to ladle it nicely on the plate.

If jota gets too thick just add a bit of water to dilute it.

When jota is cooked, depending on what type of meats you use, take the meat of the bones, discard skin and bones and transfer pieces of shredded meat to the soup if you wish.

Discard the bay leaves before serving jota hot with a nice piece of crunchy bread.

Just a thought

Jota will keep well in a fridge for few days and is suitable for freezing.

If jota gets too thick, simply dilute it adding a bit of water, bring to boil and serve hot.

Wine suggestion

Venezia Giulia Pinot GrigioIGT 2019 – Azienda Agricola Pierpaolo Pecorari

November 10, 2021 /tina oblak
Sauerkraut recipe, Istrian sauerkraut stew, Istrian sauerkraut soup, hearty stew, comforting stew, borlotti beans, potatoes, autumnal stew, winter stew, winter dish
Adriatic Recipe, Central European recipes, dinner, Eastern European recipes, Easy recipe, entrée course, healthy mael, Istrian cuisine, Istrian dish, Istrian food, Istrian gastronomy, main course, main dish, Mitteleuropean recipes, Nutritious dish, one pot meal, recipe from Northern Ital, Rustic dish, Slovenian cuisine, Slovenian food, Slovenian gastronomy, Soups, Starters, stew, supper, Vegan, Vegetarian, Autumnal recipe, Autumnal dish, Winter recipe, Winter dish
2 Comments

Borlotti beans salad Recipe

Beans and Sardines
October 29, 2021 by tina oblak in Adriatic Recipe, Appetizers, Central European recipes, dinner, Easy recipe, healthy mael, Istrian cuisine, Istrian dish, Istrian food, Istrian gastronomy, main course, main dish, Nutritious dish, Rustic dish, Slovenian cuisine, Slovenian food, Slovenian gastronomy, Small bites, Starters, supper, Vegan, Vegetarian

This filling and substantial salad is traditionally made with either fresh borlotti beans when they are in season (mid to end summer and early autumn) or dried borlotti beans, during colder months when fresh borlotti beans are no longer available to buy as a seasonal produce. To make this dish even more convenient and fast, the use of good quality tinned borlotti beans is a common practice when you want to rustle up a quick meal.

Both my paternal and maternal grandfathers would take this salad to the vegetable garden and have it for lunch there with some bread and a small glass of red wine that they always kept in the garden shed.

I am sharing here the recipe for the salad, how has always been made in my family, traditionally using borlotti beans, (fresh, dried or tinned) however, you can use other types of beans if you prefer.

Ingredients

Serves 4 as part of meal

  • Double the quantity of the beans if you wish to make a more substantial bean salad and serve it as a main dish for 4 people.

  • 250g fresh or dried borlotti beans (when buying fresh borlotti beans in their pods you will need about 500g)

  • If using dried borlotti beans, they need to be soaked overnight in a large bowl of cold water (for at least 8 hours), then drained and rinsed and then they are ready to be cooked.

  • For this recipe you can also use tinned borlotti beans (one tin of borlotti beans weighing 400g will give you 250g of beans after they have been drained). If the liquid in the can is very thick, thin it out with a little bit of water and save it, as it makes integral part of the dressing.

  • 1 small onion, peeled and thinly sliced (you can use yellow, white or red onions, shallots or spring onions)

  • fresh flat leaf parsley, finely chopped

  • extra virgin olive oil, generous drizzle

  • white or red wine vinegar (you can use balsamic vinegar or other types of vinegar)

  • sea salt

  • black pepper

  • bay leaf (fresh or dry)

Method

Place fresh borlotti beans (previously taken out of their pods) or dried borlotti beans (previously soaked overnight) in a big pot and add plenty of cold water until about 3cm (just over an inch) from the top.

Add bay leaf and bring to boil. Turn down the heat and gently boil the beans uncovered for up to 1 hour or until tender. If using dried borlotti beans the cooking time will be slightly longer.

When the beans are cooked season with sea salt.

Drain cooked beans keeping a bit of their liquid.

Transfer the beans to a salad dish.

Add finely sliced onions, finely chopped fresh flat leaf parsley, a generous drizzle of extra virgin olive oil, vinegar, black pepper and a bit of the liquid that you kept aside.

Taste and adjust the seasoning.

Enjoy warm, at room temperature or cold.

Just a thought

You can turn this simple bean salad into a more substantial meal, adding to the beans for example some tomatoes, carrots, celery, beetroot or tinned tuna, just to mention few options.

Store the bean salad in an airtight container and keep it refrigerated, it will last between 2 and 4 days.

Wine suggestion

Friuli Colli Orientali DOC “Friulano di Jacopo”2019 - Necotium

October 29, 2021 /tina oblak
fresh borlotti beans, dry borlotti beans, borlotti beans salad, dry borlotti beans salad, bean salad with fresh parsley and onion
Adriatic Recipe, Appetizers, Central European recipes, dinner, Easy recipe, healthy mael, Istrian cuisine, Istrian dish, Istrian food, Istrian gastronomy, main course, main dish, Nutritious dish, Rustic dish, Slovenian cuisine, Slovenian food, Slovenian gastronomy, Small bites, Starters, supper, Vegan, Vegetarian
Comment
Plum Dumplings 18.jpg

Plum Dumplings Recipe

Beans and Sardines
September 16, 2021 by tina oblak in Adriatic Recipe, Appetizers, breakfast, brunch, Central European recipes, dessert, dinner, Easter treats, Eastern European recipes, Easy recipe, entrée course, Istrian cuisine, Istrian dish, Istrian food, Istrian gastronomy, main course, main dish, Mitteleuropean recipes, pudding, Rustic dish, Slovenian cuisine, Slovenian food, Slovenian gastronomy, Starters, supper, sweet course, Sweet Things, Vegetarian, Dumplings

This is a great dish for Autumn that originated in the Austro-Hungarian Empire. It is made with potato gnocchi dough in which you stuff the plums, simmer them in water, and then coat them with breadcrumbs, sugar and cinnamon mixture.

These rustic plum dumplings will become a real treat in the family since they are super delicious and easy to make! This dish is traditionally offered as a dessert, however, it is very common as a main course for lunch or dinner.

Plum dumplings are very well known and common throughout the countries that were once part of the Austro-Hungarian Empire. This dish is therefore very popular in Eastern and Central Europe as well as in Trieste and the province of Trieste in Italy.

This historical influence made plum dumplings a very appreciated meal in Slovenia, and is referred to in Slovenian as češpljevi cmoki or slivovi cmoki (češplje and slive meaning plums and cmoki meaning dumplings). They are widely available to buy frozen in bags in the supermarkets, but nothing is comparable to making them at home with this simple recipe.

This dish is very familiar to me, I grew up with it, and it was prepared frequently in the late summer and early autumn when plums are in peak season, in abundance, and with the right level of sugar and sweetness in them.

In Slovenia, where I come from, plum trees are very common to have in the back garden or in a near by orchard and the sight of these beautiful, humble, bluish purple colour fruits, almost like jewels hanging from the branches, is simply heart warming. Plums are popular to use not only for plum dumplings but also for other desserts like bake trays, tarts, jams, and compotes.

Damsons plums, being oval and small, therefore easy to handle, are the preferred and most frequently used type of plums for this recipe. Other types of plums work very well too and fresh apricots are also used frequently to make the dumplings.

If you decide to offer plum dumplings as a dessert, I would suggest to serve 2, if you decide to prepare them as a main meal then 3 or 4 depending on the size.

Plum Dumplings 1.jpg

Ingredients

Serves 6- 8 (you will get about 16 dumplings)

Ingredients for the plum dumplings

  • 16 fresh plums, Damsons plums and prune plums most commonly used, you can use other variety (plums should be sweet, ripe and fairly firm to the touch, avoid overripe with soft pulp as it gets quite difficult and messy to pit them). You can use fresh apricots instead.

  • 1kg floury, yellow-fleshed potatoes, e.g. King Edward, Maris Piper, (avoid new potatoes). I use red skin potatoes.

  • 300g all purpose flour (plus extra for flouring the board and working surface)

  • 1 egg, slightly beaten

  • sea salt, a pinch

Ingredients for the breadcrumb coating

The ingredients stated here are to coat all the dumplings, if you wish to half the quantity of dumplings half the ingredients for the breadcrumb coating

  • 100g unsalted butter

  • 5 Tbsp natural dry breadcrumbs

  • 5 Tbsp caster sugar

  • 1 Tsp cinnamon

Method

Start this recipe by making a basic potato gnocchi dough. (For more details refer to my full step by step recipe for Potato gnocchi dough)

Wash the potatoes, with the skin on, under cold running water.

Place the potatoes in a saucepan or a pot, cover with cold water and bring to boil. After the water has come to a boil, cook for about 20 minutes or until tender. Cooking time will obviously vary depending on the size of the potatoes you are using.

Don't pierce them during cooking and don't overcook them allowing the skin to burst as they will absorb too much water, alternatively you can steam them.

Remove from the pot, drain them in a colander and let them cool enough to handle, then remove the skin. If the potatoes are still quite warm to handle, the best way to remove the skin is to stick the fork though the potato and peel it using a knife.

Put the flour on a working surface, add salt and mix with the fork.

Make a well in the middle and pass the potatoes through a potato ricer while still warm as they become stickier when cooler. Allow riced potatoes to cool for few minutes and then add the egg.

With your fingers work the flour into the potato and egg, bringing the dough together, until it becomes a soft, pliable dough and do not overwork it. If the dough is too sticky, wet and soft add a bit more flour. Make sure your working surface is always well floured.

When the dough is the right consistency it should not stick to your fingers.

Shape the potato dough into a log.

Plum Dumplings 4.jpg

Prepare your plums by washing them and pat dry them. Then cut each plum lengthwise all the way round in order to get two halves and remove the pits.

View fullsize Plum Dumplings 2.jpg
View fullsize Plum Dumplings 3.jpg

Flour well your working surface and divide and cut the potato dough log roughly into 16 portions.

With your hands slightly floured, flatten and shape each portion into a round circle.

View fullsize Plum Dumplings 4a.jpg
View fullsize Plum Dumplings 5.jpg

Place one half of the plum in the centre and fill it with half Tsp of sugar, then place the other half of the plum on top of it.

If your plums are quite big in size, you might want to use only one half, as you will end up with very big dumplings which are more difficult to handle and not looking particularly elegant on a serving plate.

View fullsize Plum Dumplings 6.jpg
View fullsize Plum Dumpling 7.jpg

Wrap the dough tightly around the plums.

Seal the edges properly and tightly and shape it into a ball, roughly the size of a peach.

If the edges do not stick properly, dampen the edges with your fingers previously dipped in a bit of water, this will act a bit like a glue.

This step is quite important to prevent the dumplings from bursting and losing the juices during cooking.

Make sure you place each dumpling on a well floured surface to avoid sticking.

View fullsize Plum dumplings 8.jpg
View fullsize Plum Dumplings 9.jpg

It is quite crucial, when making dumplings, that you start and finish the process without interrupting for too long, as the sauce from inside the dumplings (the sugar inside the plum starts dissolving) will start leaking from the dumplings making it quite a mission to rescue them, and this is from the first hand experience!

Repeat the process until you use all the dough.

View fullsize Plum Dumplings 10.jpg
View fullsize Plum Dumplings 11.jpg
Plum Dumplings 12.jpg

Fill a large pot with water, add a generous pinch of salt and bring to boil.

Place gently each plum dumpling in a pot making sure they do not stick to the bottom.

Cook the plum dumplings in simmering water for about 12 minutes (not strong boiling as that can damage the dumplings).

They are fully cooked when they float on the surface.

While the plum dumplings are simmering, make the breadcrumbs sauce.

In a large pan, ideally non stick, melt gently the butter, add the breadcrumbs and toast for few minutes on a medium-low heat until slightly darker in colour.

Add sugar and cinnamon and mix until all the ingredients are well combined. Remove the pan from the heat to avoid burning the breadcrumbs mixture.

View fullsize Plum Dumplings 13.jpg
View fullsize Plum Dumplings 14.jpg

With a slotted spoon, remove plum dumplings from the simmering water.

Transfer them and place them in a pan with breadcrumbs mixture.

View fullsize Plum Dumplings 15.jpg
View fullsize Plum Dumplings 16.jpg

Shake the pan gently so the dumplings can roll around and get fully coated in the breadcrumbs mixture.

Plum Dumplings 17.jpg

Place on the serving plate, dust them with a bit of extra icing sugar and serve immediately. They are best eaten hot but equally delicious at room temperature.

Plum Dumplings 19.jpg

Just a thought

If you decide to only make half a batch of plum dumplings, you can use half of the potato dough for the plum dumplings and the other half for potato gnocchi. (see my full recipe step by step for potato gnocchi).

You can store cooked plum dumplings for up to three days in a airtight container.

If you need and desire to warm them up, putting them in a microwave is a good option as they retain the moisture.

The great thing about plum dumplings is also that they freeze very well. It is very important that you spread the uncooked dumplings in a single layer, leaving a bit of space between each dumpling, so they don't stick together, on a well floured wooden board, baking sheet, serving tray laid with baking parchment or with well floured kitchen cloth or similar.

Put the tray with the freshly made dumplings into a freezer, for at least 20- 30 minutes, and once frozen, put them into a freezing bag.

When you want to cook them just drop them frozen directly into a boiling salted water without defrosting them first, bearing in mind that the cooking time will be slightly longer, around 15 minutes. They are ready when they are floating on the surface.

Wine suggestion

Moscato Rosa delle Venezie IGT 2014 - Foffani

September 16, 2021 /tina oblak
Autumn Recipe, autumnal recipe, plums, plum puddings, plum desserts, potato gnocchi dough, češpljevi cmoki, slivovi cmoki, sweet dumplings
Adriatic Recipe, Appetizers, breakfast, brunch, Central European recipes, dessert, dinner, Easter treats, Eastern European recipes, Easy recipe, entrée course, Istrian cuisine, Istrian dish, Istrian food, Istrian gastronomy, main course, main dish, Mitteleuropean recipes, pudding, Rustic dish, Slovenian cuisine, Slovenian food, Slovenian gastronomy, Starters, supper, sweet course, Sweet Things, Vegetarian, Dumplings
Comment
Sautèed Bell Peppers- Final dish.jpg

Sautéed Bell Peppers with Onions and fresh Basil Recipe

July 20, 2021 by tina oblak in Adriatic Recipe, Appetizers, brunch, Canapés, Easy recipe, Finger food, healthy mael, Istrian cuisine, Istrian dish, Istrian food, Istrian gastronomy, main course, main dish, Nutritious dish, Rustic dish, Side Dishes, Slovenian cuisine, Slovenian food, Slovenian gastronomy, Small bites, Snacks, Starters, supper, Vegan, Vegetarian

This recipe is very easy, very tasty, you only need a few fresh ingredients and you have a perfect summer side dish to accompany meat or fish.

Peppers cooked this way are also fantastic served on bruschetta, can also be used as a sauce for pasta dishes, great base for risotto, or simply enjoyed on its own with a fresh crunchy bread. I also love using sautèed peppers as a topping on a pizza.

This dish can really be summed up as a simplicity at its best.

I simply adore peppers, I love them raw in salads, cooked, sautèed, grilled...

I have very vivid memories as a child going with my mother to the farmers market and seeing the vegetable and fruit stalls full of colourful peppers, it just looked so beautiful...

After buying the peppers, I would pick one and my mother would wash it under cold water in one of the Venetian looking fountains in the market, and I would just munch it raw during the trip back home.

As soon as the peppers were available fresh to buy at end of spring and during the summer, when they are in abundance, my mother would make this dish very often and here I am very happy to share it with you..

Ingredients

Serves 4

  • 6 mixed colour bell peppers, about 1kg (I used yellow, orange, green and red, you can use just one variety or a mixture of your preference)

  • 1-2 onions, about 200g (peeled and thinly sliced)

  • fresh basil, few leaves

  • sea salt

  • 4 Tbsp extra virgin olive oil

  • chili, optional

Sautèed Bell Peppers 1.jpg

Method

Wash and dry the peppers, cut them in half, remove the seeds and the white filaments.

Cut the peppers into smaller pieces.

View fullsize Sautèed Bell Peppers 2.jpg
View fullsize Sautèed Bell Peppers 3.jpg

Peel the onions and slice thinly.

Add the oil into a fairly large non stick pan.

Heat the oil and add the onions and a pinch of salt

Stew the onions over medium-low heat, for about 15 minutes, stirring occasionally, until the onions become soft and translucent.

View fullsize Sautèed Bell Peppers 4.jpg
View fullsize Sautèed Bell Peppers 5.jpg

Add the peppers, mix them well with the onions, add sea salt, fresh basil leaves and chilli if using.

Cover with the lid and cook the peppers on a medium-low heat anything between 30-50minutes, stirring occasionally.

The peppers, after this time, should be completely soft and all the water should be completely absorbed.

If the peppers are completely cooked but still quite watery, take the lid off and cook further for few minutes until all the water is completely absorbed.

Add few more fresh basil leaves and your peppers are ready to be enjoyed hot, warm, at room temperature or cold.

View fullsize Sautèed bell Peppers 7.jpg
View fullsize Sautèed Bell Peppers 6.jpg

Just a thought

Peppers cooked this way can be stored for about 2-3 days in the fridge in an airtight container.

Freezing this dish is not recommended.

You can add crashed garlic (1 or 2 cloves) if you wish and replace fresh basil for fresh flat leaf parsley or use both.

Wine suggestion

Friuli Colli Orientali Sauvignon DOC 2019 by Valentino Butussi, Colli Orientali, Friuli

July 20, 2021 /tina oblak
bell peppers, fresh basil, sautèed bell peppers, sautèed bell peppers with onions, sautèed bell peppers with frsh basil
Adriatic Recipe, Appetizers, brunch, Canapés, Easy recipe, Finger food, healthy mael, Istrian cuisine, Istrian dish, Istrian food, Istrian gastronomy, main course, main dish, Nutritious dish, Rustic dish, Side Dishes, Slovenian cuisine, Slovenian food, Slovenian gastronomy, Small bites, Snacks, Starters, supper, Vegan, Vegetarian
Comment

Ćevapčići (Grilled Minced Meat Sausages of the Balkans) recipe

Beams and Sardines
July 13, 2021 by tina oblak in brunch, Central European recipes, dinner, Eastern European recipes, Easy recipe, Finger food, Istrian cuisine, Istrian dish, Istrian food, Istrian gastronomy, main course, main dish, main meat course, Meat, Mitteleuropean recipes, Slovenian cuisine, Slovenian food, Slovenian gastronomy, Small bites, supper, Balkan dish

Ćevapčići (plural and diminutive form of Ćevapčić) or Ćevapi (pronounced [ʨɛ'va:pi]) are small pieces of rolled grilled mince meat, type of Turkish kofte kebab, originally made in the Balkans during the Ottoman period. They are oriental in origin but can be traditionally found in the countries of what was formerly Yugoslavia, the Czech republic, Austria, Slovakia and the Italian province of Trieste and Gorizia.

Ćevapčići must be one of everyone's absolute favourite dishes back home in Slovenia and it is hard to imagine a barbecue without them. In fact, they are so popular, you can buy them ready made in almost every butcher shop or supermarket. They are popular street food (fast food) and became part of everyday diet in Slovenia. For meat lovers this little skinless sausages are a real dream.

As a child I have very vivid memories of going to a skiing holiday to a capital of Bosnia and Herzegovina, Sarajevo, and having the best ever, and I mean the best ever Ćevapčići in Baščaršija which is Sarajevo's old bazaar and the historical and cultural centre of the city. I was utterly fascinated by the place being so different from my native small Venetian looking coastal town of Koper. That was the first time I saw a real mosque and was captured by the beautiful Ottoman architecture.

Ćevapčići are grilled and served as a main course in groups of five to ten pieces on a plate or in a lepinja (traditional flatbread). They are commonly eaten with Ajvar (cream of roasted red peppers), chips, flat breads, pieces of spring onions or thinly sliced yellow or white onions and kajmak (type of cream cheese). What accompanies really well this dish is a fresh salad of tomatoes, cucumber, onions and any feta type of cheese, it completes the meal well.

I currently live in England where I cannot buy ready made Ćevapčići so I have decided to make them fresh from scratch, there is a great sense of satisfaction as you can tweak the ingredients to your taste.

The main ingredient is mince meat, lamb, veal pork or beef, you can mix two or three types of minced meat and there could be a variation of meat content and seasoning.

I am sharing here my father's recipe, he used to love Ćevapčići and he loved preparing them for the family.

Ingredients

Serves 4

  • 500g mince lamb

  • 500g mince beef (can use 250g of mince beef and 250g of mince pork)

  • 60g unsmoked pancetta or bacon, cut in small pieces (can use smoked alternative if prefer)

  • 180g roughly of onions (very finely chopped)

  • 1-2 clove of garlic (pressed)

  • 1 egg (slightly beaten)

  • 1 Tbsp powdered Hungarian sweet paprika

  • ¼ Tsp baking soda

  • sunflower oil for brushing

  • sea salt

  • black pepper (freshly ground)

Method

Put a table spoon of water in a frying pan and sautée on a medium heat pieces of pancetta or bacon. Turn the heat down, add the onions, garlic, a pinch of salt and fry gently, stirring frequently, until they become golden in colour and soft. It should take 10-15min, then set aside and cool.

View fullsize Cevapcici 2.jpg
View fullsize Cevapcici 3.jpg
View fullsize Cevapcici 4.jpg

Transfer the pancetta/bacon and onion mixture into a food processor, add mince meat and mix at a low speed. Pulse if you can, as you do not want a completely smooth paste but a mixture with still a bit of a texture. If you have a smaller food processor you might have to do this in batches.

View fullsize Cevapcici 5.jpg
View fullsize Cevapcici 6.jpg

Transfer the mixture from the food processor into a big bowl. Add the egg, pinch of salt, black pepper, baking soda and sweet paprika. With your hands mix well to combine all the ingredients, no food processor will do better job!

View fullsize Cevapcici 6a.jpg
View fullsize Cevapcici 6b.jpg
View fullsize Cevapcici 7.jpg

Take a size of a golf ball, weighing roughly between 30-40g and shape into small sausages of about 7-8cm long.

Place your Ćevapčići onto a big plate or a tray and refrigerate for about 1hour.

Ćevapčići are ideal for barbecuing but as this is not always possible you can cook them in a grill pan.

Barbecue or grill the Ćevapčići on the hot grill pan for about 14 minutes, turning them often in between. They are ready when nice and brown on the outside and cooked through. It might be a good idea to check by cutting one in the middle. In this way you can calculate the grilling time for the following batches.

No matter which way you choose to cook them, make sure you lightly brush them with oil during the cooking process and try not over cook them as they will go hard.

View fullsize Cevapcici 9.jpg
View fullsize Cevapcici 10.jpg

Just a thought

Ćevapčići freeze well, just make sure you freeze them individually first on a plate or a tray to avoid them sticking to each other, and then place them in a freezing bag...... and you are all set for your next BBQ outside with friends or family, or for an enjoyable meal indoors!

Wine suggestion

Carso-Kras DOC "Terra Rossa" 2009 by Branko & Vasja Čotar, Carso-Kras

July 13, 2021 /tina oblak
mince pork, mince beef, mince lamb, grilled meat, grilled sausages, BBQ, Ćevapčići, Grilled Minced Sausages of the Balkans
brunch, Central European recipes, dinner, Eastern European recipes, Easy recipe, Finger food, Istrian cuisine, Istrian dish, Istrian food, Istrian gastronomy, main course, main dish, main meat course, Meat, Mitteleuropean recipes, Slovenian cuisine, Slovenian food, Slovenian gastronomy, Small bites, supper, Balkan dish
1 Comment
Minestrone Primavera 10.jpg

Minestrone Primavera (Spring Vegetable Soup) recipe

Beams and Sardines
June 29, 2021 by tina oblak in Adriatic Recipe, Appetizers, brunch, dinner, Easy recipe, entrée course, healthy mael, Istrian cuisine, Istrian dish, Istrian food, Istrian gastronomy, main course, main dish, Nutritious dish, Rustic dish, Slovenian cuisine, Slovenian food, Slovenian gastronomy, Soups, Starters, supper, Vegetarian, Italian soups, Italian minestrone

This is a really lovely soup to make, it is delicious, comforting, easy to prepare, and it is a great choice for a light lunch or dinner. It will soon become one of your favourites as it is ideal for a rustic style meal or for a more elegant option dining.

What I love about this minestrone is that it is really uncomplicated to make and it looks so pretty with all the new vegetables, yes, spring in a plate and a real celebration of springtime.

This soup is Italian in origin and due to such a close geographical proximity of my homeland it became incredibly popular, it is prepared in almost every household on a weekly basis, and because of its healthy and nutritious properties it is a popular choice in nurseries, school canteens, restaurants and nursing homes.

It is also very common to blitz or puree this soup and use it as a baby food.

In Slovenia you can find it in the menus as Zelenjavna Mineštra and in Istrian dialect being referred to as Maneštra.

This spring vegetable soup is quite light but it is very common to turn it into a more substantial meal just by adding a bit of small shaped pasta or rice, barley, freshly cooked or tinned cannellini or other type of beans, chickpeas and similar.

Minestrone Primavera is one of those dishes that was created out of necessity, using what was available in the season. The idea behind this, is that you would go to the vegetable garden during the spring and early summer season and pick the vegetables that were ready to be used in cooking. And this is exactly what my both paternal and maternal grandfathers used to do.

As a alternative, if you do not have a vegetable patch, you can go to the farmers market, food stores or supermarket and pick up the spring vegetable that you like.

The beauty of Spring minestrone is that it can never taste exactly the same, as the selection of vegetables will slightly vary each time you cook it.

My mum would make this soup very frequently especially in the spring and early summer when there are fresh vegetables available in abundance.

There are also quite a lot of regional variations of this dish like Minestrone alla Genovese, a variant typical of Liguria (Italy), that commonly uses fresh basil pesto and a greater amount of fresh herbs.

What gives this humble minestrone a real boost in flavour is to put the end of a Parmiggiano Reggiano or Padano cheese rind into the soup rather than to throw it away. The rind is that part of the cheese that develops on the outside wheel as it ages and acts as a protective layer. When you are no longer able to grate the cheese, as you get to the crust that also becomes quite hard (i.e. the rind), you do not throw the crust away, use it in a soup to enrich it as it is packed full of flavour.

It just transforms the overall taste of the minestrone, as if just by magic, you have to trust me on this one! You will be amazed what an old rind of cheese can do!

Minestrone Primavera 11.jpg

This is a poor, peasant soup, my paternal nona shared with me that when she was young ingredients were scarce, and the word abundance was almost hardly ever used when it comes to food. It is quite emotional to think how incredibly clever and creative people were to use everything they could to give them fuller flavour with something that would normally end up in the bin or compost.

Here I will share a basic recipe for the minestrone, just how it has been made in my family for generations and it is just a guide, as there is no set recipe.

20210609_114927.jpg

Ingredients

Ingredients for soffritto (Italian in origin, it is a flavour base for many dishes, gently fried chopped onions, carrots and celery in olive oil)

  • 4 Tbsp extra virgin olive oil

  • 1 medium onion, approx. 140g, finely chopped

  • 1 medium carrot (finely chopped), use 70g for soffritto and chop the rest of the carrot and use it in a soup together with the other vegetables

  • 1 celery stick (approx. 70g), finely chopped

Ideally, the onion, carrot and celery stick should be chopped quite finely when preparing soffritto. If you have a mini food processor, this is the time to use it.

The rest of the ingredients for the soup

  • courgette (approx. 100g), a handful, sliced and roughly chopped

  • 1 potato (approx 130g), peeled and cut into cubes

  • 4 runner beans, washed trimmed and sliced

  • 4 green asparagus, wash, trim off the wooden ends and finely slice the stalks leaving the tips whole

  • 4-5 radishes, washed and roughly chopped

  • 5 broad bean pods, podded

  • fresh sweet peas in pods (approx. 150g), remove the peas from the pods (frozen petits pois would do just fine, about a handful)

  • baby spinach, about a handful, chopped

  • 1 handful fresh flat leaf parsley, stalks included (that is where the flavour is), finely chopped

  • 3-4 fresh basil leaves, roughly chopped

  • 1 fresh sage leaf

  • 2l hot vegetable or chicken stock (using instant stock is perfectly fine). You can just simply use hot water if you do not have any type of stock in hand.

  • sea salt (to taste)

  • freshly ground black pepper (optional)

  • Parmiggiano Reggiano cheese rind (optional)

  • 80-100g small shaped pasta or broken up spaghetti

Method

Prepare all your vegetables as described in the Ingredients list above and put it aside.

Minestrone Primavera 12.jpg

Drizzle the oil in a casserole pan, add onions, carrots and celery and prepare the soffritto by gently and slowly frying the trio of vegetables for about 15 minutes, stirring occasionally until soft.

View fullsize Minestrone Primavera 2.jpg
View fullsize Minestrone Primavera 3.jpg
View fullsize Minestrone Primavera 4.jpg
View fullsize Minestrone Primavera 5.jpg

Add all the other vegetables and fry gently together with soffritto for few minutes.

Add all the herbs, stock and cheese rind, if using, and cook for about 40 minutes.

Taste and adjust the seasoning with sea salt and black pepper. If using cheese rind there might be no need for extra seasoning as the cheese rind is quite salty already.

View fullsize Minestrone Primavera 7.jpg
View fullsize Minestrone Primavera 8.jpg

Halfway through cooking add barley, beans (already cooked or canned), rice or any other small shaped pasta you like, very traditional is to use ditalini shape pasta. It is also very common, especially when you realized you have not got any small shaped pasta or completely run out of it, to take a bit of spaghetti and break them up into smaller pieces.

I have lovely memories of my mother giving me this job when I was a child to keep me entertained.

I give this same job to my son today, to keep him entertained...

Serve it hot with freshly grated Parmiggiano Reggiano cheese and bruschetta of your choice.

Minestrone Primavera 9.jpg

Wine suggestion

Chardonnay DOC “Vigna Runc” 2019 by Il Carpino, Collio.

June 29, 2021 /tina oblak
Minestrone Primavera, spring vegetable soup, Nutritious soup, Healthy soup, Zelenjavna minestra, Zuppa primavera, Mixed vegetable soup, Mixed vegetable minestrone
Adriatic Recipe, Appetizers, brunch, dinner, Easy recipe, entrée course, healthy mael, Istrian cuisine, Istrian dish, Istrian food, Istrian gastronomy, main course, main dish, Nutritious dish, Rustic dish, Slovenian cuisine, Slovenian food, Slovenian gastronomy, Soups, Starters, supper, Vegetarian, Italian soups, Italian minestrone
Comment
Final dish- sautéed sweet peas with parsley and onion.jpg

Sautéed Early Sweet Peas with fresh parsley and onion recipe

Beans and Sardines
June 08, 2021 by tina oblak in Adriatic Recipe, brunch, dinner, Eastern European recipes, Easy recipe, healthy mael, Istrian cuisine, Istrian dish, Istrian food, Istrian gastronomy, Nutritious dish, Rustic dish, Side Dishes, Slovenian cuisine, Slovenian food, Slovenian gastronomy, supper, Vegetarian

This is a great classic side dish, light and delicious, ideal for a rustic as well as a more formal lunch or dinner, it goes with just about any meat or fish dish, and it is quick and easy to make.

It can also be used as a base for pasta and risotto dishes and is very tasty used in frittatas and on top of bruschetta.

It is ideal to make this dish in spring using fresh peas as they are very sweet and tender. For this recipe, however, you can use fresh peas when in season but frozen petits pois are the ones I use most of the time as they are great alternative to the fresh peas when they are not in season and can be enjoyed all year round.

My mother made sautéed peas very frequently, they are nutritious, healthy and delicious, and they were served on a weekly basis, used fresh when in season but most of the time my mother used frozen petits pois as an alternative.

As a child I loved going to the allotment with my maternal grandparents and have vivid memories picking the pea pods from the plant. I also remember being always amazed walking home with big wicker baskets full of pea pods and ending up with half of what we picked after removing the peas from the pods.

I found picking the pea pods very entertaining, I liked very much opening the pods and finding this lovely vibrant green peas inside them.

As a child, I also soon spotted the opportunity to play and as the peas were all different sizes I would create a long line of peas starting with the smallest.

I thought that was great fun, it also provided fantastic healthy snack, I ate them as I went along creating this pea chain.

My most heart-warming memories around peas, whether they were picked at the allotment or bought at the farmers market, must have been me sitting at the table with my mother or paternal grandmother, and remove the peas from the pods. It provided the opportunity just to be together, have conversation or just stay in silence and smile at each other, I guess I felt reassured, loved...

View fullsize Ingredients- sautéed sweet peas 1.jpg
View fullsize Ingredients- sautéed sweet peas 2.jpg

Ingredients

Serves 4 as part of meal

  • 1kg fresh early sweet peas in pods (after removing the pods you should end up with roughly between 400- 500g of peas)

    You can use sugar snap peas, in this case you will need about 2kg to get roughly 400g of peas after removing the pods.

    In both cases do not worry if you end up with more or less peas. Just use what you end up with after taking them outside the pod and follow the recipe.

    You can also use frozen Petits Pois (about 500g) or canned peas.

  • 4 Tbsp extra virgin olive oil

  • 1 onion, medium size (about 130g), finely chopped

  • fresh flat leaf parsley, about a handful, finely chopped

  • hot vegetable stock or Bouillon powder instant stock

  • sea salt (only needed if using vegetable stock without the salt)

Ingredients- sautéed sweet peas 4.jpg

Method

If using fresh peas, clean and prepare them by removing the peas from inside the pods and discard the pods.

Ingredients- sautéed sweet peas 3.jpg

In a skillet add the olive oil and onions and sautéed them over gentle heat until lightly browned and softened (this should take 5-7 minutes).

View fullsize sautéed sweet peas 5.jpg
View fullsize sautéed sweet peas 6.jpg

Add the peas, fresh or frozen, and sautéed them together with the onions for few minutes. If using frozen peas cover with the lid as it will help to defrost them quicker.

Add fresh parsley and hot vegetable stock just enough to completely cover the peas.

View fullsize sautéed sweet peas 7.jpg
View fullsize sautéed sweet peas 8.jpg

Cook uncovered over medium heat, stirring occasionally, until all the liquid is absorbed but the peas are still nice and moist and not dry (it should take around 15 minutes).

Taste and season with sea salt if needed and serve warm.

sautéed sweet peas 10.jpg

Just a thought

You can keep the cooked peas in the fridge, in a airtight container, for about two or three days.

They freeze very well, so good side dish to prepare ahead.

June 08, 2021 /tina oblak
sautéed peas, sautéed sweet peas, sautéed early sweet peas, sweet peas with fresh parsley and onion, sautéed petits pois, sautéed peits pois woth fresh parsley and onion
Adriatic Recipe, brunch, dinner, Eastern European recipes, Easy recipe, healthy mael, Istrian cuisine, Istrian dish, Istrian food, Istrian gastronomy, Nutritious dish, Rustic dish, Side Dishes, Slovenian cuisine, Slovenian food, Slovenian gastronomy, supper, Vegetarian
Comment
Frittata with dry sausage 1.jpg

Frittata with dry sausage (salami) recipe

Beans and Sardines
June 01, 2021 by tina oblak in Adriatic Recipe, Appetizers, breakfast, brunch, Canapés, Central European recipes, entrée course, Finger food, Istrian cuisine, Istrian dish, Istrian food, Istrian gastronomy, main course, main dish, Rustic dish, Slovenian cuisine, Slovenian food, Slovenian gastronomy, Small bites, Snacks, dinner, supper

Frittata with dry sausage is a quick and easy midweek lunch or dinner and a great weekend breakfast or brunch option. Fantastic eaten hot but often served at room temperature and perfect to make ahead for picnics and larger groups. Serve it with rustic bread or polenta and a salad. Great also as a sandwich filling.

To me, however, this simple dish is more than just a quick meal solution.

Both my grandfathers loved frittatas, and not without a glass of red wine! They would normally have it upon the return back home late morning after working in the allotments or in the olive grove.

My paternal grandfather really liked dry sausage frittata while my maternal grandfather was really keen on wild fresh herbs frittata but both really liked wild asparagus and pancetta (or without) variation. All three typical in the region.

This simple dish, similar to an omelette, is Italian in origin (frittata is an Italian word and roughly translates to “fried”) but due to such a close geographical proximity to Italy, frittata found a huge popularity in a local cuisine and could be referred to as Fritaja s klobasami – Fritata or Frtalja s klobasami and Fritaia con le luganiche in Istrian dialect. All these names come from the Venetian word fritaia.

Amazingly, this simple frittata with dry sausage, is a speciality in Istria and also has a deep meaning in a local folklore. This type of frittata is typically made especially during Carnival period (festive season that occurs before the liturgical season of Lent). In rural areas and particularly in small villages locals dressed up in different Carnival costumes. In groups they would walk from house to house singing traditional folk songs accompanied by sound and the melodies of the accordion, usually played by one member of the group.

As a sign of appreciation for entertaining and lifting the spirits, they received food gifts which consisted of fresh eggs, dry sausages, salami, crostoli, fritole (typical Carnival sweet things) and also wine.

When this simple Carnival procession was over, the participants would gather in somebody's home and frittata with dry sausage was made and other dishes were prepared with everything they received.

All the food was displayed on the table, shared and enjoyed, often ending up in excessive consumption of alcohol and other foods that will be forgone during upcoming Lent. There was a lot of singing and dancing, this is how local people came together and enjoyed each other company, the festive period and the the end of harsh winter.

My nona Nada also shared with me a lovely story, telling me that this festive season also provided the opportunity for young men and women to casually meet and possibly fall in love...

Frittata with dry sausage 2.jpg

Ingredients

Serves 4

  • Italian dry sausage/salami (about 150g), can use French sausage (saucisson), Spanish Chorizo (the important thing is that they are not too dry and hard, when buying should feel a bit soft when squeezing)

  • 6 eggs, beaten or whisked

  • 1 Tbsp extra virgin olive oil

  • sea salt, to taste (bear in mind the sausages are dry cured and taste salty already)

  • black pepper, freshly ground (to taste)

Method

Peel the dry sausage, place it on a chopping board, slice it, half it and then cut it into quarters.

View fullsize Frittata with dry sausage 3.jpg
View fullsize Frittata with dry sausage 4.jpg

In a separate bowl whisk the eggs and season with salt and pepper.

Frittata with dry sausage 5.jpg

Put the oil in a skillet, ideally non stick, and heat it.

Sauté and lightly sear the sausage on a medium high heat stirring frequently.

Frittata with dry sausage 6.jpg

Pour the egg mixture in the skillet over the sausage, turn the heat to fairly low and cover with the lid (glass lid with steam hole works very well, if you have it). Also, using a slightly bigger lid than the skillet will help to keep the frittata “dry”. Lid that fits perfectly on top of the skillet could potentially trap quite a bit of steam and possibly making your frittata a bit wet.

The use of the lid will also help to cook the frittata evenly, avoiding the bottom of frittata being almost burnt and the egg mixture on the top being still raw, runny and unset.

Cook the frittata for about 20 min. The frittata is cooked when the underside is set and the egg mixture on the top no longer runny.

Frittata with dry sausage - Recipe.jpg

Just a thought

In this recipe, I have chosen to cook the frittata on the stove with a lid as my family has always used this method. I have also bear in mind that not everyone has a skillet that can go in the hot oven or under the grill.

However, if you are familiar cooking the frittata in the oven, and that is your preferred method, it is perfectly fine to do so.

Wine suggestion

Refosco dal Peduncolo Rosso IGT 2017 by Vigna Petrussa, Venezia Giulia.

June 01, 2021 /tina oblak
Italian salami, dry sausage, chorizo sausage, french sausage, saucisson, fresh eggs, frittata, Istrian frttata, Fritaja s klobasami
Adriatic Recipe, Appetizers, breakfast, brunch, Canapés, Central European recipes, entrée course, Finger food, Istrian cuisine, Istrian dish, Istrian food, Istrian gastronomy, main course, main dish, Rustic dish, Slovenian cuisine, Slovenian food, Slovenian gastronomy, Small bites, Snacks, dinner, supper
Comment
  • Newer
  • Older