Beans and Sardines

  • Home
  • About
  • Recipe of the week
  • Recipes
  • Wines
  • Contact

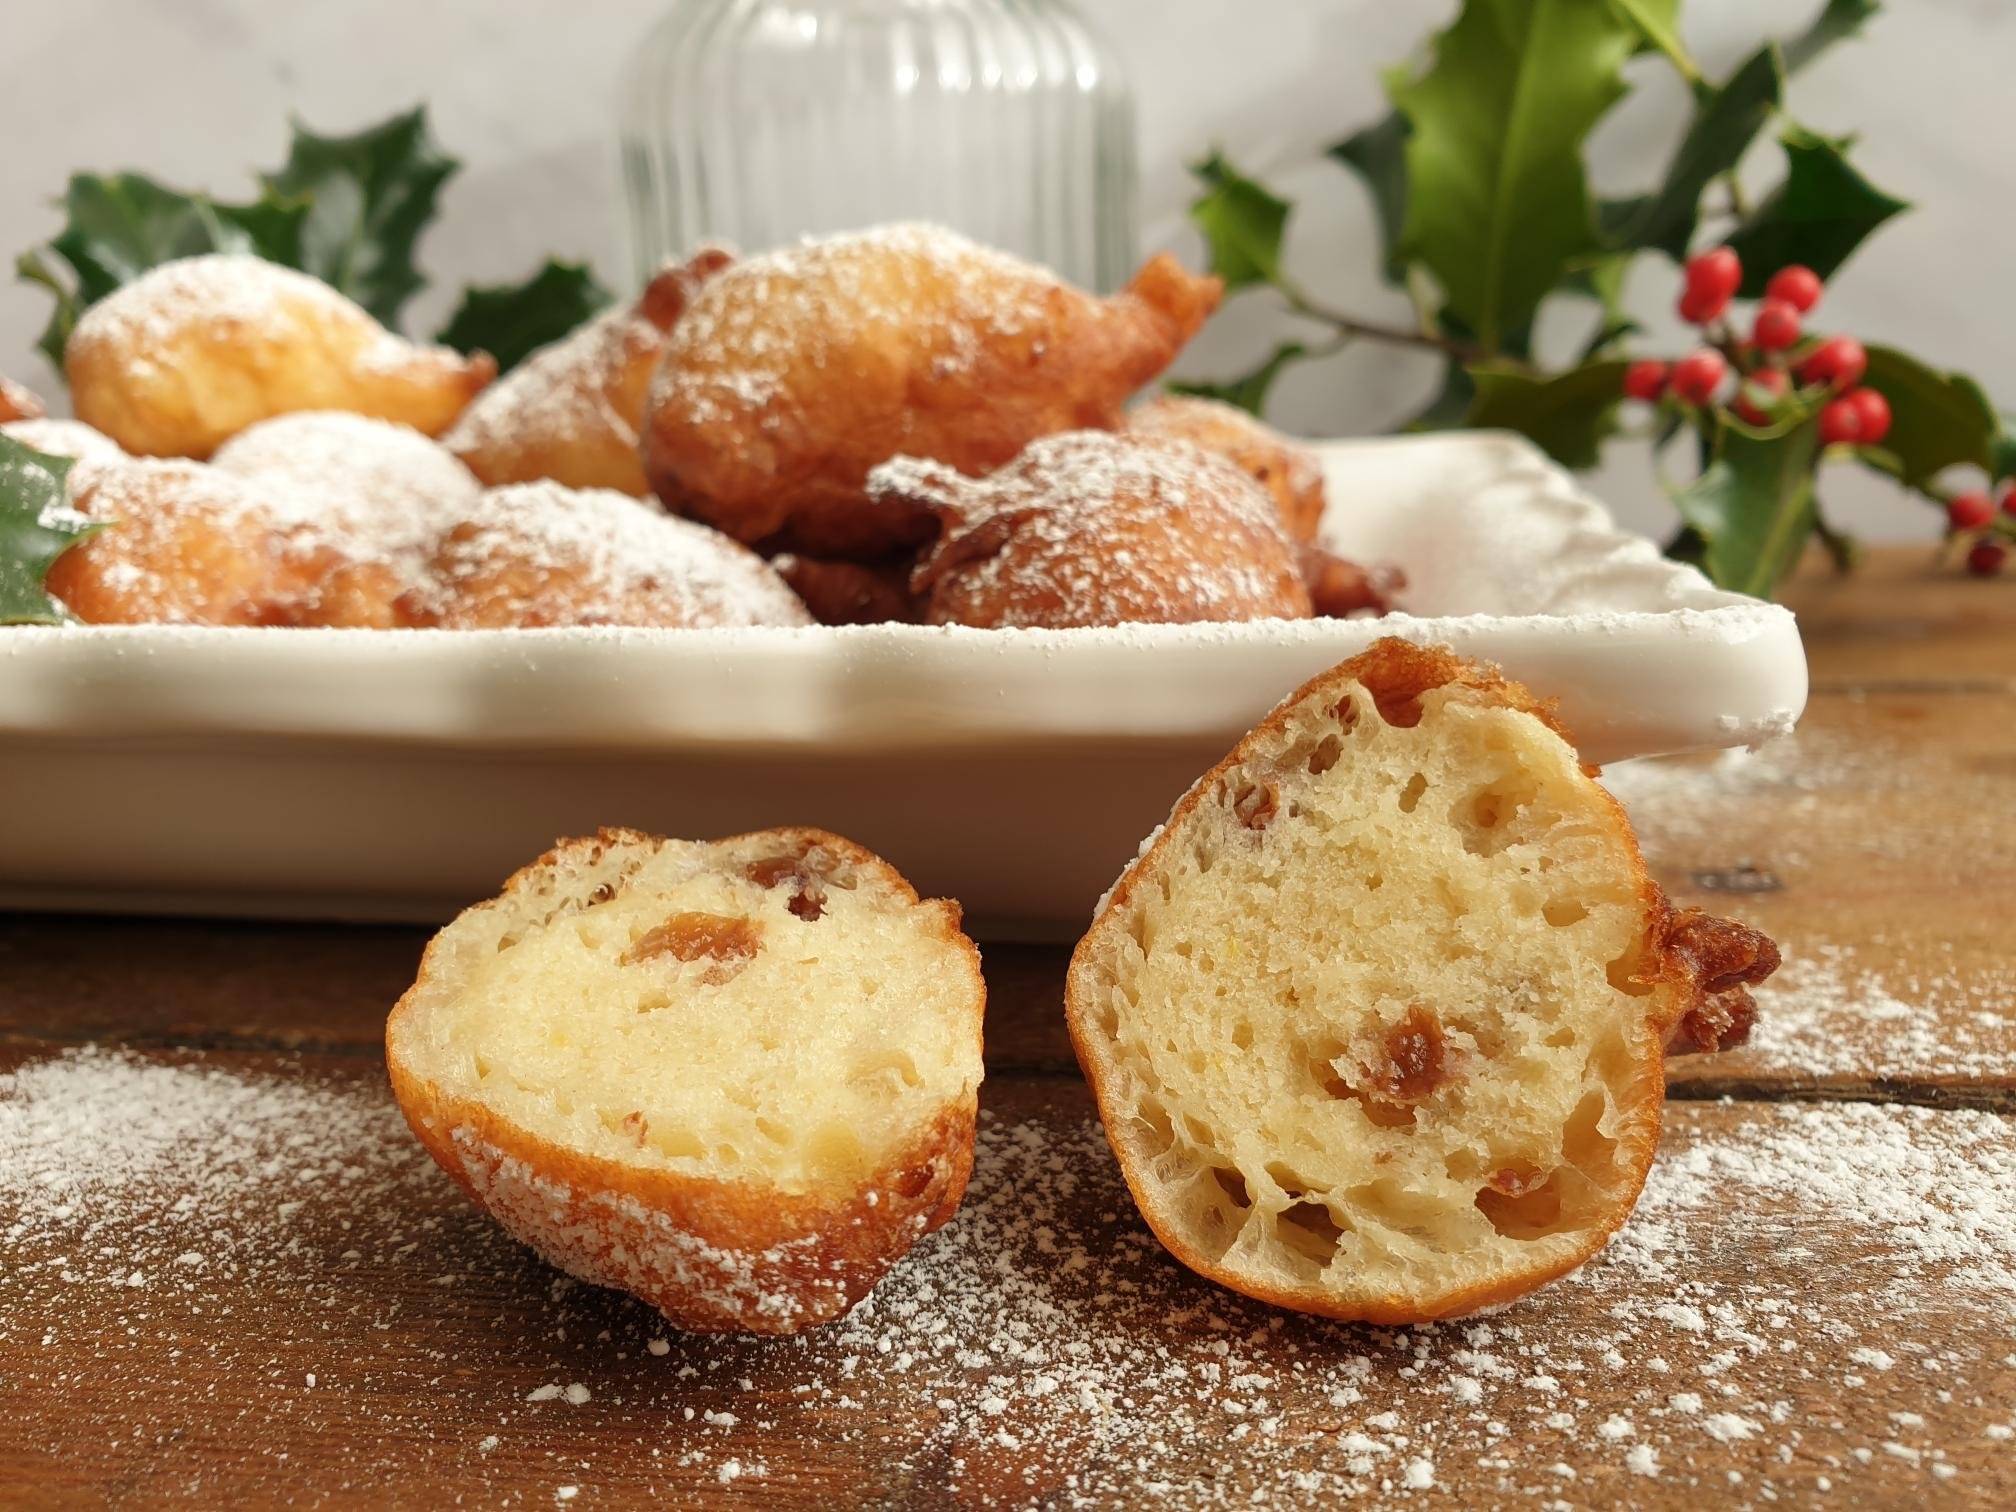
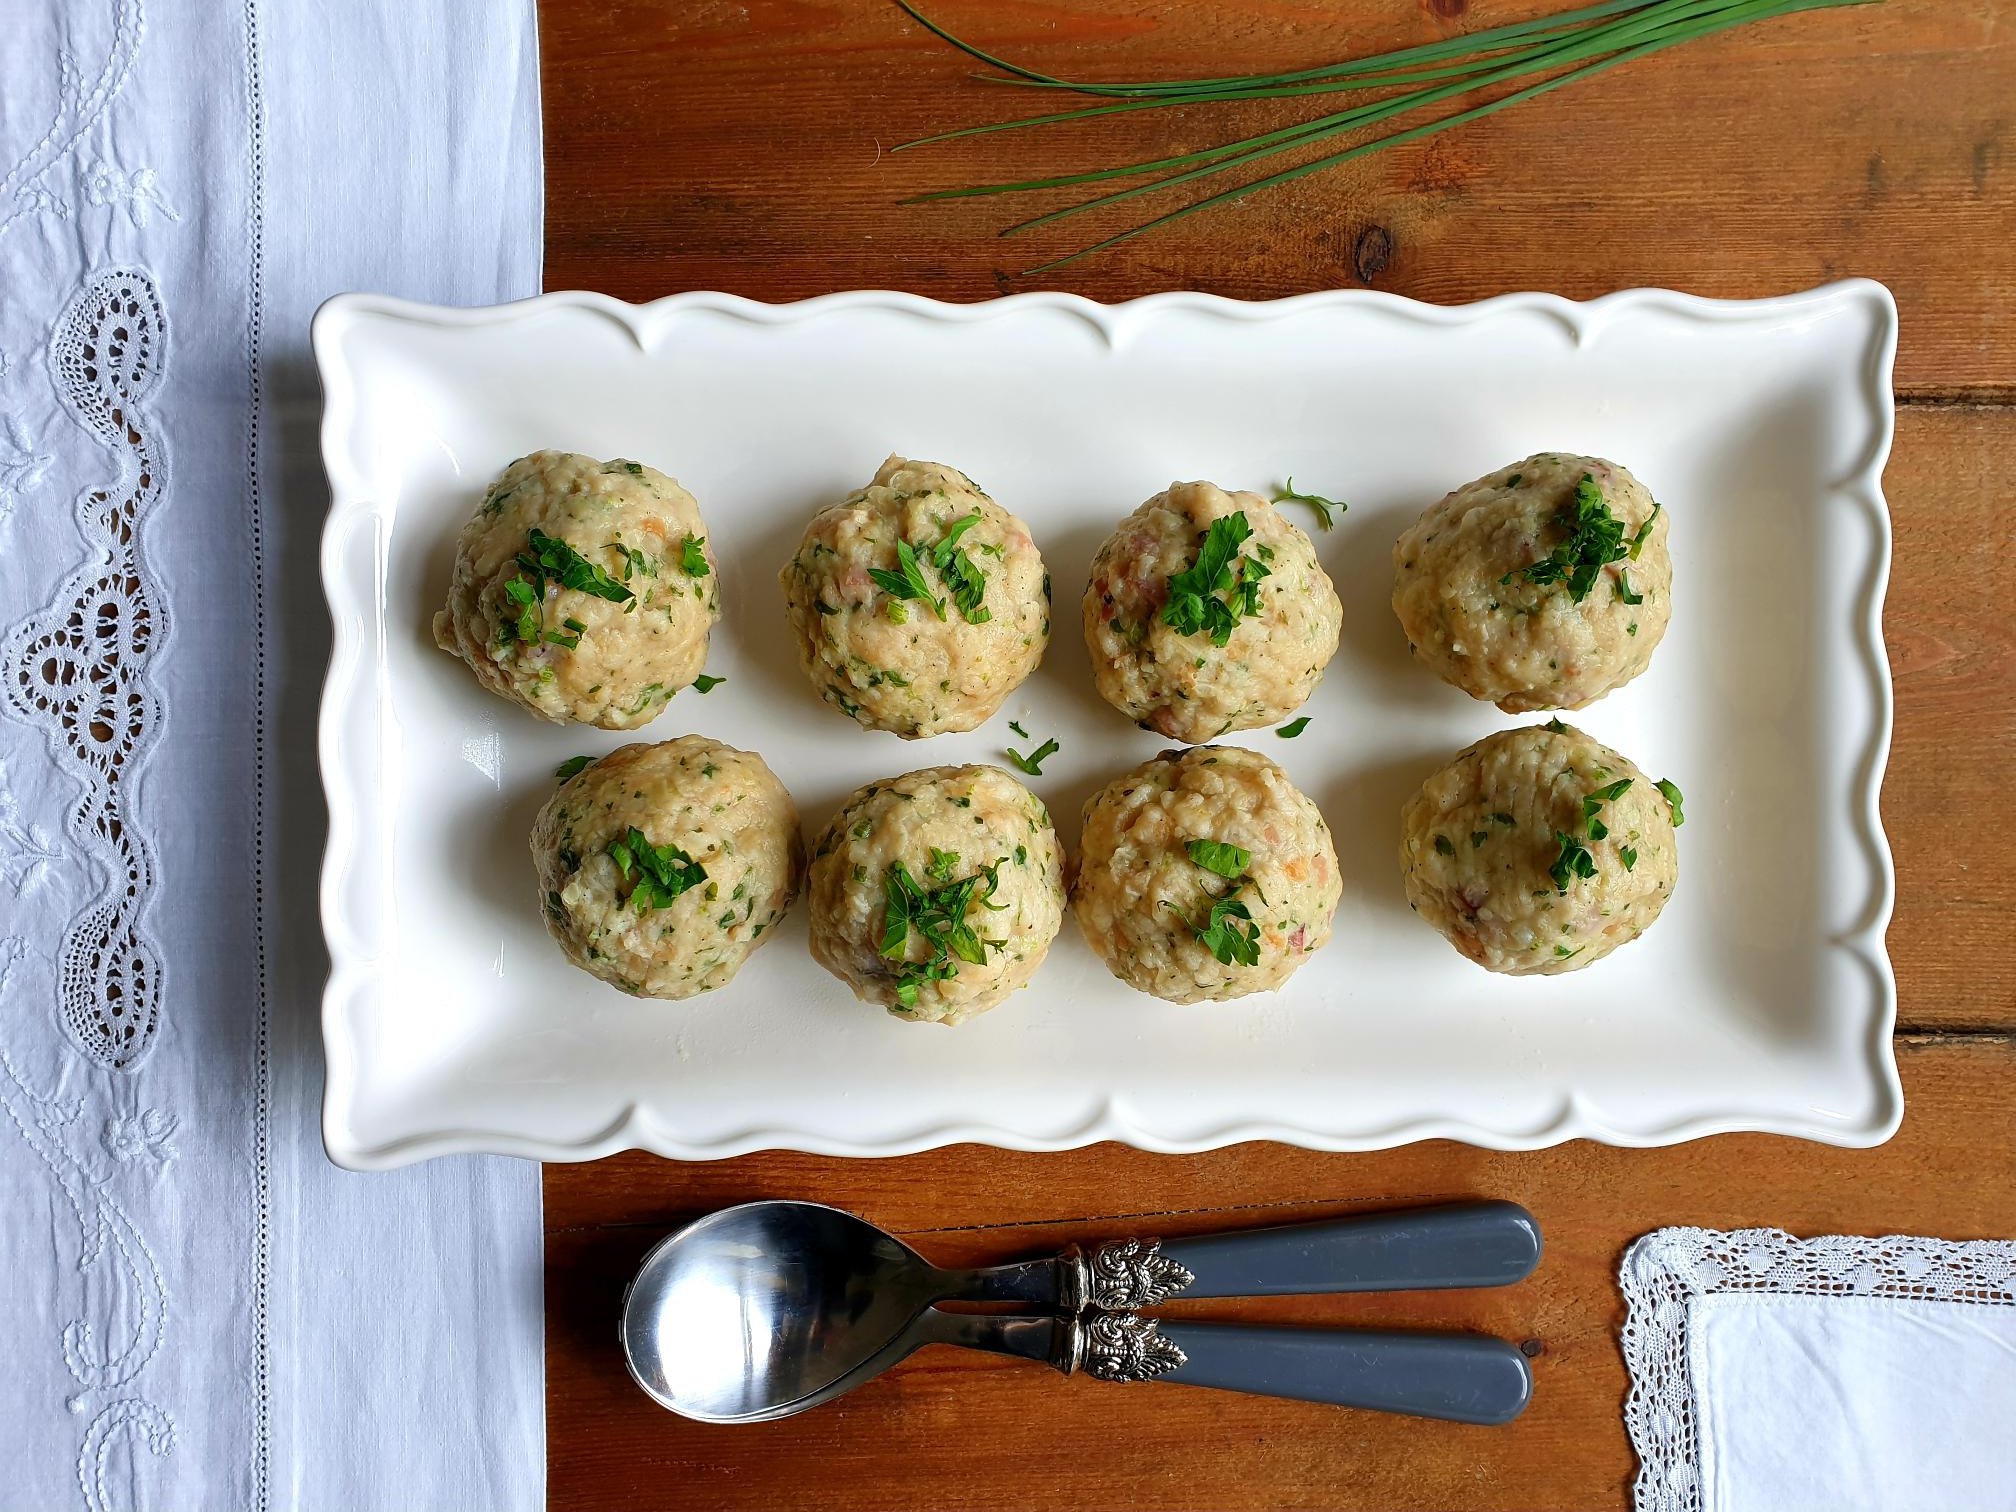
Bread dumplings Recipe

Beans and Sardines
March 23, 2022 by tina oblak in Adriatic Recipe, Austrian inspired dishes, Autumnal dish, Autumnal recipe, casserole, Celebratory dish, Central European recipes, dinner, Dumplings, Eastern European dishes, Eastern European recipes, Easy recipe, Istrian cuisine, Istrian dish, Istrian food, Istrian gastronomy, main course, main dish, Mitteleuropean cuisine, Mitteleuropean dish, Mitteleuropean food, Mitteleuropean recipes, one pot meal, Rustic dish, Side Dishes, Slovenian cuisine, Slovenian food, Slovenian gastronomy, stew, supper, Vegetarian, Winter dish, Winter recipe, family friendly meal, child friendly meal, child friendly dish, family friendly dish

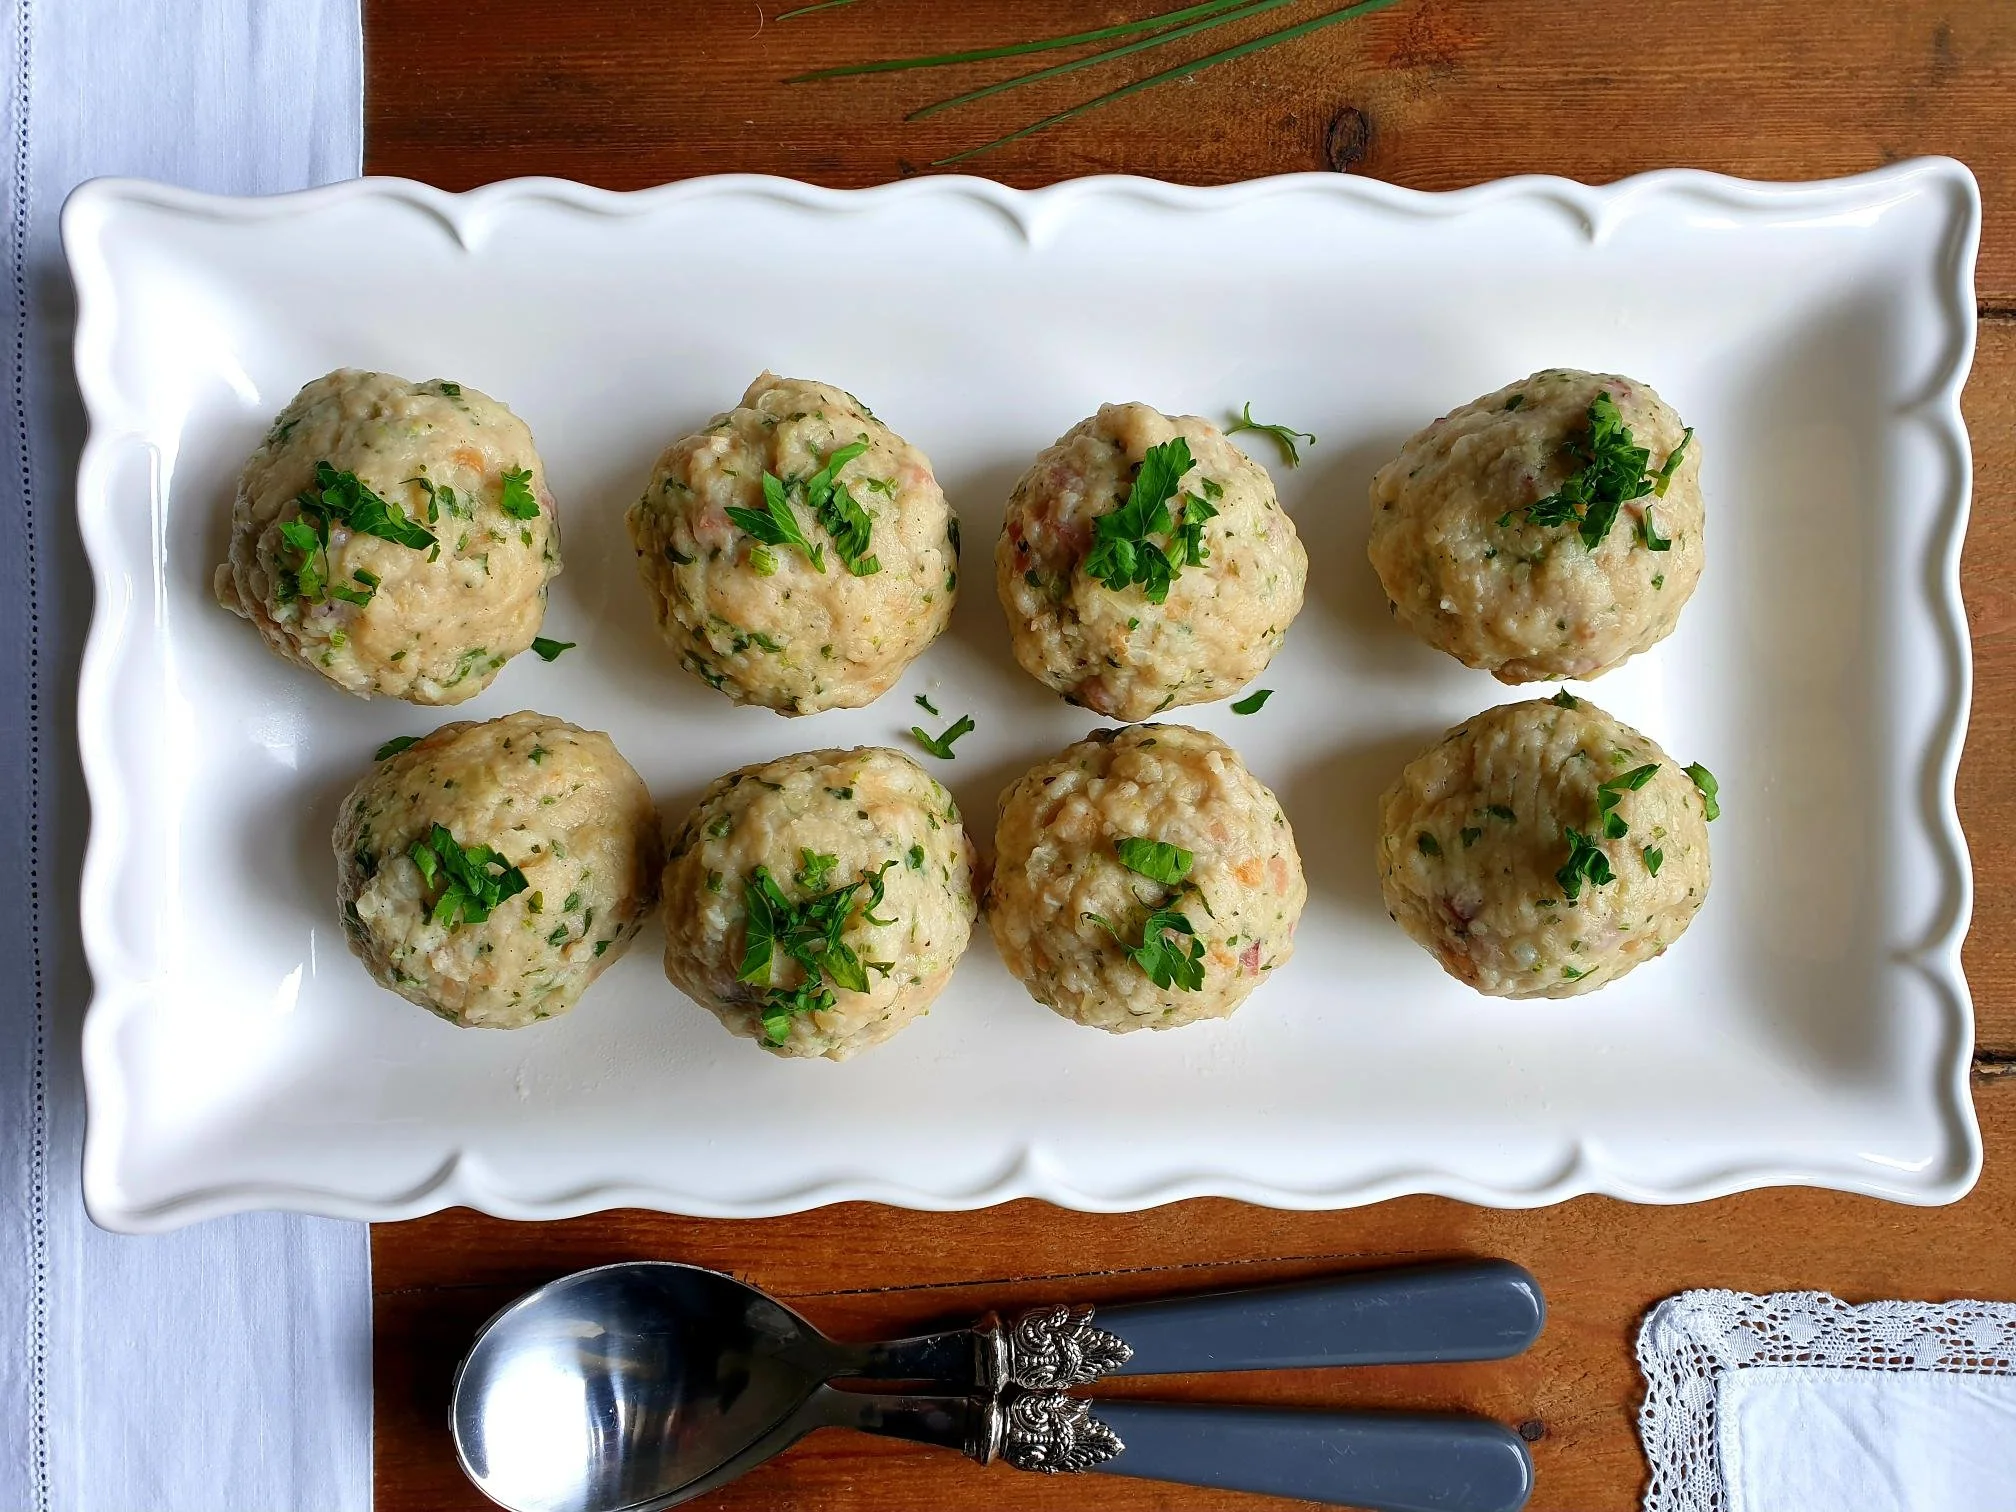
Bread dumplings are a real crowd pleaser, they are made from a mixture of stale bread soaked in milk and combined with fresh parsley, marjoram, onions, pancetta, beaten egg, seasoned with sea salt and black pepper, then formed into a ball shape and gently cooked in simmering water.

They can be easily turned into a vegetarian friendly option by simply omitting the meaty element and adding, if prefer, a bit of grated cheese, depending on your preference.

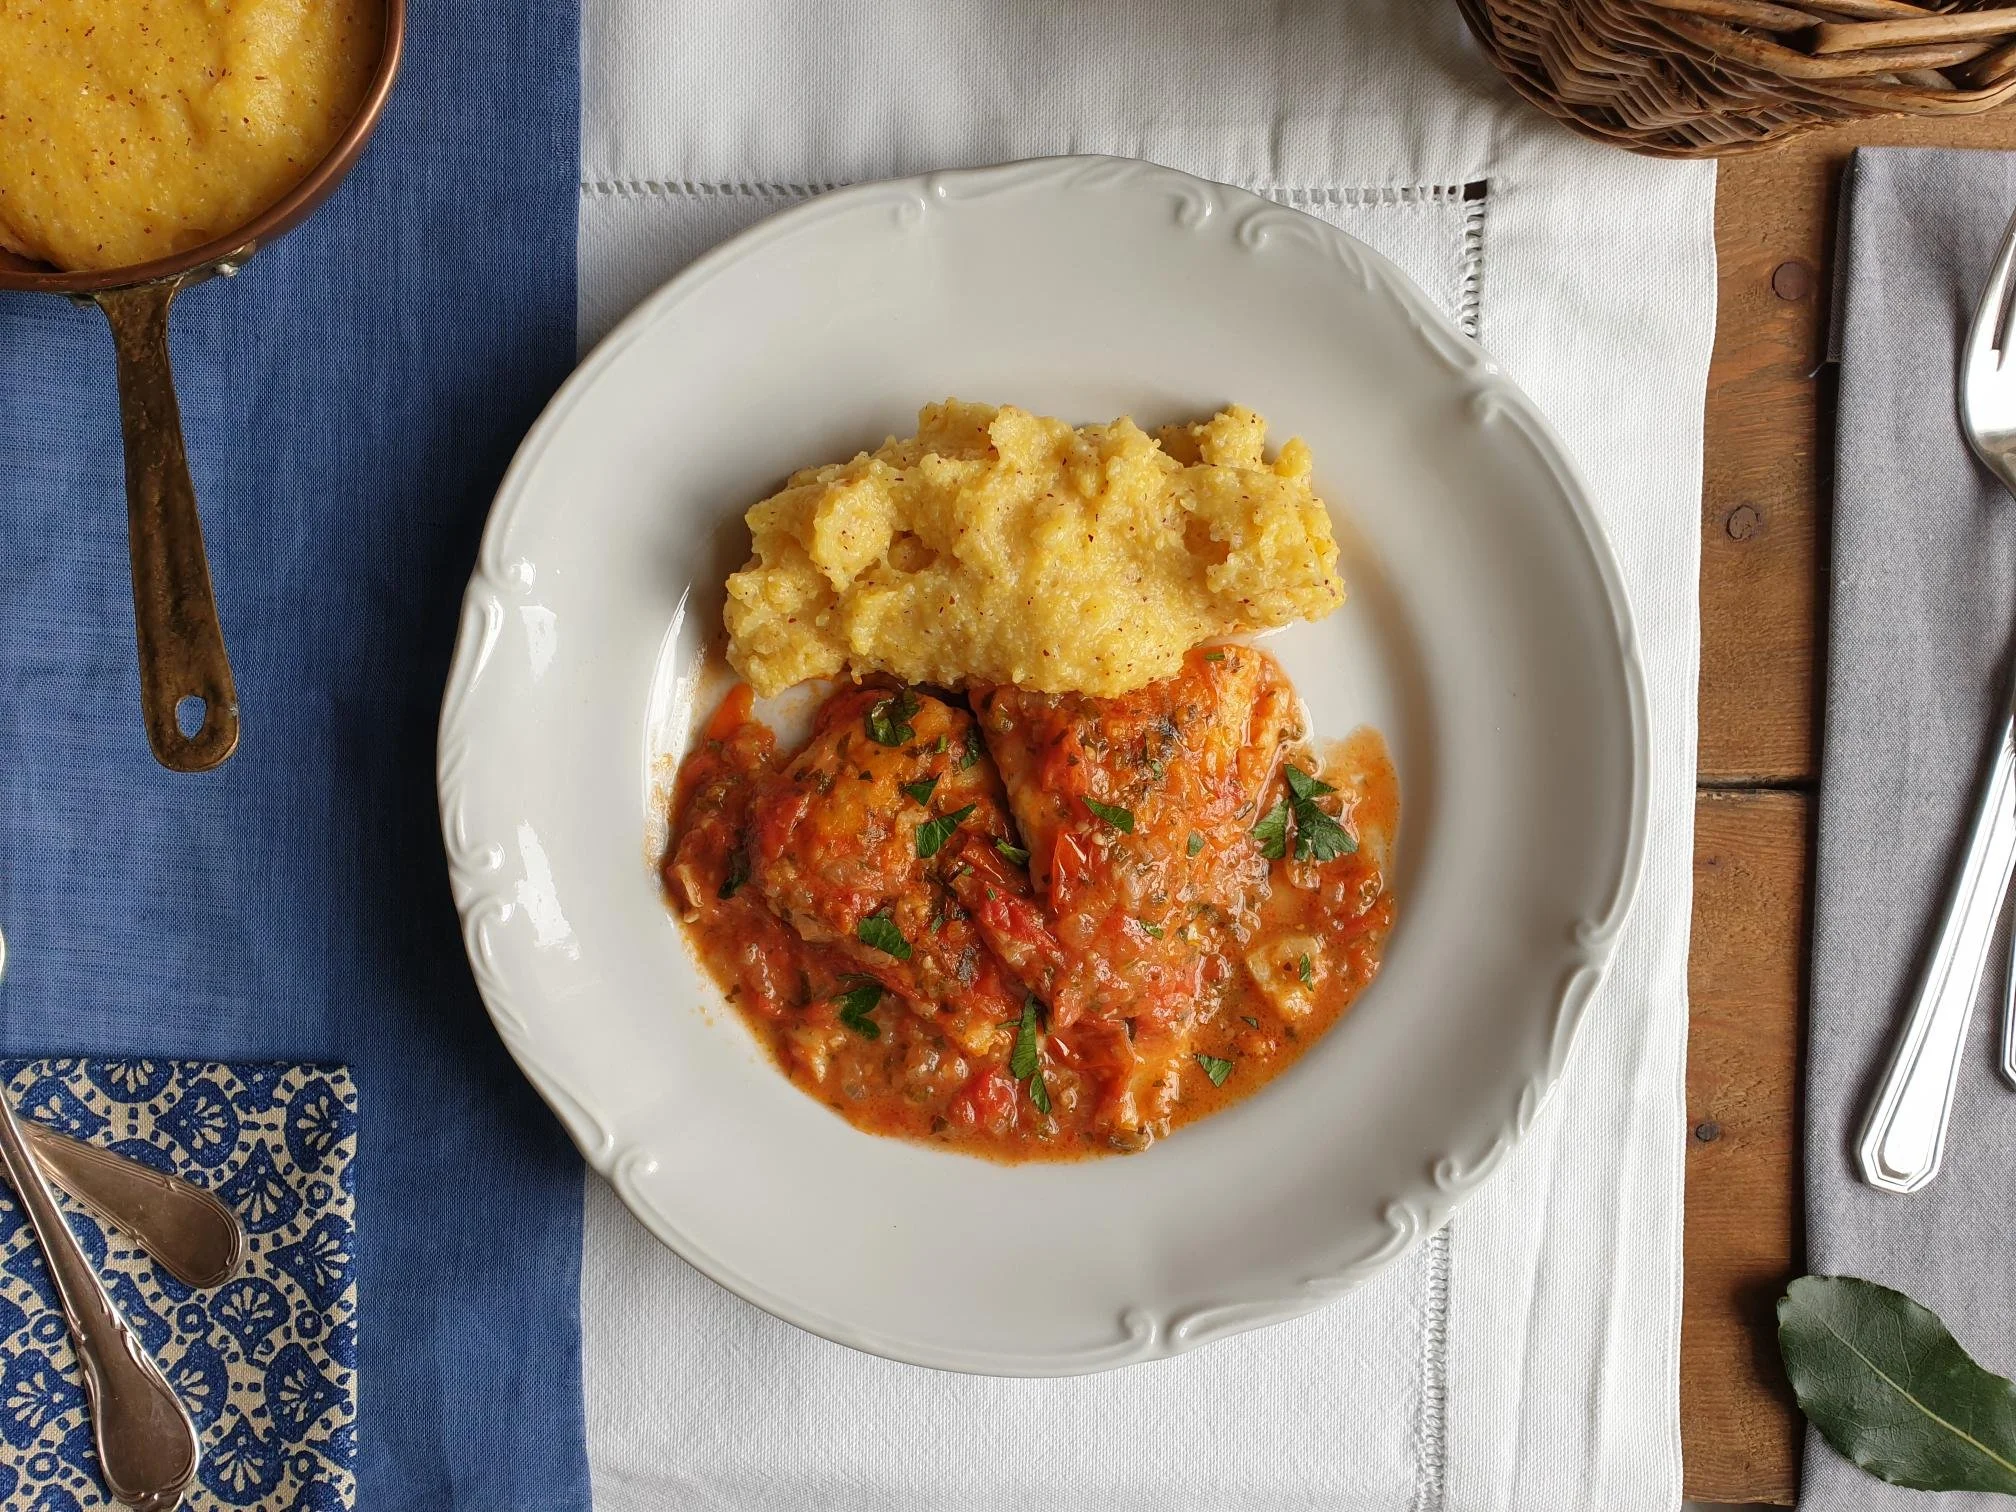
They are served as a perfect companion to stews, braised meats and roasted meats with a gravy. The idea behind these dumplings is to squash them with the fork, and this will soak up all the juices of whatever is accompanying them. In other words, it is an ideal side dish for almost anything that has some kind of sauce with it.

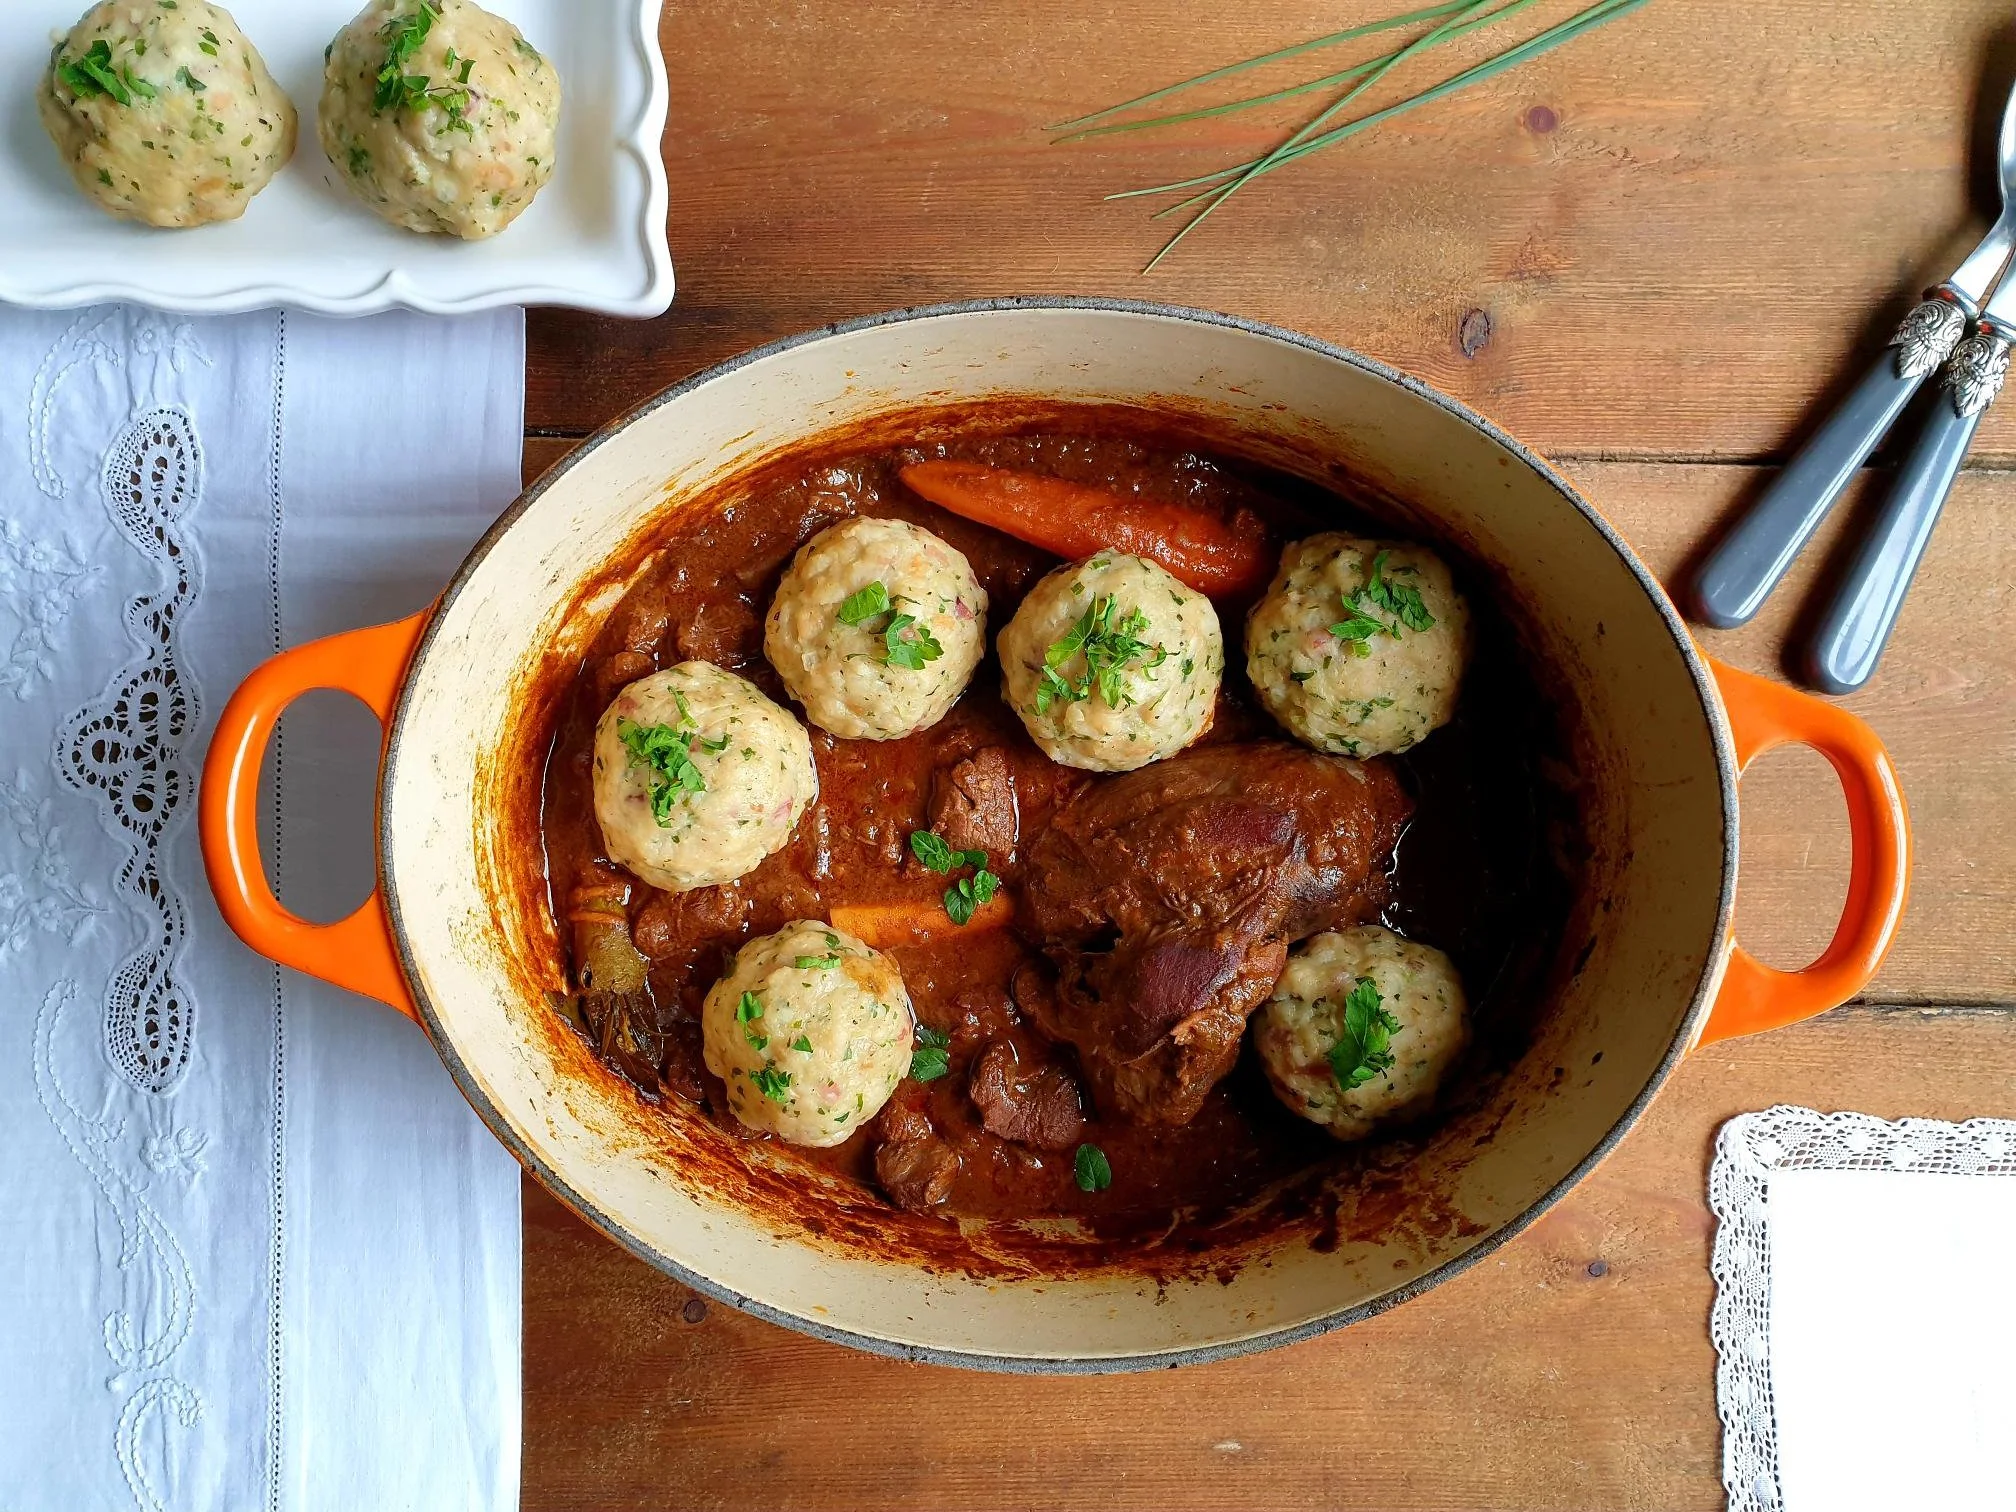
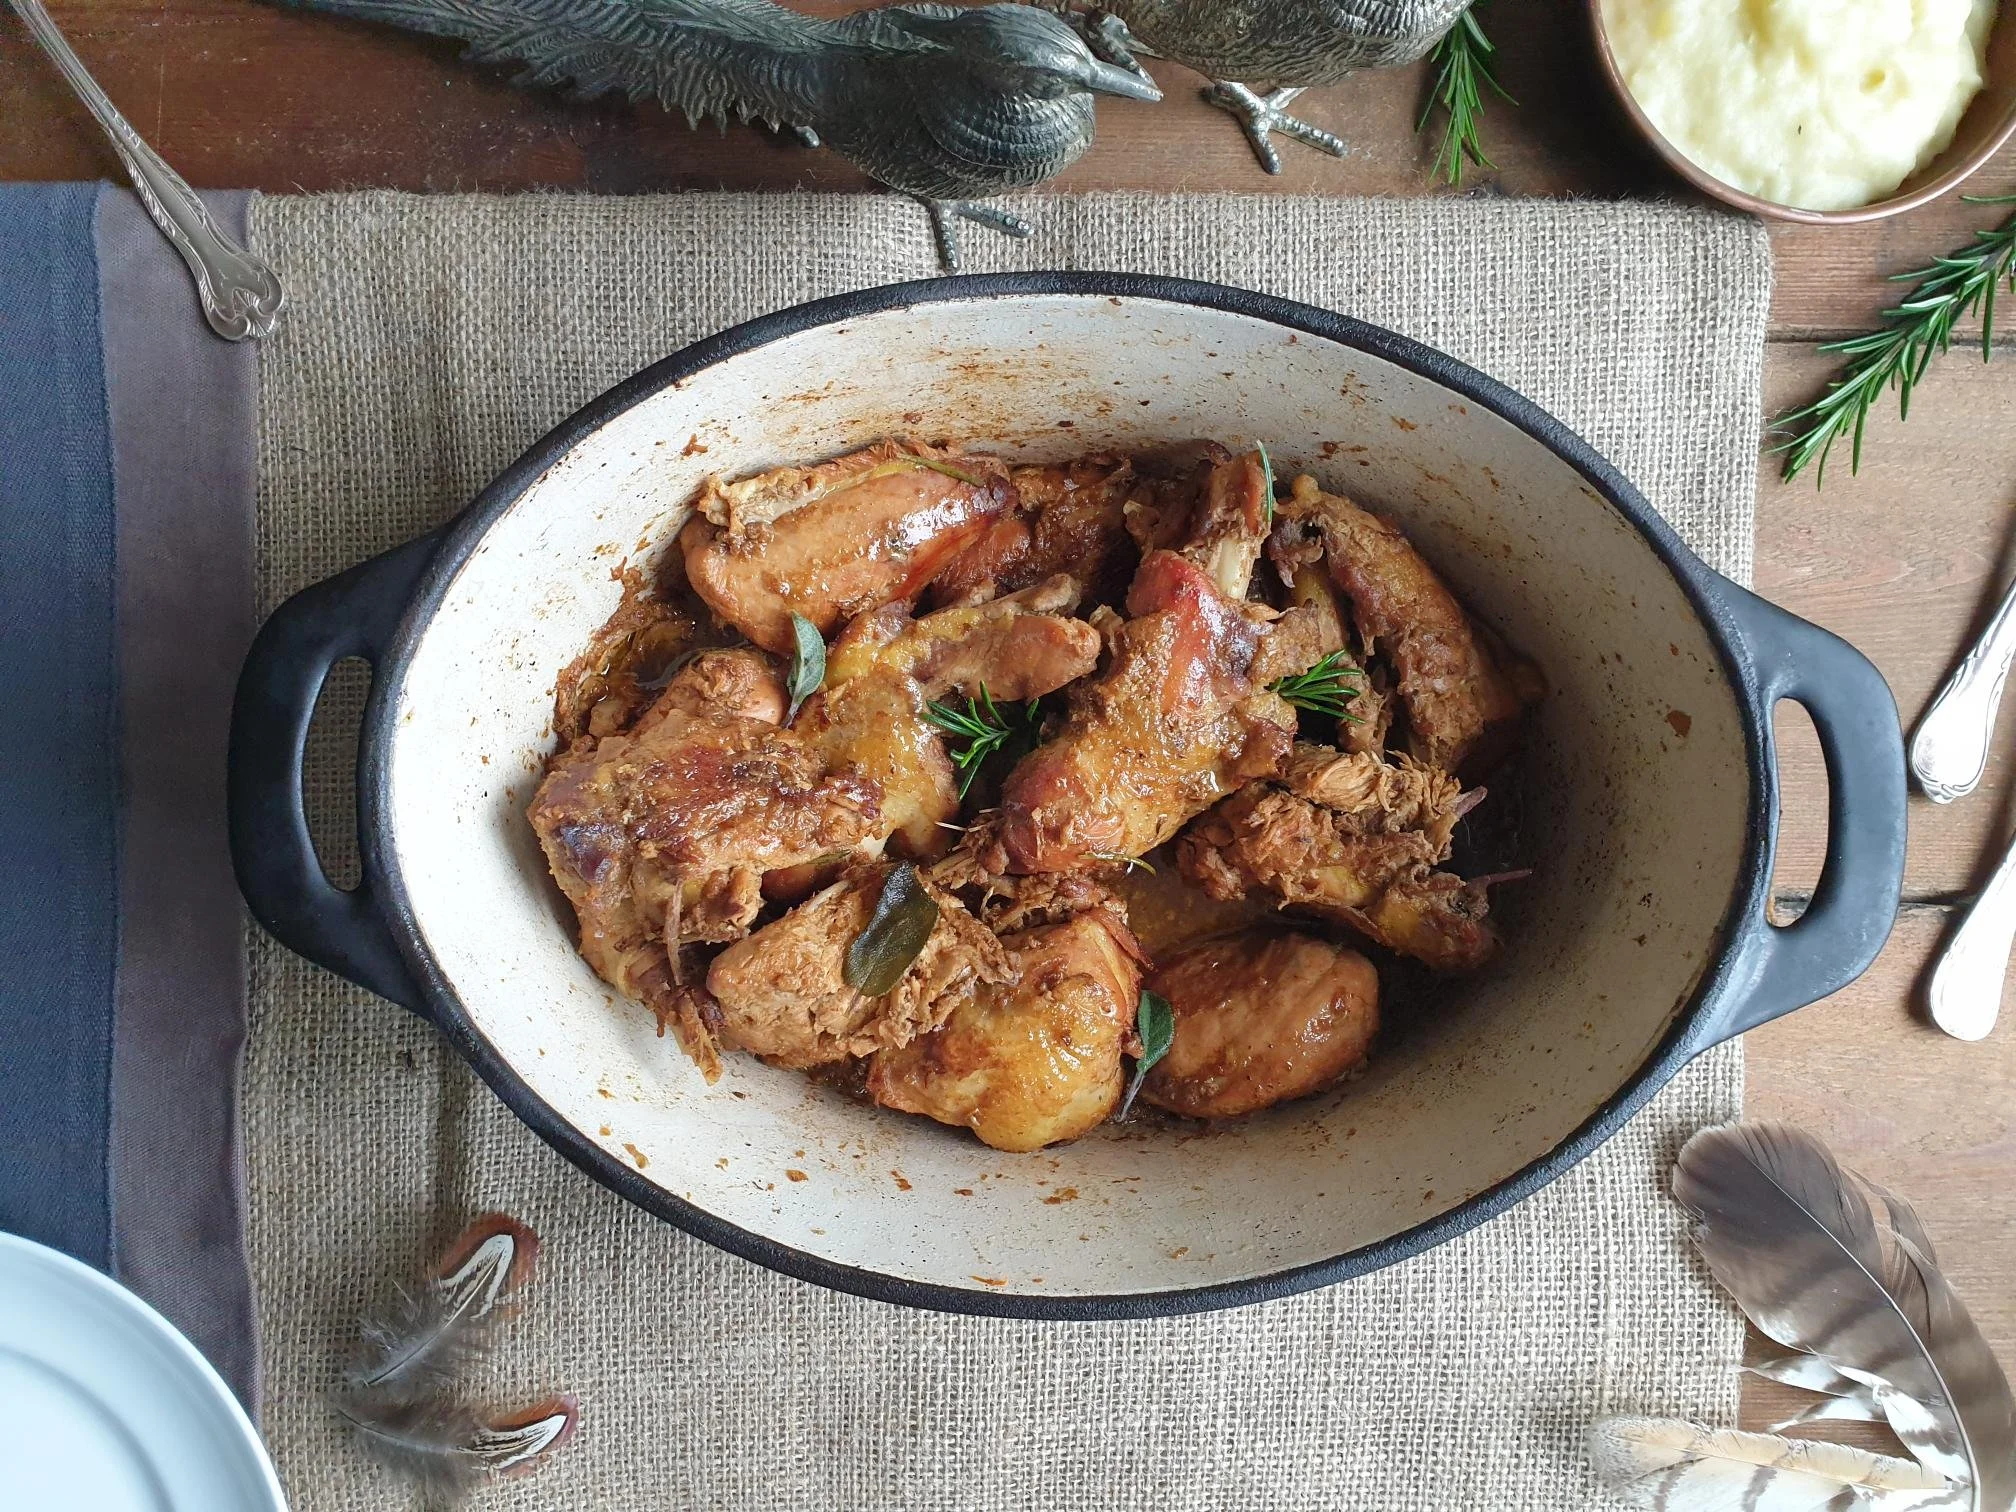
Bread dumplings with Venison stew

I simply love the recipes that provide some kind of a solution to the “problem” of avoiding food waste, and in this case the recipe is a brilliant side dish that uses - nothing more than stale bread as the key ingredient.

This is one of those recipes that you do not really need to plan since you can make bread dumplings when you simply end up with old bread and do not know what to do with it. If you have quite a bit of it to use up, then double or triple the ingredients since you can freeze a big batch of bread dumplings.

These rustic and elegant bread dumplings became a staple dish in a lot of cuisines of Eastern and Central Europe where stale bread has been very cleverly turned into a pure delicacy.

In Slovenia, where I was born and grew up, bread dumplings, called Kruhovi cmoki, have been so popular they almost became a national dish, and this recipe is most similar, or actually almost identical to the Austrian and South German( Bavarian) variety, where it is believed bread dumplings originated from, and are referred to as Semmelknödel.

There are a variety of bread dumpling recipes, for example, in the Czech Republic, fresh herbs, onions and the meaty element is not added to the bread mixture, which is also not shaped into small balls, but instead into a roll, then boiled and sliced.

Similar to bread dumplings are Canederli, found in Italy, in Trentino Alto Adige, an autonomous province of Italy, and in Austria, where small pieces of speck (lightly smoked cured meat) and cheese are added to the basic bread mixture, then they are shaped into small balls and typically cooked and served in hot beef or chicken broth.

This dish was one of my favourite dishes when I was a child, and it really does take me down memory lane. My mother would prepare them quite often, and I am sharing here her recipe, a typical Istrian variation of bread dumplings, in which fresh marjoram is added to the basic bread mixture.

Ingredients

Will make about 8 dumplings, depending on the size.

  • 310g roughly of stale bread (for this recipe I used 5 stale white baps)

  • 250-300ml milk (skimmed, semi skimmed or full fat)

  • 1 egg, beaten

  • 2 Tbsp olive oil

  • a handful of fresh flat leaf parsley (about 10g), finely chopped

  • 1 medium onion (about 100g), peeled and finely chopped

  • sea salt

  • ground black pepper

  • 40-50g sliced pancetta, cut into very small pieces (can use bacon or lardons), optional

  • 1 Tbsp fresh marjoram, very finely chopped, optional

  • all purpose flour (enough to coat the bread dumplings)

  • 1 Tbsp white dry breadcrumbs (only if needed)

Method

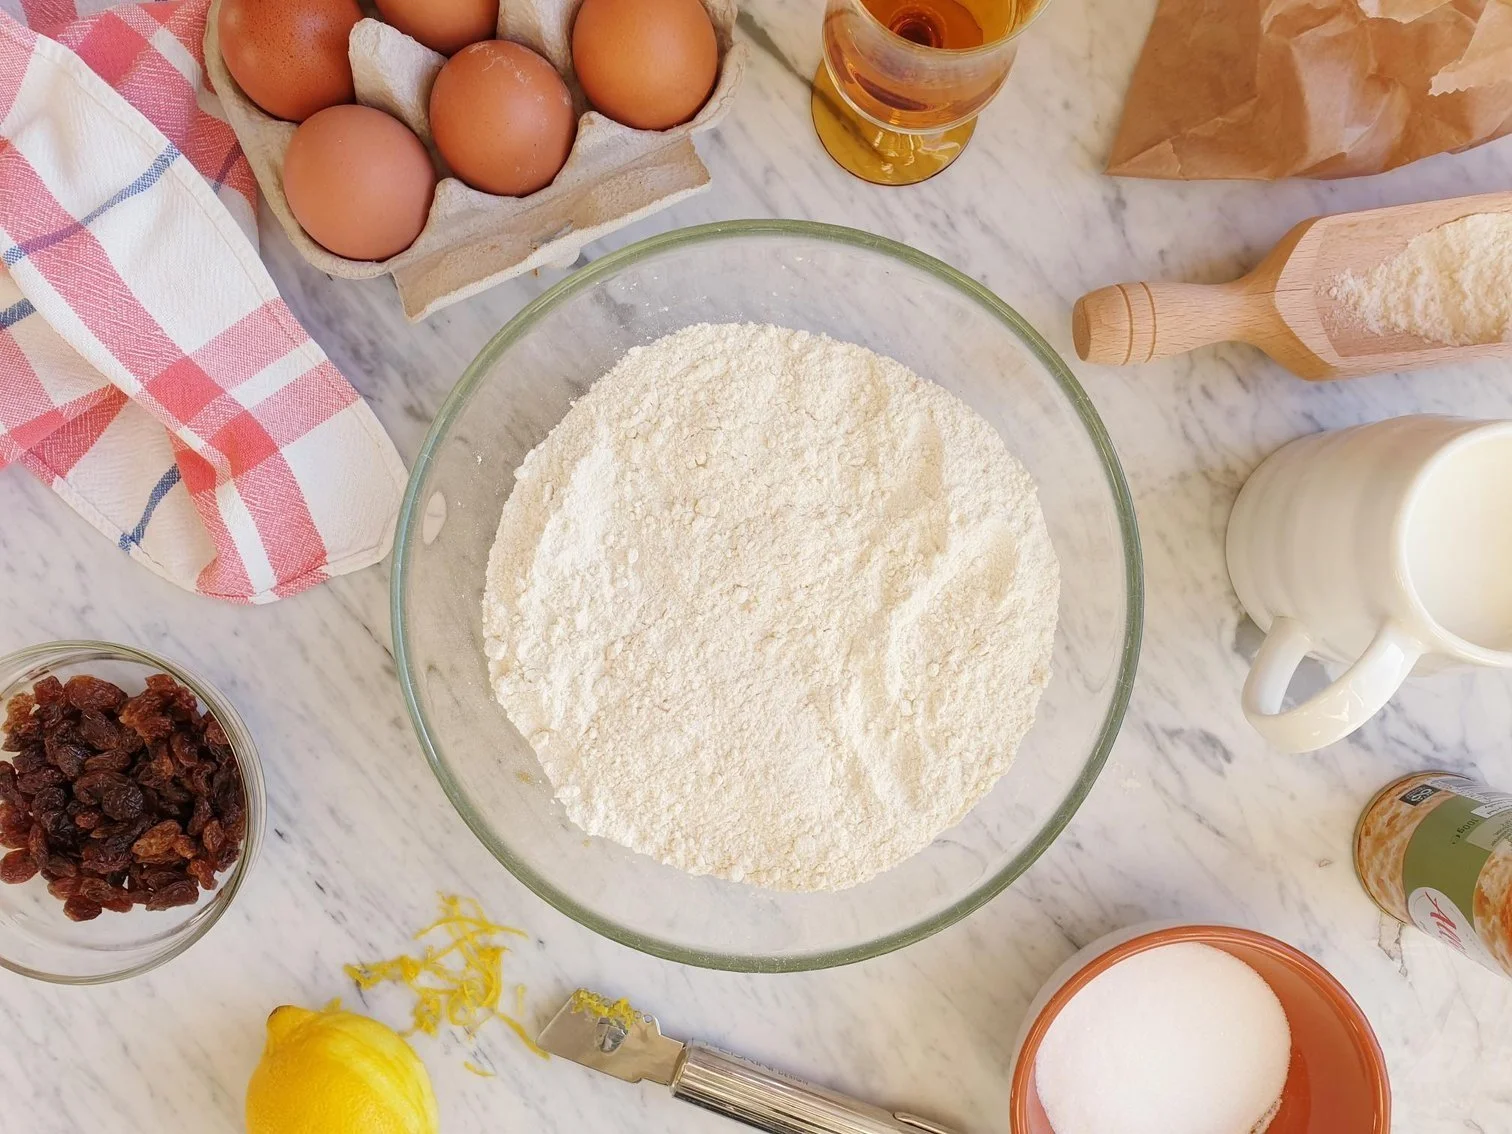
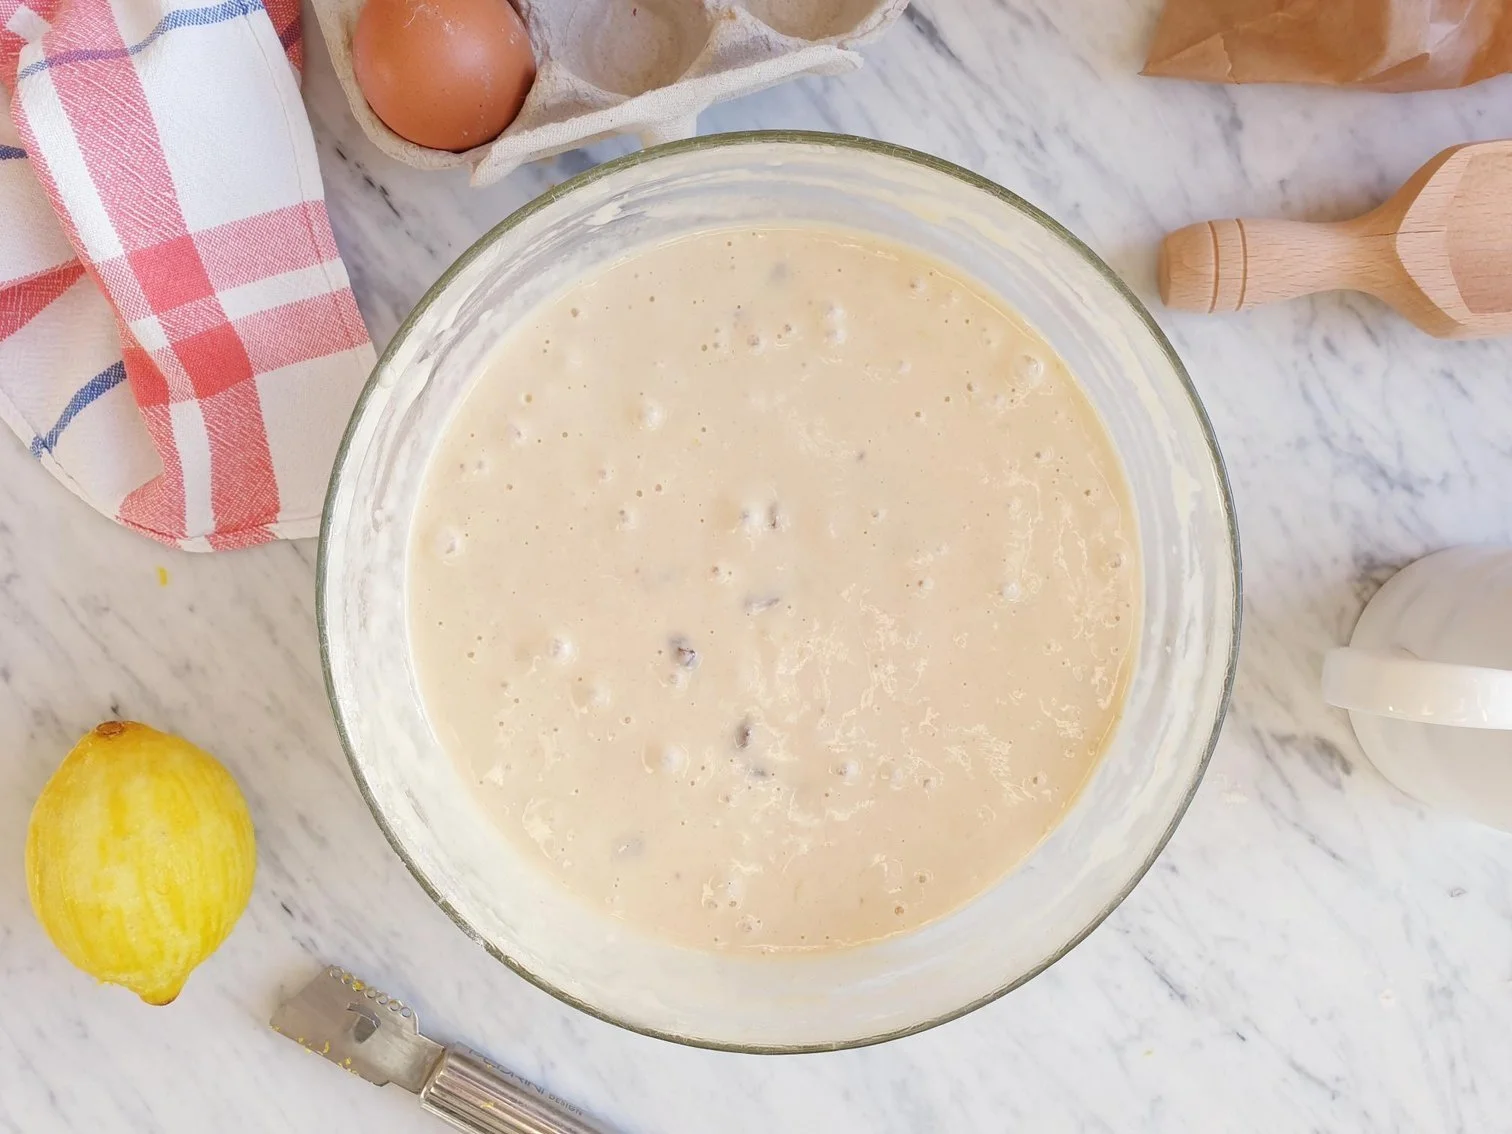
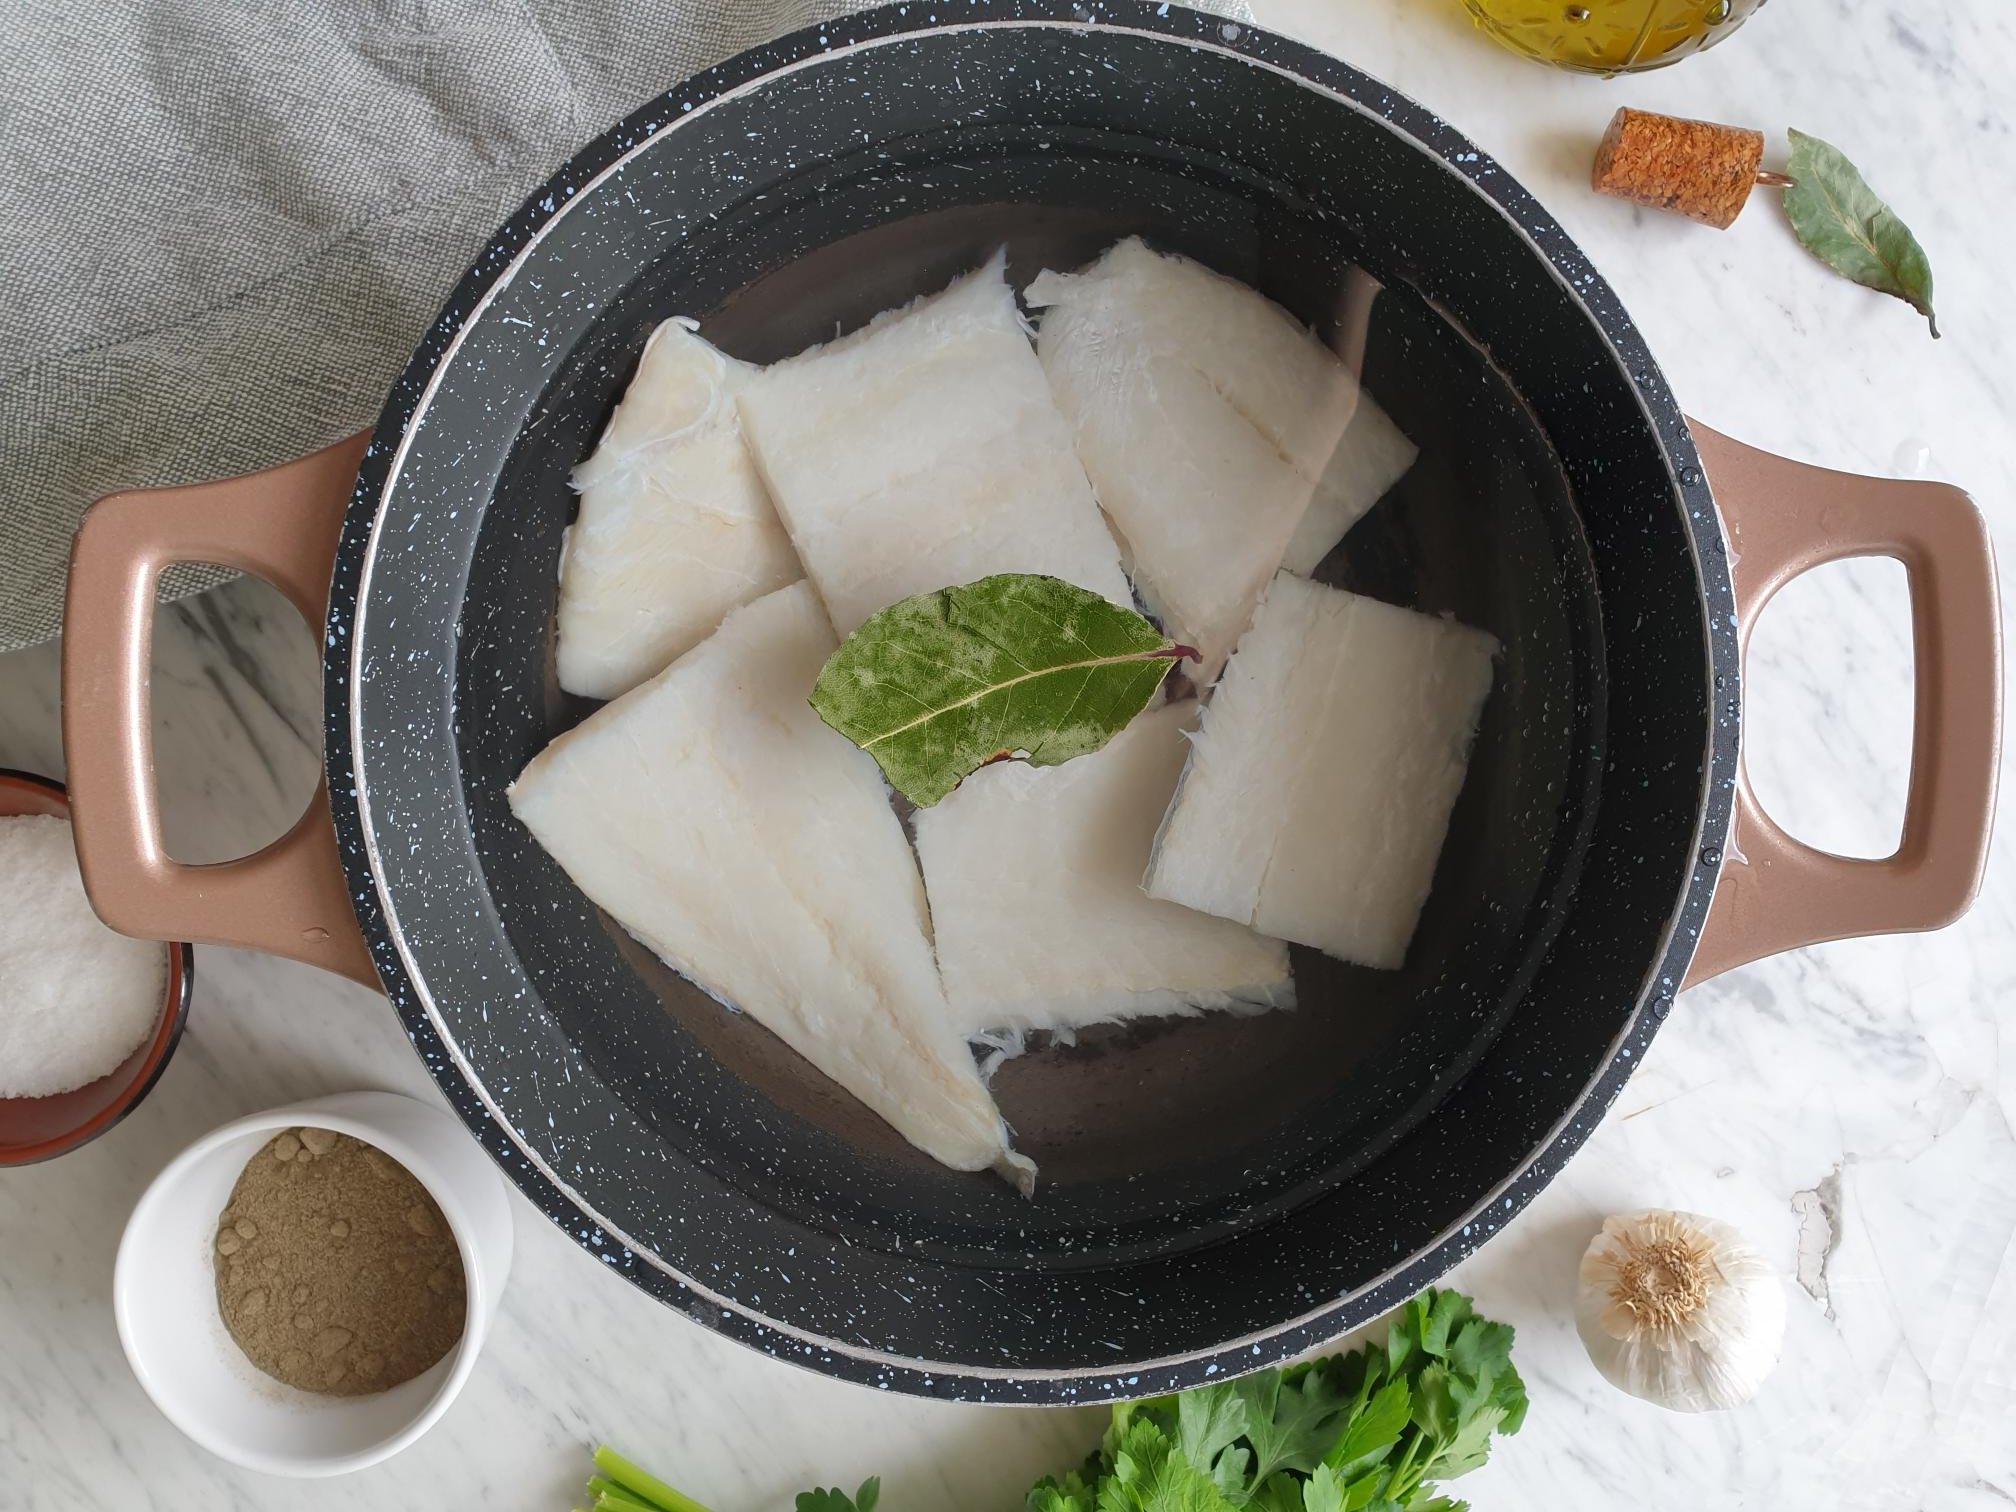
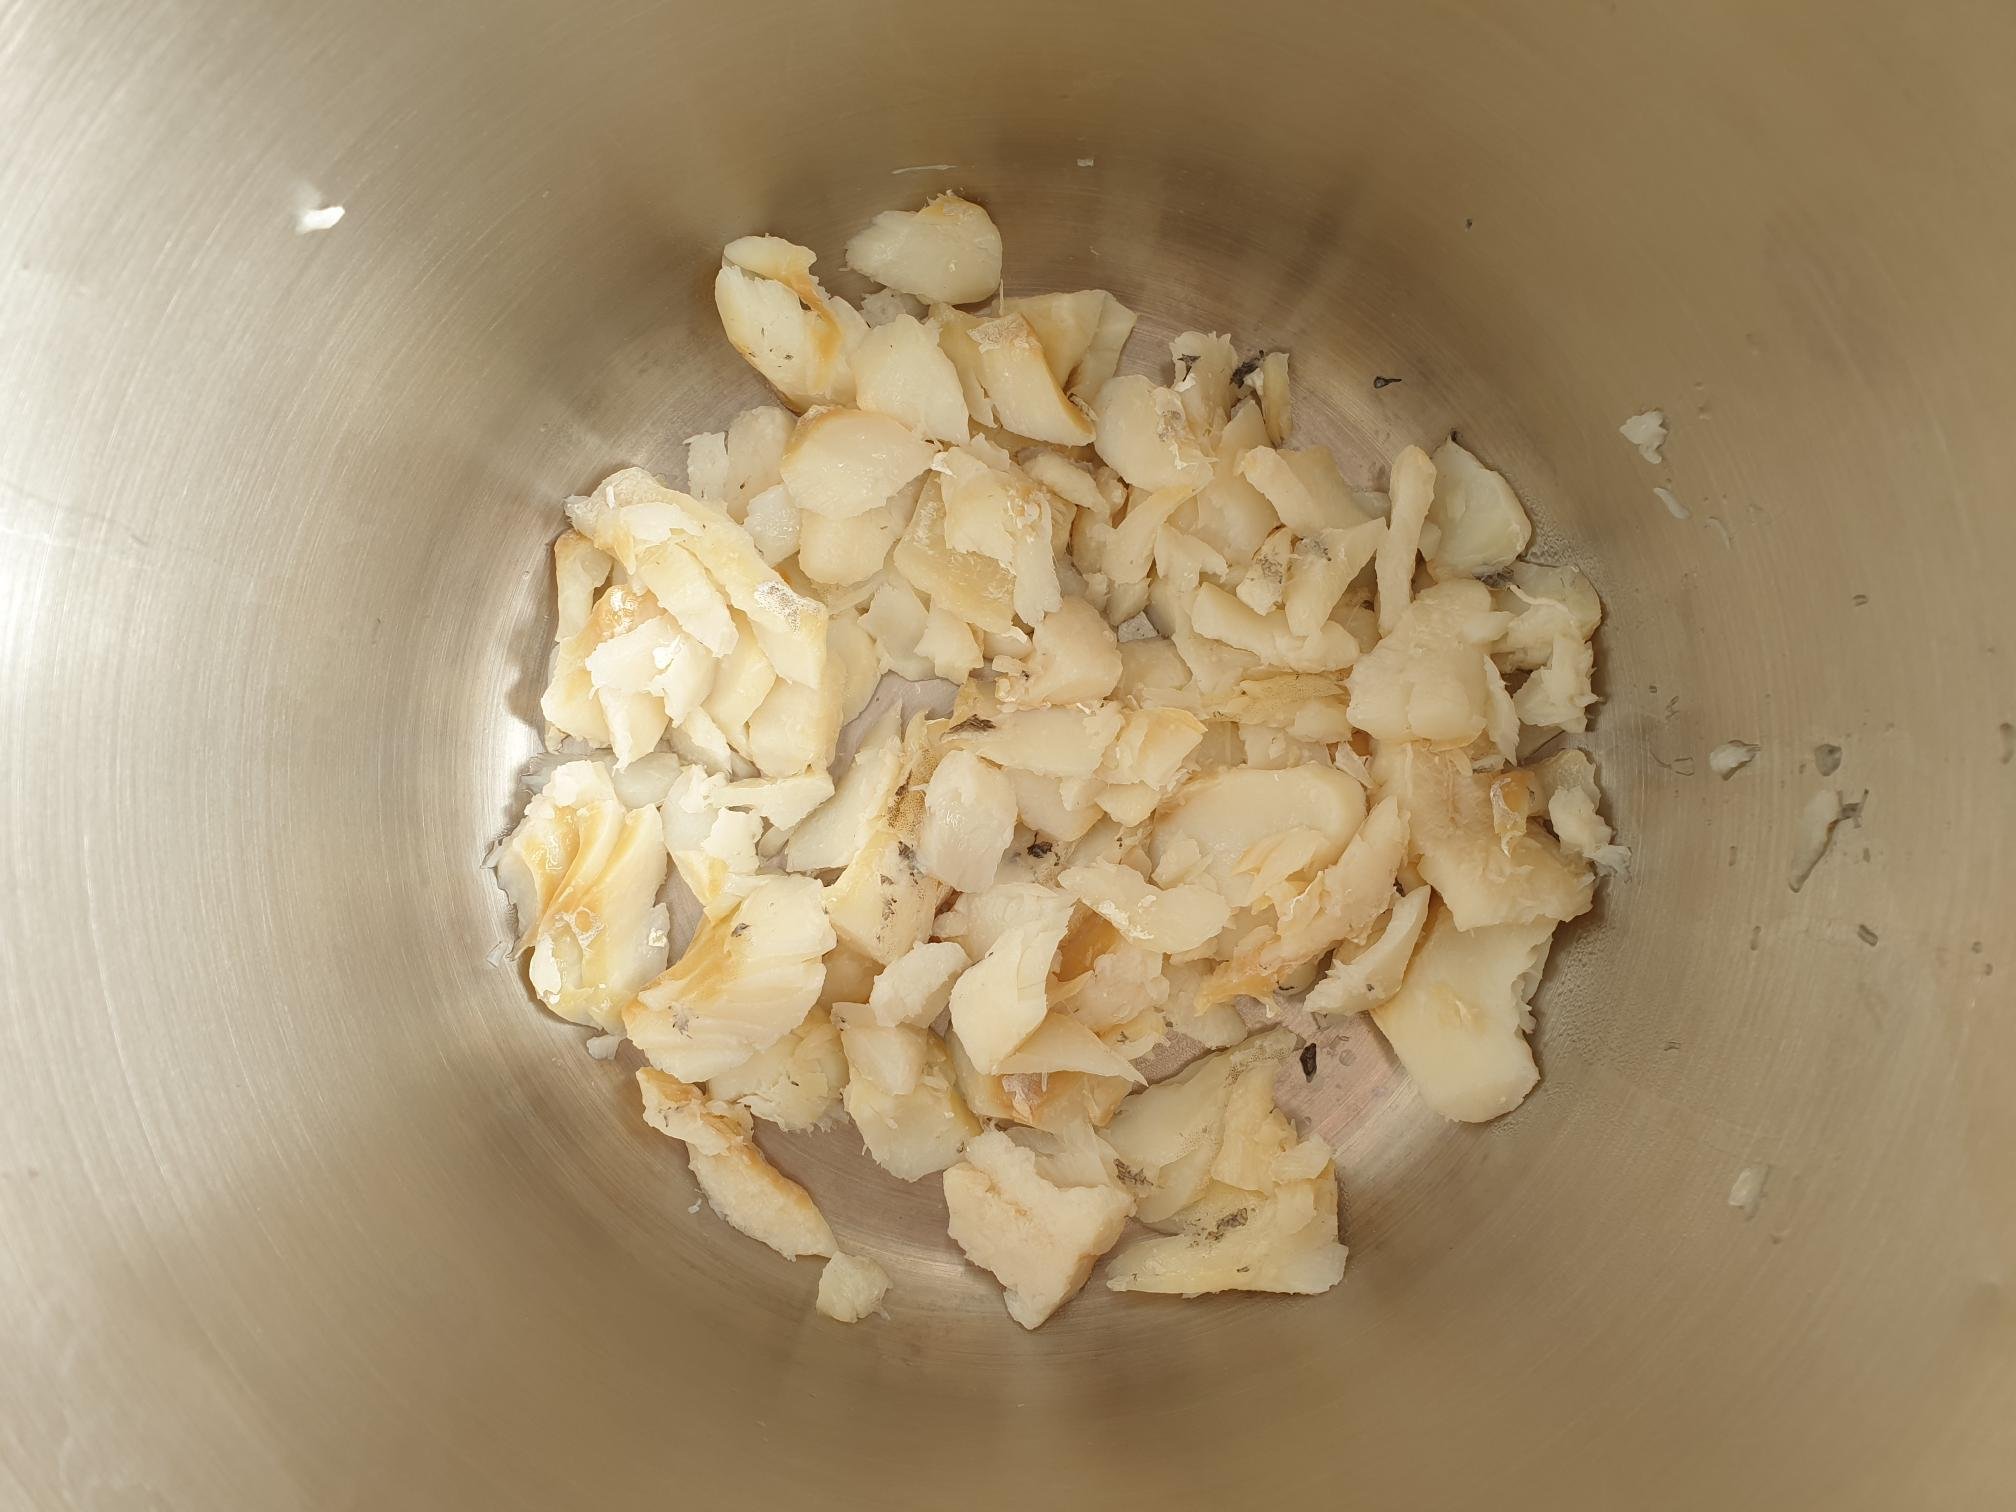
Cut or tear with your hands white baps (or any other type of stale bread you are using) into small pieces and put them in a fairly large bowl. Pour over the milk, mix well and leave to soak for about 20-30 minutes or until the bread is completely softened.

View fullsize Bread Dumplings 2.jpg
View fullsize Bread Dumplings 3.jpg

While the bread is soaking in milk, prepare the onion and pancetta mixture.

Put olive oil, finely chopped onions and small pieces of pancetta in a frying pan. Gently fry the mixture until the onions become nice and soft and transparent but not brown. Cool the pancetta and onion mixture and set aside.

View fullsize Bread Dumplings 4.jpg
View fullsize Bread Dumplings 5.jpg

Add to the bowl with the soaked bread, the beaten egg, onion and pancetta mixture, finely chopped parsley and marjoram and season with sea salt and black pepper.

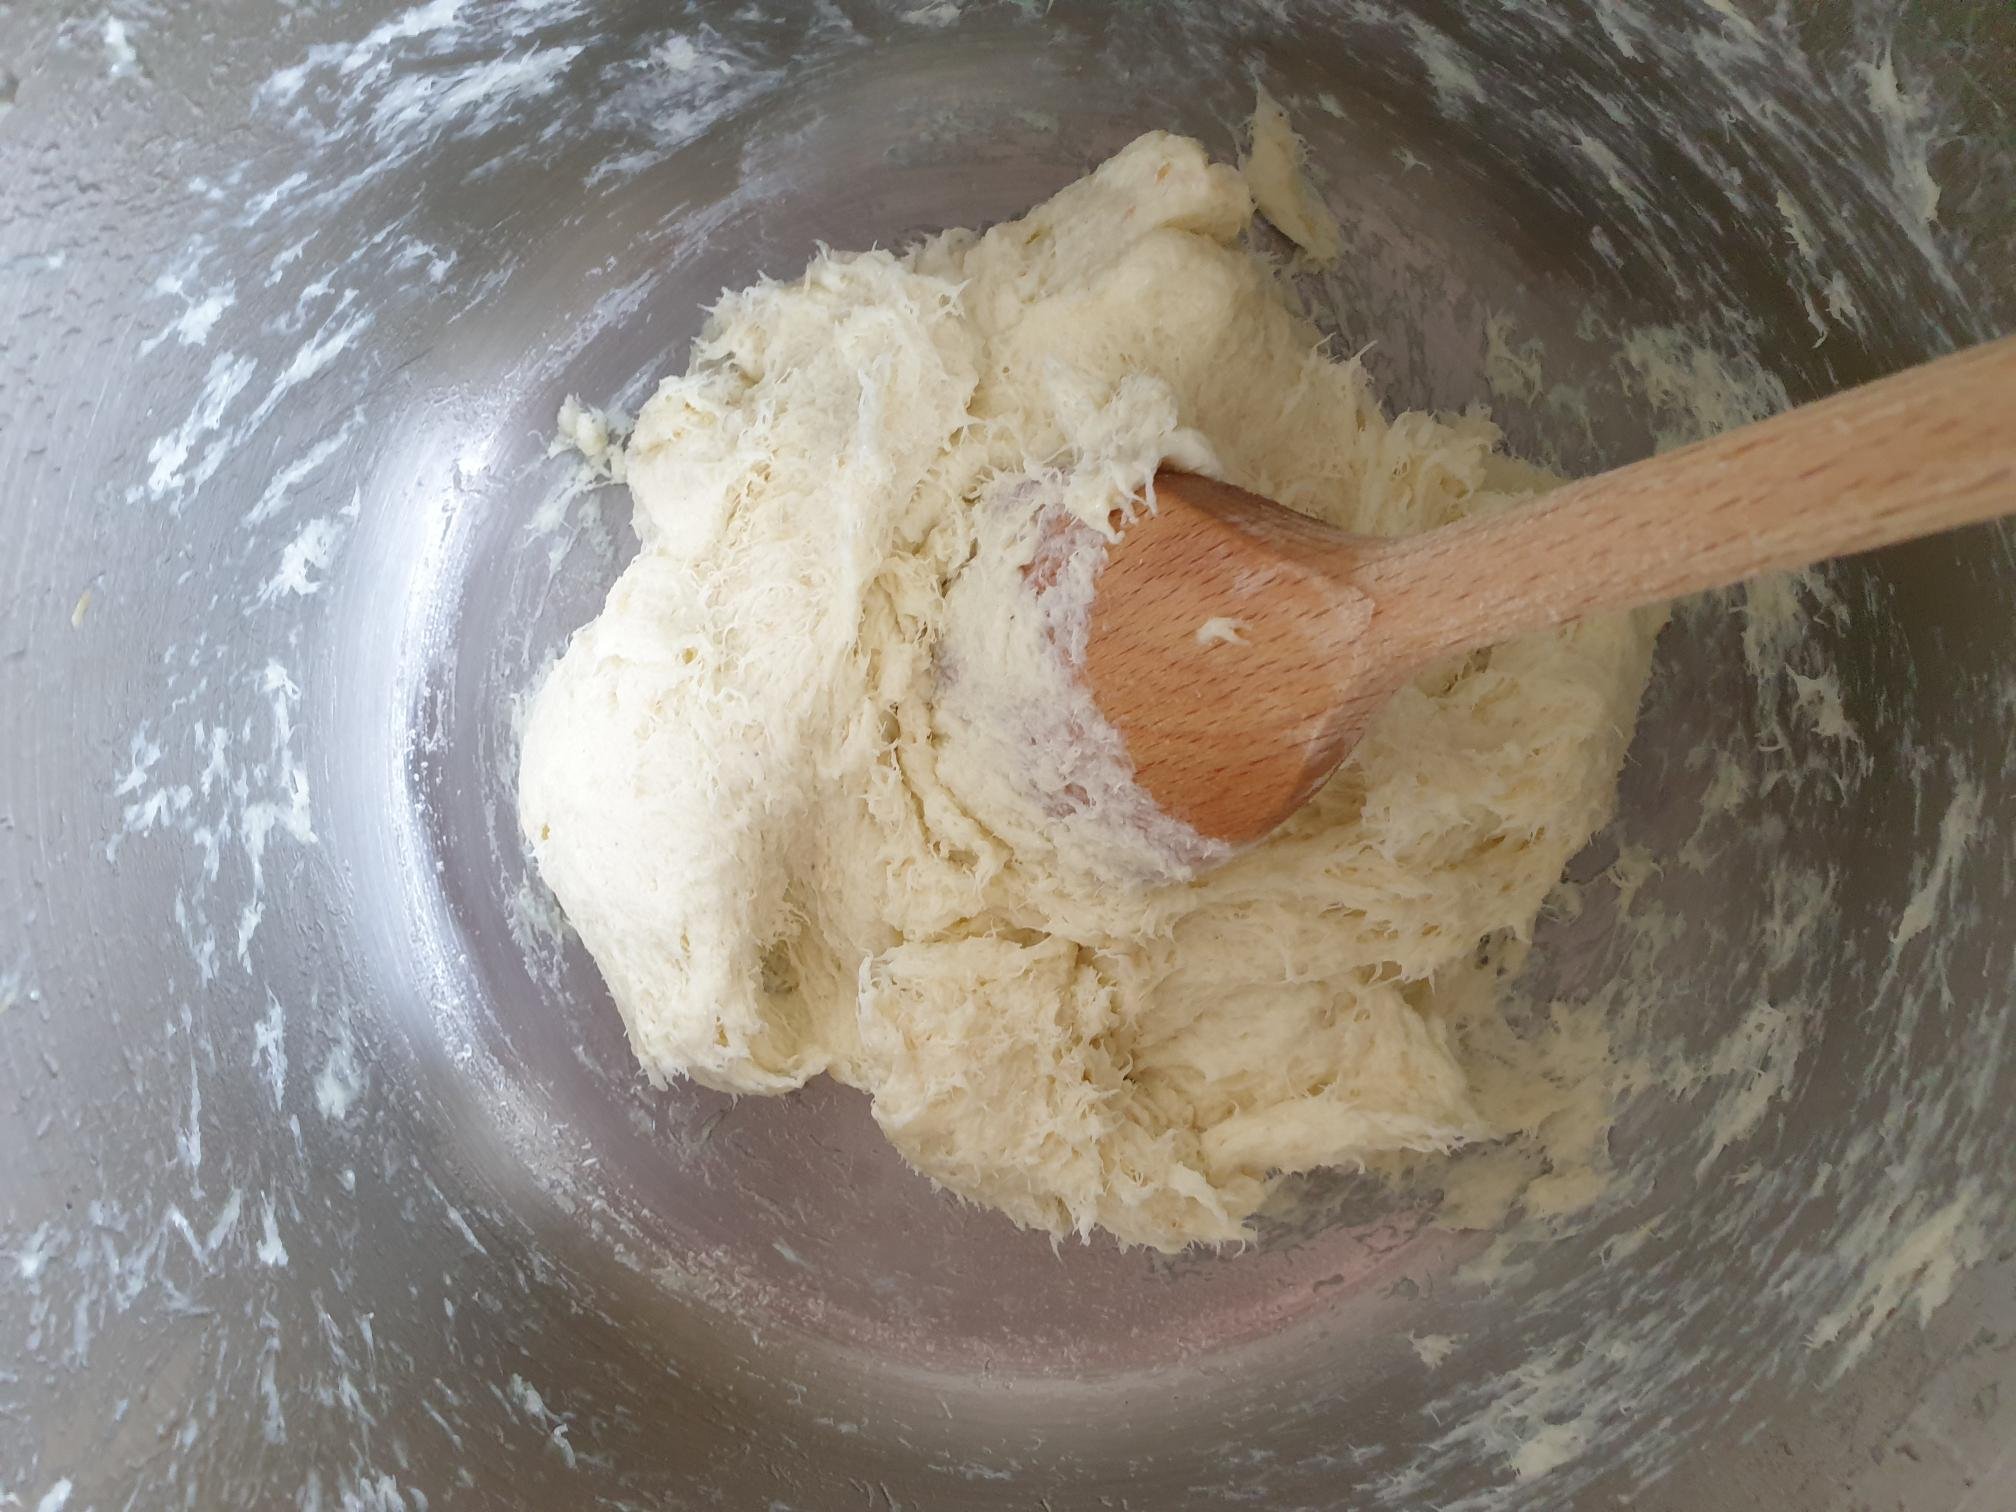
With your hand(s) mix very well all the ingredients, almost using a squeezing action, to thoroughly combine the mixture. You should end up with a bread mixture that is soft, and with a fairly smooth consistency (if you end up with bigger bread pieces just break them with your fingers).

Adjust the mixture, adding a bit of breadcrumbs (and never the flour, as the mixture will get too sticky and will become unworkable), one tablespoon at the time, if the bread mixture is too wet.

On the contrary, if you feel the mixture is too hard and dry, add a bit of milk.

It is important to use a bit of personal judgment and intuition here. The idea behind this recipe is using the stale bread or a combination of different types of stale bread which will absorb a slightly different quantity of liquid, therefore the moisture of the bread mixture needs to be adjusted accordingly.

View fullsize Bread Dumplings 6.jpg
View fullsize Bread Dumplings 7.jpg

Wet you hands (this will prevent the dough to stick to your hands).

Take roughly a handful of the mixture and shape it into a compact ball, about the size of a tennis ball.

Repeat the process until you run out of the mixture.

Put some flour into a deep plate or a bowl.

Gently coat each dumpling into a flour and remove excess flour (this will prevent sticking).

View fullsize Bread Dumplings 8.jpg
View fullsize Bread Dumplings 9.jpg

Fill a large pot of water and bring to boil. Turn down the heat and leave the water to a gentle boil.

With a slotted spoon, drop one dumpling at the time in a simmering water and cook for about 15 minutes. Do not allow the dumplings to cook in a strong boiling water as they might loose the shape and fall apart.

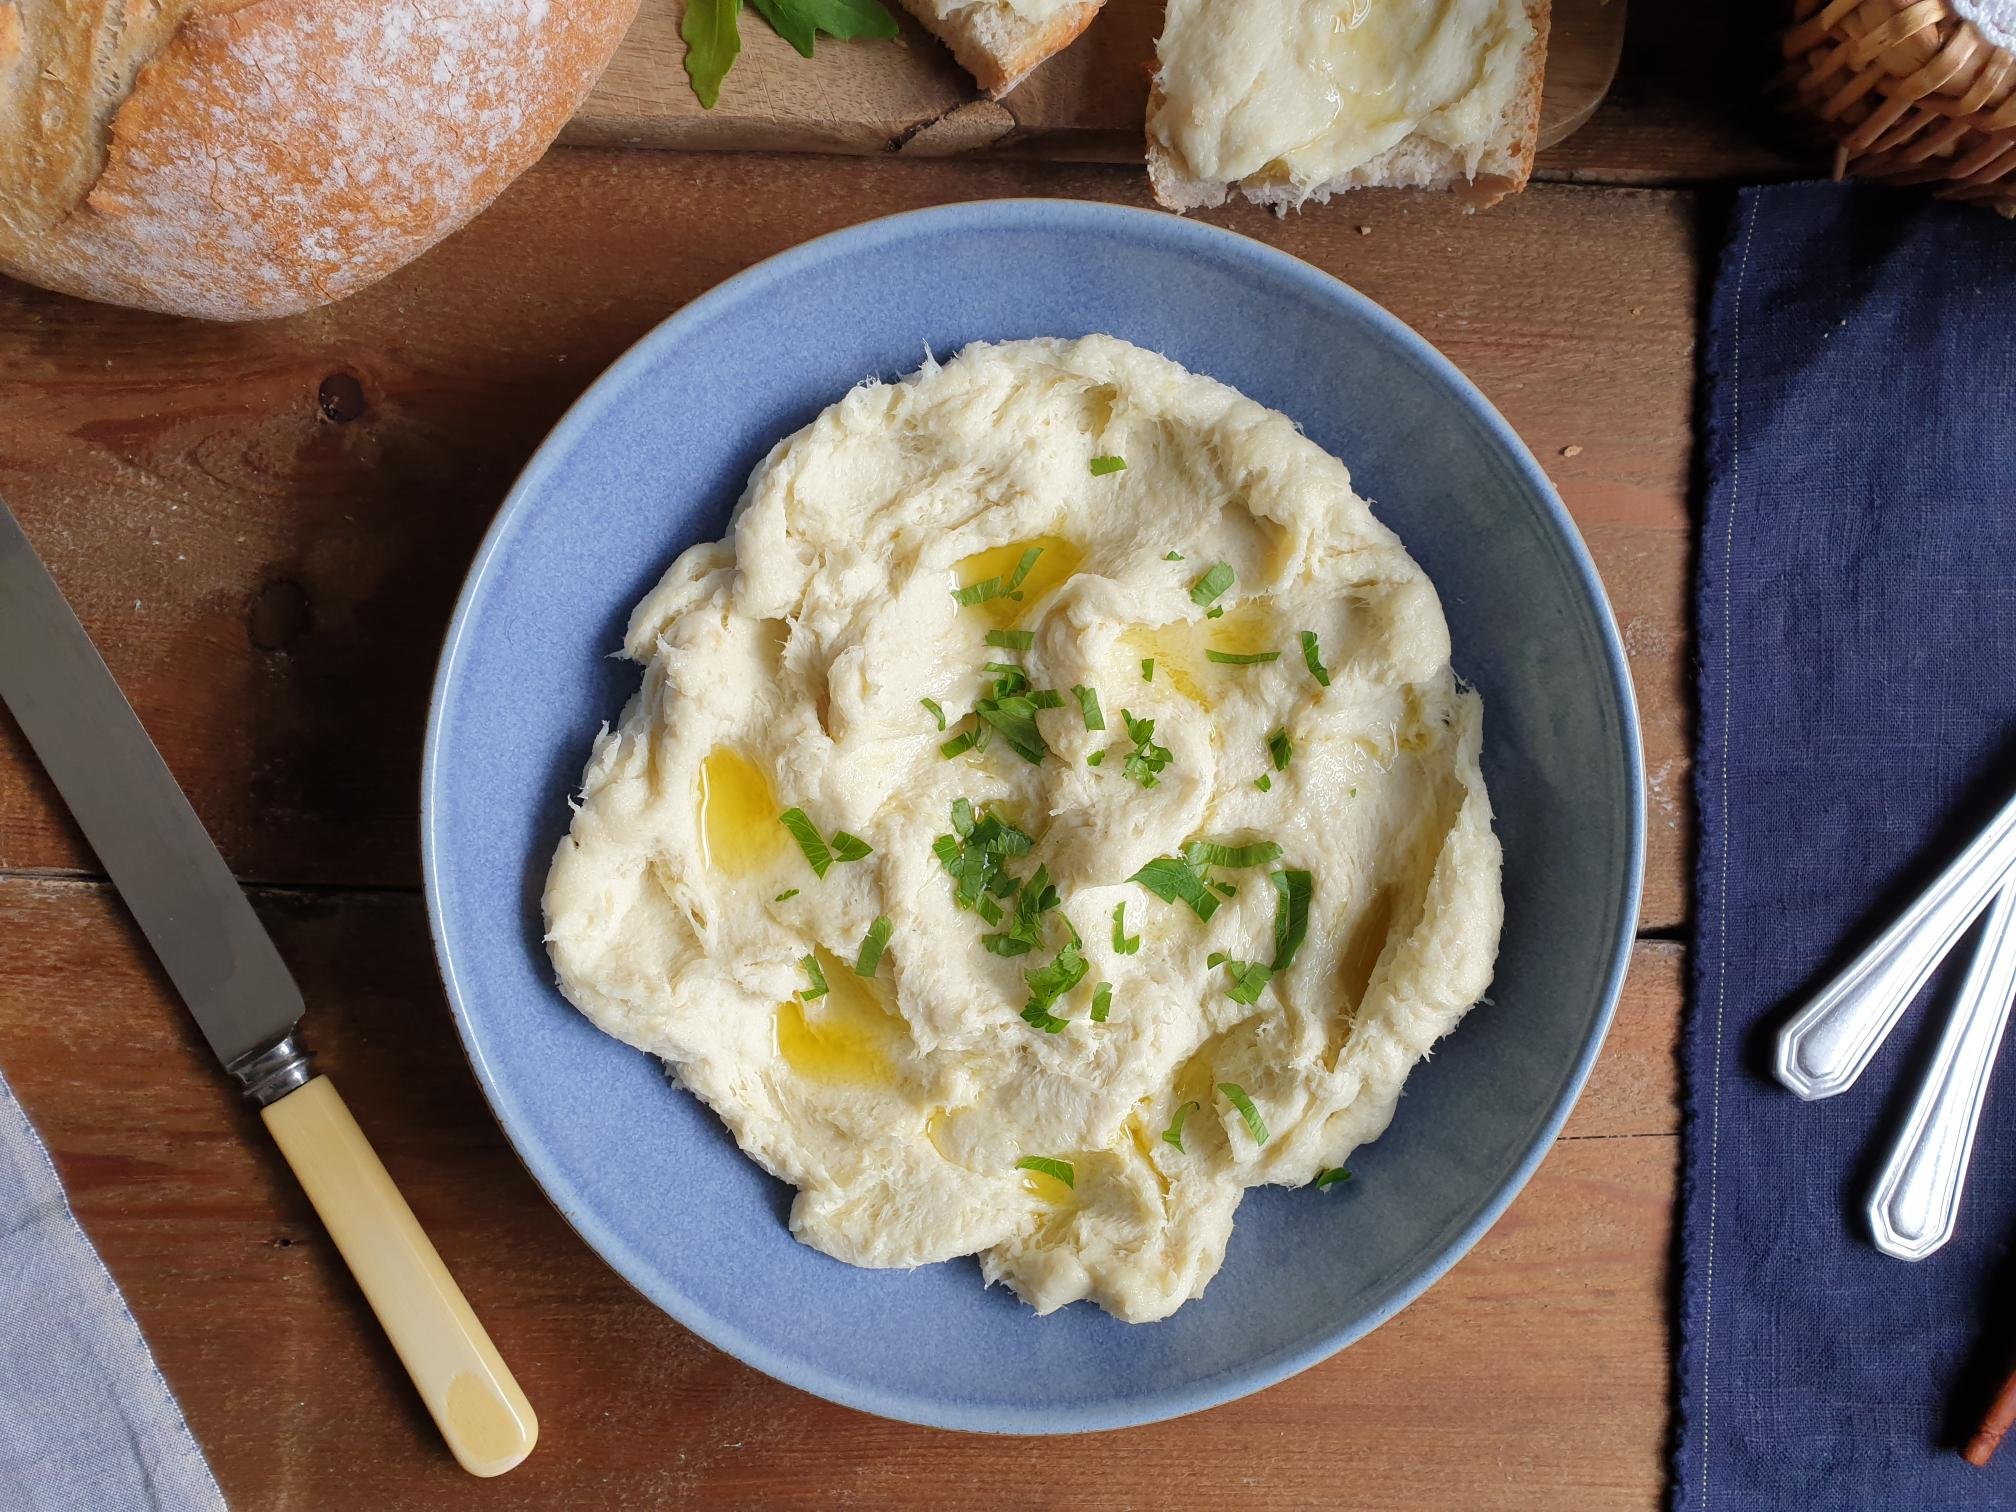
Remove cooked dumplings with a slotted spoon and transfer onto a serving plate or directly on the plates, serve warm.

Just a thought

Bread dumplings are suitable for freezing.

You can freeze uncooked dumplings by freezing them individually first, and then transfer them into freezing bags or containers. Do not defrost the dumplings when you need them, just plop them frozen directly into a simmering water and cook them slightly longer, and they are cooked when they float on the surface.

Alternatively, you can freeze already cooked dumplings. Cool them first, freeze them individually and place in freezing bags or containers. When you want to use the dumplings, let them thaw first and then reheat covered, in order to get some steam, using a microwave works well.

You can “recycle” this dish even further, if you end up with some left over cooked dumplings, slice them up and fry the slices on both sides lightly in a frying pan with some butter or olive oil.

You really could not ask anything more from stale bread!

Wine suggestion

Alto Adige Schiava DOC "Menzen" 2020 - Colterenzio

March 23, 2022 /tina oblak
stale bread, old bread, dumplings, savory dumplings, Kruhovi cmoki, Semmelknödel, Canederli
Adriatic Recipe, Austrian inspired dishes, Autumnal dish, Autumnal recipe, casserole, Celebratory dish, Central European recipes, dinner, Dumplings, Eastern European dishes, Eastern European recipes, Easy recipe, Istrian cuisine, Istrian dish, Istrian food, Istrian gastronomy, main course, main dish, Mitteleuropean cuisine, Mitteleuropean dish, Mitteleuropean food, Mitteleuropean recipes, one pot meal, Rustic dish, Side Dishes, Slovenian cuisine, Slovenian food, Slovenian gastronomy, stew, supper, Vegetarian, Winter dish, Winter recipe, family friendly meal, child friendly meal, child friendly dish, family friendly dish

Sarme - Pickled cabbage leaves stuffed with minced meat and rice in a light tomato sauce

Beans and Sardines
March 11, 2022 by tina oblak in Adriatic Recipe, Austrian inspired dishes, Hungarian inspired dishes, Autumnal dish, Autumnal recipe, Celebratory dish, Central European recipes, dinner, Eastern European dishes, Winter recipe, Winter dish, stew, Slovenian gastronomy, Slovenian food, Slovenian cuisine, Rustic dish, one pot meal, main dish, stuffed dishes, Mitteleuropean dish, Mitteleuropean cuisine, Mitteleuropean food

Sarme, which is a plural form of sarma, but also holding the name of the dish, is made of a mixture of minced meat and white rice wrapped in pickled cabbage leaves, and then slow cooked on a bed of shredded sauerkraut in a light tomato sauce.

This dish takes a special place in my recipe collection for comfort food, it is easy to make, hearty and satisfying, especially popular during colder months, it will wrap you in warmth like a woollen blanket. It used to be commonly served for lunch or dinner during the holidays and special occasions but nowadays it is also eaten as midweek meal.

Taking into account the historical context, it is quite clear, that Sarma probably originated in Turkey (the name sarma derives from a Turkish word sarmak, meaning to roll) and belongs to the dolma food family (stuffed dishes) spread in the cuisines in territories of the former Ottoman Empire from the Middle East to the Balkans and Central Europe, but like with most dishes, different places developed different versions of the same basic recipe.

When I first arrived to England, I was quite nostalgic about this dish as I could not find the whole sauerkraut head to buy. When my mother visited me she would buy it back home for me, put it in a suitcase and bring it with her on a plane. We would then prepare and cook sarme together. In Slovenia, where I come from, it is quite common to pickle large quantities of cabbage heads and buy them in the supermarkets in plastic bags or on farmer's markets directly from barrels available to make sarme during the winter.

View fullsize Sarme 1.jpg
View fullsize Sarme 3.jpg

In the family this dish would very often be made for big family gatherings in a big batch with the hope that some of it could be frozen and taken out on a lazy day, but that almost never happened!

I am Sharing here a version of sarme my maternal grandmother and my mother always cooked. It is highly recommended to make ahead as it tastes even better the following day, and serve sarme with mashed or boiled potatoes, or crusty bread and a dollop of sour cream on top.

It is very common to add in a pot of simmering sarme some lardons, bacon (thick cut), pancetta or pork ribs, smoked or unsmoked, this will give an additional meaty taste to the dish.

If you live in the UK and happened to watch on the television Rick's Steins Long Weekends short holiday and cooking series a few years ago, this dish was prepared for him in Vienna and described by him as one of his absolute favourites of all his long weekend programmes.

Ingredients

Serves 4-6 (about 12 rolls)

  • 1 pack of whole pickled cabbage head (you will find this on line or European delicatessens, especially Polish in the chilled section)

  • 250g minced beef

  • 250g minced pork

  • 100g white rice

  • 1 onion (about 100g), peeled and finely chopped

  • 2-3 cloves of garlic, peeled and crushed

  • 3 Tbsp olive oil

  • sea salt

  • ground black pepper

  • 2 bay leaves, fresh or dry

  • 2 Tbsp tomato concentrate

  • 1 Tbsp (or to taste) sweet Hungarian paprika

  • 1-2 Tbsp all purpose flour

  • sour cream for serving, optional

Method

The filling

Place the rice in a pan and cover with plenty of water.

Cook the rice as instructed on the pack, but cut the cooking time in half, as you only want the rice to be part-cooked.

Drain the rice in a colander and let it cool completely.

Put the oil, finely chopped onions and crushed garlic in a frying pan and sauté on a gentle heat until the onions become nice and soft.

Turn the heat to medium, add minced beef and pork, season with sea salt and black pepper and cook for about 20 minutes until the meat is browned.

Remove the frying pan from the heat, set aside and cool completely.

When both the rice and the meat mixture are cooled completely, put them in a bowl and mix them well together.

This is now your filling ready to fill the cabbage leaves.

Prepare the cabbage leaves for stuffing.

View fullsize Sarme 4.jpg
View fullsize Sarme 5.jpg

Carefully unpeel the leaves from the whole pickled cabbage head and gently open them up without breaking them. This is quite important so you do not have breakage and holes in the leaves, as the filling might come out once rolled. If you end up damaging quite badly the leaf, do not worry about it, just thinly shred it and use it later as a part of a sauce.

You will only need bigger and medium size leaves that come off the head quite easily. How many leaves you can obtain it really depends on the size of the whole pickled cabbage head (from the medium size cabbage head you should get around 12 leaves, this is the amount I used for this recipe).

View fullsize Sarme 8.jpg
View fullsize Sarme 9.jpg

Once you peel off the leaves, you will end up with smaller inner cabbage head. Shred it with a sharp knife and set aside, this will be part of your sauce later on.

Place each leaf on a chopping board and cut out the thick and hard part of the stem, this will allow you to roll the leaf easily.

View fullsize Sarme 10.jpg
View fullsize Sarme 11.jpg

Take one leaf, place it on a working surface and spoon the filling on the edge of each leaf. It is tricky to give the exact amount, maybe 3 Tbsp for bigger leaves and a bit less for smaller leaves. You really want to use a bit of judgement here and just put the amount of filling you think the size of the leaf you are using can hold.

First fold inwards (away from you) the leaf section.

View fullsize Sarme 15.jpg
View fullsize Sarme 16.jpg

Then fold over the two flaps on the side. Then you simply roll forward until you get a cabbage roll.

View fullsize Sarme 17.jpg
View fullsize Sarme 18.jpg

Set aside the rolls and keep repeating the process until you use up all the leaves.

Put half the shredded pickled cabbage over the base of a fairly large casserole dish or pan with a lid.

Place and arrange the stuffed leaves, fold-side down, next to each other, nice and tightly.

Scatter the other half of shredded cabbage on top of the rolls.

View fullsize Sarme 20.jpg
View fullsize Sarme 21.jpg

Add a bit of water, about half way to 1/3 way up the dish.

In a small cereal bowl put the flour, few tables spoons of lukewarm water and mix well to avoid lumps.

Add sweet paprika, tomato paste and mix.

Pour the mixture over the stuffed leaves.

Stick 1 or 2 bay leaf between sarma, add sea salt and black pepper.

Cover with the lid and gently simmer for about 2 hours. It is important not to stir and keeping the gas on a fairly low as high heat might cause aggressive boil causing the rolls to open up and break. Just shake the pot gently a few times during the cooking process.

If after two hours you think the sauce is too watery just dissolve 1 Tbsp of flour in a bit of lukewarm water, pour it in the pot and continue simmering. This should thicken a bit the sauce.

Taste and adjust the seasoning with sea salt and black pepper.

Lift the cabbage rolls gently out of the pot, with the help of the spoon and a fork and serve warm with mashed or boiled potatoes or plenty of crunchy bread to soak up the juices.

For extra flavour top the rolls with a dollop of sour cream.

Just a thought

Sarme will keep in the fridge up to 3-4 days in an airtight container.

The dish also freezes very well, but before using it, defrost in the fridge overnight and reheat well.

Wine suggestion

Venezia Giulia Malvasia Istriana IGT 2017 - Damijan Podversic

March 11, 2022 /tina oblak
Sarma, Sarme, sauerkraut, Sauerkraut recipe, minced meat, mince pork, mince beef, rice, shredded sauerkraut, pickled cabbage leaves, hearty dish
Adriatic Recipe, Austrian inspired dishes, Hungarian inspired dishes, Autumnal dish, Autumnal recipe, Celebratory dish, Central European recipes, dinner, Eastern European dishes, Winter recipe, Winter dish, stew, Slovenian gastronomy, Slovenian food, Slovenian cuisine, Rustic dish, one pot meal, main dish, stuffed dishes, Mitteleuropean dish, Mitteleuropean cuisine, Mitteleuropean food
Comment

Braised Pheasant with fresh herbs Recipe

Beans and Srdines
January 12, 2022 by tina oblak in Adriatic Recipe, Autumnal dish, Autumnal recipe, Celebratory dish, Central European recipes, Christmas dish, dinner, Eastern European recipes, Easy recipe, Festive dish, Istrian cuisine, Istrian dish, Istrian food, Istrian gastronomy, main dish, main meat course, Meat, one pot meal, Rustic dish, Slovenian cuisine, Slovenian food, Slovenian gastronomy, Winter dish, Winter recipe, one pot meat recipe

Braised pheasant is a fantastic winter warmer, comforting and hearty, made with only few fresh ingredients evoking seasonal flavours.

First, the pheasant meat is browned and then slowly cooked with fresh herbs in a beautiful sauce allowing the meat to be tenderised.

This simple and rustic dish offers and provides full and rich but delicate flavour and it is best made ahead of time as it improves when cooked in advance and then re-heated gently before serving.

Braised pheasant has been a very much loved traditional dish in Slovenian Istra where its gentle landscape has provided many opportunities for hunting, a pheasant representing one of the foremost preys among the local hunters.

This area was once part of The Republic of Venice, and it is believed that this gamebird with oriental plumage, was introduced to the West via Venice, as this majestic city had very close links with the Byzantine empire.

Moreover, some sources report that the name pheasant, Fasan, in venetian dialect, and Fazan, in standard Slovenian, comes from the fact that the pheasant was originally a native of the river Phasis in Colchis (in present day Western Georgia).

Cooking pheasant meat, in general, used to be a rare treat and was reserved for festivities and very special occasions, and although nowadays pheasant meat is a bit more accessible and affordable, it is still served to mark more special events, and is not presented on your plate as a average midweek dinner. Pheasant dishes can be enjoyed and found on menus in formal and informal restaurants during autumn and winter pheasant hunting months.

Braised pheasant is a very much appreciated dish in the family and here I am sharing my nona and my mother's recipe.

Ingredients

Serves 4-6

  • 2 small pheasants (about 1.5kg) jointed (your butcher will be more than happy to do this for you)

  • 3 Tbsp extra virgin olive oil

  • 1 medium onion (about 150g), roughly chopped

  • 2 celery sticks (about 40g), finely chopped

  • carrot (about 50g), finely grated

  • 2 cloves of garlic, peeled and crushed

  • sea salt

  • ground black pepper

  • 1 fresh rosemary spring (tied with the cooking string as this makes it easier to remove after cooking and prevents the needles to fall off the spring)

  • 2-3 fresh sage leafs

  • 100 ml white wine

  • chicken or vegetable stock (can use just water) It is perfectly fine to use a good quality instant stock .

Method

In a heavy, lidded casserole pan add extra virgin olive oil, chopped onions, finely grated carrot, finely chopped celery sticks, crushed garlic, jointed pheasants and mix well.

On a low and gentle heat, fry, stirring occasionally and moving around the meat. Scrape the bits off the bottom of the pan with the wooden spoon if it starts to catch to avoid burning (this will get deglazed later and become part of the sauce).

This stage of very gently frying and browning the meat on all sides can take up to one hour (the longer you brown the meat the darker the sauce will be).

View fullsize Braised pheasant 2.jpg
View fullsize Braised pheasant 3.jpg

Deglaze the pan with white wine and let it completely evaporate.

Add fresh spring of rosemary, fresh sage leafs and stock or water, just enough to cover halfway up.

Place the casserole pan over a medium heat and bring to a simmering point.

Cover with a lid, lower the heat and gently simmer for about 1 hour, stirring occasionally, until the pheasant meat is tender and cooked through. Cooking the pheasant with the lid covered partially or completely will ensure the pheasant meat stays moist as the moisture will be kept in the pan, gently steaming the meat during the simmering process.

If excess fat is formed during cooking process skim it off using a spoon.

Remove rosemary spring and sage leafs.

Taste and adjust the seasoning with sea salt and black pepper.

If the sauce is too liquidy, increase the heat allowing it to reduce and thicken slightly. On the contrary, if the sauce has a thick consistency dilute it a bit with the stock or water.

Serve hot with soft cooked or grilled polenta, mashed potato, potato gnocchi, egg based pasta like bleki or simply nice fresh crunchy rustic style bread to soak up the juices.

Just a thought

This is a great dish to make ahead of time and suitable for freezing.

Wine suggestion

Friuli Colli Orientali Merlot DOC 2017 - Livio Felluga

January 12, 2022 /tina oblak
Pheasant, Pheasant meat, game meat, Braised pheasant, Slow cooked pheasant, Istrian style braised pheasant
Adriatic Recipe, Autumnal dish, Autumnal recipe, Celebratory dish, Central European recipes, Christmas dish, dinner, Eastern European recipes, Easy recipe, Festive dish, Istrian cuisine, Istrian dish, Istrian food, Istrian gastronomy, main dish, main meat course, Meat, one pot meal, Rustic dish, Slovenian cuisine, Slovenian food, Slovenian gastronomy, Winter dish, Winter recipe, one pot meat recipe
Comment

Fritole - Istrian small doughnuts Recipe

Beans and Sardines
December 23, 2021 by tina oblak in Adriatic Recipe, Autumnal dish, Autumnal recipe, Celebratory dish, Central European recipes, Christmas dish, dessert, Easter dish, Easter treats, Eastern European recipes, Easy recipe, Enriched dough, Festive dish, Finger food, Istrian cuisine, Istrian dish, Istrian food, pudding, Rustic dish, Slovenian cuisine, Slovenian food, Slovenian gastronomy, Small bites, Snacks, sweet course, Sweet Things, Winter dish, Winter recipe, festive sweet things, festive dessert, celebratory desserts

Fritole are a type of small fried doughnuts made of thick batter-like dough enriched with raisins and served warm covered in icing sugar, they are light and crunchy on the outside and soft and aromatic on the inside, they just melt in your mouth.

This sinfully delicious and fragrant little delights have a very deep connection with Christian, especially Catholic liturgical festivities like the Carnival season, the time of the year in which eating in excess, and gastronomic indulgence was allowed by the Church before the start of fasting and austerity during Lent, and ending with Easter.

In Venice, where this sweet treats are a synonym of Carnival, fritole used to be prepared and served strictly during the days of Carnival. Nowadays, they appear not only in Venice but also in the region of Veneto and north-east region of Friuli-Venezia Giulia, Italy, and Istria where fritole are also very popular and start appearing as soon as Christmas festivities are over and remain around on offer as a irresistible sweet temptation until Ash Wednesday begins the Lent season.

However, on the coastal part of Slovenian Istra, once being part of what was called, ‘The most Serene Republic of Venice,’ fritole hold a very special place on Christmas Eve and this is when my nona would make fritole as the tradition called upon her to do.

In dialect they could also be called Fritle, Fritule or miške, meaning little mice in standard Slovenian, as when you drop the batter in hot oil, there is a little trail on the end, resembling little mice.

My father adored them and everyone in the family simply loves fritole, and whoever also grew up with fritole knows this very well. I am sure they can share with me the fact that they get eaten far faster than they can ever be made! When my nona started to get ready for the frying process, the kitchen would suddenly get crowded, we would get louder, and more excited, and our eyes would sparkle with joy just waiting in anticipation for them to be finished, and ready to eat!

My nona would be carefully scooping fritole out of hot oil and they would be disappearing in front of her yes and my nona, being incredibly experienced and fast could hardly keep up with us.

My nona made fritole with raisins but like most recipes fritole have few variation where pine nuts, cinnamon and candied fruit is added to a basic batter.

We would eventually get full, our greediness would decrease, the kitchen would be less noisy and less crowded but she kept frying, ending up layering the fritole on a big plate and dusting them with sugar looking like a snowy mountain, and this vision will stay with me forever...

She would then lovingly packed them for us to take home...

I am miles away from her kitchen, and years have passed by, but when I close my eyes I get transported immediately right back there ... I can smell and feel all of it, and in the stillness of these thoughts I can fully recollect all the nostalgic flavours, and the emotions so closely tied to my family.

My nona is now 93 years old, and her hands sadly are no longer able to make fritole, and so I feel privileged to be have learned how to make them from her, and since she gave me the family recipe, I am to able to keep making them and keep this family tradition alive.

This is why for me these sweet treats hold a very special place in my heart, they are more than just another recipe, they are part of who I am, and who I have become as a person ...

I am sharing here my nona's recipe that was passed down to her by her nona, and so try to make them, and delight your family and friends.

Ingredients

Makes about 40 small doughnuts

  • 400g plain flour

  • 3 eggs, (room temperature) beaten

  • 50g granulated sugar

  • 60-70g raisins or sultanas

  • 3 Tsp fast action dried yeast (also called instant yeast) or 40 g of fresh yeast

  • 250ml milk, lukewarm (full fat or semi skimmed)

  • 4 Tbsp of dark rum or grappa

  • finely grated lemon zest of one unwaxed lemon

  • sea salt, a pinch

  • sunflower or corn oil for frying

  • icing sugar for dusting

Method

Put the raisins in a small bowl, add warm water to completely cover and soak them for at least 20 minutes or until they plump up.

In a large bowl place the flour, beaten eggs, sugar, pinch of salt, yeast, grated lemon zest.

Gradually start adding the milk, mixing constantly until all the ingredients are well incorporated and you end up with a sticky dough that will be soft but thick resembling batter-like dough or a thick cake mix.

Adjust the dough by adding more milk if the dough is too thick, on the contrary, if you find the dough too runny add a bit more flour.

Add to the dough drained soaked raisins (squeeze out the all the excess liquid).

Cover the bowl with cling film or clean tea towel and place it in a warm place free of drafts from any open window.

Let the dough rest for at least 1 hour.

After this time the dough should rise a bit and have a bubbly surface.

Take a medium- sized deep skillet. Add the oil and heat it up over a medium heat to about 180C.

(If you do not have a thermometer, drop a cube of bread into the oil, it is ready when bread turns golden brown in 15 seconds).

Fritole are fried by dropping a small spoonfuls of dough/batter into the hot oil.

Take two tablespoons, with the first spoon scoop up the sticky dough from the bowl, with the second spoon slip off the dough from the first spoon into the hot oil.

Do not overcrowd the skillet with fritole and fry them in small batches, a few at the time, (4-6) this will obviously depend on the size of your pan. Fry them on both sides, fitole are fried in no time, about a minute on each size, so help them to flip over by using a fork or some tongs, however fritole will sometimes flip over themselves.

Whne you drop the batter/dough into a hot oil they will most probably not form perfect shaped balls but instead will leave a little trail on the end.

Fry until dark-ish brown in colour, puffed and well cooked through. I suggest you do a little test to make sure they are not raw inside. Simply open up a cooked fritola, if still gooey inside the oil is probably too hot and the heat too high.

Line a large plate with absorbent kitchen paper towels. Drain fried fritole with a slotted spoon and transfer them on a plate.

Allow the fritole to cool a bit.

Dust them with icing sugar or roll them in caster sugar.

Serve warm or at room temperature.

Just a thought

Fritole are to best enjoyed served still warm, however they are still delicious at room temperature.

Fritole can be warmed up in a microwave or in the oven. My nona put a plate of fritole on the radiator.

Wine suggestion

Moscato del Veneto IGT "Dindarello"2020 - Maculan'

December 23, 2021 /tina oblak
fritole, fritule, deep fried desserts, miske, miške, Fritle, Traditional Istrian doughnuts, small doughnuts, doughnuts, Venetian desserts, Venetian frittole
Adriatic Recipe, Autumnal dish, Autumnal recipe, Celebratory dish, Central European recipes, Christmas dish, dessert, Easter dish, Easter treats, Eastern European recipes, Easy recipe, Enriched dough, Festive dish, Finger food, Istrian cuisine, Istrian dish, Istrian food, pudding, Rustic dish, Slovenian cuisine, Slovenian food, Slovenian gastronomy, Small bites, Snacks, sweet course, Sweet Things, Winter dish, Winter recipe, festive sweet things, festive dessert, celebratory desserts
Comment

Potica – traditional Slovenian festive nut roll Recipe

Beans and Sardines
December 20, 2021 by tina oblak in Adriatic Recipe, Autumnal dish, Autumnal recipe, baked dish, baking, breakfast, celebratory desserts, Celebratory dish, Christmas dish, dessert, Easter dish, Easter treats, Enriched dough, festive dessert, Festive dish, festive sweet things, Istrian dish, Istrian food, Istrian gastronomy, Slovenian food, Slovenian gastronomy, Sweet bread, sweet course, sweet finger food, sweet nibbles, Sweet Things, Vegetarian, Winter dish, Winter recipe, festive bakes, Christmas bakes

Potica – traditional Slovenian festive nut roll Recipe

Potica is a light brioche like roll filled with rich and very tasty walnut filling, it is the most famous Slovenian dessert and the queen of festive sweet treats.

This cake is traditionally prepared and eaten around Christmas and Easter or other special and festive occasions like the weddings, Christening, family celebrations like birthdays and the birth of a new baby, but these days potica is available to buy in bakeries and supermarkets all year round.

Most loved and well-known is walnut potica, with or without raisins, but other regional sweet and savoury varieties are also very popular, where fillings are most commonly made with poppy seeds, pork crackling, cottage cheese and tarragon. They are all super delicious and recipes for potica are proudly passed from generation to generation.

The name "potica" derives from a Slovenian word “poviti” which means to roll up or to wrap and goes back as far as 16th century when it was baked in Slovenian monasteries.

In Slovenia, potica is traditionally baked in “potičnik” which is a round bundt-style baking dish made from ceramic, but it is also very commonly baked in a simple bundt cake tin, loaf tin or cake pan.

Potica, this Slovenian national treasure, has been registered as a Traditional speciality guaranteed (TSG) in the European Union since April 2001.

A slice of potica can be a great choice for breakfast, is ideal as an afternoon treat with coffee or tea, or like me, you will find any excuse, or none at all, to eat it.

I am sharing here the recipe of my nona's grandmother that made the filling for potica using a mixture of walnuts and almonds, the latter being widely available in Istria.

The mild Mediterranean climate makes almond trees a very common sight. My nona told me that the filling for potica was made with a mixture of those nuts that were most readily available, and sometimes raisins and a little bit of grated apple were also added to the nut mixture, and very rarely, a piece of a chocolate bar (not the whole bar), might be grated into the mixture, which then made the potica particularly luxurious. She reminded me that in the olden days, when she was small, (in the 30s and 40s) seasonal and home grown produce were used to create a wonderful array of dishes, shopping lists, as we know them today, just simply did not exist...

Ingredients for the dough

  • 500g all purpose flour or 00 type flour

  • 20g of fresh yeast or 7g fast-action dried yeast (also called instant yeast)

  • 100g unsalted butter, melted

  • 80g caster sugar

  • 250ml lukewarm full fat or semi skimmed milk

  • 2 eggs, separated (egg yolks slightly beaten, keep the whites for brushing potica just before putting in the oven)

  • 1 Tbsp dark rum

  • grated lemon zest of 1 unwaxed lemon

  • pinch of sea salt

Ingredients for the filling

  • 250g walnuts

  • 250g almonds (skin on or peeled)

  • 200ml single cream (can use semi skimmed or full fat milk instead)

  • 100g caster sugar

  • 1Tbsp dark rum

  • 2Tbsp of honey (about 50g)

  • 2 eggs, separated (egg yolks slightly beaten and egg whites whisked to soft peaks)

  • finely grated lemon zest of 1 unwaxed lemon

  • icing sugar for dusting

Method

The dough

In a fairly large bowl, sift the flour, make a little well in the centre and add instant yeast, melted butter, caster sugar, lightly beaten egg yolks, grated lemon zest, dark rum and a pinch of sea salt. Mix and combine well all the ingredients.

(If using fresh yeast, slightly brake it down into smaller pieces with your fingers and place it into a small bowl. Add few tablespoons of tepid milk, ¼ Tsp of sugar, gently stir and leave for about 15-20 minutes or until gentle bubbles form on the surface).

View fullsize Potica2.jpg
View fullsize Potica3.jpg

Transfer the mixture onto a well floured working surface and start kneading, for about ten minutes, adding a little flour at a time if the mixture is too wet and sticky.

Alternatively, use a mixer fitted with a dough hook and leave running for about 5 minutes.

The dough is ready when it ends up being really smooth and elastic. It should not stick to your hands or working surface and should leave the bowl clean if using a mixer.

Transfer the dough back into a very lightly oiled bowl and cover with cling film or clean kitchen towel.

Put the bowl in a warm room free of drafts for at least one hour and leave the dough to rest and rise, the dough should double in size.

View fullsize Potica12.jpg
View fullsize Potica13.jpg

While the dough is resting and rising start preparing the filling.

The filling

Place walnuts and almonds in a food processor and mix to a coarse consistency.

View fullsize Potica5.jpg
View fullsize Potica6.jpg

Transfer ground walnuts and almonds into a bowl, pour over lukewarm single cream and mix well.

Add caster sugar, dark rum, honey, 2 lightly beaten egg yolks and 2 egg whites (previously whisked to soft peaks and not too stiff) and grated lemon zest. Mix all the ingredient until very well combined and set aside.

View fullsize Potica7.jpg
View fullsize Potica8.jpg
View fullsize Potica9.jpg
View fullsize Potica10.jpg

Flour well your working surface and rolling pin. Put your dough onto a working surface and roll it out to a more or less rectangular shape (40cmx50cm) to the thickness of about not more than 1cm.

View fullsize Potica16.jpg
View fullsize Potica17.jpg
View fullsize Potica18.jpg
View fullsize Potica19.jpg

Take the walnut-almond mixture and spread it evenly on the rolled dough but leave some space around the edge so the filling does not come out when rolling the dough.

View fullsize Potica20.jpg
View fullsize Potica21.jpg

Gently roll the filled dough quite tightly into a log.

Cut off or tuck well in the edges.

View fullsize Potica22.jpg
View fullsize Potica24.jpg
View fullsize Potica25.jpg

Prepare the bundt pan (for the quantities in this recipe I use a 24cm round bundt cake tin).

Grease it very well with butter, make sure you reach all the nooks and crannies and coat it well with the flour. Shake the excessive flour out of the bundt tin.

If you do not have a bundt pan you can use:

  1. loaf tins (cut the roll into two or three parts, depending on the size of the loaf tins you are using)

  2. greased spring form cake tin (24cm for the quantity in this recipe)

  3. or simply use a baking tray previously greased with butter (in this case model the log into a U shape)

View fullsize Potica14.jpg
View fullsize Potica15.jpg

Very gently place your rolled dough (seam side down) into a bundt pan, cake tin or baking tray. Cover with a clean kitchen towel, place it in a warm, draft free room and leave to prove for the second time for 30min to 1h or until well risen (not necessarily doubling in size, just filling out nicely the tin).

View fullsize Potica26.jpg
View fullsize Potica27.jpg

Take a toothpick and make little holes in the dough on the whole surface and brush with egg whites.

View fullsize Potica28.jpg
View fullsize Potica29.jpg

Bake in the preheated oven at 180C static for about 50-60 minutes. Halfway through baking, tent the potica with the aluminium foil to prevent it browning too much and starting to burn.

Leave until completely cold in a tin.

To remove the potica more easily, take a little plastic knife and run it around the edges to loosen the cake.

Transfer on a serving plate, dust with icing sugar and serve.

Just a thought

Potica tastes at its best the day after has been baked.

You can store it in an airtight container for up to five days and is suitable for freezing.

Wine suggestion

Friuli Colli Orientali Picolit Cialla DOC 2008 - Ronchi di Cialla (0.5l - astuccio)

December 20, 2021 /tina oblak
Christmas cakes, nut bakes, walnut bakes, almond bakes, Potica, festive nut roll, traditional Slovenian bakes, Traditional Eastern European bakes, Festive Eastern European bakes
Adriatic Recipe, Autumnal dish, Autumnal recipe, baked dish, baking, breakfast, celebratory desserts, Celebratory dish, Christmas dish, dessert, Easter dish, Easter treats, Enriched dough, festive dessert, Festive dish, festive sweet things, Istrian dish, Istrian food, Istrian gastronomy, Slovenian food, Slovenian gastronomy, Sweet bread, sweet course, sweet finger food, sweet nibbles, Sweet Things, Vegetarian, Winter dish, Winter recipe, festive bakes, Christmas bakes
Comment

Creamed salted cod (or stockfish) Recipe

Beans and Sardines
December 16, 2021 by tina oblak in Adriatic Recipe, Appetizers, Autumnal dish, Autumnal recipe, bite-sized nibbles, brunch, Canapés, Celebratory dish, Central European recipes, Christmas dish, dinner, Easter dish, Easy recipe, entrée course, Festive dish, Finger food, Fish & Seefood, healthy mael, Istrian cuisine, Istrian dish, Istrian food, Istrian gastronomy, main course, main dish, Nutritious dish, recipe from Northern Ital, Rustic dish, Slovenian cuisine, Slovenian food, Slovenian gastronomy, Small bites, Snacks, spreads, Starters, Winter dish, Winter recipe, fish spreads, fish starter

Venetian in origin, this light and creamy, almost mousse like spread, it is one of the most loved dishes, due to its very mild fishy flavour and no bones to worry about, and so it covers the whole family from the youngest children to the oldest members.

Spread on fresh or toasted slices of bread or it can be eaten with polenta, and it is a very convenient dish since it is served cold and it is prepared in advance. Creamed salted cod is rustic but it can soon turn into very elegant canapé served with a pre dinner drink.

I think that this recipe is one of the greatest recipes ever invented! Quite frankly, it takes a bit of a genius to turn an uneatable dry stockfish, which looks utterly unappealing, and is as dry as a plank of wood, into the most luxurious and delicious dishes ever created.

Venetian creamed cod, known in Italy as Baccalà mantecato, is a real speciality and a staple dish in Venice, where it was created, and it is very much appreciated and well known in the rest of Italy. Slightly less known however in the rest of the world, creamed salted cod certainly deserves greater international praise and renown.

This dish is one of my absolute top favourites, one of those dishes I am most grateful to the Venetians to have brought with them during the time they ruled my homeland in the North Adriatic, period during which dried stockfish was first introduced in Istria in 15th century from Venetian cuisine.

In Slovenian it is called Bakala na belo or Polenovka na belo or simply called by the locals Bakala or Bakalar.

My paternal grandfather, or my nono as I called him, used to always buy stockfish at the beginning of December, I have this image in my head of the dry long stockfish sticking heavily out of the shopping bag, I knew very well that it was the start of the Christmas festivities.

This recipe is a real classic holiday and festive dish in Slovenian Istra, and holds a very special place among the locals. Dried stockfish was once a food for the poor but nowadays is a staple dish and considered a delicacy, taking central stage on household tables during Christmas and Easter as it is cooked on holy days during the fasting time and not eating meat.

Traditionally, creamed stockfish is home made and served as part of Christmas Eve dinner, together with sautéed Savoy cabbage and polenta, and Istrian fritole (small fried doughnuts), of course.

These days you can find creamed stockfish on the supermarket shelves all year round, and especially during the holiday season and Easter, but unfortunately, the sad reality is, that very often, the quality of commercially produced cod spread leaves much to be desired, as very common practice is to add lard or potatoes to increase the weight

I have very vivid memories about the process of soaking the stockfish, this huge restaurant size pot was left outside in the back garden during the night and when the temperatures plummeted below 0, the ice formed on the top, and I just loved finding the sheet of ice the following morning, and braking it into pieces. My son does the same...what is it with the children and the ice, and love for breaking it ...

My son Jakob (age 9) with his gran grandmother (age91) making creamed stockfish with the help of a standard mixer

My nono was in charge of stockfish, year, after year, after year, until he sadly passed away, then my father took over and now it is down to myself, my brother, my husband, and the children, since my father sadly is longer around. Back home, according to tradition, stockfish and the preparation of it is still a male affair, however, maybe it is time for this to change!

My nono would sit on the chair, place a big pot containing pieces of cooked cod between the legs, a bottle of olive oil would be kept very close to him for an easy and frequent reach and as tradition requests, the cooked cod would then be beaten with big and long wooden flat spoon like, known locally as polentar or bat which resembles very much a cricket bat, but in my research I have found no connection between the two types of bats!

In honour of my family but in particular in honour of my nono and my father I am sharing here this very special generational family recipe. Give it a go, you will love it!

Ingredients

Serves 4

  • 500g salted cod or 1 dry stockfish

  • 170ml extra virgin olive oil (the very best you can afford) plus a bit of extra as needed

  • 1-2 cloves of garlic, peeled

  • 1 bay leaf, fresh or dry

  • fresh flat leaf parsley (about 7g) finely chopped, optional

  • sea salt, to taste

Method

For this recipe you can use either salted cod or dry stockfish, both need to be soaked and rehydrated first.

If you are using salted cod (I used this type for the recipe) first you need to rinse well the salted cod under very cold running water and soak it. Place rinsed cod in an airtight container, fill it completely with freezing cold water, and with some ice, if you have it, so the fillets are completely submerged. Close the lid and put the container in the fridge. Change the water after 24 hours and place in the fridge for another day. After 48 hours, the cod will be completely soaked. Remove the cod from the container, rinse well with cold water and cut the fillet/s into portion size.

Place pre-soaked pieces of cod in a pan and fill it with plenty of cold water so the pieces of fish are completely submerged in the water. Add bay leaf and bring to boil.

View fullsize Creamed Salted Cod 3.jpg
View fullsize Creamed Salted Cod 4.jpg

Turn the heat down and cook further on a gentle heat for about 20 to 30 minutes and skim the foam on the surface as needed.

After the fish is cooked drain in the colander.

As soon as it is cool enough to handle carefully remove the skin and the odd bone.

With your fingers break the flesh into smaller pieces and place them in a pan or in a bowl of a standard mixer if you are using one.

View fullsize Creamed Salted Cod 5.jpg
View fullsize Creamed Salted Cod 6.jpg

If using a whole dried stockfish, this needs to be soaked and rehydrated first. Place the whole stockfish in a big stock pot and fill completely with cold water and soak for 2-3 days, changing the water every day. If you do not have a very big pot to fit the whole stockfish in, you can use a smaller pot, like a regular 5 litre stock pot, and then place the stockfish in a pot where half of it will probably stick out, and half will be submerged in the water. Soak the submerged part of stockfish for 24 hours and after this time the soaked part of the stockfish will get soft enough to bend, which will allow you to bend it in a such a way for the whole stockfish to be completely submerged into the water in order to get properly rehydrated. No need for rinsing as the dried stockfish is not salted.

Soaked and rehydrated cod needs then to be cooked. Place it in a stock pot, the same one you used for soaking, fill it with plenty of cold water (the whole fish needs to be completely submerged), add bay leaf and bring to boil. Lower the heat and cook further on a gentle heat until the fish is tender, for about 1 hour or just over.

Drain the fish and as soon as is cold enough to handle carefully remove the skin and all the bones.

With your fingers break the flesh into smaller pieces and place them back into in big pan or into a bowl of a standard mixer if you are using one.

Whether you have decided to use salted cod or stockfish you are now left with cooked cleaned small pieces of cod in a big pan or in a bowl of a standard mixer, again only if you are using one.

Place 5 Tbsp of extra virgin olive oil in a small frying pan, add the garlic previously peeled and cut in half lengthwise. Fry the garlic on a gentle heat until golden in colour to infuse the oil then discard the garlic.

Add garlic infused oil to the bowl.

Now the magic can begin.

Take a wooden spoon and start beating the pieces of fish quite vigorously. If using a standard mixer, put it on the lowest and slowest setting.

Keep beating and poring gradually the rest of the oil until you obtain a whitish paste and until the creamy mixture can no longer absorb any more oil.

This action of beating and adding very gradually small quantities of oil will eventually turn the pieces of cod into a light and fluffy cream, this process, in order to get the best result, can take up to 30 minutes.

View fullsize Creamed salted Cod 7.jpg
View fullsize Creamed salted cod 9.jpg

Add sea salt to your taste and very finely 1 chopped clove of garlic, although this optional, mix well, taste, and adjust the seasoning.

Transfer cod spread on a serving plate.

Serve it accompanied with slices of fresh rustic bread, toasted slices of bread (bruschetta) or slices of grilled yellow polenta.

Wine suggestion

Venezia Giulia Malvasia IGT 2019 - Skerk

December 16, 2021 /tina oblak
creamed salted cod, creamed stockfish, creamed salted cod mousse, baccala mantecato, Bakala na belo, Bakala, Bakalar, Istrian fish delicacy, Venetian fish specialty
Adriatic Recipe, Appetizers, Autumnal dish, Autumnal recipe, bite-sized nibbles, brunch, Canapés, Celebratory dish, Central European recipes, Christmas dish, dinner, Easter dish, Easy recipe, entrée course, Festive dish, Finger food, Fish & Seefood, healthy mael, Istrian cuisine, Istrian dish, Istrian food, Istrian gastronomy, main course, main dish, Nutritious dish, recipe from Northern Ital, Rustic dish, Slovenian cuisine, Slovenian food, Slovenian gastronomy, Small bites, Snacks, spreads, Starters, Winter dish, Winter recipe, fish spreads, fish starter
Comment

Salted Cod in tomato sauce Istrian Recipe

Beans and Sardines
December 08, 2021 by tina oblak in Adriatic Recipe, Autumnal dish, Autumnal recipe, dinner, Easy recipe, Fish & Seefood, healthy mael, Istrian cuisine, Istrian dish, Istrian food, Istrian gastronomy, main course, main dish, Nutritious, Nutritious dish, one pot meal, Rustic dish, Slovenian cuisine, Slovenian food, Slovenian gastronomy, stew, Winter dish, Winter recipe, one post fish recipe, Christmas dish, Easter dish, Celebratory dish, Festive dish

Salted Cod in tomato sauce Istrian Recipe

This main, fish based dish is absolutely delicious and very special! It is rustic but delicate and elegant at the same time - cod is cooked in a simple tomato sauce enriched with onions, garlic, and fresh parsley. It is very easy to make but it does require a bit of organization and planning ahead since it is traditionally prepared with dried stockfish or salted cod that needs to be soaked and hydrated, although in this recipe you have the option to use fresh cod or similar.

This recipe is a real classic holiday and festive dish in Slovenian Istra, and holds a very special place among the locals. Dried stockfish was once a food for the poor but nowadays is a staple dish and considered a delicacy taking central stage on household tables during Christmas and Easter as it is cooked on holy days during the fasting from meat.

Dried stockfish was introduced in Istria in 15th century from Venetian cuisine, and this should not be surprising since the Venetians established a monopoly in the Adriatic Sea.

The origins of this fish, however, is far away from being local dish. It can be traced to the extreme north of Norway, to the Lofoten Islands where the Vikings, most probably the earliest inhabitants of the area, had to find a solution to the perpetual problem of hunger. They fished enormous cod shoals, then they dried the headed and gutted fish in the strong winds of the north, hanging them by their tails, the fish turned as hard as a plank of wood and it would last for a very, very long time.

This dried fish eventually started to be sold by the Norwegians to the rest of Europe, sometime in the eleven century. Gastronomically speaking, and perhaps surprisingly, dried stockfish has not been particularly well appreciated by the Scandinavians. On the contrary, in the Mediterranean countries, stockfish became an elevated dish, it was highly valued, and much more appreciated.

The biggest consumers of dry cod, just to mention a few, are Italy, Spain, Portugal, Brazil, West Africa, Caribbean, and many other countries.

Local people back home, on the Slovenian coast, are very traditional and conservative when it comes to the choice of the ingredients and cooking, therefore the use of dried stockfish would be the first choice to prepare this dish. The use of less traditional salted pieces of cod would be the second choice influenced mainly by simplicity, practicality and speed, and this is the type of cod I I use for this recipe.

In the recipe description below I am also giving you the option to use fresh cod or a similar fish, if you have difficulty finding dried stockfish, salted cod or pre-soaked cod, or simply prefer to use fresh fish instead.

Here, in the United Kingdom, where I currently live, you can find and buy dried stockfish or salted cod (sold vacuum packed) in Italian delicatessen shops especially around Christmas and Easter or alternatively order it from your trusted fishmonger or from an on-line specialist shop.

I am sharing here this very special family festive recipe in honour of my father, who very sadly is no longer with us, and who absolutely adored preparing and enjoying this dish.

At the start of Christmas season, my father would buy dried stockfish, soaked it, cooked it, removed the skin and all the bones to be left with bite size pieces that would get vacuum packed and I would take the pack on the plane back to the UK...

Ingredients

  • 500g salted cod or about 800g of already pre-soaked cod (soaked and rehydrated cod almost doubles its original weight) Both varieties are sold vacuum packed in form of fillets with no bones.

    (can use about 800g of fresh cod fillets or similar like haddock or pollock instead)

    Whole stockfish (unsalted, dry cod) is traditionally used for this recipe.

  • white flour (for coating the fish)

  • 2 Tbsp extra virgin oil

  • 1 medium onion (about 140g) finely chopped

  • 1 clove of garlic, peeled and crushed

  • 1 handful of fresh flat leaf parsley (about 12g)

  • 250g plum or other types of tomatoes (when in season), quartered or chopped. Use tomato passata, tinned chopped or plum tomatoes as alternative.

  • sea salt, if needed

Method

Serves 4

How you start this recipe will really depend on what type of cod you have.

1. If you have salted cod (I used this type for the recipe) first you need to rinse well the salted cod under very cold running water. Place rinsed cod in an airtight container, fill it completely with freezing cold water, and with some ice, if you have it, so the fillets are completely submerged. Close the lid and put the container in the fridge. Change the water after 24 hours and place in the fridge for another day. After 48 hours, the cod will be completely soaked. Remove the cod from the container, rinse well with cold water and tap dry with kitchen paper. Cut the fillet in portion size.

View fullsize Bacala in tomato sauce 1.jpg
View fullsize Bacala in tomato sauce 2.jpg

2. You can buy (a bit trickier to find, at least in the United Kingdom) already soaked and rehydrated cod. In this case just rinse with running cold water, tap dry and cut in portion size.

3. You can simply use fresh cod or similar like haddock or pollock fillets and cut it into portion size.

4. You can buy a whole dried stockfish. This could prove the trickiest option as the stock fish might be quite long and you need quite a big stock pot to fit it in, fill completely with very cold water and soak for at least 3 days, changing the water every day. If you do not have a very big pot to fit the whole stockfish you can use a smaller pot, like a regular 5 litre stock pot, and then place the stockfish in a pot, half of it will probably stick out, and half will be submerged in the water. Soak the submerged part of stockfish for 24 hours and after this time the soaked part of the stockfish will get soft enough to bend, which will allow you to bend it in a such a way for the whole stockfish to be completely submerged into the water in order to get properly rehydrated.

No need for rinsing as the dried stockfish is not salted. Soaked and rehydrated cod needs then to be cooked until tender, for about 1 hour or just over. When is cooked take the skin off and remove all the bones. You are left with portion size or smaller bite size piece ready to be used for this recipe.

Very lightly coat the pieces of cod in flour and shake off the excess.

Place oil in a pan (the pan should be big enough so all the pieces of cod are nicely tucked next to each other and do not overlap).

Add finely chopped onions, crashed garlic and sauté very gently until soft.

Place chopped tomatoes or passata in a pan and cook further for about 10 minutes stirring occasionally. If using fresh tomatoes make sure they are soft and use the back of a fork to squash a bit.

Place cod pieces in a tomato sauce, add finely chopped parsley and enough water to almost cover the cod fillets. If using fresh cod add the water half way up as it cooks quicker.

View fullsize Bacala in tomato sauce 3.jpg
View fullsize Bacala in tomato sauce 4.jpg

Partially cover with the lid and on a gentle heat cook for about 40 minutes, shaking the pan now and again. If using fresh cod the cooking time will be slightly reduced.

After this time you should end up with the velvety sauce that is not too thick nor too thin and liquidy.

If the the sauce, however, is too thin sprinkle a bit of flour or breadcrumbs and cook further briefly until you get the desired consistency.

Contrary, if the sauce gets too thick dilute it with a bit of water.

Taste and adjust the seasoning with sea salt especially if preparing this dish using dried stockfish or fresh fish. If using salted cod you will most probably not need any extra sea salt for seasoning, as although the fish gets soaked and desalinated, the fish still retains some of the salt, and this gets released during cooking.

Just a thought

This dish is traditionally served with soft cooked polenta or some crunchy bread to soak up the sauce.

Salted cod in tomato sauce can also be eaten with the pasta of your choice or it can be used as a base to make a risotto.

This dish will keep well in the fridge for few days in an airtight container and is suitable for freezing.

Wine suggestion

Pinot Bianco DOC 2020- Doro Princic

December 08, 2021 /tina oblak
salted cod in tomato sauce, dry stockfish in tomato sauce, pollock in tomato sauce, cod in to, cod in tomato sauce, haddock in tomato sauce, easy fish recipe, Istrian fish recipe, traditional Istrian fish recipe
Adriatic Recipe, Autumnal dish, Autumnal recipe, dinner, Easy recipe, Fish & Seefood, healthy mael, Istrian cuisine, Istrian dish, Istrian food, Istrian gastronomy, main course, main dish, Nutritious, Nutritious dish, one pot meal, Rustic dish, Slovenian cuisine, Slovenian food, Slovenian gastronomy, stew, Winter dish, Winter recipe, one post fish recipe, Christmas dish, Easter dish, Celebratory dish, Festive dish
Comment
  • Newer
  • Older