Beans and Sardines

  • Home
  • About
  • Recipe of the week
  • Recipes
  • Wines
  • Contact

Squid Risotto Adriatic style Recipe

Beans and Sardines
March 30, 2022 by tina oblak in Adriatic Recipe, Appetizers, All year round recipe, brunch, child friendly dish, child friendly meal, dinner, Easy recipe, family friendly dish, family friendly meal, Fish & Seefood, fish starter, Healthy, healthy mael, Istrian cuisine, Istrian dish, Istrian food, Istrian gastronomy, light fish course, light meal, main course, main dish, recipe from Northern Ital, Risotti, Rustic dish, Starters, first course, first course dish, first course meal

Squid or calamari risotto is very delicate in taste, yet flavoursome, hearty and filling, very quick and easy to make, which makes it a perfect choice for a light lunch or dinner and a staple mid-week dish.

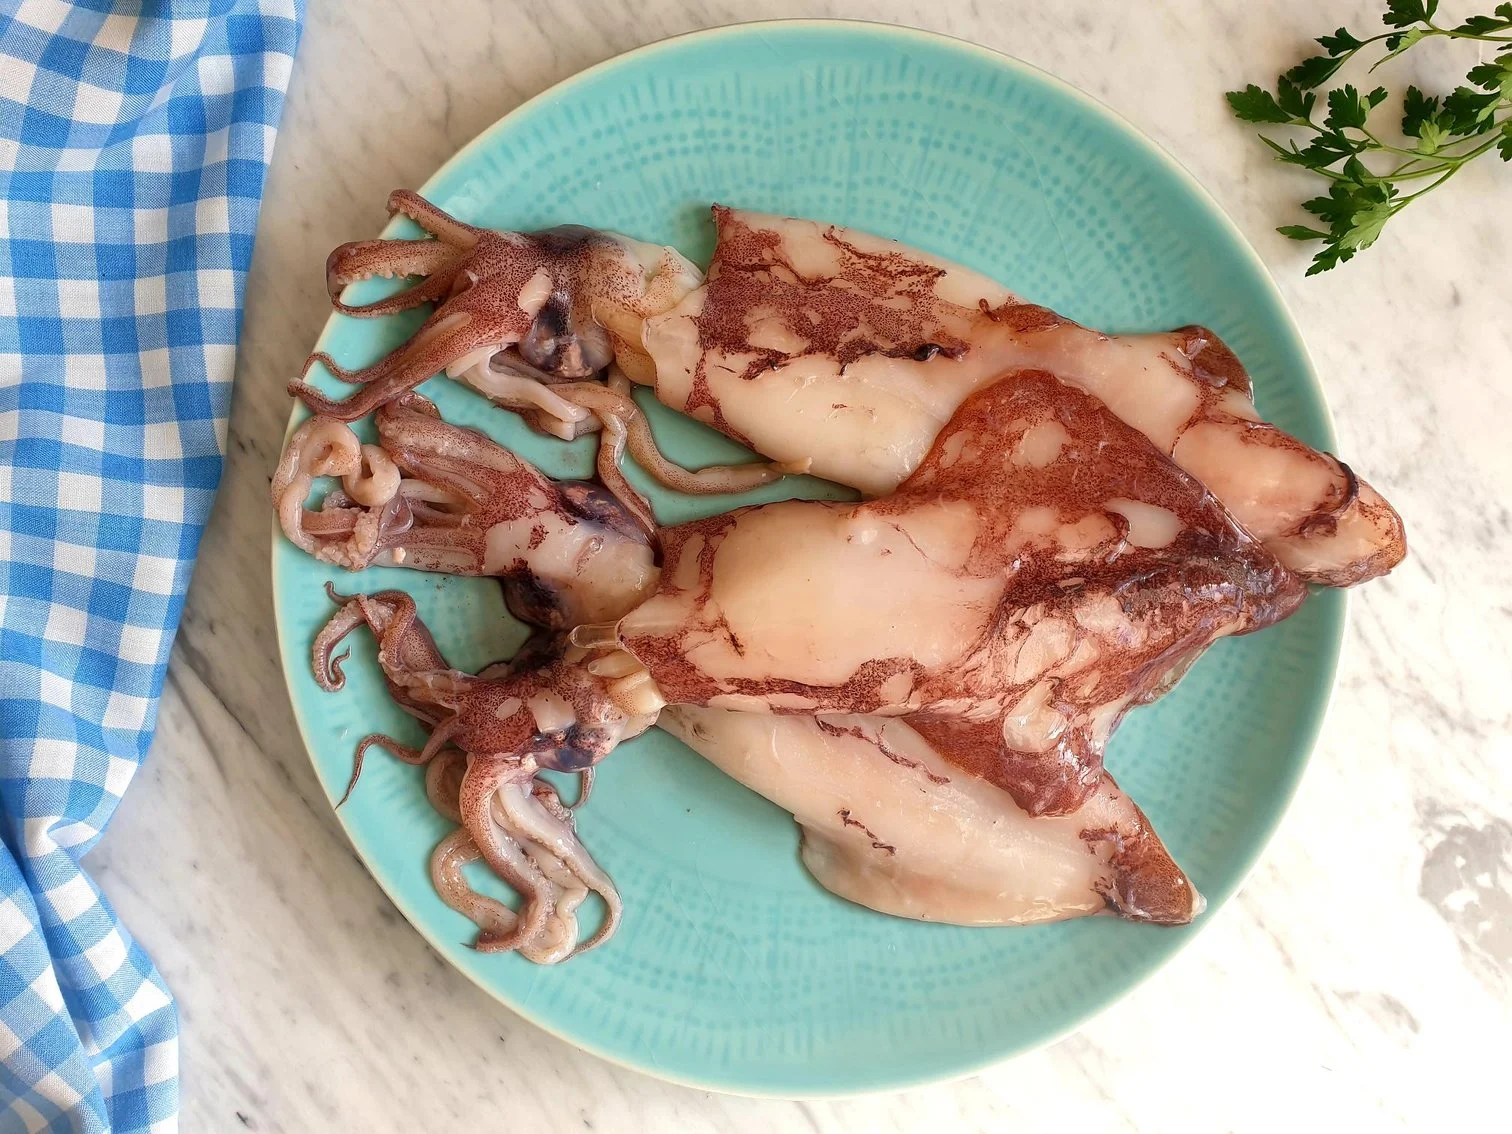
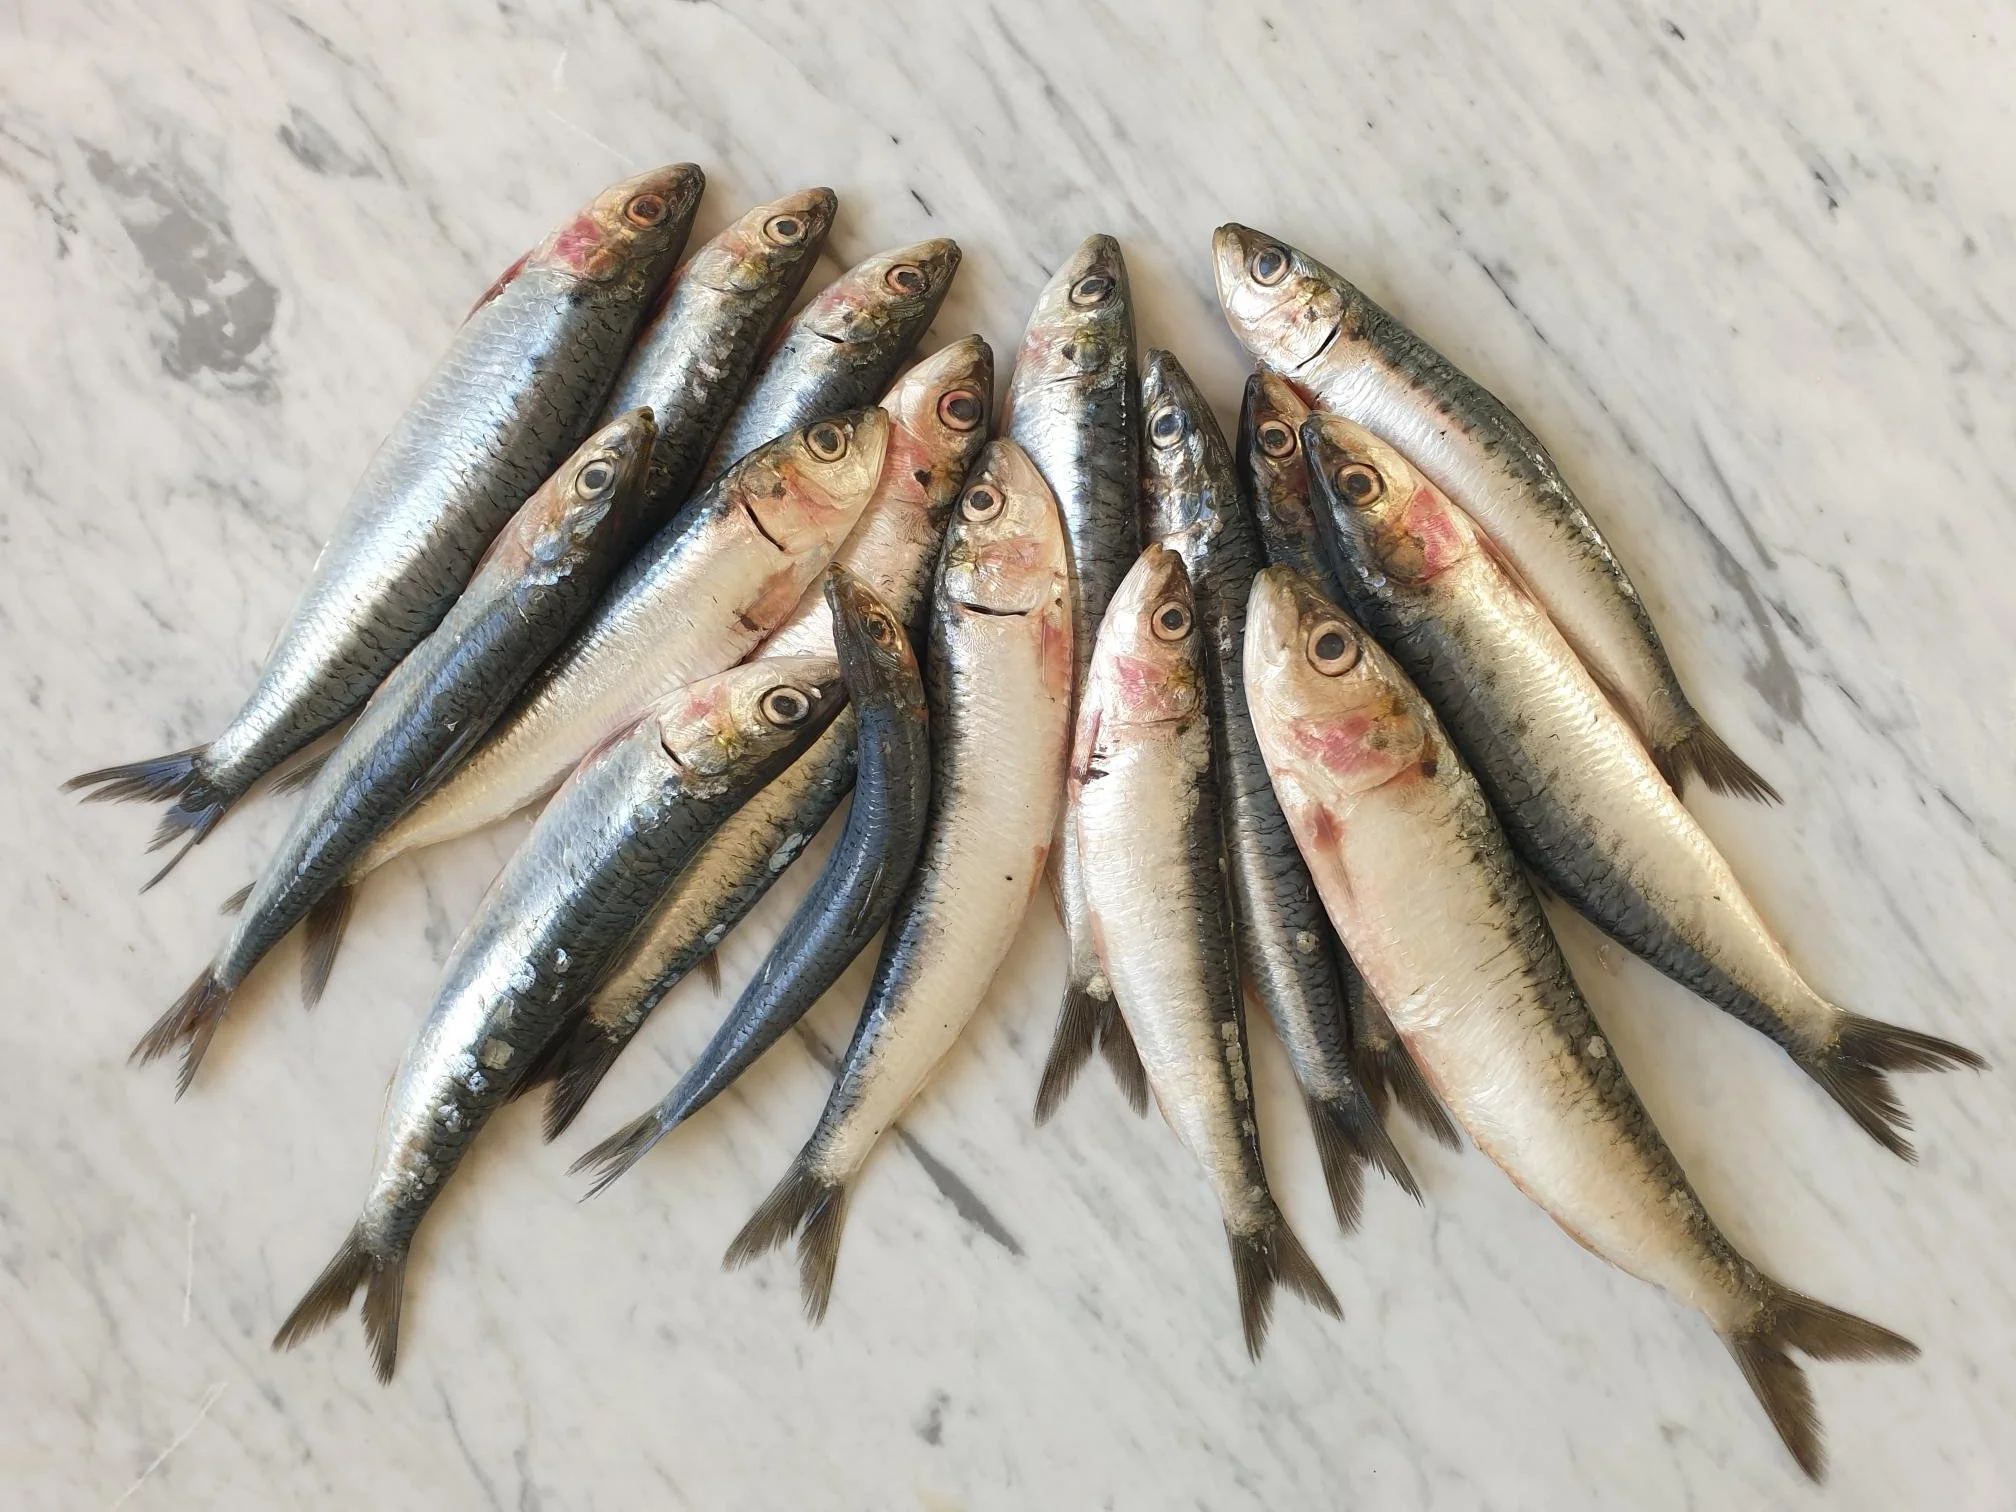
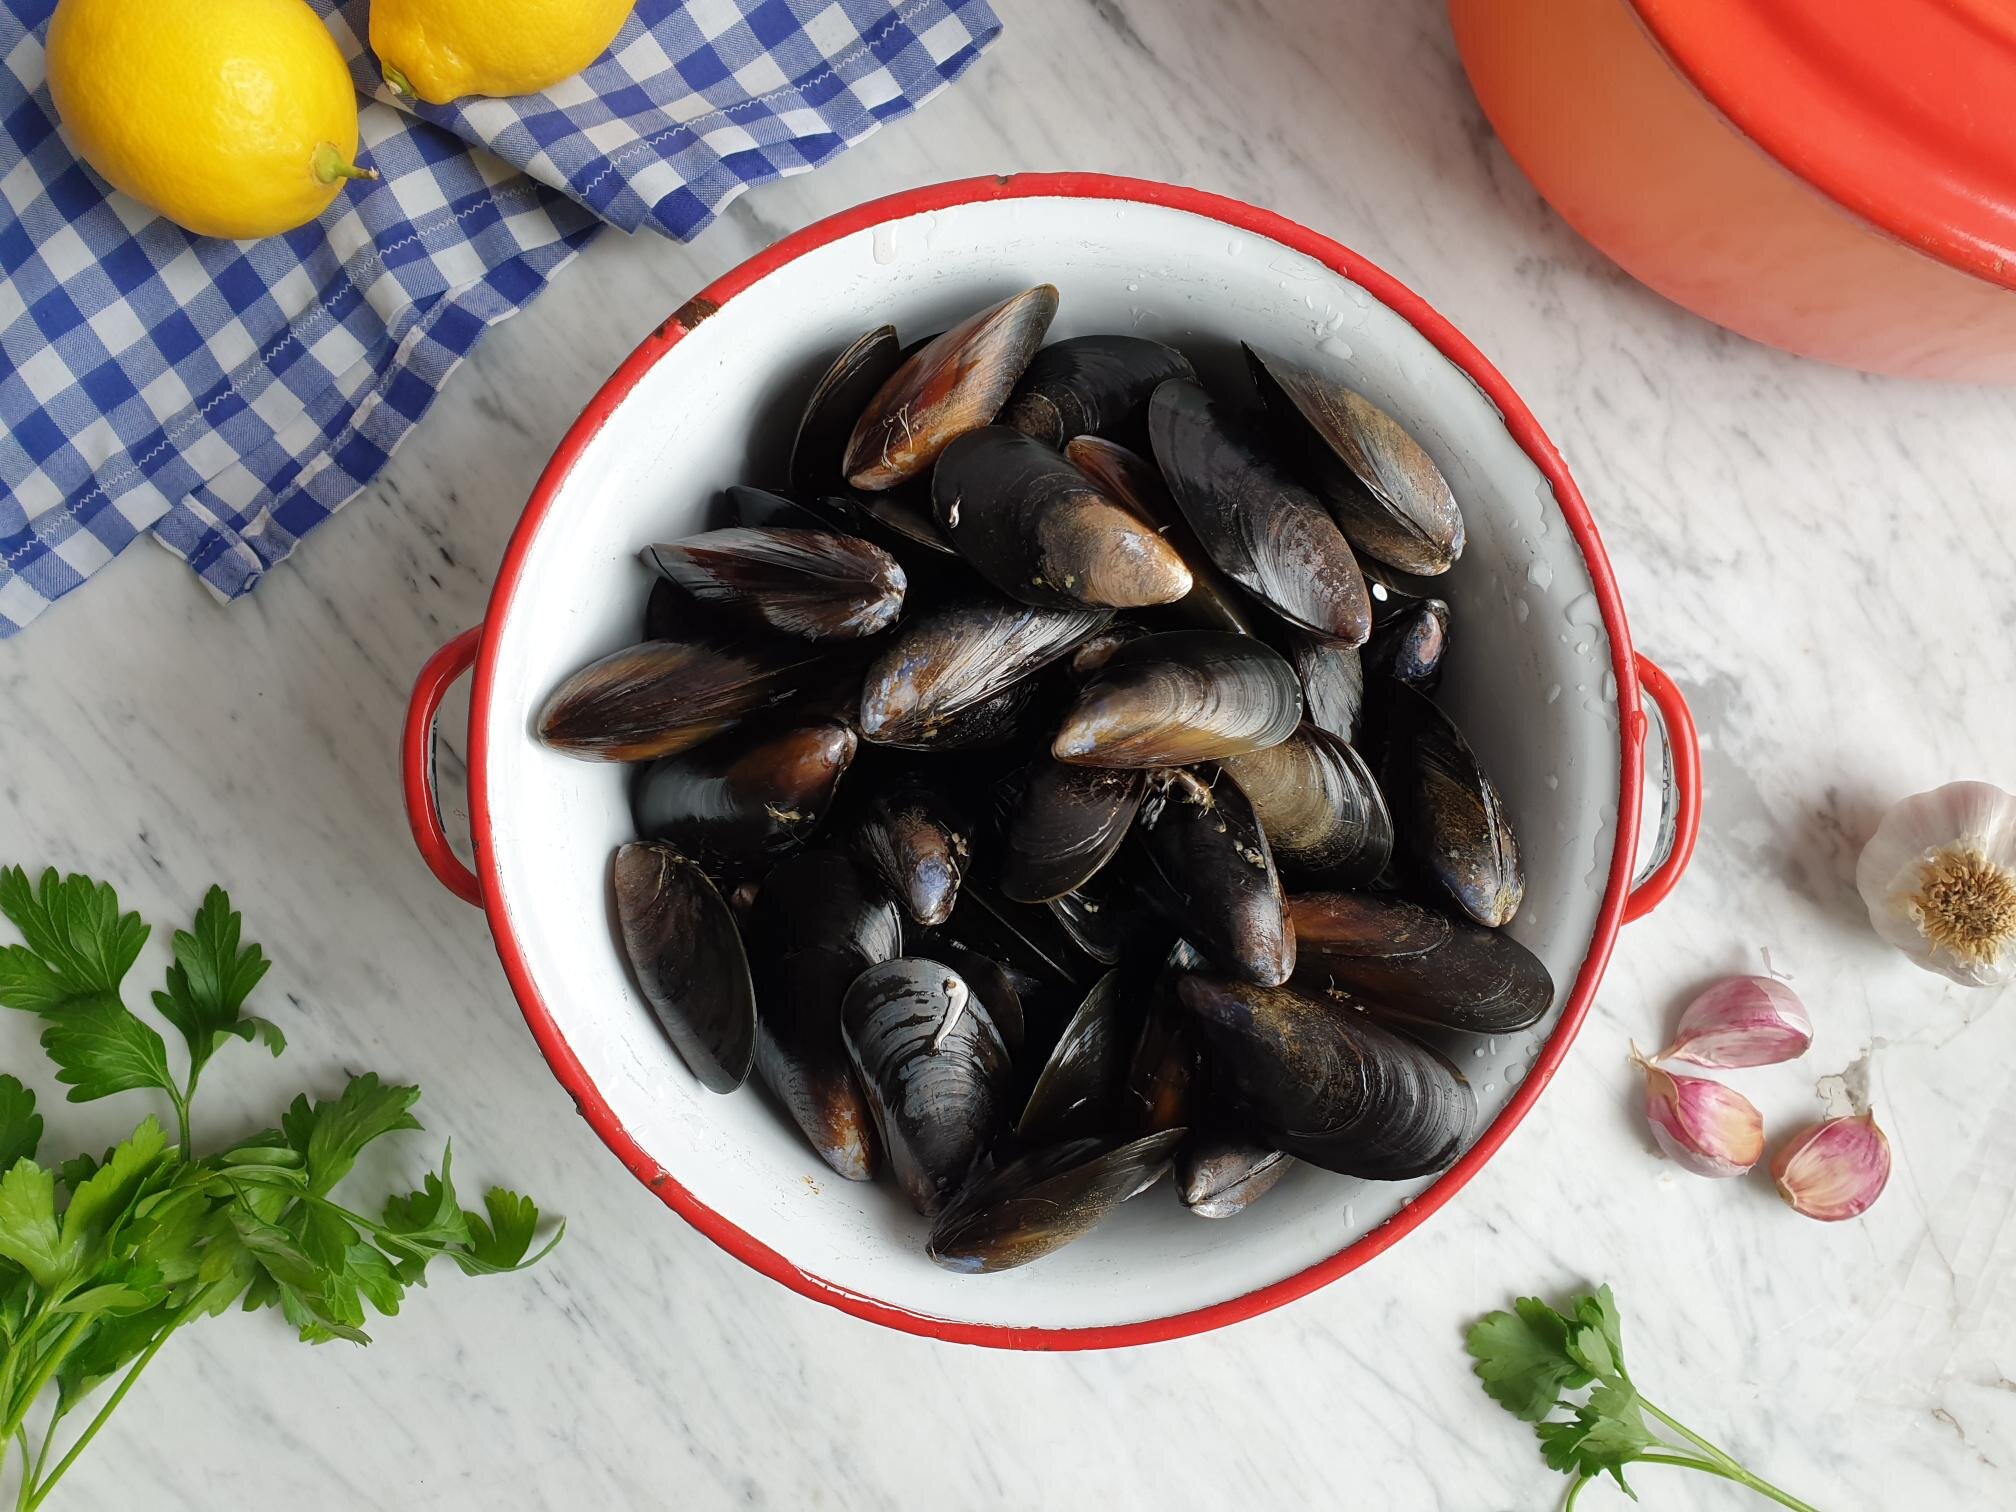
Fresh squid (not cleaned yet)

This risotto is an absolute winner, it will delight the whole family, and it is very pleasant to eat with its creamy texture and sweet and tender squid. It is simply delicious, and it is packed with Mediterranean ingredients that recall holidays by the sea.

I grew up on this type of risotto, it has been made in my family since as long as I can remember. My mother told me I was partially weaned on this risotto, she obviously made sure the squid chunks were cut in miniscule pieces to make it safe for me to eat. I loved it, apparently, and I still do.

The frequency with which this risotto, among many other types of risotti, has been made should come as no surprise. The area where I was born and grew up, the Slovenian coast, it is just under two hours drive from northern region of Veneto in Italy, where the greatest number and variety of risotto recipes can be found.

Squid risotto is very often prepared and cooked in the households, and regularly printed on the menus in the local restaurants, where you will find it as Rižota s kalamari or Rižota z lignji.

I am sharing here my mother's recipe, and do not be put off by the task of cleaning the squid, ask your fishmonger to do it for you and try this fantastic risotto dish.

Ingredients

Serves 4

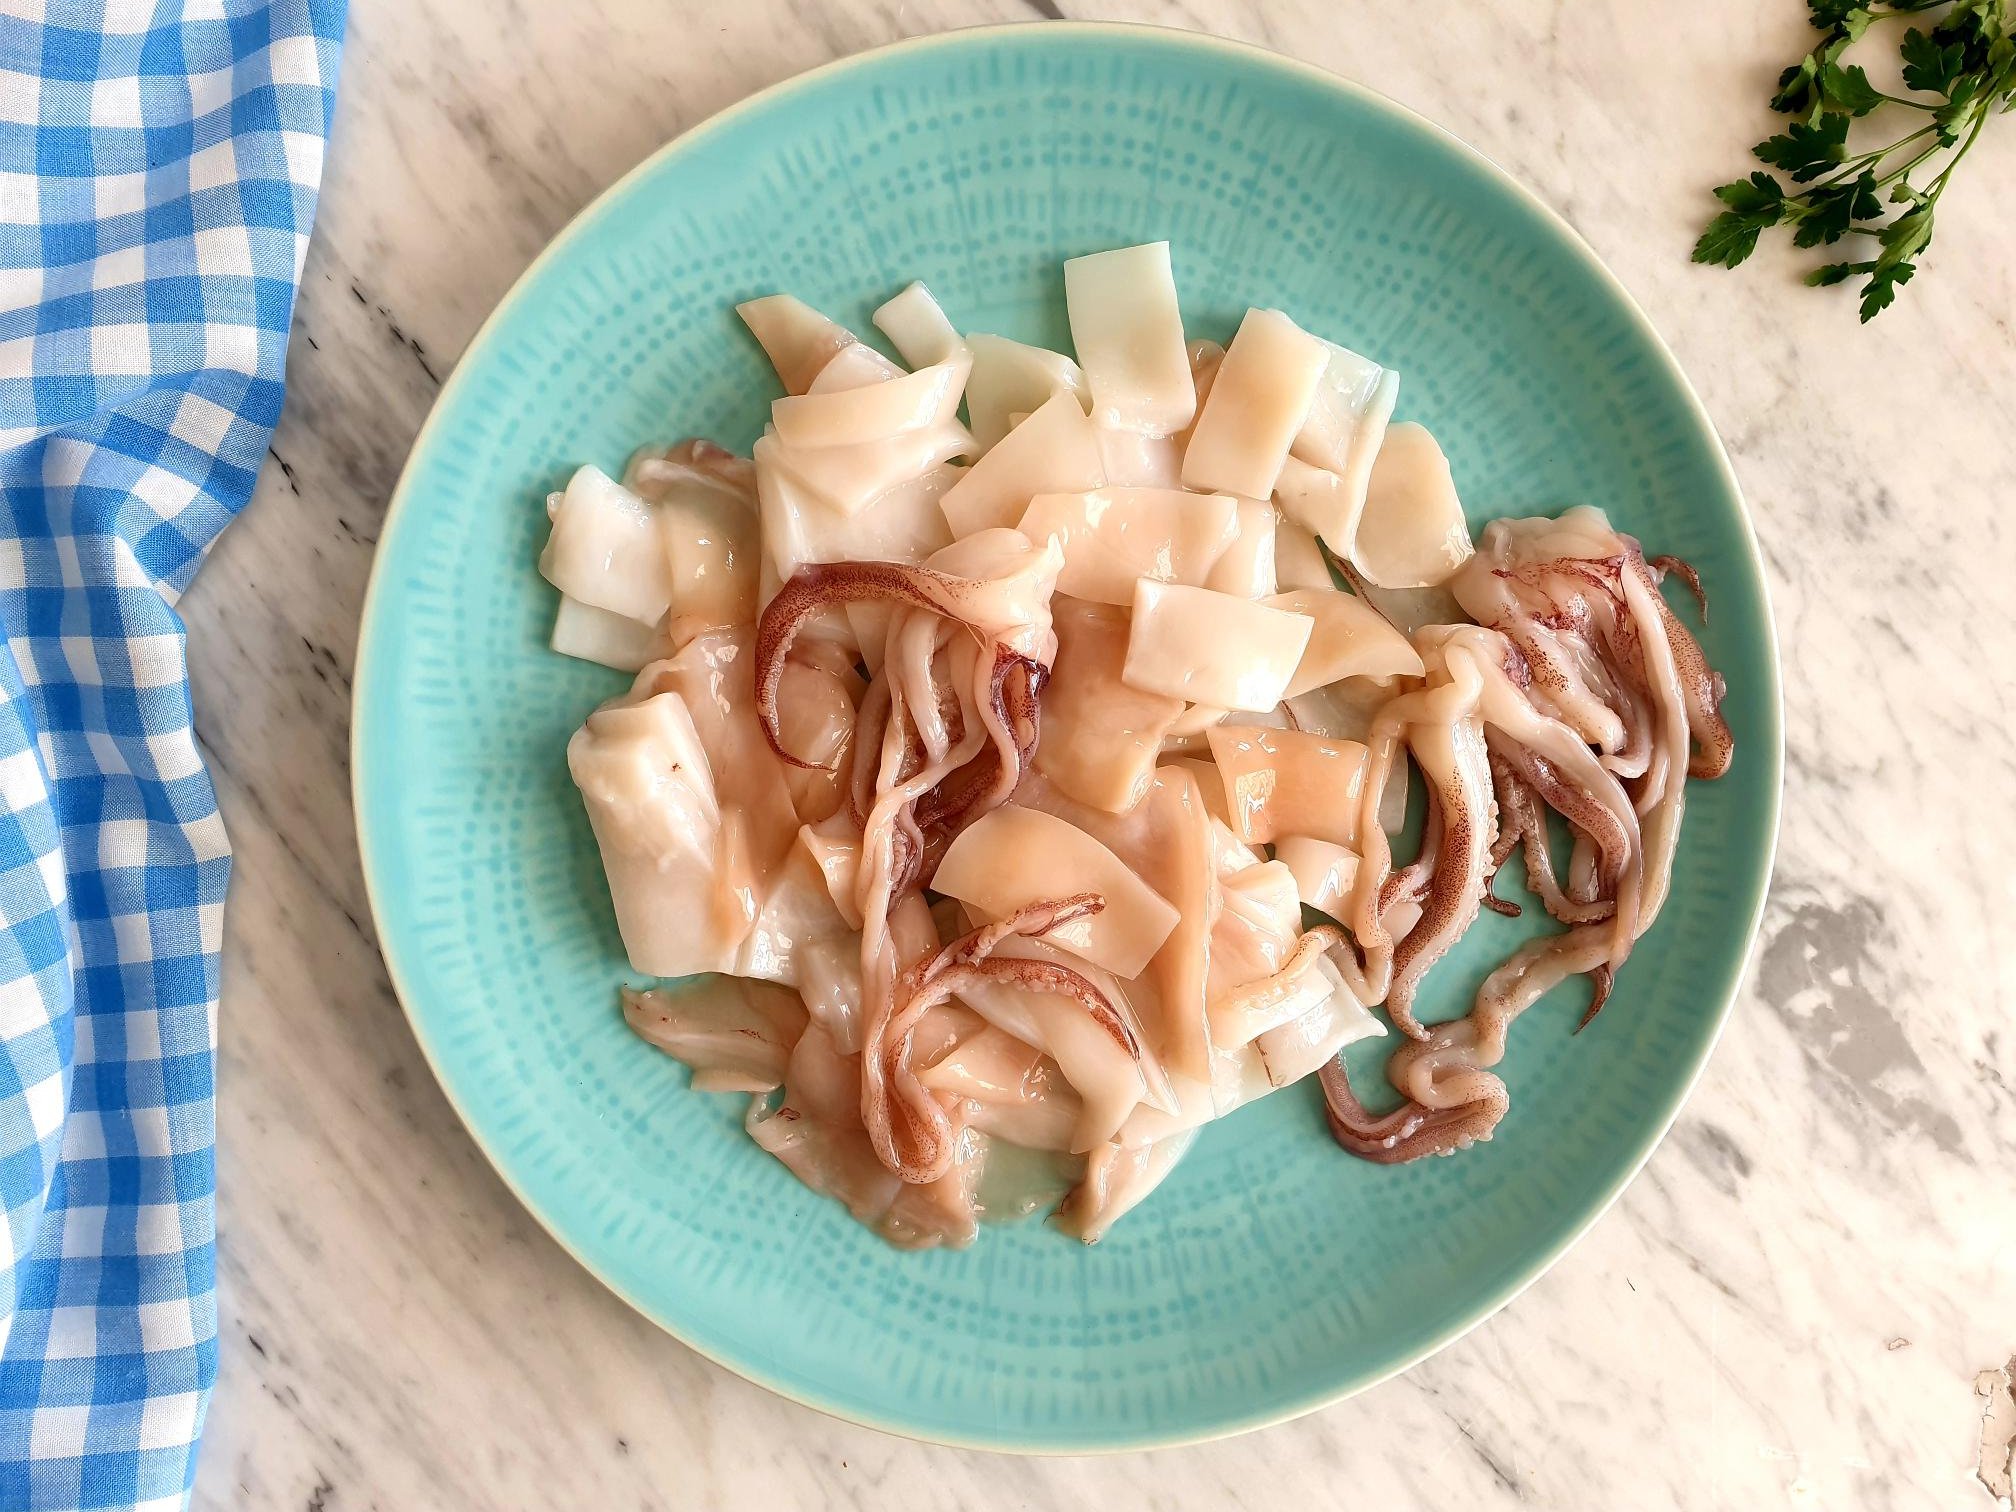
  • 500g roughly, fresh squid, cleaned and cut into smaller pieces or rings (keep the tentacles). For this recipe you can also use frozen raw already cleaned squid tubes available in most bigger supermarkets.

  • 1 small onion (about 80g), peeled and finely chopped

  • 1 clove garlic, peeled and crushed

  • 4 Tbsp extra virgin olive oil

  • 1 Tbsp tomato purée

  • 300g risotto rice (like Vialone Nano, Arborio or Carnaroli)

  • fresh flat leaf parsley, about a handful (roughly 8g), some extra for garnish

  • 1 litre hot vegetable stock or hot water

  • sea salt

  • ground black pepper

View fullsize Squid risotto 2.jpg
View fullsize Squid risotto 3.jpg

Method

Before starting making risotto, it is a good idea to have your boiling hot stock or hot water ready to hand for later.

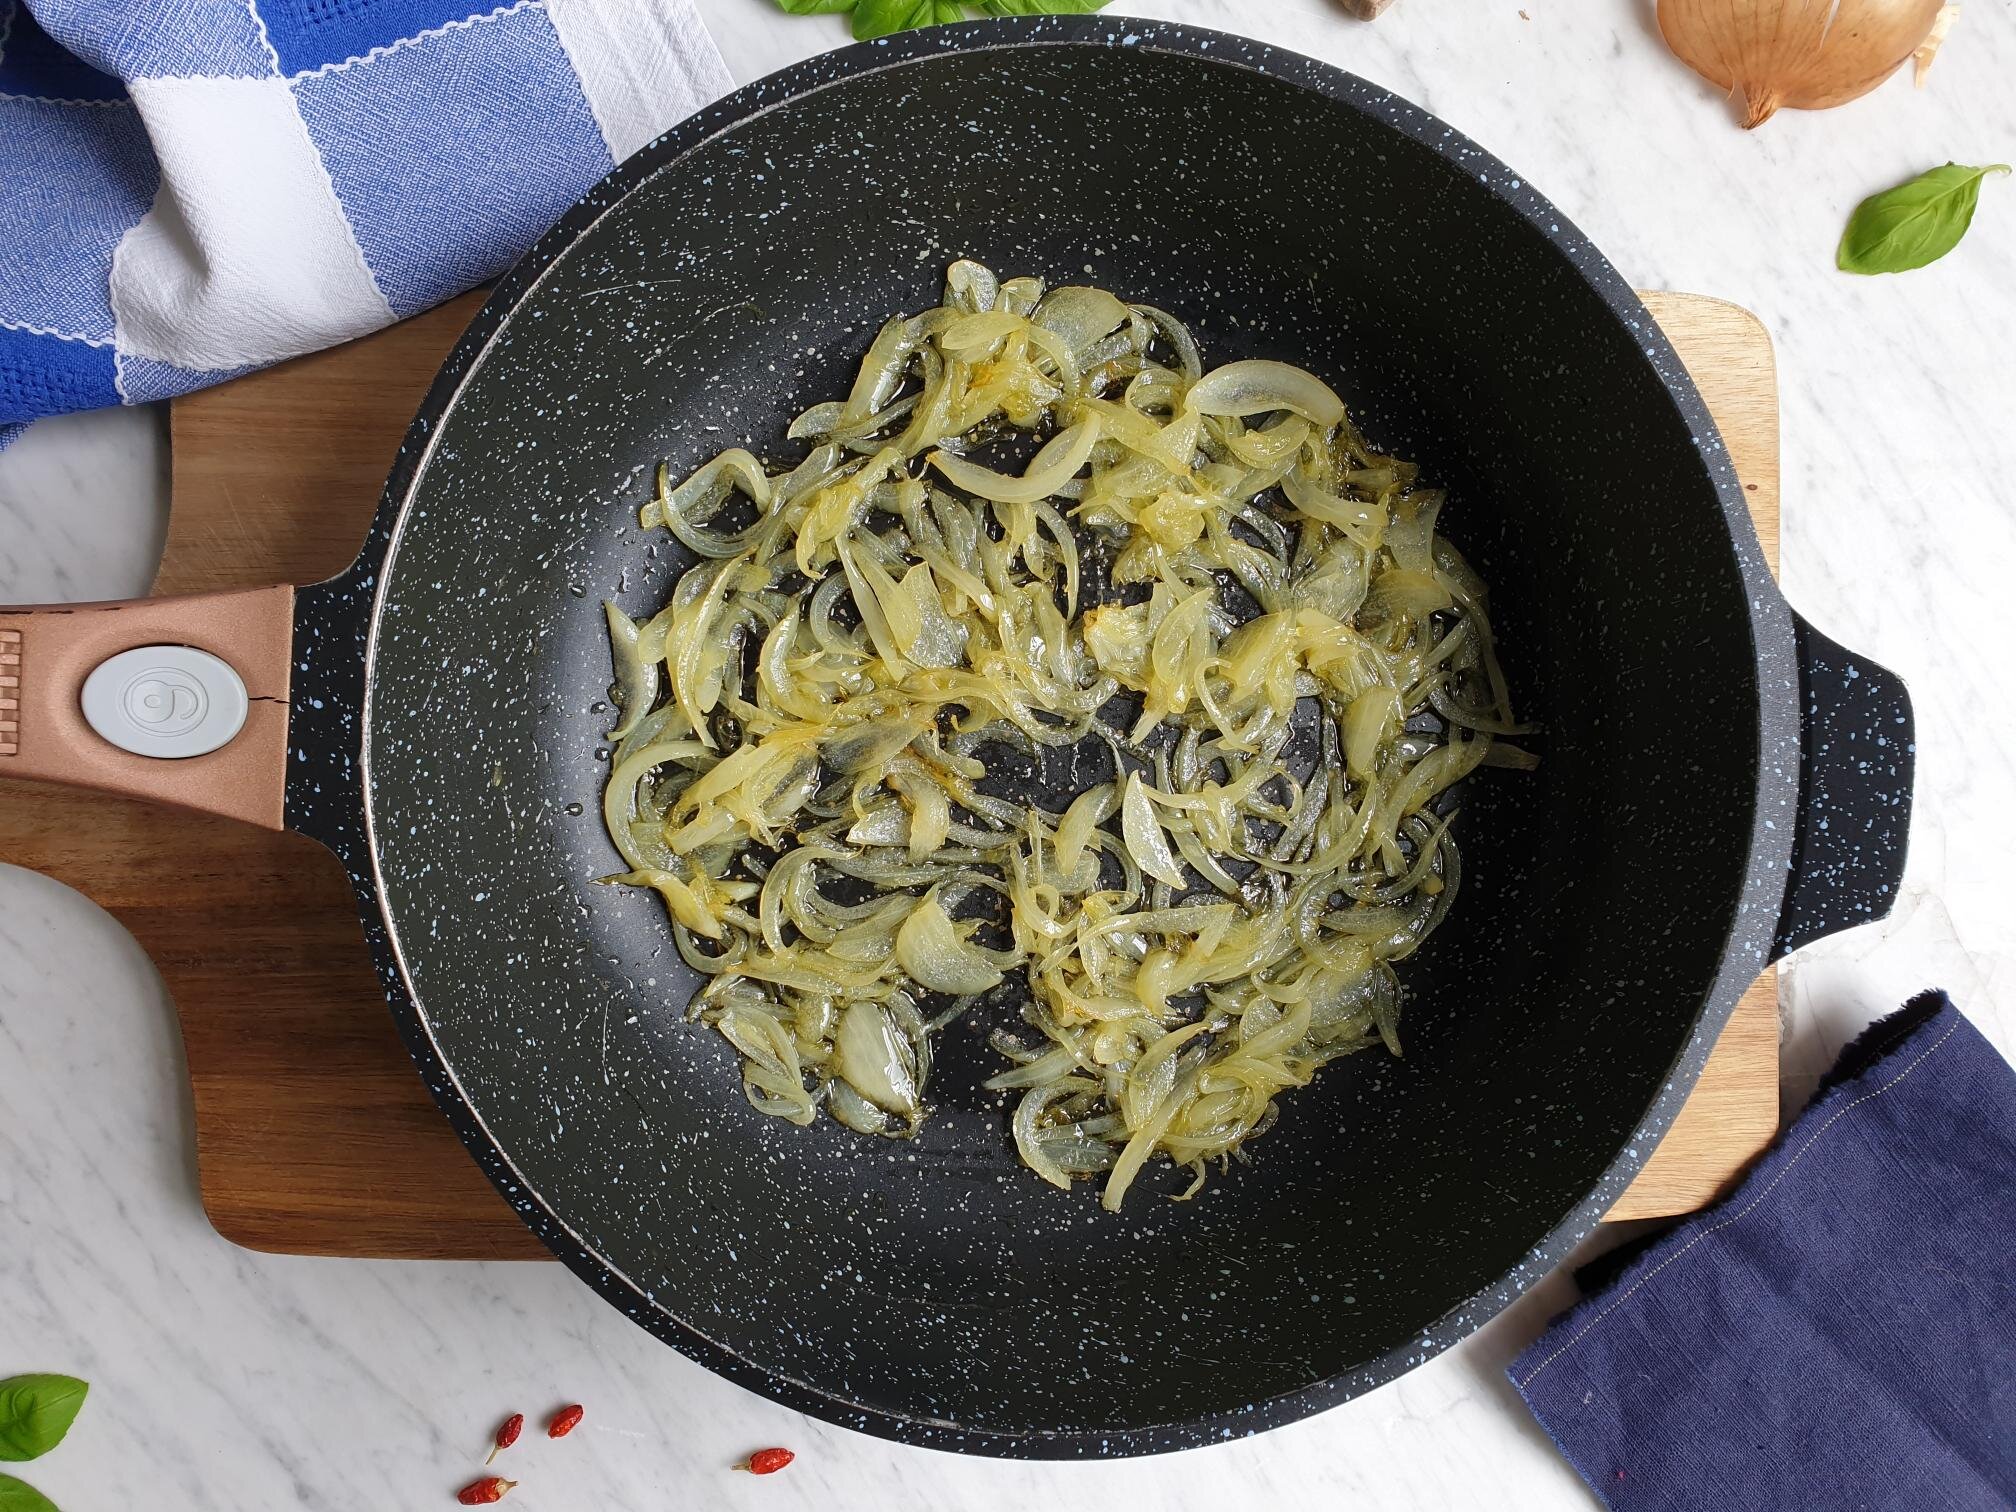
Put extra virgin olive oil in a pan, add finely chopped onions and sauté on a gentle heat until soft.

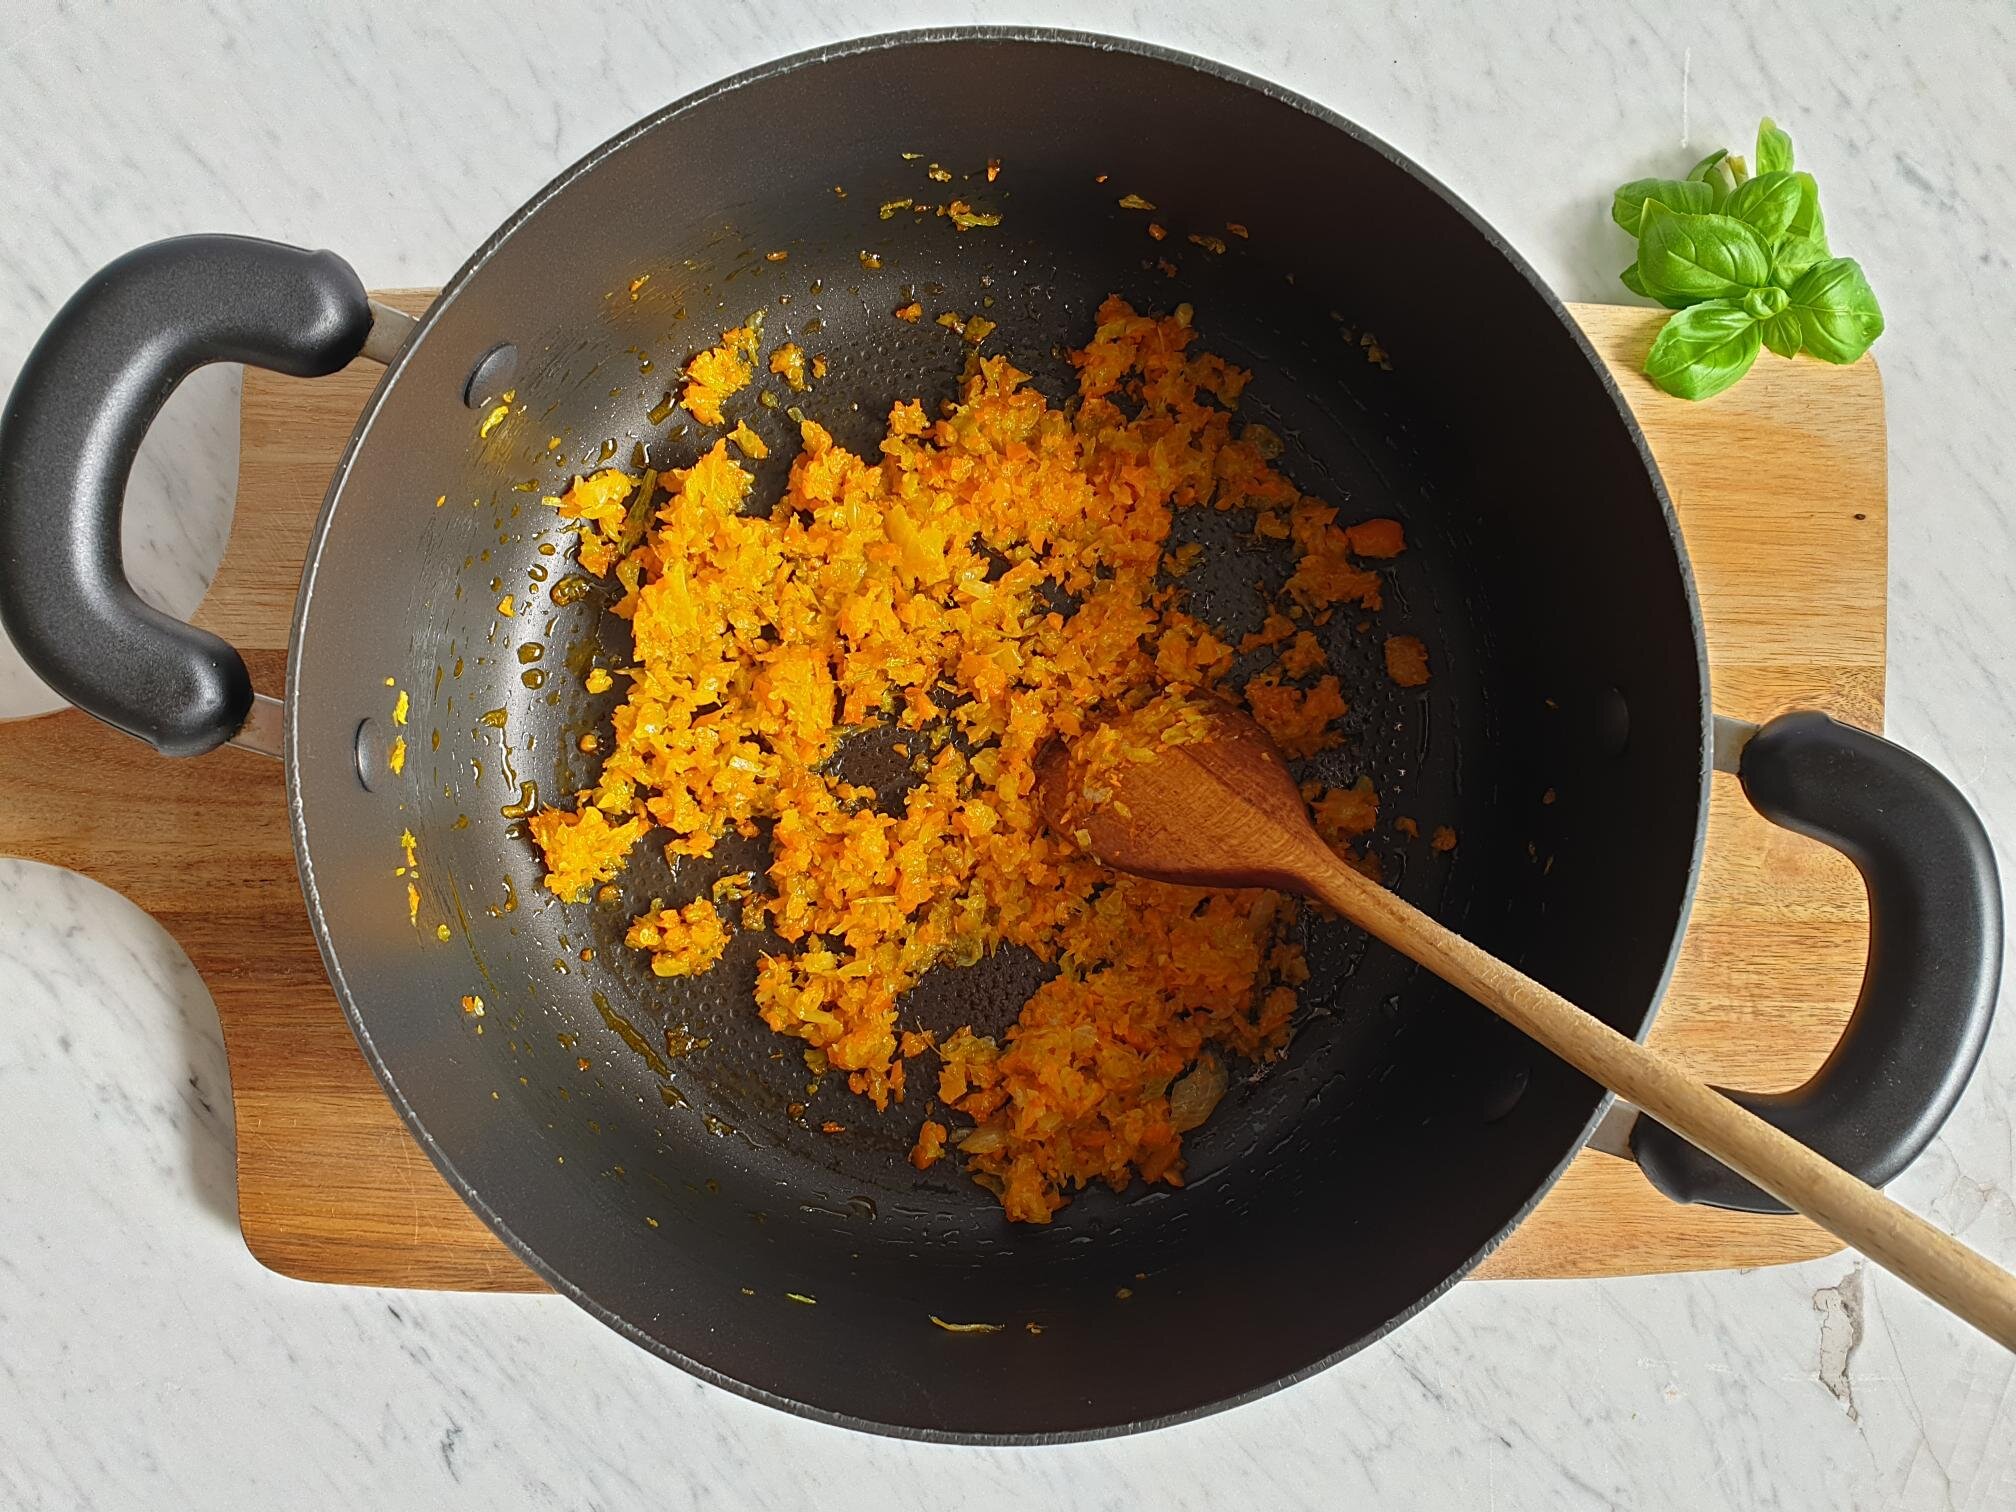
Add crushed garlic and cook for about a minute together with the onions.

Place clean pieces of squid in a pan and cook for about three minutes or so, until opaque.

Add the rice, mix well with the onion, garlic and squid mixture, and toast it for few minutes stirring constantly to avoid sticking to the pan.

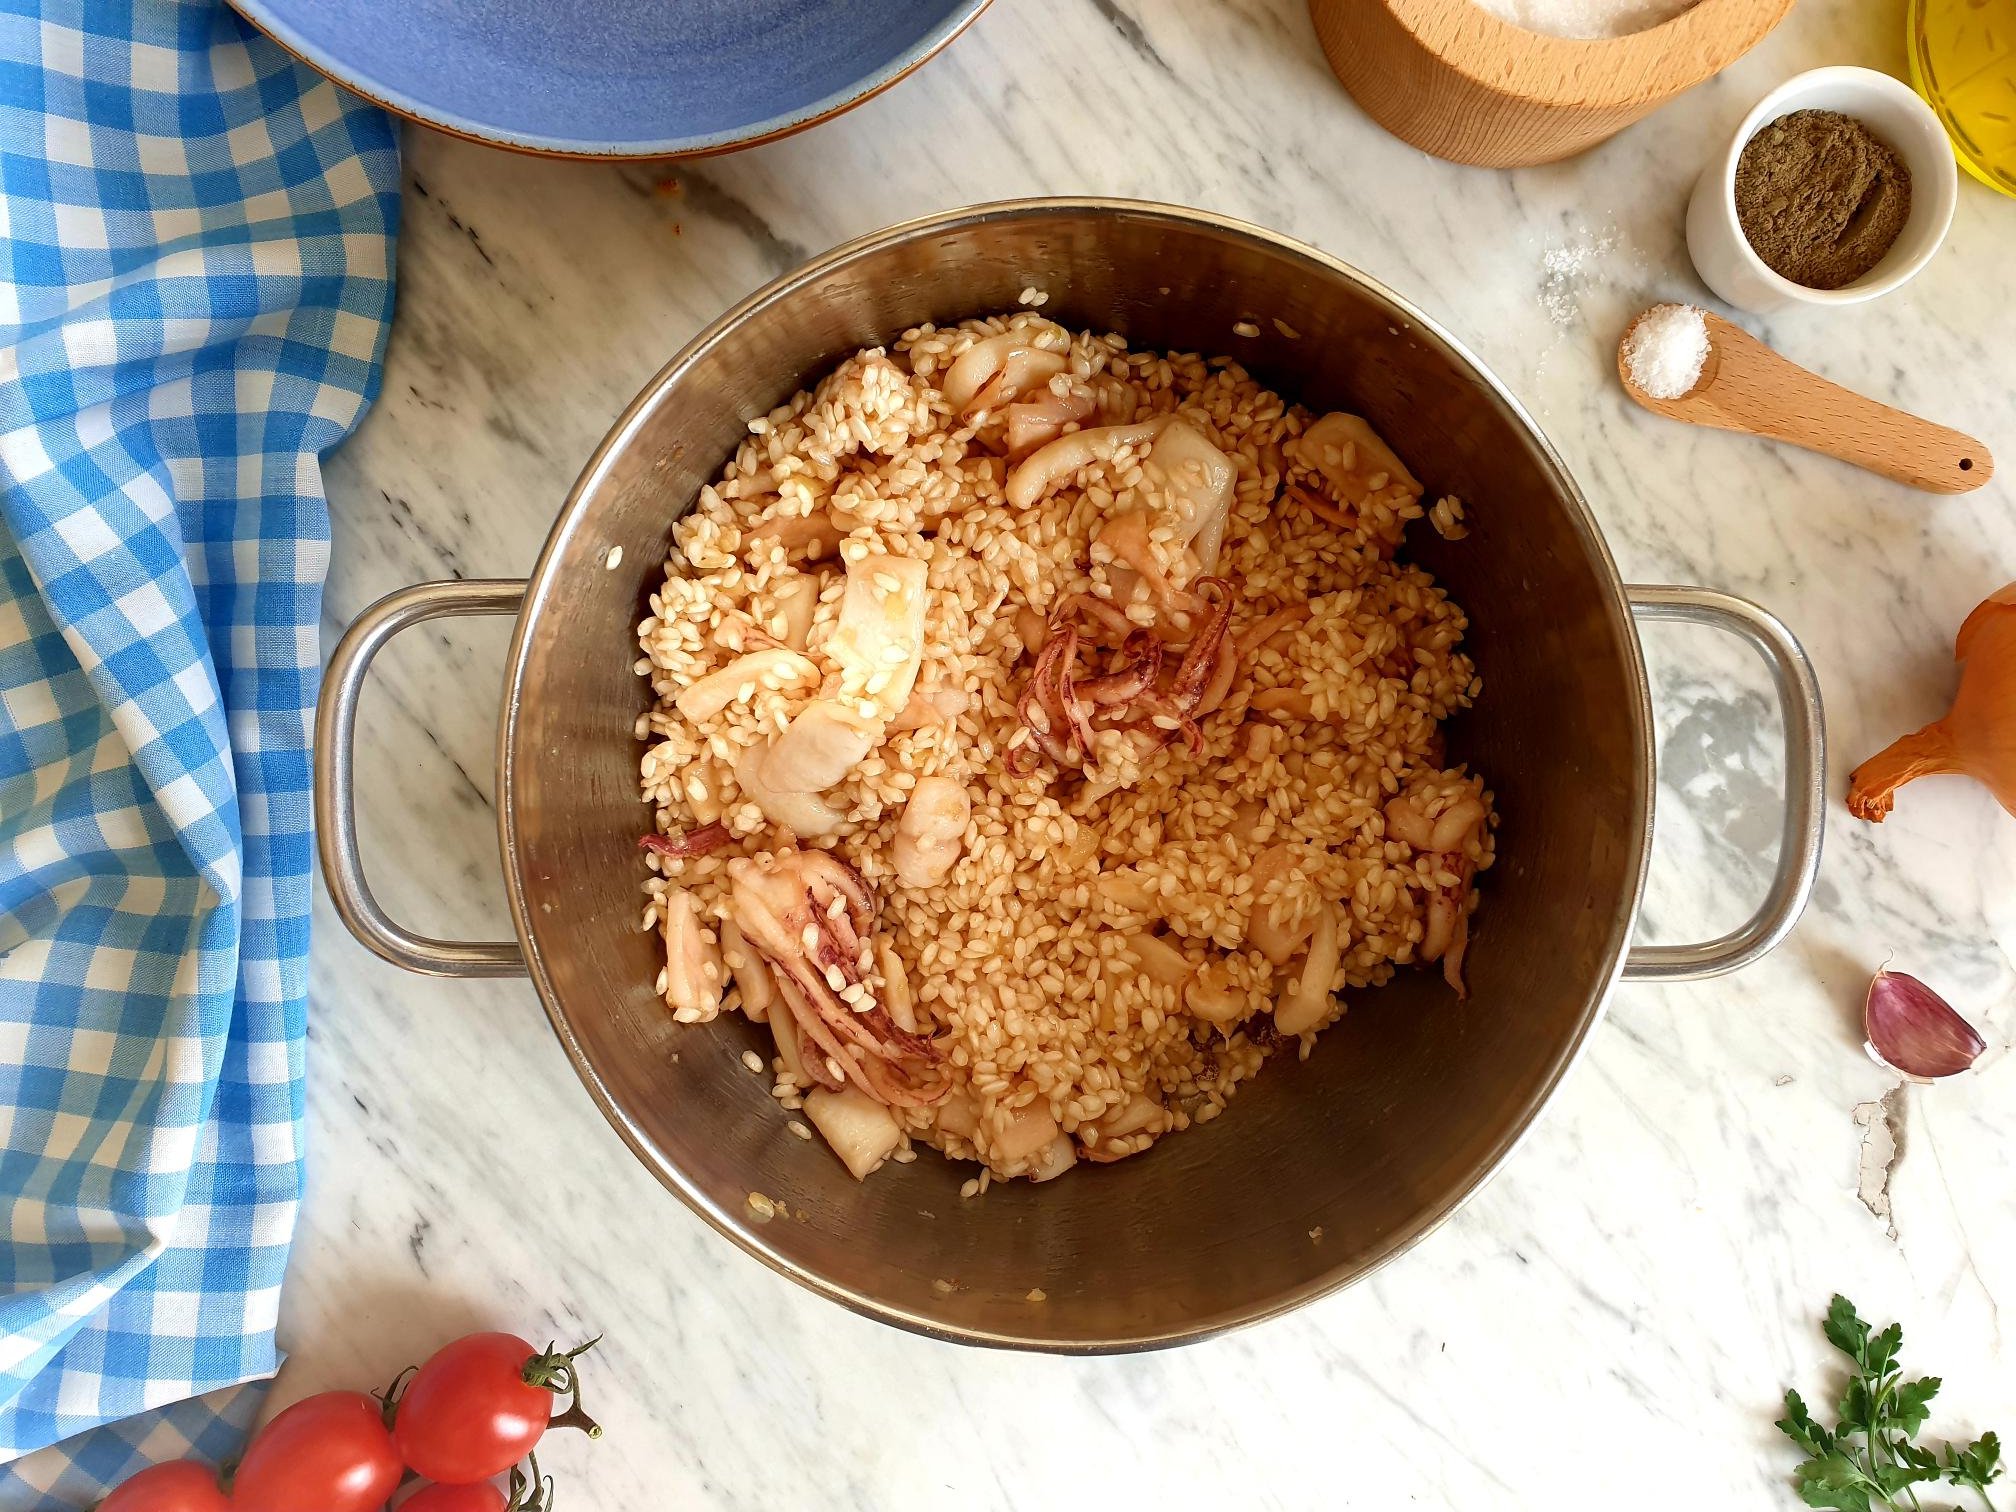
Add tomato purée, pour in the pan all the hot stock or hot water and add chopped parsley.

If you have made a risotto before and have a clear idea of how moist you like it to be, you can control the moisture of the risotto by gradually adding ladles of hot stock or water, one at a time, allowing the liquid to be absorbed before adding more, rather than pouring the whole quantity of liquid over toasted rice, like I did in this recipe.

Cook on a medium heat, stirring almost constantly, until the rice is cooked al dente (fully cooked but still firm when bitten). It will generally take about 15-18 minutes for a risotto to be cooked.

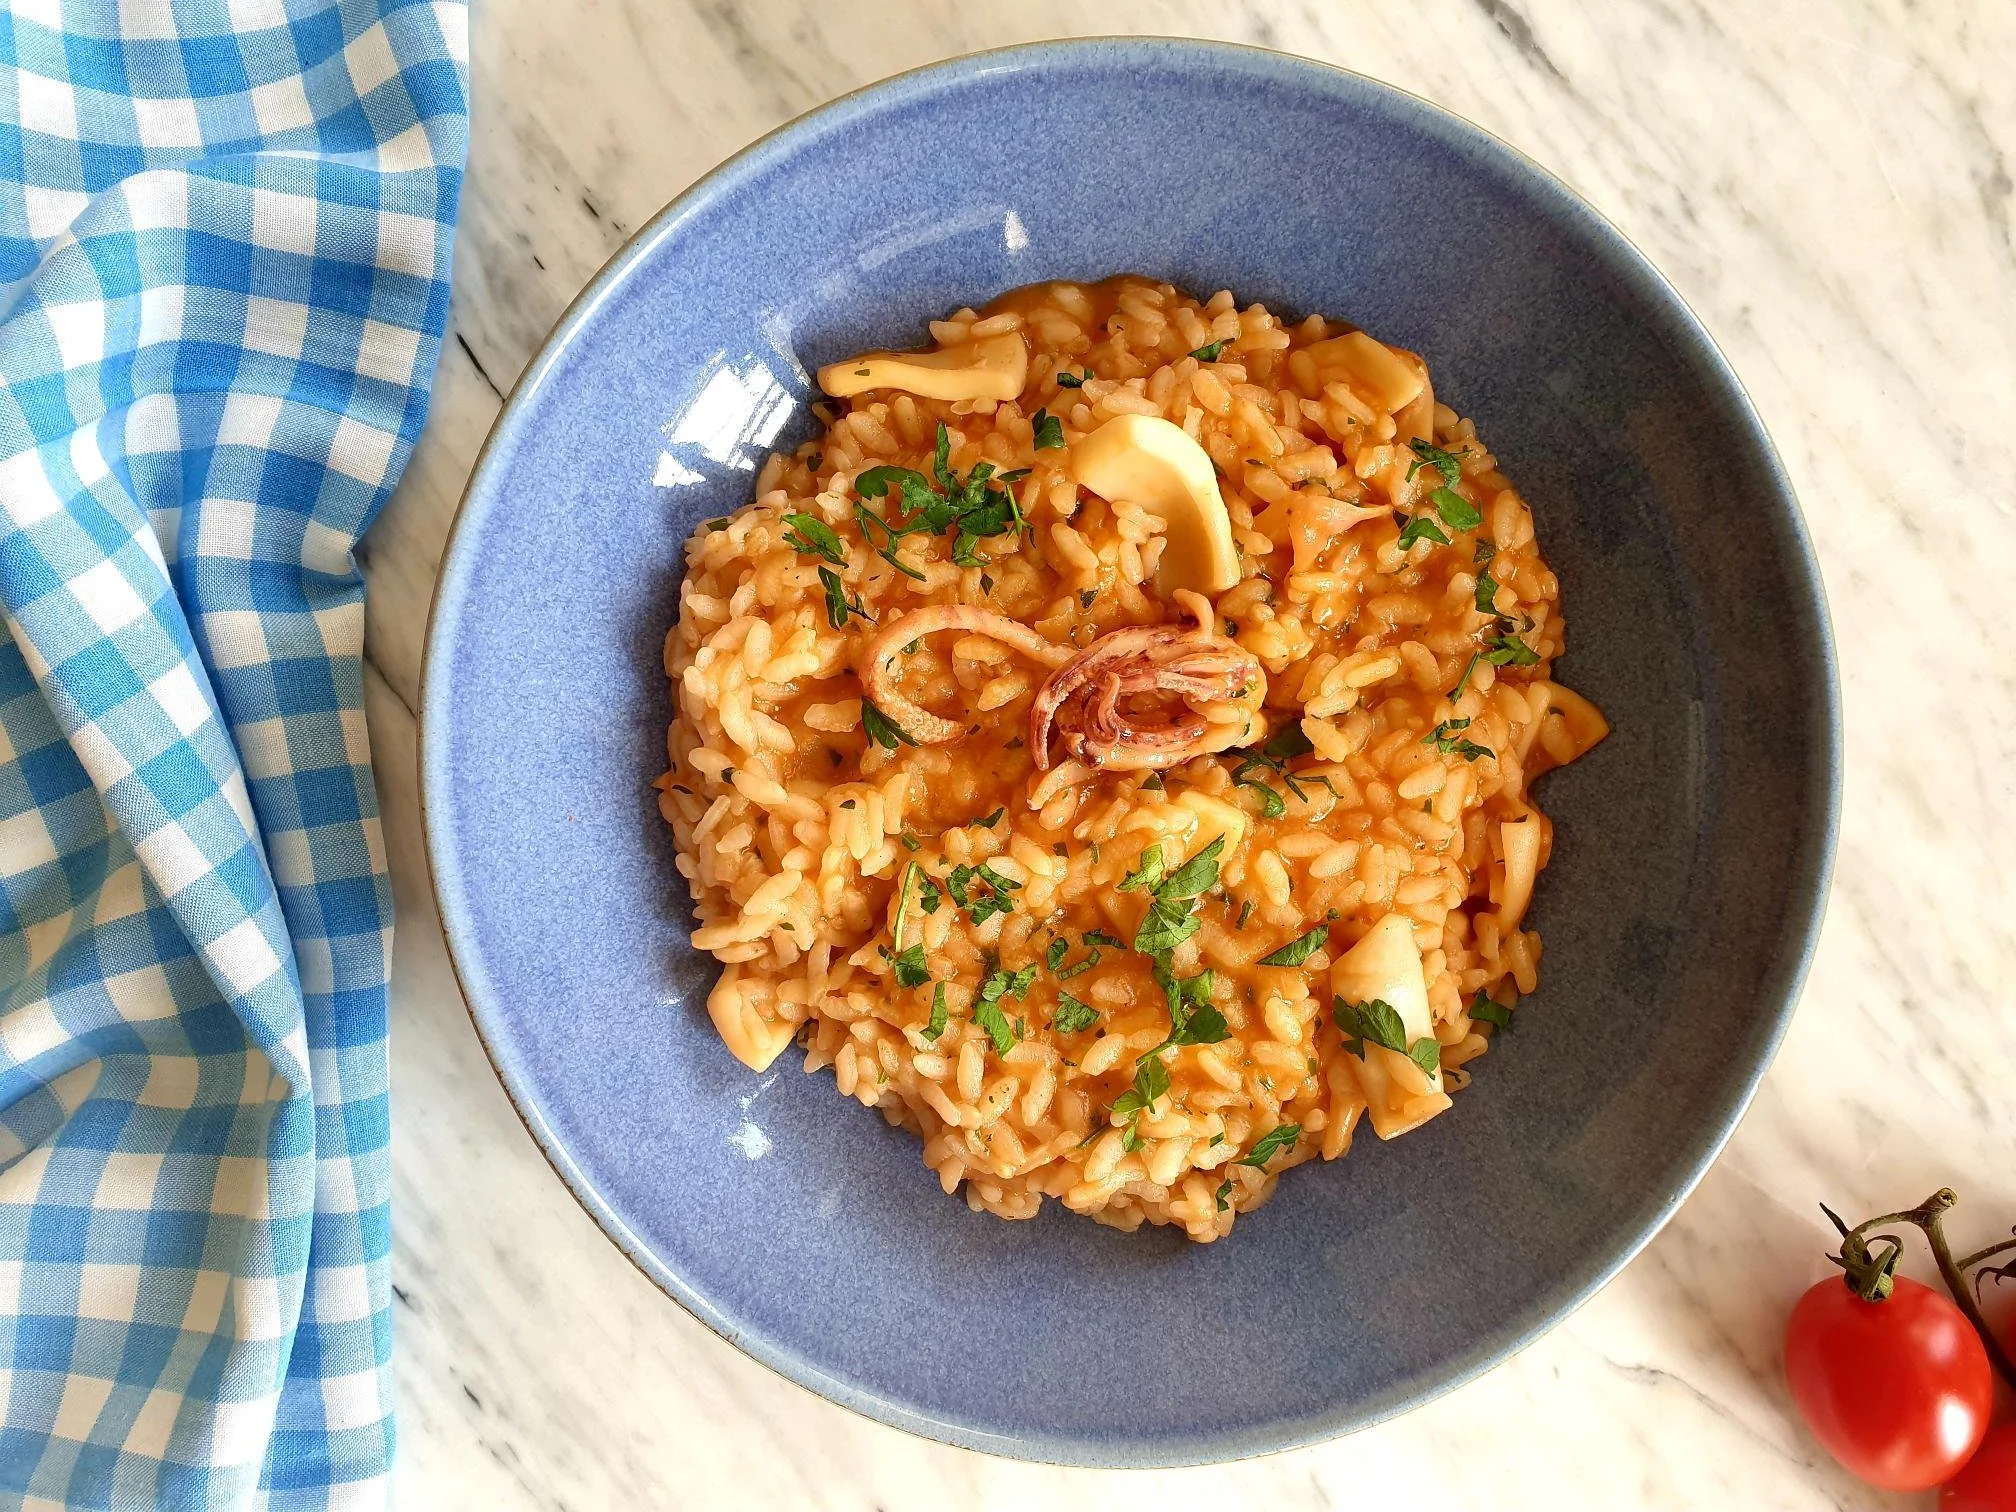
There should be enough liquid just to cover the risotto, the Italians say that risotto should be smooth and runny enough to be described as all'onda, on the wave. Quite right, eating dry risotto is not particularly enjoyable.

Taste and adjust the seasoning with sea salt and ground pepper.

Serve hot and garnish with roughly chopped fresh flat parsley.

Just a thought

You can add to the risotto a small amount of chilli to give it an extra kick, but in small amounts, as you do not want to overpower the delicate flavour of the squid and of the dish in general.

Wine suggestion

Colli di Luni Vermentino “Etichetta Nera” 2021 - Lunae

March 30, 2022 /tina oblak
fresh squid, frozen squid, fresh calamari, frozen calamari, squid risotto
Adriatic Recipe, Appetizers, All year round recipe, brunch, child friendly dish, child friendly meal, dinner, Easy recipe, family friendly dish, family friendly meal, Fish & Seefood, fish starter, Healthy, healthy mael, Istrian cuisine, Istrian dish, Istrian food, Istrian gastronomy, light fish course, light meal, main course, main dish, recipe from Northern Ital, Risotti, Rustic dish, Starters, first course, first course dish, first course meal
Comment

Hungarian style Creamy Potato and Beef Goulash Soup Recipe

Beans and Sardines
February 23, 2022 by tina oblak in Appetizers, Autumnal dish, Autumnal recipe, casserole, Central European recipes, dinner, Eastern European recipes, Easy recipe, entrée course, main course, main dish, Mitteleuropean recipes, one pot meal, Slovenian cuisine, Slovenian food, Slovenian gastronomy, Starters, stew, supper, Vegan, Winter dish, Winter recipe, winter soup, Hungarian inspired dishes

This soup, warm, wholesome, and rich in flavour, can be used as a main meal, especially on those cold days when it will be much appreciated. It is made with only a few simple ingredients, and when cooked well and simmered slowly, it makes a perfect meal choice for body and soul, it is also quite filling, so there is no need to plan a main course.

This Hungarian soup, Gulyásleves, is generally made of beef, vegetables, ground paprika and other spices, but originates from a dish, a thicker stew (what is commonly known as beef goulash) that was cooked outside in the cauldron over an open fire, by the cattlemen, the Hungarian cowboys, who camped with their cattle in the Great Hungarian Plain.

This dish, although native to Hungary, became very popular in the countries around Hungary, which, like in most cases, gave a little twist to the original recipe, and is the origin of variety of new regional variations.

For example in Austria, where this dish is called Goulaschsuppe, it is common to cook this soup without its meat component, which makes a fantastic vegetarian and vegan friendly meal.

In Slovenia, where I come from however, this soup (called kromprjev golaž) which is a real crowd pleaser and became part of Slovenian food culture, testimony of the strong presence of the Austro-Hungarian Empire in the the territory, is almost always cooked with the meat component, where beef can be substituted by dry meats, i.e. some sort or sausages (smoked varieties are often used for a deeper, smokier, and more “imperial” flavour).

In Slovenia, like in Italy (mountainous parts of some regions like of Trentino-Alto Adige, Veneto and Friuli-Venezia Giulia bordering with Austria), this soup is generally served in the informal mountainside restaurants to the delight of hikers and skiers, as well as cooked in the households.

This seriously delicious one pot meal is quite nostalgic for me and reminds me of my childhood. It was served in the school canteens for lunch, and what were called 'dinner ladies, cooked the soup from scratch with fresh ingredients, and the aroma would travel around the school, into the classrooms, destructing the minds of us children struggling with some impossible maths sexercises, especially when approaching lunch time, when you could hear growling in the little tummies.

The soup would be followed by the Austrian inspired pudding, Buchteln, sweet yeast buns filled with apricot jam. This is the type of lunch, among many others, we children really looked forward to...

When I moved to England, goulash soup is one of those dishes, which for some strange reason has been a bit forgotten, and it was not until our skiing trip to Austria, when I saw this soup on the menu that all my childhood memories suddenly came back to me, this is what food does...

As soon as we got back to England I cooked this wonderful tasting goulash soup, it was a hit. I have been making it on a regular basis since then, and I will most definitely make sure this time it stays on the menu.

It is just so hearty, comforting and cosy, the whole family loves this one pot soup and it is cooked very often for my husband and my son who simply adore it. When I serve it, we get transported to the skiing memories we created together as a family, and the table conversations would start ....

I am sharing here a family recipe how my maternal grandmother used to make it, and how my mother still makes it. If you never had this soup before, try it and it will become one of your favourites, and all you need to serve the soup with is a nice rustic bread to dunk it, yes .... this is 'home' for me...

Ingredients

Serves 4

  • 4 Tbsp extra virgin olive oil

  • 3 medium size potatoes (about 500g) peeled and chopped into small cubes

  • 1 onion (about 120g) peeled and finely chopped

  • 1 clove of garlic, peeled and crushed

  • 2 Tbsp Hungarian sweet paprika

  • 2 Tsp red or white wine vinegar

  • 2 Tbsp tomato purée

  • 1 Tsp fresh marjoram (a few springs) finely chopped, (can use dry marjoram)

  • 3 Tsp caraway seeds, crashed with mortar and pestle (can use spice or coffee grinder)

    whole caraway seeds can be used if you have none of the above ways to ground the seeds

  • 400-500g braising steak or shin of beef, trim any hard fat off the beef and dice finely

  • sea salt

  • black pepper, freshly ground

  • 2 fresh or dry bay leaves

  • 2l water or vegetable stock

  • sour cream (optional)

  • fresh flat leaf parsley, roughly chopped, for garnish (optional)

Method

Put the oil in a fairly large pan, add chopped onions, crushed garlic, a pinch of salt and gently sauté until the onions are soft and translucent.

Pour wine vinegar and cook for a minute or so stirring the onion and garlic mixture. The vinegar will help to deglaze and release any bits stuck to the bottom of the pan.

Add diced beef and continue to cook, turning and stirring regularly, until the meat is nicely browned on all sides.

View fullsize Goulash soup 4.jpg
View fullsize Goulash soup 5.jpg

Add cubed potatoes and cook briefly for a few minutes together with meat and onions mixture.

View fullsize Goulash soup 7.jpg
View fullsize Goulash soup 8.jpg
View fullsize Goulash soup 9.jpg
View fullsize Goulash soup 10.jpg

Add paprika, tomato purée, fresh or dry marjoram, crushed caraway seeds and bay leaves, sea salt and black pepper.

Add water or vegetable stock, bring to a boil.

View fullsize Goulash soup 11.jpg
View fullsize Goulash soup 12.jpg
View fullsize Goulash soup 13.jpg
View fullsize Goulash soup 14.jpg

Cover with the lid and simmer on a gentle heat for about 2 hours. After this time, the soup will become slightly thicker and the meat will become so tender it will just melt in your mouth.

To make the goulash soup slightly “creamier” in consistency, you can press with a fork few cubes of potatoes on the side of the casserole pan and give it a good stir.

Taste and adjust the seasoning with sea salt and black pepper and add more paprika to your liking, if you wish.

Serve hot with a spoonful of sour cream, if desired, sprinkle some roughly chopped fresh parsley for garnish and a bit more paprika. Place some crunchy rustic bread on the table to dunk in the goulash soup and life just cannot get any better.

Just a thought

Double the amount of the ingredients in the recipe, if serving for 6-8 people or, if you wish to make a bigger batch and freeze.

Like most stews and soups, this goulash soup is best made in advance, as it tastes better every time you reheat it.

Wine suggestion

Vigneti delle Dolomiti Rosso IGT "Fojaneghe" 2015 - Bossi Fedrigotti, Masi

February 23, 2022 /tina oblak
potatoes, beef, stewing beef, shin of beef, caraway seeds, paprika, sweet Hungarian paprika, Gulyásleves, Goulaschsuppe, kromprjev golaž, Goulash soup, Goulash soup without meat, Hungarian beef and potato stew
Appetizers, Autumnal dish, Autumnal recipe, casserole, Central European recipes, dinner, Eastern European recipes, Easy recipe, entrée course, main course, main dish, Mitteleuropean recipes, one pot meal, Slovenian cuisine, Slovenian food, Slovenian gastronomy, Starters, stew, supper, Vegan, Winter dish, Winter recipe, winter soup, Hungarian inspired dishes
Comment

Venetian style Sardines in Savor (Marinated Fried Sardines)

Beans and Sardines
February 02, 2022 by tina oblak in Adriatic Recipe, Appetizers, bite-sized nibbles, brunch, Canapés, dinner, Easy recipe, entrée course, Fish & Seefood, fish starter, Healthy, healthy mael, Istrian cuisine, Istrian dish, Istrian food, Istrian gastronomy, main course, main dish, main fish meal, Nutritious, Nutritious dish, recipe from Northern Ital, Rustic dish, Slovenian cuisine, Slovenian food, Slovenian gastronomy, Small bites, Starters

Marinated sardines is a classic and quintessentially Venetian dish, where sardines are lightly fried and then marinated in onion and vinegar mixture. It is prepared and found on Venetian menus (Sarde in saòr) where typical humble dishes are served all year round The name of the dish comes from the Venetian word saòr, meaning sapore in standard Italian, which translates as flavour, and refers to the fact that the flavour of the marinated fish is elevated by the use of good quality wine vinegar.

This dish originated simply out of necessity, when the catch of the fish was particularly abundant and plentiful, people had to figure out how to preserve food to be able to eat it for days without going bad, as the refrigeration had not yet been invented.

This Venetian dish in origin is also very popular and became a staple dish along the coast of the Slovenian Istra, where local gastronomy was strongly shaped and influenced by the Venetian cuisine, and this is of no surprise, as this land was once part of The Republic of Venice who “left behind” the recipe for marinated sardines and enriched the food habits of the locals, who refer to this dish as Sardele in savor (Sardele na šavor in standard Slovenian) and serve it as a cold starter or sometimes as main. It is made all year round but particularly pleasant to eat cold during the hot summer months due to its refreshing taste.

Unlike the Venetian variety of this dish, Istrian marinated sardines do not include the use of pine nuts or raisins, testimony to the introduction of expensive and unusual ingredients in noble Venice due to a its strong trading activity with the East.

More humble and poorer Istrian variation, to offer extra flavour to this dish, introduced the use of fresh parsley and Mediterranean herbs like rosemary and bay leaves growing in abundance along the coast, instead of pine nuts and raisins, difficult to find and expensive, and therefore out of reach for most households. This variation also introduced the use of red wine vinegar, home made and produced in most households, instead of white wine vinegar, type of vinegar solely used in Venetian recipe.

This dish is customarily made with sardines (small ones are particularly suitable) but can be made with other types of fish like sprats, called papaline (Venetian word) by the locals and mackerel being most popular and most common alternative to sardines, and fillets of more prestigious fish like sea bream and sea bass can also be considered.

Once, this was food for the poor, nowadays is a delicacy and a speciality very much appreciated for their unique flavour and highly valued for nutritional content, especially in Slovenian Istra, where, unlike in Venice, this dish, although very traditional in the area, is not easily available in the restaurants, but almost exclusively made in the households.

My nona told me a lovely story, when she was only twenty two years old and got married she moved into the house, where she still currently lives, not very far away from the sea, and during the hot summer nights, the windows would be kept wide open in the hope to get some fresh breeze from the sea to cool the bedrooms to make it easier to sleep.

She could very clearly hear, in the middle of the night, the sound of very small fishing boats leaving the port and going out in the open sea to fish, this is the sound that she remembers as a very special and nostalgic one, and this is because she can no longer hear these sounds, as the majority of those small boats were replaced by only few commercial bigger fishing boats. These days they struggle for a few big catches since over the years the the sea has been depleted of fish. Sadly, fishing has become very difficult and complicated, and so is not very appealing to the younger generations.

I am sharing here my nona's recipe, this is the dish she grew up with, and the one she recalls was also made by her grandmother. This is a traditional, local and authentic family recipe for Istrian style marinated sardines. However, if you wish to “jazz up” this recipe a bit, and make it more “noble” and Venetian, you can add 50g of pine nuts and 50g raisins (previously soaked in lukewarm water for few minutes to help them become more plump).

Ingredients

Serves 4-6

  • 1 kg very fresh sardines, cleaned (scaled, gutted, heads and central bone removed and butterflied)

    (ask fishmonger to prepare them for you if uncomfortable with the task)

  • all purpose flour (quantity enough to flour the sardines)

  • 400 ml frying oil

  • 5 Tbsp extra virgin olive oil

  • 500 g onions, peeled and thinly sliced

  • 5 whole black peppercorns

  • 1 Tbsp white dry breadcrumbs

  • 100 ml white or red wine vinegar

  • 1 bay leaf, fresh or dry

  • 1 small fresh rosemary spring

  • very generous pinch of fresh flat leaf parsley (about 2g), finely chopped

  • sea salt

Method

Cut the heads of the sardines, gut them and remove the central bone. Butterfly the sardines, rinse them well under cold running water and pat dry thoroughly with the kitchen paper.

View fullsize Sarde in saor 4.jpg
View fullsize Sarde in saor 5.jpg

Coat them in flour and shake off flour in excess.

View fullsize Sarde in saor 6.jpg
View fullsize Sarde in saor 7.jpg

Place frying oil in a frying pan, heat it up and fry gently and quickly the sardines, 2 minutes on each side is sufficient. They should have a light, not very crunchy, coating coating.

Drain well on a kitchen paper.

Season well with sea salt and set aside.

Peel the onions and slice them thinly.

View fullsize Sarde in saor 10.jpg
View fullsize Sarde in saor 11.jpg

In a separate frying pan, ideally non stick, put extra virgin olive oil and heat a bit.

Add the onions and cook them on a very gentle heat until they become very soft and translucent, stirring often to avoid getting too brown.

View fullsize Sarde in saor 12.jpg
View fullsize Sarde in saor 13.jpg

Add black peppercorns, breadcrumbs, bay leaf, small fresh rosemary spring, finely chopped fresh flat leaf parsley.

Pour in wine vinegar and enough water to completely cover the onion mixture.

View fullsize Sarde in saor 14.jpg
View fullsize Sarde in saor 15.jpg

Cook the onion and vinegar mixture on a gentle heat for about 20 minutes. The sauce should slightly thicken and reduce a little, but you should still be left with quite a bit of liquid.

If too much liquid has evaporated during the cooking add a bit more water.

Take a serving dish and alternate layers of onions in the vinegar mix and fried sardines.

Repeat the process of layering until the dish is full. The number of layers will depend on the size of your serving dish but the last layer should be onion and vinegar mix.

If you are left with a bit of vinegary liquid from the onion mixture just pour it over the layers.

View fullsize Sarde in saor 17.jpg
View fullsize Sarde in saor 18.jpg
View fullsize Sarde in saor 19.jpg
View fullsize Sarde in saor 20.jpg

Place the dish in a fridge or a cool place for at least 24 hours or a couple of days, so the sardines marinate well and absorb all the flavours.

The longer you leave to marinate the better it will taste, but bare in mind that the fish will keep for up to a week.

Wine Suggestion

Collio Sauvignon Doc 2020 Draga

February 02, 2022 /tina oblak
Marinated sardines, sardines, papaline, mackerel, sprats, sea bream fillets, sea bass filets, marinated fresh fish, marinated fish, Sardele in Savor, Sardines in savor, Venetian sarde in savor, Sardele in savor, Sardele na šavor, Istrian sardines in savor, Istrian marinated fish
Adriatic Recipe, Appetizers, bite-sized nibbles, brunch, Canapés, dinner, Easy recipe, entrée course, Fish & Seefood, fish starter, Healthy, healthy mael, Istrian cuisine, Istrian dish, Istrian food, Istrian gastronomy, main course, main dish, main fish meal, Nutritious, Nutritious dish, recipe from Northern Ital, Rustic dish, Slovenian cuisine, Slovenian food, Slovenian gastronomy, Small bites, Starters
Comment

Home made Baked Beans Istrian Recipe

Beans and Sardines
January 26, 2022 by tina oblak in Adriatic Recipe, Appetizers, Autumnal dish, Autumnal recipe, brunch, Central European recipes, Eastern European recipes, Easy recipe, Healthy, healthy mael, Istrian cuisine, Istrian dish, Istrian food, Istrian gastronomy, main course, main dish, Nutritious dish, Nutritious, one pot meal, one pot meat recipe, Rustic dish, Side Dishes, Slovenian cuisine, Slovenian food, Slovenian gastronomy, Small bites, Starters, stew, Vegan, Vegetarian, Winter dish, Winter recipe, casserole

Home made baked beans is one of the most humble staple dishes in Slovenian Istra, the peninsula located at the head of the Adriatic Sea. This dish is nutritious, as full of fibre and protein, wholesome, super delicious, cheap and simple to make, and what it may lack in appearance it most certainly makes up in flavour.

This dish is classic comfort food, quintessentially rustic, a truly peasant food since it used to be made by farmers during colder months to help them to get warm, and to partially replenish their energy used up during the very hard, physical and laborious jobs required in the fields during the day.

This borlotti beans casserole is made with beautifully caramelized onions and sautéed pancetta and flavoured with garlic, bay leaf and a touch of tomato paste, it is typically served with polenta or crusty bread and a fantastic companion to grilled meats.

My nona grew up with this dish, as borlotti beans were consistently cooked as a part of the Mediterranean diet, the recipe was passed down to my father who adored baked beans and would prepare them regularly when there was a family barbecue, normally in such a huge quantities that we would eat them on a toasted bread for days to follow, nobody seemed to mind or complained about it, on the contrary...

This home made baked beans are known in standard Slovenian as Praženi Fižol, but the locals would refer to this dish simply in the dialect as Pražen Fežu.

This very traditional dish calls for dry borlotti beans, but you can use canned beans to cut down on time without compromising the deliciousness of the final dish, it can also be made with or without the meat component, in which case, this version makes an excellent vegetarian and vegan meal option.

I am sharing here the traditional, local family recipe which uses only few simple ingredients, however, you can take this dish slightly off the beaten track and jazz it up a bit by adding few chilli flakes or powdered sweet or smoked Hungarian paprika, which will give a more “Imperial” and “Balcanic” flavour. My father attempted this only once and was severely told off by his mother, my famous nona, for “corrupting” the traditional recipe making it too “exotic” for her to eat, this version of baked beans, although very delicious indeed, was never cooked again by my father in her presence...

Whether you go for a traditional or more exotic version of the recipe for home made baked beans, give it a go, a store bought tinned baked beans might just become a thing of a past...

Ingredients

Serves 6-8

  • 500g dry borlotti beans, (or other dry beans of your choice) soaked overnight or for about 8 hours

    For this recipe you can also use tinned borlotti beans or other tinned beans of your choice 4 x 400g)

  • 1 medium onion, (about 130g) finely chopped

  • 4 Tbsp extra virgin olive oil

  • 2 cloves of garlic, peeled and crushed

  • 100g pancetta, (smoked or unsmoked) thinly sliced and chopped

  • You can replace pancetta for smoked or unsmoked bacon or lardons

  • 1 Tsp white all purpose flour

  • 2 Tbsp tomato paste

  • 2 bay leaves (fresh or dry)

  • sea salt

  • black pepper

Method

Place dry borlotti beans, or other dry beans of your choice, in a big bowl, cover completely with plenty of cold water and soak for about 8 hours or overnight.

Drain soaked beans in a colander and rinse with cold running water.

View fullsize Baked borlotti beans 4.jpg
View fullsize Baked borlotti beans 5.jpg

Transfer soaked beans in a pot.

View fullsize Baked borlotti beans 6.jpg
View fullsize Baked borlotti beans 7.jpg

Add plenty of cold water, to completely cover the beans, a bay leaf and bring to boil.

Turn the heat down to medium-low and cook the beans for about 1 -1 ½ hour or until the beans are fully cooked and soft but not falling apart. Skim any foam if it rises to the surface. Towards the end of cooking time add sea salt.

Fish out the bay leaf and discard. Turn the heat off, leaving the pot with the beans in their liquid on the stovetop for later use.

View fullsize Baked borlotti beans 8.jpg
View fullsize Baked borlotti beans 11.jpg

Put extra virgin olive oil in a fairly large and deep skillet or casserole dish (both preferably non stick). Add finely chopped onion, crushed garlic, finely sliced and chopped pancetta or similar, if using, and sauté on a gentle heat, stirring occasionally, until the onions become soft and translucent.

Add the flour and stir well with the onion, garlic and pancetta mixture.

View fullsize Baked borlotti beans 10.jpg
View fullsize Baked borlotti beans 12.jpg

With the slotted spoon, (or a regular big serving spoon) transfer the beans to the skillet with the onion, garlic and pancetta mixture.

Pour the liquid from the beans into the skillet to completely cover the beans. If you are left with more liquid from the beans as needed at this stage, keep it aside and do not discard it. You might use it later on, if the beans during the cooking process get too dry. On the contrary, if you end up using all the liquid from the beans, and the beans get too dry, you can simply use water.

Add sea salt, black pepper, bay leaf, tomato paste and bring to a gentle boil.

View fullsize Baked borlotti beans 13.jpg
View fullsize Baked borlotti beans 14.jpg

Lower the heat and gently simmer for about 30 minutes stirring occasionally.

Taste and adjust the seasoning with sea salt and black pepper.

Serve hot or at room temperature.

Just a thought

Home made baked beans are suitable for freezing.

Wine suggestion

Schiava Alto Adige DOC "Kolbenhofer" 2020 - Hofstater

January 26, 2022 /tina oblak
borlotti beans, baked beans, baked borlotti beans, baked beans with pancetta, baked beans with lardons, baked beans with bacon, rustic baked beans, beaked beans on a hob, baked beans on stove, Stovetop baked beans, Skillet baked beans, baked beans in a frying pan, Praženi Fižol, Pražen Fežu, Istrian borlotti beans
Adriatic Recipe, Appetizers, Autumnal dish, Autumnal recipe, brunch, Central European recipes, Eastern European recipes, Easy recipe, Healthy, healthy mael, Istrian cuisine, Istrian dish, Istrian food, Istrian gastronomy, main course, main dish, Nutritious dish, Nutritious, one pot meal, one pot meat recipe, Rustic dish, Side Dishes, Slovenian cuisine, Slovenian food, Slovenian gastronomy, Small bites, Starters, stew, Vegan, Vegetarian, Winter dish, Winter recipe, casserole

Green Split Peas Soup Istrian Recipe

Beans and Srdines
January 19, 2022 by tina oblak in Adriatic Recipe, Appetizers, Autumnal dish, Autumnal recipe, brunch, dinner, entrée course, healthy mael, Istrian cuisine, Istrian dish, Istrian food, Istrian gastronomy, main course, main dish, Nutritious dish, one pot meal, Rustic dish, Slovenian cuisine, Slovenian food, Slovenian gastronomy, Soups, Starters, supper, Vegan, Vegetarian, Winter dish, winter soup

This comforting, filling and hearty soup is a perfect winter warmer, incredibly easy to make, super delicious in its simplicity, and once you try it, you will add it to your soups recipe collection!

Split peas are quite different from their fresh counterpart, they are a specific kind of field pea, which are dried in order to be stored for a longer period. They are called split peas because after the outer hull is removed the peas are then split in half along a natural seam.

This wonderful soup is protein packed and here I am sharing my nona's recipe. For her, this dish represents a good “old fashioned” basic recipe and is a real staple in the gastronomic repertoire since she learned to make this soup from her grandmother, and so this is a very old family recipe.

She told me that when she was a child, this soup was very often on the tables, as it is a a traditional and classic soup made in Slovenian Istra, where locals refer to it in dialect as Maneštra iz biži špakaj while in standard Slovenian is called Mineštra iz suhega graha.

My nona also shared with me that when she was small, most of the ingredients were home made but this is not the case for dried green split peas, they were bought at the local food market or in a small family run food shop, since for both types of local businesses it was a crucial time for the local microeconomy.

This soup is normally home made and not typically found on the menus in the restaurants.

Try this very tasty one pot soup, and you will think twice before you open a can of soup bought in the supermarket!

Ingredients

  • 500g green split peas, soaked for about 8 hours or overnight

  • 1 medium potato (about 200g), peeled and roughly diced

  • 1 medium onion (about 100g), peeled and roughly chopped

  • few celery leaves

  • fresh flat leaf parsley, a handful (about 10g), roughly chopped

  • 1 small carrot (about 50g), peeled and finely grated

  • tip of fresh or dry bay leaf

  • 4 Tbsp extra virgin olive oil

  • sea salt

  • ground black pepper

  • 2l cold water

Method

Place dried green split peas in a bowl, cover completely with plenty of cold water and soak for about 8 hours or overnight.

Drain soaked peas in a colander and rinse with cold running water.

Transfer soaked peas in a soup pot and add peeled and roughly diced potato, peeled and roughly chopped onion, few celery leaves, roughly chopped parsley, peeled and finely grated carrot, tip of fresh or dry bay leaf, extra virgin olive oil, pinch of sea salt and ground black pepper.

Add 2 litres of cold water and bring to boil.

View fullsize Green split peas soup 5.jpg
View fullsize Green split peas soup 6.jpg

Turn the heat down, partially cover with the lid and gently simmer for about 1 ½ - 2 hours or until the peas are completely tender and disintegrated. Stir occasionally to avoid peas sticking to the bottom of the pan.

Taste and adjust the seasoning with sea salt and black pepper and fish out the tip of bay leaf.

View fullsize Green split peas soup 7.jpg
View fullsize Green split peas soup 8.jpg

You can serve this soup as it is with a bit of texture or if you prefer a creamier texture purée the soup using an immersion blender (like I did for this recipe) or a regular blender.

For a smoother texture you can also use food mill or pass the puréed soup through a sieve which will result in an exceptionally smooth soup.

The soup should generally have a nice thickish consistency, but not too thick, in which case, dilute it adding a bit of water.

This soup is great served hot with some bread croutons, roughly chopped parsley and a drizzle of extra virgin olive oil.

Traditionally it is served with small shaped pasta (ditalini, stelline, orzo, ect.) or rice, both cooked previously and separately and then added to the soup.

Just a thought

This soup is great made in advance and freezes very well.

Wine suggestion

Alto Adige Valle Isarco Sylvaner DOC 2020 - San Michele Appiano

January 19, 2022 /tina oblak
green split peas, dried split green peas, dried split peas creamed soup, cream of green split peas soup, Maneštra iz biži špakaj, Mineštra iz suhega graha
Adriatic Recipe, Appetizers, Autumnal dish, Autumnal recipe, brunch, dinner, entrée course, healthy mael, Istrian cuisine, Istrian dish, Istrian food, Istrian gastronomy, main course, main dish, Nutritious dish, one pot meal, Rustic dish, Slovenian cuisine, Slovenian food, Slovenian gastronomy, Soups, Starters, supper, Vegan, Vegetarian, Winter dish, winter soup
Comment

Creamed salted cod (or stockfish) Recipe

Beans and Sardines
December 16, 2021 by tina oblak in Adriatic Recipe, Appetizers, Autumnal dish, Autumnal recipe, bite-sized nibbles, brunch, Canapés, Celebratory dish, Central European recipes, Christmas dish, dinner, Easter dish, Easy recipe, entrée course, Festive dish, Finger food, Fish & Seefood, healthy mael, Istrian cuisine, Istrian dish, Istrian food, Istrian gastronomy, main course, main dish, Nutritious dish, recipe from Northern Ital, Rustic dish, Slovenian cuisine, Slovenian food, Slovenian gastronomy, Small bites, Snacks, spreads, Starters, Winter dish, Winter recipe, fish spreads, fish starter

Venetian in origin, this light and creamy, almost mousse like spread, it is one of the most loved dishes, due to its very mild fishy flavour and no bones to worry about, and so it covers the whole family from the youngest children to the oldest members.

Spread on fresh or toasted slices of bread or it can be eaten with polenta, and it is a very convenient dish since it is served cold and it is prepared in advance. Creamed salted cod is rustic but it can soon turn into very elegant canapé served with a pre dinner drink.

I think that this recipe is one of the greatest recipes ever invented! Quite frankly, it takes a bit of a genius to turn an uneatable dry stockfish, which looks utterly unappealing, and is as dry as a plank of wood, into the most luxurious and delicious dishes ever created.

Venetian creamed cod, known in Italy as Baccalà mantecato, is a real speciality and a staple dish in Venice, where it was created, and it is very much appreciated and well known in the rest of Italy. Slightly less known however in the rest of the world, creamed salted cod certainly deserves greater international praise and renown.

This dish is one of my absolute top favourites, one of those dishes I am most grateful to the Venetians to have brought with them during the time they ruled my homeland in the North Adriatic, period during which dried stockfish was first introduced in Istria in 15th century from Venetian cuisine.

In Slovenian it is called Bakala na belo or Polenovka na belo or simply called by the locals Bakala or Bakalar.

My paternal grandfather, or my nono as I called him, used to always buy stockfish at the beginning of December, I have this image in my head of the dry long stockfish sticking heavily out of the shopping bag, I knew very well that it was the start of the Christmas festivities.

This recipe is a real classic holiday and festive dish in Slovenian Istra, and holds a very special place among the locals. Dried stockfish was once a food for the poor but nowadays is a staple dish and considered a delicacy, taking central stage on household tables during Christmas and Easter as it is cooked on holy days during the fasting time and not eating meat.

Traditionally, creamed stockfish is home made and served as part of Christmas Eve dinner, together with sautéed Savoy cabbage and polenta, and Istrian fritole (small fried doughnuts), of course.

These days you can find creamed stockfish on the supermarket shelves all year round, and especially during the holiday season and Easter, but unfortunately, the sad reality is, that very often, the quality of commercially produced cod spread leaves much to be desired, as very common practice is to add lard or potatoes to increase the weight

I have very vivid memories about the process of soaking the stockfish, this huge restaurant size pot was left outside in the back garden during the night and when the temperatures plummeted below 0, the ice formed on the top, and I just loved finding the sheet of ice the following morning, and braking it into pieces. My son does the same...what is it with the children and the ice, and love for breaking it ...

My son Jakob (age 9) with his gran grandmother (age91) making creamed stockfish with the help of a standard mixer

My nono was in charge of stockfish, year, after year, after year, until he sadly passed away, then my father took over and now it is down to myself, my brother, my husband, and the children, since my father sadly is longer around. Back home, according to tradition, stockfish and the preparation of it is still a male affair, however, maybe it is time for this to change!

My nono would sit on the chair, place a big pot containing pieces of cooked cod between the legs, a bottle of olive oil would be kept very close to him for an easy and frequent reach and as tradition requests, the cooked cod would then be beaten with big and long wooden flat spoon like, known locally as polentar or bat which resembles very much a cricket bat, but in my research I have found no connection between the two types of bats!

In honour of my family but in particular in honour of my nono and my father I am sharing here this very special generational family recipe. Give it a go, you will love it!

Ingredients

Serves 4

  • 500g salted cod or 1 dry stockfish

  • 170ml extra virgin olive oil (the very best you can afford) plus a bit of extra as needed

  • 1-2 cloves of garlic, peeled

  • 1 bay leaf, fresh or dry

  • fresh flat leaf parsley (about 7g) finely chopped, optional

  • sea salt, to taste

Method

For this recipe you can use either salted cod or dry stockfish, both need to be soaked and rehydrated first.

If you are using salted cod (I used this type for the recipe) first you need to rinse well the salted cod under very cold running water and soak it. Place rinsed cod in an airtight container, fill it completely with freezing cold water, and with some ice, if you have it, so the fillets are completely submerged. Close the lid and put the container in the fridge. Change the water after 24 hours and place in the fridge for another day. After 48 hours, the cod will be completely soaked. Remove the cod from the container, rinse well with cold water and cut the fillet/s into portion size.

Place pre-soaked pieces of cod in a pan and fill it with plenty of cold water so the pieces of fish are completely submerged in the water. Add bay leaf and bring to boil.

View fullsize Creamed Salted Cod 3.jpg
View fullsize Creamed Salted Cod 4.jpg

Turn the heat down and cook further on a gentle heat for about 20 to 30 minutes and skim the foam on the surface as needed.

After the fish is cooked drain in the colander.

As soon as it is cool enough to handle carefully remove the skin and the odd bone.

With your fingers break the flesh into smaller pieces and place them in a pan or in a bowl of a standard mixer if you are using one.

View fullsize Creamed Salted Cod 5.jpg
View fullsize Creamed Salted Cod 6.jpg

If using a whole dried stockfish, this needs to be soaked and rehydrated first. Place the whole stockfish in a big stock pot and fill completely with cold water and soak for 2-3 days, changing the water every day. If you do not have a very big pot to fit the whole stockfish in, you can use a smaller pot, like a regular 5 litre stock pot, and then place the stockfish in a pot where half of it will probably stick out, and half will be submerged in the water. Soak the submerged part of stockfish for 24 hours and after this time the soaked part of the stockfish will get soft enough to bend, which will allow you to bend it in a such a way for the whole stockfish to be completely submerged into the water in order to get properly rehydrated. No need for rinsing as the dried stockfish is not salted.

Soaked and rehydrated cod needs then to be cooked. Place it in a stock pot, the same one you used for soaking, fill it with plenty of cold water (the whole fish needs to be completely submerged), add bay leaf and bring to boil. Lower the heat and cook further on a gentle heat until the fish is tender, for about 1 hour or just over.

Drain the fish and as soon as is cold enough to handle carefully remove the skin and all the bones.

With your fingers break the flesh into smaller pieces and place them back into in big pan or into a bowl of a standard mixer if you are using one.

Whether you have decided to use salted cod or stockfish you are now left with cooked cleaned small pieces of cod in a big pan or in a bowl of a standard mixer, again only if you are using one.

Place 5 Tbsp of extra virgin olive oil in a small frying pan, add the garlic previously peeled and cut in half lengthwise. Fry the garlic on a gentle heat until golden in colour to infuse the oil then discard the garlic.

Add garlic infused oil to the bowl.

Now the magic can begin.

Take a wooden spoon and start beating the pieces of fish quite vigorously. If using a standard mixer, put it on the lowest and slowest setting.

Keep beating and poring gradually the rest of the oil until you obtain a whitish paste and until the creamy mixture can no longer absorb any more oil.

This action of beating and adding very gradually small quantities of oil will eventually turn the pieces of cod into a light and fluffy cream, this process, in order to get the best result, can take up to 30 minutes.

View fullsize Creamed salted Cod 7.jpg
View fullsize Creamed salted cod 9.jpg

Add sea salt to your taste and very finely 1 chopped clove of garlic, although this optional, mix well, taste, and adjust the seasoning.

Transfer cod spread on a serving plate.

Serve it accompanied with slices of fresh rustic bread, toasted slices of bread (bruschetta) or slices of grilled yellow polenta.

Wine suggestion

Venezia Giulia Malvasia IGT 2019 - Skerk

December 16, 2021 /tina oblak
creamed salted cod, creamed stockfish, creamed salted cod mousse, baccala mantecato, Bakala na belo, Bakala, Bakalar, Istrian fish delicacy, Venetian fish specialty
Adriatic Recipe, Appetizers, Autumnal dish, Autumnal recipe, bite-sized nibbles, brunch, Canapés, Celebratory dish, Central European recipes, Christmas dish, dinner, Easter dish, Easy recipe, entrée course, Festive dish, Finger food, Fish & Seefood, healthy mael, Istrian cuisine, Istrian dish, Istrian food, Istrian gastronomy, main course, main dish, Nutritious dish, recipe from Northern Ital, Rustic dish, Slovenian cuisine, Slovenian food, Slovenian gastronomy, Small bites, Snacks, spreads, Starters, Winter dish, Winter recipe, fish spreads, fish starter
Comment

Barley, potato and borlotti beans Istrian soup Recipe

Beans and Sardines
December 01, 2021 by tina oblak in Adriatic Recipe, Appetizers, Autumnal dish, Autumnal recipe, Central European recipes, dinner, Eastern European recipes, Easy recipe, entrée course, healthy mael, Istrian cuisine, Istrian dish, Istrian food, Istrian gastronomy, main course, main dish, Nutritious dish, one pot meal, Rustic dish, Slovenian cuisine, Slovenian food, Slovenian gastronomy, Soups, Starters, stew, supper, Vegan, Vegetarian, Winter dish, Winter recipe, winter minestrone, winter soup

This hearty and filling one pot barley soup is a traditional soup from Slovenian Istra, a perfect choice to warm you up on a cold day, delicious in its simplicity, and it could not be easier to make.

Barley soup is a very popular choice in many households and is found on the menus as Ječmenova mineštra in more rustic, informal, mountainside, and family run restaurants.

Barley soup together with other types of soups like Jota (sauerkraut, borlotti beans and potato stew), Bobići (Sweet corn soup), Pasta e fasoi (Pasta and borlotti beans soup) play an incredibly important role in Istrian cooking as the soups were eaten as a main dish and sometimes the only hot meal of the day. The choice of the ingredients to make mineštre/maneštre (Istrian dialect word, from Italian minestra, indicating thicker soup) would rely exclusively on the type of vegetables and pulses that were available during a particular season.

Barley soup is traditionally made during colder autumn and winter months using dry borlotti beans, potatoes and barley that were harvested by the end of summer and autumn and appropriately stored to be used later in the year when the cold weather did not allow you to grow a vast array of vegetables, unlike during the spring, when it was warmer, and you could grow them in abundance to make even a lighter Minetrone Primavera.

In Slovenian Istra it is very common to put in some soups, besides different pork cuts, dried ham bone or pešto or taca (smooth paste made with pancetta, crushed garlic and very finely chopped parsley) to boost the flavour of the dish.

Traditionally this recipe calls for some unsmoked or smoked pork meat cuts to be added to the soup however you can turn this soup into a vegetarian and vegan friendly dish by simply leaving out the meaty component.

This family recipe really goes back generations. I am sharing with you the recipe for barley soup from my paternal nona's grandmother.

Ingredients

Serves 8-12

  • 300g dried borlotti beans, soaked overnight

  • 300g pearl barley

  • 500g roughly of pork ribs, ham hock, pig trotters or similar (slab of pancetta or bacon, about 130g). You can use smoked version of the meats if you prefer a slightly deeper smoky flavour or a combination of both.

  • 2 medium size potatoes (about 300g), peeled and cubed

  • leaves from 2-3 sticks of celery

  • 1 medium size onion (about 130g), finely chopped

  • 1 clove of garlic, peeled and crushed

  • 1 medium size carrot (about80g) peeled and finely grated

  • handful of fresh flat leaf parsley (about 15g) finely chopped

  • 1 bay leaf, fresh or dry

  • sea salt

  • black pepper

Method

In a fairly big stock pot place all the ingredients, except the sea salt and black pepper, add 4 ½ litres of cold water and bring to boil.

Turn the heat down and skim the surface as needed.

Cover partially with the lid and cook the soup on a gentle heat for about 1h ½.

View fullsize Barley soup 2.jpg
View fullsize Barley soup 3.jpg

After this time the soup should have a nice thicker velvety consistency as the potatoes and the barley release the starch. If the soup gets too thick simply dilute it with a bit of water.

Season with sea salt and black pepper, taste and adjust the seasoning.

Just a thought

Barley soup will keep well in a fridge for few days and is suitable for freezing.

Wine suggestion

Search results for 'Refosco dal Peduncolo Rosso DOC "Villa Locatelli" 2019 - Tenuta di Angoris

December 01, 2021 /tina oblak
barley soup, barley, potato and borlotti beans soup, barley minestrone, barley potato and borlotti beans minestrone, one pot barley soup, Istrian barley soup, Istrian barley minestrone
Adriatic Recipe, Appetizers, Autumnal dish, Autumnal recipe, Central European recipes, dinner, Eastern European recipes, Easy recipe, entrée course, healthy mael, Istrian cuisine, Istrian dish, Istrian food, Istrian gastronomy, main course, main dish, Nutritious dish, one pot meal, Rustic dish, Slovenian cuisine, Slovenian food, Slovenian gastronomy, Soups, Starters, stew, supper, Vegan, Vegetarian, Winter dish, Winter recipe, winter minestrone, winter soup
Comment

Green Beans simple salad Recipe

Beans and Sardines
November 23, 2021 by tina oblak in Adriatic Recipe, Appetizers, Autumnal dish, Autumnal recipe, dinner, Easy recipe, healthy mael, Istrian cuisine, Istrian dish, Istrian food, Istrian gastronomy, Nutritious dish, Rustic dish, Side Dishes, Slovenian cuisine, Slovenian food, Slovenian gastronomy, Small bites, Starters, supper, Vegan, Vegetarian, Salads

This Green Bean salad is one of the quickest side dishes you can prepare using only four ingredients. It is incredibly simple to make, as the beans, after being cooked and still warm get tossed in delicious extra virgin olive oil and sliced garlic.

This salad, using fresh green beans, when they are in season, is an excellent choice to accompany almost any meat or fish dish.

In this recipe I slice the garlic, since this allows the option to remove it easily if someone would only like a hint of garlic flavour without a stronger one, even though traditionally the garlic is very finely chopped.

Best served still warm or at room temperature and in the summer is very refreshing dish taken out of the fridge.

This side dish is a perfect example of simplicity at its best and it has been with me as long as I can remember.

I am sharing here how it has been prepared in my family.

Ingredients

Serves 4 as part of meal

  • 500g fresh green beans

  • 3 Tbsp extra virgin olive oil (the best you can afford)

  • 1 Tbsp red or white wine vinegar (can use balsamic vinegar)

  • 1 clove of garlic(peeled and crushed or very finely sliced or chopped) You can replace garlic with finely sliced onion.

Method

Trim the stalk ends off the beans, place them in a colander and wash well with cold running water.

Place the beans in a pan with boiling unsalted water and cook the beans for about 15 minutes or just until al dente (tender but still with a bit of bite).

Drain well and place the beans in a large bowl. Add a pinch of sea salt, extra virgin olive oil, sliced, chopped or crushed garlic and toss well. Taste and adjust the seasoning.

Serve and enjoy!

November 23, 2021 /tina oblak
fresh green beans, simple salad, simple green beans salad
Adriatic Recipe, Appetizers, Autumnal dish, Autumnal recipe, dinner, Easy recipe, healthy mael, Istrian cuisine, Istrian dish, Istrian food, Istrian gastronomy, Nutritious dish, Rustic dish, Side Dishes, Slovenian cuisine, Slovenian food, Slovenian gastronomy, Small bites, Starters, supper, Vegan, Vegetarian, Salads
Comment

Borlotti beans salad Recipe

Beans and Sardines
October 29, 2021 by tina oblak in Adriatic Recipe, Appetizers, Central European recipes, dinner, Easy recipe, healthy mael, Istrian cuisine, Istrian dish, Istrian food, Istrian gastronomy, main course, main dish, Nutritious dish, Rustic dish, Slovenian cuisine, Slovenian food, Slovenian gastronomy, Small bites, Starters, supper, Vegan, Vegetarian

This filling and substantial salad is traditionally made with either fresh borlotti beans when they are in season (mid to end summer and early autumn) or dried borlotti beans, during colder months when fresh borlotti beans are no longer available to buy as a seasonal produce. To make this dish even more convenient and fast, the use of good quality tinned borlotti beans is a common practice when you want to rustle up a quick meal.

Both my paternal and maternal grandfathers would take this salad to the vegetable garden and have it for lunch there with some bread and a small glass of red wine that they always kept in the garden shed.

I am sharing here the recipe for the salad, how has always been made in my family, traditionally using borlotti beans, (fresh, dried or tinned) however, you can use other types of beans if you prefer.

Ingredients

Serves 4 as part of meal

  • Double the quantity of the beans if you wish to make a more substantial bean salad and serve it as a main dish for 4 people.

  • 250g fresh or dried borlotti beans (when buying fresh borlotti beans in their pods you will need about 500g)

  • If using dried borlotti beans, they need to be soaked overnight in a large bowl of cold water (for at least 8 hours), then drained and rinsed and then they are ready to be cooked.

  • For this recipe you can also use tinned borlotti beans (one tin of borlotti beans weighing 400g will give you 250g of beans after they have been drained). If the liquid in the can is very thick, thin it out with a little bit of water and save it, as it makes integral part of the dressing.

  • 1 small onion, peeled and thinly sliced (you can use yellow, white or red onions, shallots or spring onions)

  • fresh flat leaf parsley, finely chopped

  • extra virgin olive oil, generous drizzle

  • white or red wine vinegar (you can use balsamic vinegar or other types of vinegar)

  • sea salt

  • black pepper

  • bay leaf (fresh or dry)

Method

Place fresh borlotti beans (previously taken out of their pods) or dried borlotti beans (previously soaked overnight) in a big pot and add plenty of cold water until about 3cm (just over an inch) from the top.

Add bay leaf and bring to boil. Turn down the heat and gently boil the beans uncovered for up to 1 hour or until tender. If using dried borlotti beans the cooking time will be slightly longer.

When the beans are cooked season with sea salt.

Drain cooked beans keeping a bit of their liquid.

Transfer the beans to a salad dish.

Add finely sliced onions, finely chopped fresh flat leaf parsley, a generous drizzle of extra virgin olive oil, vinegar, black pepper and a bit of the liquid that you kept aside.

Taste and adjust the seasoning.

Enjoy warm, at room temperature or cold.

Just a thought

You can turn this simple bean salad into a more substantial meal, adding to the beans for example some tomatoes, carrots, celery, beetroot or tinned tuna, just to mention few options.

Store the bean salad in an airtight container and keep it refrigerated, it will last between 2 and 4 days.

Wine suggestion

Friuli Colli Orientali DOC “Friulano di Jacopo”2019 - Necotium

October 29, 2021 /tina oblak
fresh borlotti beans, dry borlotti beans, borlotti beans salad, dry borlotti beans salad, bean salad with fresh parsley and onion
Adriatic Recipe, Appetizers, Central European recipes, dinner, Easy recipe, healthy mael, Istrian cuisine, Istrian dish, Istrian food, Istrian gastronomy, main course, main dish, Nutritious dish, Rustic dish, Slovenian cuisine, Slovenian food, Slovenian gastronomy, Small bites, Starters, supper, Vegan, Vegetarian
Comment
Stuffed Peppers 7.jpg

Stuffed peppers with minced meat and rice in a tomato sauce Istrian Recipe

Beans and Sardines
October 20, 2021 by tina oblak in Adriatic Recipe, Appetizers, Balkan dish, Central European recipes, Eastern European recipes, Easy recipe, Istrian cuisine, Istrian dish, Istrian food, Istrian gastronomy, main dish, Rustic dish, Slovenian cuisine, Slovenian food, Slovenian gastronomy, Starters, one pot meal, baked dish

This Balkan dish made of peppers, stuffed with a mix of minced meat and rice and cooked or baked in a rich tomato sauce is very rustic, unpretentious, hearty and traditionally made during summer months, end of summer and early autumn.

Yes, there are a few steps to this recipe, but it is very simple to make and there is absolutely nothing complicated about it.

Stuffed peppers is a dish that is common in many cuisines around the world and generally consists of peppers getting halved or hollowed and then stuffed with a variety of different fillings such as meat, rice, vegetables, cheese, fish etc.

This dish, with its many variations, can be found in Greece, Central and Southeast Europe, Scandinavian and Baltic countries, Guatemala, North America Eastern Mediterranean, India and Spain.

It is in Eastern Mediterranean that stuffed peppers are part of Dolma, a word of Turkish origin, meaning “something stuffed” and it indicates a family of stuffed dishes originating from Ottoman Cuisine. The Ottoman Empire directly administered a vast territory, and eventually reached the Balkans and the area not far from the Istrian peninsula, where I come from, and this is why they strongly shaped the local cuisine.

As a result of this historical influence, there is no surprise that in the whole of Slovenia and in coastal Istria, stuffed peppers, known as Filana paprika or Polnjena paprika become integral part of the local diet and can be found on the menus informal family run restaurants, and it is one of the most frequently made dishes in many households.

I like to call this dish “a generational dish” since it is very much loved across different generations in the family, so when stuffed peppers are on the menu, everyone leaves the table happy.

Stuffed peppers are traditionally served with plenty of creamy mashed potatoes or just a lot of rice and bread. What is not to like about this dish?

Everyone in the family makes delicious stuffed peppers but this dish tastes super special and extra delicious when my brother cooks them. They are most often made a day in advance so all the flavours can fully develop and then gently reheat it. This is when they taste at their best.

I am sharing here my brother's recipe for stuffed peppers baked in the oven.

Ingredients

Serves 4-8 (depending if you are serving one or two stuffed peppers per person)

  • 7-9 bell peppers, mixed colour or use just the ones that you prefer. The number of the peppers will depend on their size and also on the size of the dish you will use for this recipe and into which they need to fit. I used 8 medium size mixed peppers. (Babura type of peppers is a variety of peppers most commonly used for this recipe).

  • 400g mince beef

  • 400 mince pork

  • 100g rice, any risotto type rice like Arborio, Vialone Nano, Carnaroli will work well

  • bigger size onion (about 170g), finely chopped

  • 4 cloves of garlic, peeled and crushed

  • 2 Tbsp extra virgin olive oil

  • sea salt

  • black pepper, finely ground

Sauce

  • 2 tinned finely chopped tomatoes (2x400g), the best quality you can afford

  • medium size onion, finely chopped

  • 2 cloves of garlic, peeled and crushed

  • 4 Tbsp extra virgin olive oil

  • few fresh basil leaves

  • sea salt

Method

Before starting this recipe, I suggest you do a little test to see how many peppers will you actually need. Take the ovenproof dish you intend to bake the stuffed peppers in and see how many peppers will fit in it.

For this recipe you can use a deep baking tray and cover stuffed peppers with an aluminium foil.

Stuffed Peppers 1.jpg

Start by making a simple tomato sauce. Put extra virgin olive oil in a pan, add finely chopped onions, a pinch of salt and fry on a gentle heat until the onions become soft. Add crushed garlic and fry gently together with the onions just for a minute or so. Add tinned tomatoes, few fresh basil leaves, bring to the boil, turn the heat down, partially cover with the lid and gently simmer for about 30 minutes, stirring occasionally. By this time, the sauce should have a nice rich velvety consistency.

Prepare and clean the peppers. Cut off the top part and remove white little seeds from inside the peppers. Rinse the outside and the inside of the peppers with cold running water. Dry the peppers a bit with a kitchen towel or kitchen paper.

Stuffed Peppers 2.jpg

Take a griddle pan (if you have it, otherwise non stick pan will work just fine) and heat it until very hot. Place the peppers in a pan and charcoal grill them on all sides. The skin of the peppers will burst slightly and turn a bit black giving the peppers a slightly smoky flavour. Cool the peppers and set aside.

Charcoal grilling the peppers first will really give and extra dimension in terms of the flavour to the dish, however, you can skip this step.

Stuffed Peppers 5.jpg

Cook the rice, following the instruction on the packet, but only halfway through. This will avoid the rice to become too mushy in the stuffing. Rinse in a small colander, cool and keep aside.

Put extra virgin olive oil in a pan, add finely chopped onions, a pinch of salt and fry on a gentle heat until the onions become soft. Add crushed garlic and fry gently together with the onions just for a minute or so. Place mince beef and mince pork in a pan and fry until brown, stirring occasionally. With the back of wooden spoon break bigger lumps of meat. Taste and adjust the seasoning with sea salt and finely ground black pepper. Cool a bit and set aside.

Transfer cooked rice and browned mince meat in a big mixing bowl. Mix well and set aside.

View fullsize Stuffed Peppers 3.jpg
View fullsize Stuffed Peppers 4.jpg

Transfer the tomato sauce in a ovenproof dish.

Turn the oven on and preheat it to 180C static or equivalent.

With the help of a spoon, fill each pepper with meat and rice mixture. With the back of the spoon press the mixture down as you go along, this will allow you to get more mixture in a pepper.

Place each filled pepper in the ovenproof dish filled with tomato sauce.

Stuffed Peppers 6.jpg

Cover with the lid and bake for 2 hours. Check occasionally giving a dish a gentle shake.

Stuffed Peppers 8.jpg

Just a thought

If you are left with meat and rice mixture you can use it in frittata or make scrambled eggs with it and there is another meal sorted.

You can store stuffed peppers for few days in an airtight container and they also freeze very well.

Wine suggestion

Collio Cabernet Sauvignon DOC 2018 - Muzic

October 20, 2021 /tina oblak
bell peppers, stuffed peppers, mince meat and rice, pepperoni ripieni, polnjene paprike, filane paprike, one pot meal, baked peppers
Adriatic Recipe, Appetizers, Balkan dish, Central European recipes, Eastern European recipes, Easy recipe, Istrian cuisine, Istrian dish, Istrian food, Istrian gastronomy, main dish, Rustic dish, Slovenian cuisine, Slovenian food, Slovenian gastronomy, Starters, one pot meal, baked dish
Comment
Mussels all abuzara 7.jpg

Mussels buzara style with garlic, parsley and white wine Istrian Recipe

Beans and Sardines
October 13, 2021 by tina oblak in Adriatic Recipe, Appetizers, Canapés, Easy recipe, entrée course, Finger food, Fish & Seefood, healthy mael, Istrian cuisine, Istrian dish, Istrian food, Istrian gastronomy, main course, main dish, Nutritious dish, Rustic dish, Slovenian cuisine, Slovenian food, Slovenian gastronomy, Small bites, Starters

This delicious, one pot recipe for mussels, is a great way to bring restaurant style mussels to your home, as is it surprisingly easy and quick to cook yourself.

This is one of the healthiest “fast foods” filled with proteins, zing and iron, makes a great appetizer or a light meal choice, above all, it is sustainable and affordable.

Mussels alla Busara (or Buzara) or Busara mussels is one of the most traditional and common ways of preparing mussels and other type of shellfish in coastal Croatia, Istria and in Italy, in Trieste, province of Trieste and in Venice.

There are two types of busara or buzara sauce, the white variation with olive oil, garlic, white wine, fresh parsley and breadcrumbs and the red variation where finely chopped onions and tomatoes are added to the sauce, a variation very commonly used with langoustines.

This is lovely way of cooking mussels as during the steaming process they release their juices and together with the rest of the ingredients make the most delicious sauce.

This was one of my dad's favourite dishes and he used to cook it very often. When the mussels were on the menu, I knew my parents would have friends coming round, usually for a Saturday evening gathering. My dad would prepare a huge pot of mussels, placed it in the centre of the table with a big serving spoon, so everyone could help themselves, and plenty of fresh crunchy bread to dip in the sauce.

I am sharing here his recipe, but before you cook the mussels, make sure you buy them as fresh as you can, they should not have a strong “fishy” smell but should have a fragrance of the sea. As soon as you can, after purchasing, take the mussels out of the plastic bag, put them loose in a bowl, cover with the cloth and refrigerate. Drain any expelled liquid, clean and prepare them only when ready to cook.

Mussels alla buzara 1.jpg

Ingredients

Serves 4 as a starter

  • 1kg fresh mussels, cleaned with beard (fibrous darkish brown string like hanging out of the join in the shell) removed

  • 4 Tbsps extra virgin olive oil

  • fresh flat leaf parsley, a handful (about 10g), finely chopped

  • 2-3 cloves of garlic, peeled and crushed (you can use more or less garlic depending on the size and personal preference)

  • 1-2 Tbsp dry breadcrumbs

  • 200ml white wine

  • sea salt

Method

Rinse well the mussels with cold running water.

Mussels alla buzara 2.jpg

If you find the mussels particularly dirty, place them in a large bowl or sink filled with cold water, add a generous pinch of salt and leave to soak for up to 30 minutes, this will help to get rid of sand and grit. Swish them around with your hands to wash them thoroughly and then rinse well with cold water. Most of the time, when mussels are bought at the fishmonger or supermarkets, they come fairly clean and you will most probably skip this step.

Mussels normally come with beards (fibrous darkish brown string like hanging out of the join in the shell) that need removing, but not all the mussels will have beards.

Pull off the beards, they need a firm tug, the use of knife will help you.

During this process of debearding check each mussels as you go along.

It is really important to discard damaged mussels with broken shells.

Also look for any open mussels, tap them sharply with a knife, against the worktop or the side of the sink. If they don't close, mean they are dead, not edible and you need to discard them.

Rinse the mussels well with cold water and place them in a colander to drain.

View fullsize Mussels alla buzara 3.jpg
View fullsize Mussels alla buzara 4.jpg

In a large pan (Dutch oven is great if you have it) put the oil and the garlic, stir around on a gentle heat for few seconds to flavour and infuse the oil with the garlic.

Add white wine, 1 Tbsp of breadcrumbs, half the parsley and bring to boil.

Add mussels, the rest of the parsley, cover with the lid and cook the mussels on a high heat for about 6 minutes giving a pan a good shake now and again so the mussels cook evenly.

Mussels alla buzara 5.jpg

The mussels are fully cooked when they are all opened, discard the mussels that have not opened.

Taste the sauce, season with sea salt if needed and add one more tablespoon of breadcrumb if you like the sauce slightly thicker.

Sprinkle cooked mussels with some extra roughly chopped flat parsley and serve hot immediately.

Just a thought

Cooked mussels should not be made in advance and then reheated and they are not particularly suitable meal for storing.

Wine suggestion

Friuli Colli Orientali Ribolla Gialla DOC 2018 – La Viarte

October 13, 2021 /tina oblak
fresh mussels, mussels buzara style, mussels busara style, mussels alla buzara, mussels alla busara, mussels Adriatic recipe, mussels Adriatic style, mussels with no cream
Adriatic Recipe, Appetizers, Canapés, Easy recipe, entrée course, Finger food, Fish & Seefood, healthy mael, Istrian cuisine, Istrian dish, Istrian food, Istrian gastronomy, main course, main dish, Nutritious dish, Rustic dish, Slovenian cuisine, Slovenian food, Slovenian gastronomy, Small bites, Starters
Comment
Green beans with tomatoes 13a.jpg

Green Beans with tomatoes Istrian style Recipe

Beans and Sardines
September 22, 2021 by tina oblak in Adriatic Recipe, Appetizers, brunch, Easy recipe, healthy mael, Istrian cuisine, Istrian dish, Istrian food, Istrian gastronomy, Nutritious dish, Rustic dish, Side Dishes, Slovenian cuisine, Slovenian food, Slovenian gastronomy, Vegan, Vegetarian

This comforting, rustic, vegetable side dish is super delicious and super easy to make, perfect to accompany just about any grilled or roasted meats or fish.

I am sharing with you the recipe my nona and my mother have made this dish very often when fresh green beans were in season and tasting at their best.

Green beans with tomatoes 1.jpg

This is a very popular dish during the summer and end of summer.

My maternal grandfather grew green beans at his vegetable garden, they got picked and enjoyed all the way through the summer, but somehow it would be the very last batch, at the end of the summer, that tasted the best. Did it really, or is this just an impression stored in my nostalgic box of memories? As a child I was aware that eating that last few green beans meant that the summer would very soon drew to a close...

Traditionally green beans in tomato sauce are eaten with soft polenta or just with some bread. It can also be served with cooked rice, fried eggs or on bruschetta.

Ingredients

Serves 4 as part of meal

  • 500g fresh green beans, washed and trimmed

  • 1 medium onion (about 140g), finely chopped

  • 250g tomatoes, washed and roughly chopped (I used fresh mini San Marzano tomatoes but you can use other varieties or good quality tinned tomatoes of your choice.) If using fresh tomatoes make sure the tomatoes are nicely ripe and sweet. You can change the quantity of the tomatoes according to your preference.

  • a bunch of fresh flat leaf parsley, stalks included (about 16g), finely chopped

  • 3 generous Tbsp extra virgin olive oil

  • 1 clove garlic, peeled and crushed

  • sea salt

  • 150ml water

Green beans with tomatoes 2.jpg

Method

Wash and trim green beans.

View fullsize Green beans with tomatoes 3.jpg
View fullsize Green beans with tomatoes 4.jpg

Cut them in three or four pieces.

View fullsize Green beans with tomatoes 5.jpg
View fullsize Green beans with tomatoes 6.jpg

Peel the onion and chop it finely then peel and crush the garlic.

In a fairly big pan, ideally non stick, put extra virgin olive oil.

Add the onions, a pinch of sea salt and sauté on a gentle heat for few minutes, stirring frequently, until they become soft and translucent.

Add the garlic and mix well with the onions.

Place green beans in a pan, mix well with onions and garlic and cook for about 10 minutes, stirring quite frequently.

Add chopped tomatoes, mix well with green beans and cook for further 10 minutes or until tomatoes start to break down a bit.

View fullsize Green beans with tomatoes 7.jpg
View fullsize Green beans with tomatoes 8.jpg
View fullsize Green beans with tomatoes 9.jpg
View fullsize Green beans with tomatoes 10.jpg

Season with sea salt, add fresh chopped parsley and add water.

Partially cover the pan with the lid and cook on a gentle heat for about 60minutes, stirring occasionally. After this simmering time the beans should be nice and soft.

If at any point during the cooking you feel the beans are getting too dry add a splash of water.

Season to taste and serve hot, at room temperature or cold.

Green beans with tomatoes 12.jpg

Just a thought

The quantity of the tomatoes for this recipe is a guideline only and you can adjust it according to your taste, liking and preference.

For this recipe you can use frozen green beans as well.

This is a great dish to be made ahead and refrigerated overnight.

September 22, 2021 /tina oblak
fresh green beans, green beans, frozen green beans, green beans with tomatoes, Braised green beans with tomatoes, Fagiolini al pomodoro in umido
Adriatic Recipe, Appetizers, brunch, Easy recipe, healthy mael, Istrian cuisine, Istrian dish, Istrian food, Istrian gastronomy, Nutritious dish, Rustic dish, Side Dishes, Slovenian cuisine, Slovenian food, Slovenian gastronomy, Vegan, Vegetarian
Comment
Plum Dumplings 18.jpg

Plum Dumplings Recipe

Beans and Sardines
September 16, 2021 by tina oblak in Adriatic Recipe, Appetizers, breakfast, brunch, Central European recipes, dessert, dinner, Easter treats, Eastern European recipes, Easy recipe, entrée course, Istrian cuisine, Istrian dish, Istrian food, Istrian gastronomy, main course, main dish, Mitteleuropean recipes, pudding, Rustic dish, Slovenian cuisine, Slovenian food, Slovenian gastronomy, Starters, supper, sweet course, Sweet Things, Vegetarian, Dumplings

This is a great dish for Autumn that originated in the Austro-Hungarian Empire. It is made with potato gnocchi dough in which you stuff the plums, simmer them in water, and then coat them with breadcrumbs, sugar and cinnamon mixture.

These rustic plum dumplings will become a real treat in the family since they are super delicious and easy to make! This dish is traditionally offered as a dessert, however, it is very common as a main course for lunch or dinner.

Plum dumplings are very well known and common throughout the countries that were once part of the Austro-Hungarian Empire. This dish is therefore very popular in Eastern and Central Europe as well as in Trieste and the province of Trieste in Italy.

This historical influence made plum dumplings a very appreciated meal in Slovenia, and is referred to in Slovenian as češpljevi cmoki or slivovi cmoki (češplje and slive meaning plums and cmoki meaning dumplings). They are widely available to buy frozen in bags in the supermarkets, but nothing is comparable to making them at home with this simple recipe.

This dish is very familiar to me, I grew up with it, and it was prepared frequently in the late summer and early autumn when plums are in peak season, in abundance, and with the right level of sugar and sweetness in them.

In Slovenia, where I come from, plum trees are very common to have in the back garden or in a near by orchard and the sight of these beautiful, humble, bluish purple colour fruits, almost like jewels hanging from the branches, is simply heart warming. Plums are popular to use not only for plum dumplings but also for other desserts like bake trays, tarts, jams, and compotes.

Damsons plums, being oval and small, therefore easy to handle, are the preferred and most frequently used type of plums for this recipe. Other types of plums work very well too and fresh apricots are also used frequently to make the dumplings.

If you decide to offer plum dumplings as a dessert, I would suggest to serve 2, if you decide to prepare them as a main meal then 3 or 4 depending on the size.

Plum Dumplings 1.jpg

Ingredients

Serves 6- 8 (you will get about 16 dumplings)

Ingredients for the plum dumplings

  • 16 fresh plums, Damsons plums and prune plums most commonly used, you can use other variety (plums should be sweet, ripe and fairly firm to the touch, avoid overripe with soft pulp as it gets quite difficult and messy to pit them). You can use fresh apricots instead.

  • 1kg floury, yellow-fleshed potatoes, e.g. King Edward, Maris Piper, (avoid new potatoes). I use red skin potatoes.

  • 300g all purpose flour (plus extra for flouring the board and working surface)

  • 1 egg, slightly beaten

  • sea salt, a pinch

Ingredients for the breadcrumb coating

The ingredients stated here are to coat all the dumplings, if you wish to half the quantity of dumplings half the ingredients for the breadcrumb coating

  • 100g unsalted butter

  • 5 Tbsp natural dry breadcrumbs

  • 5 Tbsp caster sugar

  • 1 Tsp cinnamon

Method

Start this recipe by making a basic potato gnocchi dough. (For more details refer to my full step by step recipe for Potato gnocchi dough)

Wash the potatoes, with the skin on, under cold running water.

Place the potatoes in a saucepan or a pot, cover with cold water and bring to boil. After the water has come to a boil, cook for about 20 minutes or until tender. Cooking time will obviously vary depending on the size of the potatoes you are using.

Don't pierce them during cooking and don't overcook them allowing the skin to burst as they will absorb too much water, alternatively you can steam them.

Remove from the pot, drain them in a colander and let them cool enough to handle, then remove the skin. If the potatoes are still quite warm to handle, the best way to remove the skin is to stick the fork though the potato and peel it using a knife.

Put the flour on a working surface, add salt and mix with the fork.

Make a well in the middle and pass the potatoes through a potato ricer while still warm as they become stickier when cooler. Allow riced potatoes to cool for few minutes and then add the egg.

With your fingers work the flour into the potato and egg, bringing the dough together, until it becomes a soft, pliable dough and do not overwork it. If the dough is too sticky, wet and soft add a bit more flour. Make sure your working surface is always well floured.

When the dough is the right consistency it should not stick to your fingers.

Shape the potato dough into a log.

Plum Dumplings 4.jpg

Prepare your plums by washing them and pat dry them. Then cut each plum lengthwise all the way round in order to get two halves and remove the pits.

View fullsize Plum Dumplings 2.jpg
View fullsize Plum Dumplings 3.jpg

Flour well your working surface and divide and cut the potato dough log roughly into 16 portions.

With your hands slightly floured, flatten and shape each portion into a round circle.

View fullsize Plum Dumplings 4a.jpg
View fullsize Plum Dumplings 5.jpg

Place one half of the plum in the centre and fill it with half Tsp of sugar, then place the other half of the plum on top of it.

If your plums are quite big in size, you might want to use only one half, as you will end up with very big dumplings which are more difficult to handle and not looking particularly elegant on a serving plate.

View fullsize Plum Dumplings 6.jpg
View fullsize Plum Dumpling 7.jpg

Wrap the dough tightly around the plums.

Seal the edges properly and tightly and shape it into a ball, roughly the size of a peach.

If the edges do not stick properly, dampen the edges with your fingers previously dipped in a bit of water, this will act a bit like a glue.

This step is quite important to prevent the dumplings from bursting and losing the juices during cooking.

Make sure you place each dumpling on a well floured surface to avoid sticking.

View fullsize Plum dumplings 8.jpg
View fullsize Plum Dumplings 9.jpg

It is quite crucial, when making dumplings, that you start and finish the process without interrupting for too long, as the sauce from inside the dumplings (the sugar inside the plum starts dissolving) will start leaking from the dumplings making it quite a mission to rescue them, and this is from the first hand experience!

Repeat the process until you use all the dough.

View fullsize Plum Dumplings 10.jpg
View fullsize Plum Dumplings 11.jpg
Plum Dumplings 12.jpg

Fill a large pot with water, add a generous pinch of salt and bring to boil.

Place gently each plum dumpling in a pot making sure they do not stick to the bottom.

Cook the plum dumplings in simmering water for about 12 minutes (not strong boiling as that can damage the dumplings).

They are fully cooked when they float on the surface.

While the plum dumplings are simmering, make the breadcrumbs sauce.

In a large pan, ideally non stick, melt gently the butter, add the breadcrumbs and toast for few minutes on a medium-low heat until slightly darker in colour.

Add sugar and cinnamon and mix until all the ingredients are well combined. Remove the pan from the heat to avoid burning the breadcrumbs mixture.

View fullsize Plum Dumplings 13.jpg
View fullsize Plum Dumplings 14.jpg

With a slotted spoon, remove plum dumplings from the simmering water.

Transfer them and place them in a pan with breadcrumbs mixture.

View fullsize Plum Dumplings 15.jpg
View fullsize Plum Dumplings 16.jpg

Shake the pan gently so the dumplings can roll around and get fully coated in the breadcrumbs mixture.

Plum Dumplings 17.jpg

Place on the serving plate, dust them with a bit of extra icing sugar and serve immediately. They are best eaten hot but equally delicious at room temperature.

Plum Dumplings 19.jpg

Just a thought

If you decide to only make half a batch of plum dumplings, you can use half of the potato dough for the plum dumplings and the other half for potato gnocchi. (see my full recipe step by step for potato gnocchi).

You can store cooked plum dumplings for up to three days in a airtight container.

If you need and desire to warm them up, putting them in a microwave is a good option as they retain the moisture.

The great thing about plum dumplings is also that they freeze very well. It is very important that you spread the uncooked dumplings in a single layer, leaving a bit of space between each dumpling, so they don't stick together, on a well floured wooden board, baking sheet, serving tray laid with baking parchment or with well floured kitchen cloth or similar.

Put the tray with the freshly made dumplings into a freezer, for at least 20- 30 minutes, and once frozen, put them into a freezing bag.

When you want to cook them just drop them frozen directly into a boiling salted water without defrosting them first, bearing in mind that the cooking time will be slightly longer, around 15 minutes. They are ready when they are floating on the surface.

Wine suggestion

Moscato Rosa delle Venezie IGT 2014 - Foffani

September 16, 2021 /tina oblak
Autumn Recipe, autumnal recipe, plums, plum puddings, plum desserts, potato gnocchi dough, češpljevi cmoki, slivovi cmoki, sweet dumplings
Adriatic Recipe, Appetizers, breakfast, brunch, Central European recipes, dessert, dinner, Easter treats, Eastern European recipes, Easy recipe, entrée course, Istrian cuisine, Istrian dish, Istrian food, Istrian gastronomy, main course, main dish, Mitteleuropean recipes, pudding, Rustic dish, Slovenian cuisine, Slovenian food, Slovenian gastronomy, Starters, supper, sweet course, Sweet Things, Vegetarian, Dumplings
Comment
Sautèed Bell Peppers- Final dish.jpg

Sautéed Bell Peppers with Onions and fresh Basil Recipe

July 20, 2021 by tina oblak in Adriatic Recipe, Appetizers, brunch, Canapés, Easy recipe, Finger food, healthy mael, Istrian cuisine, Istrian dish, Istrian food, Istrian gastronomy, main course, main dish, Nutritious dish, Rustic dish, Side Dishes, Slovenian cuisine, Slovenian food, Slovenian gastronomy, Small bites, Snacks, Starters, supper, Vegan, Vegetarian

This recipe is very easy, very tasty, you only need a few fresh ingredients and you have a perfect summer side dish to accompany meat or fish.

Peppers cooked this way are also fantastic served on bruschetta, can also be used as a sauce for pasta dishes, great base for risotto, or simply enjoyed on its own with a fresh crunchy bread. I also love using sautèed peppers as a topping on a pizza.

This dish can really be summed up as a simplicity at its best.

I simply adore peppers, I love them raw in salads, cooked, sautèed, grilled...

I have very vivid memories as a child going with my mother to the farmers market and seeing the vegetable and fruit stalls full of colourful peppers, it just looked so beautiful...

After buying the peppers, I would pick one and my mother would wash it under cold water in one of the Venetian looking fountains in the market, and I would just munch it raw during the trip back home.

As soon as the peppers were available fresh to buy at end of spring and during the summer, when they are in abundance, my mother would make this dish very often and here I am very happy to share it with you..

Ingredients

Serves 4

  • 6 mixed colour bell peppers, about 1kg (I used yellow, orange, green and red, you can use just one variety or a mixture of your preference)

  • 1-2 onions, about 200g (peeled and thinly sliced)

  • fresh basil, few leaves

  • sea salt

  • 4 Tbsp extra virgin olive oil

  • chili, optional

Sautèed Bell Peppers 1.jpg

Method

Wash and dry the peppers, cut them in half, remove the seeds and the white filaments.

Cut the peppers into smaller pieces.

View fullsize Sautèed Bell Peppers 2.jpg
View fullsize Sautèed Bell Peppers 3.jpg

Peel the onions and slice thinly.

Add the oil into a fairly large non stick pan.

Heat the oil and add the onions and a pinch of salt

Stew the onions over medium-low heat, for about 15 minutes, stirring occasionally, until the onions become soft and translucent.

View fullsize Sautèed Bell Peppers 4.jpg
View fullsize Sautèed Bell Peppers 5.jpg

Add the peppers, mix them well with the onions, add sea salt, fresh basil leaves and chilli if using.

Cover with the lid and cook the peppers on a medium-low heat anything between 30-50minutes, stirring occasionally.

The peppers, after this time, should be completely soft and all the water should be completely absorbed.

If the peppers are completely cooked but still quite watery, take the lid off and cook further for few minutes until all the water is completely absorbed.

Add few more fresh basil leaves and your peppers are ready to be enjoyed hot, warm, at room temperature or cold.

View fullsize Sautèed bell Peppers 7.jpg
View fullsize Sautèed Bell Peppers 6.jpg

Just a thought

Peppers cooked this way can be stored for about 2-3 days in the fridge in an airtight container.

Freezing this dish is not recommended.

You can add crashed garlic (1 or 2 cloves) if you wish and replace fresh basil for fresh flat leaf parsley or use both.

Wine suggestion

Friuli Colli Orientali Sauvignon DOC 2019 by Valentino Butussi, Colli Orientali, Friuli

July 20, 2021 /tina oblak
bell peppers, fresh basil, sautèed bell peppers, sautèed bell peppers with onions, sautèed bell peppers with frsh basil
Adriatic Recipe, Appetizers, brunch, Canapés, Easy recipe, Finger food, healthy mael, Istrian cuisine, Istrian dish, Istrian food, Istrian gastronomy, main course, main dish, Nutritious dish, Rustic dish, Side Dishes, Slovenian cuisine, Slovenian food, Slovenian gastronomy, Small bites, Snacks, Starters, supper, Vegan, Vegetarian
Comment
Minestrone Primavera 10.jpg

Minestrone Primavera (Spring Vegetable Soup) recipe

Beams and Sardines
June 29, 2021 by tina oblak in Adriatic Recipe, Appetizers, brunch, dinner, Easy recipe, entrée course, healthy mael, Istrian cuisine, Istrian dish, Istrian food, Istrian gastronomy, main course, main dish, Nutritious dish, Rustic dish, Slovenian cuisine, Slovenian food, Slovenian gastronomy, Soups, Starters, supper, Vegetarian, Italian soups, Italian minestrone

This is a really lovely soup to make, it is delicious, comforting, easy to prepare, and it is a great choice for a light lunch or dinner. It will soon become one of your favourites as it is ideal for a rustic style meal or for a more elegant option dining.

What I love about this minestrone is that it is really uncomplicated to make and it looks so pretty with all the new vegetables, yes, spring in a plate and a real celebration of springtime.

This soup is Italian in origin and due to such a close geographical proximity of my homeland it became incredibly popular, it is prepared in almost every household on a weekly basis, and because of its healthy and nutritious properties it is a popular choice in nurseries, school canteens, restaurants and nursing homes.

It is also very common to blitz or puree this soup and use it as a baby food.

In Slovenia you can find it in the menus as Zelenjavna Mineštra and in Istrian dialect being referred to as Maneštra.

This spring vegetable soup is quite light but it is very common to turn it into a more substantial meal just by adding a bit of small shaped pasta or rice, barley, freshly cooked or tinned cannellini or other type of beans, chickpeas and similar.

Minestrone Primavera is one of those dishes that was created out of necessity, using what was available in the season. The idea behind this, is that you would go to the vegetable garden during the spring and early summer season and pick the vegetables that were ready to be used in cooking. And this is exactly what my both paternal and maternal grandfathers used to do.

As a alternative, if you do not have a vegetable patch, you can go to the farmers market, food stores or supermarket and pick up the spring vegetable that you like.

The beauty of Spring minestrone is that it can never taste exactly the same, as the selection of vegetables will slightly vary each time you cook it.

My mum would make this soup very frequently especially in the spring and early summer when there are fresh vegetables available in abundance.

There are also quite a lot of regional variations of this dish like Minestrone alla Genovese, a variant typical of Liguria (Italy), that commonly uses fresh basil pesto and a greater amount of fresh herbs.

What gives this humble minestrone a real boost in flavour is to put the end of a Parmiggiano Reggiano or Padano cheese rind into the soup rather than to throw it away. The rind is that part of the cheese that develops on the outside wheel as it ages and acts as a protective layer. When you are no longer able to grate the cheese, as you get to the crust that also becomes quite hard (i.e. the rind), you do not throw the crust away, use it in a soup to enrich it as it is packed full of flavour.

It just transforms the overall taste of the minestrone, as if just by magic, you have to trust me on this one! You will be amazed what an old rind of cheese can do!

Minestrone Primavera 11.jpg

This is a poor, peasant soup, my paternal nona shared with me that when she was young ingredients were scarce, and the word abundance was almost hardly ever used when it comes to food. It is quite emotional to think how incredibly clever and creative people were to use everything they could to give them fuller flavour with something that would normally end up in the bin or compost.

Here I will share a basic recipe for the minestrone, just how it has been made in my family for generations and it is just a guide, as there is no set recipe.

20210609_114927.jpg

Ingredients

Ingredients for soffritto (Italian in origin, it is a flavour base for many dishes, gently fried chopped onions, carrots and celery in olive oil)

  • 4 Tbsp extra virgin olive oil

  • 1 medium onion, approx. 140g, finely chopped

  • 1 medium carrot (finely chopped), use 70g for soffritto and chop the rest of the carrot and use it in a soup together with the other vegetables

  • 1 celery stick (approx. 70g), finely chopped

Ideally, the onion, carrot and celery stick should be chopped quite finely when preparing soffritto. If you have a mini food processor, this is the time to use it.

The rest of the ingredients for the soup

  • courgette (approx. 100g), a handful, sliced and roughly chopped

  • 1 potato (approx 130g), peeled and cut into cubes

  • 4 runner beans, washed trimmed and sliced

  • 4 green asparagus, wash, trim off the wooden ends and finely slice the stalks leaving the tips whole

  • 4-5 radishes, washed and roughly chopped

  • 5 broad bean pods, podded

  • fresh sweet peas in pods (approx. 150g), remove the peas from the pods (frozen petits pois would do just fine, about a handful)

  • baby spinach, about a handful, chopped

  • 1 handful fresh flat leaf parsley, stalks included (that is where the flavour is), finely chopped

  • 3-4 fresh basil leaves, roughly chopped

  • 1 fresh sage leaf

  • 2l hot vegetable or chicken stock (using instant stock is perfectly fine). You can just simply use hot water if you do not have any type of stock in hand.

  • sea salt (to taste)

  • freshly ground black pepper (optional)

  • Parmiggiano Reggiano cheese rind (optional)

  • 80-100g small shaped pasta or broken up spaghetti

Method

Prepare all your vegetables as described in the Ingredients list above and put it aside.

Minestrone Primavera 12.jpg

Drizzle the oil in a casserole pan, add onions, carrots and celery and prepare the soffritto by gently and slowly frying the trio of vegetables for about 15 minutes, stirring occasionally until soft.

View fullsize Minestrone Primavera 2.jpg
View fullsize Minestrone Primavera 3.jpg
View fullsize Minestrone Primavera 4.jpg
View fullsize Minestrone Primavera 5.jpg

Add all the other vegetables and fry gently together with soffritto for few minutes.

Add all the herbs, stock and cheese rind, if using, and cook for about 40 minutes.

Taste and adjust the seasoning with sea salt and black pepper. If using cheese rind there might be no need for extra seasoning as the cheese rind is quite salty already.

View fullsize Minestrone Primavera 7.jpg
View fullsize Minestrone Primavera 8.jpg

Halfway through cooking add barley, beans (already cooked or canned), rice or any other small shaped pasta you like, very traditional is to use ditalini shape pasta. It is also very common, especially when you realized you have not got any small shaped pasta or completely run out of it, to take a bit of spaghetti and break them up into smaller pieces.

I have lovely memories of my mother giving me this job when I was a child to keep me entertained.

I give this same job to my son today, to keep him entertained...

Serve it hot with freshly grated Parmiggiano Reggiano cheese and bruschetta of your choice.

Minestrone Primavera 9.jpg

Wine suggestion

Chardonnay DOC “Vigna Runc” 2019 by Il Carpino, Collio.

June 29, 2021 /tina oblak
Minestrone Primavera, spring vegetable soup, Nutritious soup, Healthy soup, Zelenjavna minestra, Zuppa primavera, Mixed vegetable soup, Mixed vegetable minestrone
Adriatic Recipe, Appetizers, brunch, dinner, Easy recipe, entrée course, healthy mael, Istrian cuisine, Istrian dish, Istrian food, Istrian gastronomy, main course, main dish, Nutritious dish, Rustic dish, Slovenian cuisine, Slovenian food, Slovenian gastronomy, Soups, Starters, supper, Vegetarian, Italian soups, Italian minestrone
Comment

Rustic Sea Bream spread recipe

Beans and Sardines
June 15, 2021 by tina oblak in Adriatic Recipe, Appetizers, brunch, Canapés, dinner, Easy recipe, Finger food, Fish & Seefood, Healthy, healthy mael, Istrian dish, Istrian food, Istrian gastronomy, Nutritious dish, Rustic dish, Small bites, Snacks, spreads, Starters

This fish spread is creamy and full of flavour and could not be simpler and quicker to make. It is rustic and informal, fantastic as a dinner party starter or as light lunch, it brings people together at the table as it is a real sharing dish and a real success every time I make it.

You can prepare this spread any time of the year but on a hot sunny day it feels somehow a bit of a treat.

Back home it is very popular starter and commonly used as a part of a selection of cold fish based starters.

This spread, like many other dishes, was created out of necessity with the left over baked fish. The fish was cleaned and the three most basic ingredients used in the North Adriatic (garlic, extra virgin olive oil, flat fresh leaf parsley) were added to the fish that was simply mashed with a fork.

Place the spread in the centre of a table, sprinkle with some extra chopped parsley or dill, a drizzle of olive oil, arrange some bread, olives, sliced tomatoes, salads, other fish based starters and really all the other things that you like.

Your family and friends will love this spread, they will ask you for the recipe or you will find them on your doorstep before you intent to invite them back.

Ingredients

Serves 4- 8

  • 2 whole baked sea breams (each weighing between 300-500g before baking) or 4 fillets (can use sea bass, mackerel or similar)

  • 1 clove of garlic, peeled and pressed (small to a medium sized garlic would be appropriate to avoid overpowering the delicate flavour of the fish, you can use big garlic if you are after a more garlicky taste)

  • 4 Tbsp extra virgin olive oil

  • fresh flat leaf parsley, stalks included, finely chopped (about a handful)

  • sea salt, to taste

  • lemon juice (optional, to taste)

Method

If using the whole fish, remove the skin and any bones from the fish.

View fullsize Sea Bream spread 1.jpg
View fullsize Sea Bream Spread-2.jpg
Sea Bream Spread 3.jpg

Place cleaned pieces of fish meat in a food processor. If you do not have food processor you can use hand blender which will give you a very smooth consistency or you can simply finely chop fish fillets and have a spread with more texture.

Add pressed garlic, extra virgin olive oil, chopped parsley and a pinch of sea salt.

Blend until smooth or blitz for more coarse consistency.

View fullsize SEa Bream Spread 4.jpg
View fullsize SEa Bream Spread 5.jpg

Taste and adjust seasoning with sea salt.

Add a squeeze of lemon juice if desired.

Serve at room temperature with fresh or toasted bread, crackers or bread sticks.

SEa Bream Spread 6.jpg

Just a though

If you bake the fish, there will be juices coming out of the fish. Spoon them up and add to the rest of the ingredients. It will really give extra flavour.

This spread can be made up to a day ahead and kept in the fridge but served at room temperature.

Wine suggestion

Ribolla Gialla IGT 2019 by I Clivi, Tre Venezie.

June 15, 2021 /tina oblak
Sea Bream, rustic fish spread, sea bream paté, home made fish spread
Adriatic Recipe, Appetizers, brunch, Canapés, dinner, Easy recipe, Finger food, Fish & Seefood, Healthy, healthy mael, Istrian dish, Istrian food, Istrian gastronomy, Nutritious dish, Rustic dish, Small bites, Snacks, spreads, Starters
Comment
Frittata with dry sausage 1.jpg

Frittata with dry sausage (salami) recipe

Beans and Sardines
June 01, 2021 by tina oblak in Adriatic Recipe, Appetizers, breakfast, brunch, Canapés, Central European recipes, entrée course, Finger food, Istrian cuisine, Istrian dish, Istrian food, Istrian gastronomy, main course, main dish, Rustic dish, Slovenian cuisine, Slovenian food, Slovenian gastronomy, Small bites, Snacks, dinner, supper

Frittata with dry sausage is a quick and easy midweek lunch or dinner and a great weekend breakfast or brunch option. Fantastic eaten hot but often served at room temperature and perfect to make ahead for picnics and larger groups. Serve it with rustic bread or polenta and a salad. Great also as a sandwich filling.

To me, however, this simple dish is more than just a quick meal solution.

Both my grandfathers loved frittatas, and not without a glass of red wine! They would normally have it upon the return back home late morning after working in the allotments or in the olive grove.

My paternal grandfather really liked dry sausage frittata while my maternal grandfather was really keen on wild fresh herbs frittata but both really liked wild asparagus and pancetta (or without) variation. All three typical in the region.

This simple dish, similar to an omelette, is Italian in origin (frittata is an Italian word and roughly translates to “fried”) but due to such a close geographical proximity to Italy, frittata found a huge popularity in a local cuisine and could be referred to as Fritaja s klobasami – Fritata or Frtalja s klobasami and Fritaia con le luganiche in Istrian dialect. All these names come from the Venetian word fritaia.

Amazingly, this simple frittata with dry sausage, is a speciality in Istria and also has a deep meaning in a local folklore. This type of frittata is typically made especially during Carnival period (festive season that occurs before the liturgical season of Lent). In rural areas and particularly in small villages locals dressed up in different Carnival costumes. In groups they would walk from house to house singing traditional folk songs accompanied by sound and the melodies of the accordion, usually played by one member of the group.

As a sign of appreciation for entertaining and lifting the spirits, they received food gifts which consisted of fresh eggs, dry sausages, salami, crostoli, fritole (typical Carnival sweet things) and also wine.

When this simple Carnival procession was over, the participants would gather in somebody's home and frittata with dry sausage was made and other dishes were prepared with everything they received.

All the food was displayed on the table, shared and enjoyed, often ending up in excessive consumption of alcohol and other foods that will be forgone during upcoming Lent. There was a lot of singing and dancing, this is how local people came together and enjoyed each other company, the festive period and the the end of harsh winter.

My nona Nada also shared with me a lovely story, telling me that this festive season also provided the opportunity for young men and women to casually meet and possibly fall in love...

Frittata with dry sausage 2.jpg

Ingredients

Serves 4

  • Italian dry sausage/salami (about 150g), can use French sausage (saucisson), Spanish Chorizo (the important thing is that they are not too dry and hard, when buying should feel a bit soft when squeezing)

  • 6 eggs, beaten or whisked

  • 1 Tbsp extra virgin olive oil

  • sea salt, to taste (bear in mind the sausages are dry cured and taste salty already)

  • black pepper, freshly ground (to taste)

Method

Peel the dry sausage, place it on a chopping board, slice it, half it and then cut it into quarters.

View fullsize Frittata with dry sausage 3.jpg
View fullsize Frittata with dry sausage 4.jpg

In a separate bowl whisk the eggs and season with salt and pepper.

Frittata with dry sausage 5.jpg

Put the oil in a skillet, ideally non stick, and heat it.

Sauté and lightly sear the sausage on a medium high heat stirring frequently.

Frittata with dry sausage 6.jpg

Pour the egg mixture in the skillet over the sausage, turn the heat to fairly low and cover with the lid (glass lid with steam hole works very well, if you have it). Also, using a slightly bigger lid than the skillet will help to keep the frittata “dry”. Lid that fits perfectly on top of the skillet could potentially trap quite a bit of steam and possibly making your frittata a bit wet.

The use of the lid will also help to cook the frittata evenly, avoiding the bottom of frittata being almost burnt and the egg mixture on the top being still raw, runny and unset.

Cook the frittata for about 20 min. The frittata is cooked when the underside is set and the egg mixture on the top no longer runny.

Frittata with dry sausage - Recipe.jpg

Just a thought

In this recipe, I have chosen to cook the frittata on the stove with a lid as my family has always used this method. I have also bear in mind that not everyone has a skillet that can go in the hot oven or under the grill.

However, if you are familiar cooking the frittata in the oven, and that is your preferred method, it is perfectly fine to do so.

Wine suggestion

Refosco dal Peduncolo Rosso IGT 2017 by Vigna Petrussa, Venezia Giulia.

June 01, 2021 /tina oblak
Italian salami, dry sausage, chorizo sausage, french sausage, saucisson, fresh eggs, frittata, Istrian frttata, Fritaja s klobasami
Adriatic Recipe, Appetizers, breakfast, brunch, Canapés, Central European recipes, entrée course, Finger food, Istrian cuisine, Istrian dish, Istrian food, Istrian gastronomy, main course, main dish, Rustic dish, Slovenian cuisine, Slovenian food, Slovenian gastronomy, Small bites, Snacks, dinner, supper
Comment
LRM_20191009_123138.jpg

Liptauer (Austro-Hungarian paprika spiced cheese spread) recipe

Beans and Sardines
March 09, 2021 by tina oblak in Starters, brunch, Easy recipe, entrée course, healthy mael, Slovenian cuisine, Slovenian food, Slovenian gastronomy, Vegetarian, spreads, Eastern European recipes, Central European recipes, Mitteleuropean recipes, Snacks, Canapés, Finger food, Small bites, Appetizers

Liptauer, pronounced “Lip-tower”, is a simple, flavourful, central European, or Mitteleuropean, well seasoned, paprika spiced cheese spread with a sharp, rich, and deep smoky taste.

Its origin has long been disputed but the name derived from the German name Liptau for the region of Liptov (Hungarian: 'Lipto') in northern Slovakia, a former county in the Austro-Hungarian Empire.

Nowadays, Liptauer spread appears in numerous variations throughout many other European countries, and is a part of Slovak, Hungarian, Slovenian, Italian (some north-east regions) and Austrian cuisine, where it is commonly served as a popular dish in wine taverns, and as a snack for kids during break time in schools.

Despite extensive variations on the recipe, as many families have their own unique version of Liptauer, they all have in common the main ingredient which is cheese that can vary from Quark, Bryndza (a sheep milk cheese) cream cheese, cottage or goat cheese and powdered sweet paprika giving a spread a beautiful colour.

It is great for vegetarians and you can change and play around with the quantities of some ingredients to suit your taste.

Here, I will share with you the recipe my maternal Grandma Iva used to make. This dish was a constant part of my childhood and it really does bring back some wonderful memories as it was made on numerous occasions, especially when the family got together to mark special festivals like Carnival (before Lent began), Easter, Christmas, and All Saint's Day, or family celebrations like birthdays and anniversaries.

LRM_20191009_123656 (1).jpg

My grandmother would put the spread in the middle of the table with freshly made home made bread, and everyone would help themselves before the big meal ahead. Along with the spread, there would be a selection of cold meats, different types of cheeses, and a variety of pickles. We children often got so stuffed with this delicacy we did not get to the first course! We just simply could not resist the fresh spread on a crunchy piece of bread. It is a great appetizer from Mitteleuropa to start the children on!

LRM_20191009_115935.jpg

Liptauer has a very versatile use. Traditionally served as part of cheese and charcuterie board and hard boiled eggs.

It is typically eaten as an open sandwich, or on toast, crackers and bagels. It is a great alternative base for a variety of sandwiches, and can be used as canapè spread.

You can serve it with drinks, pretzels, and a selection of pickles, cheese sticks, and really whatever you fancy.

I also serve them as a canapè with drinks, and they do go down as a real treat. Just take a single round of thinly sliced piece of German or Hungarian style salami, spread a bit of Liptauer and roll it into a cigar shape. And there you have it, salami roll ups.

LRM_20191015_110326.jpg

Ingredients

  • 250g curd cheese (was difficult to find, now available in most supermarkets and Polish food stores)

  • 50g butter (soft at room temperature)

  • 1 Tsp Dijon mustard

  • 1 Tsp powdered sweet Hungarian paprika

  • 1 Tsp caraway seeds (crashed well with pestle and mortar)

  • 2 Tbsp pickled gherkins, cornichons or pickled cucumber (very finely chopped)

  • 2 Tbsp onions (very finely chopped)

  • sea salt, a pinch or to taste

  • freshly ground black pepper, a pinch or to taste

View fullsize LRM_20191008_110825.jpg
View fullsize LRM_20191008_135836.jpg

Method

Put all the ingredients in a bowl. Mix and combine well all the ingredients. Serve as a cold starter.

LRM_20191009_103405.jpg

You can keep the spread in the fridge for up to a week in an airtight container.

Just a thought

This is a great cold starter. If you can, try to prepare it in advance, and ahead of a time to allow all the ingredients and flavours to absorb well.

Wine suggestion

Traminer Aromatico DOC 2019 by Sirch, Friuli Colli Orientali.

March 09, 2021 /tina oblak
Sweet Hungarian paprika, Liptauer (Austro-Hungarian paprika spiced cheese spread) recipe, Austro-Hungarian paprika spiced cheese spread recipe, Liptauer spread, Eastern European cheese spreads, Eastern European cheese spread, sandwich spread, canapé spread, vegetarian curd cheese spread, Liptauer
Starters, brunch, Easy recipe, entrée course, healthy mael, Slovenian cuisine, Slovenian food, Slovenian gastronomy, Vegetarian, spreads, Eastern European recipes, Central European recipes, Mitteleuropean recipes, Snacks, Canapés, Finger food, Small bites, Appetizers
1 Comment
  • Newer
  • Older