Beans and Sardines

  • Home
  • About
  • Recipe of the week
  • Recipes
  • Wines
  • Contact

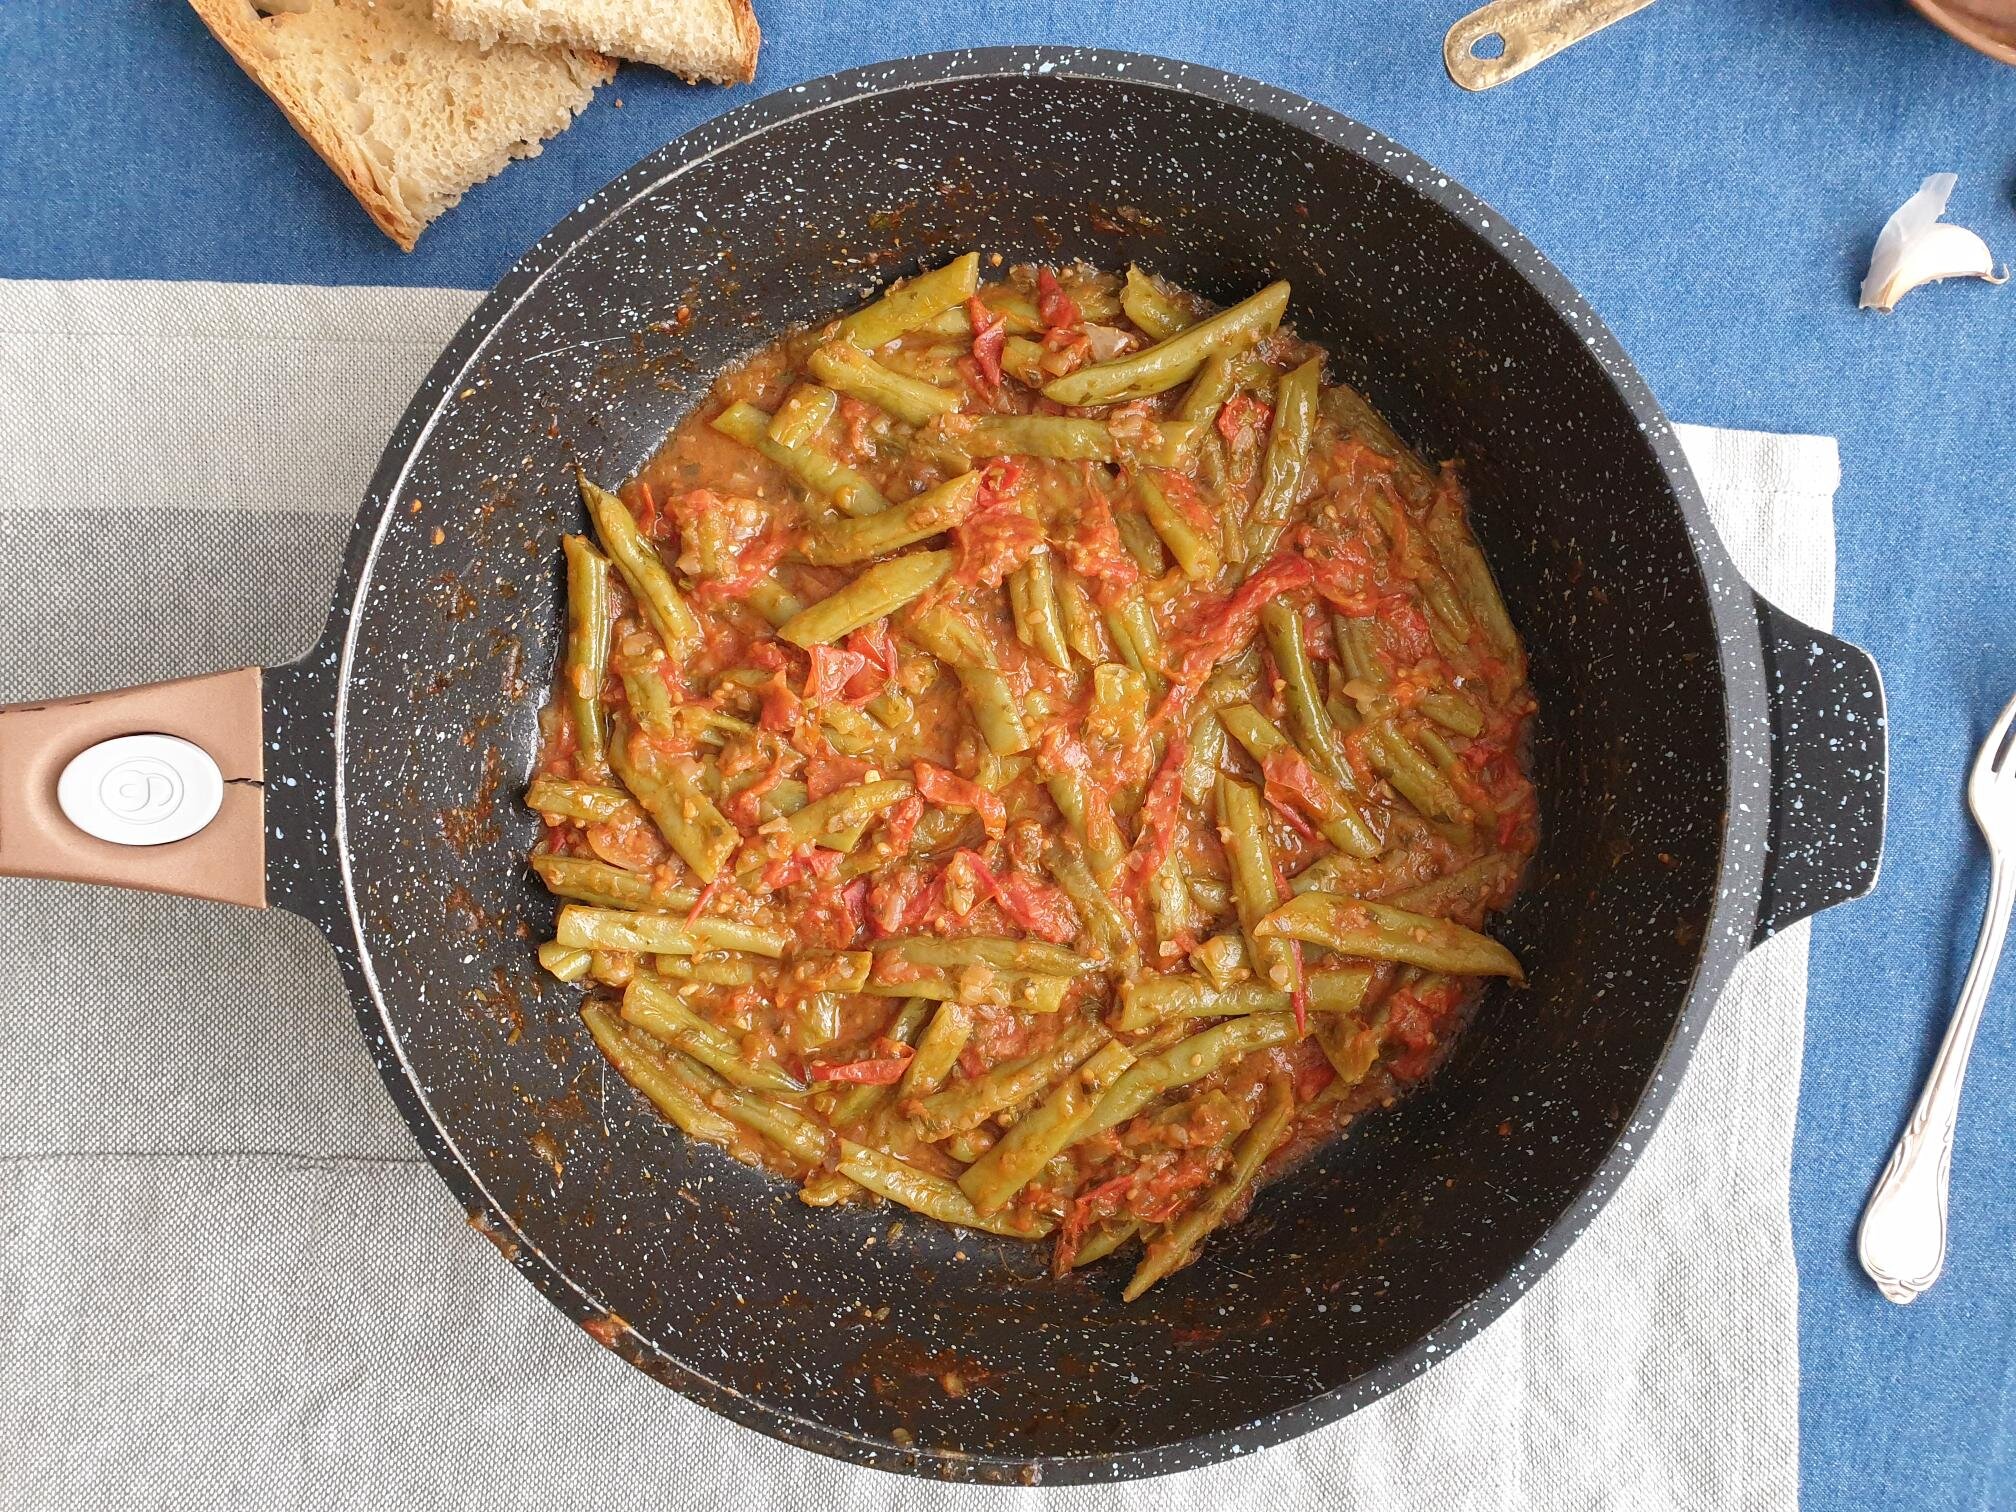
Green Beans simple salad Recipe

Beans and Sardines
November 23, 2021 by tina oblak in Adriatic Recipe, Appetizers, Autumnal dish, Autumnal recipe, dinner, Easy recipe, healthy mael, Istrian cuisine, Istrian dish, Istrian food, Istrian gastronomy, Nutritious dish, Rustic dish, Side Dishes, Slovenian cuisine, Slovenian food, Slovenian gastronomy, Small bites, Starters, supper, Vegan, Vegetarian, Salads

This Green Bean salad is one of the quickest side dishes you can prepare using only four ingredients. It is incredibly simple to make, as the beans, after being cooked and still warm get tossed in delicious extra virgin olive oil and sliced garlic.

This salad, using fresh green beans, when they are in season, is an excellent choice to accompany almost any meat or fish dish.

In this recipe I slice the garlic, since this allows the option to remove it easily if someone would only like a hint of garlic flavour without a stronger one, even though traditionally the garlic is very finely chopped.

Best served still warm or at room temperature and in the summer is very refreshing dish taken out of the fridge.

This side dish is a perfect example of simplicity at its best and it has been with me as long as I can remember.

I am sharing here how it has been prepared in my family.

Ingredients

Serves 4 as part of meal

  • 500g fresh green beans

  • 3 Tbsp extra virgin olive oil (the best you can afford)

  • 1 Tbsp red or white wine vinegar (can use balsamic vinegar)

  • 1 clove of garlic(peeled and crushed or very finely sliced or chopped) You can replace garlic with finely sliced onion.

Method

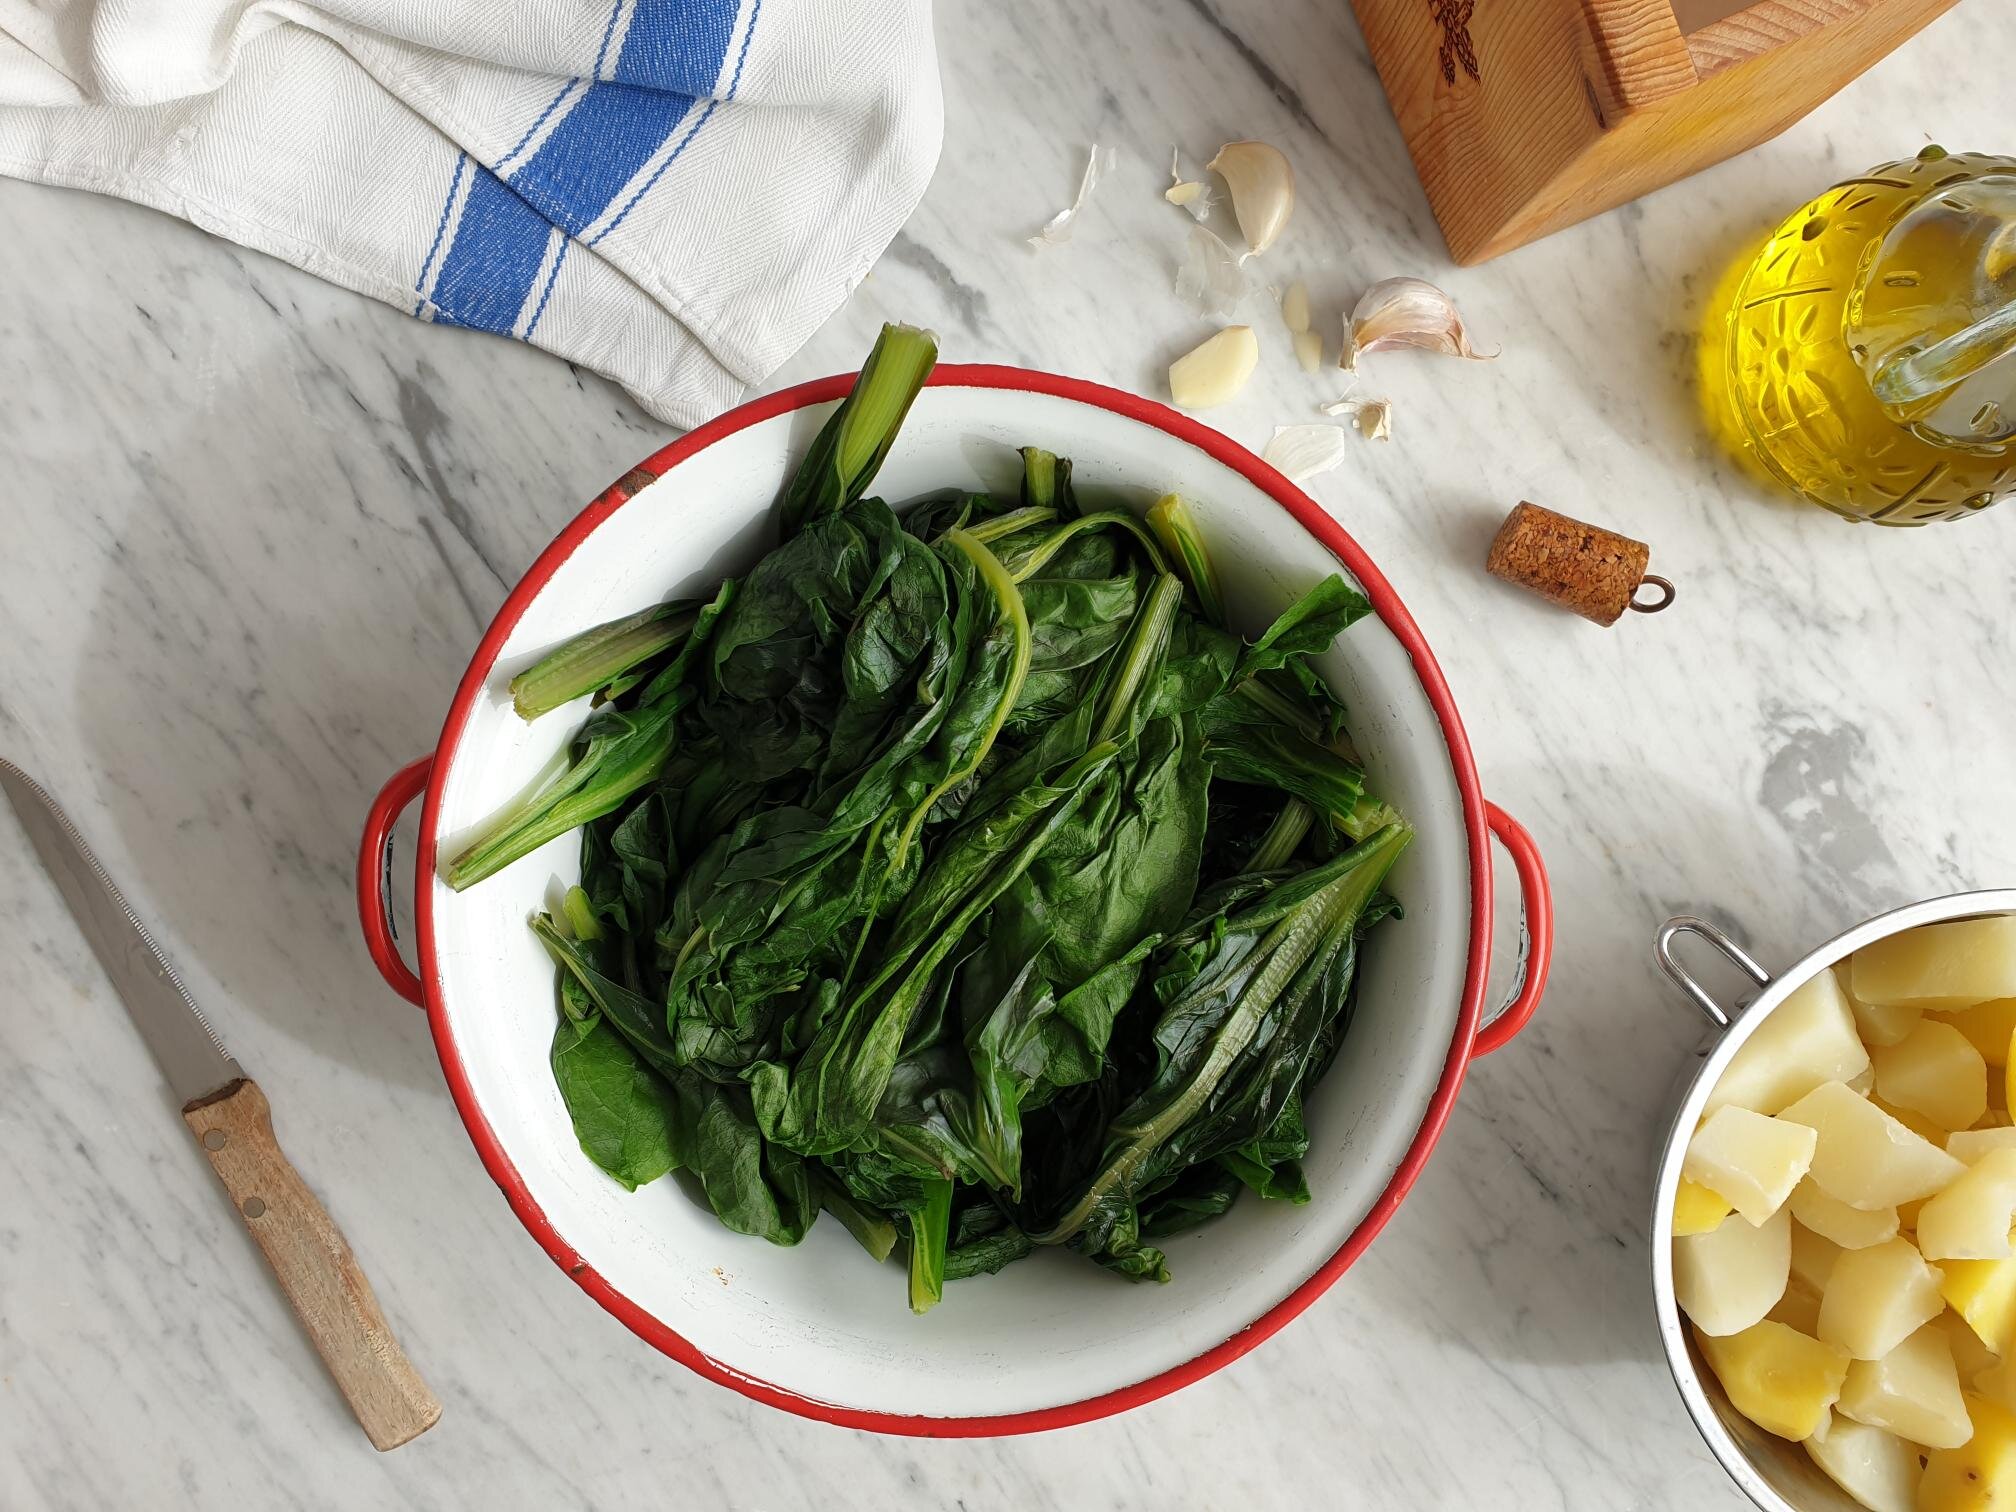
Trim the stalk ends off the beans, place them in a colander and wash well with cold running water.

Place the beans in a pan with boiling unsalted water and cook the beans for about 15 minutes or just until al dente (tender but still with a bit of bite).

Drain well and place the beans in a large bowl. Add a pinch of sea salt, extra virgin olive oil, sliced, chopped or crushed garlic and toss well. Taste and adjust the seasoning.

Serve and enjoy!

November 23, 2021 /tina oblak
fresh green beans, simple salad, simple green beans salad
Adriatic Recipe, Appetizers, Autumnal dish, Autumnal recipe, dinner, Easy recipe, healthy mael, Istrian cuisine, Istrian dish, Istrian food, Istrian gastronomy, Nutritious dish, Rustic dish, Side Dishes, Slovenian cuisine, Slovenian food, Slovenian gastronomy, Small bites, Starters, supper, Vegan, Vegetarian, Salads
Comment
Spinach or chard with garlic and olive oil Istrian way 7.jpg

Spinach or chard with potatoes garlic and olive oil Istrian way Recipe

Beans and Sardines
October 02, 2021 by tina oblak in Adriatic Recipe, brunch, Central European recipes, Easy recipe, healthy mael, Istrian cuisine, Istrian dish, Istrian food, Istrian gastronomy, Nutritious dish, Rustic dish, Side Dishes, Slovenian cuisine, Slovenian food, Slovenian gastronomy, Vegan, Vegetarian

Spinach or chard with garlic and extra virgin olive oil is a peasant dish, hearty, rustic and nutritious. It is extremely easy to make, inexpensive and with its humble appearance it most certainly offers a lot more than meets the eye.

It is a perfect side dish to any grilled or fried fish, but equally delicious with pork, lamb or chicken and accompanied with fried egg makes a great vegetarian meal option.

Back home, on the Slovenian coast, this dish is a most frequent companion to grilled fish and grilled or deep fried squid, a bit like fish and chips and mushy peas in the United Kingdom.

Spinach or chard with garlic and olive oil is very popular in Dalmatia and on Dalmatian islands (Croatia) where it is believed it originated from. It is on this islands, where tomatoes, peppers, cucumbers and other summer vegetables are abundant during the summer, that chard would be the only green leaf vegetable that could grow during the scorching summer heat therefore it has been a very treasured vegetable containing a lot of vitamins and minerals and a lot of water make it very hydrating and easy to digest.

This dish travelled north along Dalmatian coastline to Istria where it has become as popular as in Dalmatia and is found on the menus in most restaurants and cooked in almost every household.

This is another dish that is part of my childhood and adulthood, it never came into the fashion, it never went out of the fashion, it has simply always been there...

I am sharing here my family recipe.

Spinach or chard with garlic and olive oil Istrian way 1.jpg

Ingredients

Serves 4-6 as part of meal

  • 1kg spinach, baby spinach or chard

  • 400-450g potatoes, peeled and cubed

  • 4 cloves of garlic, peeled

  • 5 Tbs extra virgin olive oil (the best you can afford)

  • sea salt

Method

Wash thoroughly spinach or chard, (no need to do so if bought already washed version) cut off the stalks and chop or just tear the leafs with your hands into smaller pieces. If you are not using the stalks for this recipe you can use them for vegetable minestrone, put them on a compost or simply discard.

If using chard remove tough centre stalks.

View fullsize Spinach or chard with garlic and olive oil Istrian way 2.jpg
View fullsize Spinach or chard with garlic and olive oil Istrian way 3.jpg

Place cubed potatoes in a pan, add water, a pinch of salt and boil until just tender, for about 10 minutes. Drain and set aside.

Fill a large pot with ¼ of hot water, add spinach or chard and cook only for few minutes until wilted.

Drain very well in a colander. When the spinach is in a colander, press down with a back of a wooden spoon to remove a bit of excess water. You can use a big colander to drain both potatoes and chard.

Spinach or chard with garlic and olive oil Istrian way 4.jpg

Rinse quickly and dry the pot where you cooked the spinach, add extra virgin olive oil and garlic.

Fry the garlic on a gentle heat until it becomes softer and golden in colour. The oil will be nicely infused with the garlic.

Remove and discard the garlic.

Add spinach and potatoes to the pan with garlic infused oil and sautéed on a medium heat for about 15 minutes, stirring occasionally or until you get a nice velvety consistency and you loose most of the water from the spinach.

Adjust the seasoning with sea salt and serve hot or at the room temperature.

View fullsize Spinach or chard with garlic and olive oil Istrian way 5.jpg
View fullsize Spinach and chard with garlic and olive oil 6.jpg

Just a thought

This vegetable side dish has a delicate garlicky flavour. If you are a big fan of garlic and keen on stronger garlicky taste, add crushed garlic to extra virgin olive oil without removing it instead of adding the whole garlic and removing it after the oil has been infused like suggested in the recipe.

You can also prepare this dish by cooking the potatoes and the spinach or chard in one big pot together rather then separately. Use one big pot, boil cubed potatoes first until just tender then add spinach or chard and cook until wilted, drain both in big colander.

October 02, 2021 /tina oblak
sautéed baby spinach with potatoes, easy spinach recipe, sautéed spinach with potatoes, fresh baby spinach, baby spinach in a skillet, quick spinach recipe, potatoes and spinach
Adriatic Recipe, brunch, Central European recipes, Easy recipe, healthy mael, Istrian cuisine, Istrian dish, Istrian food, Istrian gastronomy, Nutritious dish, Rustic dish, Side Dishes, Slovenian cuisine, Slovenian food, Slovenian gastronomy, Vegan, Vegetarian
Comment
Green beans with tomatoes 13a.jpg

Green Beans with tomatoes Istrian style Recipe

Beans and Sardines
September 22, 2021 by tina oblak in Adriatic Recipe, Appetizers, brunch, Easy recipe, healthy mael, Istrian cuisine, Istrian dish, Istrian food, Istrian gastronomy, Nutritious dish, Rustic dish, Side Dishes, Slovenian cuisine, Slovenian food, Slovenian gastronomy, Vegan, Vegetarian

This comforting, rustic, vegetable side dish is super delicious and super easy to make, perfect to accompany just about any grilled or roasted meats or fish.

I am sharing with you the recipe my nona and my mother have made this dish very often when fresh green beans were in season and tasting at their best.

Green beans with tomatoes 1.jpg

This is a very popular dish during the summer and end of summer.

My maternal grandfather grew green beans at his vegetable garden, they got picked and enjoyed all the way through the summer, but somehow it would be the very last batch, at the end of the summer, that tasted the best. Did it really, or is this just an impression stored in my nostalgic box of memories? As a child I was aware that eating that last few green beans meant that the summer would very soon drew to a close...

Traditionally green beans in tomato sauce are eaten with soft polenta or just with some bread. It can also be served with cooked rice, fried eggs or on bruschetta.

Ingredients

Serves 4 as part of meal

  • 500g fresh green beans, washed and trimmed

  • 1 medium onion (about 140g), finely chopped

  • 250g tomatoes, washed and roughly chopped (I used fresh mini San Marzano tomatoes but you can use other varieties or good quality tinned tomatoes of your choice.) If using fresh tomatoes make sure the tomatoes are nicely ripe and sweet. You can change the quantity of the tomatoes according to your preference.

  • a bunch of fresh flat leaf parsley, stalks included (about 16g), finely chopped

  • 3 generous Tbsp extra virgin olive oil

  • 1 clove garlic, peeled and crushed

  • sea salt

  • 150ml water

Green beans with tomatoes 2.jpg

Method

Wash and trim green beans.

View fullsize Green beans with tomatoes 3.jpg
View fullsize Green beans with tomatoes 4.jpg

Cut them in three or four pieces.

View fullsize Green beans with tomatoes 5.jpg
View fullsize Green beans with tomatoes 6.jpg

Peel the onion and chop it finely then peel and crush the garlic.

In a fairly big pan, ideally non stick, put extra virgin olive oil.

Add the onions, a pinch of sea salt and sauté on a gentle heat for few minutes, stirring frequently, until they become soft and translucent.

Add the garlic and mix well with the onions.

Place green beans in a pan, mix well with onions and garlic and cook for about 10 minutes, stirring quite frequently.

Add chopped tomatoes, mix well with green beans and cook for further 10 minutes or until tomatoes start to break down a bit.

View fullsize Green beans with tomatoes 7.jpg
View fullsize Green beans with tomatoes 8.jpg
View fullsize Green beans with tomatoes 9.jpg
View fullsize Green beans with tomatoes 10.jpg

Season with sea salt, add fresh chopped parsley and add water.

Partially cover the pan with the lid and cook on a gentle heat for about 60minutes, stirring occasionally. After this simmering time the beans should be nice and soft.

If at any point during the cooking you feel the beans are getting too dry add a splash of water.

Season to taste and serve hot, at room temperature or cold.

Green beans with tomatoes 12.jpg

Just a thought

The quantity of the tomatoes for this recipe is a guideline only and you can adjust it according to your taste, liking and preference.

For this recipe you can use frozen green beans as well.

This is a great dish to be made ahead and refrigerated overnight.

September 22, 2021 /tina oblak
fresh green beans, green beans, frozen green beans, green beans with tomatoes, Braised green beans with tomatoes, Fagiolini al pomodoro in umido
Adriatic Recipe, Appetizers, brunch, Easy recipe, healthy mael, Istrian cuisine, Istrian dish, Istrian food, Istrian gastronomy, Nutritious dish, Rustic dish, Side Dishes, Slovenian cuisine, Slovenian food, Slovenian gastronomy, Vegan, Vegetarian
Comment
Sautèed Bell Peppers- Final dish.jpg

Sautéed Bell Peppers with Onions and fresh Basil Recipe

July 20, 2021 by tina oblak in Adriatic Recipe, Appetizers, brunch, Canapés, Easy recipe, Finger food, healthy mael, Istrian cuisine, Istrian dish, Istrian food, Istrian gastronomy, main course, main dish, Nutritious dish, Rustic dish, Side Dishes, Slovenian cuisine, Slovenian food, Slovenian gastronomy, Small bites, Snacks, Starters, supper, Vegan, Vegetarian

This recipe is very easy, very tasty, you only need a few fresh ingredients and you have a perfect summer side dish to accompany meat or fish.

Peppers cooked this way are also fantastic served on bruschetta, can also be used as a sauce for pasta dishes, great base for risotto, or simply enjoyed on its own with a fresh crunchy bread. I also love using sautèed peppers as a topping on a pizza.

This dish can really be summed up as a simplicity at its best.

I simply adore peppers, I love them raw in salads, cooked, sautèed, grilled...

I have very vivid memories as a child going with my mother to the farmers market and seeing the vegetable and fruit stalls full of colourful peppers, it just looked so beautiful...

After buying the peppers, I would pick one and my mother would wash it under cold water in one of the Venetian looking fountains in the market, and I would just munch it raw during the trip back home.

As soon as the peppers were available fresh to buy at end of spring and during the summer, when they are in abundance, my mother would make this dish very often and here I am very happy to share it with you..

Ingredients

Serves 4

  • 6 mixed colour bell peppers, about 1kg (I used yellow, orange, green and red, you can use just one variety or a mixture of your preference)

  • 1-2 onions, about 200g (peeled and thinly sliced)

  • fresh basil, few leaves

  • sea salt

  • 4 Tbsp extra virgin olive oil

  • chili, optional

Sautèed Bell Peppers 1.jpg

Method

Wash and dry the peppers, cut them in half, remove the seeds and the white filaments.

Cut the peppers into smaller pieces.

View fullsize Sautèed Bell Peppers 2.jpg
View fullsize Sautèed Bell Peppers 3.jpg

Peel the onions and slice thinly.

Add the oil into a fairly large non stick pan.

Heat the oil and add the onions and a pinch of salt

Stew the onions over medium-low heat, for about 15 minutes, stirring occasionally, until the onions become soft and translucent.

View fullsize Sautèed Bell Peppers 4.jpg
View fullsize Sautèed Bell Peppers 5.jpg

Add the peppers, mix them well with the onions, add sea salt, fresh basil leaves and chilli if using.

Cover with the lid and cook the peppers on a medium-low heat anything between 30-50minutes, stirring occasionally.

The peppers, after this time, should be completely soft and all the water should be completely absorbed.

If the peppers are completely cooked but still quite watery, take the lid off and cook further for few minutes until all the water is completely absorbed.

Add few more fresh basil leaves and your peppers are ready to be enjoyed hot, warm, at room temperature or cold.

View fullsize Sautèed bell Peppers 7.jpg
View fullsize Sautèed Bell Peppers 6.jpg

Just a thought

Peppers cooked this way can be stored for about 2-3 days in the fridge in an airtight container.

Freezing this dish is not recommended.

You can add crashed garlic (1 or 2 cloves) if you wish and replace fresh basil for fresh flat leaf parsley or use both.

Wine suggestion

Friuli Colli Orientali Sauvignon DOC 2019 by Valentino Butussi, Colli Orientali, Friuli

July 20, 2021 /tina oblak
bell peppers, fresh basil, sautèed bell peppers, sautèed bell peppers with onions, sautèed bell peppers with frsh basil
Adriatic Recipe, Appetizers, brunch, Canapés, Easy recipe, Finger food, healthy mael, Istrian cuisine, Istrian dish, Istrian food, Istrian gastronomy, main course, main dish, Nutritious dish, Rustic dish, Side Dishes, Slovenian cuisine, Slovenian food, Slovenian gastronomy, Small bites, Snacks, Starters, supper, Vegan, Vegetarian
Comment
Final dish- sautéed sweet peas with parsley and onion.jpg

Sautéed Early Sweet Peas with fresh parsley and onion recipe

Beans and Sardines
June 08, 2021 by tina oblak in Adriatic Recipe, brunch, dinner, Eastern European recipes, Easy recipe, healthy mael, Istrian cuisine, Istrian dish, Istrian food, Istrian gastronomy, Nutritious dish, Rustic dish, Side Dishes, Slovenian cuisine, Slovenian food, Slovenian gastronomy, supper, Vegetarian

This is a great classic side dish, light and delicious, ideal for a rustic as well as a more formal lunch or dinner, it goes with just about any meat or fish dish, and it is quick and easy to make.

It can also be used as a base for pasta and risotto dishes and is very tasty used in frittatas and on top of bruschetta.

It is ideal to make this dish in spring using fresh peas as they are very sweet and tender. For this recipe, however, you can use fresh peas when in season but frozen petits pois are the ones I use most of the time as they are great alternative to the fresh peas when they are not in season and can be enjoyed all year round.

My mother made sautéed peas very frequently, they are nutritious, healthy and delicious, and they were served on a weekly basis, used fresh when in season but most of the time my mother used frozen petits pois as an alternative.

As a child I loved going to the allotment with my maternal grandparents and have vivid memories picking the pea pods from the plant. I also remember being always amazed walking home with big wicker baskets full of pea pods and ending up with half of what we picked after removing the peas from the pods.

I found picking the pea pods very entertaining, I liked very much opening the pods and finding this lovely vibrant green peas inside them.

As a child, I also soon spotted the opportunity to play and as the peas were all different sizes I would create a long line of peas starting with the smallest.

I thought that was great fun, it also provided fantastic healthy snack, I ate them as I went along creating this pea chain.

My most heart-warming memories around peas, whether they were picked at the allotment or bought at the farmers market, must have been me sitting at the table with my mother or paternal grandmother, and remove the peas from the pods. It provided the opportunity just to be together, have conversation or just stay in silence and smile at each other, I guess I felt reassured, loved...

View fullsize Ingredients- sautéed sweet peas 1.jpg
View fullsize Ingredients- sautéed sweet peas 2.jpg

Ingredients

Serves 4 as part of meal

  • 1kg fresh early sweet peas in pods (after removing the pods you should end up with roughly between 400- 500g of peas)

    You can use sugar snap peas, in this case you will need about 2kg to get roughly 400g of peas after removing the pods.

    In both cases do not worry if you end up with more or less peas. Just use what you end up with after taking them outside the pod and follow the recipe.

    You can also use frozen Petits Pois (about 500g) or canned peas.

  • 4 Tbsp extra virgin olive oil

  • 1 onion, medium size (about 130g), finely chopped

  • fresh flat leaf parsley, about a handful, finely chopped

  • hot vegetable stock or Bouillon powder instant stock

  • sea salt (only needed if using vegetable stock without the salt)

Ingredients- sautéed sweet peas 4.jpg

Method

If using fresh peas, clean and prepare them by removing the peas from inside the pods and discard the pods.

Ingredients- sautéed sweet peas 3.jpg

In a skillet add the olive oil and onions and sautéed them over gentle heat until lightly browned and softened (this should take 5-7 minutes).

View fullsize sautéed sweet peas 5.jpg
View fullsize sautéed sweet peas 6.jpg

Add the peas, fresh or frozen, and sautéed them together with the onions for few minutes. If using frozen peas cover with the lid as it will help to defrost them quicker.

Add fresh parsley and hot vegetable stock just enough to completely cover the peas.

View fullsize sautéed sweet peas 7.jpg
View fullsize sautéed sweet peas 8.jpg

Cook uncovered over medium heat, stirring occasionally, until all the liquid is absorbed but the peas are still nice and moist and not dry (it should take around 15 minutes).

Taste and season with sea salt if needed and serve warm.

sautéed sweet peas 10.jpg

Just a thought

You can keep the cooked peas in the fridge, in a airtight container, for about two or three days.

They freeze very well, so good side dish to prepare ahead.

June 08, 2021 /tina oblak
sautéed peas, sautéed sweet peas, sautéed early sweet peas, sweet peas with fresh parsley and onion, sautéed petits pois, sautéed peits pois woth fresh parsley and onion
Adriatic Recipe, brunch, dinner, Eastern European recipes, Easy recipe, healthy mael, Istrian cuisine, Istrian dish, Istrian food, Istrian gastronomy, Nutritious dish, Rustic dish, Side Dishes, Slovenian cuisine, Slovenian food, Slovenian gastronomy, supper, Vegetarian
Comment
Potato gnocchi 1.jpg

Potato Gnocchi recipe

Beans and Sardines
May 04, 2021 by tina oblak in Gnocchi, recipe from Northern Ital, Easy recipe, healthy mael, Rustic dish, Side Dishes, main course, entrée course, main dish

Gnocchi are incredibly popular dish from where I come from, and again this is of no surprise, as the region is so close to Veneto and Friuli-Venezia Giulia, regions in Northern Italy where gnocchi actually originated. This is due to a cooler climate that is very well suited for growing potatoes.

I will share here with you my nona Nada's recipe for a basic homemade potato gnocchi that can be served with endless variety of sauces but the most common are probably melted butter, sage and grated Parmiggiano Reggiano cheese, bolognese sauce, classic tomato sauce, four cheeses sauce and basil pesto. Gnocchi can also be prepared in advance to use for a gnocchi bake.

In Slovenia they are frequently found on the menus in family run restaurants served with different meat roasts and the gravy; the idea behind it is to squash the gnocchi with the fork so they absorb the sauce. When you eat it like that, it is like receiving a hug.

I grew up on them, my nona Nada made tuns of them in her lifetime. I learnt how to make them directly from her, under her strictest supervision of course, apparently I passed!

A lot of people are quite daunted by the idea of making gnocchi from scratch, but I promise you they are much less complicated that is seems and once you make them yourself and realize how easy it is to make them and how much tastier they are compared to ready made once from the store, you will think twice before buying them.

Before you start, it is crucial that you chose the right type of potato, they need to be starchy with floury texture and minimum content of water, giving you a light and airy dough with gnocchi being soft, delicate with a pillowy texture.

Gnocchi are perfect for both informal or more formal lunches or dinners.

Recipe

Ingredients

Serves 4-6

  • 1kg floury, yellow-fleshed potatoes, e.g. King Edward, Maris Piper, (avoid new potatoes). I use red skin potatoes.

  • 300g all purpose flour (plus extra for flouring the board and working surface)

  • 1 egg, slightly beaten

  • sea salt, a pinch

Potato gnocchi 2.jpg

Method

Wash the potatoes, with the skin on, under cold running water.

Place the potatoes in a saucepan or a pot, cover with cold water and bring to boil. After the water has come to a boil, cook for about 20 minutes or until tender. Cooking time will obviously vary depending on the size of the potatoes you are using.

Don't pierce them during cooking and don't overcook them allowing the skin to burst as they will absorb too much water.

You might ask yourself why is it so important to use floury, low water content potato and why is it so important that the potatoes do not absorb too much water during the cooking.

It is crucial that the potatoes stay dry, in this way you will only add the necessary flour, having as a finished product a cooked gnocchi that will actually taste of potato, how they should. On the contrary, the wet potatoes will require more flour as the dough will be wetter and stickier resulting in potato gnocchi tasting floury.

There is a very simple way to avoid potatoes absorbing too much water, steam them, and this is my secret, success guaranteed.

Remove from the pot, drain them in a colander and let them cool enough to handle, then remove the skin. If the potatoes are still quite warm to handle, the best way to remove the skin is to stick the fork though the potato and peel it using a knife.

View fullsize Potato gnocchi 3.jpg
View fullsize Potato gnocchi 4.jpg

Put the flour on a working surface, add salt and mix with the fork.

Make a well in the middle and pass the potatoes through a potato ricer while still warm as they become stickier when cooler. Allow riced potatoes to cool for few minutes and then add the egg.

View fullsize Potato gnocchi 5.jpg
View fullsize Potato gnocchi 6.jpg
View fullsize Potato gnocchi 7.jpg

Cut a small piece of the dough; my nona Nada told me that the dough should cut like a loaf of bread, roll it out into a log about 2 cm thick and cut them into pieces.

It is very important that you sprinkle the gnocchi with a bit of flour and gently toss them so they don't stick together.

View fullsize Potato gnocchi 8.jpg
View fullsize Potato gnocchi 9.jpg
View fullsize Potato gnocchi 10.jpg
View fullsize Potato gnocchi 11.jpg

Repeat the process until you finish all the dough.

View fullsize Potato gnocchi 12.jpg
View fullsize Potato gnocchi 13.jpg

Cook them straight away or leave them uncooked for later use. They can stay uncooked for about a maximum of two hours providing you are covering the gnocchi with kitchen towel.

You can also freeze them, see my section Just a thought.

Potato gnocchi 14.jpg

Gnocchi really do cook in a flash. Place them in a large pot of salted boiling water and when they float to the top you know they are cooked.

Drain them in a colander or scoop them out with slotted spoon, I prefer the latter method as less aggressive with soft and delicate gnocchi.

Add your favourite sauce and serve immediately.

Potato gnocchi 15.jpg

Just a thought

The great thing about gnocchi is that they freeze very well. It is very important that you spread the uncooked gnocchi in a single layer, so they don't stick together, on a well floured wooden board, baking sheet, serving tray or similar laid with kitchen cloth and floured.

Put your tray with gnocchi into a freezer for at least 20- 30 minutes and once frozen put them into a freezing bag.

When you want to cook them just drop them frozen directly into a boiling salted water without defrosting them first.

May 04, 2021 /tina oblak
home made potato gnocchi, authentic potato gnocchi recipe, njoki
Gnocchi, recipe from Northern Ital, Easy recipe, healthy mael, Rustic dish, Side Dishes, main course, entrée course, main dish
Comment
Sautéed Sauerkraut 1.jpg

Sautéed Sauerkraut recipe

Beans and Sardines
February 16, 2021 by tina oblak in Side Dishes, Adriatic Recipe, Easy recipe, healthy mael, Nutritious dish, Vegan, Vegetarian, Istrian food, Istrian cuisine, Istrian gastronomy, Slovenian food, Slovenian gastronomy, Slovenian cuisine, Rustic dish

The word “sauerkraut” comes from German Sauerkraut, which literally means “sour cabbage”. From sauer “sour” and kraut “vegetable, cabbage.” The origin of the dish has been disputed but it took root mostly in Central and Eastern European cuisines.

Sauerkraut is finely shredded cabbage, that has been fermented by various lactic acid bacteria and it has a distinctive sour flavour due to the fact, that the lactic acid is formed when the bacteria ferment the sugars in the cabbage. It is the lactic acid that naturally preserves sauerkraut and gives it long shelf life.

Sautéed Sauerkraut 2.jpg

It is incredibly popular dish back home, and would appear on tables as a part of a family meal on a weekly basis, especially during colder months. Its popularity is not surprising, if we consider the fact, that the area was under Austro-Hungarian Empire until the end of First World War. Almost every household would have a slightly different version of how to prepare and cook sauerkraut.

In Slovenia, you can buy sauerkraut in all supermarkets in sealed plastic bags or glass jars, but I just love getting it from farmer's market, where it is sold on food stalls by local farmers directly from big wooden barrels.

I am sharing with you my grandma and my mum's version of how it is cooked on the coastal region, simply with extra virgin olive oil, a bit of garlic and bay leaf, however, adding a pinch of sweet Hungarian paprika and few crushed caraway seeds is quite common too, in order to achieve once again that “imperial” flavour. This is a great side dish, traditionally used to accompany almost any meat based dish like sausages, cooked ham, pork roast or other meat roasts, pork chops, black sausage...

As children, my brother and I would have it just simply with fried eggs and a bit of potato mash.

Sauerkraut is quite versatile, and it can be also used in a variety of other dishes, and just to mention a few, jota (Istrian sauerkraut and bean soup), Hungarian style sauerkraut, rice and mince pork casserole, and it is great in sandwiches, made for example, with rye bread and cooked ham.

Sautéed Sauerkraut 3.jpg

My nona Nada has vivid memories from when she was a child, of every household in the village making a big barrel of sauerkraut; cabbage would be harvested in autumn and fermented during winter month.

Sauerkraut is also very healthy, and has numerous nutritional benefits. Contains live and active probiotics, helping your body to fight off harmful bacteria or toxins, it has high level of digestive enzymes, high in vitamin C and K2. Rich in fibre and minerals like potassium, iron and magnesium.

No wonder Captain James Cook always took a store of sauerkraut on his sea voyages!

It is really not surprising, that sauerkraut has been gaining increasing popularity in the past few years, especially in the countries where it has been less known.

Back home, it has always been there...just like family.

When shopping for sauerkraut, make sure you get a good quality one, just sea salt and nothing else should be added on the ingredient list.

Ingredients

Serves 4

  • 1kg Sauerkraut (sauerkraut is normally sold in glass jars or sealed plastic bags and will have different net weights of sauerkraut, it does not matter if you end up with slightly less or more than 1kg of sauerkraut)

  • 1 bay leaf (fresh or dry)

  • 4 Tbsp extra virgin olive oil

  • 2-3 cloves of garlic (peeled and crashed)

  • sea salt

  • few black whole peppercorns

Method

Drain the saurekraut in a colander and give it a quick rinse with cold water if you think the sauerkraut is too acid for your taste, but do not over rinse it, as you will loose the characteristic sauerkraut taste.

Sautéed Sauerkraut 4.jpg

Place the rinsed sauerkraut into a large, preferably non stick pan, add sea salt, peppercorns, bay leaf, garlic, extra virgin olive oil.

Add water, just enough to cover the sauerkraut, bring to boil, reduce the heat and simmer for about 1-1 1/2 hours.

Sautéed Sauerkraut 5.jpg

Sauerkraut is cooked, when you have no excess liquid left in the pan, and the sauerkraut is nice and soft. Adjust seasoning with sea salt and freshly ground pepper.

Sautéed Sauerkraut 6.jpg
Sautéed Sauerkraut 7.jpg

Wine suggestion

Cabernet Sauvignon IGT 2017 by Balter, Vallagarina.

February 16, 2021 /tina oblak
side dish, Sautéed Sauerkraut recipe, Istrian style Sautéed Sauerkraut recipe, Sauerkraut recipe
Side Dishes, Adriatic Recipe, Easy recipe, healthy mael, Nutritious dish, Vegan, Vegetarian, Istrian food, Istrian cuisine, Istrian gastronomy, Slovenian food, Slovenian gastronomy, Slovenian cuisine, Rustic dish
Comment
Leek Risotto 10.jpg

Leek Risotto recipe

Beans and sardines
February 09, 2021 by tina oblak in Risotti, Adriatic Recipe, Easy recipe, entrée course, healthy mael, main course, recipe from Northern Ital, Side Dishes, Healthy

Leek is a humble vegetable of great potential but it is sadly often overlooked. It is a relative of the onion with long green leaves and a white bulbous root. As we know it today, leeks were first grown by the ancient Egyptians.

These alliums (the type of plants that belong to the group that includes onions, shallots, scallions, chives and garlic) are almost inedible when raw but when cooked slow and low they become mellow, sweet, creamy and taste delicious. Fantastically versatile, full of flavour, and it should be no surprise the humble leek is used in risotto where it takes central stage.

Leeks are omnipresent at the vegetable markets but at its best during the coldest months of the year from October through May.

They are packed with nutrients and anti-oxidants, and so make the best use out of them especially during autumn and winter months when less native vegetables are available. They will help fight colds and flu.

Leek Risotto 2.jpg

Back home we will use just about anything to make risotto, a very much liked and loved dish. This should be no surprise since my hometown is less than a two hours drive to Venice, and the region of Veneto (Northern Italy), especially the Po Valley, where growing rice is very popular, and is a major agricultural industry.

The valley offers a constant supply of water for the rice fields since there are many large non-seasonal rivers.

It is in this region of Italy, the Veneto region, with its colder climate compared to the warmer South of Italy, that the dishes had to be warming, hearty, and filling, and although risotto is found in the whole of Italy, it is in the Veneto that the greatest variety, and number of risotto recipes can be found.

My mum would go to the vegetable market and made risotto with the vegetables there were in season, and when the leeks were at their best, leek risotto would be on the table for lunch or dinner.

This very simple, comforting leek risotto is perfect solution for mid week quick nutritious lunch or dinner, but equally great for more formal entertaining since it is also presentable as a delicate and elegant dish.

Ingredients

Serves 4

  • 500g leeks, cleaned and chopped (Do buy more than you think you will need to allow for losses caused by trimmings)

  • 4 Tbsp extra virgin olive oil

  • 1 clove of garlic (peeled)

  • 300g risotto rice (like Vialone Nano, Arborio, Carnaroli) In this recipe I used Vialone Nano.

  • 1l vegetable or chicken stock (you can use good quality instant stock powder or boiling water)

  • 40g Parmiggiano Reggiano (finely grated)

  • knob of butter (1-2 Tbsp)

Method

Rinse your leeks under cold running water and pat dry with a paper towel.

Put your rinsed leeks on a chopping board and with a sharp knife cut off the dark green leaf ends of the leek and the muddy tips of the roots. Keep the green ends for the stock if you wish or discard.

Slice each leek in half from top to bottom and slice further the halves into thin stripes (julienne cut), then chop.

View fullsize Leek Risotto 3.jpg
View fullsize Leek Risotto 4.jpg
View fullsize Leek Risotto 5.jpg
Leek Risotto 6.jpg

Wash chopped leeks thoroughly under running cold water. Leeks need a good cleaning before using, as dirt often gets stuck between the layers of leaves as they grow.

Before starting making risotto, it is a good idea to have your boiling hot stock or water ready to hand for later.

Now, let's start making risotto by putting the oil in a pan and heat it with the garlic clove. When the garlic has turned golden in colour and infused the oil, remove it. Pay attention not to burn the garlic.

Add chopped leeks and cook them slowly on a gentle heat for about 20-30min until they reach a very soft consistency, almost disintegrating.

Season with sea salt, add risotto rice, mix well with the leeks and toast it together for few minutes stirring constantly to avoid sticking to the bottom of a pan.

View fullsize Leek Risotto 7.jpg
View fullsize Leek Risotto 8.jpg
View fullsize Leek Risotto 9.jpg

After toasting the rice, cover it completely with boiling stock or water and cook over medium heat.

Start adding gradually the ladles of stock or water, one at a time, to keep the risotto moist, allow liquid to be absorbed before adding more. Stir constantly and cook until the rice is cooked al dente (fully cooked but still firm when bitten) and the stock almost completely absorbed but make sure you do not dry the risotto too much.

If the risotto gets too dry just add a bit more stock. There should always be enough liquid just to cover the risotto, the Italians say that risotto should be smooth and runny enough to be described as all'onda (on the wave).

Generally it will take at least about 15 to 18 min for risotto to be cooked.

The risotto is now ready to be finished with a typical Italian mantecare phase which is quite essential when making risotto. Mantecare simply means that you remove the saucepan from the heat, add grated cheese and cold butter or cream to the risotto when is almost finished and stir with a wooden spoon quite vigorously in order to develop that delicious creamy texture.

Leek Risotto 1.jpg

Serve immediately garnished with extra grated or shaved Parmiggiano Reggiano if desired.

Wine suggestion

Pinot Grigio DOC 2019 by Le vigne di Zamò, Friuli Colli Orientali.

February 09, 2021 /tina oblak
leeks, creamy leek risotto, simple leek risotto, Vialone nano rice
Risotti, Adriatic Recipe, Easy recipe, entrée course, healthy mael, main course, recipe from Northern Ital, Side Dishes, Healthy
Comment
  • Newer
  • Older